This is Halloween

I love any excuse to dress up, so I've always loved Halloween. These days the challenge is to a) coordinate everyone's costume and b) find time to pull them all together. 

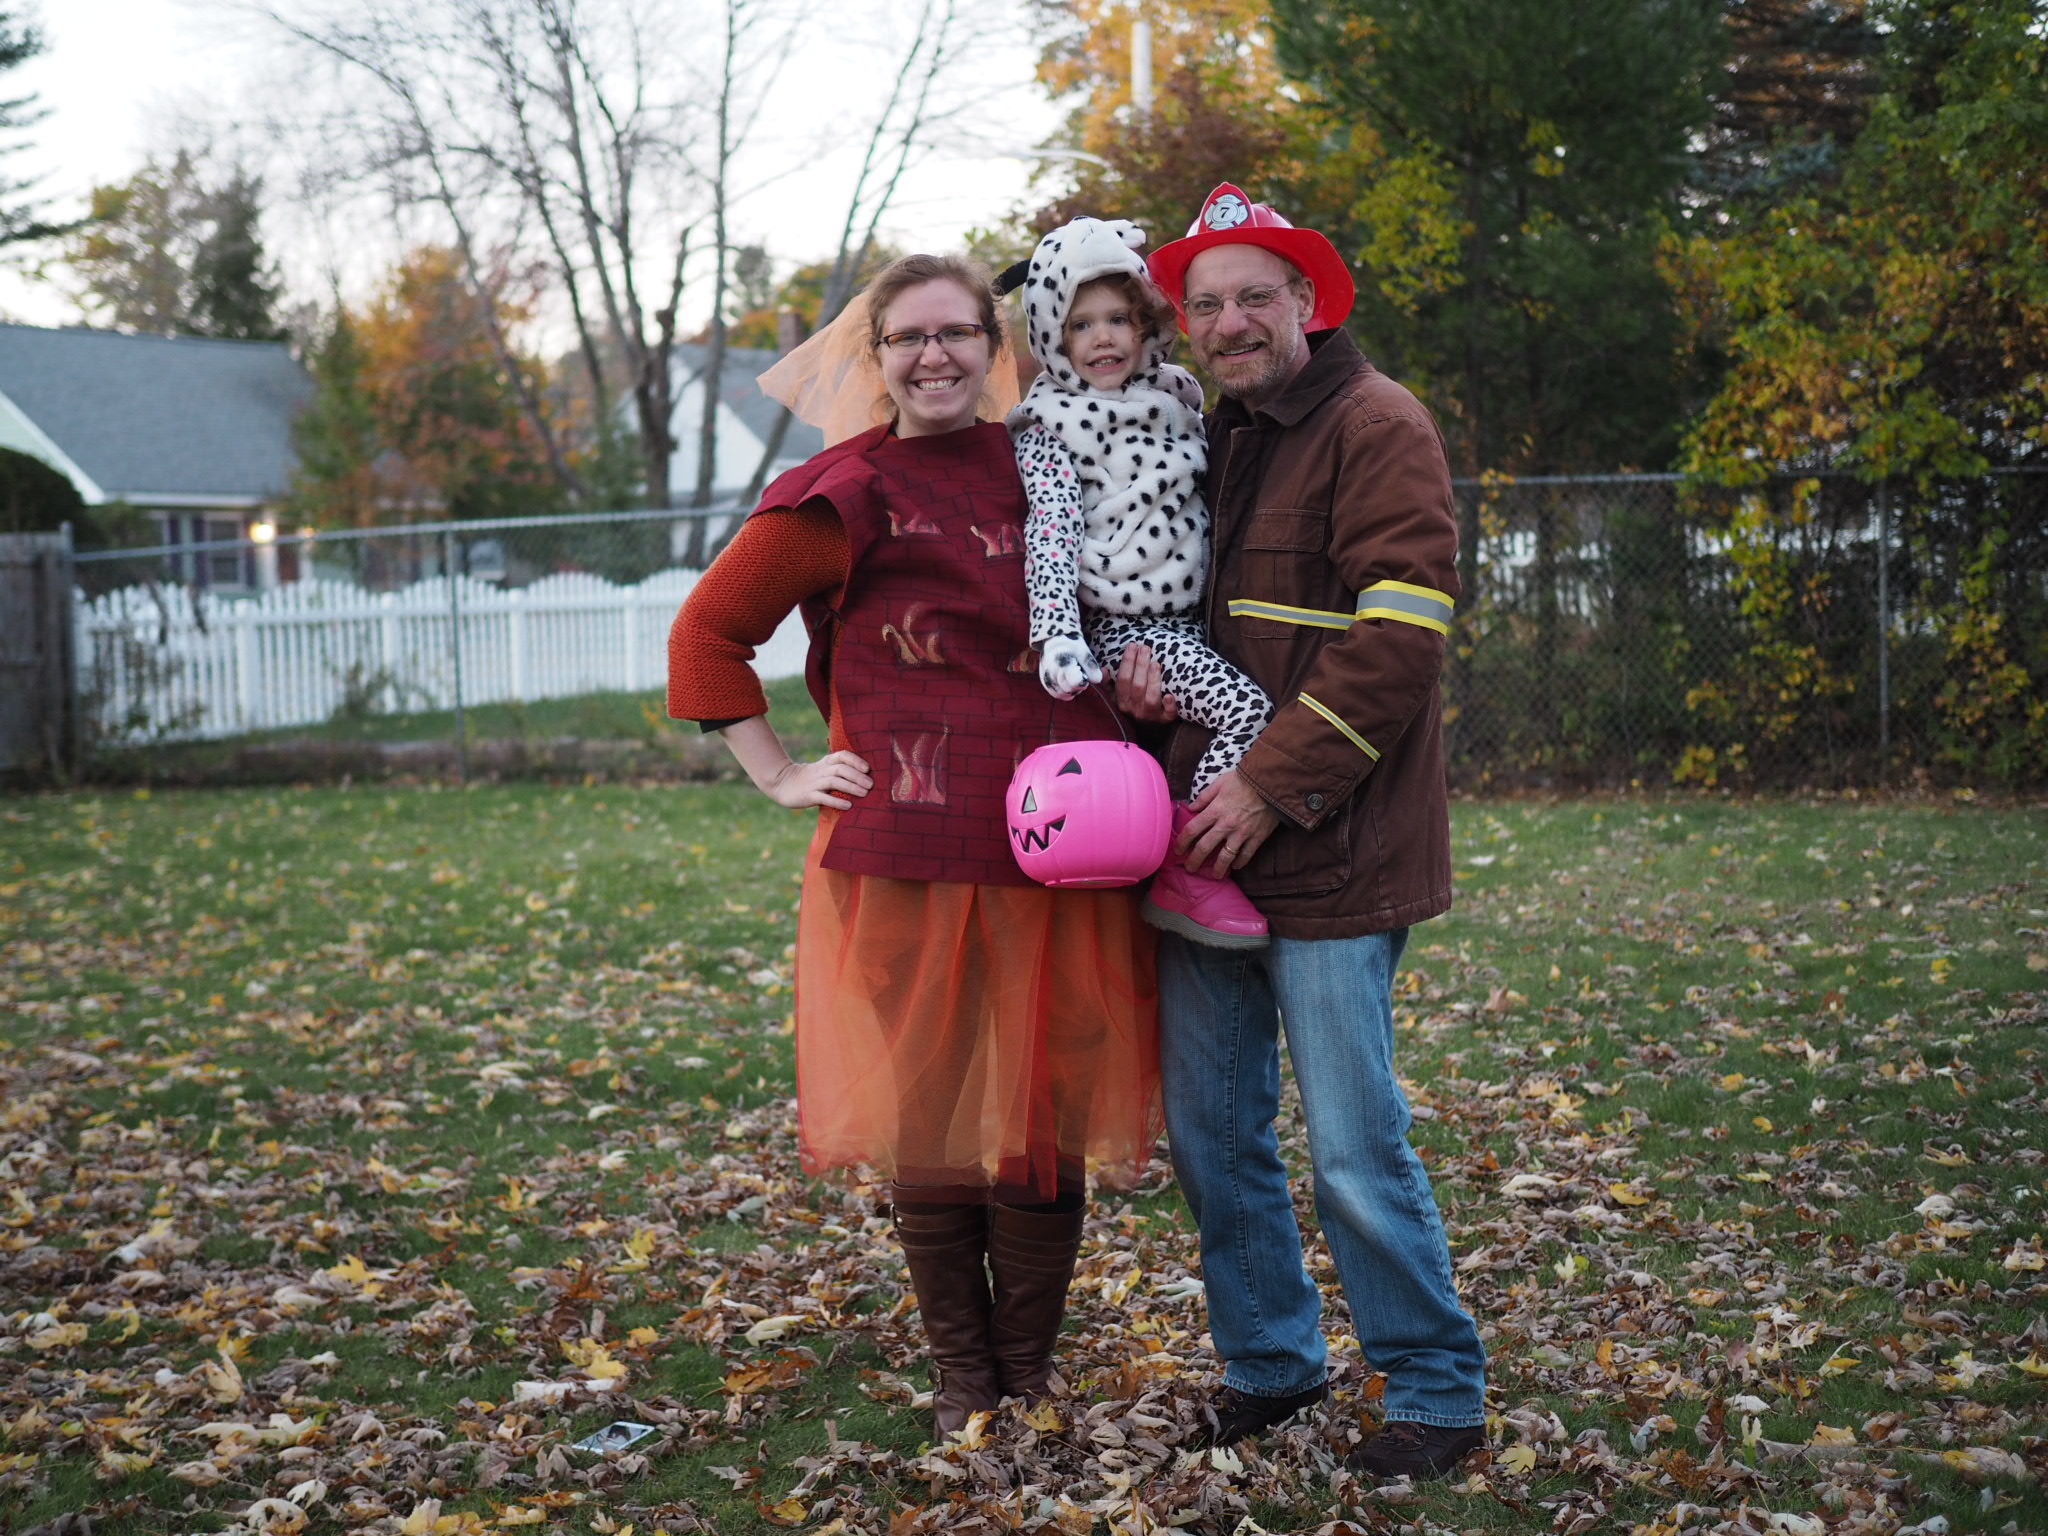
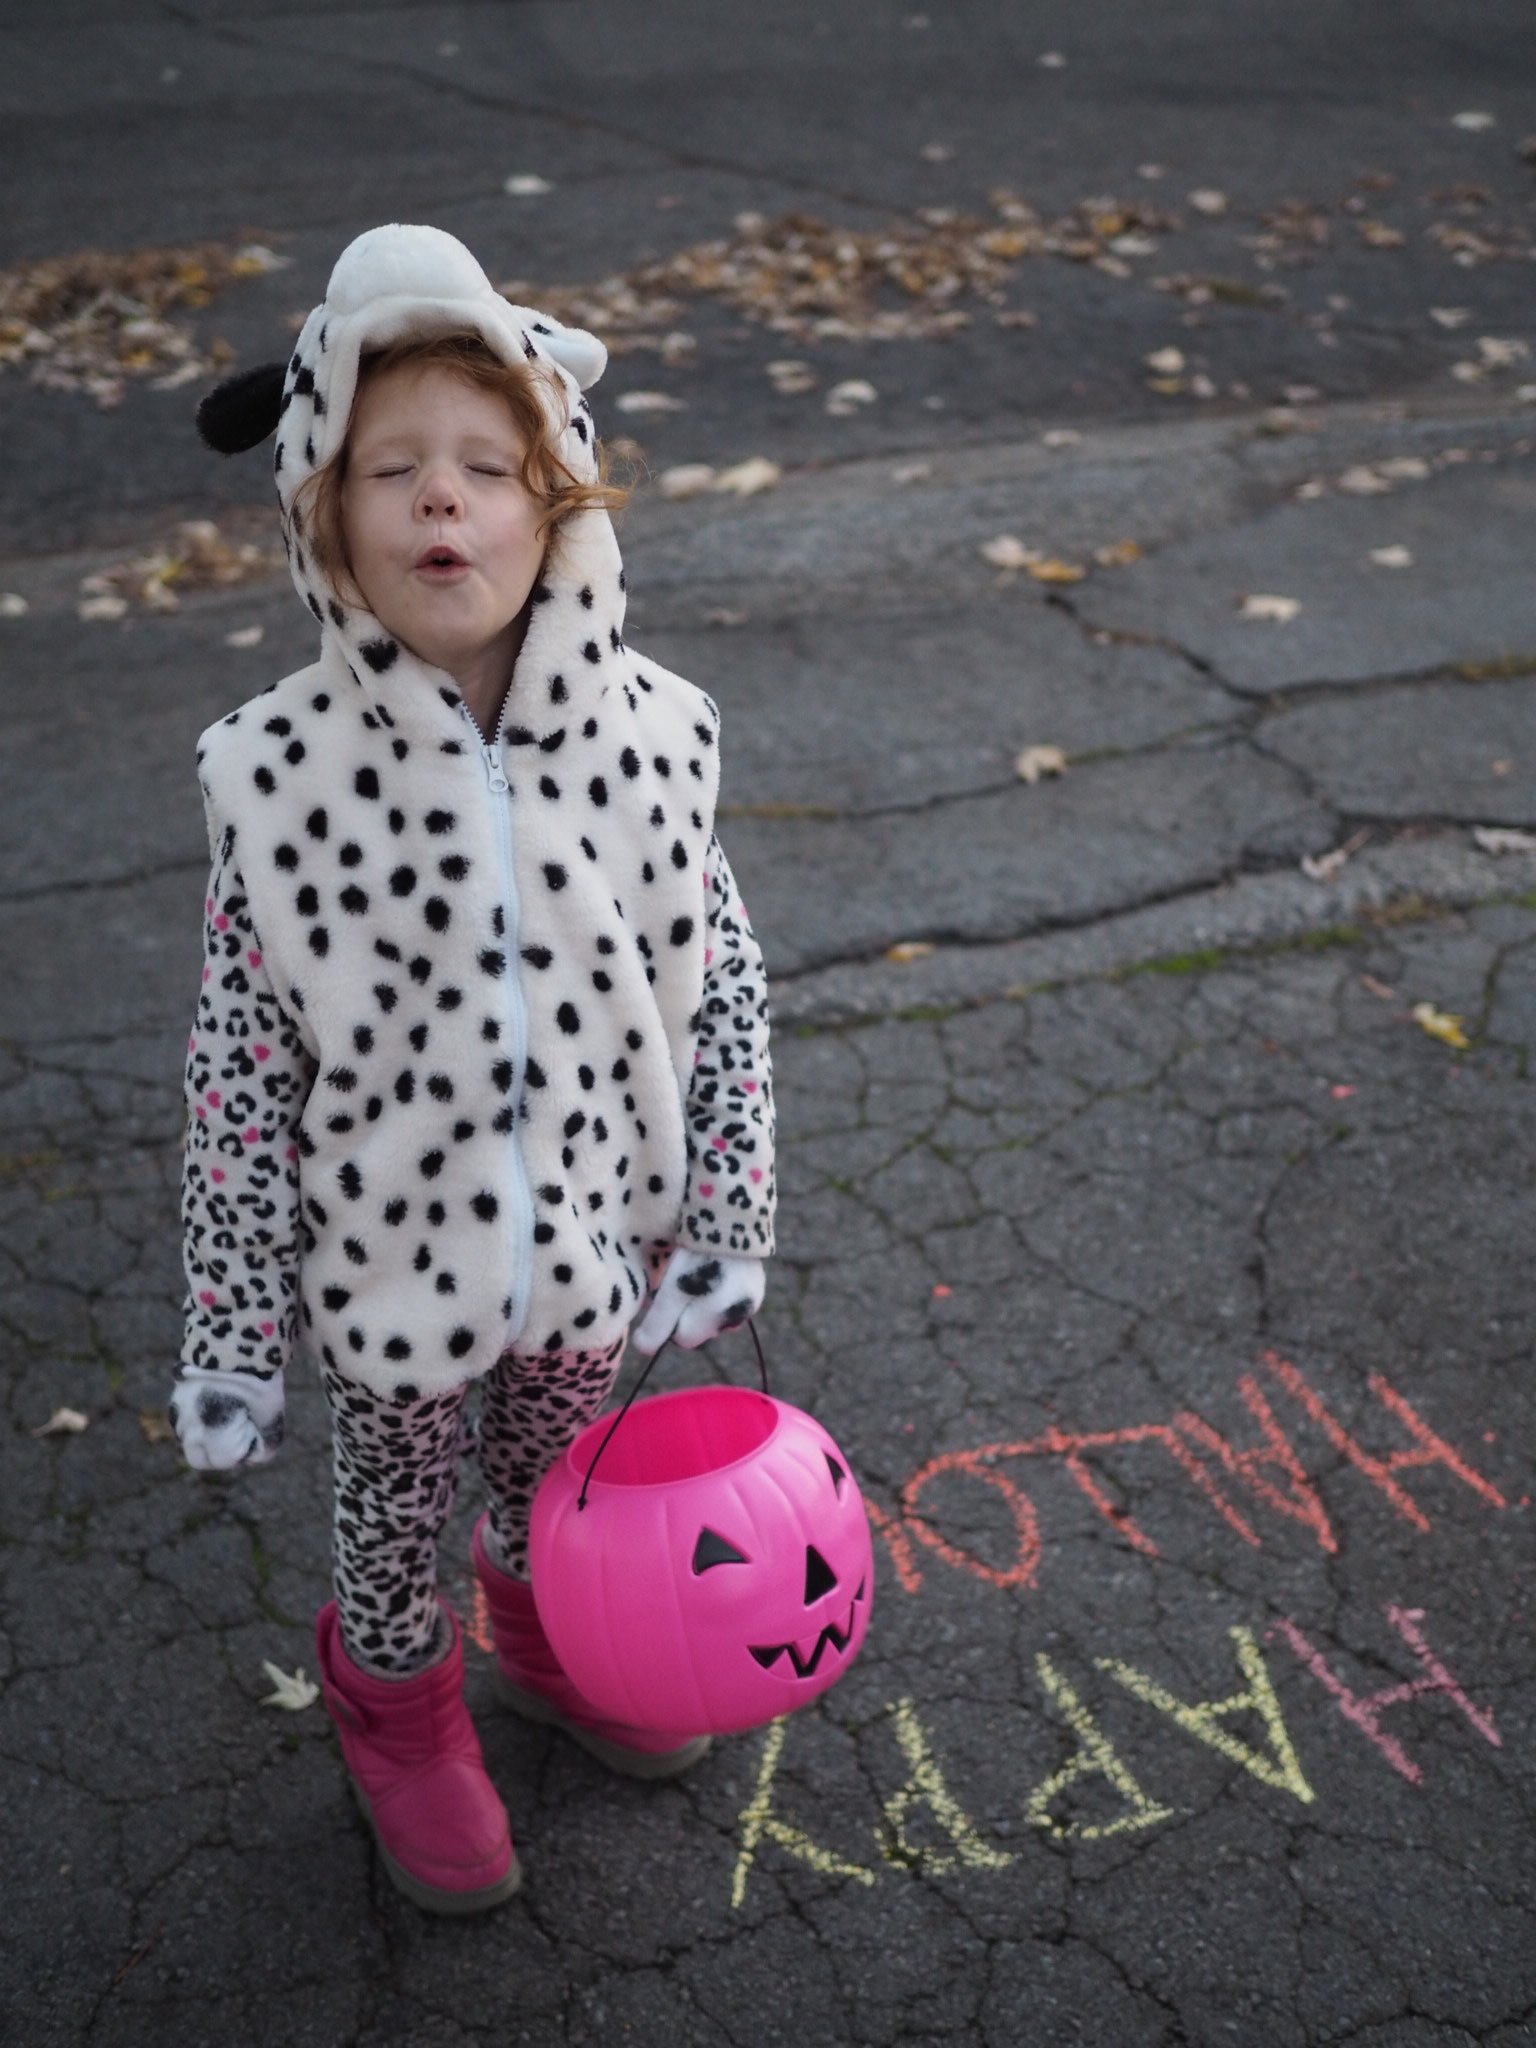
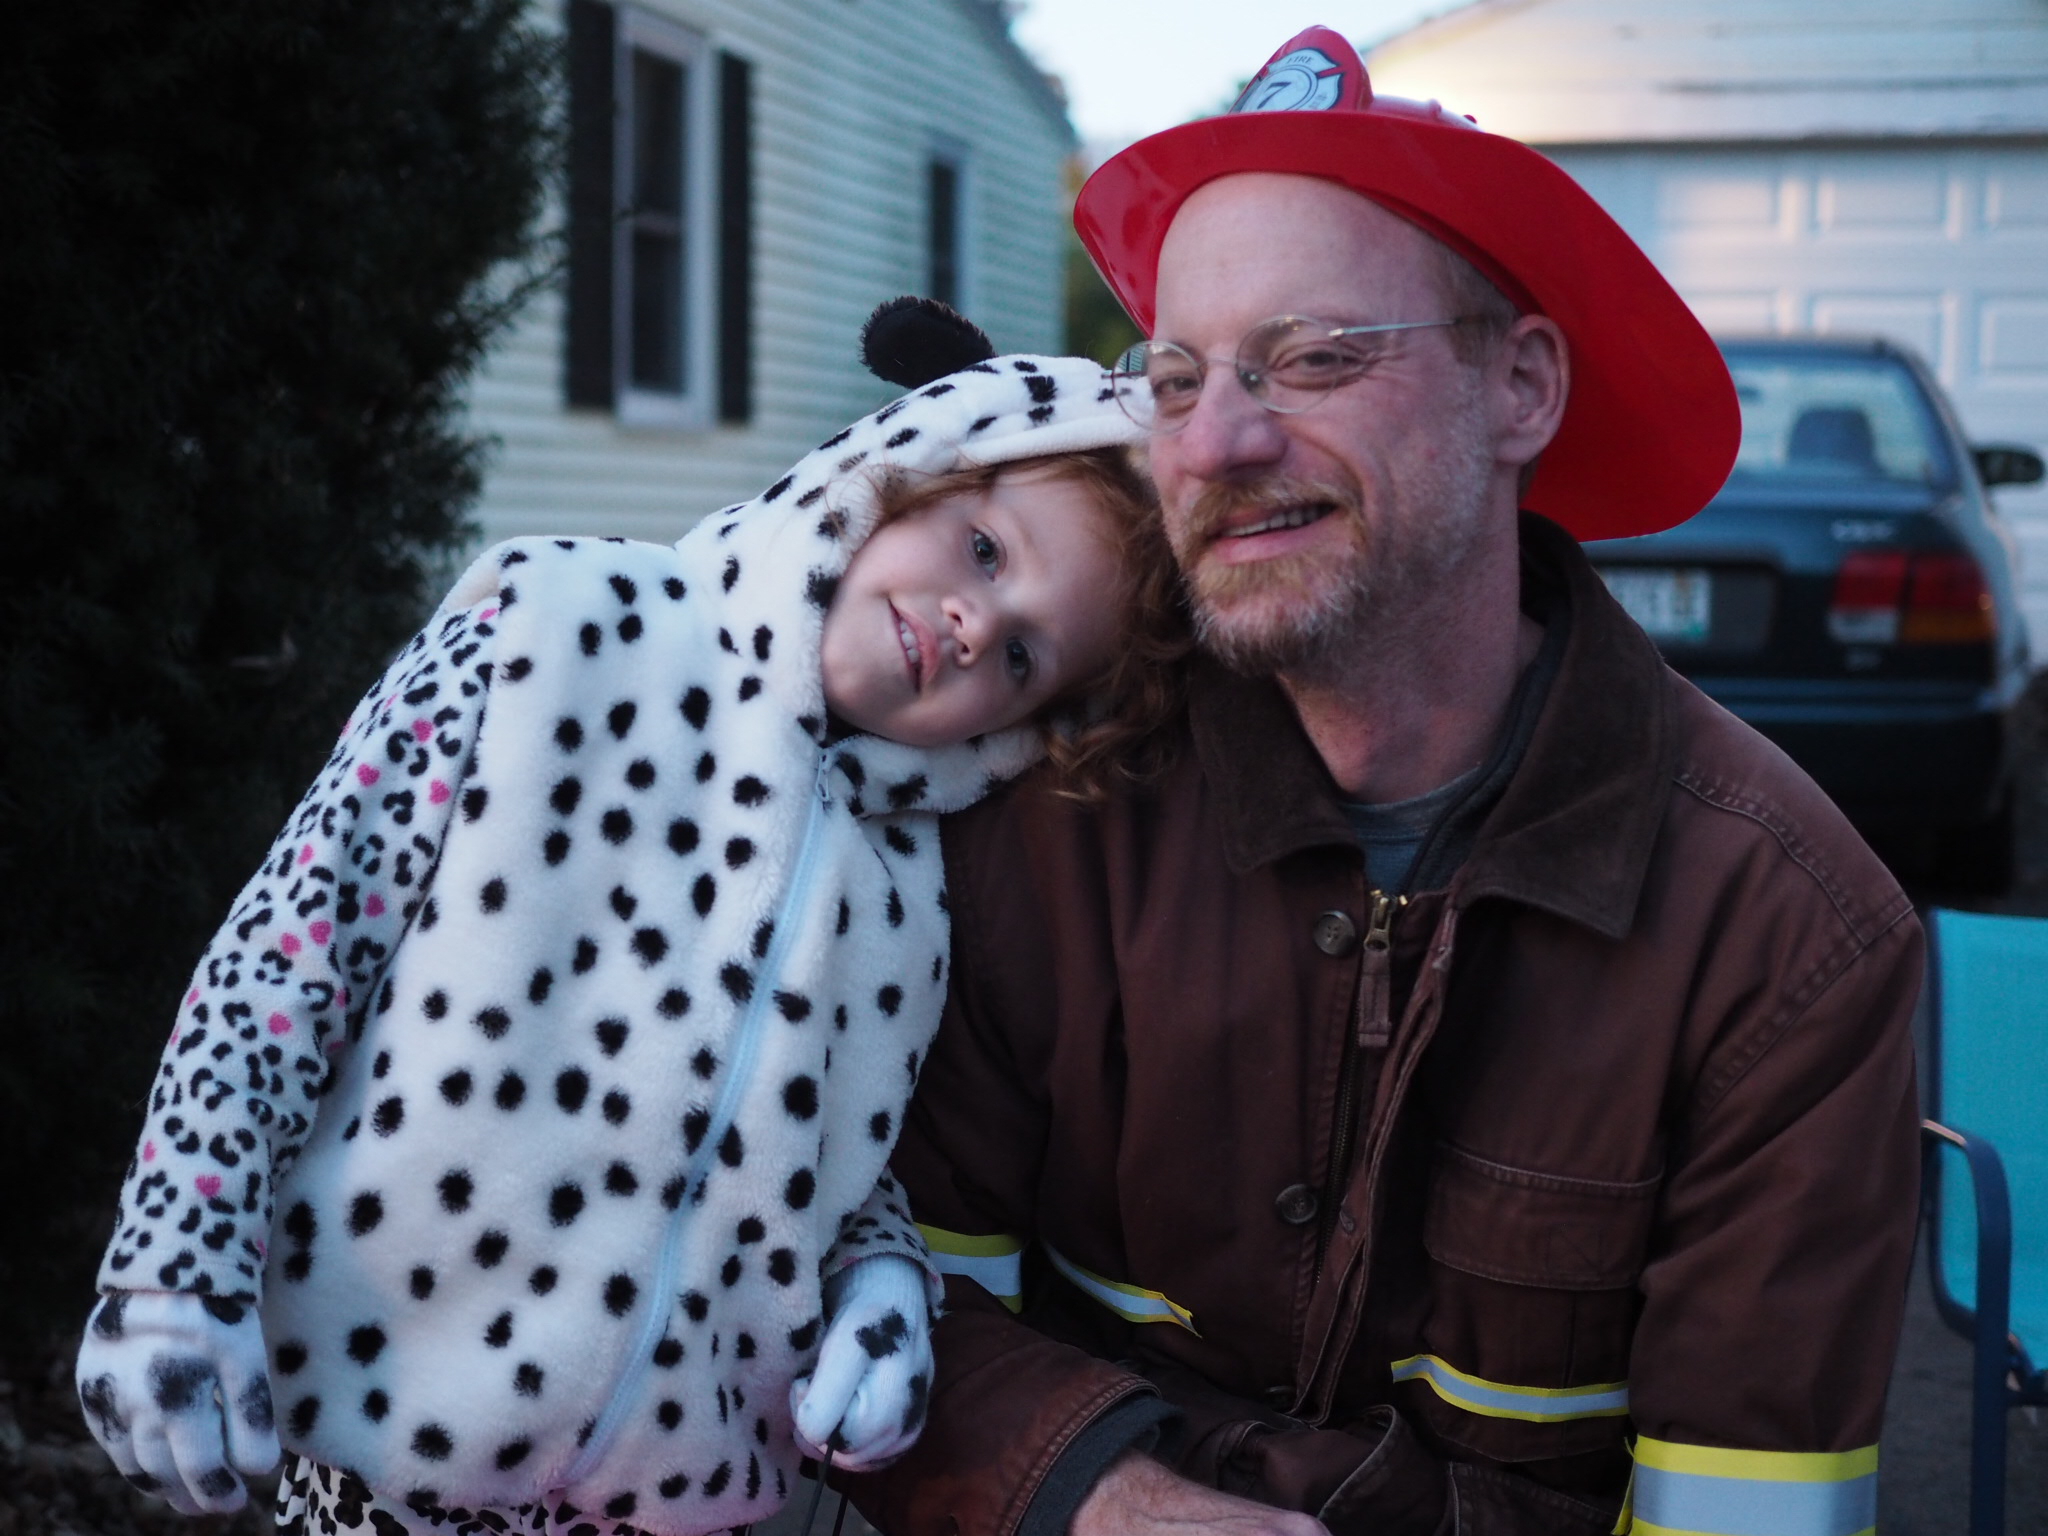
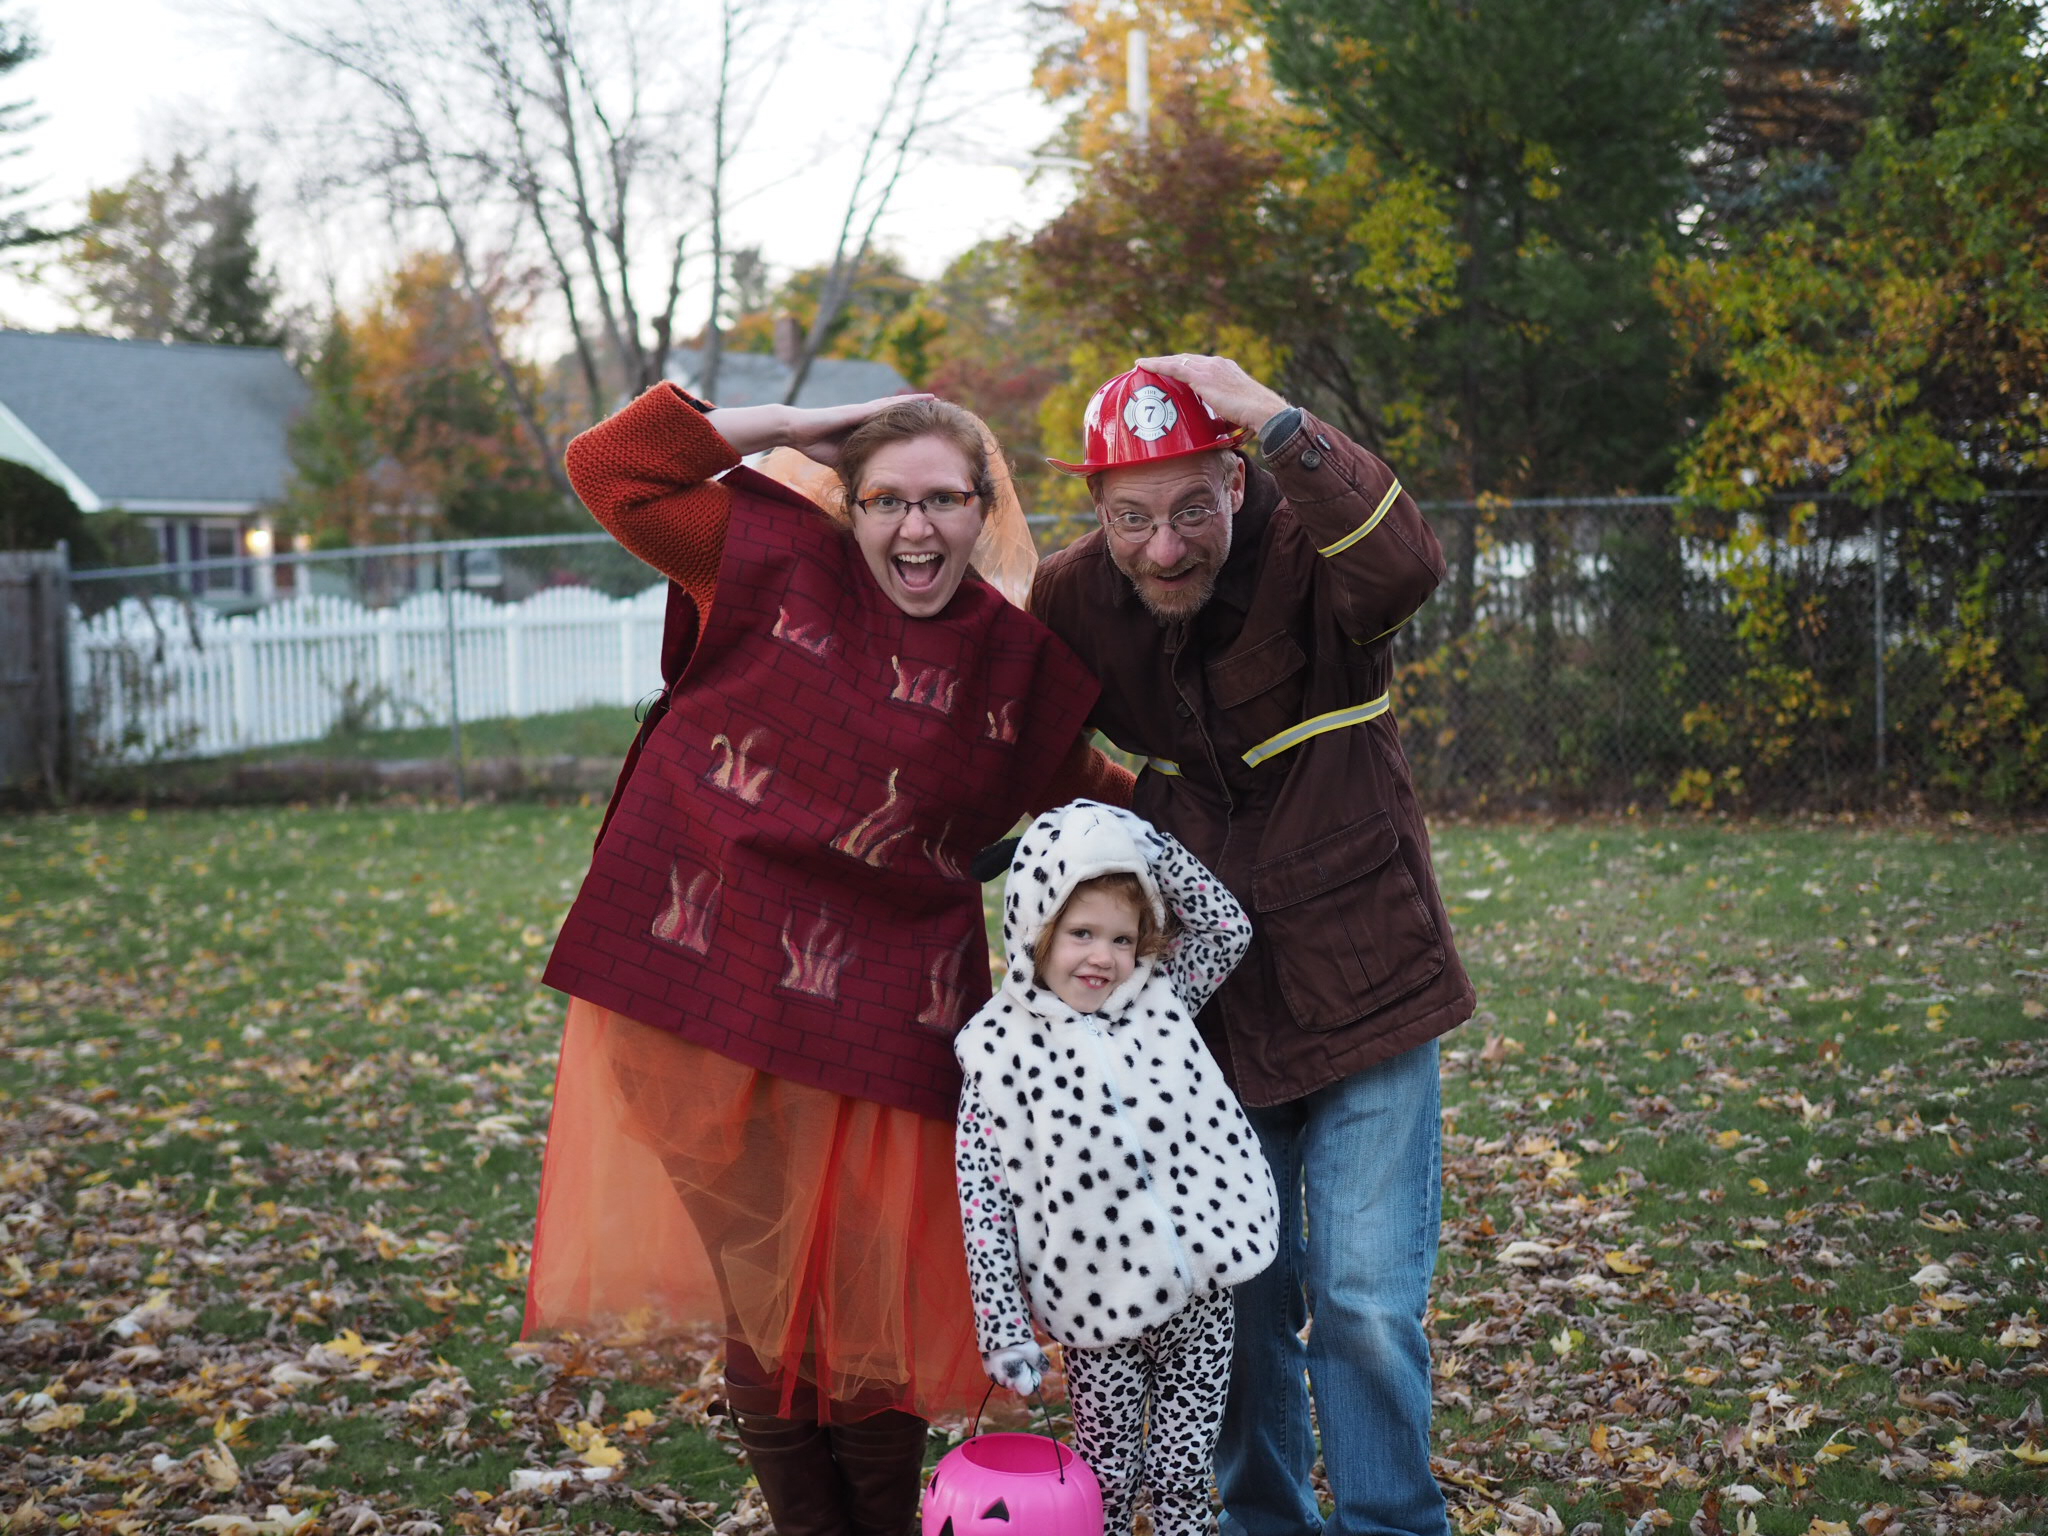
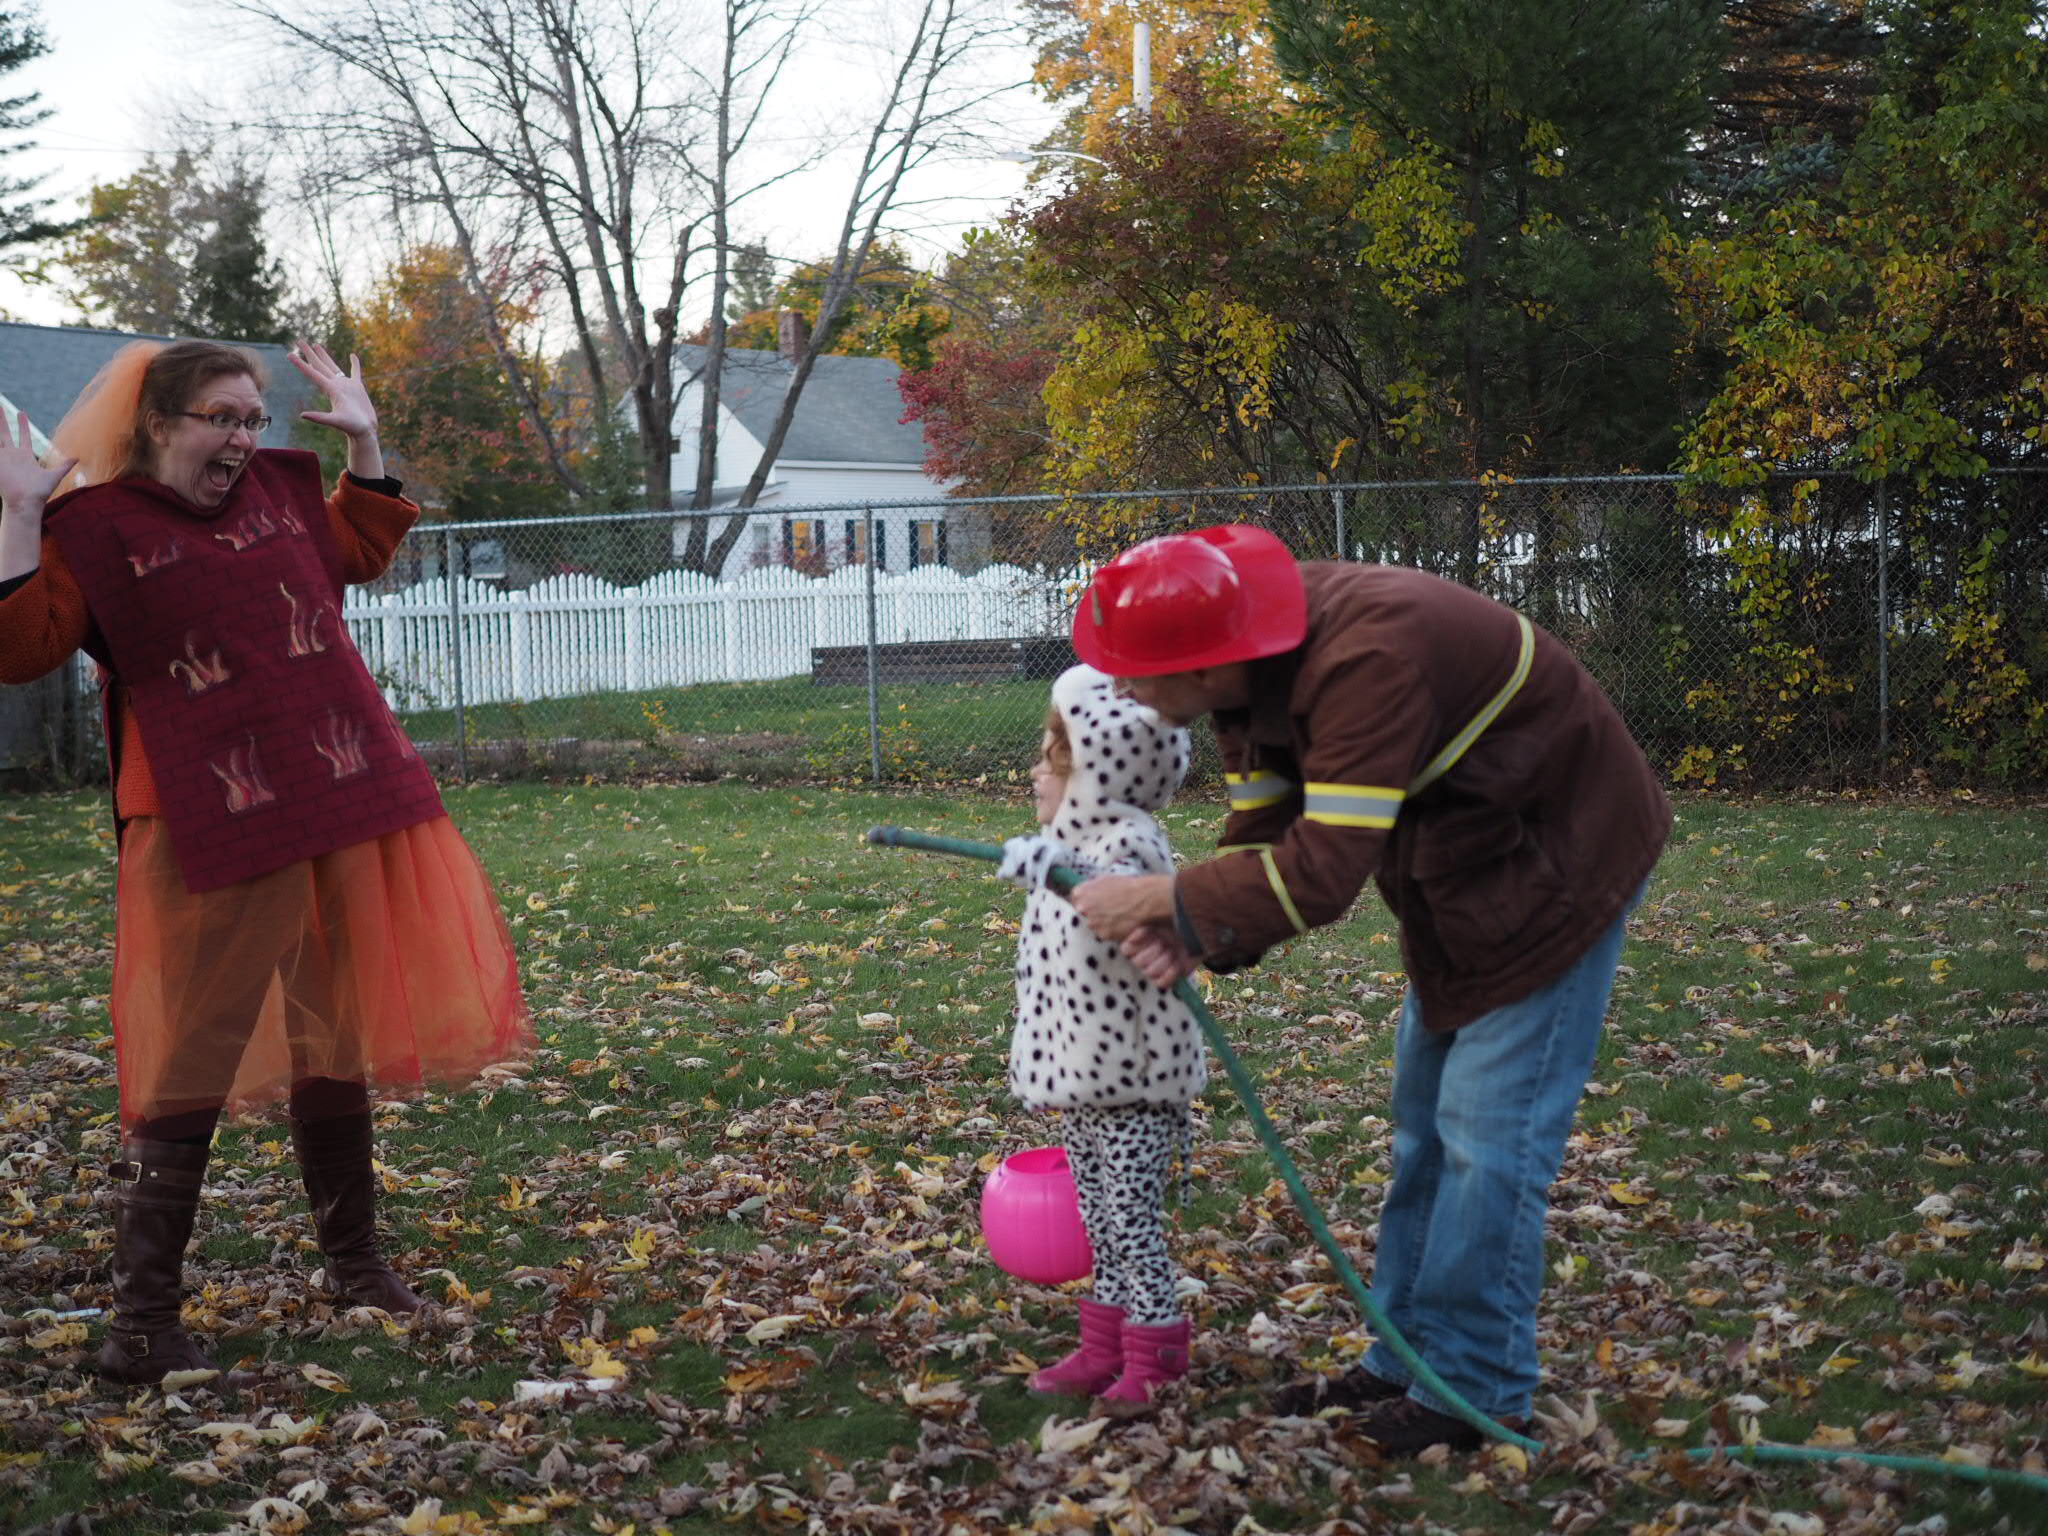
This year was a perfect mix of homemade + purchased items. Little Miss Cleaver wanted to be a dalmatian/firehouse dog and we were lucky to find the hooded vest at the consignment store. The spotted fleece she already had, so I only had to whip up some leggings and "paws". Mr. Cleaver got to be a fireman, and after little luck finding anything that looked like a firefighter coat for cheap, I bought some reflective tape at the fabric store and pinned it to one of his coats. The store-bought hat sells the look. 

As for me? Not being able to find a firefighter outfit for one, I shifted my plan from being a second firefighter to being a burning building. With some cheap felt, a dozen yards of tulle and some quality time with fabric paint and a sharpie, I ended up with the hottest costume in town. (Can't help myself.) 

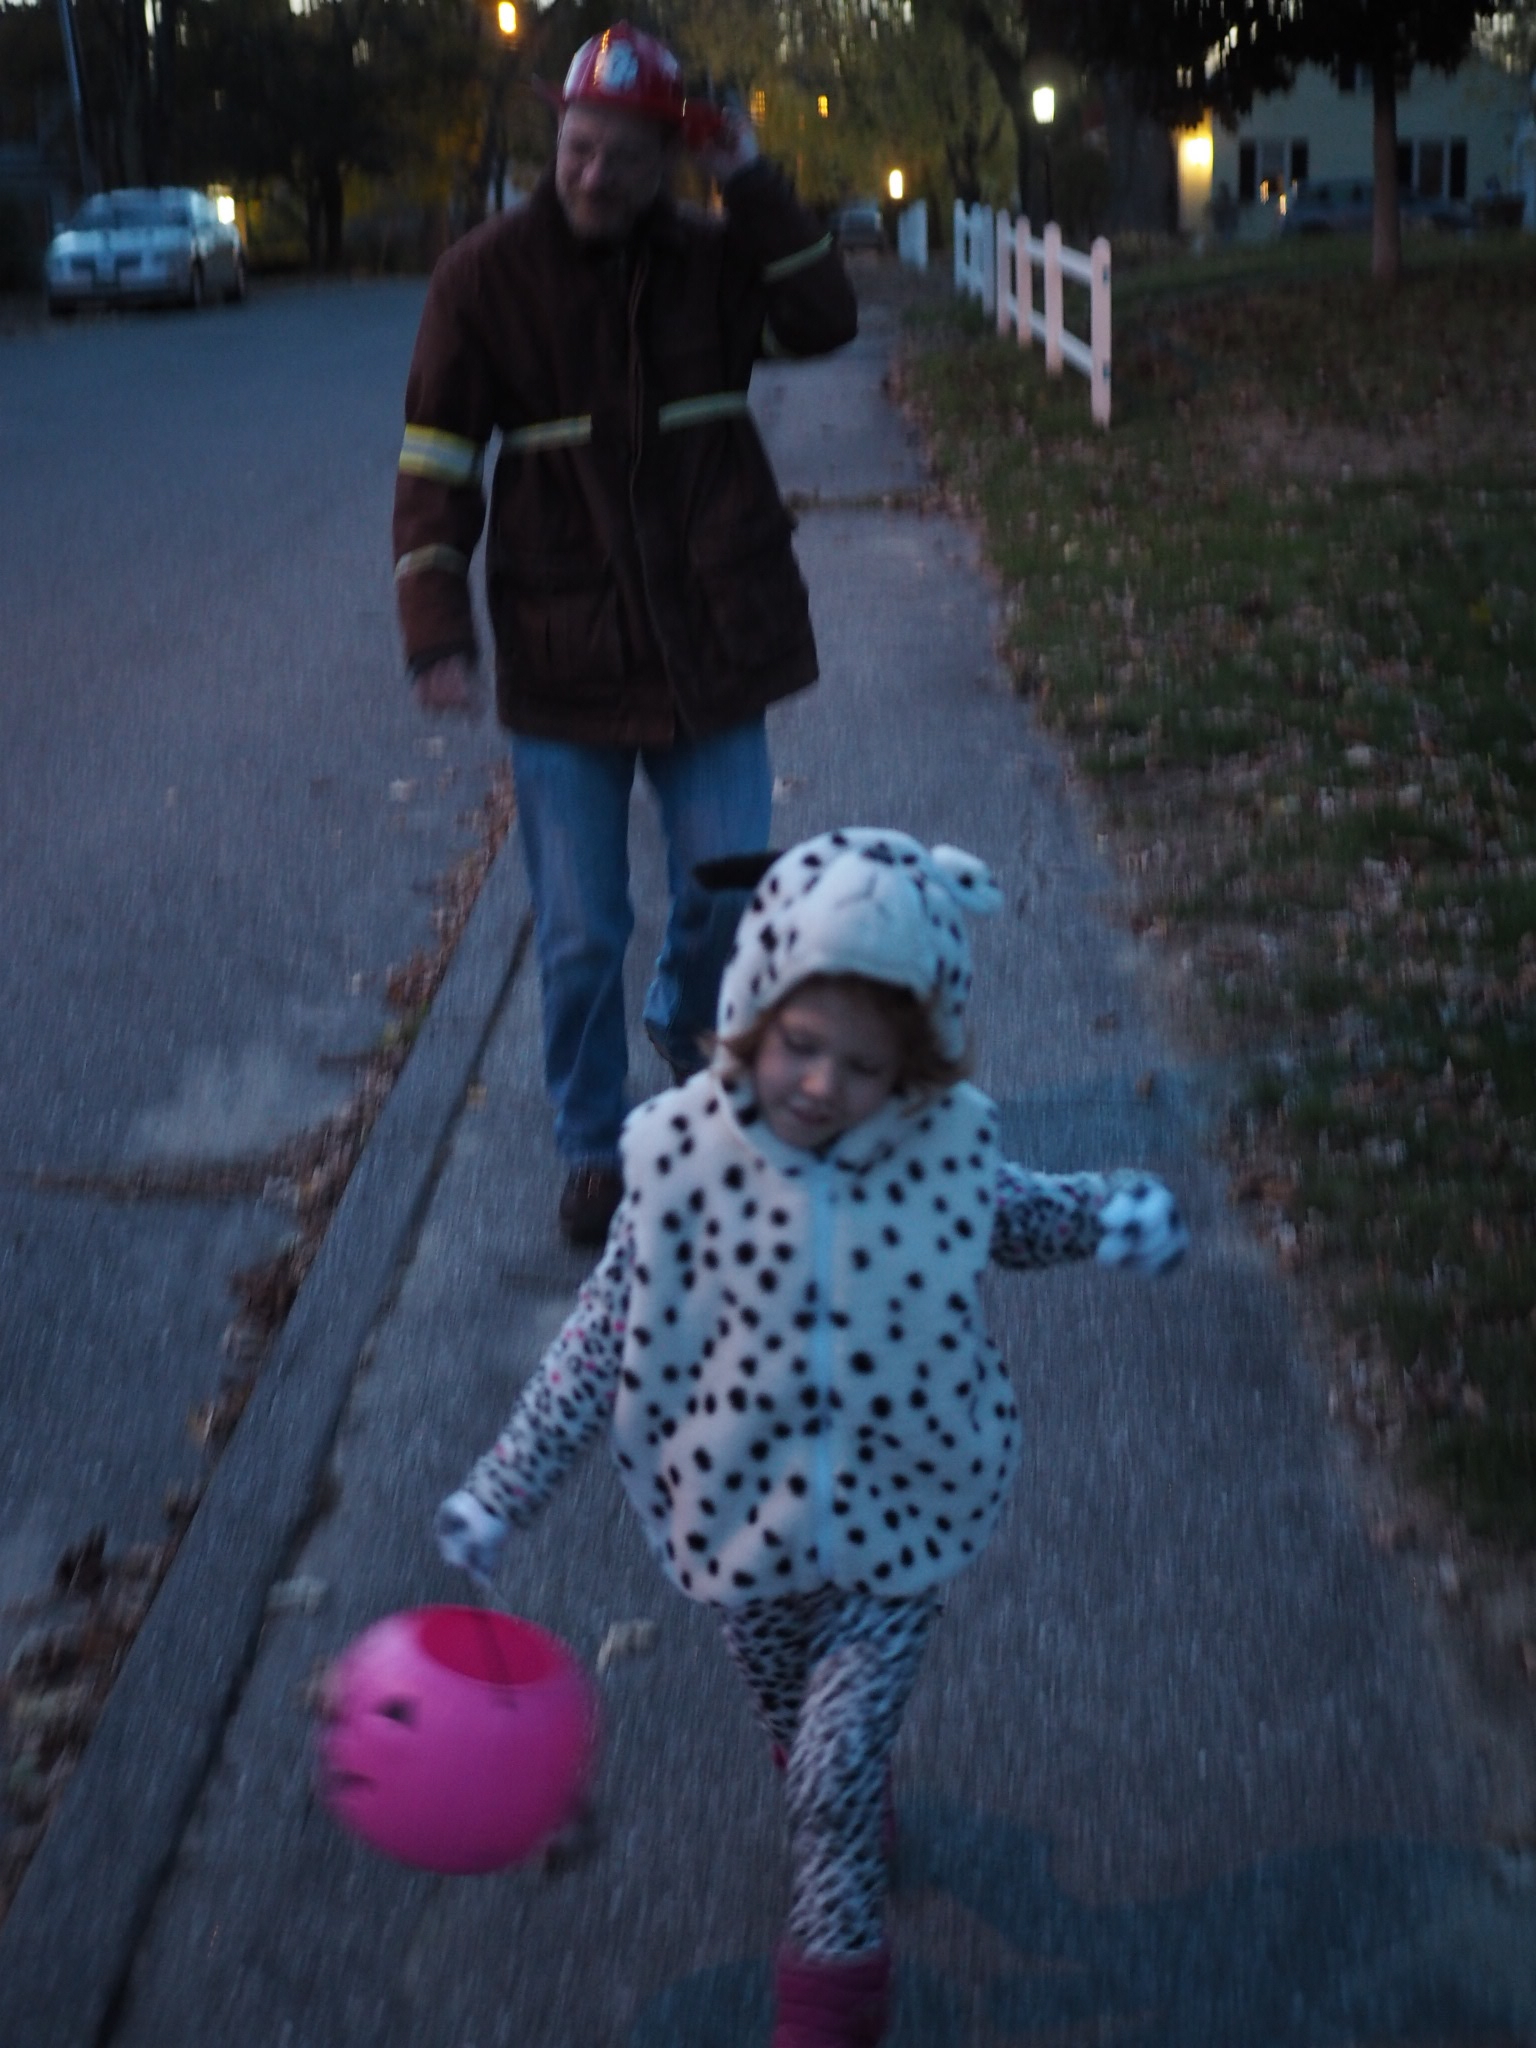
LMC had a great time trick-or-treating and handing out candy. We have some very generous neighbors, so even though we only did both sides of one street, she is well stocked on sweets. I can't wait to see what she comes up with for next year! 


Print Friendly and PDF Follow
follow us in feedly

Introducing Ezekiel Saw

Every so often, a design bursts, Athena-like, fully formed from its creator’s head. Ezekiel Saw is one such design for me. I had a clear vision of a triangle shawl in two-similarly toned, but distinct colors with detailed open lace bands.

When I went to Knitwit, my local yarn shop, to scout yarns to bring that vision to life, I was immediately entranced by the drape and subtly marled palette of CoopKnits’ Socks Yeah! yarn.

The Wave and Wheel lace pattern of the bands creates a wheel within a wheel motif, reminiscent of an old folk song about an altogether different kind of vision that we used to sing in my high school choir: “Ezekiel Saw Da Wheel.”

“Ezekiel saw da wheel;
Way up in the middle of the air.
Now Ezekiel saw da wheel in a wheel;
Way in the middle of the air.

And the big wheel run by Faith, good Lordy;
And the little wheel run by the Grace of God;
In the wheel in the wheel in the wheel good Lord;
Way in the middle of the air.”

I'm also pleased to say that for the first time, I'm offering kits for one of my designs!

The Ezekiel Saw kit is exclusively available through MsCleaver.com and comes with all the yarn needed to complete the project, a printed pattern, and a sturdy cotton drawstring project bag. You can also purchase the suggested needles if desired. 

The PDF pattern is available for $6.00 USD from the following online shops:

LoveKnitting (coming soon)   ||    Ms. Cleaver Creations    ||    Ravelry

If you knit it and participate in social media, use #ezekielsaw to share or tag me @mscleaver !  

I'd love to see your version!!!

Photos by Bristol Ivy


Print Friendly and PDF Follow
follow us in feedly

Fall-Spiced Apple Hand Pies

Fall-Spiced Apple Hand Pies

Serves 8

Crust

  • 3 cups all purpose flour
  • 1 1/2 teaspoons salt
  • 1 cup shortening or unsalted butter
  • 2/3 to 3/4 cup cold water

Filling

  • 8 medium apples, I recommend a variety of firm apples. The photos above use Jonagolds and Macs.
  • 2 Tablespoons lemon juice
  • 1 teaspoon cinnamon
  • 1/4 teaspoon nutmeg
  • 1/2 cup granulated sugar
  • 1/3 cup flour or cornstarch
  • Caramel sauce (optional) (I like the one from the Joy of Cooking)

Topping

  • 1 egg whisked with a Tablespoon of water
  • Demerara/raw sugar

Preheat oven to 350 Degrees F. 

Make crust. In a large mixing bowl, combine flour and salt. Using a pastry cutter or food processor, cut in shortening until mixture resembles damp sand. Add water, a little bit at a time, until dough sticks together. You will want it slightly more elastic than crust for a pan pie. Break dough into two evenly sized pieces, wrap in plastic wrap, and place in refrigerator up to a day in advance.

Prepare filling. Peel, core, and dice apples into small chunks. In a large mixing bowl, combine diced apples with lemon juice, cinnamon, nutmeg, sugar, and flour. Mix well, until all apple pieces are coated. 

Line two rimmed cookie sheets with parchment paper.

Remove crust from refrigerator. Cut each ball of dough into four equal pieces. On a well-floured surface, roll each piece of dough into a 7 to 8 inch square. Place dough on cookie sheet. Using a slotted spoon, scoop filling into the center of the square. If desired, drizzle caramel sauce generously over filling.

Fold dough over filling, so top portion of crust is about 1/4 inch shy of the edge of the bottom. Fold up bottom crust to meet top crust and pinch/crimp to seal. Repeat for remaining pies.

Whisk together 1 egg with 1 Tablespoon water. Brush egg wash generously over pies. Sprinkle the top of each pie with a small amount of demerara sugar. 

Place cookie sheets in oven and bake for 45-50 minutes, until filling bubbles and crust is golden brown, rotating pans halfway through cooking time.

Cool pies on wire rack prior to storage. To store, wrap in tin foil and place in refrigerator for up to one week. Serve cool, or reheat for 10-15 minutes in a 350 degree F oven. 


Print Friendly and PDF Follow
follow us in feedly

Curved Narrow Hem Tutorial

Curved Narrow Hem Tutorial by Ms. Cleaver

I love a good button-up, and if it's got that classic shirt-tail hem? All the better! But as much as I love the look of the sweeping shirt-tail hem, it can be a bit fiddly to actually hem all those curves, so here's a little trick I use to make sewing them just a little bit easier. 

Curved Narrow Hem Tutorial by Ms. Cleaver

Print Friendly and PDF Follow
follow us in feedly

Those Last Days of Summer

Those last precious days of summer.

In reality, our schedule doesn't really change all that much between the seasons, but there's something about the marker of Labor Day weekend that kicks us into gear to finally get to our favorite beach soda fountain and make the trip to the Drive-In movies. Because even if our schedule doesn't change, those things pretty much shut down come September. So we got our ice cream cones and popcorn and wore our glow bracelets and sunscreen for one last summer fling. 

And it was fabulous.


Print Friendly and PDF Follow
follow us in feedly

Things I Made This Summer

There's been so much knitting stuff this summer (which seems like an odd phrase to write) that I've sorely neglected sharing some of the other projects I've been working on!

Which is a shame, because I've been working on some cool stuff these past few months.

Like, I made a backpack!

Toddler Backpack sewn by Ms. Cleaver
Toddle Backpack sewn by Ms. Cleaver

The pattern is Made by Rae's Toddler Backpack, to which I added the optional lining, and some self-drafted pockets on the outside with mesh fabric, elastic and bias tape. It looks super-impressive, but is surprisingly easy to make.

Also awesome?

Lobster shorts!!

Lobster Thurlow Shorts sewn by Ms. Cleaver

There's been three different Renfrew tees that have been getting a lot of wear (including the white one above and this beauty):

Renfrew Tee, Sewn by Ms. Cleaver

I made baklava  for the first time and garlic scape hummus. I've baked tiny cherry pies and at least three versions of a buttermilk tea cake trying to get my recipe perfect (almost there...)

I've done some embroidery:

You Are Exactly Where You Need to Be

I've whipped up quick little projects:

Dutch Rabbit
Ribbon Brooch
Dutch Rabbit

And sewn another dress LMC refuses to wear even though she picked out the fabric from my stash.

Maggie Mae Dress sewn by Ms. Cleaver

Let's just say, it's been a productive summer. :) 


Print Friendly and PDF Follow
follow us in feedly

Three Needle Bind-Off - a quick tutorial

Three Needle Bind Off Tutorial - Ms .Cleaver Creations

A few people knitting Atlee had mentioned that they'd never done a three needle bind-off before, so I thought I'd post a real quick tutorial. Once you see how easy it is, you'll be kicking yourself for not learning it ages ago (I did!). Prefer to see it in motion? There's a quick video on my Instagram.


Print Friendly and PDF Follow
follow us in feedly

Knitting with Cotton, a tutorial

Knitting with Cotton.png

Earlier this year I had the chance to spend a lot of quality time with Willet, Quince & Co's sport-weight 100% cotton yarn. After swatching my way through a skein of yarn, I had some ideas of what did and didn't work in the yarn, and came up with three very different designs: Atlee, Ocaso, and Caiterly. While cotton yarn isn't as commonly seen in hand-knitted garments as wool or even linen, it doesn't need to be relegated to the land of dishcloths, as cotton can be very versatile and wearable.

It does, however, have some distinct differences from it's woolly counterparts that should be kept in mind, which I'll be covering today. For all the photos in this post, Willet is shown in the Dinghy colorway, a teal, and I'll be comparing it with Quince's Chickadee - a 100% sport-weight wool in Carrie's Yellow. Both swatches were knit with the same stitch and row count on size US 5 (3.75 mm) needles.


Knitting with Cotton, a tutorial by Ms. Cleaver

Gauge

Per the tag guidelines, both Willet's and Chickadee's base gauge is 6 sts/inch on size 5 (3.75 mm) needles.  When I made the swatches, I hit 6sts/inch exactly on my stitch gauge for both yarns, but Willet had 8.25 rows/inch, while Chickadee came in at 9 rows/inch. Over 12 inches, this is 9 rows of difference, so it can really add up over a long length (like a sleeve or body)

Tip #1 - when alternating between wool and cotton, pay attention to row gauge.

Knitting with Cotton, a tutorial by Ms. Cleaver

Fabric Characteristics

Even though the gauge is quite similar, the fabric itself behaves rather differently. The wool is much squishier and plusher, and tends to hold it's shape better, while the cotton is more floppy, but not exactly drapey (not like silk or linen). The wool, in general, has better recovery (springs back to shape), while cotton has a more relaxed vibe.

Tip #2 - for highly structured knits, cotton isn't your best bet, but it works great for softer, more relaxed lines. 

Knitting with Cotton, a tutorial by Ms. Cleaver

Weight

Though these swatches are basically the same size (the Willet is 5"x4.5"; Chickadee is 5"x 4.25"). the cotton weighs a gram more. This is why 50g of Chickadee (100% wool) gets you 181 yds, while 50g of Willet (100% cotton) gets you 160 yds. This weight can make a difference in two things: number of skeins required and the row gauge of finished product. 

A few grams isn't a big deal in a swatch, but again, it can really add up over a large garment. If you were working, say, a sweater coat in both yarns, the additional weight of the cotton can drag the garment down, lengthening the row gauge and pulling more on the shoulder seams, and again, leading to a more relaxed silhouette.

The weight can be compensated for in a number of ways - making a close-fitting garment, so the weight is distributed across the body; having strong shoulder seams; and making sure to block the garment flat.

Tip #3 - a little extra weight can add up, so choose your pattern wisely

Knitting with Cotton, a tutorial by Ms. Cleaver

The Yarn

The biggest complaint I've heard about cotton yarn is that it "has no give" and/or "it hurts my hands." The "no give" is pretty much true. 

Remember how I mentioned the fabric of the wool swatch is springier and has more recovery? The same is true of the yarn itself. 

From a 6 inch piece, I was able to easily stretch the wool yarn an additional 2 inches, and it sprung right back into place. With the same length of cotton yarn, I could barely stretch it all, even pulling quite hard. If you're used to tensioning wool yarn, this can be quite a shift. So once again, the key to cotton is relax. Let the yarn glide through your hands, rather than trying to pull it.

Tip #4 - When knitting with cotton, relax and don't try to fight the yarn. 

But don't think of this rigidity as a knock against the yarn. It has some great benefits, namely that the stitch definition is fantastic. The reason the single stitch cables on Caiterly or the subtle patterning on Atlee's yoke work is because of the way the Willet stitches sit on top of the fabric, instead of blending in the way it would more with wool. One caveat: this means ends don't blend in as well too, so hides your ends in an inconspicuous place, like the side seams. 

Tip #5 - Pay attention to ends, but enjoy the stitch definition!  

Knitting with Cotton, a tutorial by Ms. Cleaver

Blocking and Washability

One of the big draws of cotton is it's washability. It can go in the washer and the dryer and be none the worse for wear. Both the swatches were washed loose and dried along with a load of laundry in a top loading machine on warm and a standard electric dryer on regular. While the wool swatch clearly felted, losing about a half an inch in both length and width, the cotton swatch was virtually unchanged. That said, some cotton yarns may experience more shrinkage than others, and it may be more noticeable over a larger area than this rather small swatch. 

Tip #5 - treat your swatch like you intend to treat the finished garment, then measure gauge

In Conclusion

Cotton is great for a lot of things, but not everything. So as with any project, match your yarn appropriately to the project and you'll have success! So let's get the cotton yarn out of the kitchen and on to our bodies. 


Print Friendly and PDF Follow
follow us in feedly

In the Garden

It's been usually hot and dry in these parts of late, so I haven't spent as much time out in the garden as I'd like (I'm seriously overdue with some weeding), but with a little help from the hose, things are growing.

I started a lot of my plants from seeds this year to mixed success. My broccoli didn't make it, the leaf lettuce is sad at best, and the sugar snap peas, I think in part to some bad trellising on my part, haven't performed all that well. But where these have faltered, others have blossomed. The tomatoes and bell peppers are looking fantastic, the butternut squash and green beans grow in leaps by the day. The small batch of garlic, which i planted in the fall on a whim has been harvested and hung up to dry, waiting to make its appearance in fresh tomato sauce later this summer. I'm picking blueberries by the quart.

But the best part? How LMC asks if we can go cut more flowers for the table, or when she says "Mama, we need more peas." Now look, normally we're much more of a goldfish cracker than a kale chip kind of family, and my kid can certainly be picky, but when it's this fresh and you pick it yourself? Even a toddler can't say no. 


Print Friendly and PDF Follow
follow us in feedly
In

Cast On Party!

It's cast on day for the KAL - what are you making??


Print Friendly and PDF Follow
follow us in feedly