Things I Made This Summer

There's been so much knitting stuff this summer (which seems like an odd phrase to write) that I've sorely neglected sharing some of the other projects I've been working on!

Which is a shame, because I've been working on some cool stuff these past few months.

Like, I made a backpack!

Toddler Backpack sewn by Ms. Cleaver
Toddle Backpack sewn by Ms. Cleaver

The pattern is Made by Rae's Toddler Backpack, to which I added the optional lining, and some self-drafted pockets on the outside with mesh fabric, elastic and bias tape. It looks super-impressive, but is surprisingly easy to make.

Also awesome?

Lobster shorts!!

Lobster Thurlow Shorts sewn by Ms. Cleaver

There's been three different Renfrew tees that have been getting a lot of wear (including the white one above and this beauty):

Renfrew Tee, Sewn by Ms. Cleaver

I made baklava  for the first time and garlic scape hummus. I've baked tiny cherry pies and at least three versions of a buttermilk tea cake trying to get my recipe perfect (almost there...)

I've done some embroidery:

You Are Exactly Where You Need to Be

I've whipped up quick little projects:

Dutch Rabbit
Ribbon Brooch
Dutch Rabbit

And sewn another dress LMC refuses to wear even though she picked out the fabric from my stash.

Maggie Mae Dress sewn by Ms. Cleaver

Let's just say, it's been a productive summer. :) 


Print Friendly and PDF Follow
follow us in feedly

Minoru Jacket and Cargo Pocket Tutorial

Minoru Jacket
Minoru Sleeve Mod
Minoru Jacket
Minoru Cargo Pocket Mod
Minoru Jacket
Minoru Jacket

I finally made something for myself and it's a doozy! I loved the Minoru Jacket pattern from the moment it came out (back in late 2011), so much so that I bought the pattern, the fabric, the lining, and special ordered the zippers shortly after it came out.

Three years of sitting in my stash and five weekends of sewing later, I have a bright and beautiful new jacket that does some much-needed filling of a long-outstanding hole in my wardrobe. Of course I finished it just in time for summer, but being as I live in Maine with it's often cool nights and mornings, I'm sure it'll still get plenty of wear before getting a real workout in the Fall and Spring.

The jacket is a spring green twill of forgotten origins, lined with some silky polka dots purchased at JoAnn's, and riri metal zippers. I made the pattern in a straight size 14, which is a little bit roomy, but it means I can wear it over sweaters come Fall. It's comfy and the right amount of warm for the in-between seasons.  I found the instructions clear and concise (though missing a few metric to imperial measurement conversions in the text and there's something funky about the placket length/hem length). I pretty much made it exactly as described, with the exception of the following modifications:

  • Flat felled all the seams noted as top-stitched in the pattern - seam finishing and top-stitching in one!
  • Lined the hood
  • Moved the waist elastic up 1"/2.5 cm from pattern marking
  • Removed the cuffs
  • Made the hood zipper opening shorter
  • Added cargo pockets
  • Accidentally placed the interior pockets about 5/8 inch too low

One of the great things about sewing a pattern three years after it came out is that by then, a ton of other people have made it and you can steal their ideas and learn from their problems. About half these mods were inspired by other blogger. Case in point, I can no longer remember the blogger who mentioned it, but the hood zipper opening was indeed too long for my zipper, which I was able to check, before cutting it out. I do wish  I had headed the warnings to reduce the hood, as it is overly large. Some more direct copy-cats include borrowing Lladybird's idea to lose the cuffs (which were way long, even on me) and after I flat-felled my side seams before I inserted the side seam pockets I had planned on, I stole cutcutsew's cargo pockets idea.

The cargo pockets were a happy accident, as I love the way they turned out and they really make the jacket. I constructed my pockets largely based on this tutorial by 21 Wale. Should anyone want to copy me in my copy-catting, I've made up a PDF Cargo Pocket Pattern and Instruction Sheet  (tiled for US Letter-sized printing).

As with any coat/jacket, this was a time-consuming project. All said, it probably took me somewhere in the realm of 16 or so  hours to complete, but I love the outcome and consider it time well-spent as I can see myself wearing this coat all the time.

Speaking of wearing me-made things, I've completely missed Me-Made May, but I realized after I took the photos that everything in my outfit in these shots (not including underthings) was handmade either by me (cardigan, skirt, tank) or someone else (necklace, shoes). The fact that I didn't realize it until I took the photos is a nice nod to how the right handmade items can really become an intrinsic part of our wardrobes.

Continuing on the theme of handmade wardrobes, there's a neat little story behind the striped sweater LMC's wearing. When we first moved back to Maine, my mother-in-law gave me a bag with some random knitting stuff in it: a few sets of straight needles, some old yarn, and all the pieces to a blue and white striped baby sweater.  When I was pregnant, one of the first things I did was seam the otherwise complete sweater together, so now LMC has a Memere-made sweater, even though her Memere hasn't knit in years. The original yarn and ball bands (Reynolds Giselle) came with the sweater, but I've been unable to definitively date them and my MIL has no recollection of making the thing, so my best guess is that it was originally made for either one of her three sons, or my nephew - meaning it could be anywhere from 20 to 50 years old (quite the range, I know).  The best my google-fu can find is that the yarn was at a minimum available from 1981-1984. Doesn't look too shabby for some never-worn 30 year old yarn, does it?

Five Things Having a Baby Taught Me about Sewing

Birthday Dress
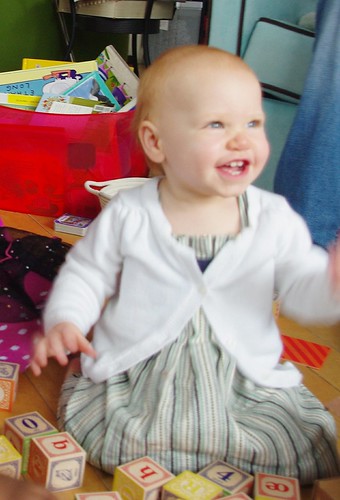
As Little Miss Cleaver is several weeks into her one-year-old-ness and several friends and family have had welcomed new babies in the past few weeks, I’ve been thinking a lot about those first few heady days of parenting of how quickly your life shifts to a new norm, and then I thought about how it’s changed what I make and why.

Thanks to Mr. Cleaver’s keen understanding of how making stuff is important to me, I’ve been able to do a fair amount of sewing since LMC’s birth. However, two vital things have changed about my sewing time. One, it’s in shorter spurts now and perhaps less frequent, but all the more welcome and two, the things I make are usually, though not always, for someone with wee clothing needs a bit different from own. Because of these two changes, I’ve experienced a few new things about sewing that I thought I’d share. Milk coma 1. Trying out new things is easier when the project is small

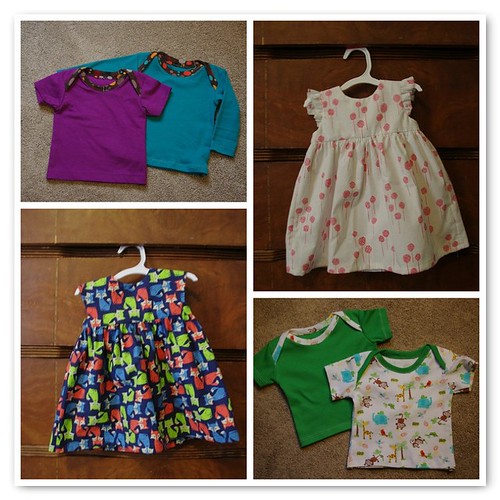
Before I started sewing baby stuff, I had never completed a project in knit fabric. I’d made a few attempts in the past, but never really finished anything. Then I decided to make some envelope tees. The fabric was fairly stable (interlock) and the seams were all of six inches long. It was a small enough project that even if I screwed it up, I was out of a quarter of a yard of fabric, maybe. I’ve probably made about ten or so since, some in interlock, some in jersey, some hacked together with the Geranium pattern into dresses.

Having worked in this small scale, I’m much more comfortable with knits and am eyeballing some larger-scale knit projects for myself. Oliver + S Birthday Party Dress 2. There’s frosting, there’s cake, and then there’s bread. And there is nothing wrong with sewing any of them.

Tasia coined the whole frosting vs. cake terminology, but sometimes, even cake is too fancy of a word for some items.

There are a lot of things that I used to think that I’d never bother making, because they were just too dull and/or readily available inexpensively. Like solid-colored t-shirts, non-fancy underwear, leggings, plain socks. But then you figure out that those ready available things are kinda cruddy. The number of onesies we bought that got holes in the fabric is astonishing, especially considering the early ones that were worn for maybe 3 months by something that didn’t move much.

Now I haven’t made any onesies, mostly because I’ve yet to have any luck with inserting snaps, despite several efforts (any suggestions welcomed!), but if I could get over that snap-inserting hump I totally would the next time I needed onesies. Because there’s a certain satisfaction to pulling something out of the drawer and wearing it on a daily basis and having the fabric be nice, and the seams finished well, even if it’s super dull. My style and sewing has become more utilitarian these days, and as much fun as it is to spend days making a fabulous dress, my current dream sewing project list is full of things those things that I never thought I’d ever bother to sew.

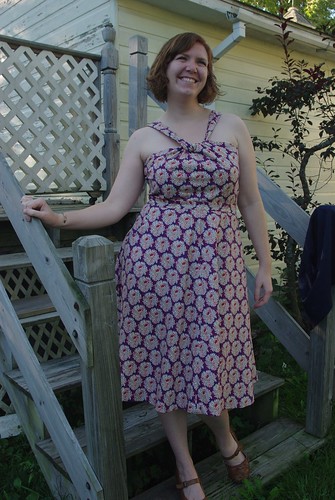
That’s not to say I don’t make the occasional fabulous piece of cake or frosting, like the Oliver + S Birthday Party Dress seen above or the wear-it-once Ewok costume , both of which were totally worth the extra effort in my opinion. My creation 3. Multiples are your friends.

Not every project has to be a special snowflake. When you make multiples of something you only have to cut/trace the pattern in each size once and depending on your fabric, you can cut out multiple projects at the same, getting to the actual sewing quicker. A huge plus when your sewing time is more limited.

When you do the same thing multiple times, you learn from your mistakes and get better. And generally faster at it too. This can be particularly helpful if you’re making those everyday bread pieces and need a bunch of them.

Untitled

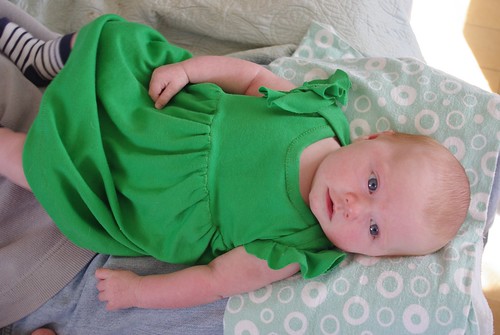
4. When in doubt, make the longer version.

It has been my experience that babies grow taller much faster than they grow wider, which means those leggings turn to capris, those pants to shorts, and those dresses to tunics.

Little Miss Cleaver was about 6 weeks old when she first started wearing that green dress. As a one-year old she still has a lovely tunic that she wears. In that case, the knit fabric also helps, but I’ve been able to stretch the life of many a handmade baby item, simply by making the longer version.


IMGP8546

5. You’ve probably already got a fabric stash, so stock-up on notions

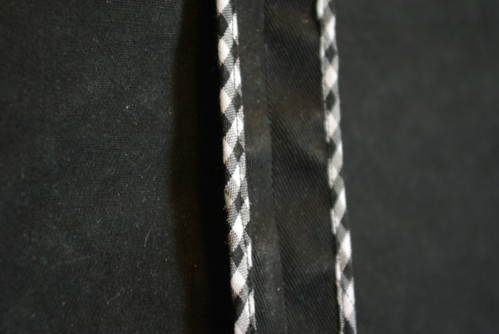
I’ve got enough adorable novelty prints to last me three years (at least), so if I want to do a project, I’ve probably already got some fabricI can use, but having a good supply of buttons and piping and zippers and thread in a variety of colors means I don’t have to use my sewing time on a trip to the store that inevitably takes longer than I want it to.

Since I am sadly, not someone who ever inherited mason jars full of fabulous vintage buttons, I early on bought a bunch of packs of multicolored buttons in various sizes that have been indispensable. I learned my lesson and also have a good stash of elastic in various widths and plenty of machine needles. Figure out what you use a lot of and get a ton.

Also, when it comes to matching colors, there is such a thing as good enough. When my mother first taught me to sew, we would go to the store, pick out a pattern, pick out the fabric and carefully select a thread color to match exactly. Now I have one thread storage box that holds about 40 spools, and generally there’s something there that is close enough (unless it’s orange, apparently I have no orange thread), or maybe that project will look great with contrasting thread!

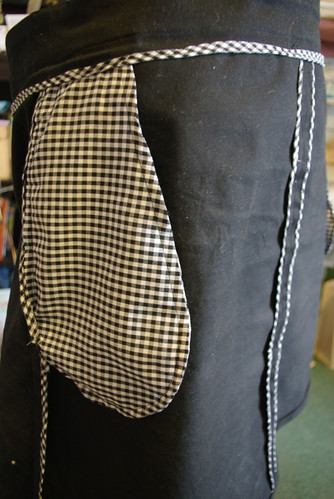
I’d also like to work on having a good stash of quality solid fabrics to use for contrasting yokes and linings.

And one bonus comment, that relates to baby clothing in general: If it’s a practical button (i.e. one that you have to actually use to get an item on and off your child), anything smaller than ½” is just so not worth the trouble. Maybe 3/8.” Maybe.


Anything your kids have taught you about sewing? Feel free to share in the comments below.

A Bit of Cake

A few weeks ago Tasia had a great post on sewing "frosting" (fun, often patterned, not necessarily everyday items) versus sewing "cake" (basics, everyday wear). Like most sewists, I definitely fall on the side of being drawn to frosting projects over cake projects - personally, I would be happy sewing nothing but pretty dresses, even if I wear a dress maybe once a week. But recently I've been finding a bit more balance between projects like my houndstooth dress, which I enjoyed sewing, think is awesome, but only wear occasionally:

Fall Palette Challenge : Houndstooth Dress

and my slew of School House Tunics that I wear practically every time they're clean enough to wear. My creation

This weekend, I focused on some serious cake.

But that isn't to say cake can't be fun too.

IMGP5362

Sure it's a basic black skirt, but have you seen the inside??

IMGP5386

In typical Leah fashion, I took a simple project (Colette Patterns Ginger, a total of four pieces), and made it 100% more complicated by adding pockets and finishing all the seams with home-made bias binding.

IMGP5381

That said, I'm pretty pleased with the finished product, even if the fabric seems to spontaneously generate lint. If I had to make any changes I would have 1) used a stiffer interfacing in the waistband 2) gone a size down in the waist and 3) done the recommended hem length (I did a bit deeper hem).

(Might still do that last one).

IMGP5352

I'm fairly certain this basic will get heaps of wear, especially since it looks so fantastic with my saddle shoes. :)

IMGP5346

IMGP5350

Oh and I should say that I'm not abandoning the pursuit of frosting, because my next project may very well prove to be the most fantastic, least practical thing I've sewn since my Halloween costume. (Still wondering where I can wear that).

Print Friendly and PDF Follow
follow us in feedly

Lonsdale in Bloom

Lonsdale in Bloom Although my internet pal Tasia at Sewaholic launched her pattern line in November 2010, it wasn't until this week that I finally got around to making one of her patterns, the recently released Lonsdale Dress.

Lonsdale in Bloom

When I first saw the pattern in her newsletter I knew I had to make it, and furthermore that I had the perfect fabric for it. Except that turned out that I only had half as much of it as I needed, in a one-way large repeat pattern and there was no way that I was going to make it work.

Lonsdale in Bloom

So I did some stash diving and pulled out this purple chrysanthemum (?) print I snagged at Marden's on a field trip with Maggie almost two years ago. It was still a one-way pattern, but with a bit of shifting pieces around, I got the whole thing cut out. Which was the most difficult part of the whole project.

Shake!

I threw caution to the wind with this project and cut it out in my recommended size (all one size! thanks to her "pear-sized" grading) and just went at it  - no muslin, no tissue fitting, no nothing, and it fits great.

Lonsdale in Bloom

Tasia put together a truly lovely pattern. The whole thing is seven pattern pieces, with simple construction, which meant I could take the time to focus and finish the project really nicely. The included instructions are clear and I used the sew-along posts to do some additional details like French-seamed pockets and stay-tape on the bodice. I'm super proud of the way the inside of this dress  from seam finishes to zipper to hem.

I love the way this dress turned out, and if you're reading this Tasia, I can't wait to see what you come up with next!

Print Friendly and PDF Follow
follow us in feedly