


A friend (who really knows the the way to this girl’s heart) gifted me with Luisa Weiss’s Classic German Baking for my birthday back in July. The summer was so full (and hot) that I rarely turned on the oven, but now that Fall is in full swing (and I’ve been watching The Great British Bake Off on Netflix), I was itching to get back to baking and trying some new recipes!
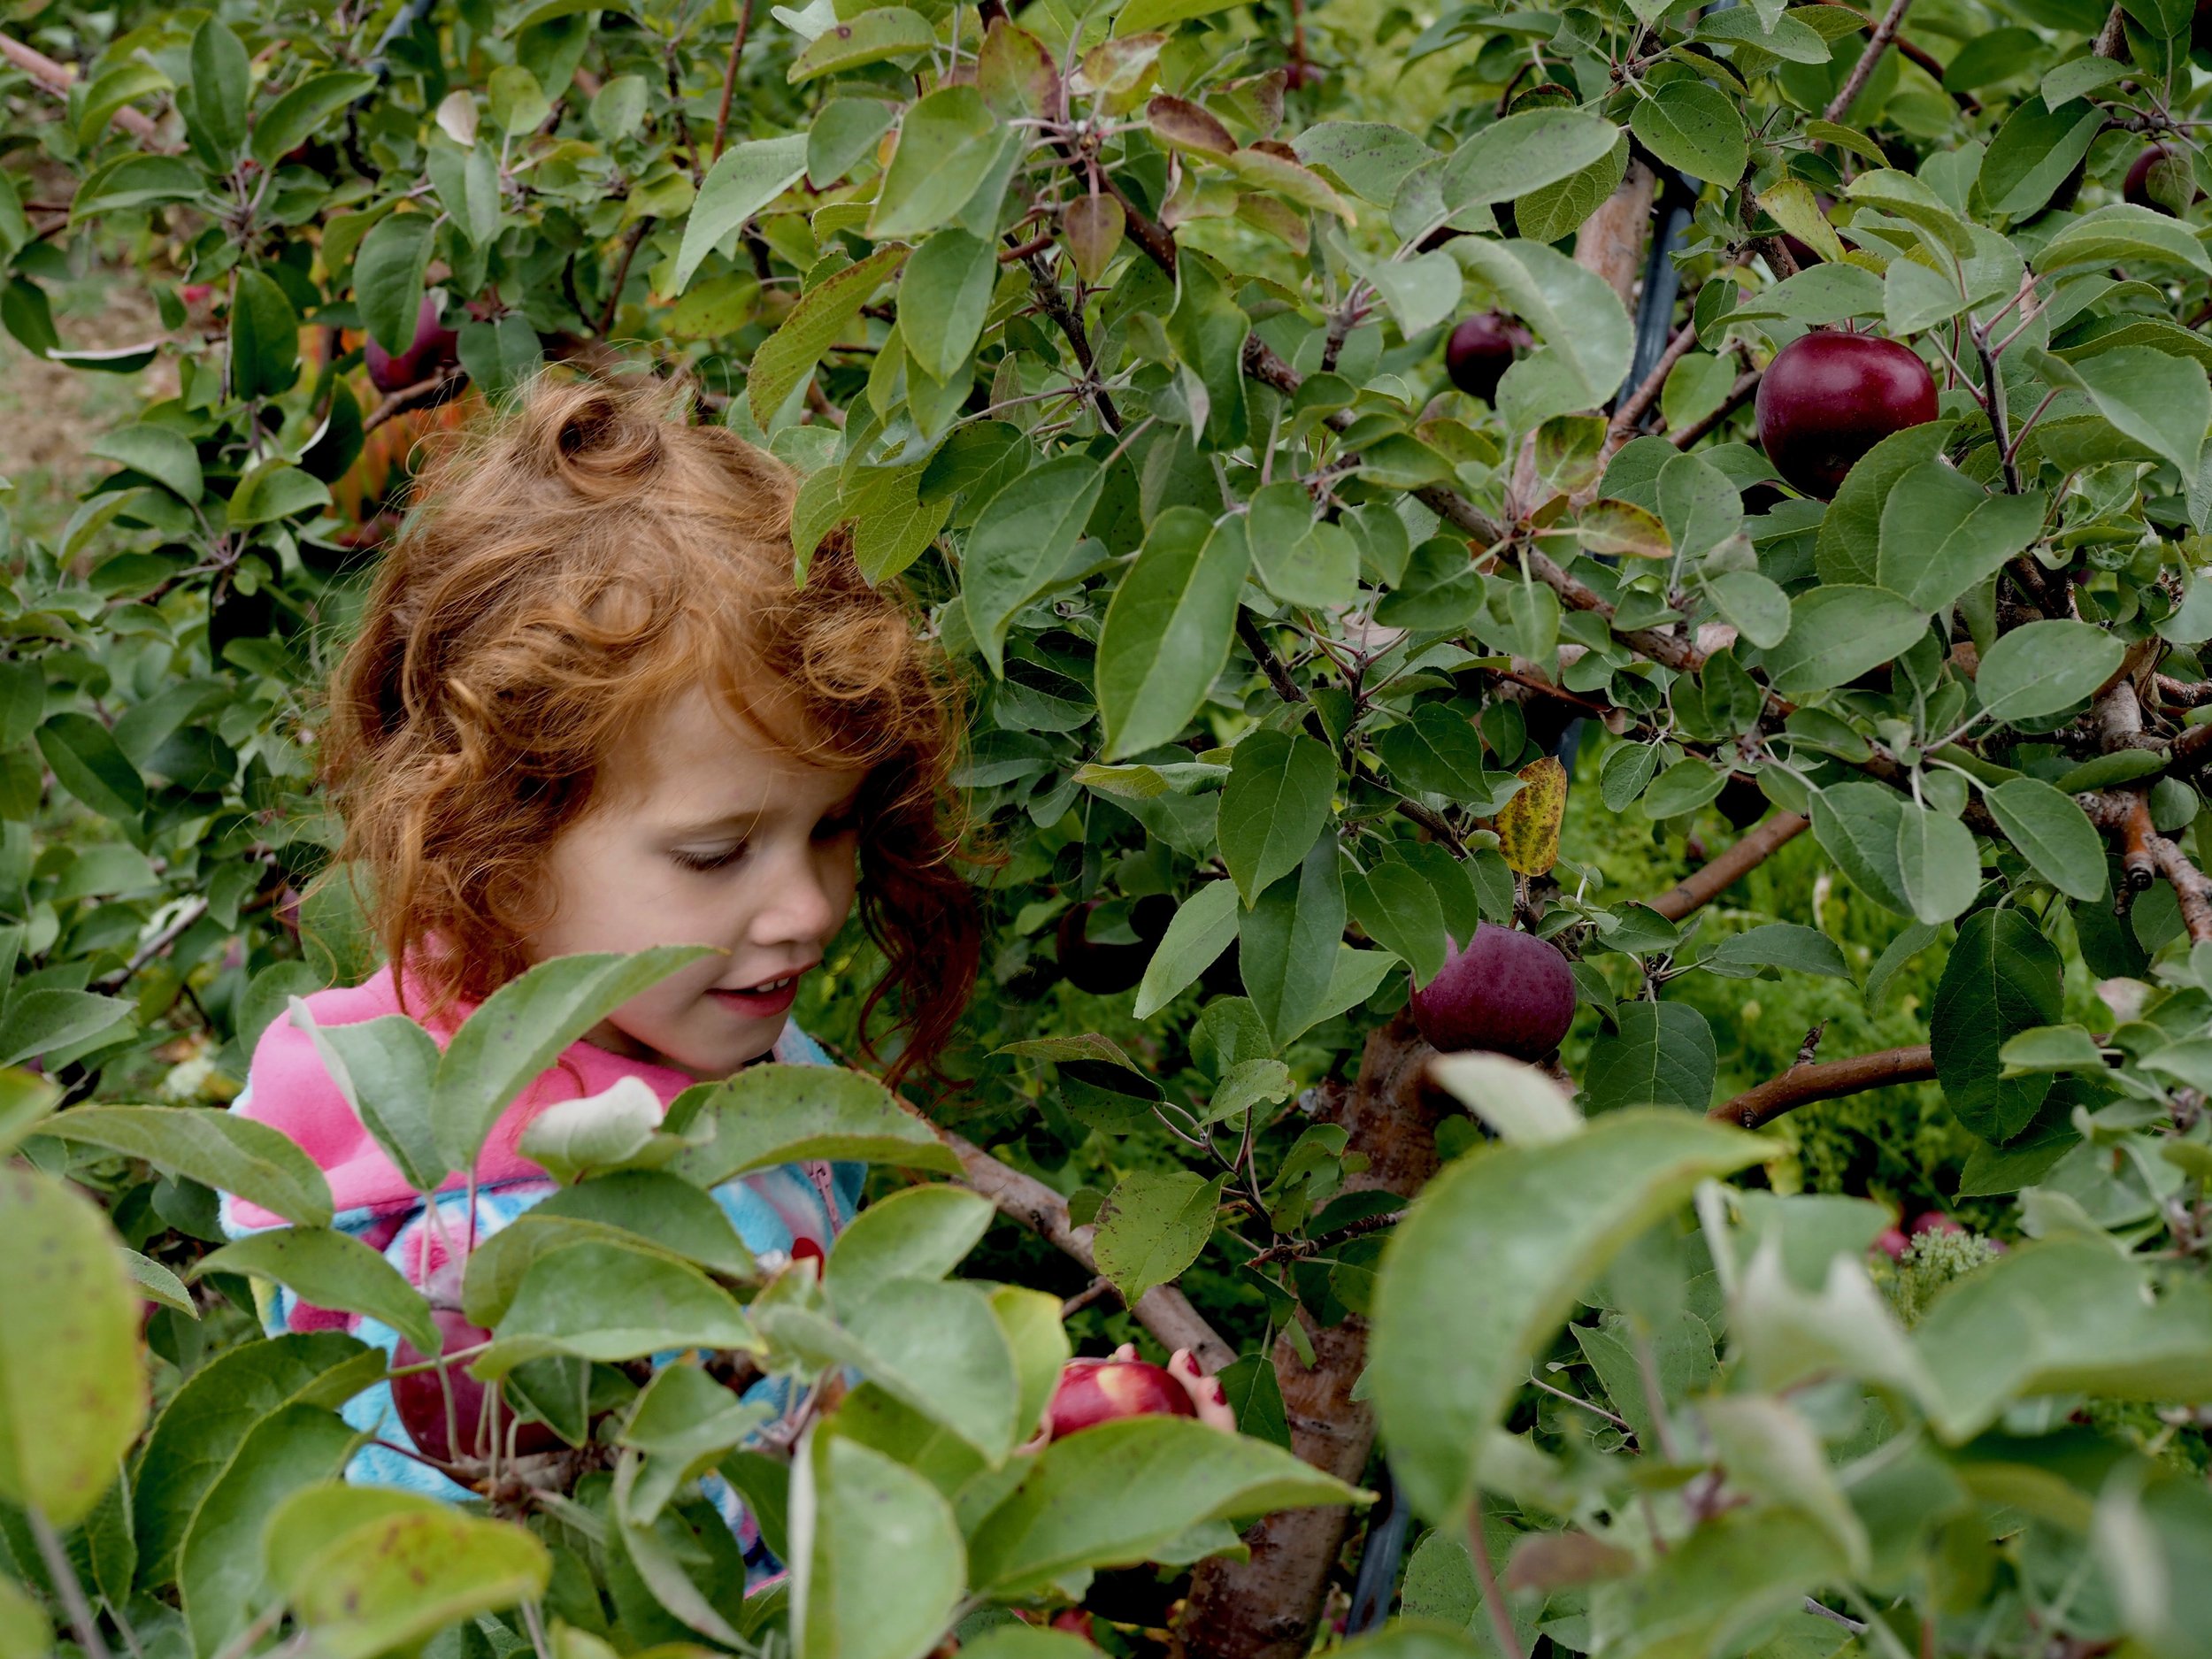
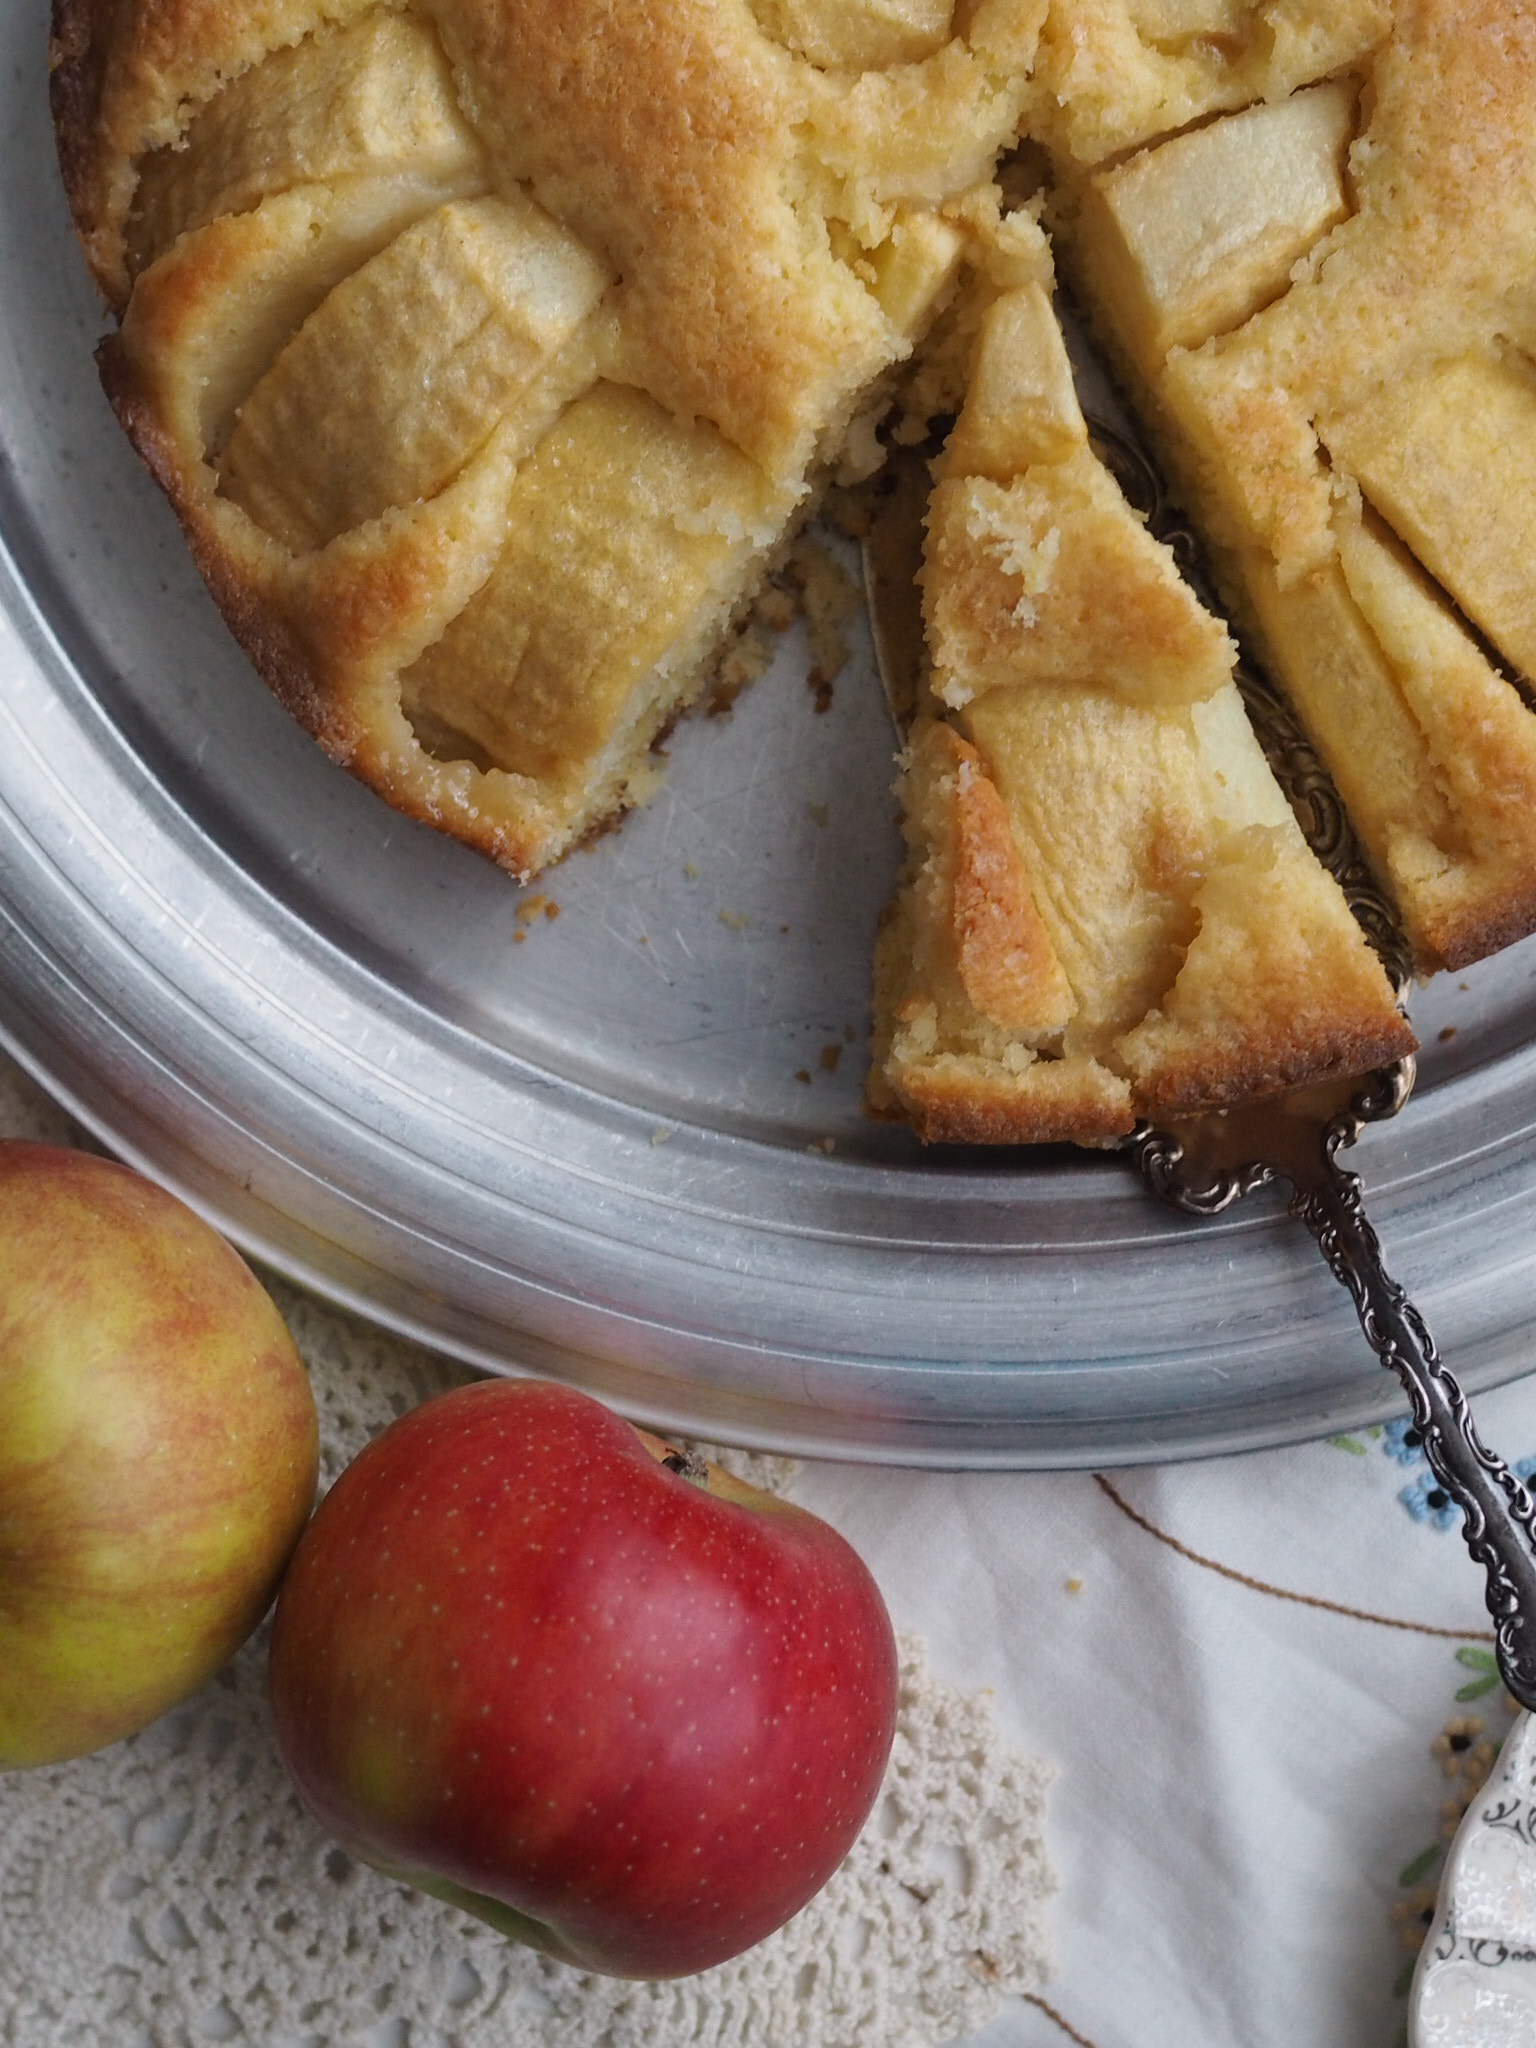
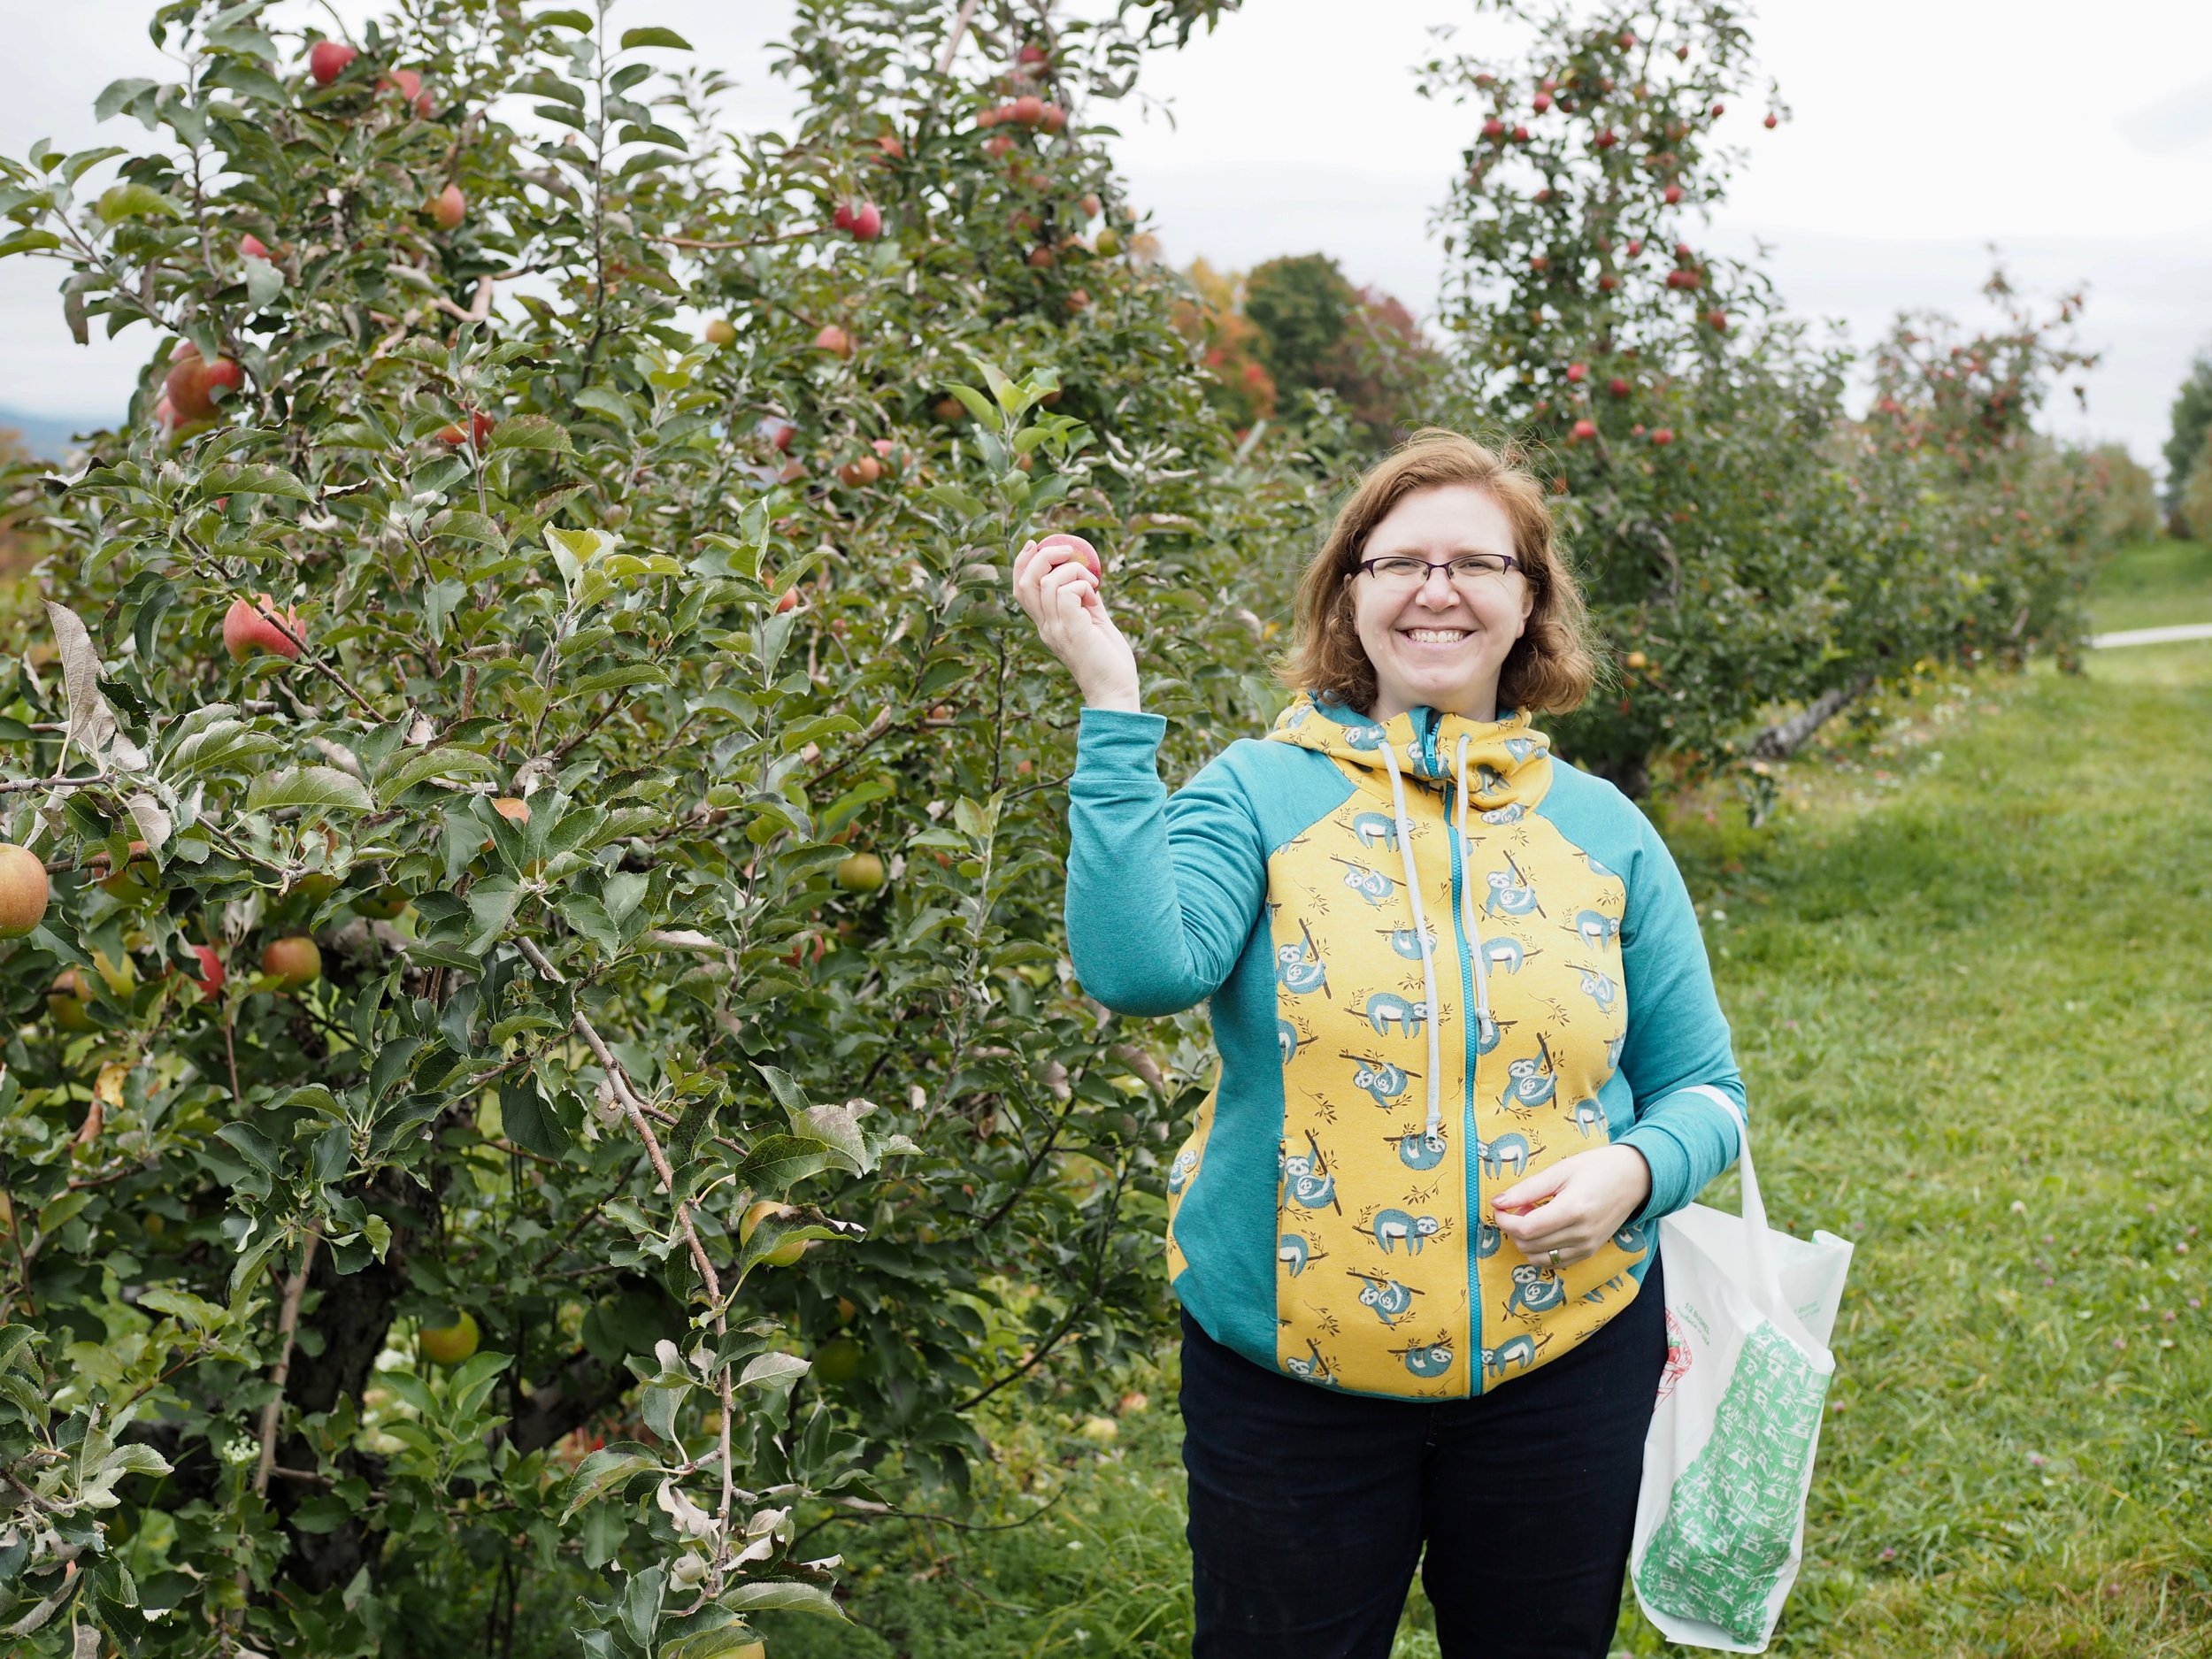
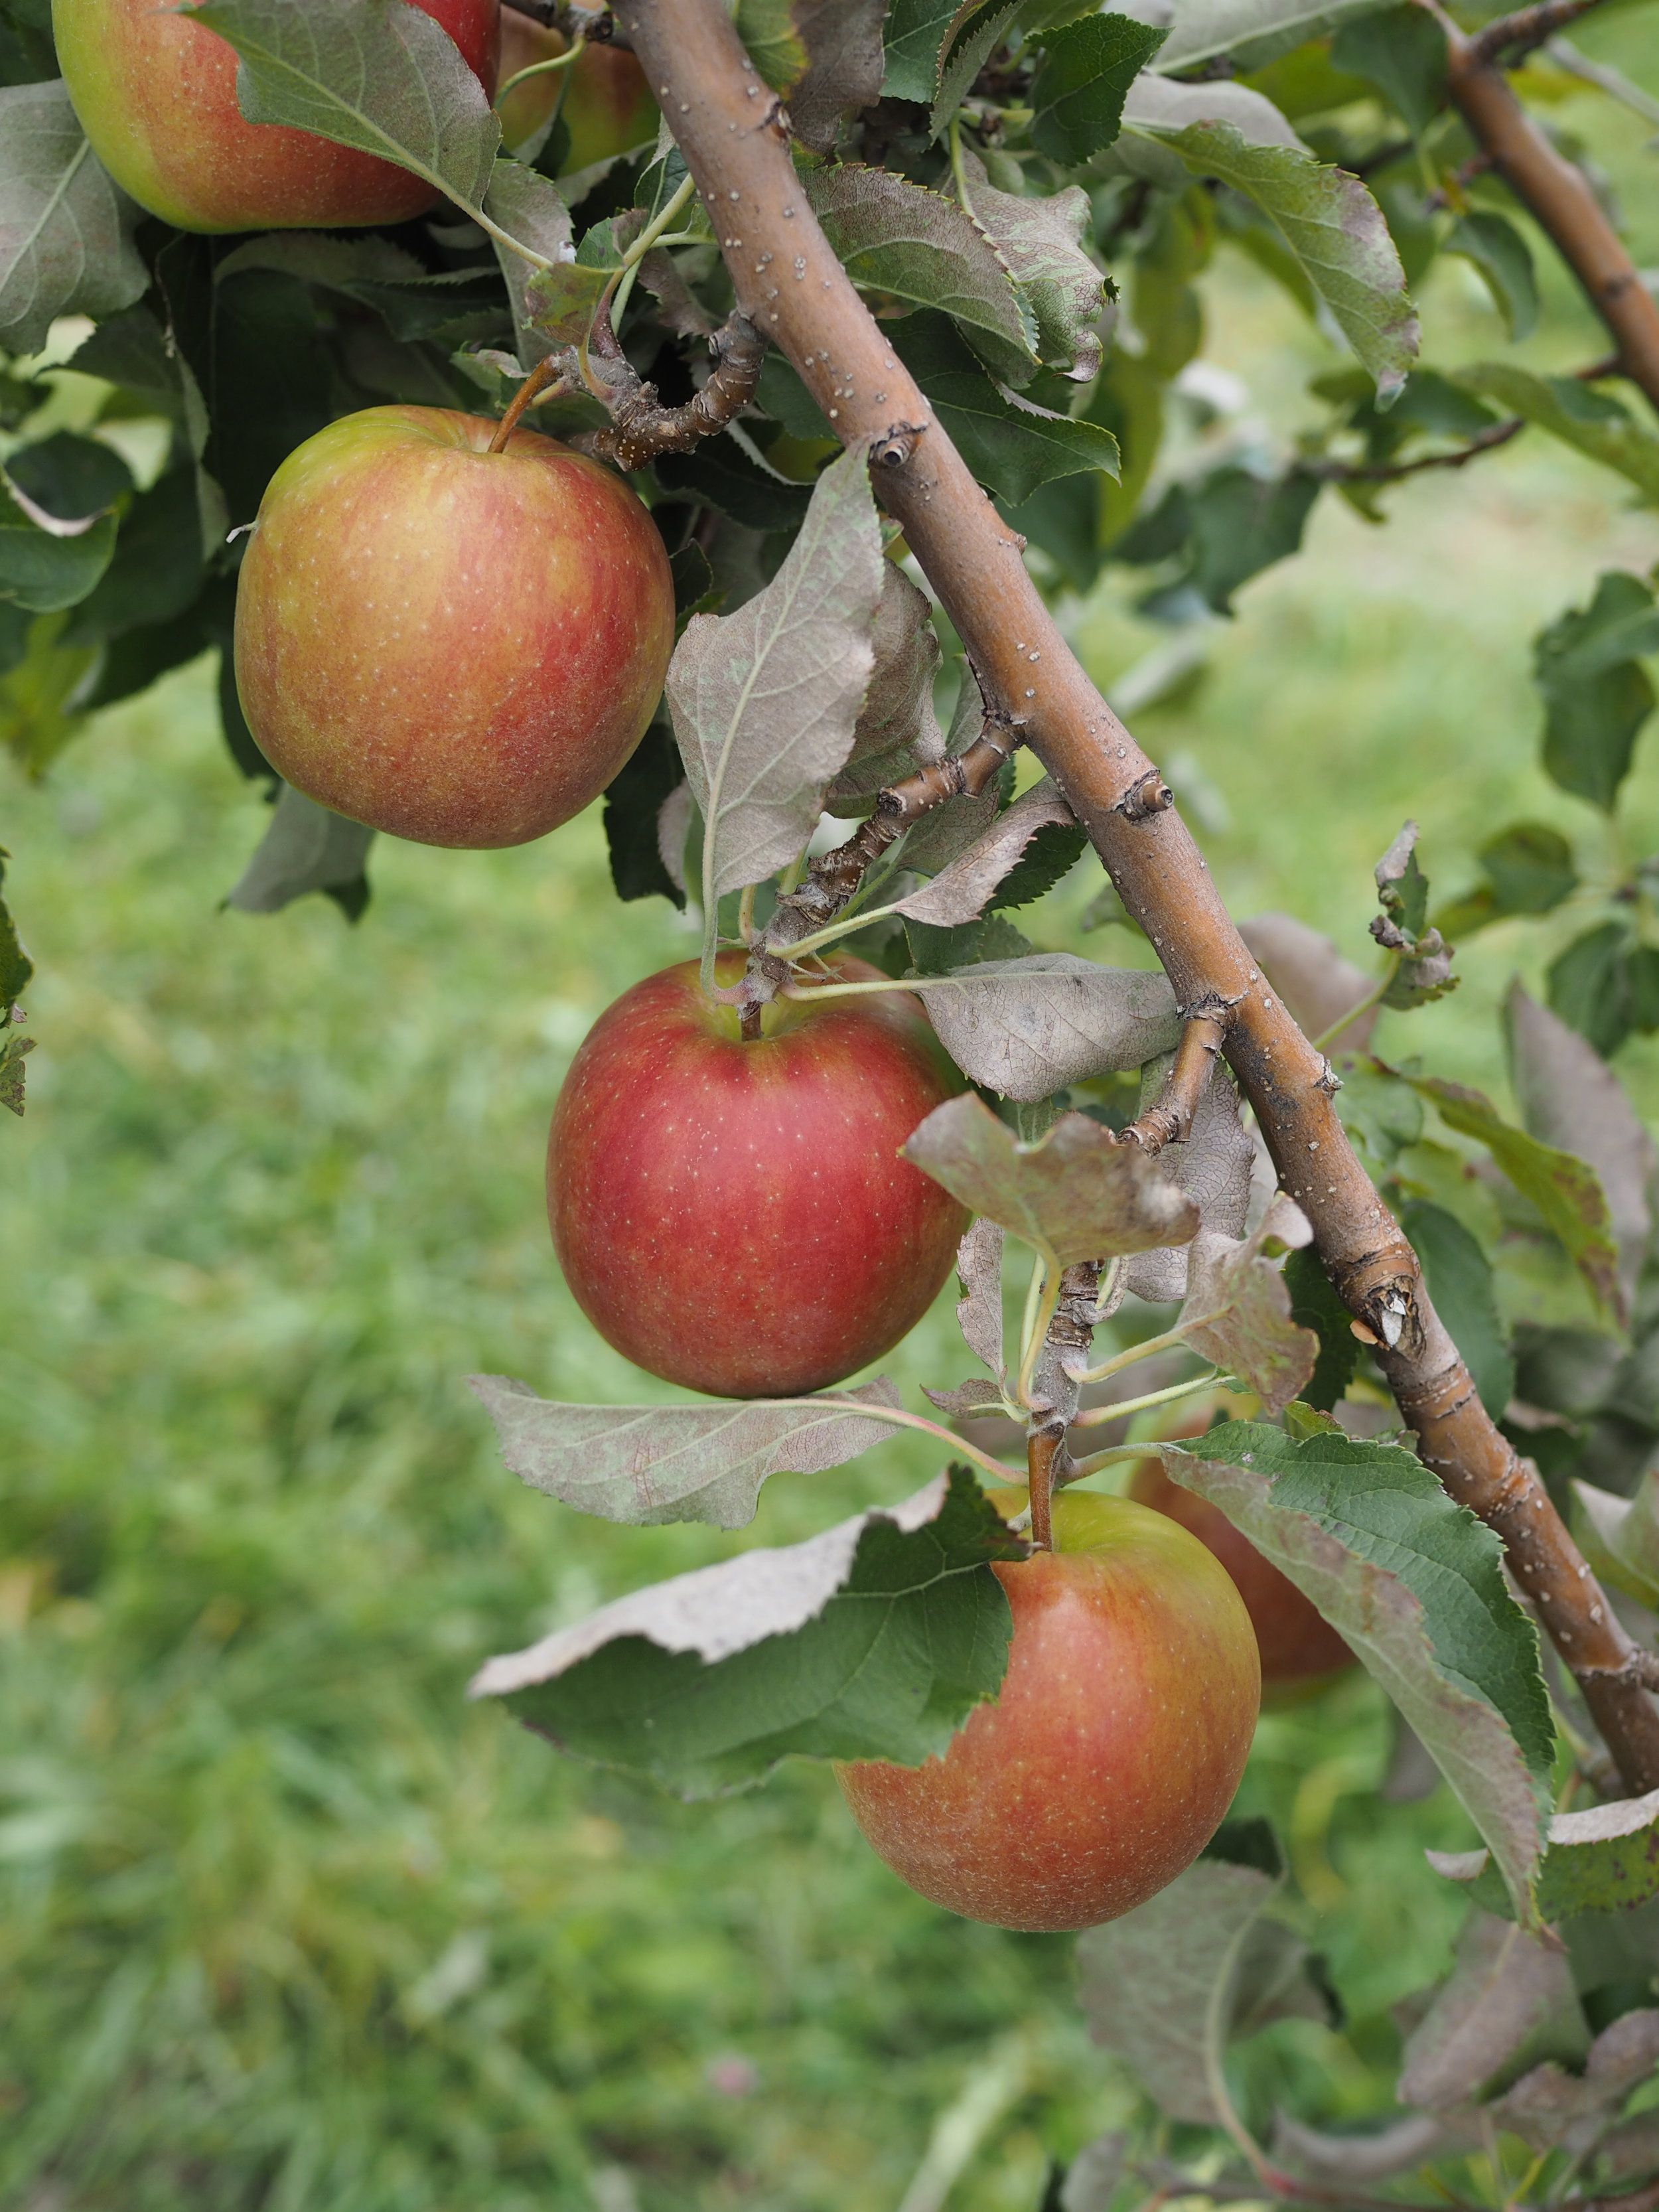
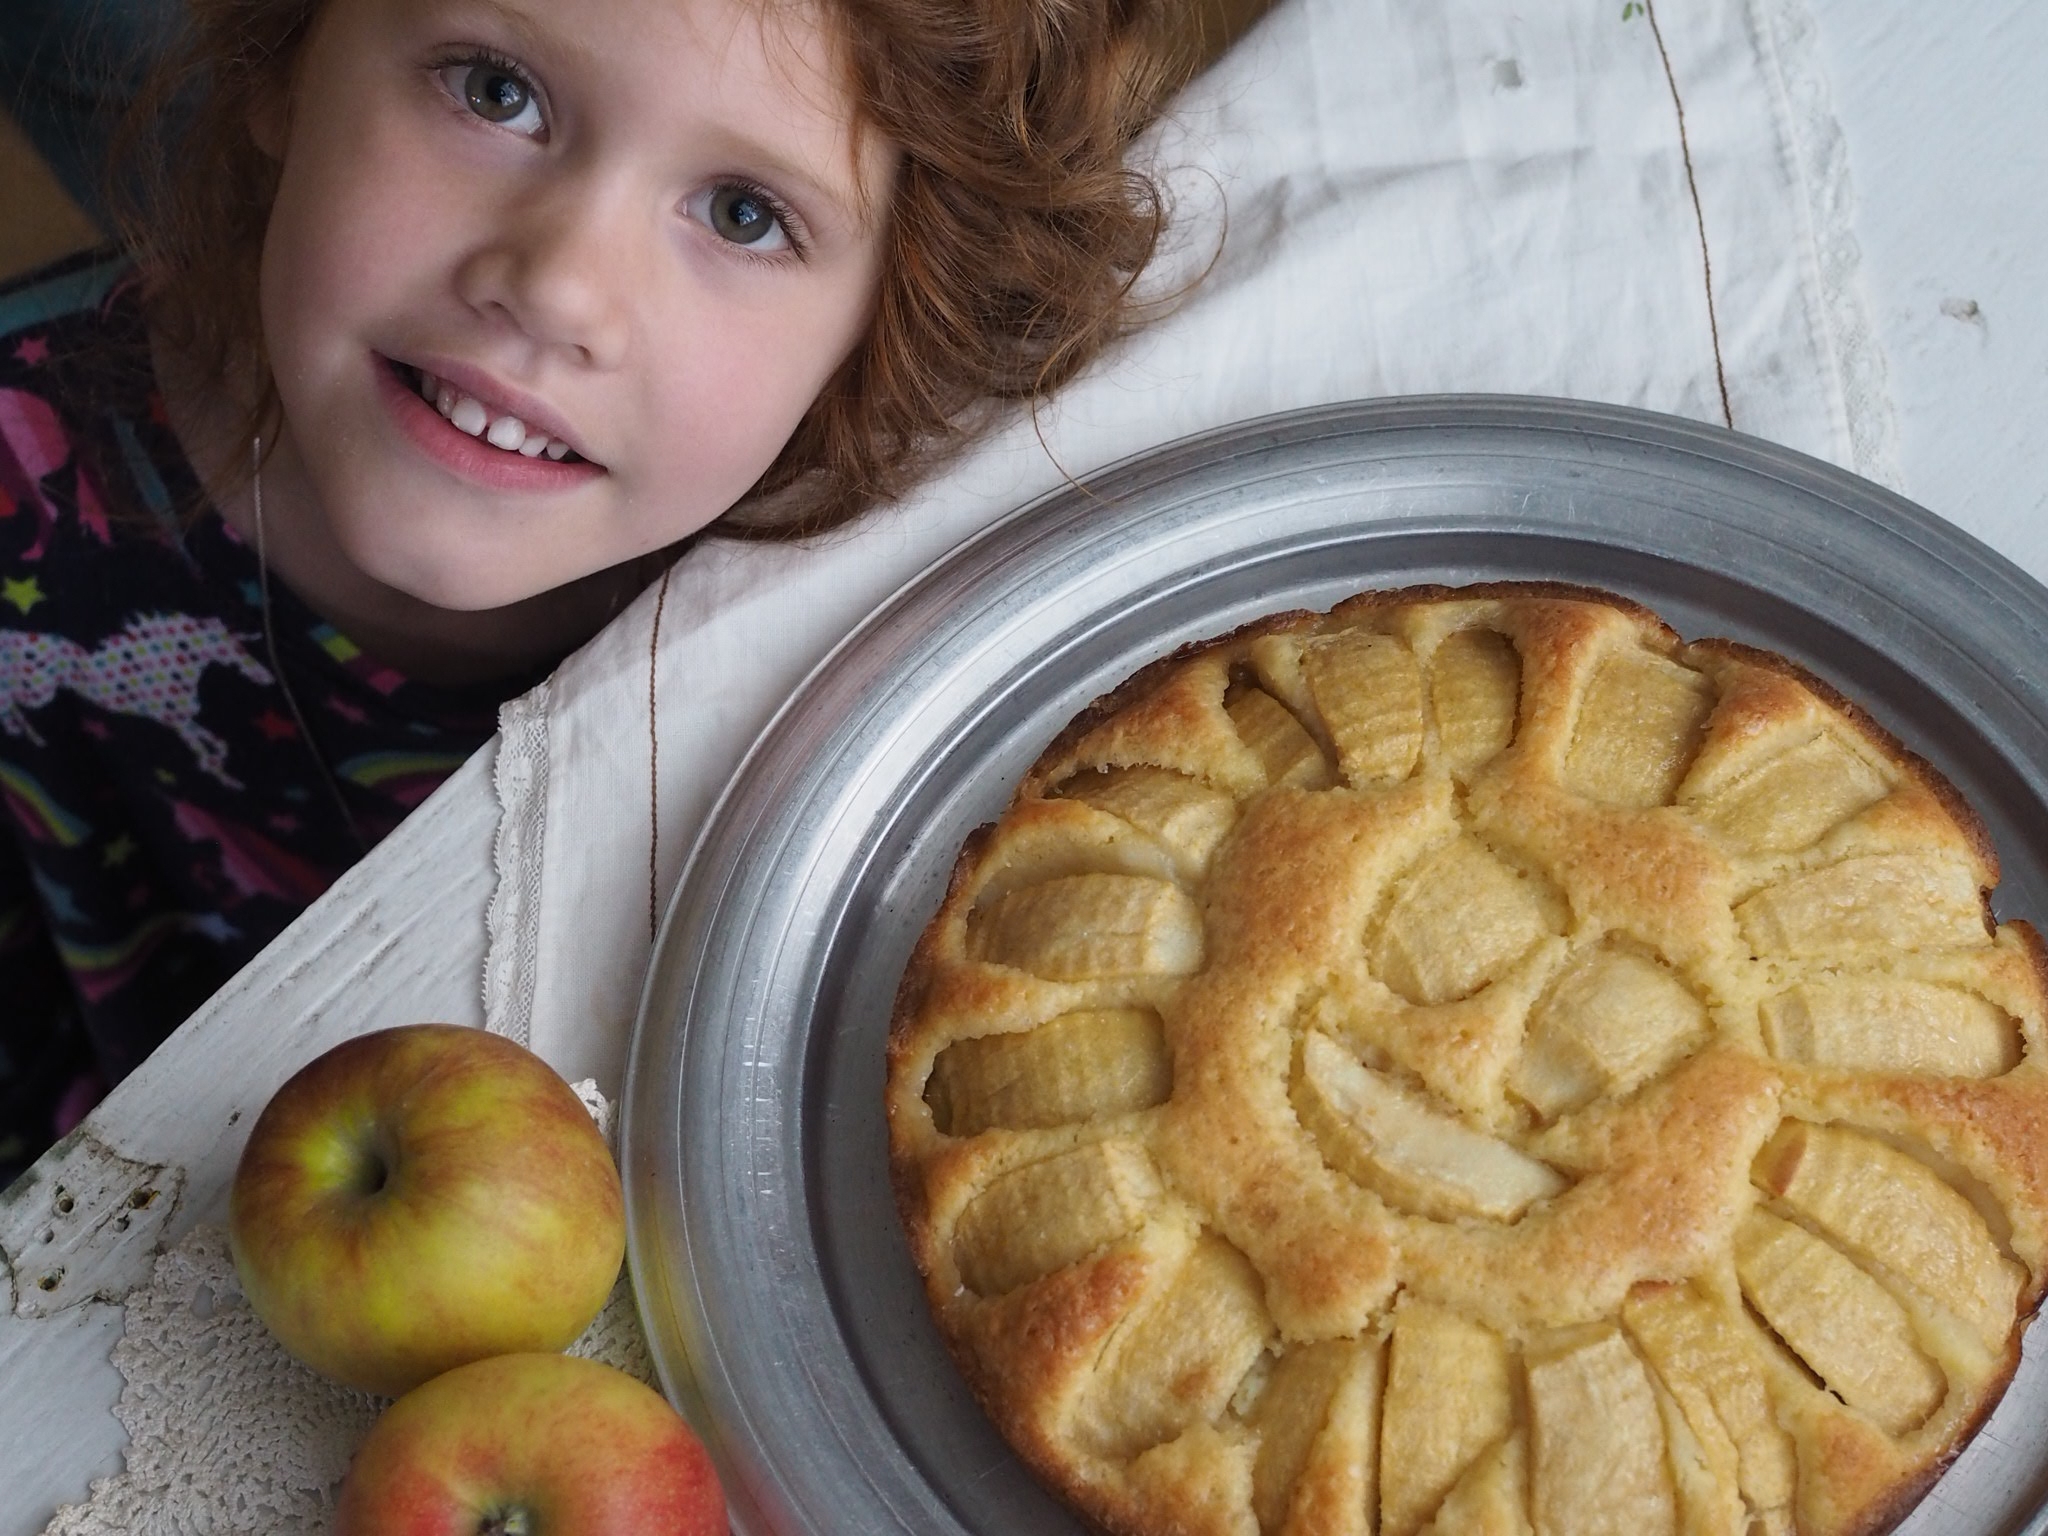
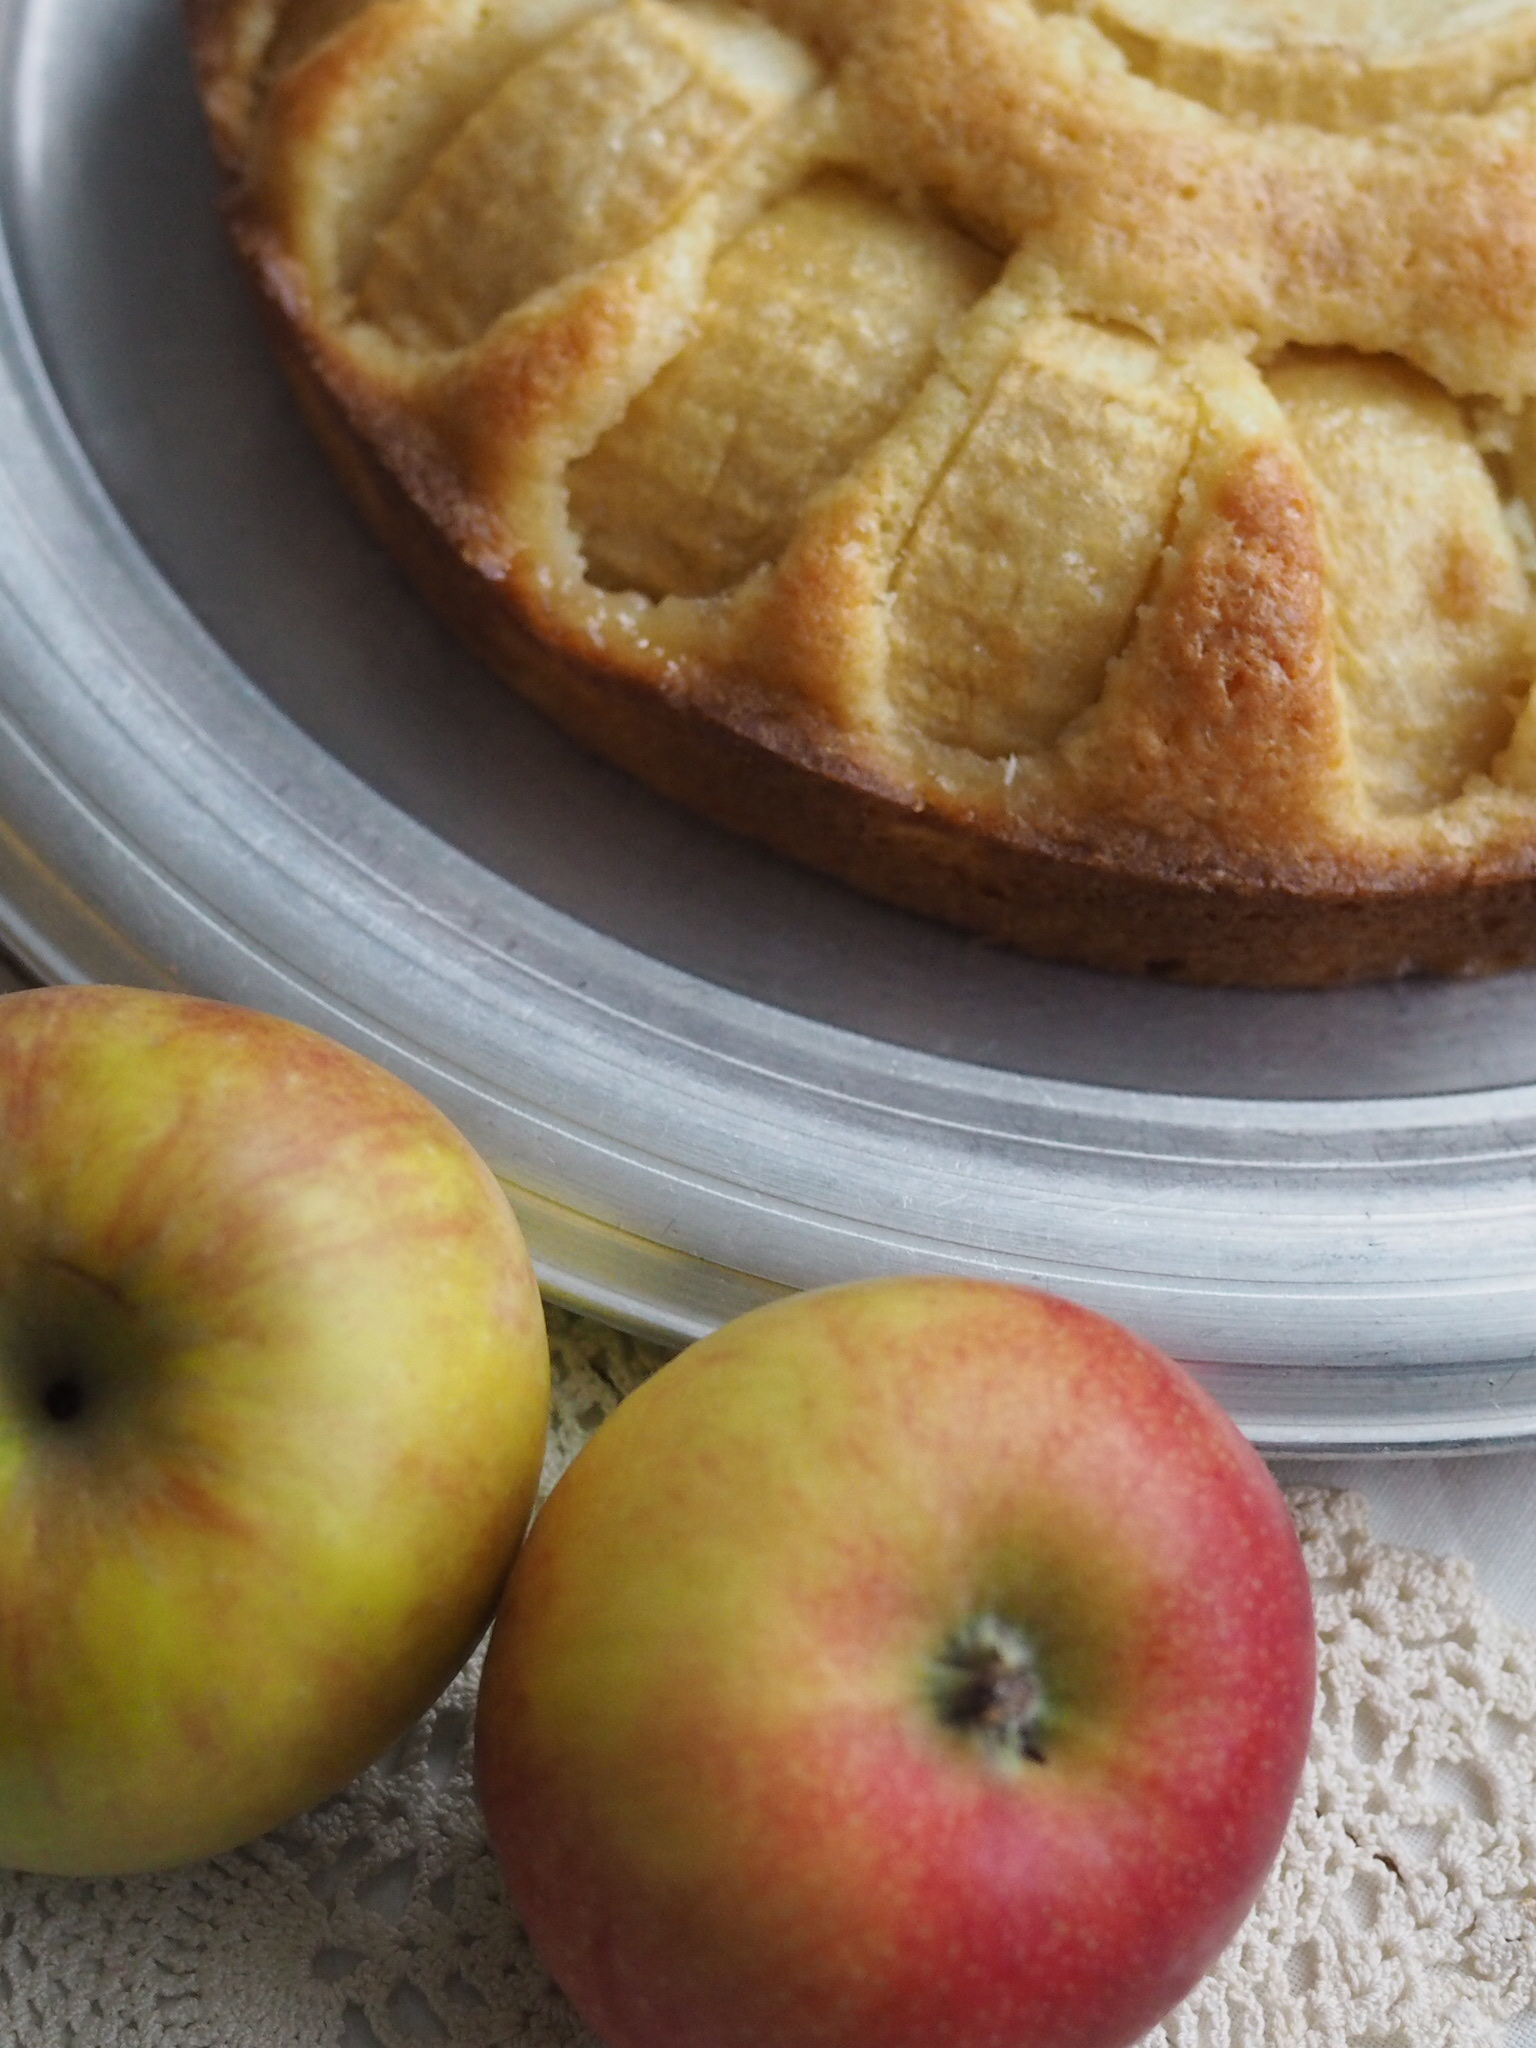
Having done our traditional apple picking trip a few weeks back, I’m up to my eyeballs in apples, even after having made two pies, but Classic German Baking was ready for me with three different Apfelkuchen recipes. I fully intend to try all three in the coming weeks, but based on what was in my pantry/fridge, I went with the Versunkener Apfelkuchen first, which also happens to be the simplest of the three. And since the recipe declared it “great for people baking with small children” I asked Little Miss Cleaver to help out. (The smiley face was all LMC’s idea and execution).
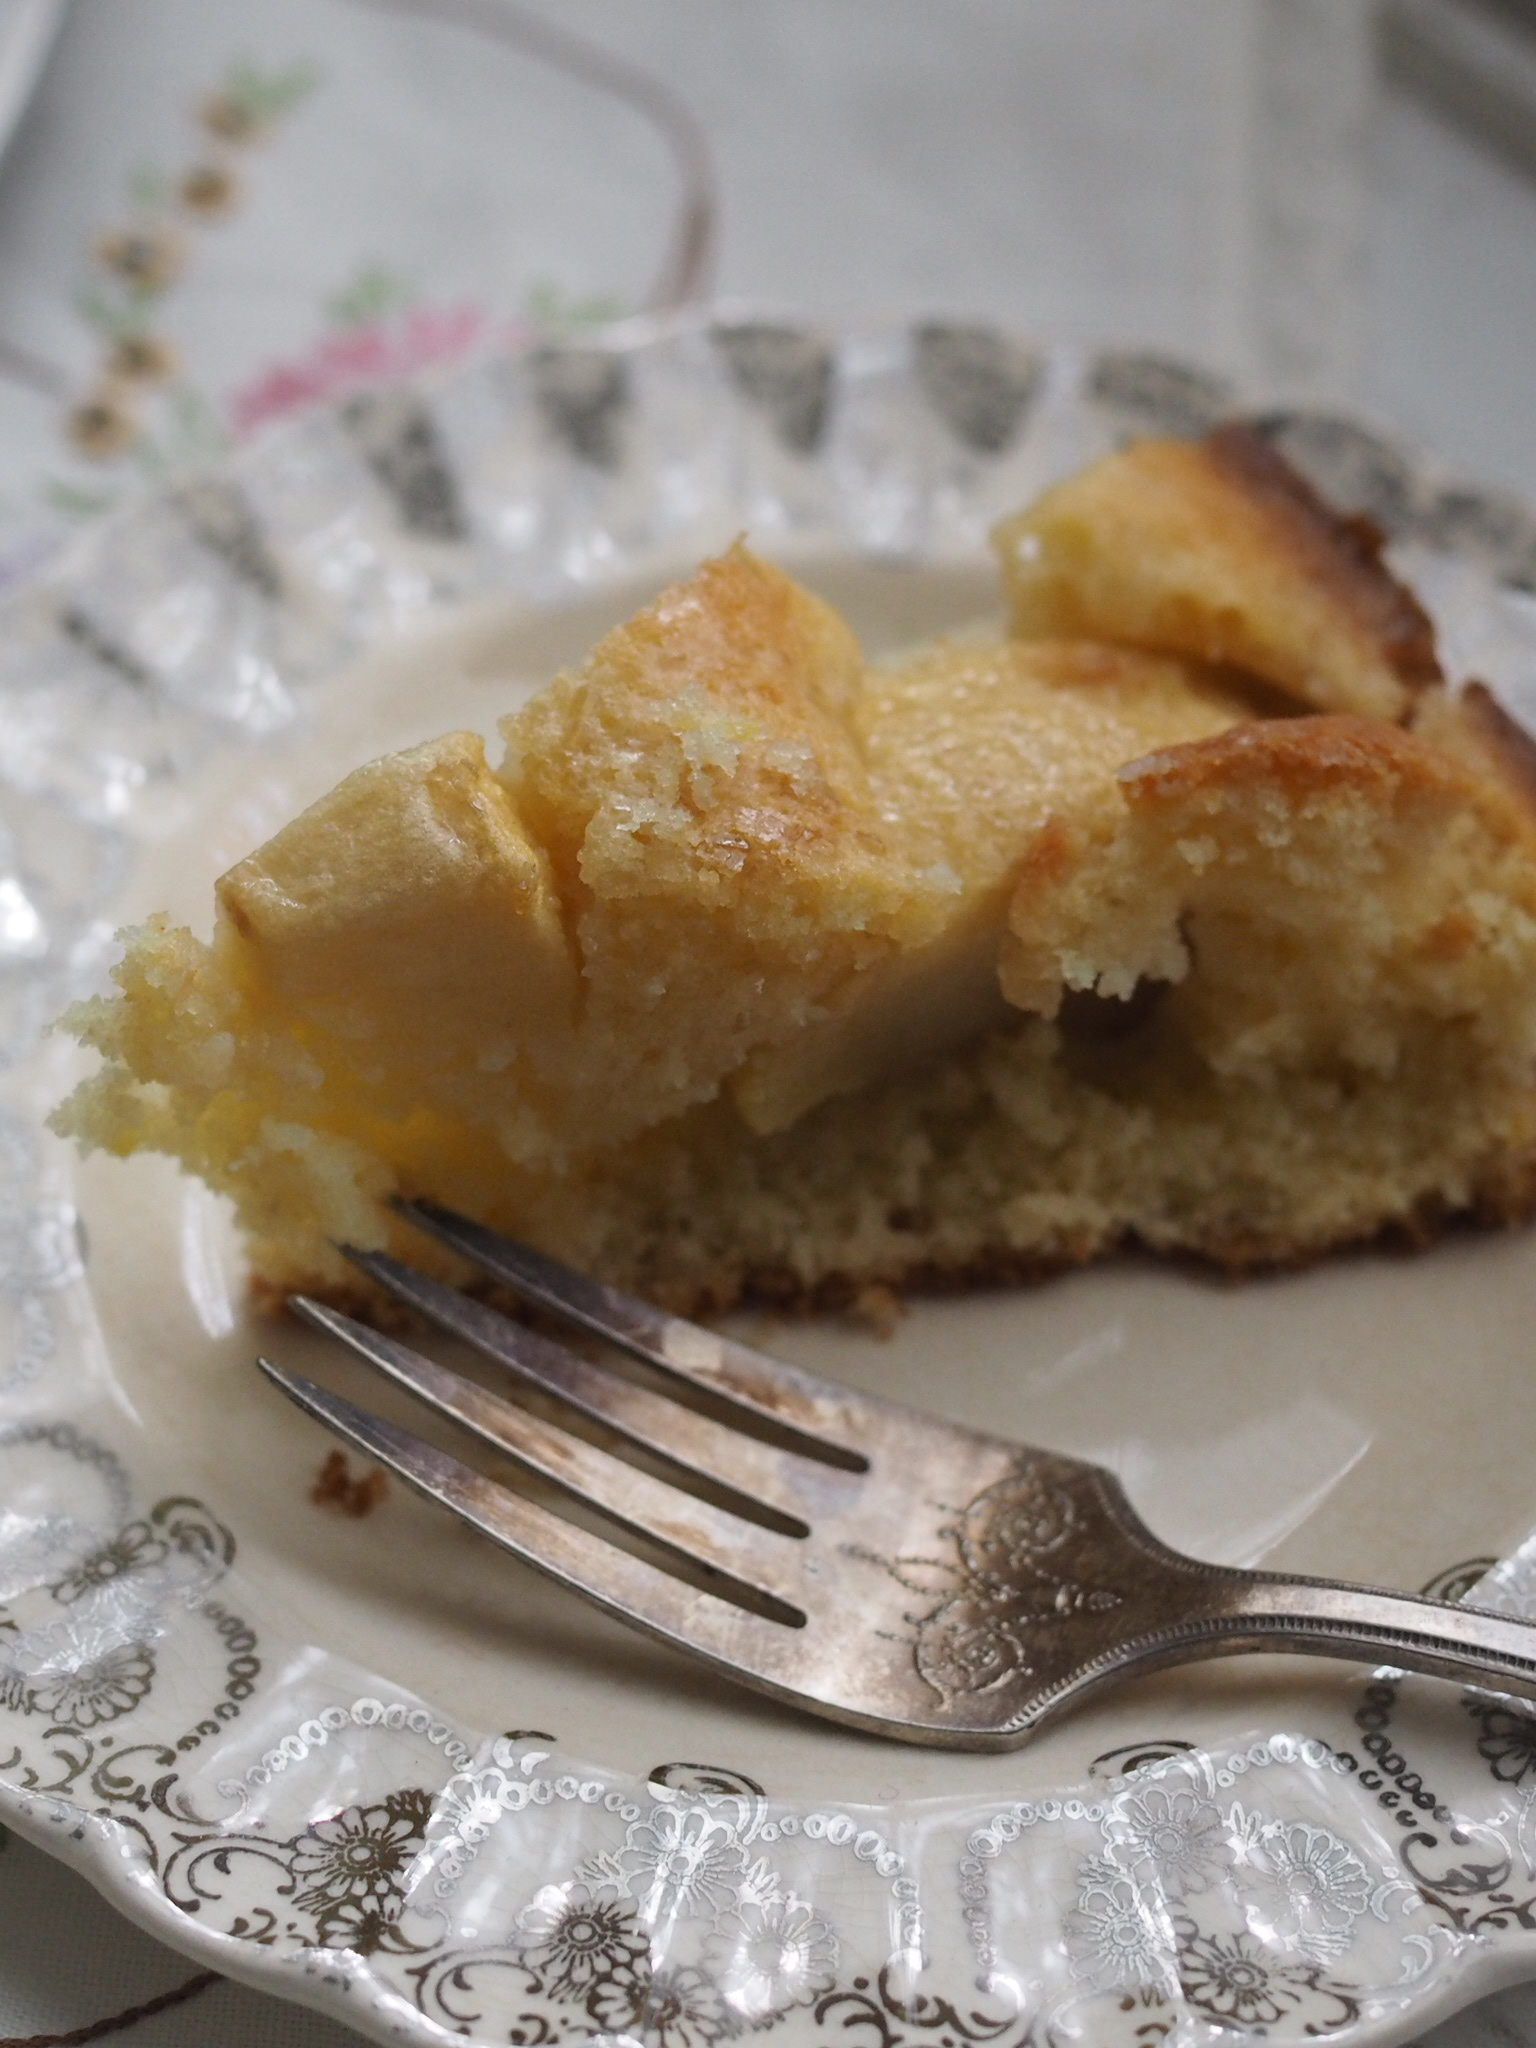
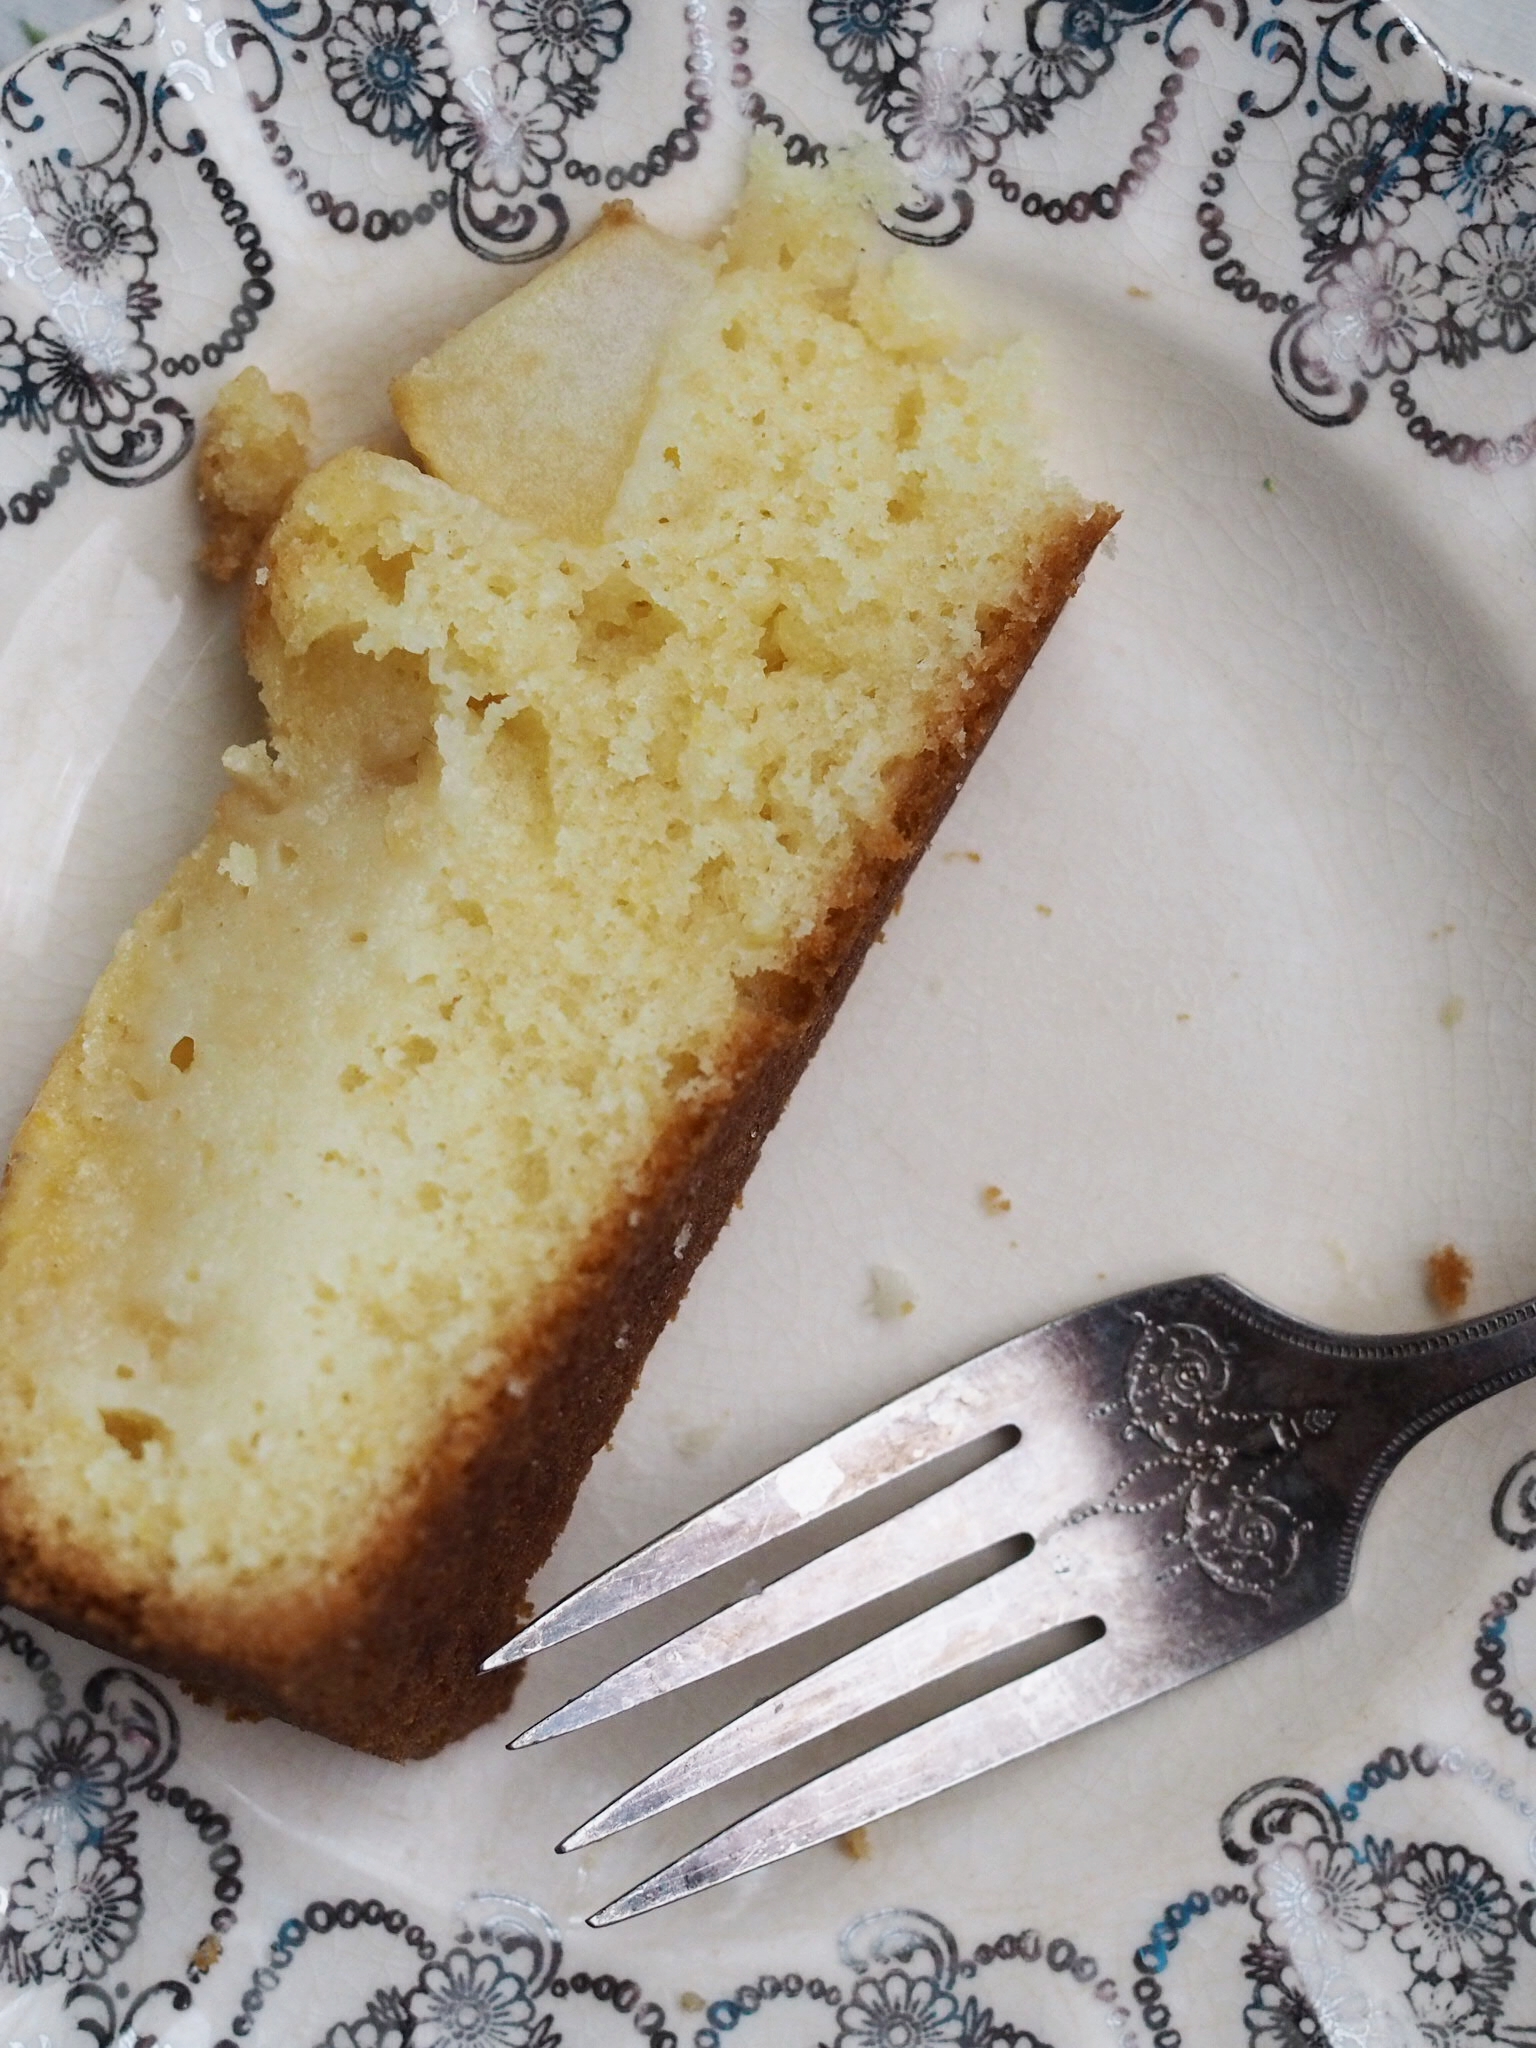
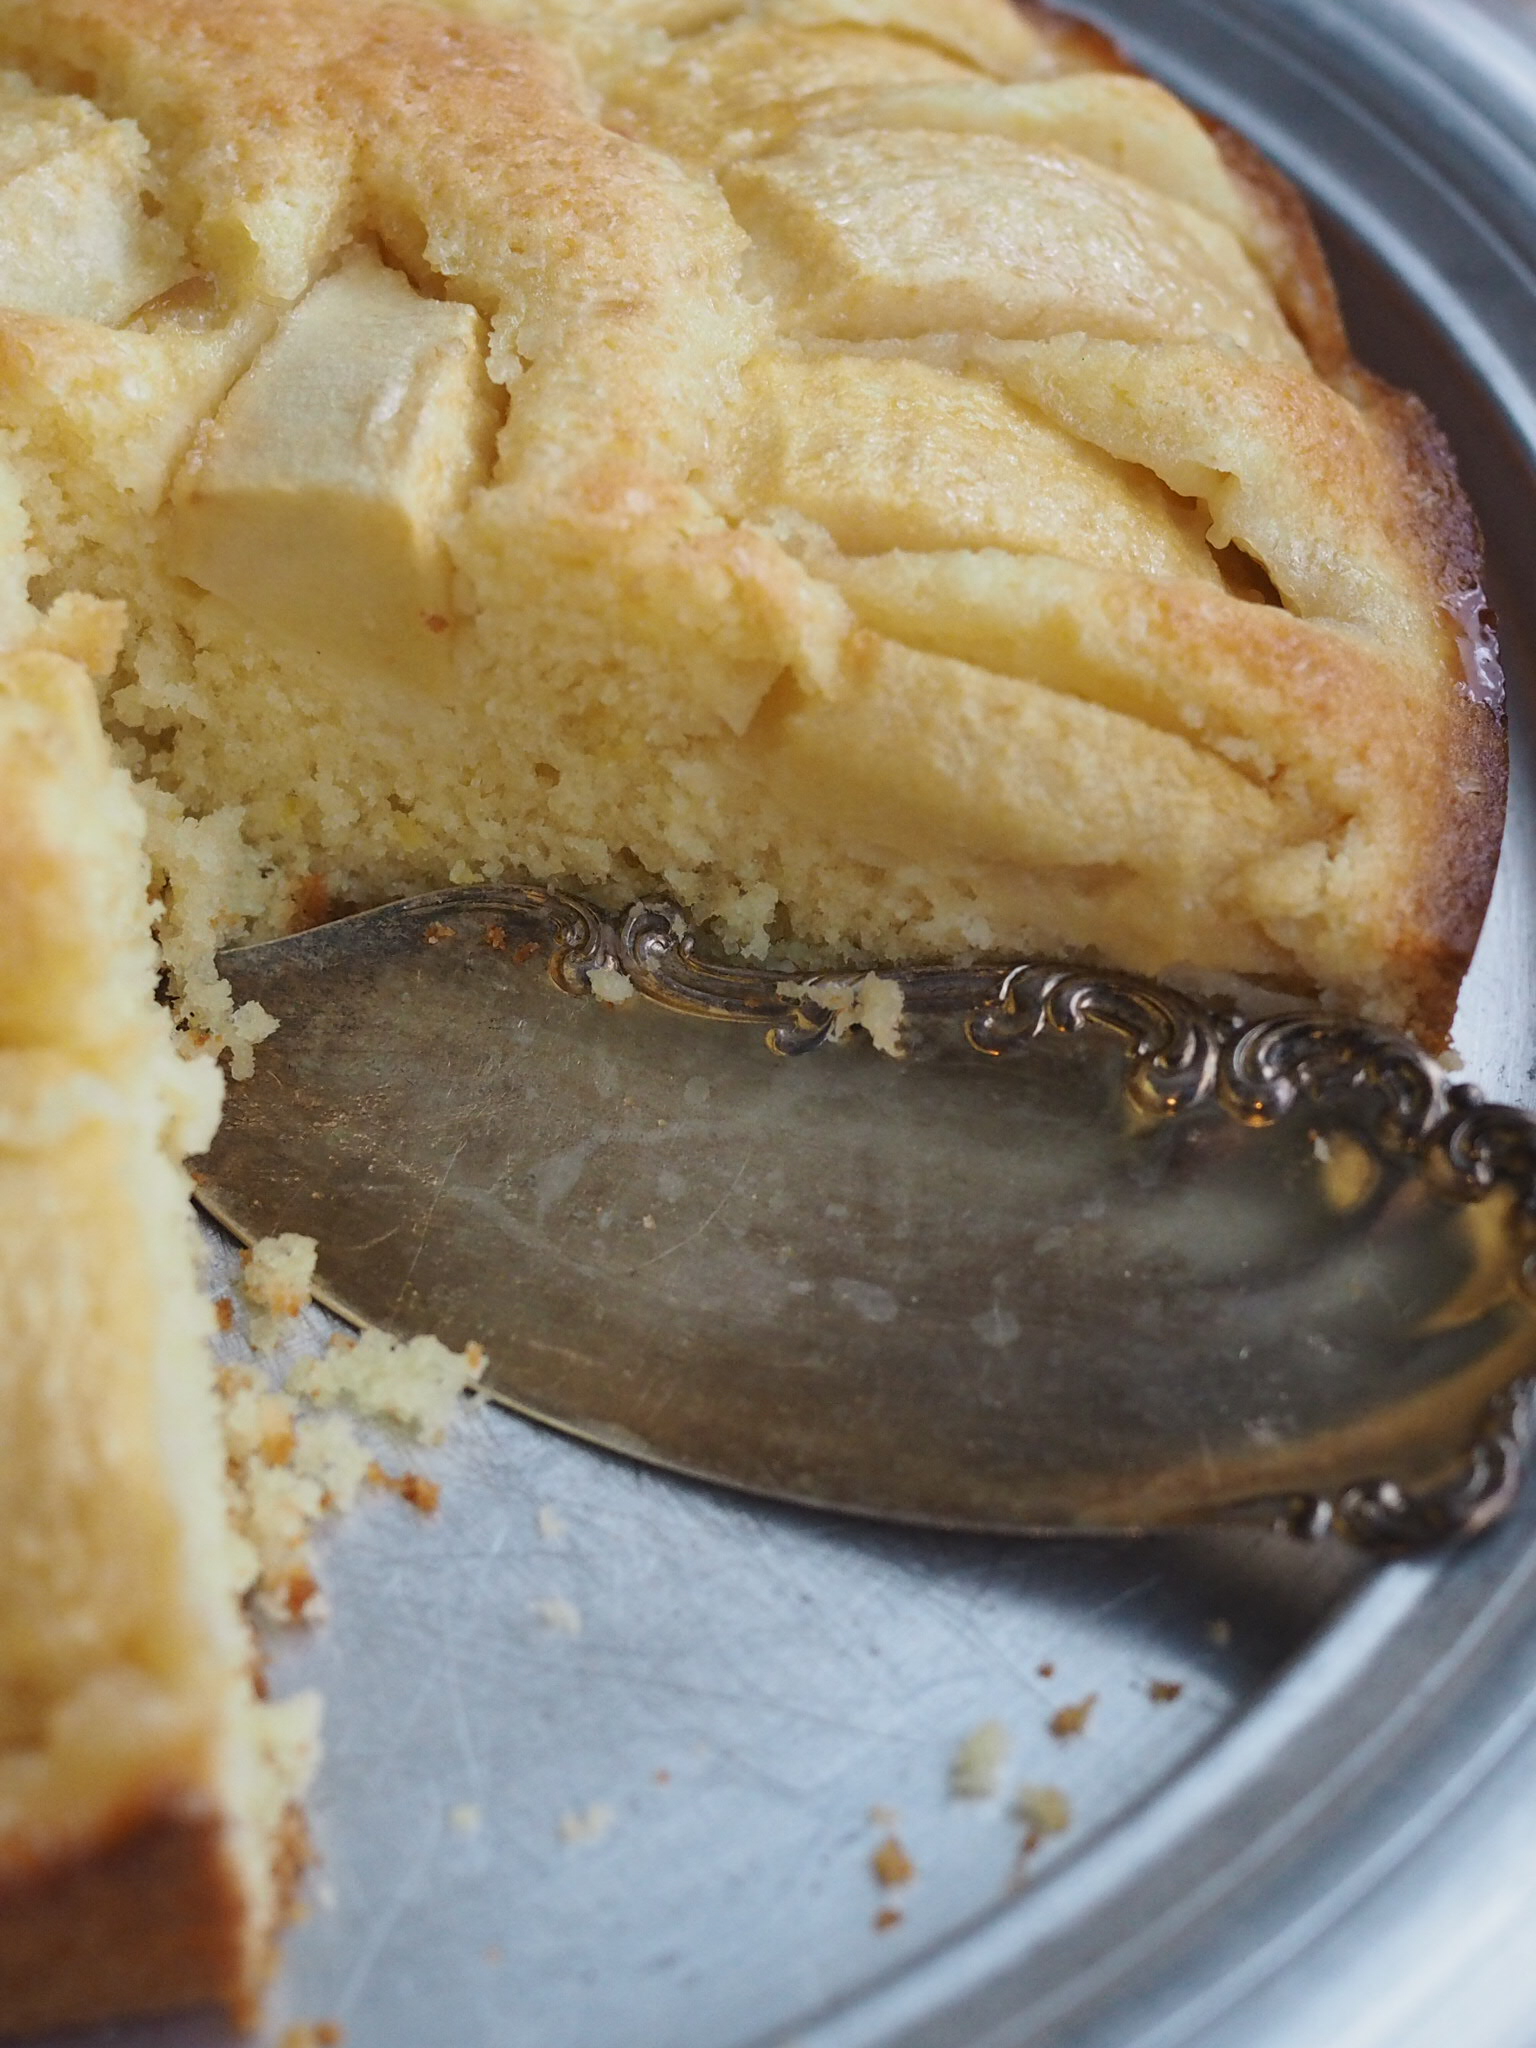
The high egg and butter content makes the cake-crumb similar to that of a pound cake and the batter is lightly flavored with lemon-zest, making it a bright alternative to the cinnamon and nutmeg-heavy desserts typical of fall and making it suitable as a spring and summer dessert too. The raw sugar sprinkled on the top before baking gives the top a pleasing crunch. I didn’t have any cream on hand to make whipped cream, but it would be nice finish to this simple, but pleasing dessert.
To print, see button at bottom of post.
German Sunken Apple Cake (Versunkener Apfelkuchen)
Easy enough to whip together on a weekday and fun to make with kids, this classic German cake combines apples and lemon zest under a raw sugar crust for a bright and delicious dessert.
3 medium apples
1 medium lemon, scrubbed
1/2 cup, plus 2 tablespoons (125g) granulated sugar
9 Tablespoons plus 1 teaspoon (130g) unsalted butter, cut into chunks and at room temperature
1/2 teaspoon vanilla extract
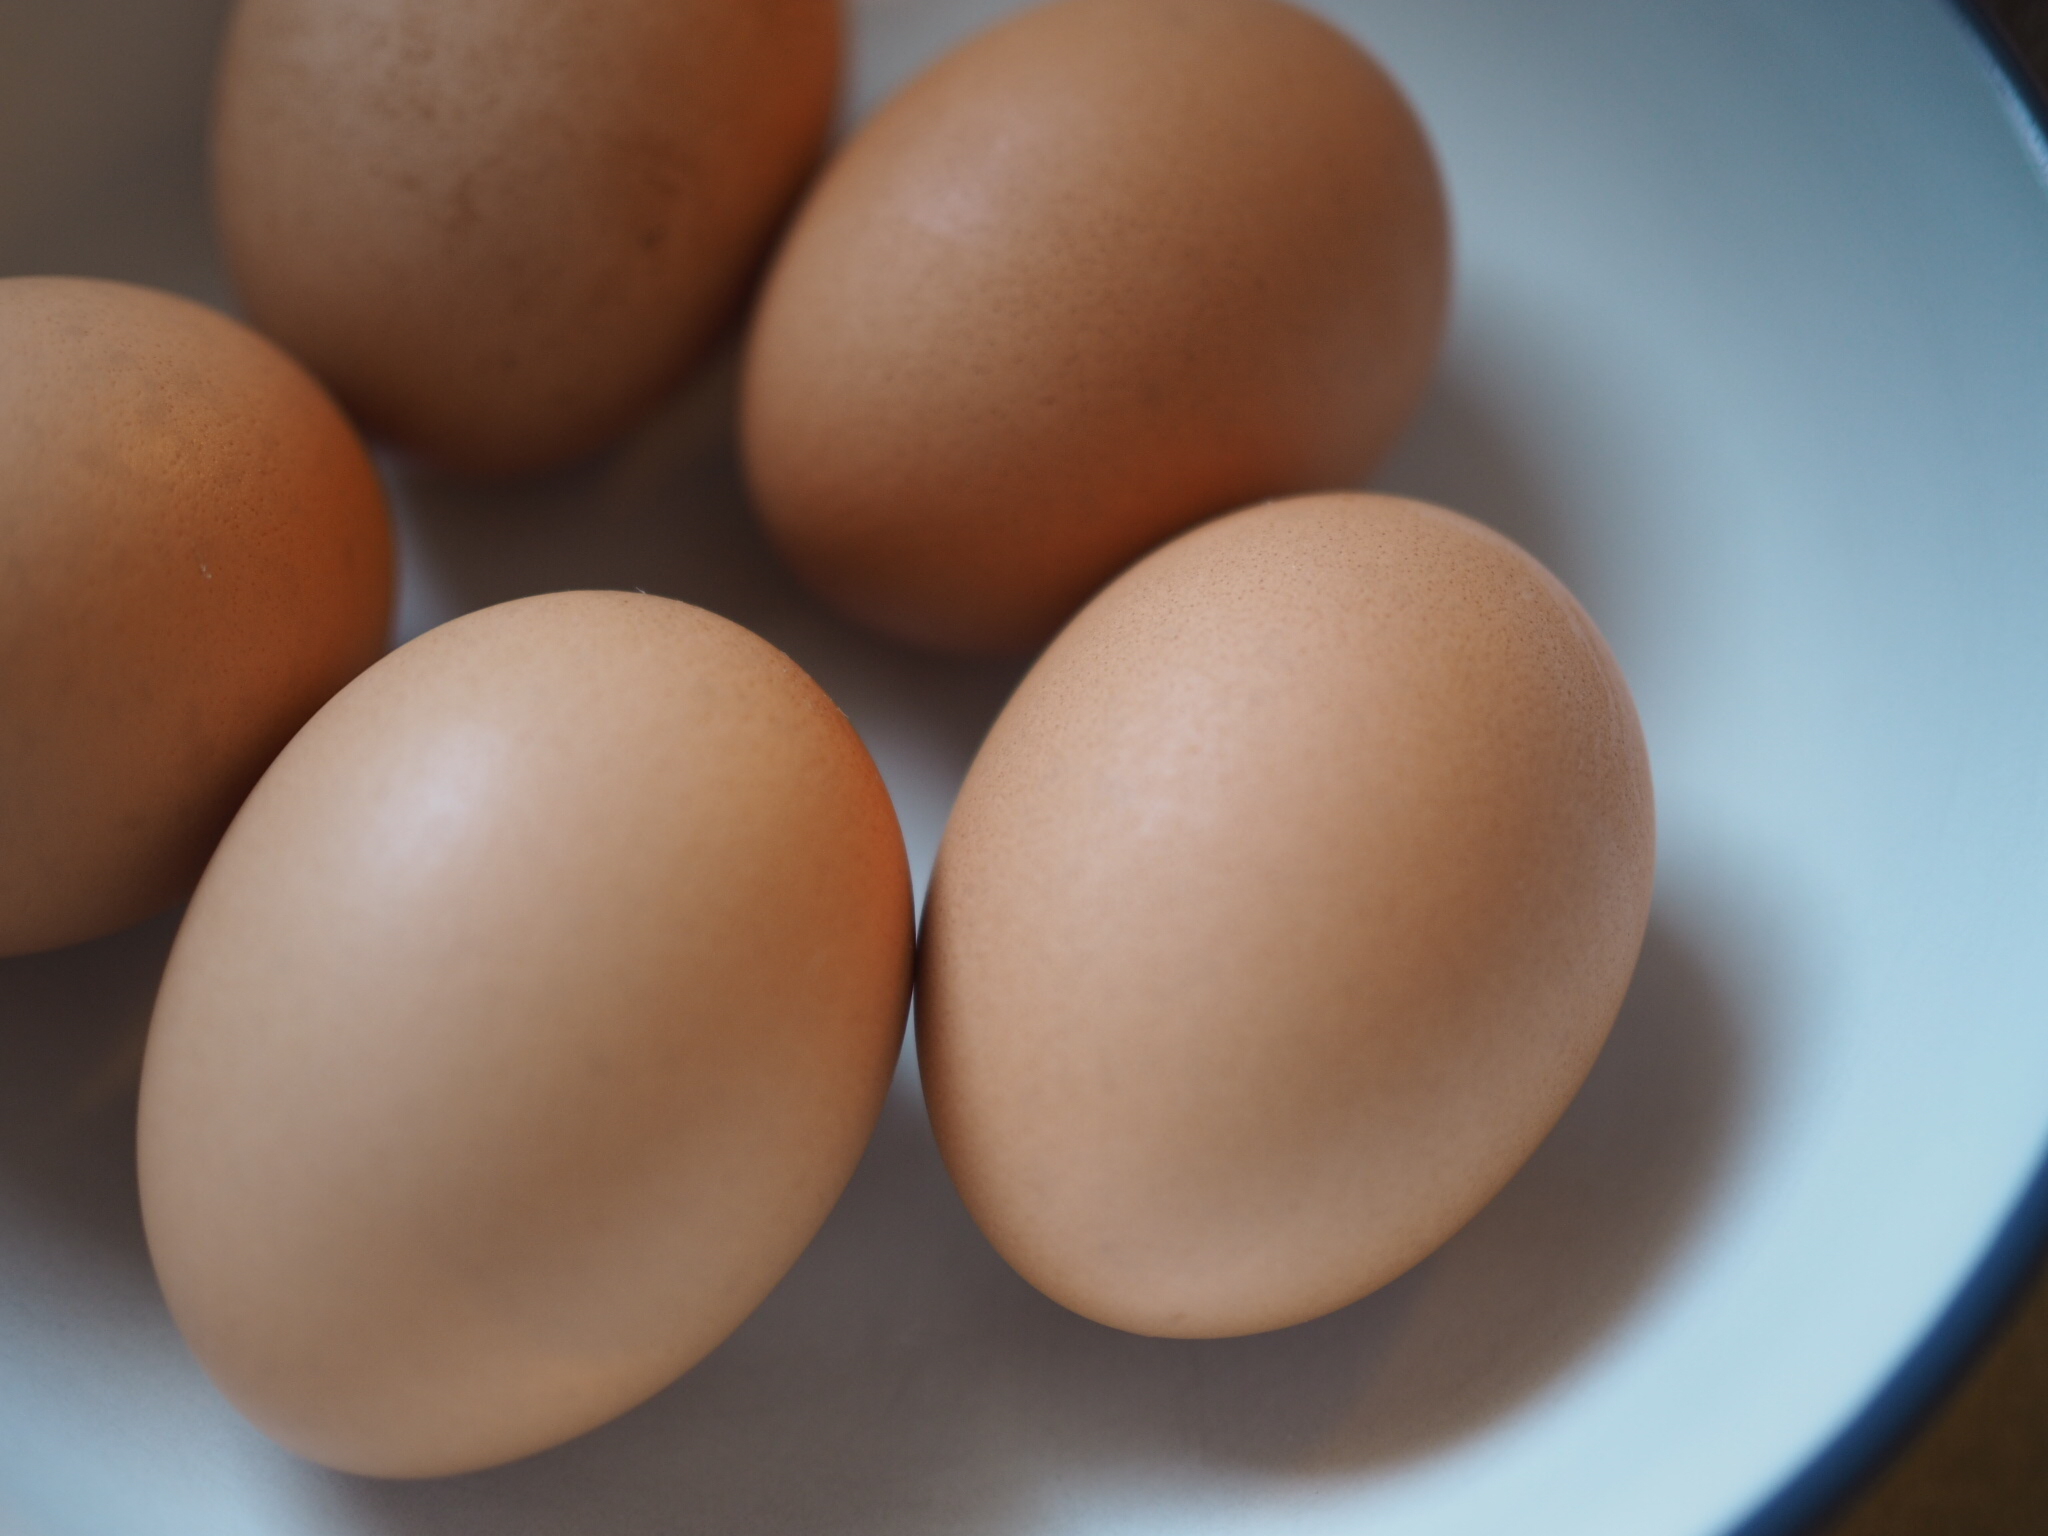
3 eggs, room temperature
11/2 cups (190g) all-purpose flour
2 teaspoons baking powder
1/4 teaspoon salt
2 Tablespoons demerara (raw) sugar
Preheat the oven to 350 degrees Fahrenheit. Grease a 9” round cake pan (or springform pan) with an oil-based spread (like Crisco or baking spray) and line the bottom of the pan with parchment.
Peel the apples, then core and slice into 8ths (I use a corer/slicer to make quick work of this).
Zest the lemon into a bowl with the butter and sugar. Cut the lemon in half and juice one half. Strain any seeds and set the juice aside.
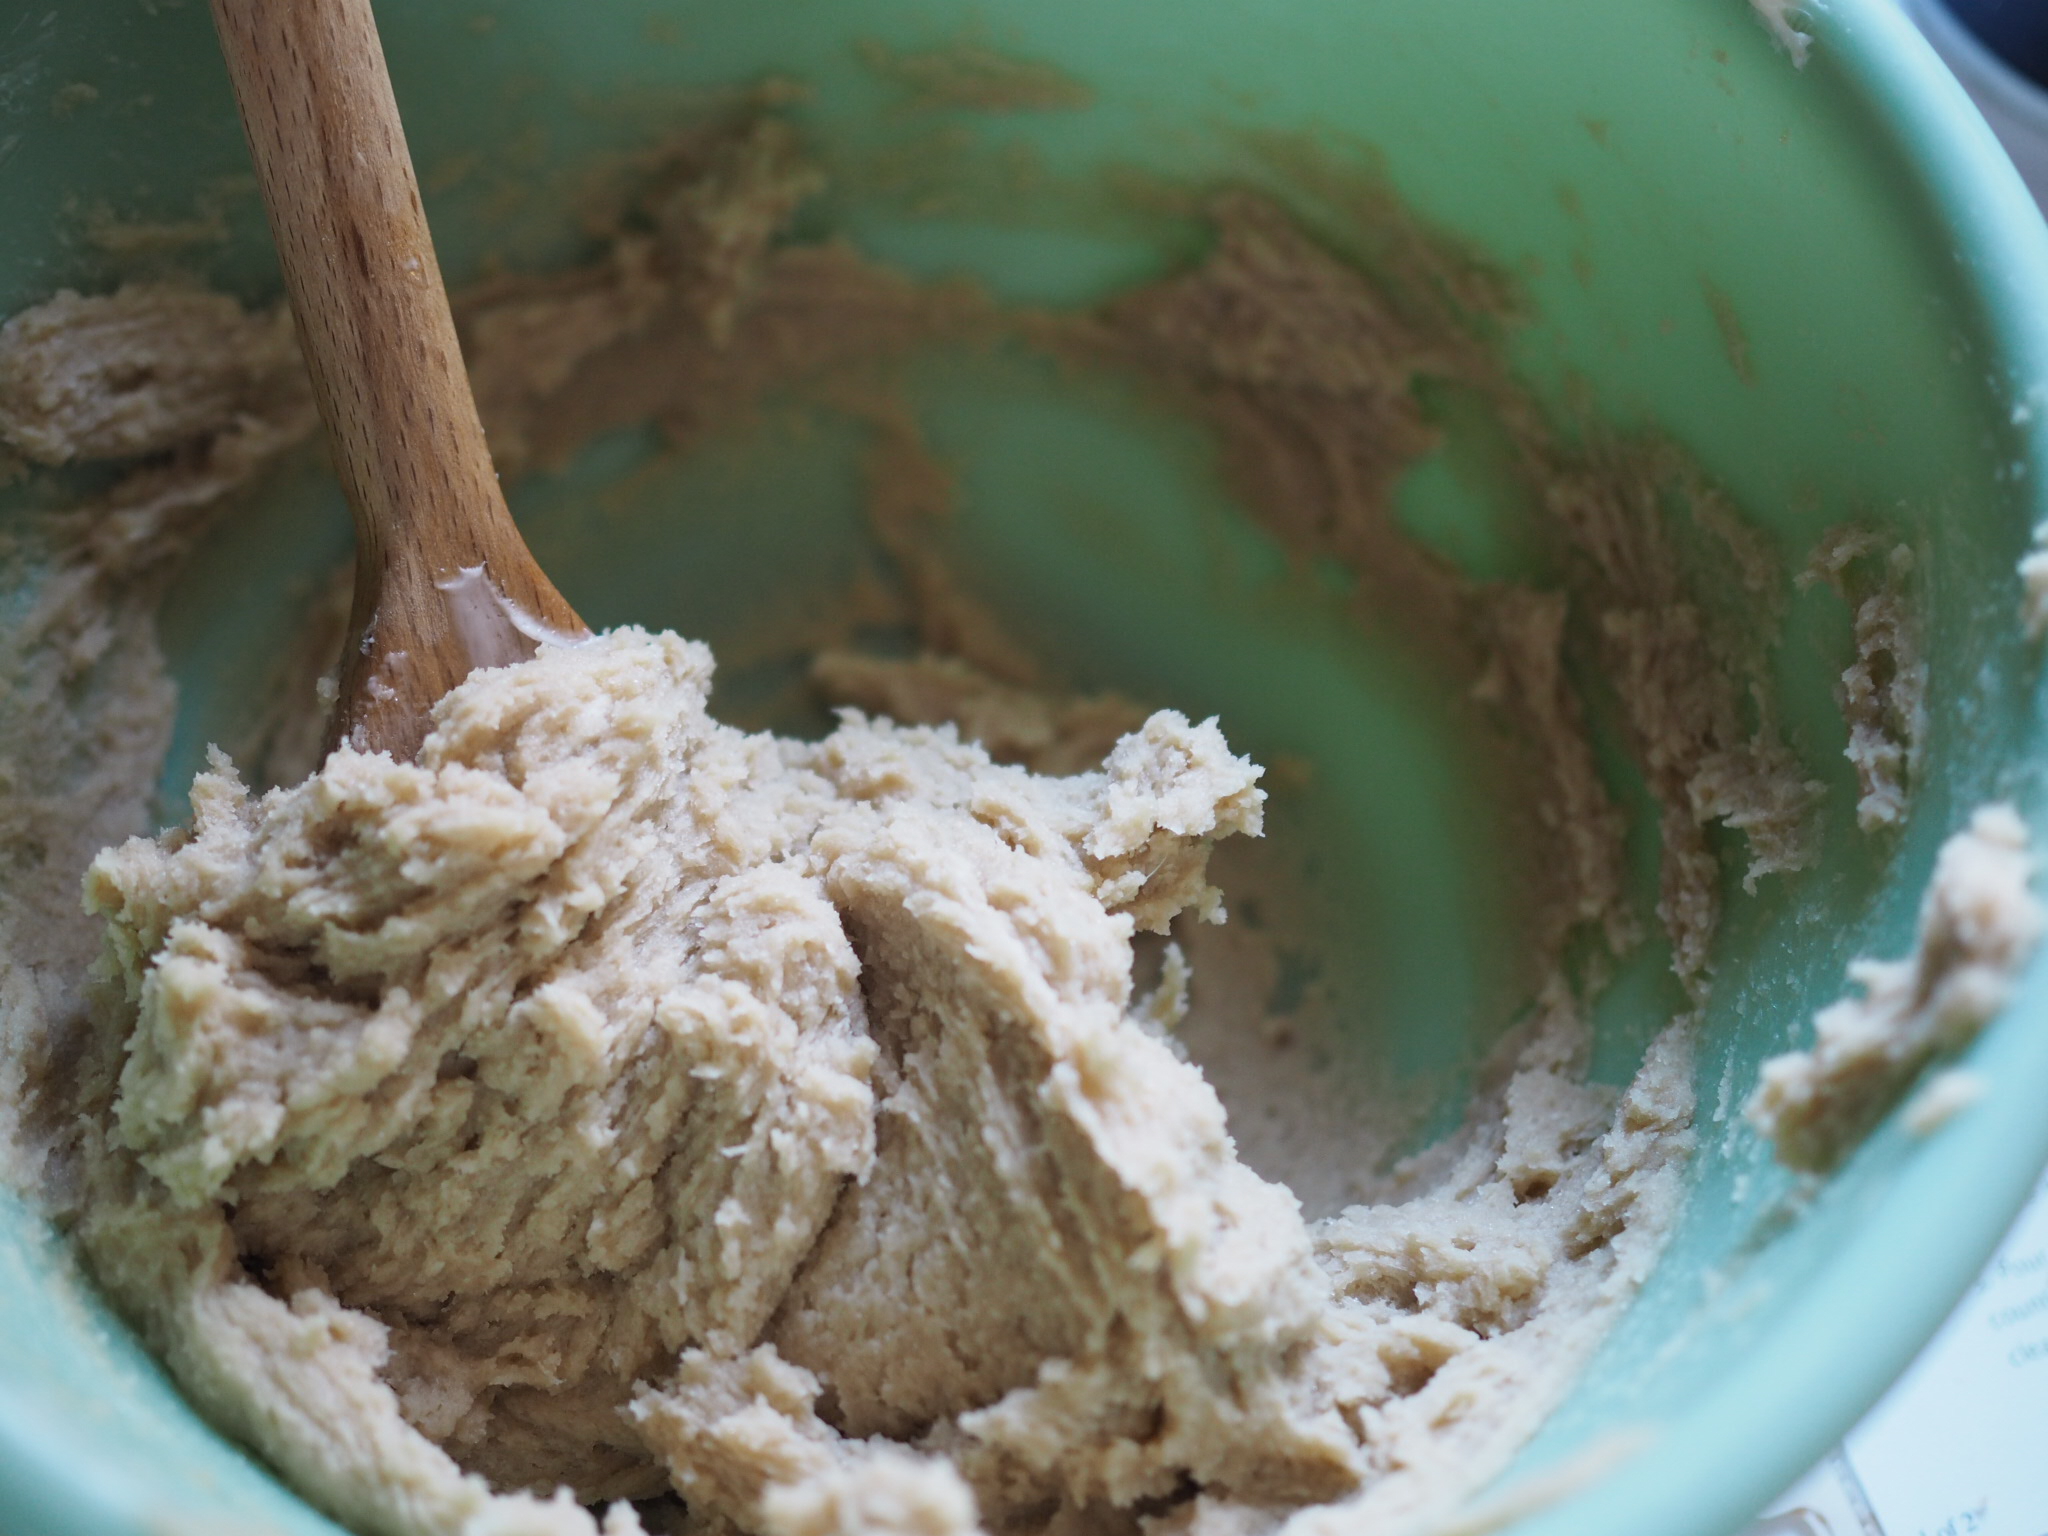
Using a sturdy wooden spoon or mixer, cream the butter and sugar together until light and fluffy.
Add vanilla extract and one egg, mixing until fully combined. Add remaining eggs one at a time, fully combining each egg before adding the next.
In a separate bowl, sift together flour, baking powder, and salt. Add the lemon juice and flour mixture to the wet ingredients, mixing until just combined.
Using a rubber spatula, scrape the batter into the prepared pan and smooth the top. Arrange the apple slices with the core side down in a circle around the edge of the pan, pressing down slightly, so each slice is secured in place. Take the remaining apples and place in the center. Sprinkle the top of the cake generously with demerara sugar.
Place pan in the center of the oven and bake for approximately 40 minutes, until the cake is golden brown and a tester comes out clean.
Let the cake cool for 5 minutes before carefully removing pan. The cake should be firm enough that it should be easy to move without disturbing the apples.
Enjoy at room temperature with some lightly sweetened whipped cream.
Adapted from Classic German Baking by Luisa Weiss


German Sunken Apple Cake Versunkener Apfelkuchen
Serves 8 Ingredients: 3 medium apples 1 medium lemon 1/2 cup, plus 2 tablespoons (125g) granulated sugar 9 Tablespoons plus 1 teaspoon (130g) unsalted butter, cut into chunks and at room temperature 1/2 teaspoon vanilla extract 3 eggs, room temperature 1 1/2 cups (190g) all-purpose flour 2 teaspoons baking powder 1/4 teaspoon salt 2 Tablespoons demerara (raw) sugarNo Chill, No Spread, Cut Out Cookies

A confession. I've never liked sugar cookies.
I don't know what recipe my mom used, I seem to recall it had lemon extract in it, but while I found the decorating fun, I never actually wanted to eat the cookies we made around holiday time. It was all too sweet, too artificial tasting.
Now, as a mom myself, I wanted to share the fun of Christmas Cookie decorating with Little Miss Cleaver, but I wanted a cookie base that actually tasted good.
This is third year these cookies have been in holiday rotation and in my book, this recipe is a winner. It's almost halfway between a sugar cookie and shortbread in taste, no weird lemon falvor and I'm happy to eat them plain if the kid poops out on decorating (not likely this year).
The biggest hassle of them is that it makes a TON of cookies - 4-5 dozen depending on your cutter (we fill five 13"x 18" half-sheets), so I've included a half batch recipe below as well.
As for frosting, I whisk up a batch of the world's easiest frosting, which once you've made it once, you'll never have to look at the recipe again.
To print, select button at bottom of post.
Cut Out Cookies - Full Batch (makes 48-60 cookies)
1 cup (2 sticks) unsalted butter, chilled and cut into small cubes
1 cup granulated sugar
3/4 tsp kosher salt
2 large eggs
1 teaspoon vanilla
4 cups all-purpose flour
3/4 cup cornstarch
Cut Out Cookies - Half Batch (makes 24-30 cookies)
1/2 cup (1 stick) unsalted butter, chilled and cut into small cubes
1/2 cup granulated sugar
slightly less than 1/2 tsp kosher salt
1 large egg
1/2 teaspoon vanilla
2 cups all-purpose flour
6 Tablespoons cornstarch
Preheat oven to 375 Degrees Fahrenheit.
Using a stand mixer or wooden spoon, cream together cold butter and sugar until it reaches an even consistency (Tip: if using a spoon, use the spoon end to pound the butter into the sugar until it starts to look like coarse sand before attempting to stir).
Add eggs one by one, until mixed in completely. Stir in vanilla.
Add flour, salt and cornstarch and mix until dough starts to form a ball. (Tip: If working by hand, it may help to kind of knead the dough together with your hands).
Working with about 1/4 to 1/2 of the dough at a time, roll out the dough to an even thickness of 1/4 inch. Cut out shapes and place on a parchment-lined cookie sheet, placing shapes with narrow parts in the center of the sheet .
Bake for approximately 11 minutes or until edges turn slightly brown.
Cool on a wire rack completely before frosting.
Easy Frosting
2-3 Cups powdered sugar
About 5 tablespoons water
Food coloring
In a large bowl, add water to sugar a little bit at a time and whisk together until frosting reaches desired consistency. For ease of frosting, you'll want it to start to pull off the whisk in a slow thick line, rather than sticking completely or dripping off.
If desired, section out some of the frosting into a separate bowls and add food coloring drop by drop until desired color is achieved.
Using a spatula, transfer frosting to a pastry bag fitted with a decorating tip. Twist pastry bag shut or tie with a twisty-tie to seal and decorate away!
(And before anyone asks, the sweater cookie cutter came from this kit that I got at Christmas Tree Shops, the other cutters are from Le Roux Kitchen)
Cookie recipe adapted from https://bakingamoment.com/how-to-bake-easy-and-delicious-cutout-cookies-with-neat-edges/

Crisp Apple Tart (Tarte Fine aux Pommes) Recipe
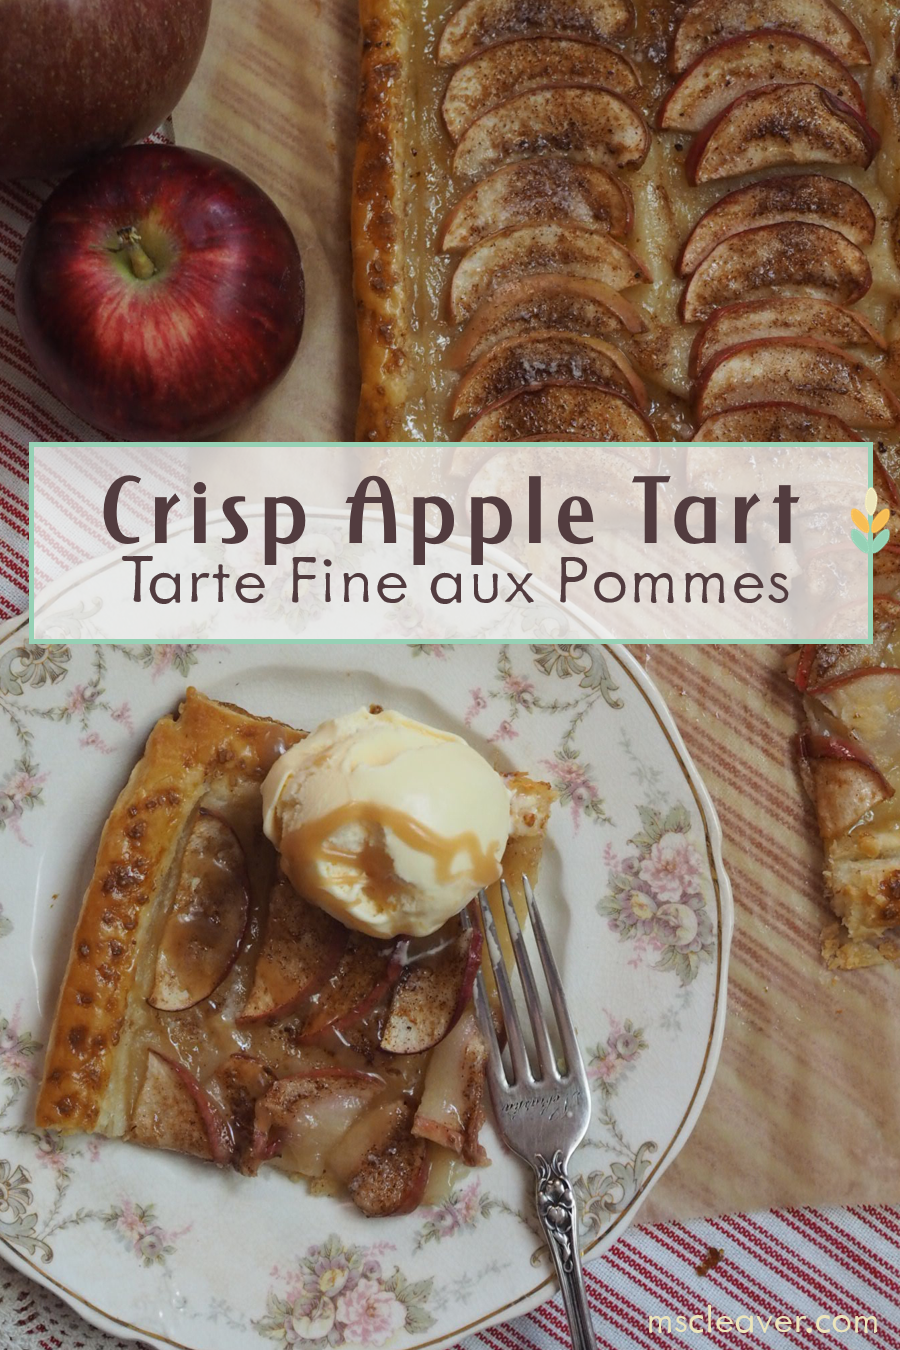
Ever since my trip to Quebec, I have been obsessed with puff pastry. That, and all the seasons of the Great British Bake Off, I've been watching.
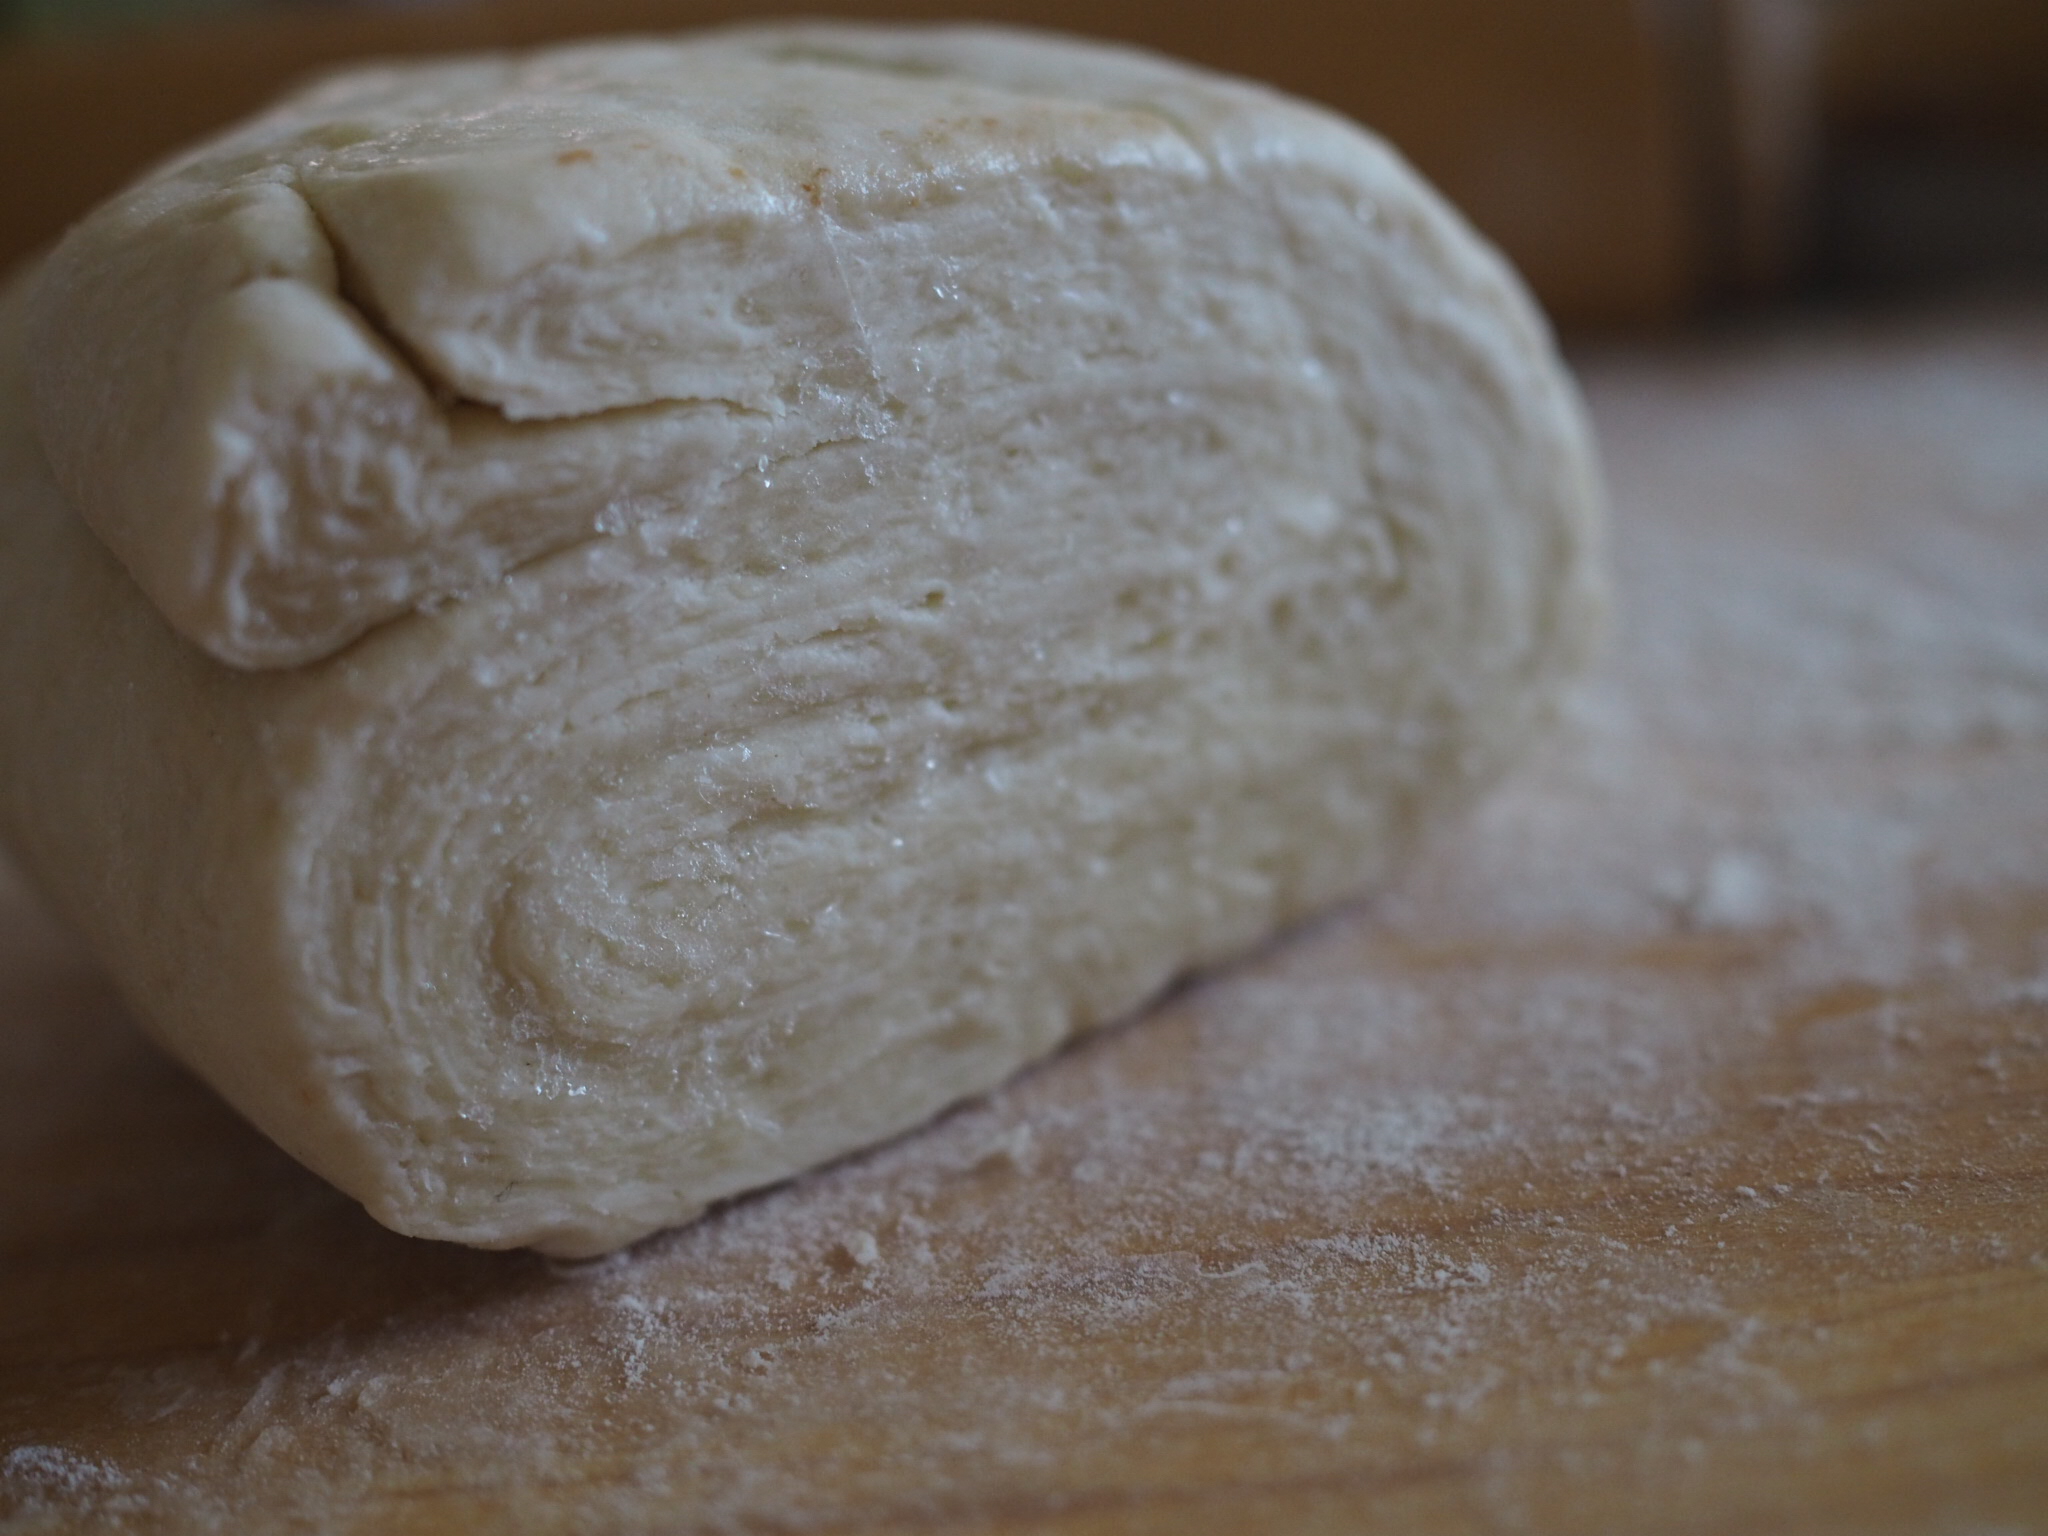
Well, rough puff pastry. I'd like to give full-on puff pastry a try but a) time and b) the pounding sounds to flatten the butter would drive my dog nuts. So to avoid extended periods of dog barking, I've turned to an easier version that uses grated frozen butter to avoid all the pounding.
But full, rough, or store bought, puff pastry (or pâte feuilletée if you're feeling French) makes an excellent bae for this deceptively elegant, yet simple traditional crisp tart (or tarte fine). I'd suggest making the puff pastry the day before, then assembling the tart takes only 15 minutes or so. I daresay, it's easier than pie.
"Rough" Puff Pastry
- 260 grams salted butter (about 2 1/2 sticks), grated
- 350 grams all-purpose flour (about 2 1/4 cups)
- 1 tsp salt
- 1/2-2/3 cup of cold water
Freeze butter and grate. This is easiest if you have a food processor or a rotary grater, but can be done by hand. Place grated butter and measured flour in freezer for at least an hour.
When butter and flour are sufficiently cold, mix together flour, salt, and 60g of the butter together with your fingers. Add water until dough just holds together, but is not sticky or wet. The dough will be firm. Turn out onto a lightly floured surface and knead until dough feels like it's holding together well, about 1 minute. Rest dough in fridge for about 5 minutes while you prepare for next step. If you work quickly, you can do the following in one go. If the dough and particularly the butter, starts to get too warm and easy to work stop and chill in the freezer for a few minutes before continuing.
- On a lightly floured surface, roll dough into a long rectangle. Sprinkle half the remaining butter on 2/3rd of the dough. Fold the rectangle in thirds, starting with the un-buttered third.
- Turn the dough 90 degrees ( so the open ends are facing the side) and repeat step 1.
- Turn the dough 90 degrees and repeat folds (without the butter) as in step 1. Repeat turn/roll/fold 2 more times.
- Cut dough in half, wrap each half secruly in plastic wrap and store in fridge overnight. If you're making tart in less than an hour, or are planning to not use the dough for more than a day, store in the freezer and thaw in the fridge prior to use.
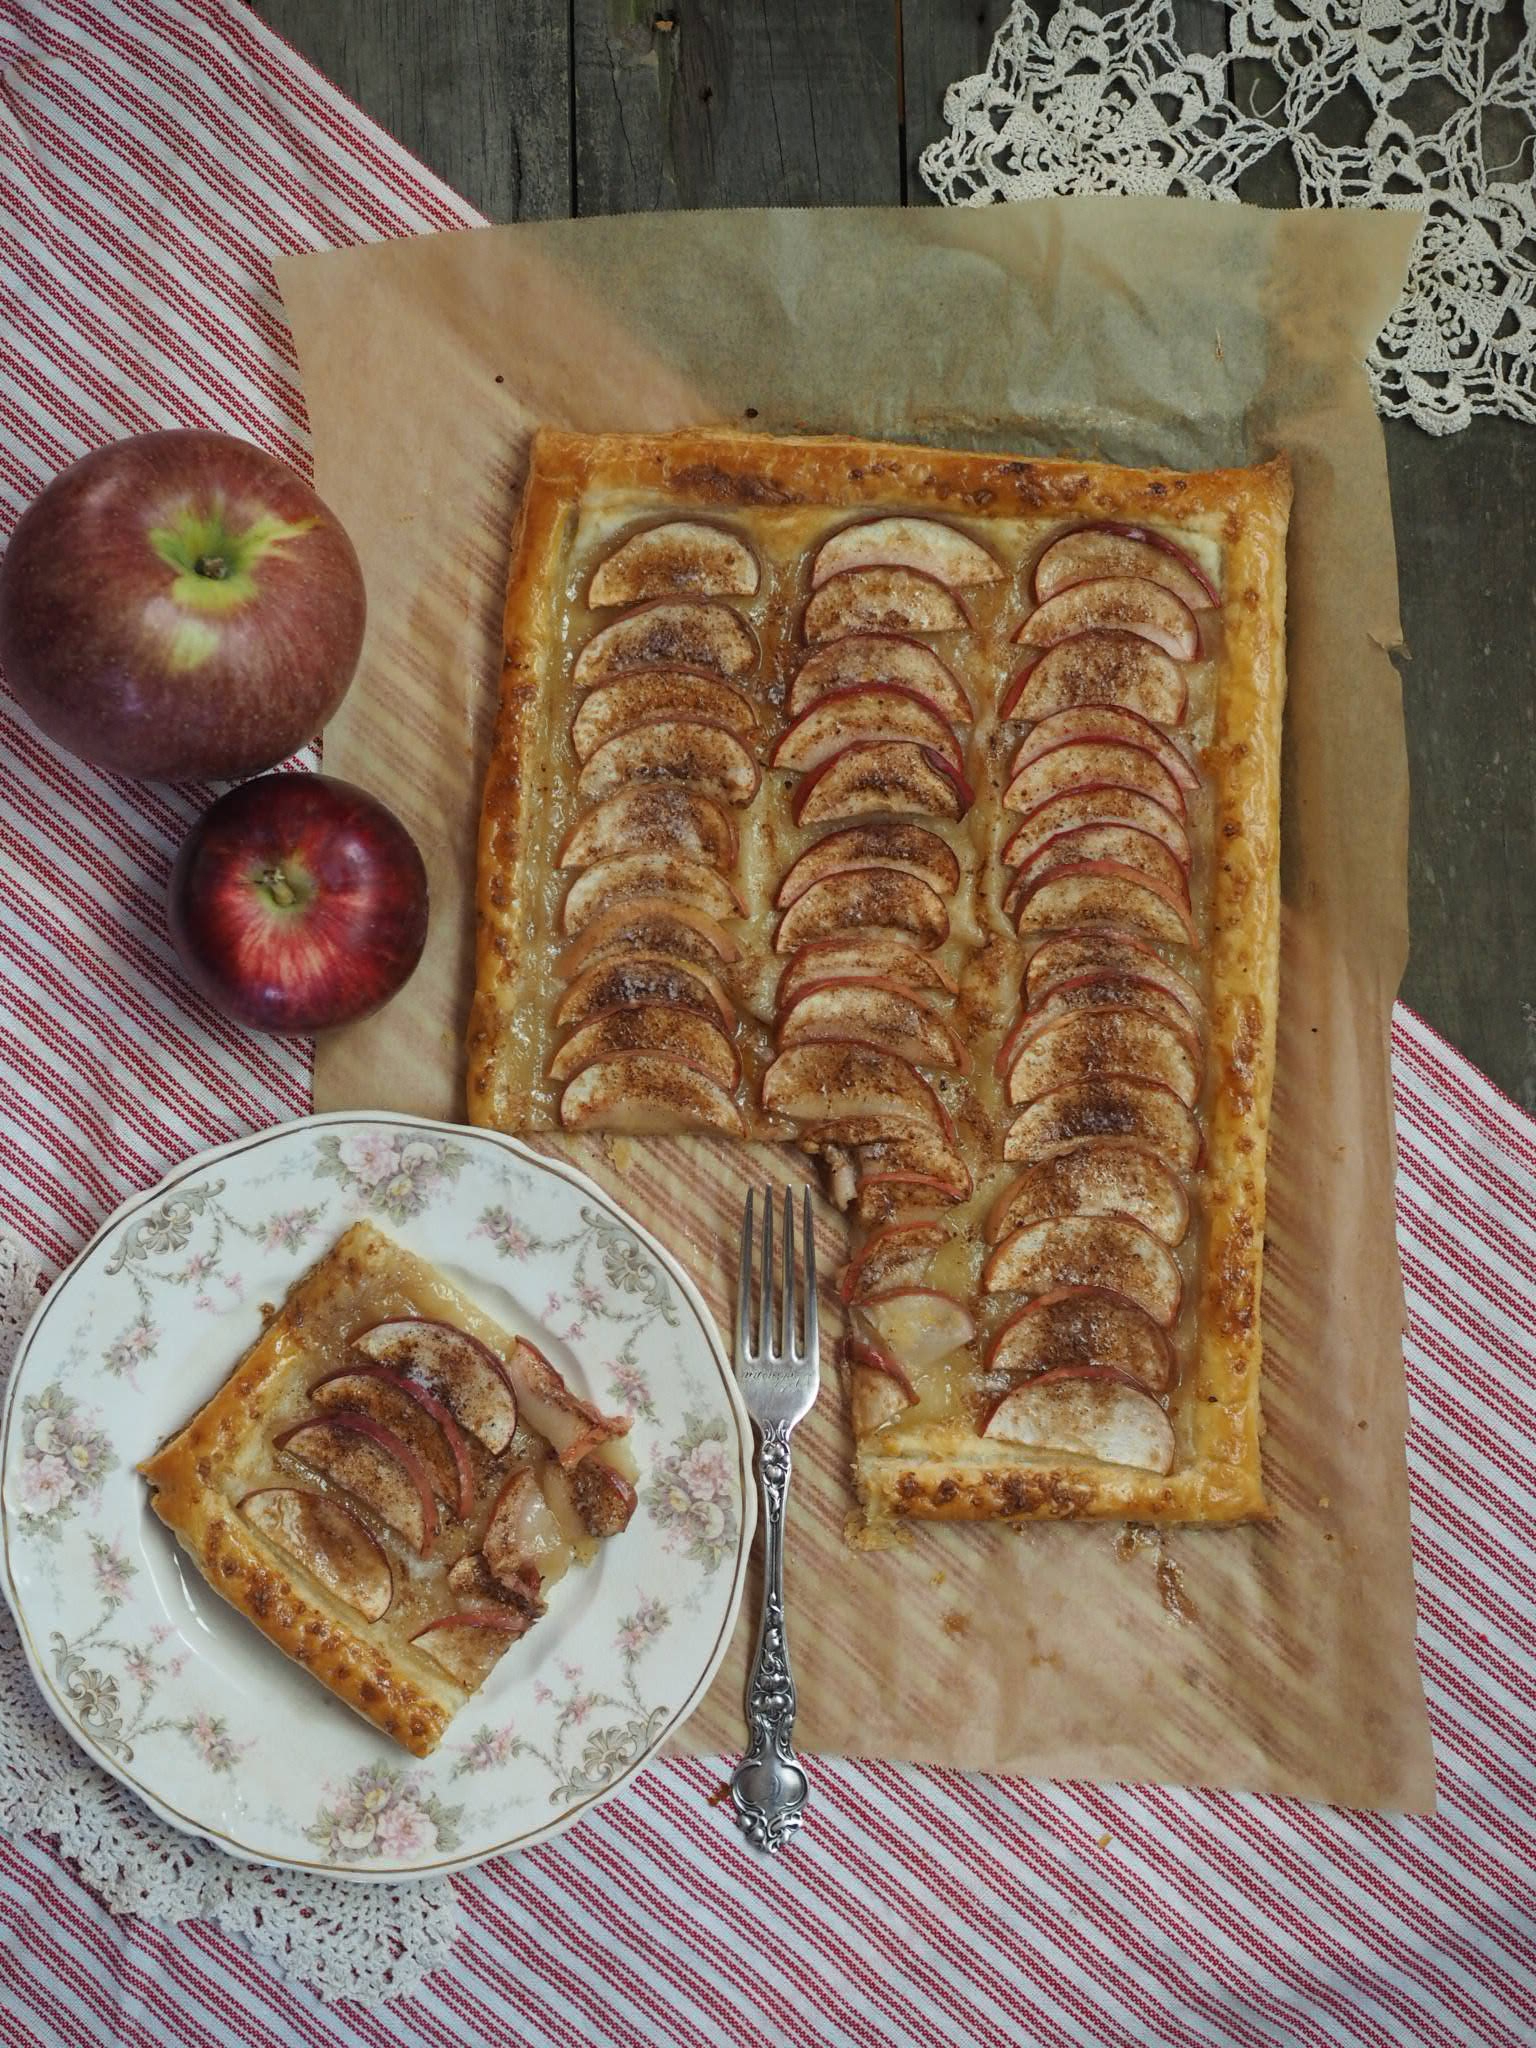
Crisp Apple Tart/Tarte Fine aux Pommes
Serves 6
- 1/2 of rough puff pastry recipe (above), or 1 sheet frozen pre-made pastry, thawed.
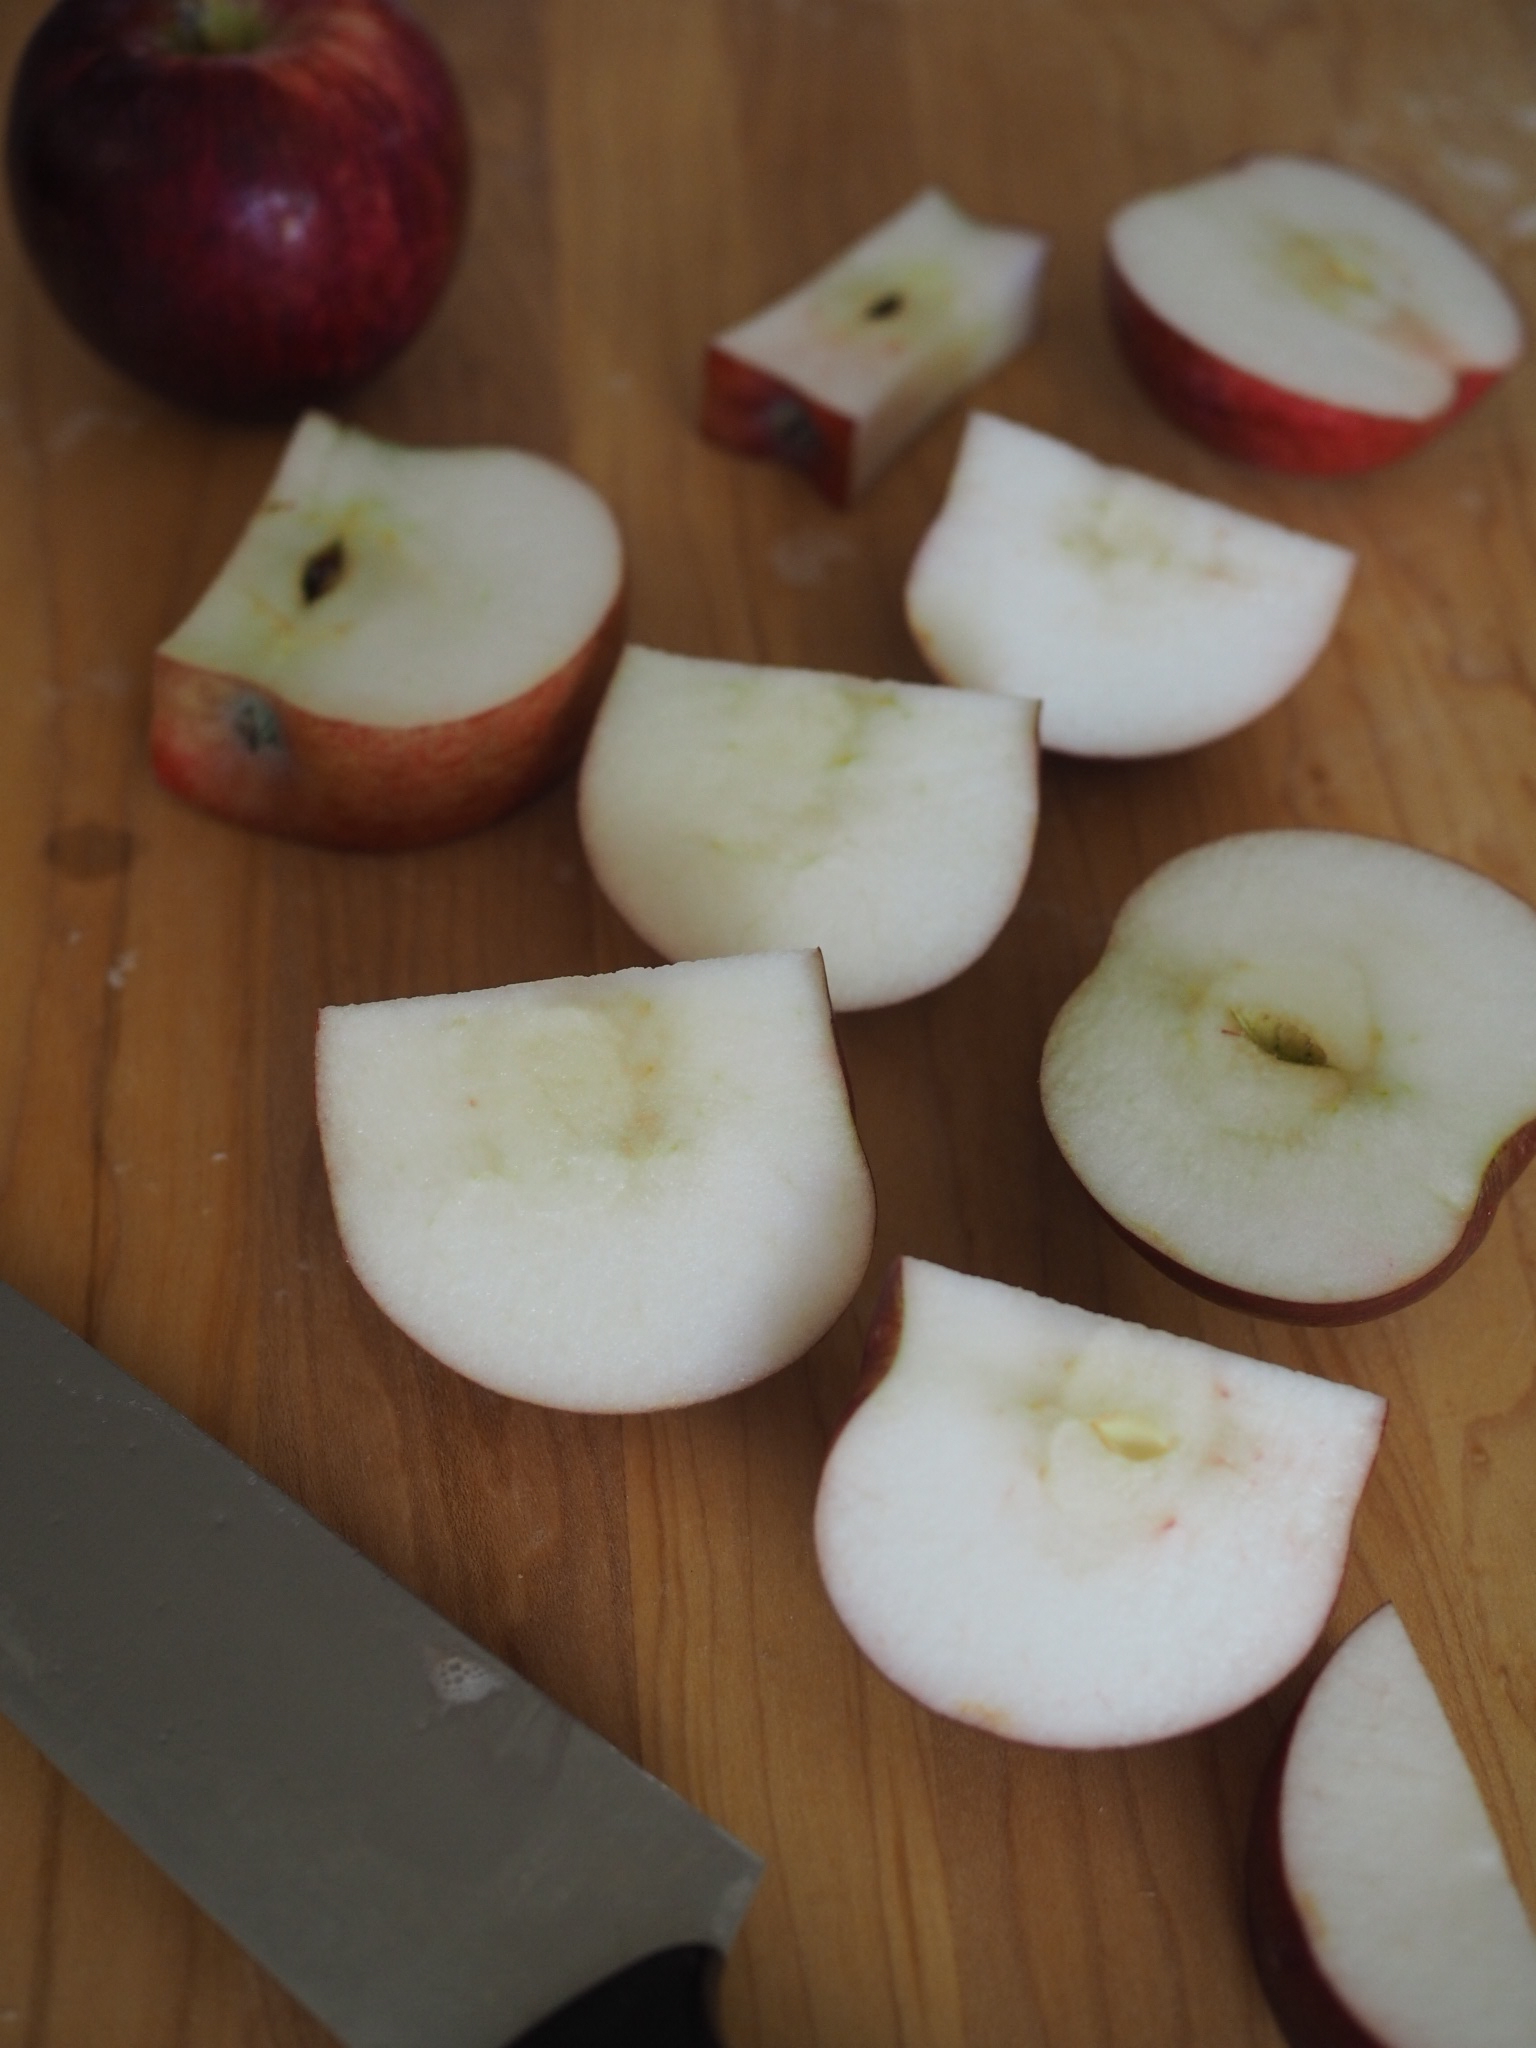
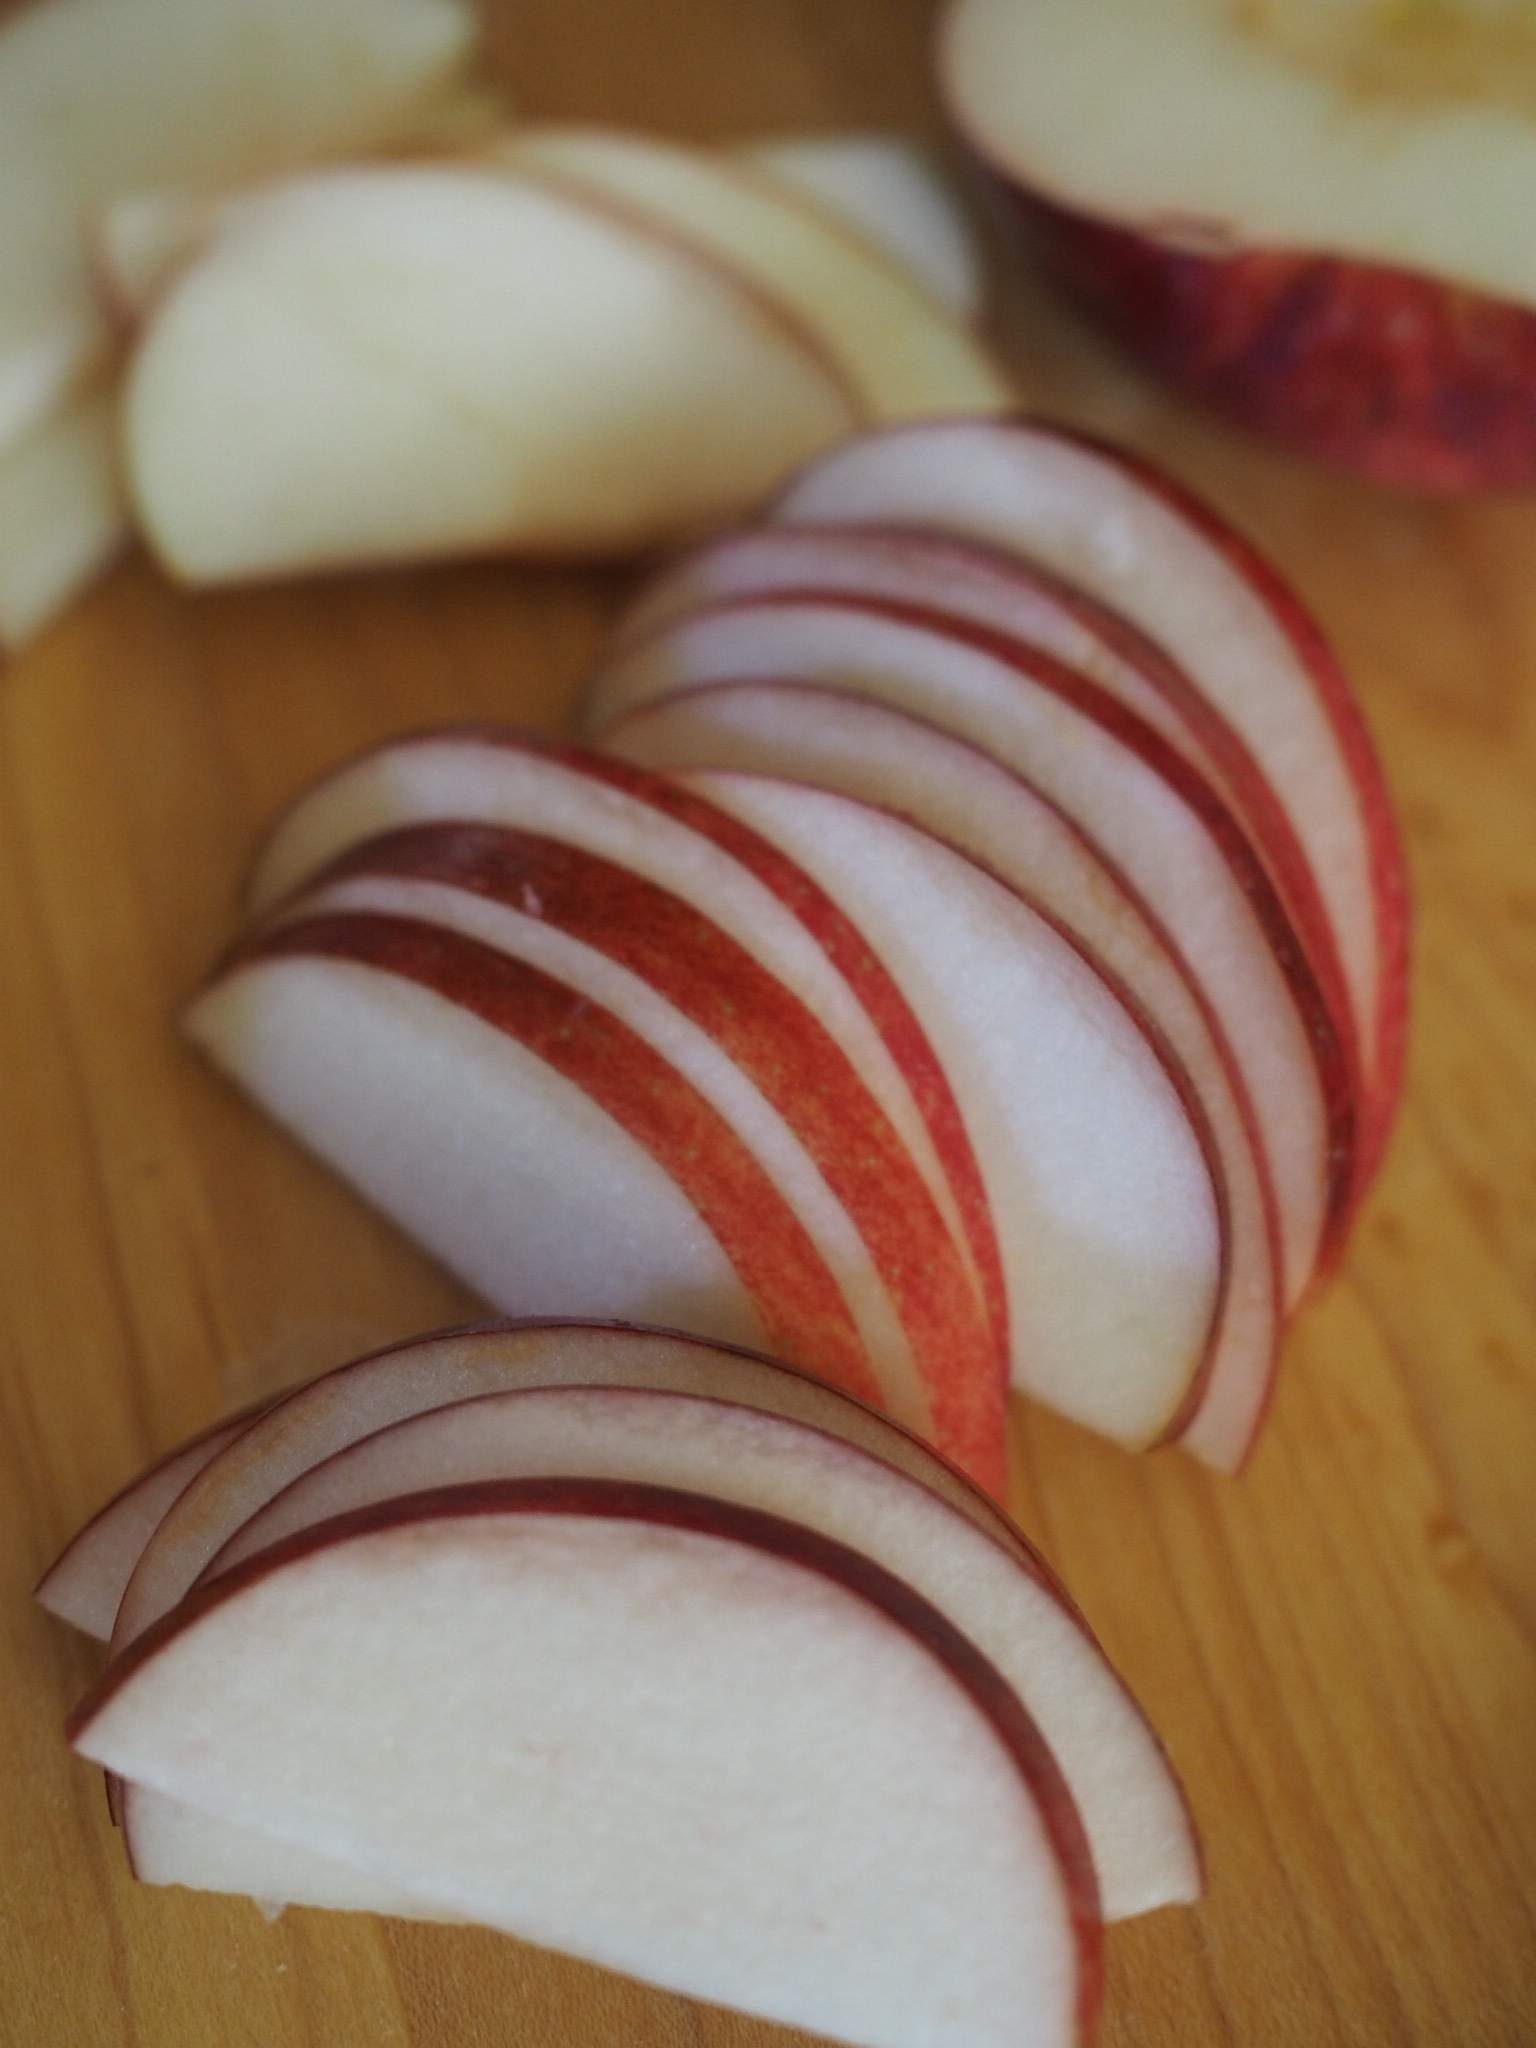
- 2 medium apples, with peels, sliced thin
- 1 egg
- 2 Tablespoons orange marmalade, apricot jelly, or apple jelly
- 2 Tablespoons Demera (raw) sugar (can subsititute granulated sugar, if desired)
- 1/4 teaspoon cinnamon
- Freshly grated nutmeg
- 2 Tablespoons salted butter, diced into cubes.
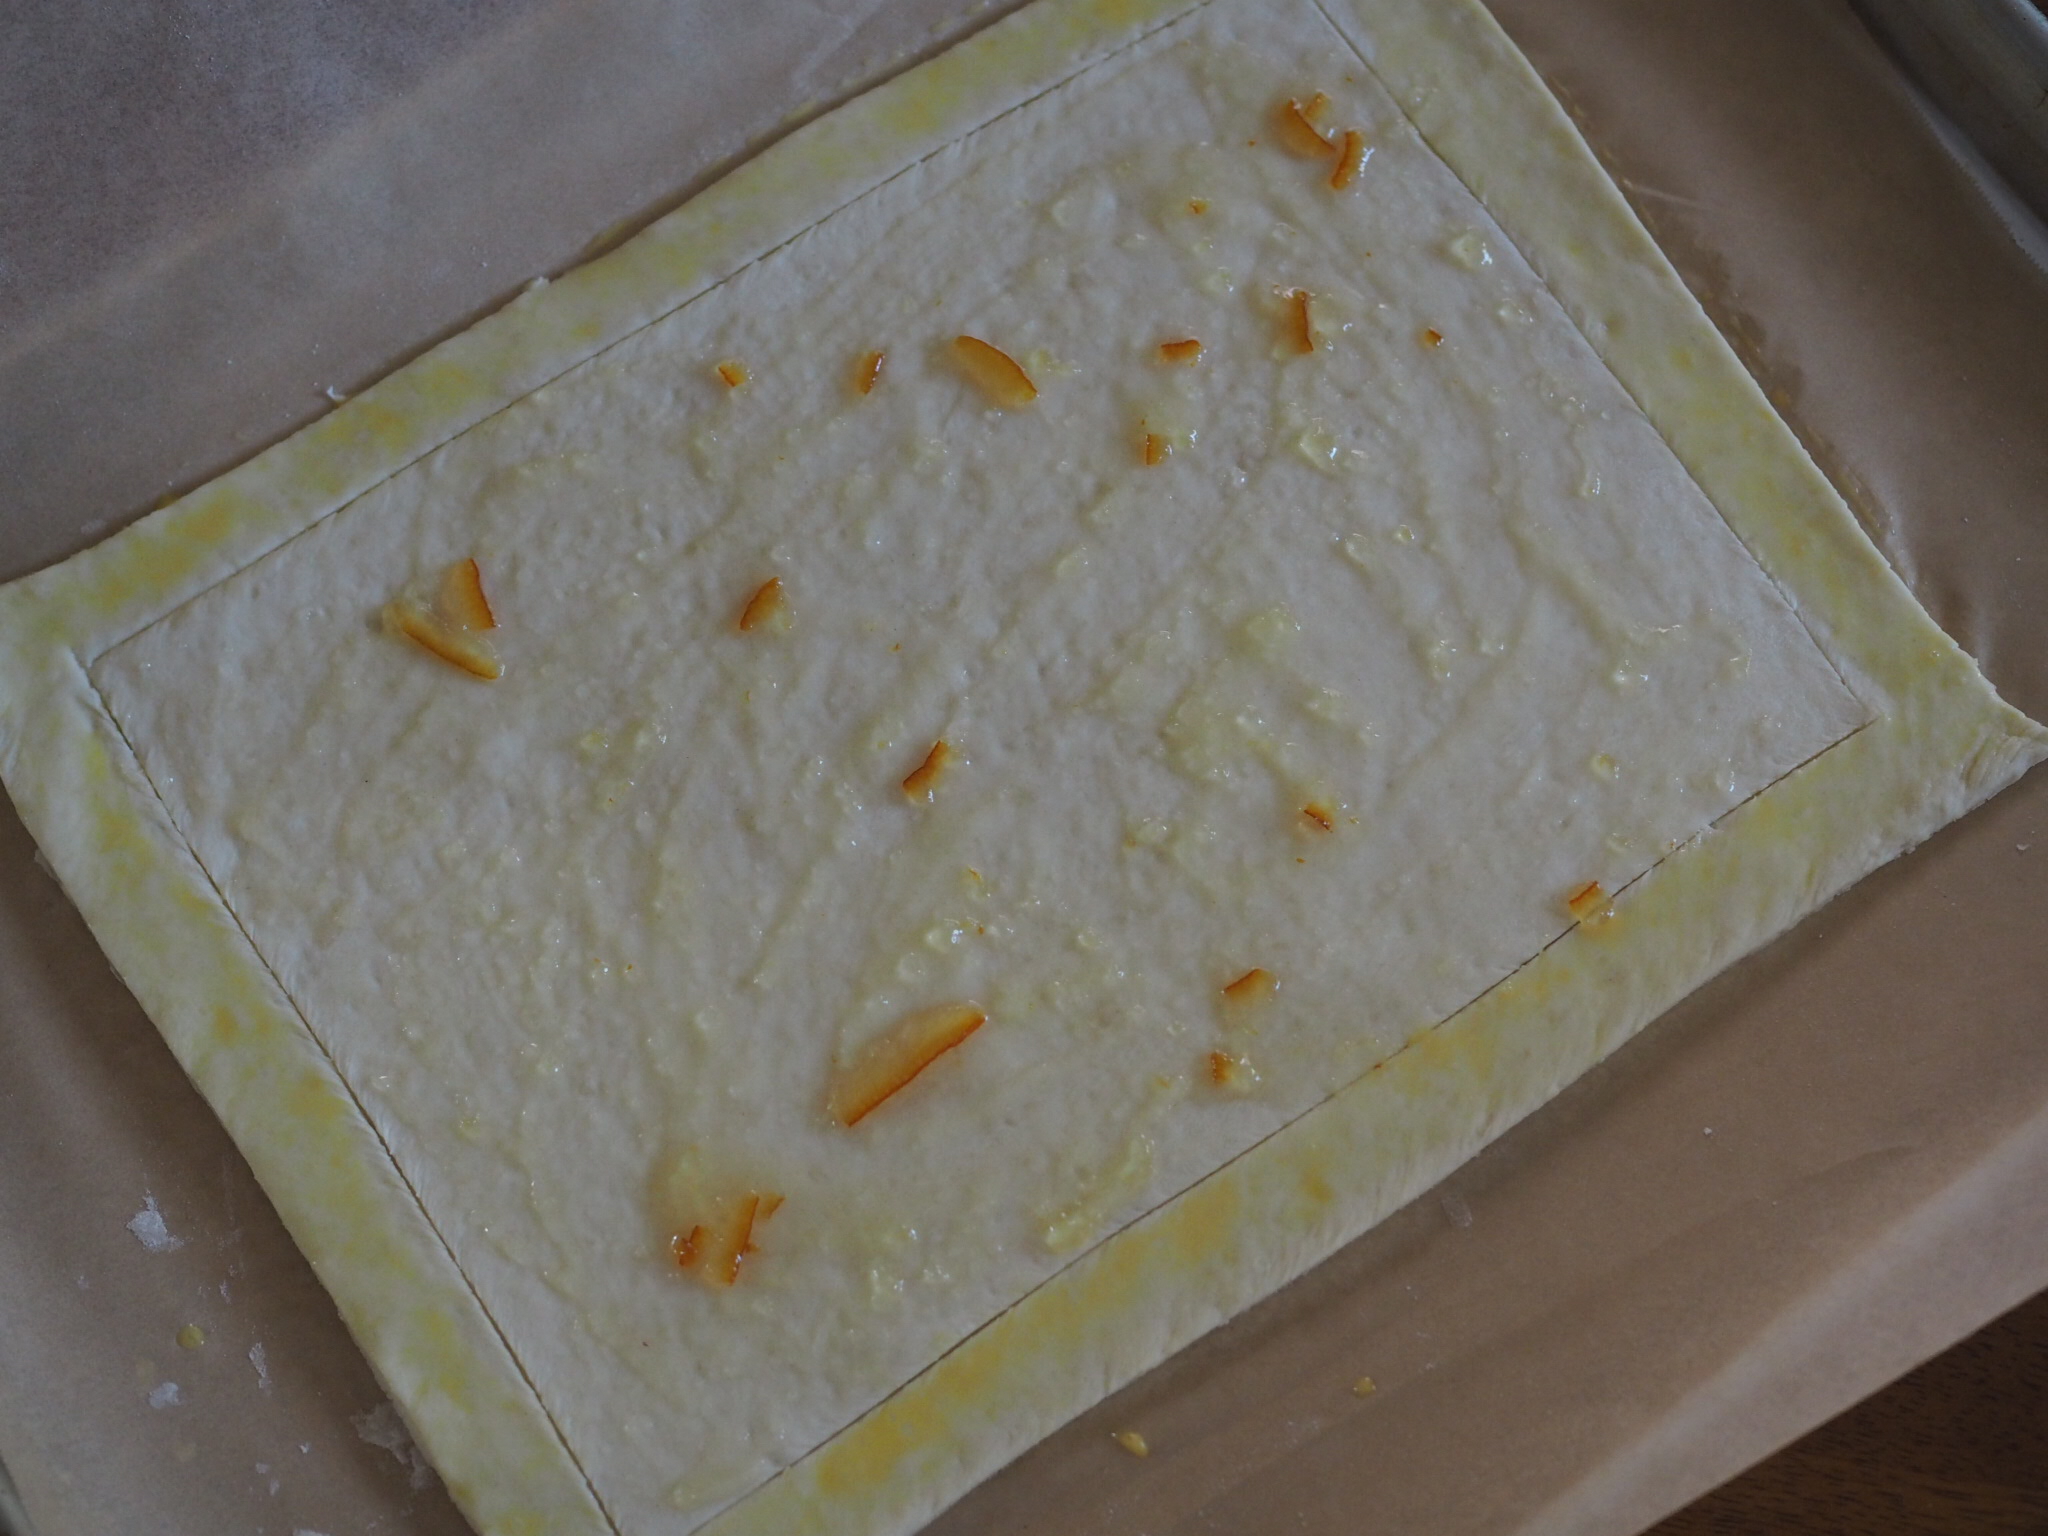
Preheat oven to 425 degrees Fahrenheit. Line a large baking sheet with parchment paper.
On a lightly floured surface, roll out dough into a large rectangle, about 9 x 12 inches, cut edges to be neat, if needed. Transfer to baking tray.
Using a sharp knife, score a 1 inch border around the dough. Beat egg in a bowl, adding a splash of water to make an egg wash. Brush egg wash along the outside border of the tart only. Mix jelly of your choice with a splash of water. Brush jelly mixture on center of tart.
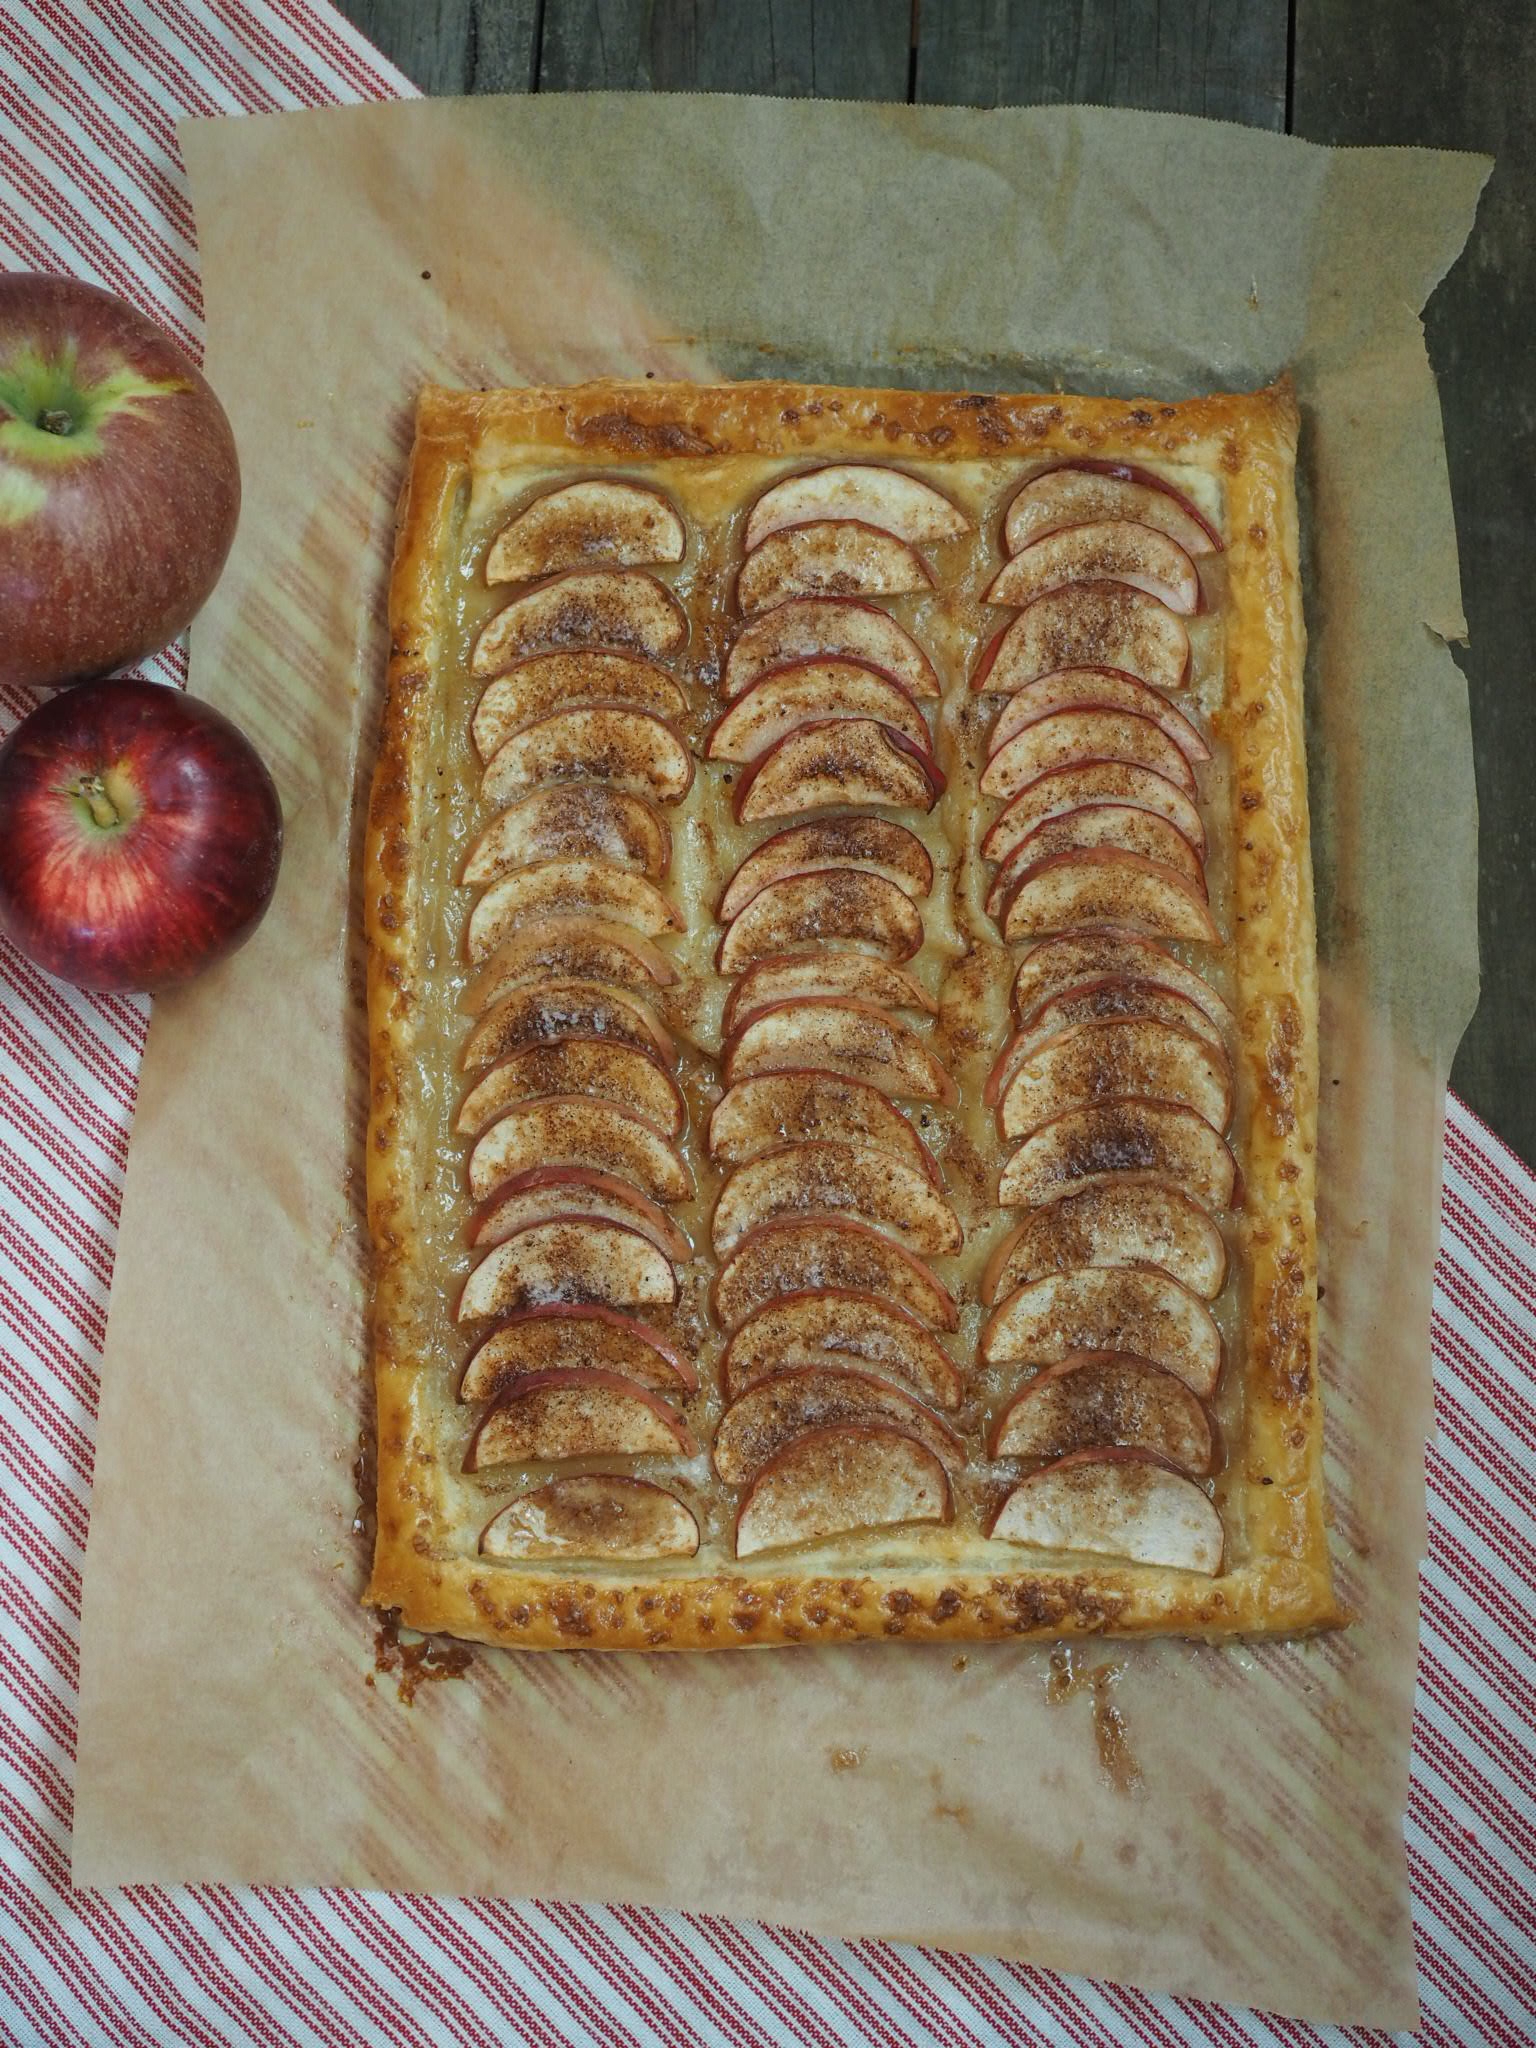
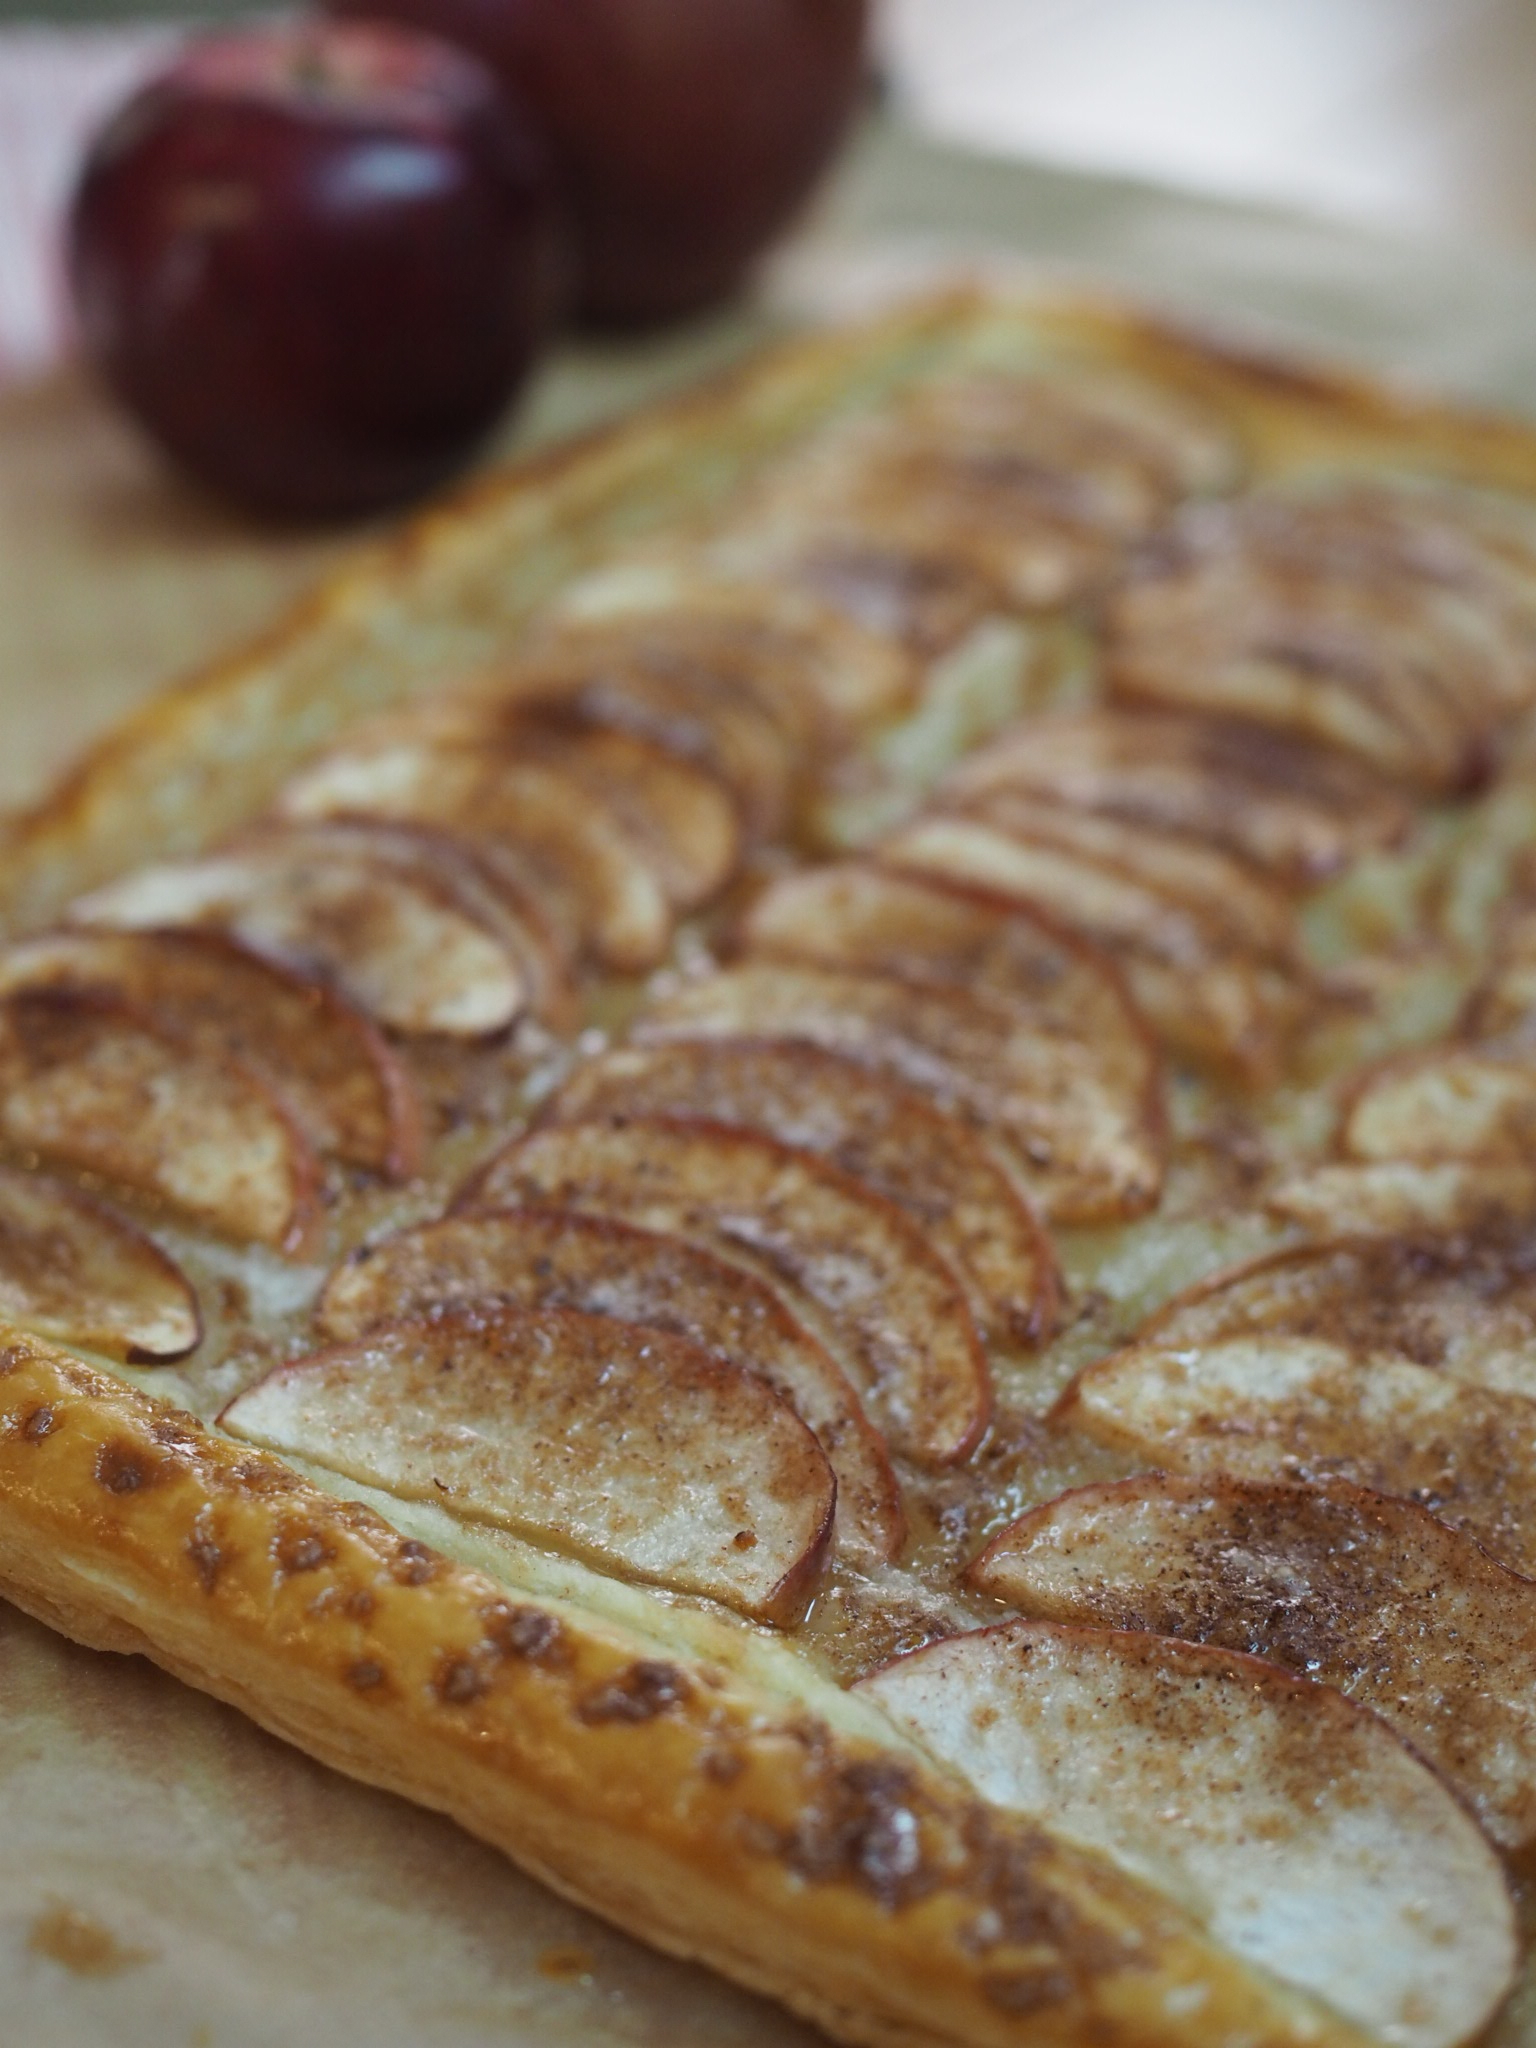
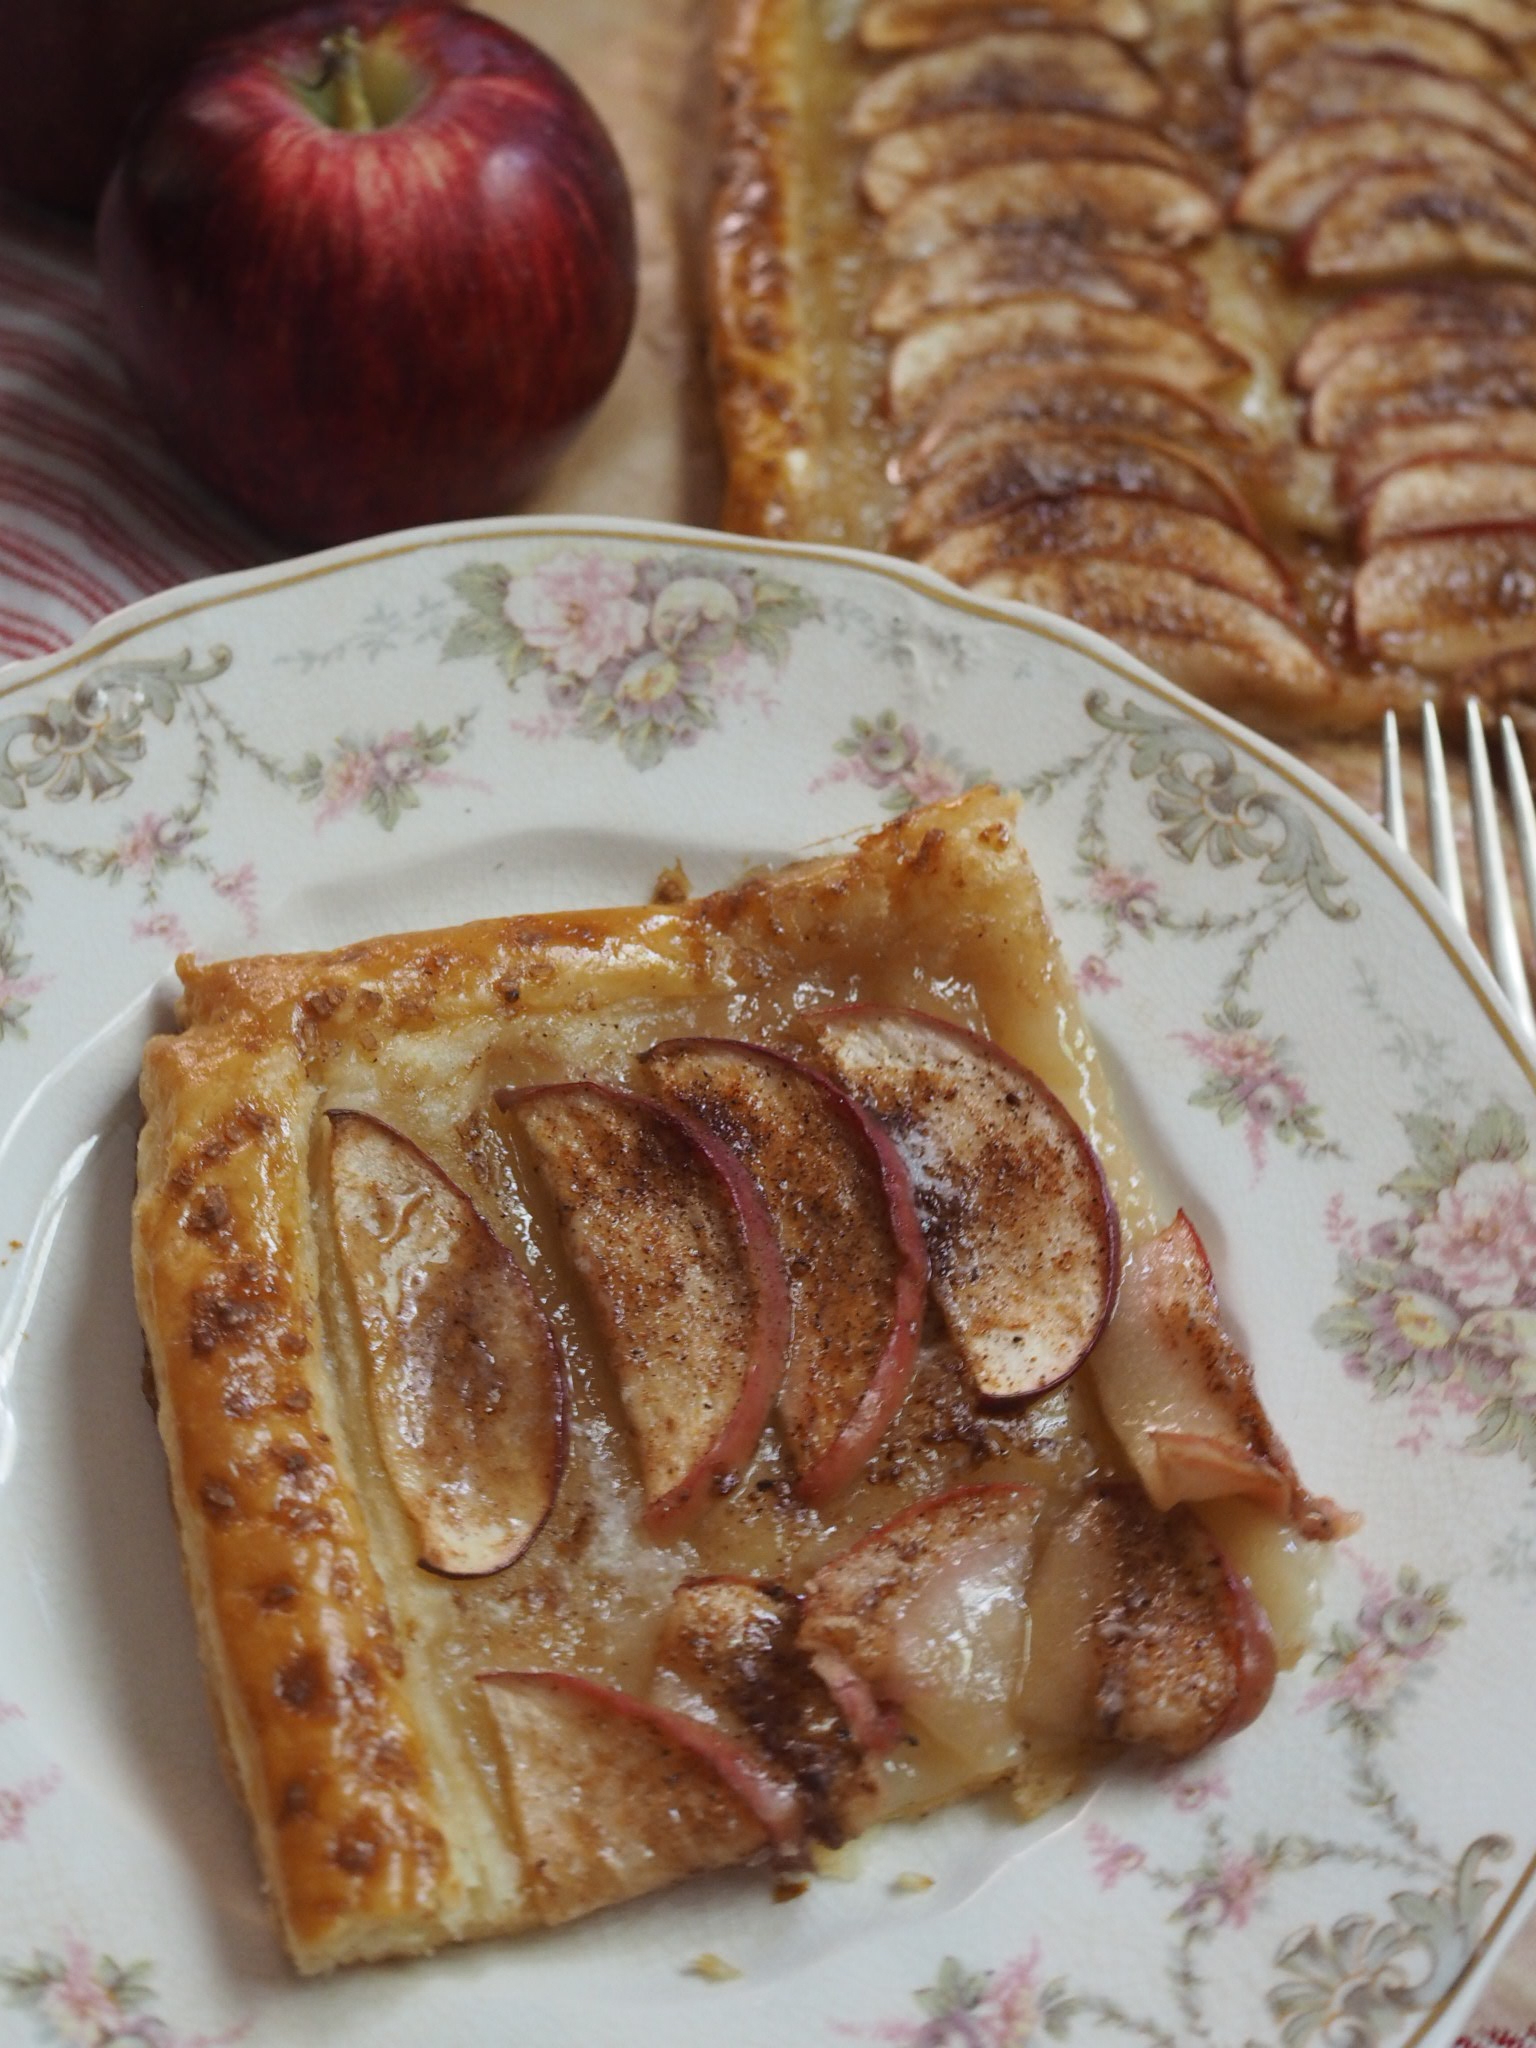
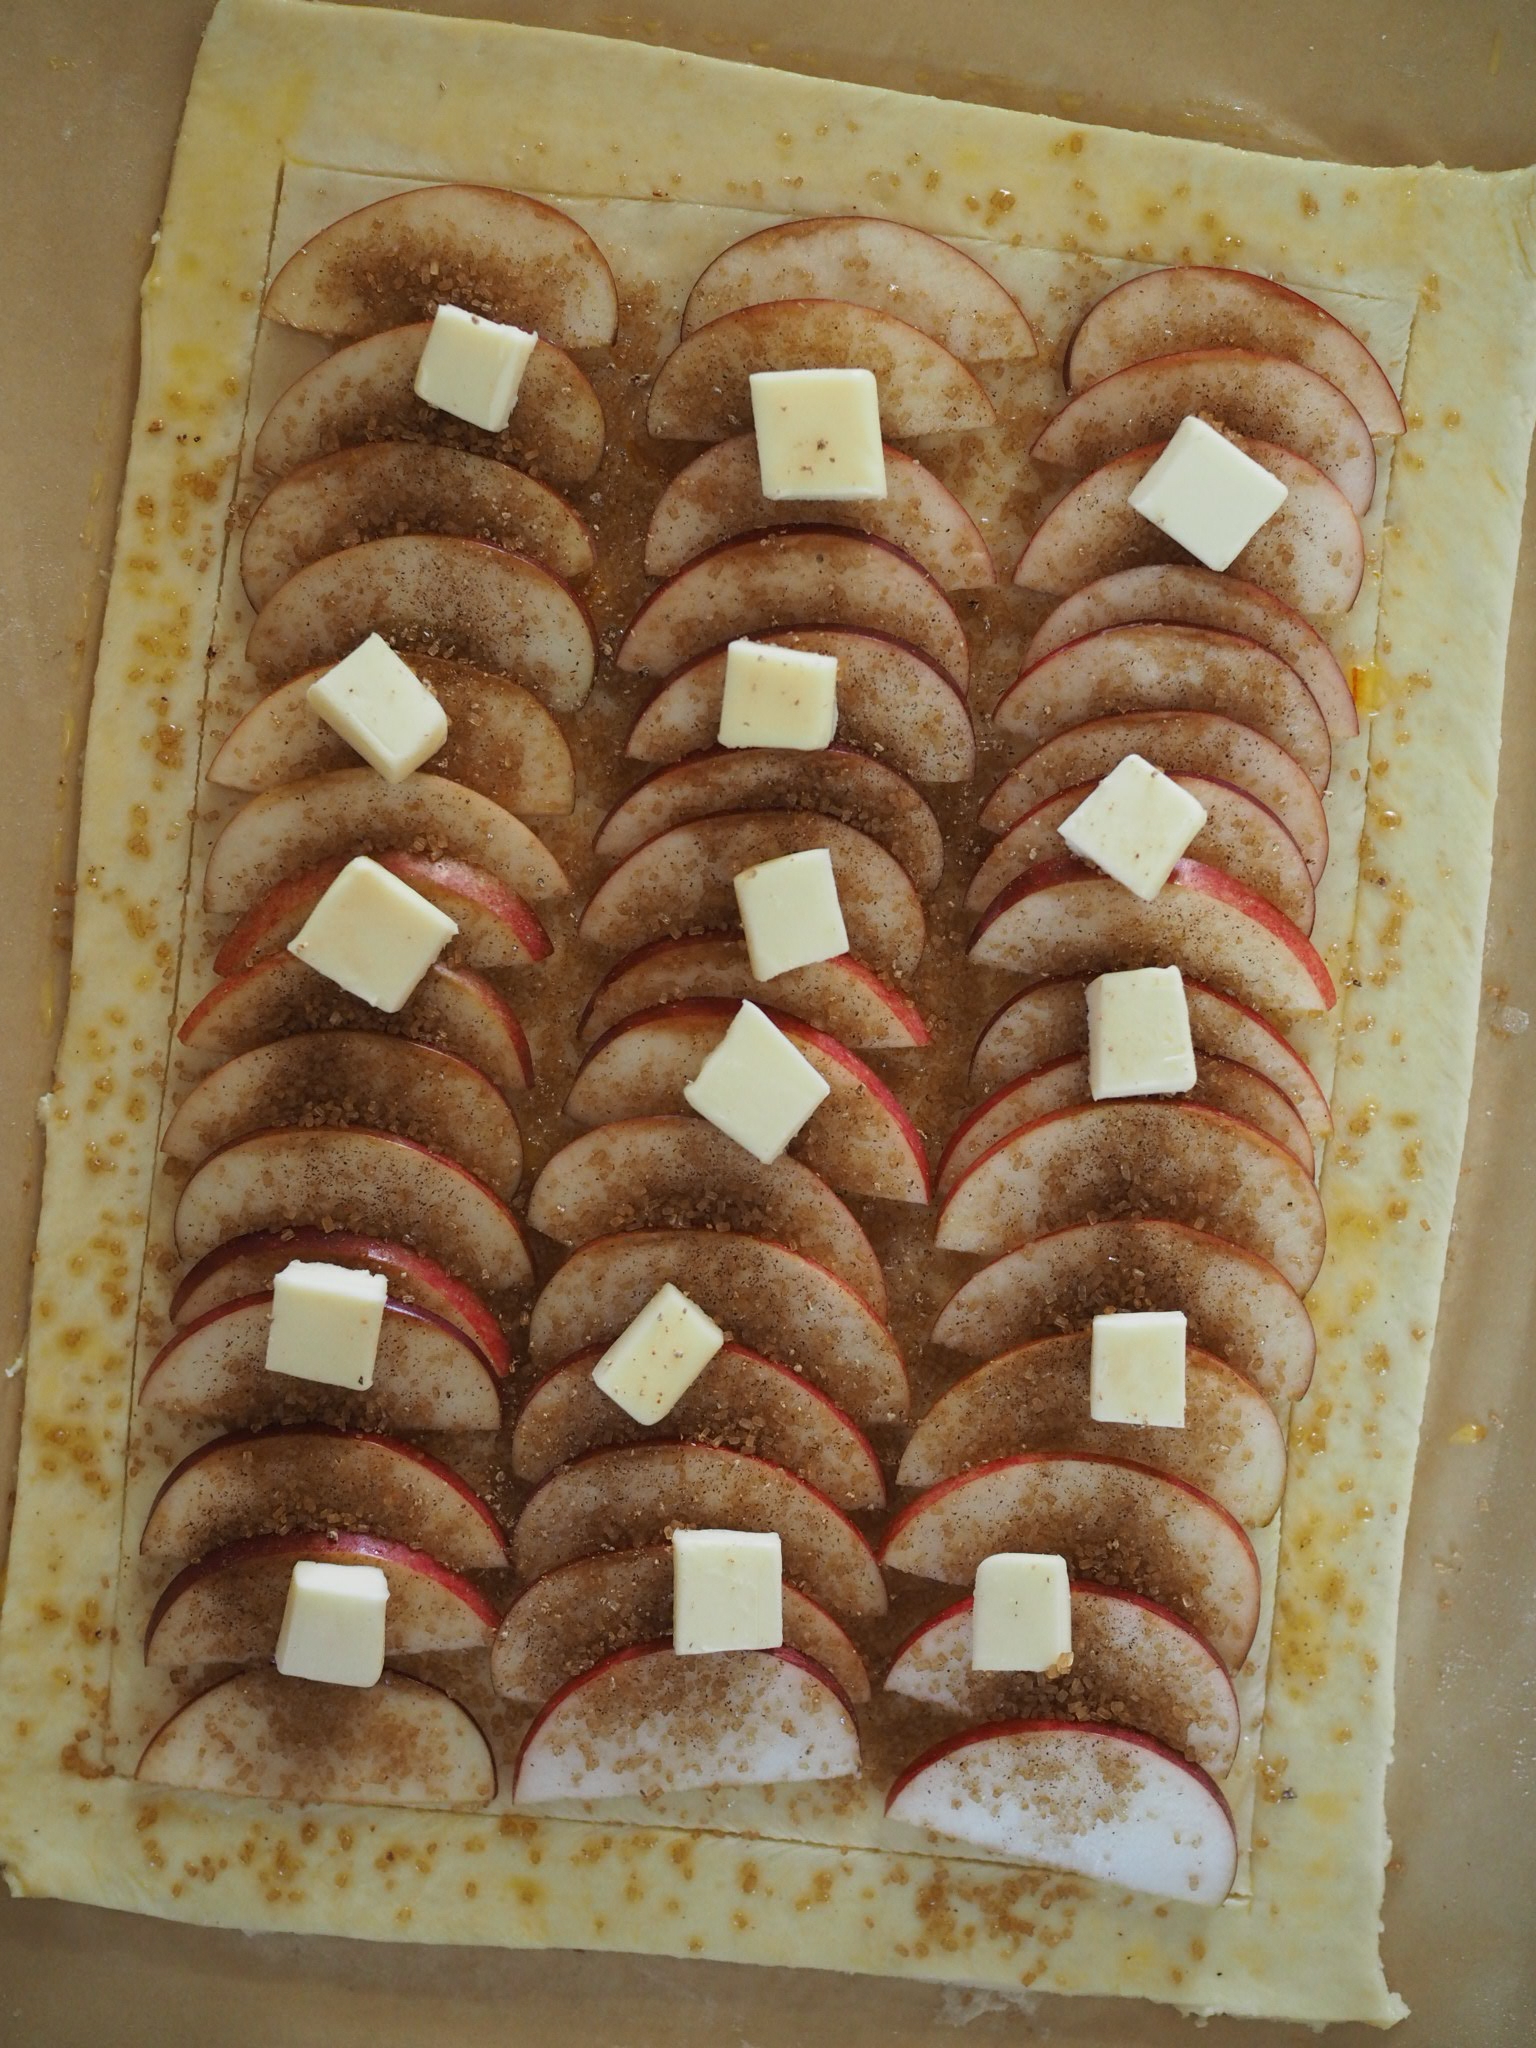
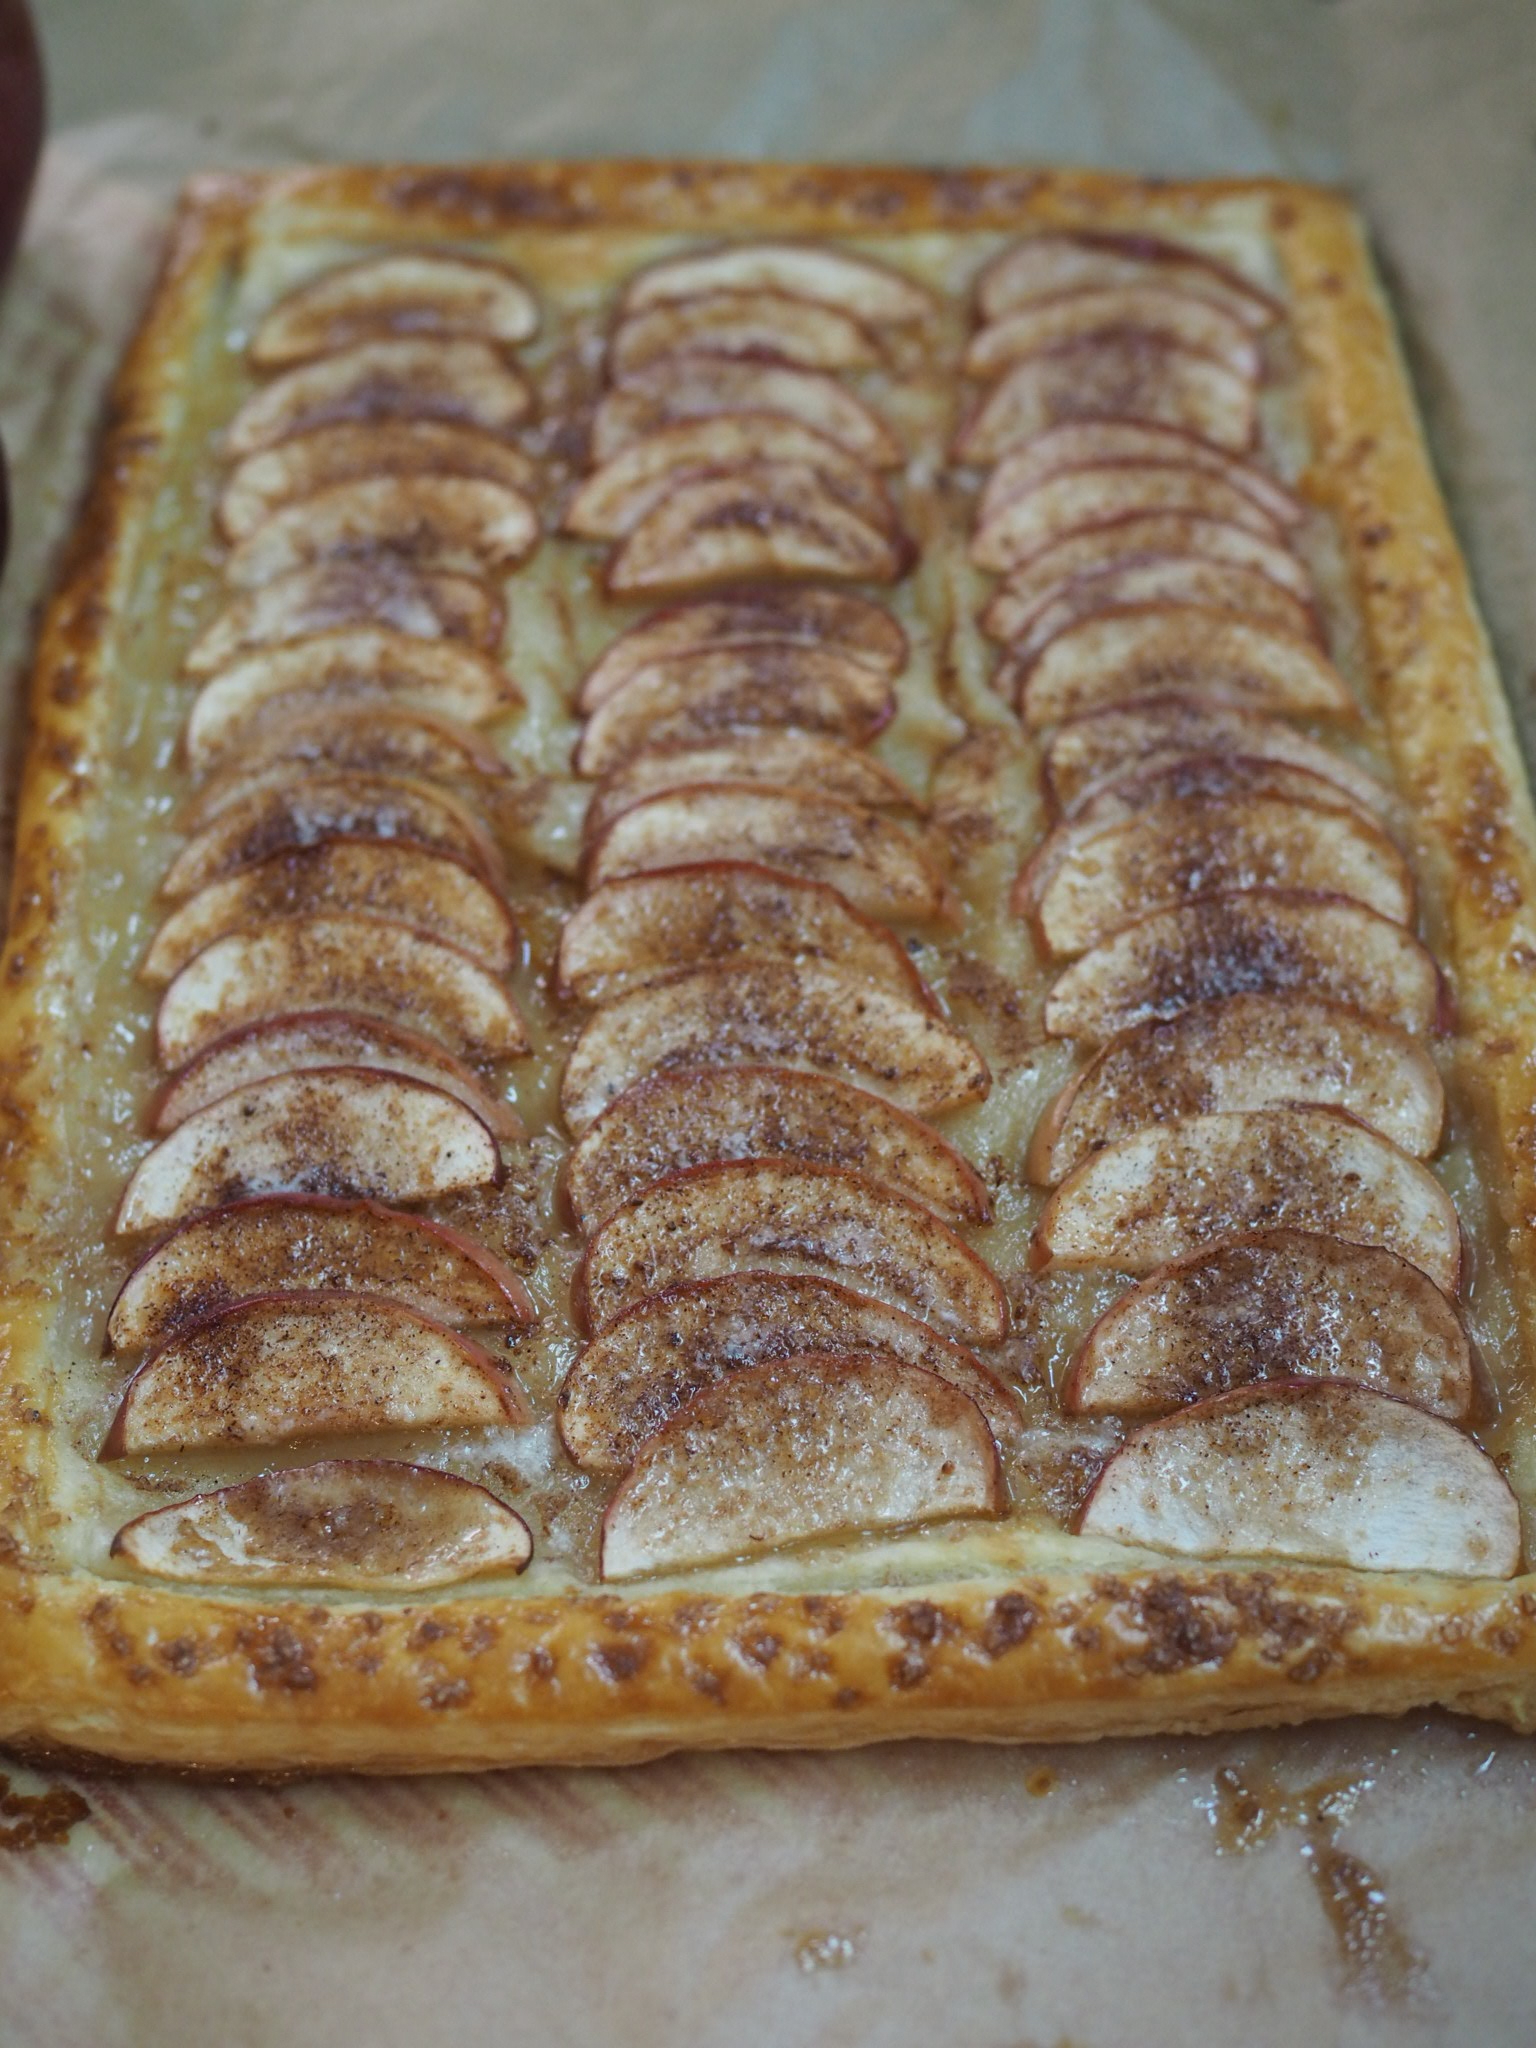
Arrange apples in three rows on center of tart, overlapping slightly. Mix together sugar, cinnamon and nutmeg in a small bowl. Sprinkle sugar and spice mixture over entire tart.
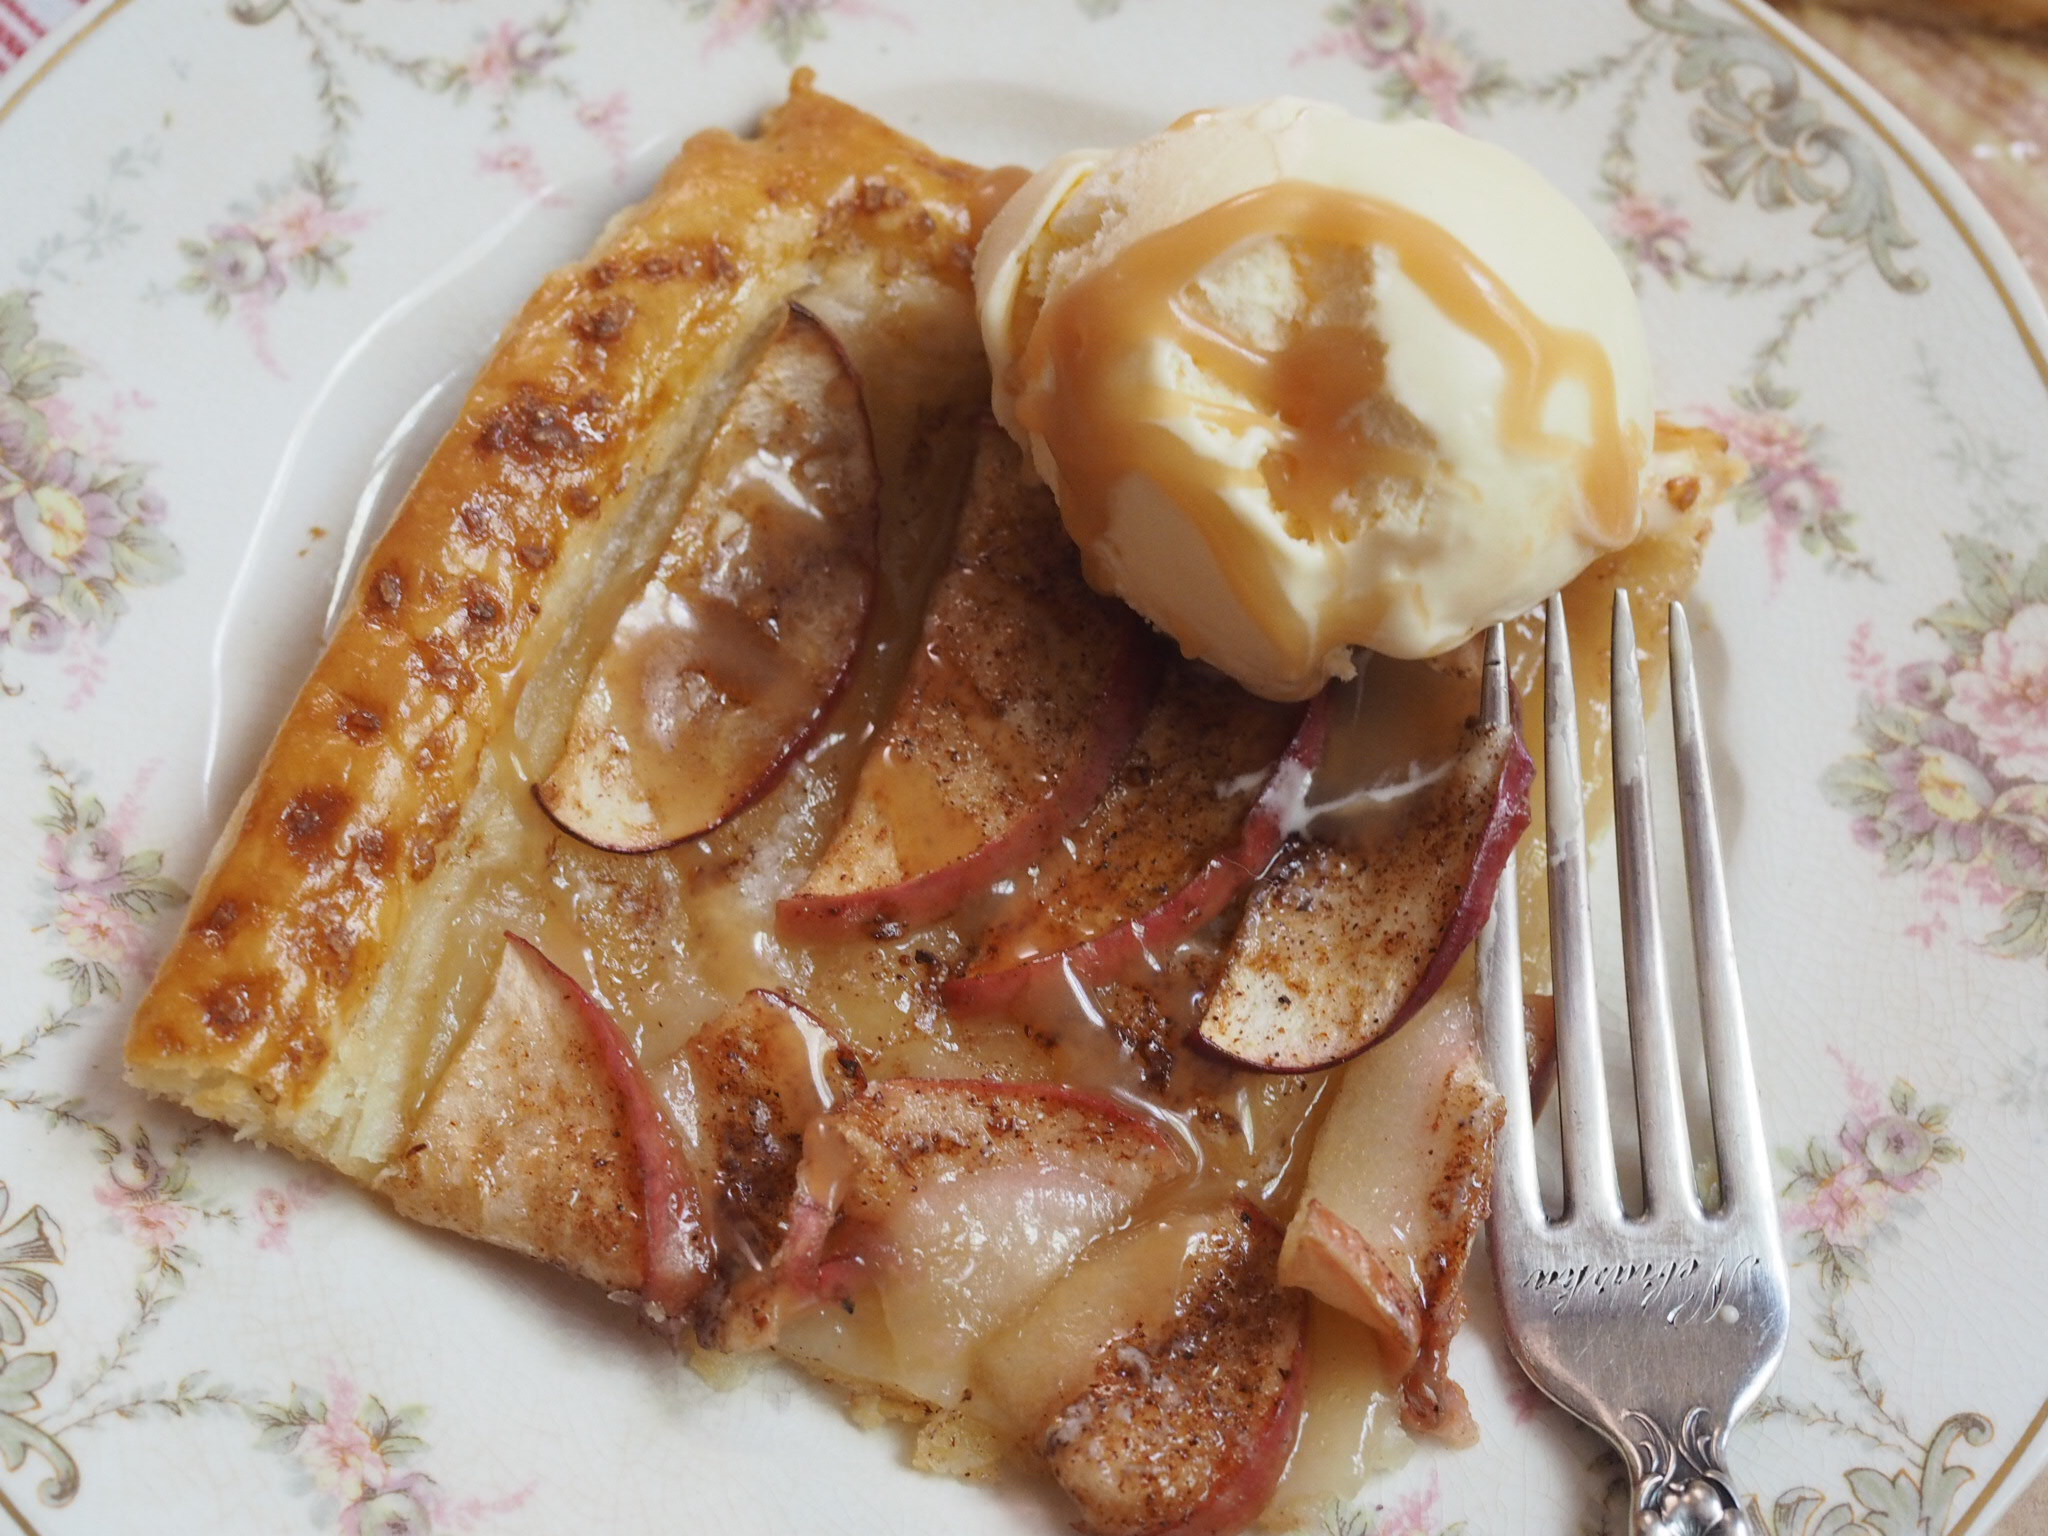
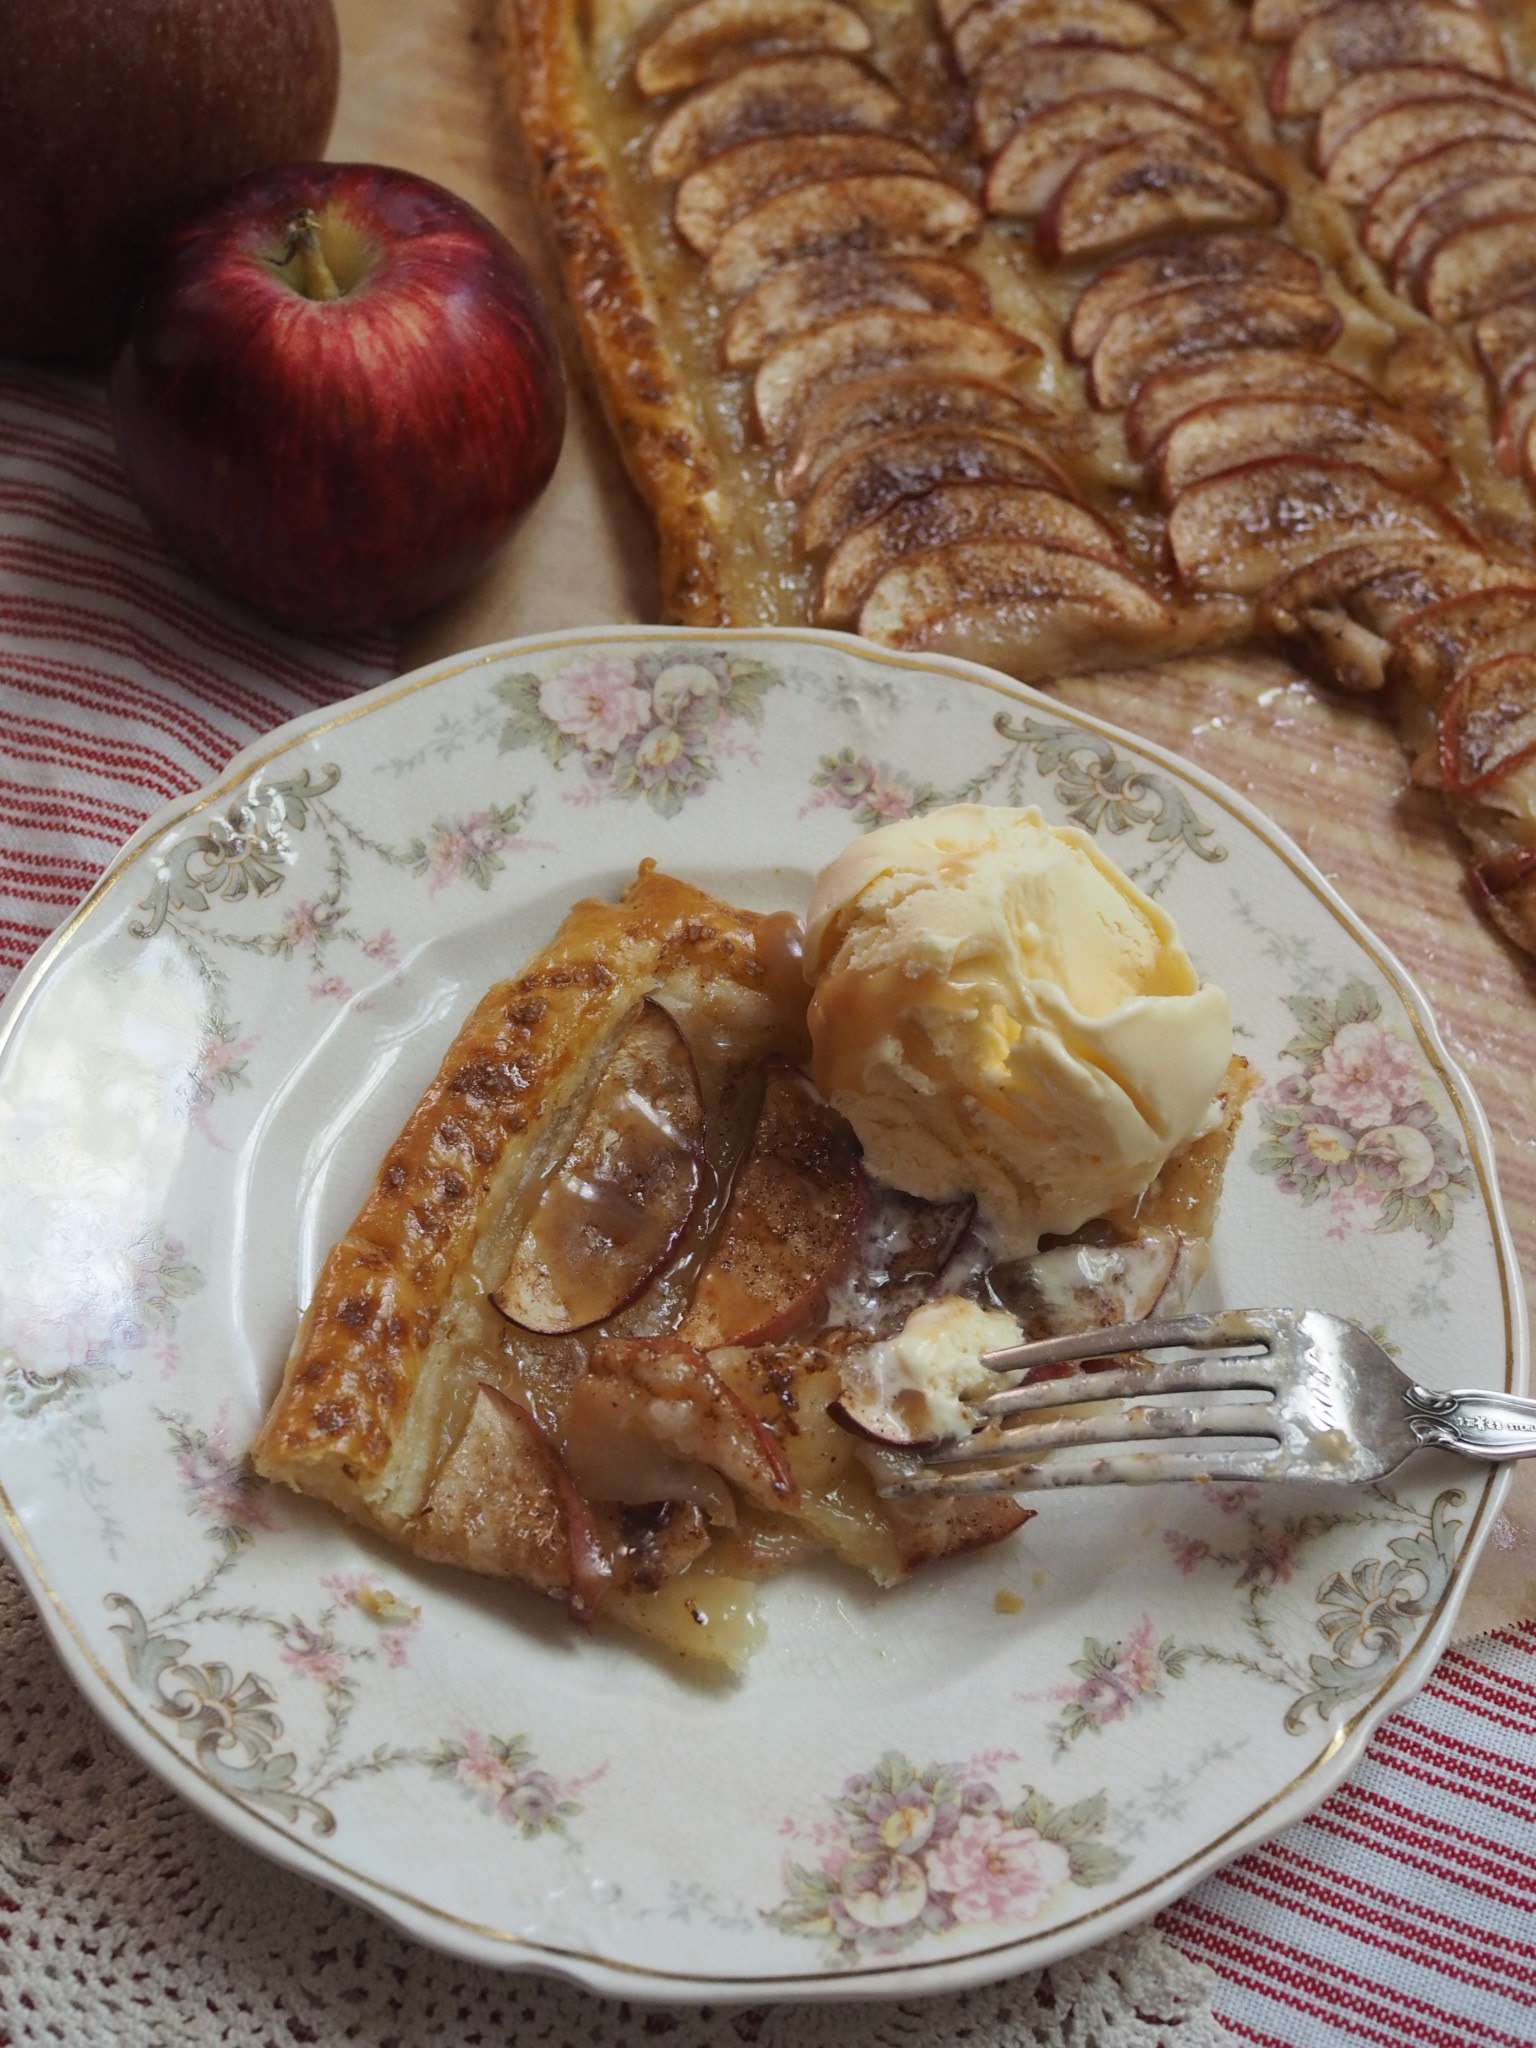
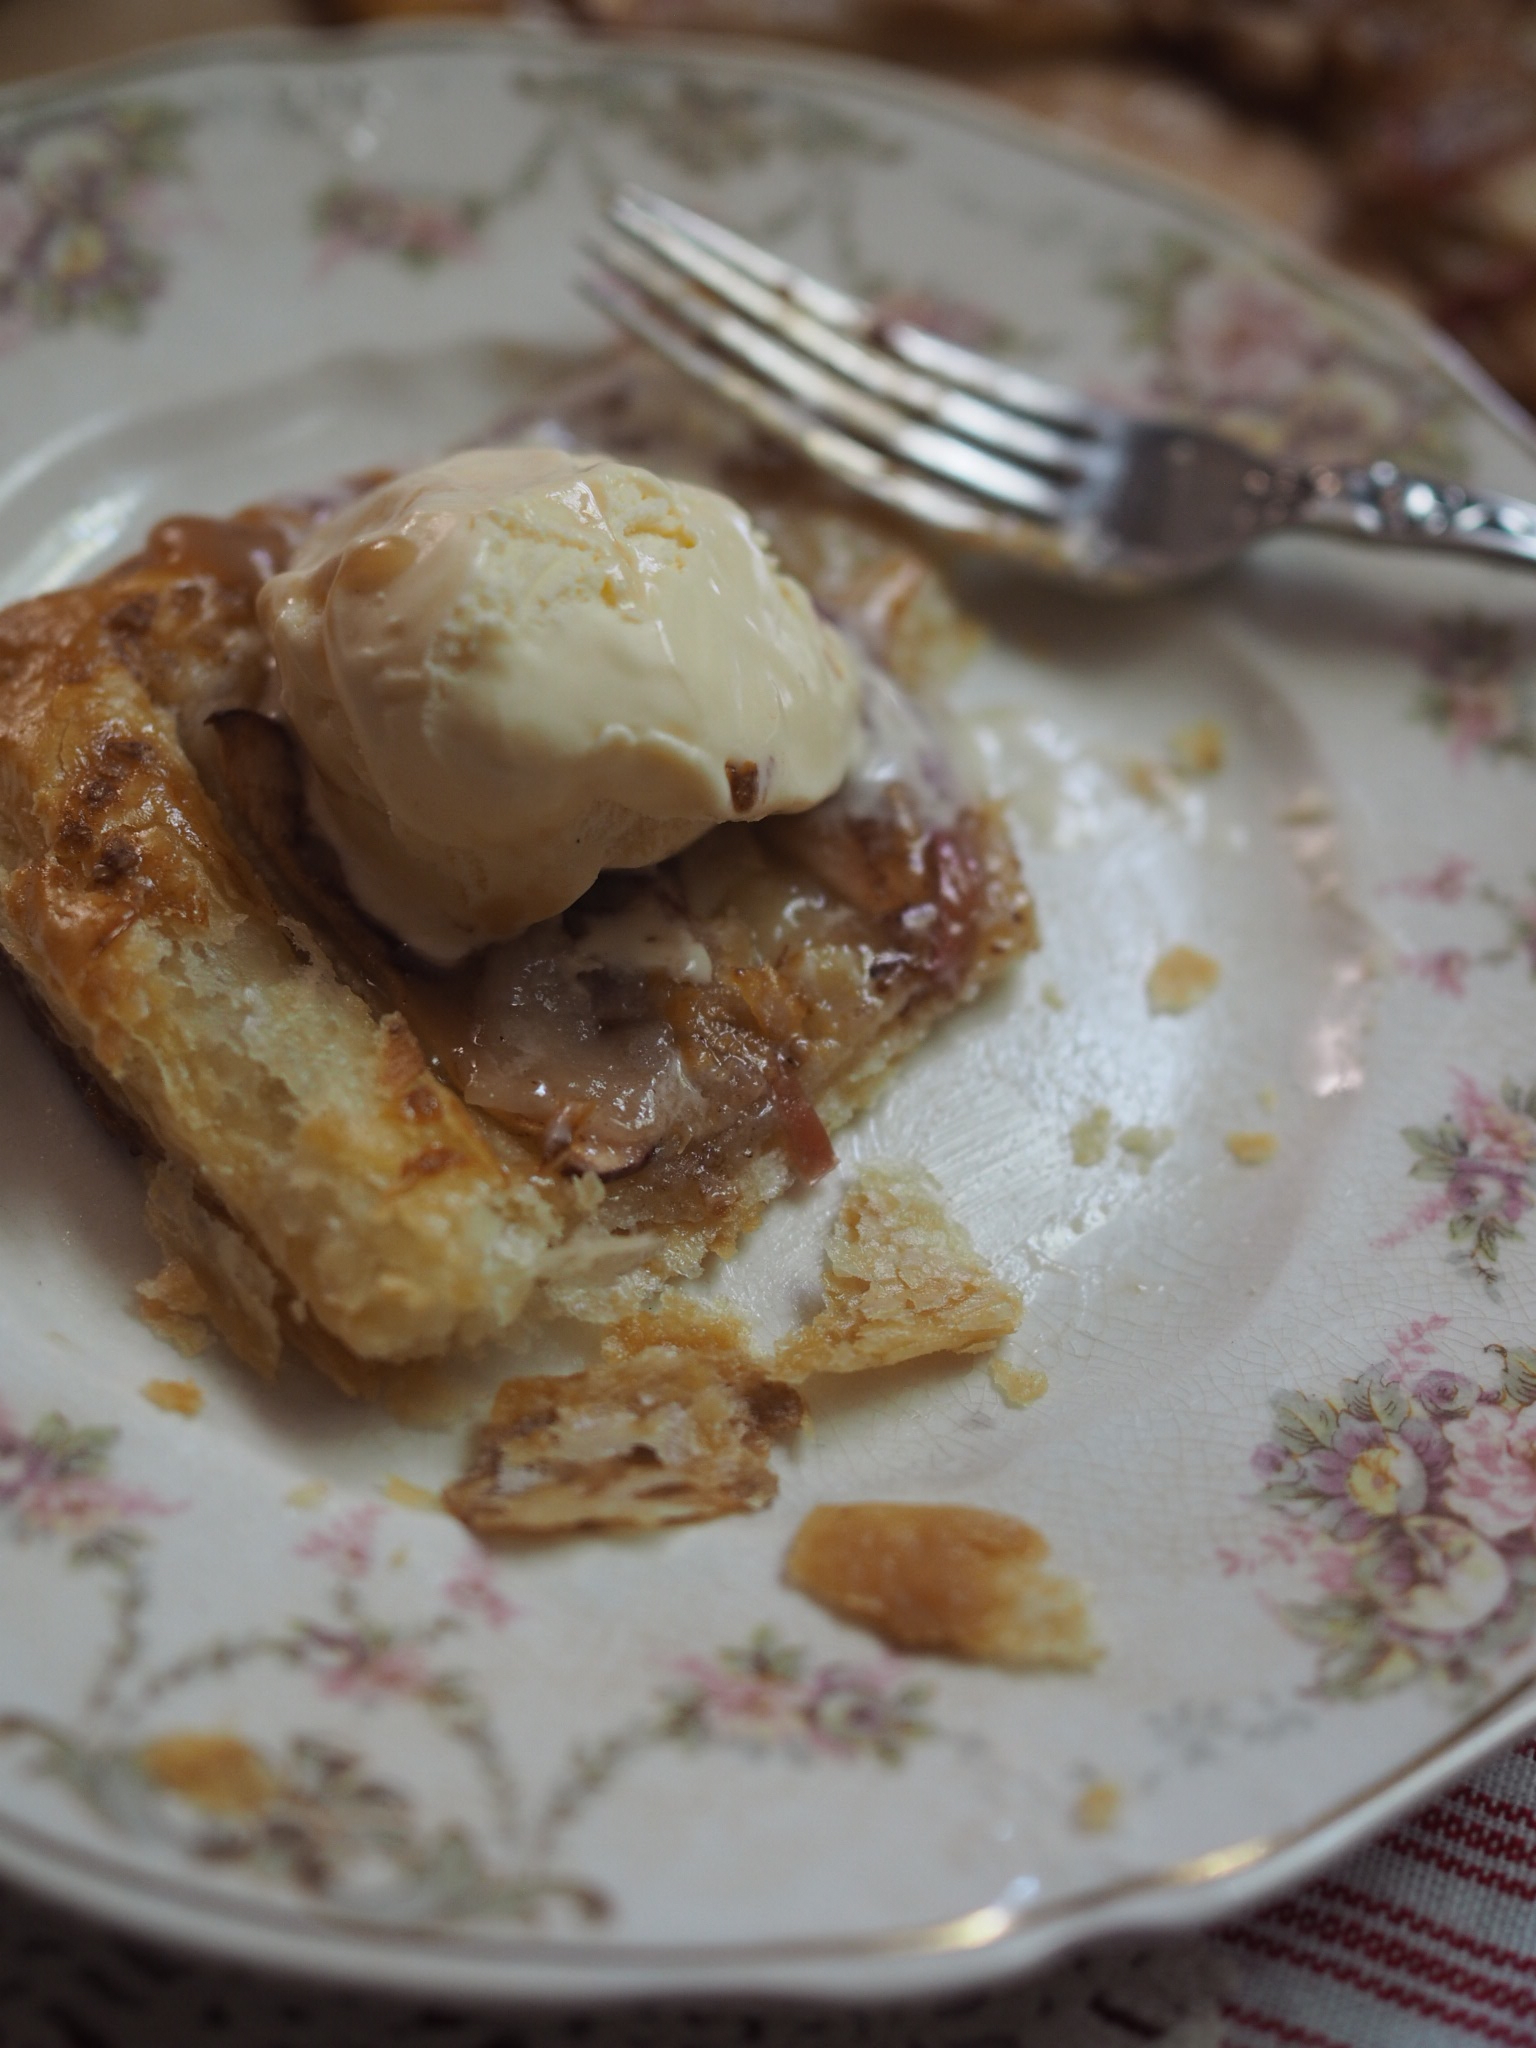
Bake for 30 minutes in the center of oven, until pastry is nicely browned. Cut into 6 slices. Serve warm with vanilla ice cream and caramel sauce.
To Print, see button at bottom of post.


Crisp Apple Tart (Tarte Fine Aux Pommes)
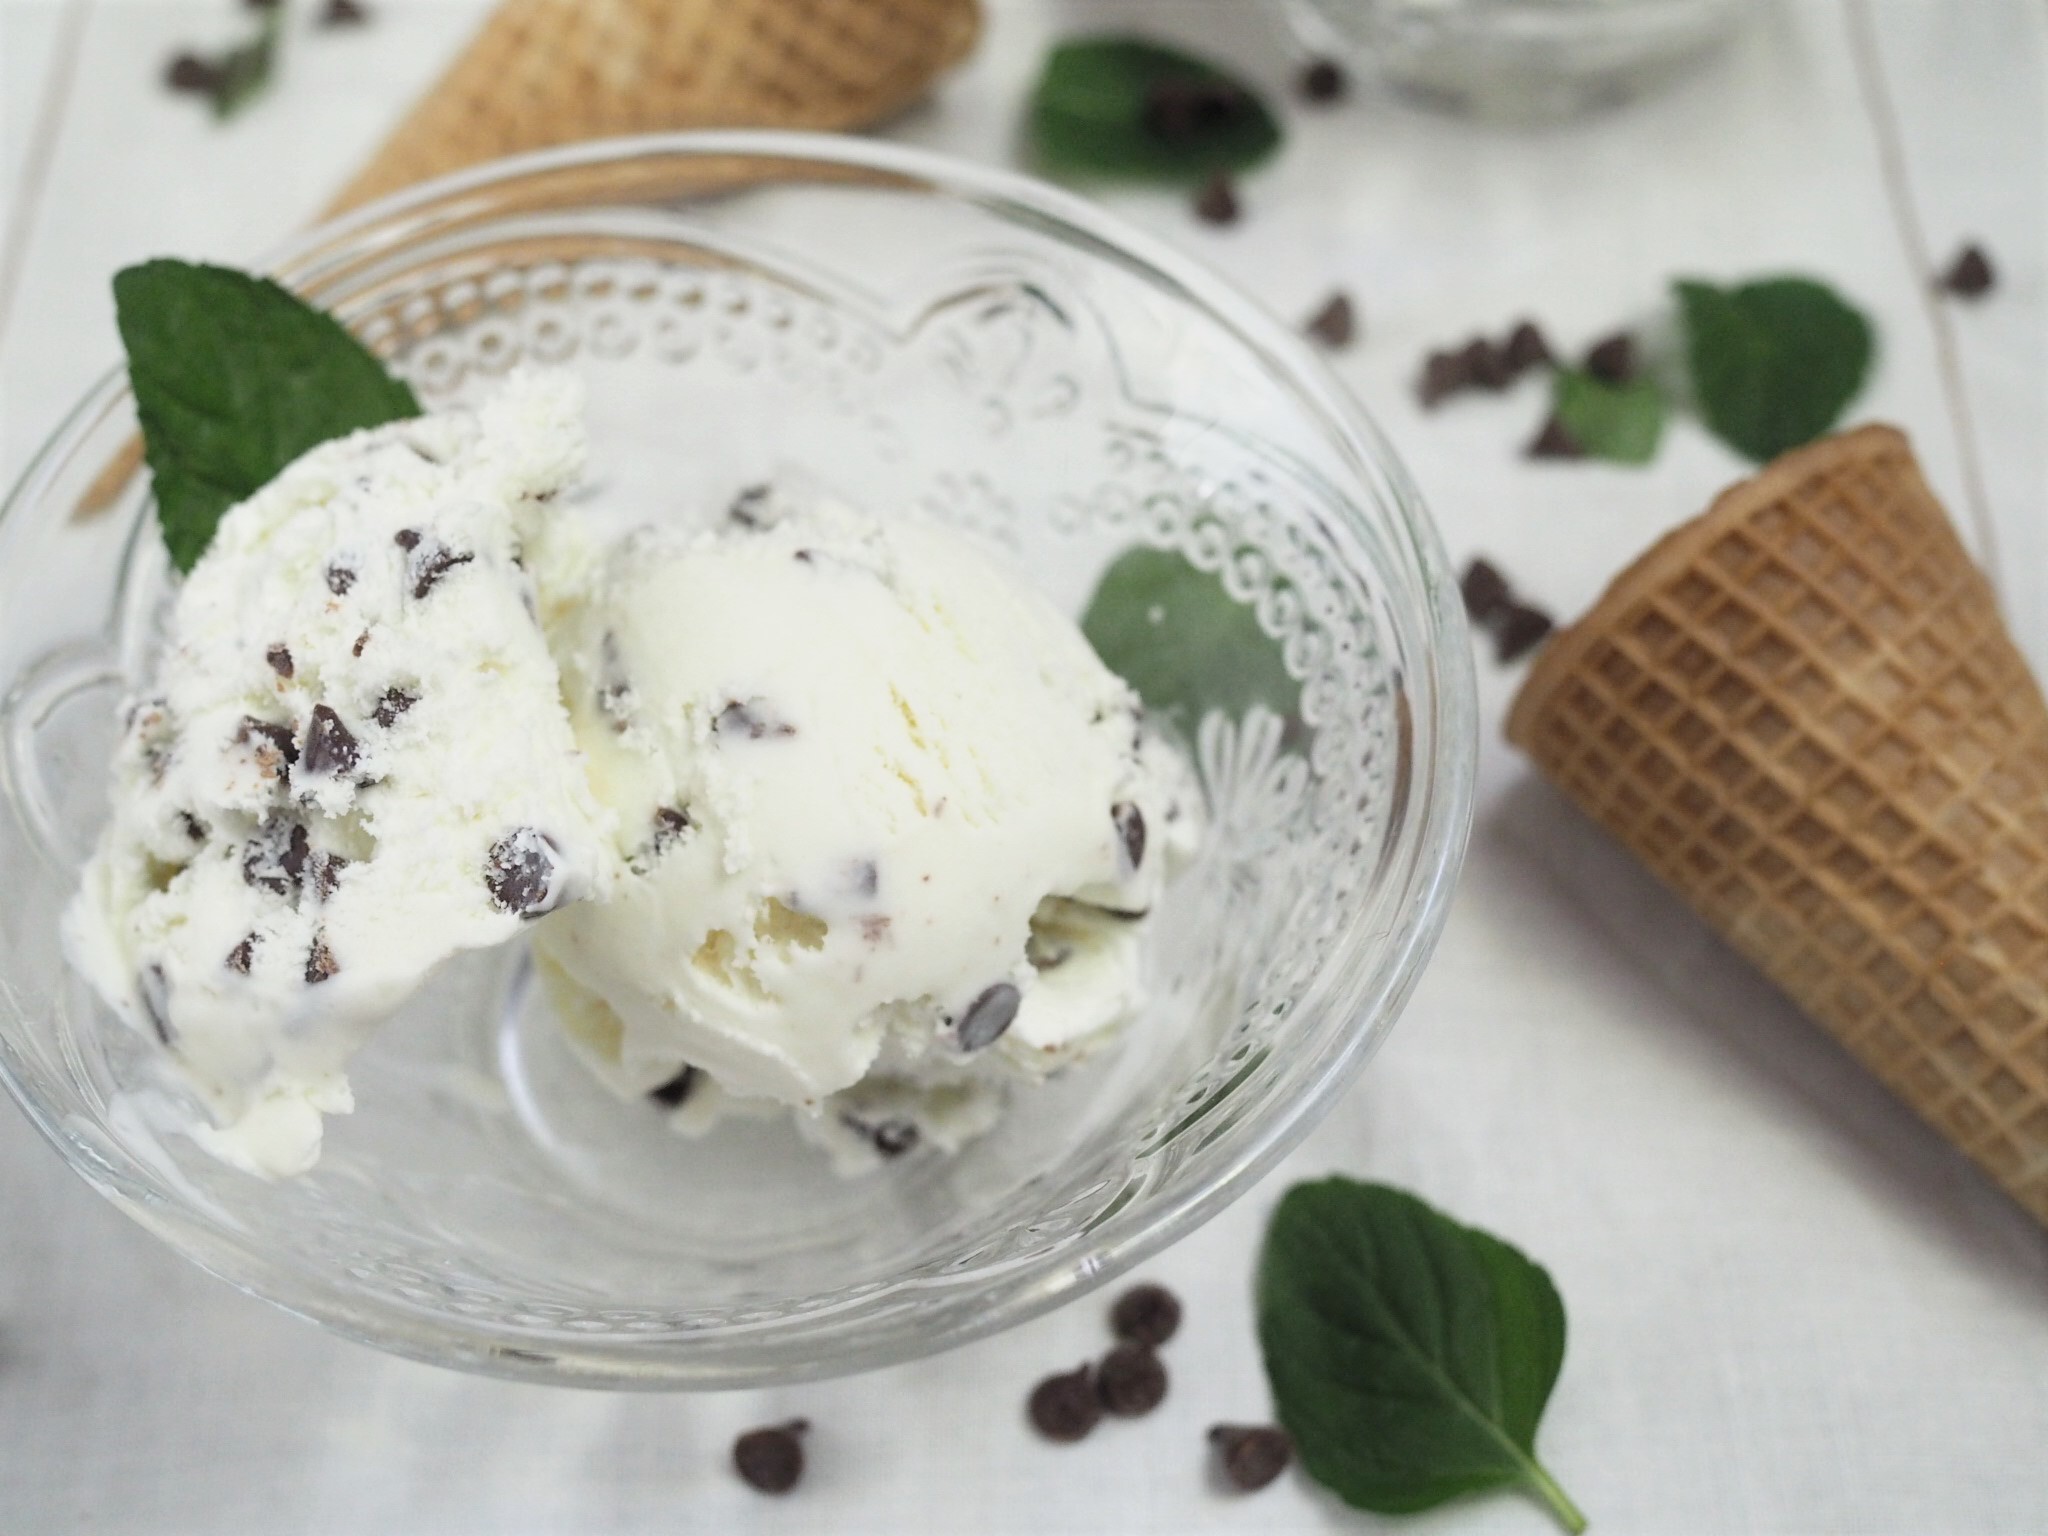
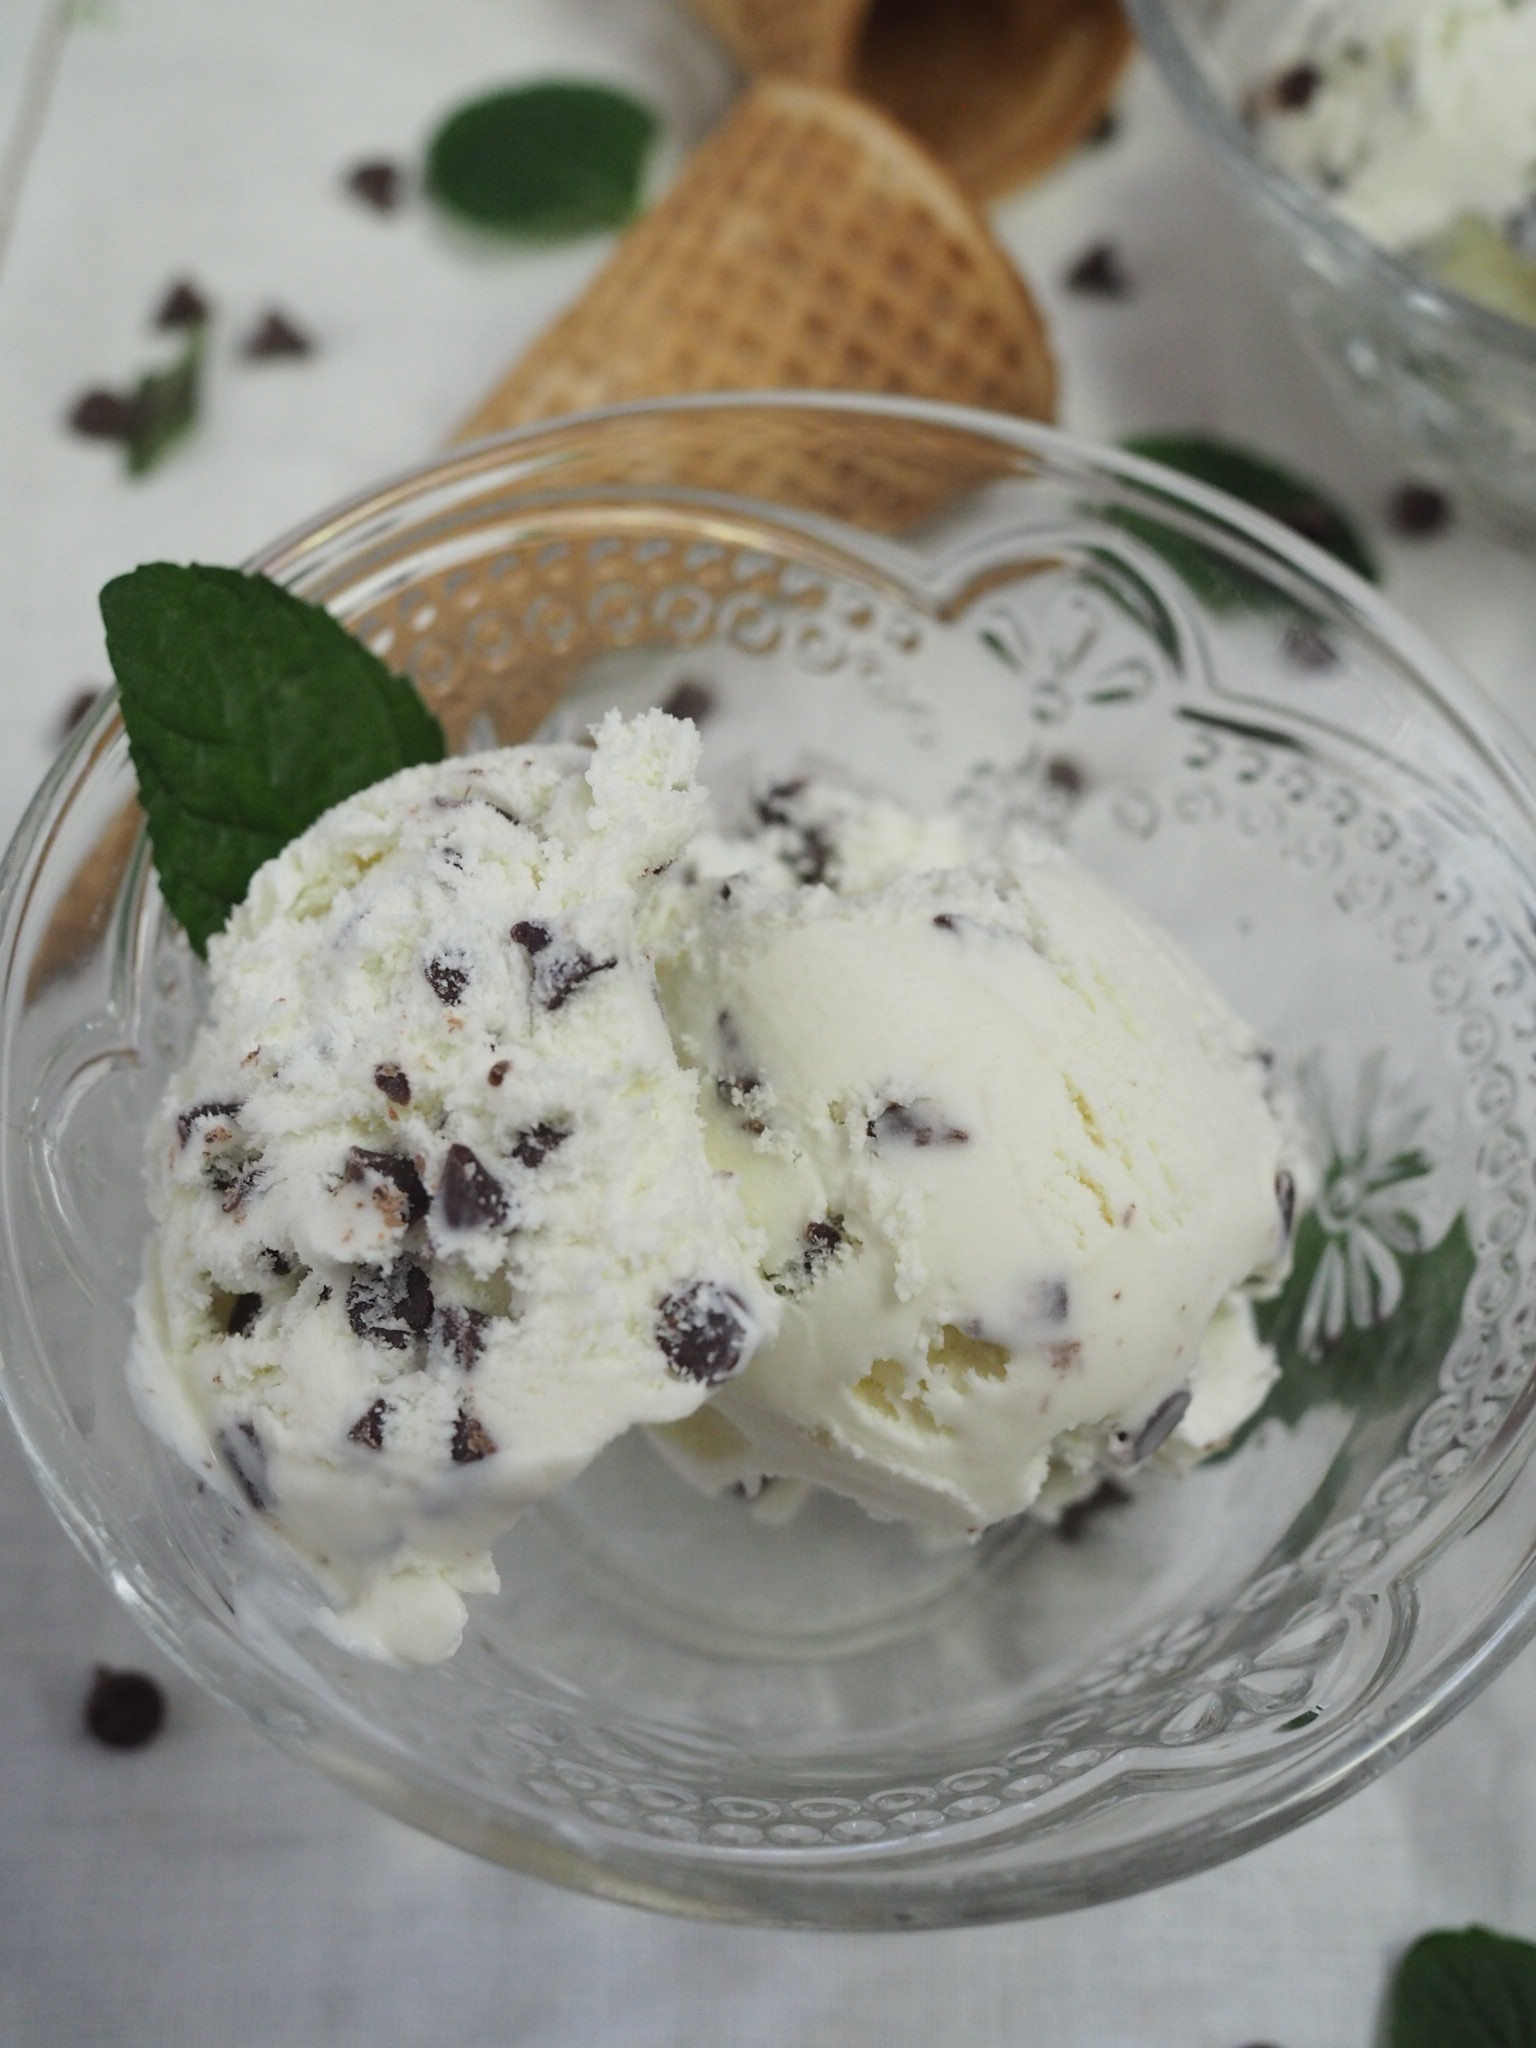
Serves 6 Ingredients: 1/2 puff pastry recipe or store bought frozen puff pastry, thawed 2 medium apples 1 egg 2 tablespoons orange marmalade 2 tablespoons demera sugar 1/4 tsp cinnamon Nutmeg 2 Tablespoons salted butterFresh Mint Ice Cream Recipe (with Chocolate Chips)

Is there anything more summery than ice cream?
Growing up, we had an ice cream maker. It was a behemoth of a thing, one of the old-fashion kinds that had an electric churn inside an outer container you had to fill with crushed ice and rock salt. We didn't use it much, rock salt and heavy cream weren't things we usually had sitting around the house, but once a summer it would make an appearance. The sound of the motor still rings clear in my mind, a sound of anticipation, the harbinger of deliciousness to come. When we did make it, it was always vanilla. I never recall getting any fancier than that, but to a kid, it was enough.
When Mr. Cleaver and I got married, we got a small, more modern ice cream maker as a wedding gift. It held about a quart and had a bowl you froze in the freezer, no rock salt required. I've tried making a dozen or so batches or ice cream and sorbet in that maker, with limited success. It never seemed to truly freeze/whip up properly and the ice cream would melt ridiculously fast. So this summer we decided to upgrade. Based on the recommendation of America's Test Kitchen, we purchased a Cuisinart ICE-21 (in pink of course!), and while we've only used it twice thus far, these results have been so much better that the bowl has earned a permanent spot in our freezer and heavy cream a regular spot on our shopping list.
My favorite part of homemade ice cream is using what's in season to make it really fresh ice cream. The obvious options - strawberries, raspberries, etc - all make delicious ice creams and sorbets, but the herb garden is also a great place to turn to for ingredients. Especially in the early weeks of a garden before the berries ripen - and anyway, it doesn't get any more classic than Mint Chocolate Chip. Unless you count vanilla, of course.
Fresh Mint Ice Cream with Chocolate Chips
Makes 1 1/2 Quarts (approx. 12 servings)
- 3/4 cup granulated sugar
- pinch salt
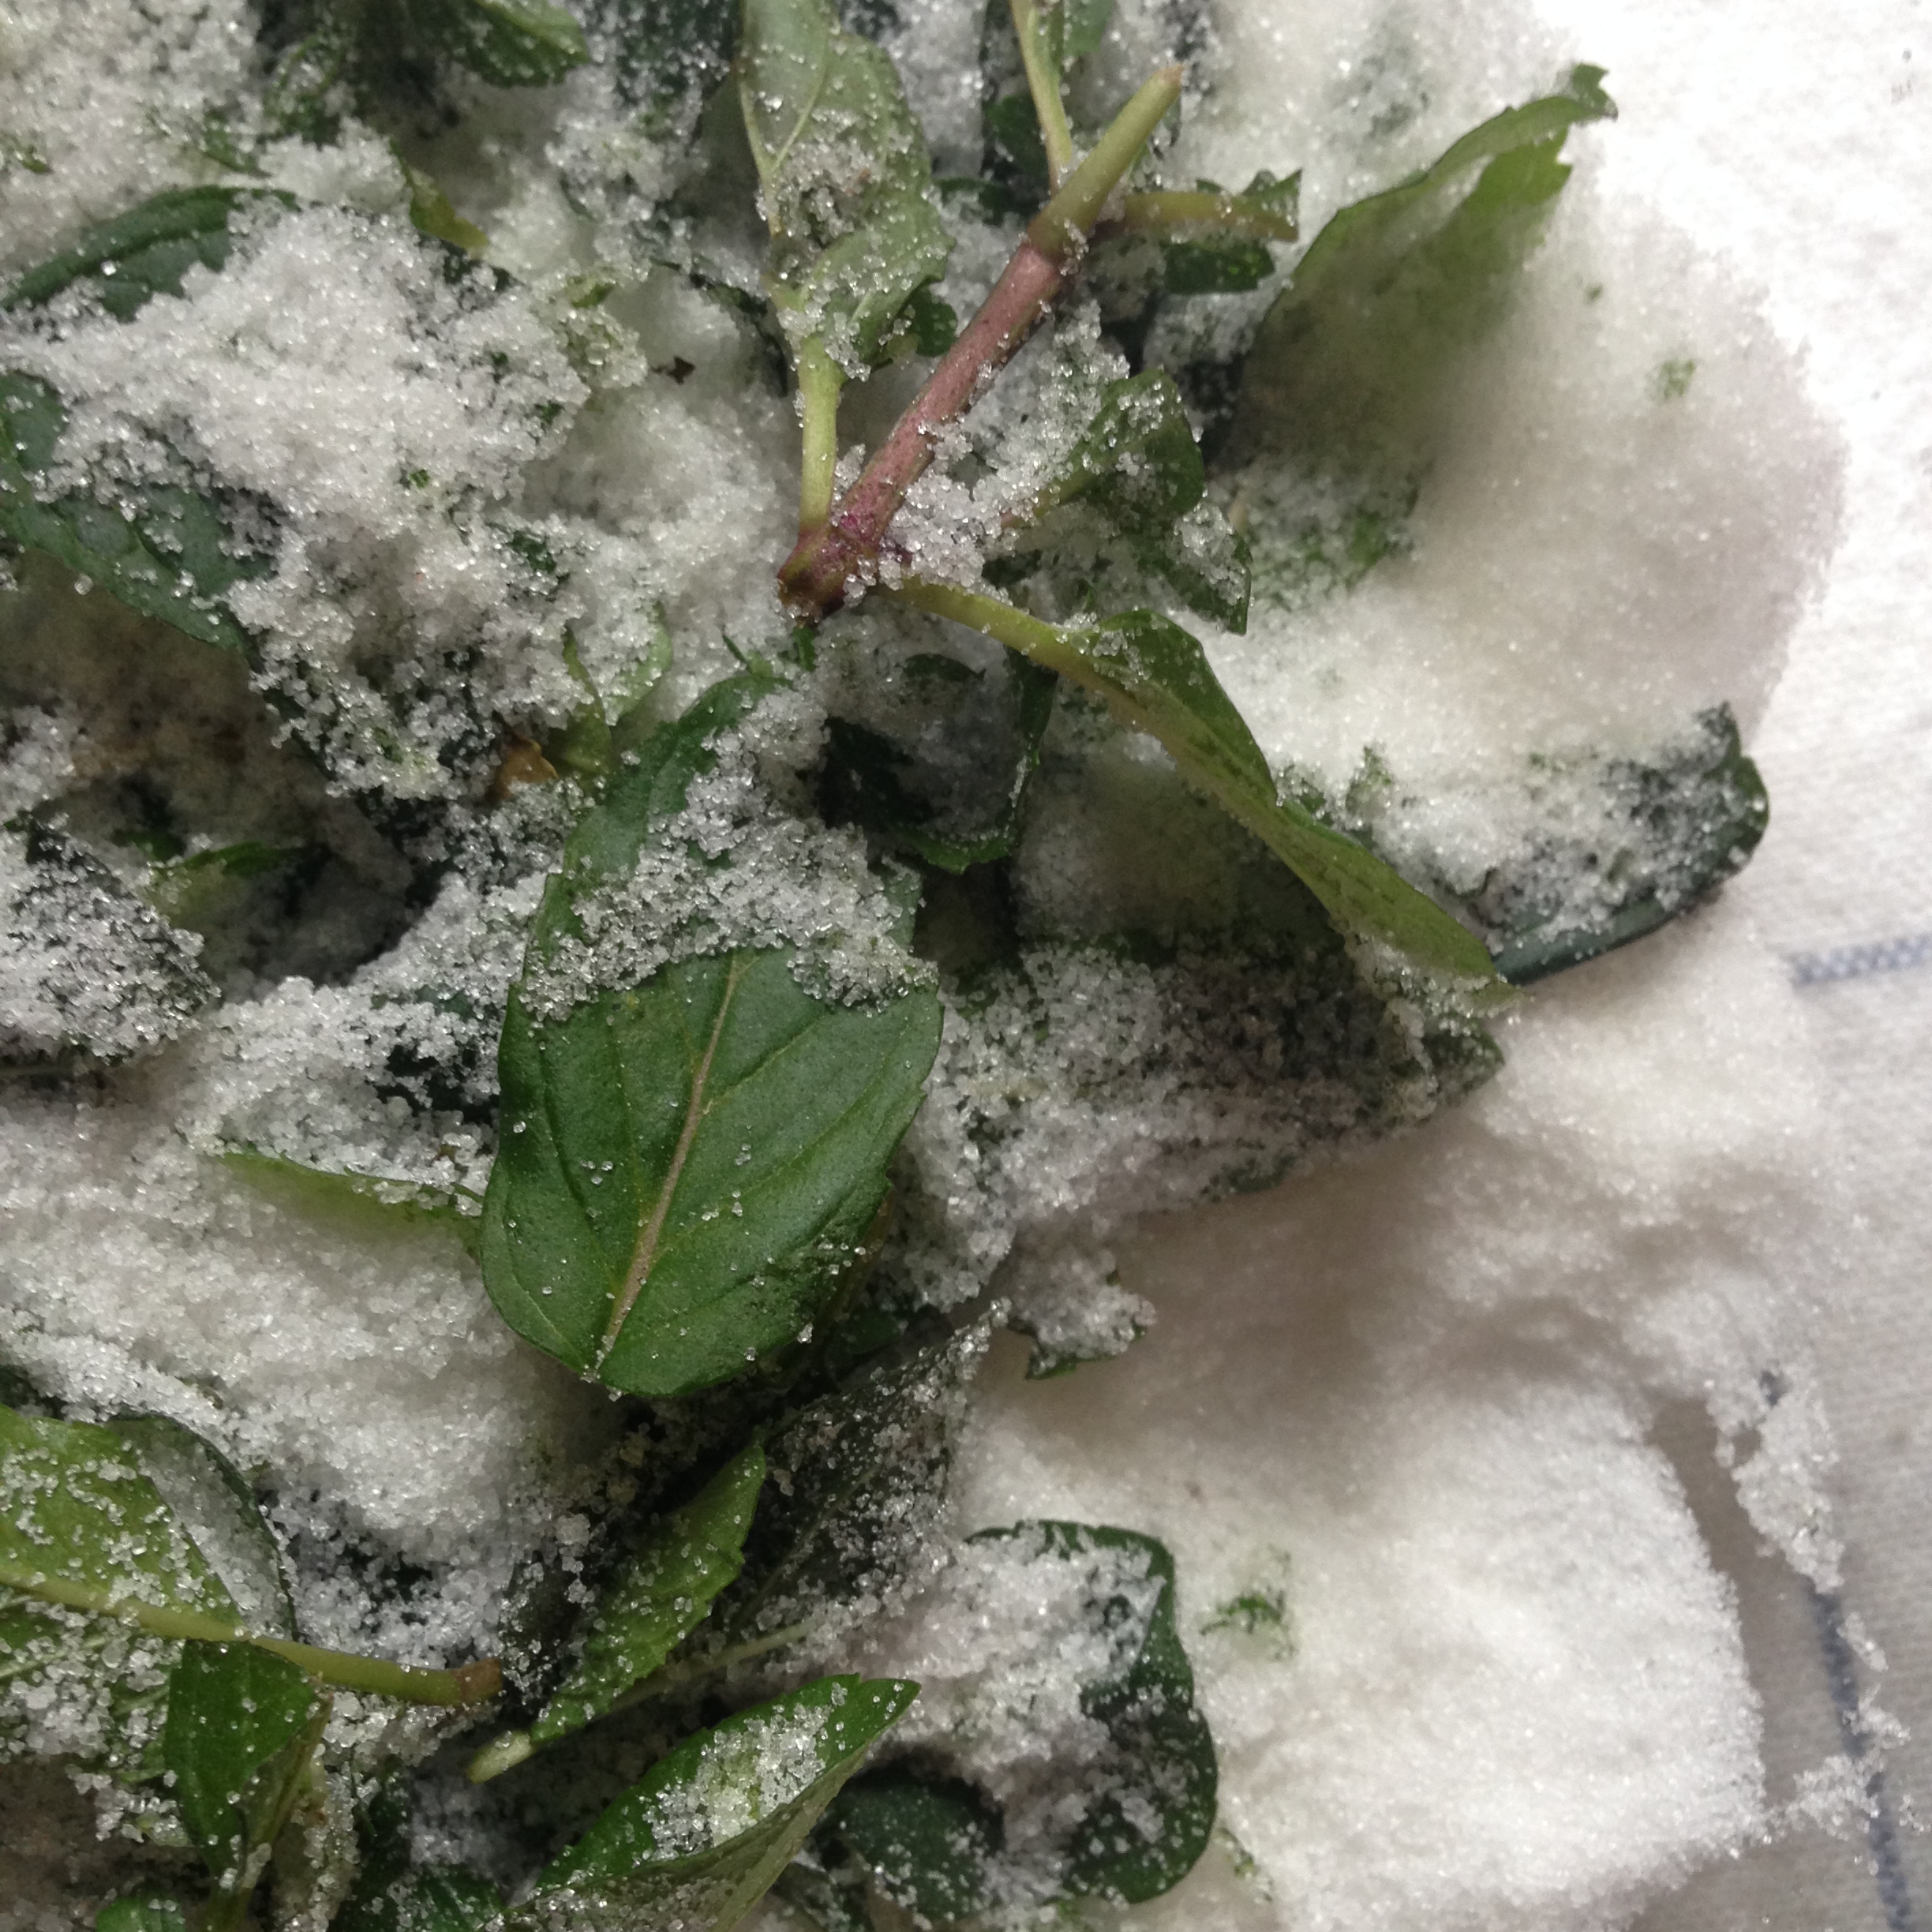
- 2 cups fresh mint leaves (peppermint or chocolate mint preferred)
- 1 cup 2% milk
- 2 cups heavy cream
- 1 Tablespoon vanilla extract
- 1 to 1 1/2 cups mini chocolate chips or chopped chocolate (optional)
Combine sugar and salt in a large bowl and top with mint leaves. With a muddler or the bottom of a sturdy wooden spoon, crush mint into the sugar to release oils. Pour in milk and cream and stir until sugar dissolves. Cover bowl and place in back of refrigerator, preferably overnight, but a minimum of 3 hours until mixture is quiet cold.
Set up ice cream maker, per manufacturer's directions. Strain mint leaves out of milk/cream mix and pour into ice cream maker. When ice cream begins to appear firm, add chocolate. While tempting to eat directly out of the machine, taste a bit, and then scoop the rest into a reusable container and store in the freezer for several hours until firm. Serve in bowls or cones and enjoy!
Fresh Mint Ice Cream with Chocolate Chips
Serves 12 (1 1/2 quarts) Ingredients: 3/4 cup granulated sugar pinch of salt 2 cups fresh mint leaves (pepperment or chocolate mint preferred) 1 cup milk 2 cups heavy cream 1 Tbl vanilla extract 1 to 1 1/2 cups mini chocolate chips or chopped chocolateLemon Lavender Poundcake Recipe

To say I have a love affair with putting citrus in my baked goods, would be putting it mildly. I generally feel that there are few things that aren't improved by bit a fresh zest, and this poundcake definitely falls into the better zesty category. With some added flavor from honey and aromatics from the inclusion of lavender buds, this is the perfect spring dessert. Not too sweet, with an excellent crumb, and easy to transport to your next picnic.
To print, see button at bottom of post.
Lemon Lavender Poundcake
(serves 8)
- 3 large eggs -room temperature
- 3 Tbl milk
- 1 1/2 tsp vanilla
- 1 1/2 cups cake flour (or 1 cup + 5 Tbl all purpose flour + 3 Tbl cornstarch)
- 3/4 cup granulated sugar
- Zest of one lemon
- 3/4 tsp baking powder
- 1/4 tsp salt
- 13 Tbl (1 stick + 5 Tbl) unsalted butter - room temperature
- Confectioner's sugar (less than a cup)
Lavender Lemon Syrup
- 1/4 cup fresh lemon juice
- 4 Tbl honey
- 2 Tbl granulated sugar
- 1 tsp dried lavender buds
Make lavender lemon syrup by combining sugar, lemon juice, and honey in a small pan over medium heat and stirring until sugars are dissolved. Pour syrup over lavender buds in a heat proof container and cover. Set aside.
Preheat oven to 350 Degrees Fahrenheit. Grease and flour a 6-cup loaf pan or line with parchment paper (preferred).
In a medium bowl, combine eggs, milk and vanilla. In a separate bowl, shift together cake flour, sugar, baking powder and salt. Add lemon zest to flour mixture and combine.
Add half of the egg mixture and all of the butter to the flour mixture. Beat with a wooden spoon until ingredients are moist and well combined. Butter should be mixed well, throughout with no visible chunks. Gradually add the egg mixture in two parts, combining each fully before adding the next. Batter will be very thick.
Scrape batter into prepared pan and spread evenly in container, smoothing the top.
Bake until a tester inserted in the center comes out clean and top is a golden brown, about 55 minutes.
After baking, remove cake from oven. Keeping the cake in the pan, place on a rack and poke all over with a wooden skewer or long toothpick. Strain lavender buds from syrup and brush strained syrup generously over the top of the cake.
Let cake sit in pan for 10 minutes, then remove and place on rack. Brush sides generously with syrup. reserving about 1/8 cup of syrup. Add confectioner's sugar Tablespoon by Tablespoon to reserved syrup until it forms a thick, opaque glaze.
When cake has cooled, place on serving platter and pour glaze on top. Decorate with lemon slices and lavender as desired. To store, wrap tightly in plastic wrap and keep at room temperature.

Lemon Lavender Poundcake Recipe
Serves 8 Ingredients: 3 large eggs -room temperature 3 Tbl milk 1 1/2 tsp vanilla 1 1/2 cups cake flour (or 1 cup + 5 Tbl all purpose flour + 3 Tbl cornstarch) 3/4 cup granulated sugar Zest of one lemon 3/4 tsp baking powder 1/4 tsp salt 13 Tbl (1 stick + 5 Tbl) unsalted butter - room temperature Confectioner's sugar (less than a cup) 1/4 cup fresh lemon juice 4 Tbl honey 2 Tbl granulated sugar 1 tsp dried lavender budsChocolate Chip Cupcakes with Quick Buttercream Frosting
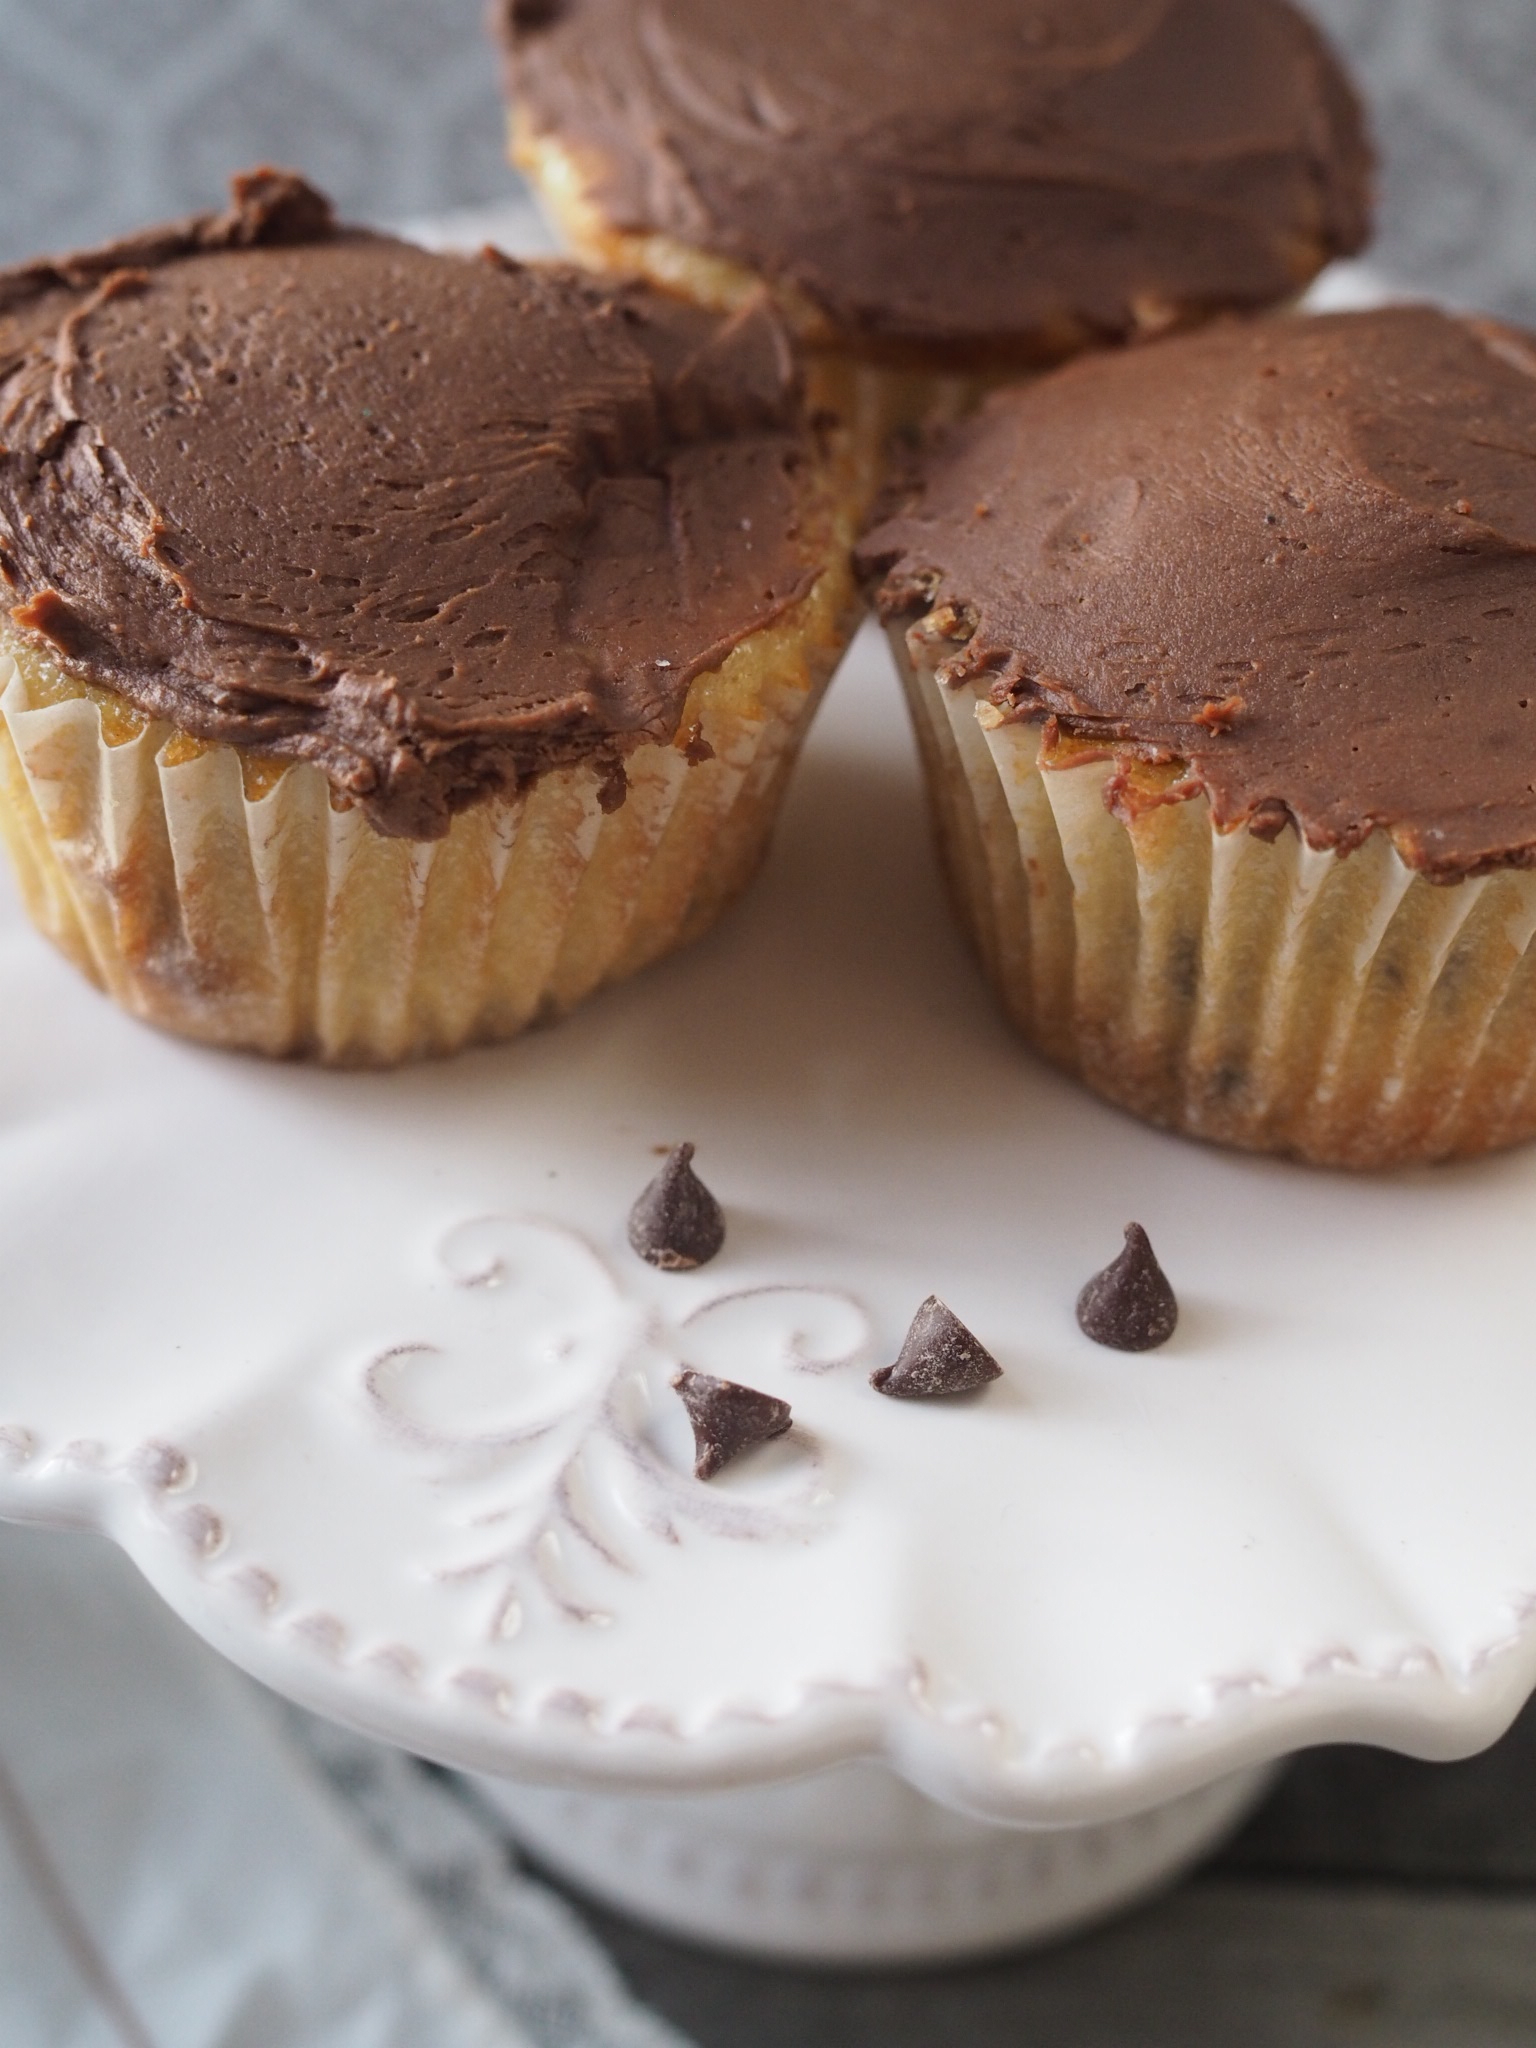
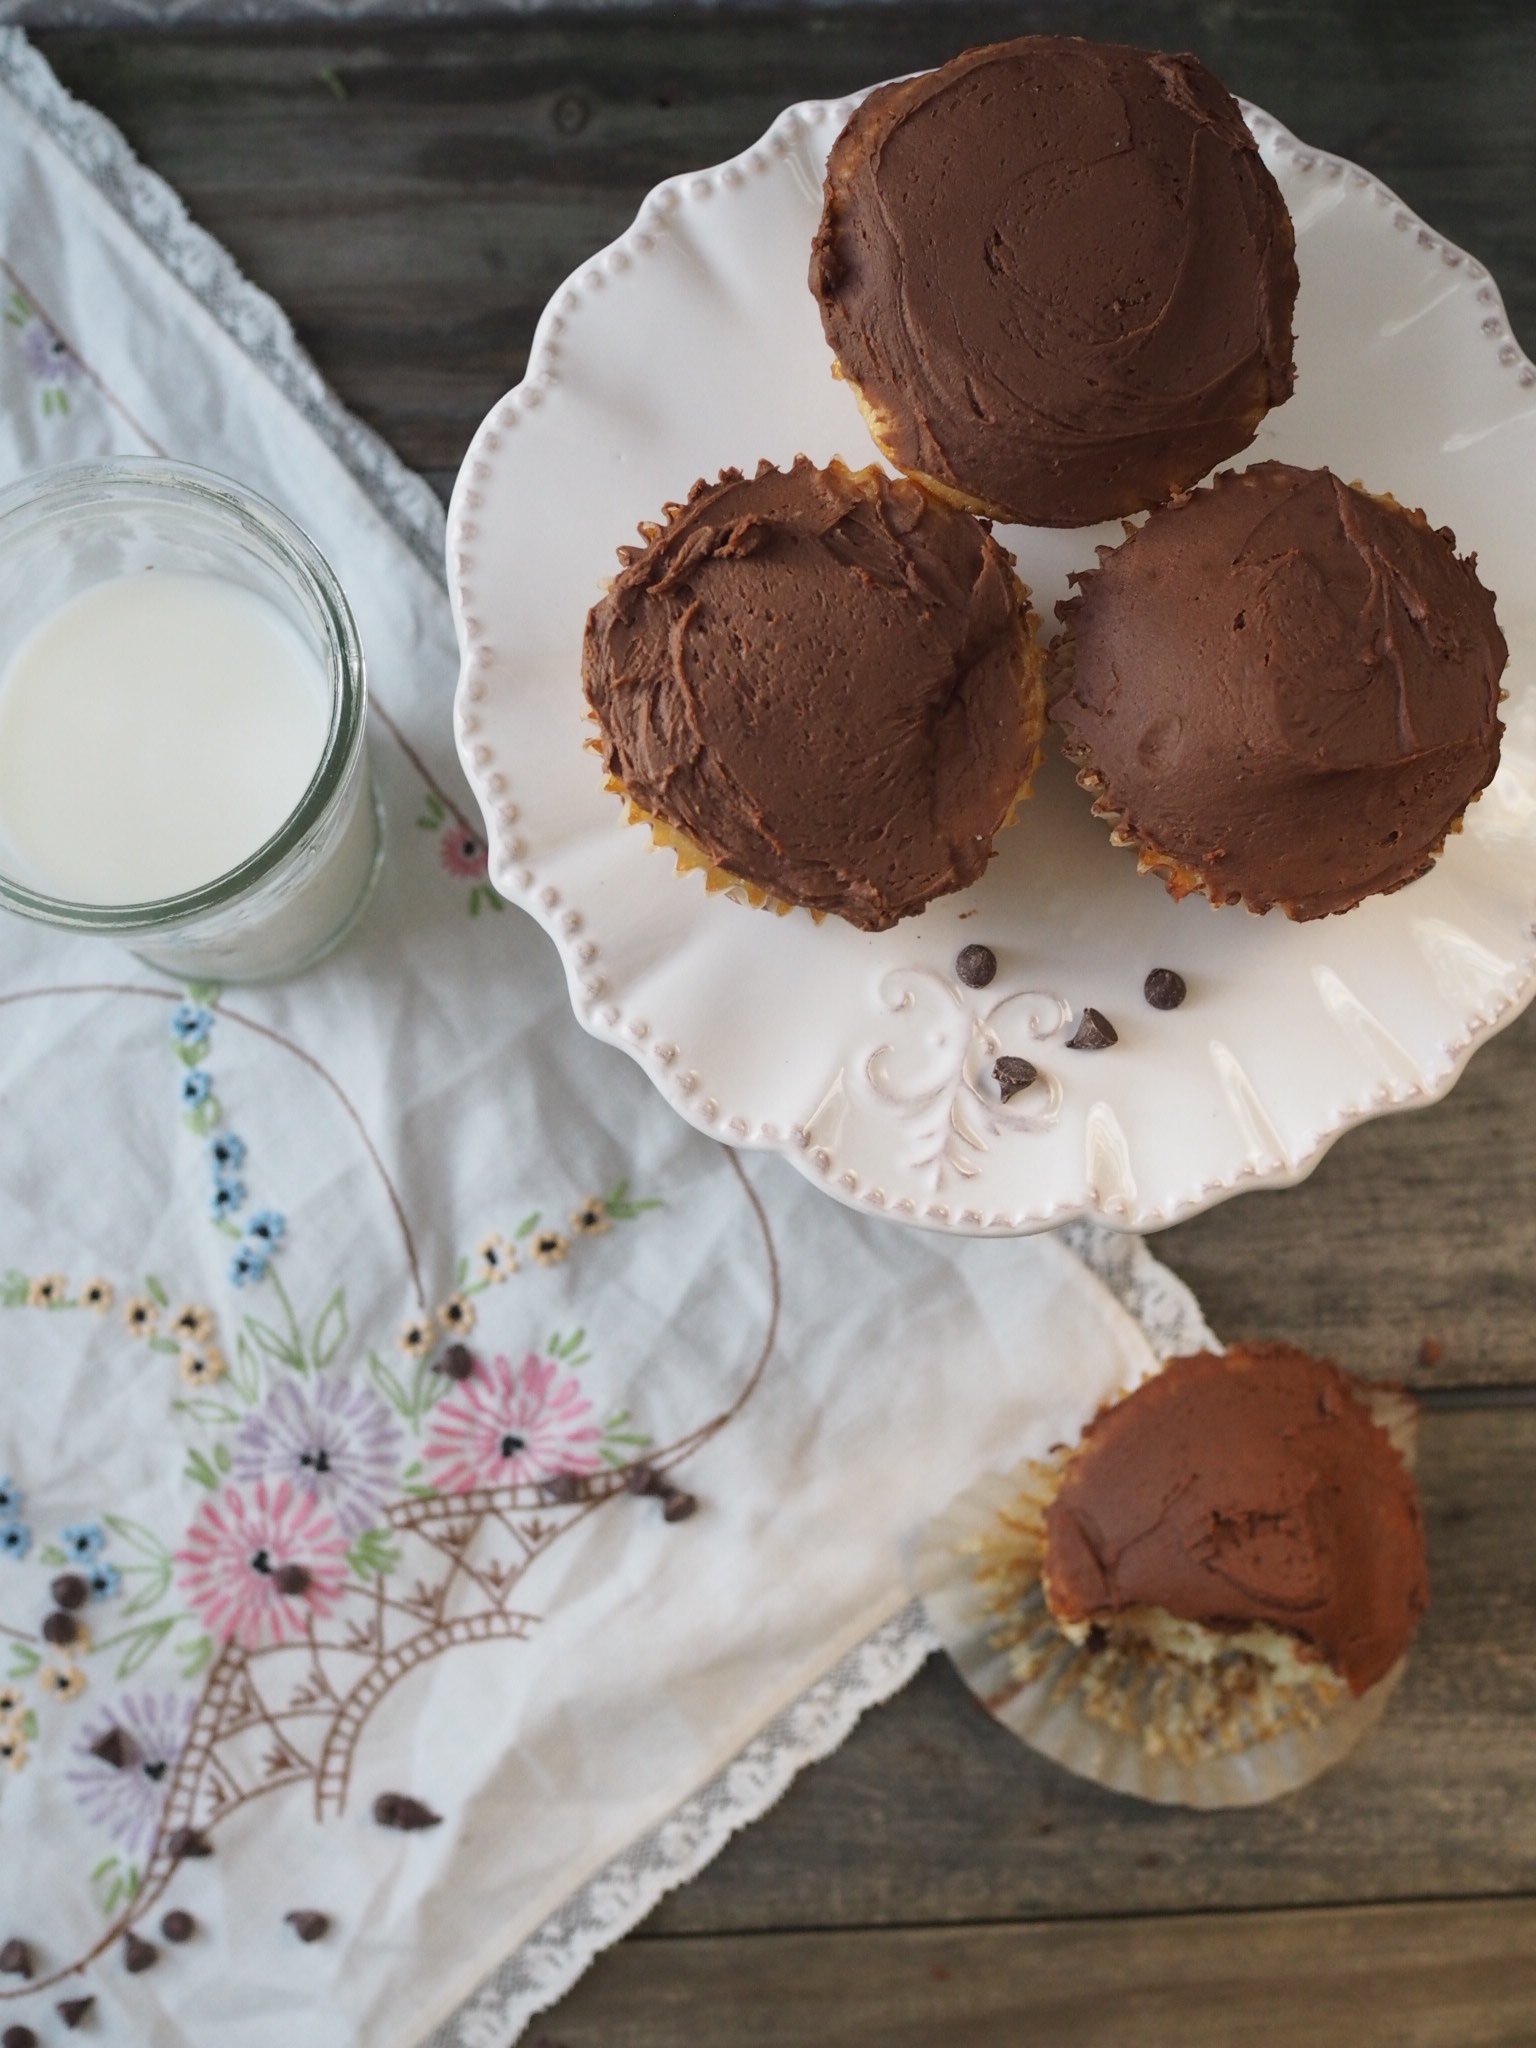

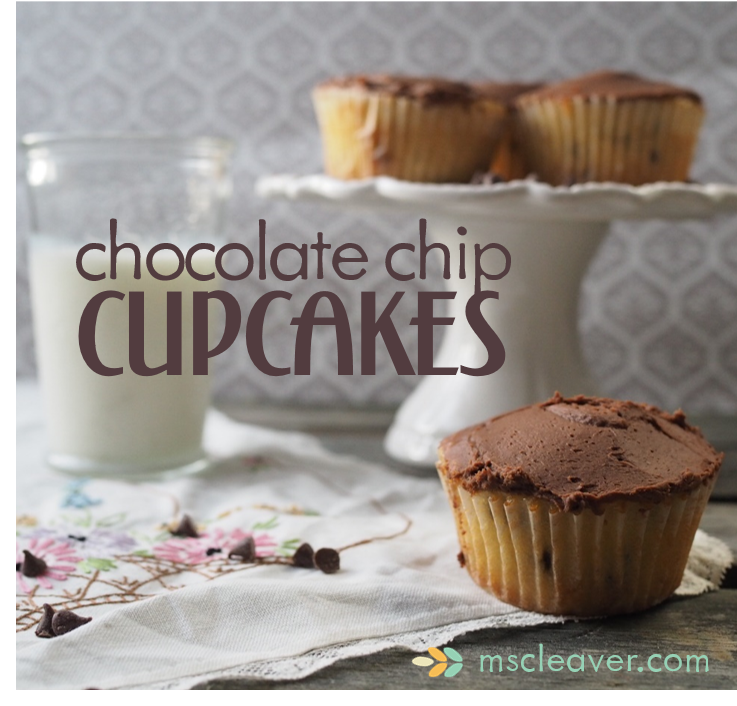
Life can be intense sometimes. Flavors can be intense. While I love 70% dark chocolate with sea salt caramel as much as the next person, some days, I just don't want intense.
Some days I just want something easy to make and easy to eat.
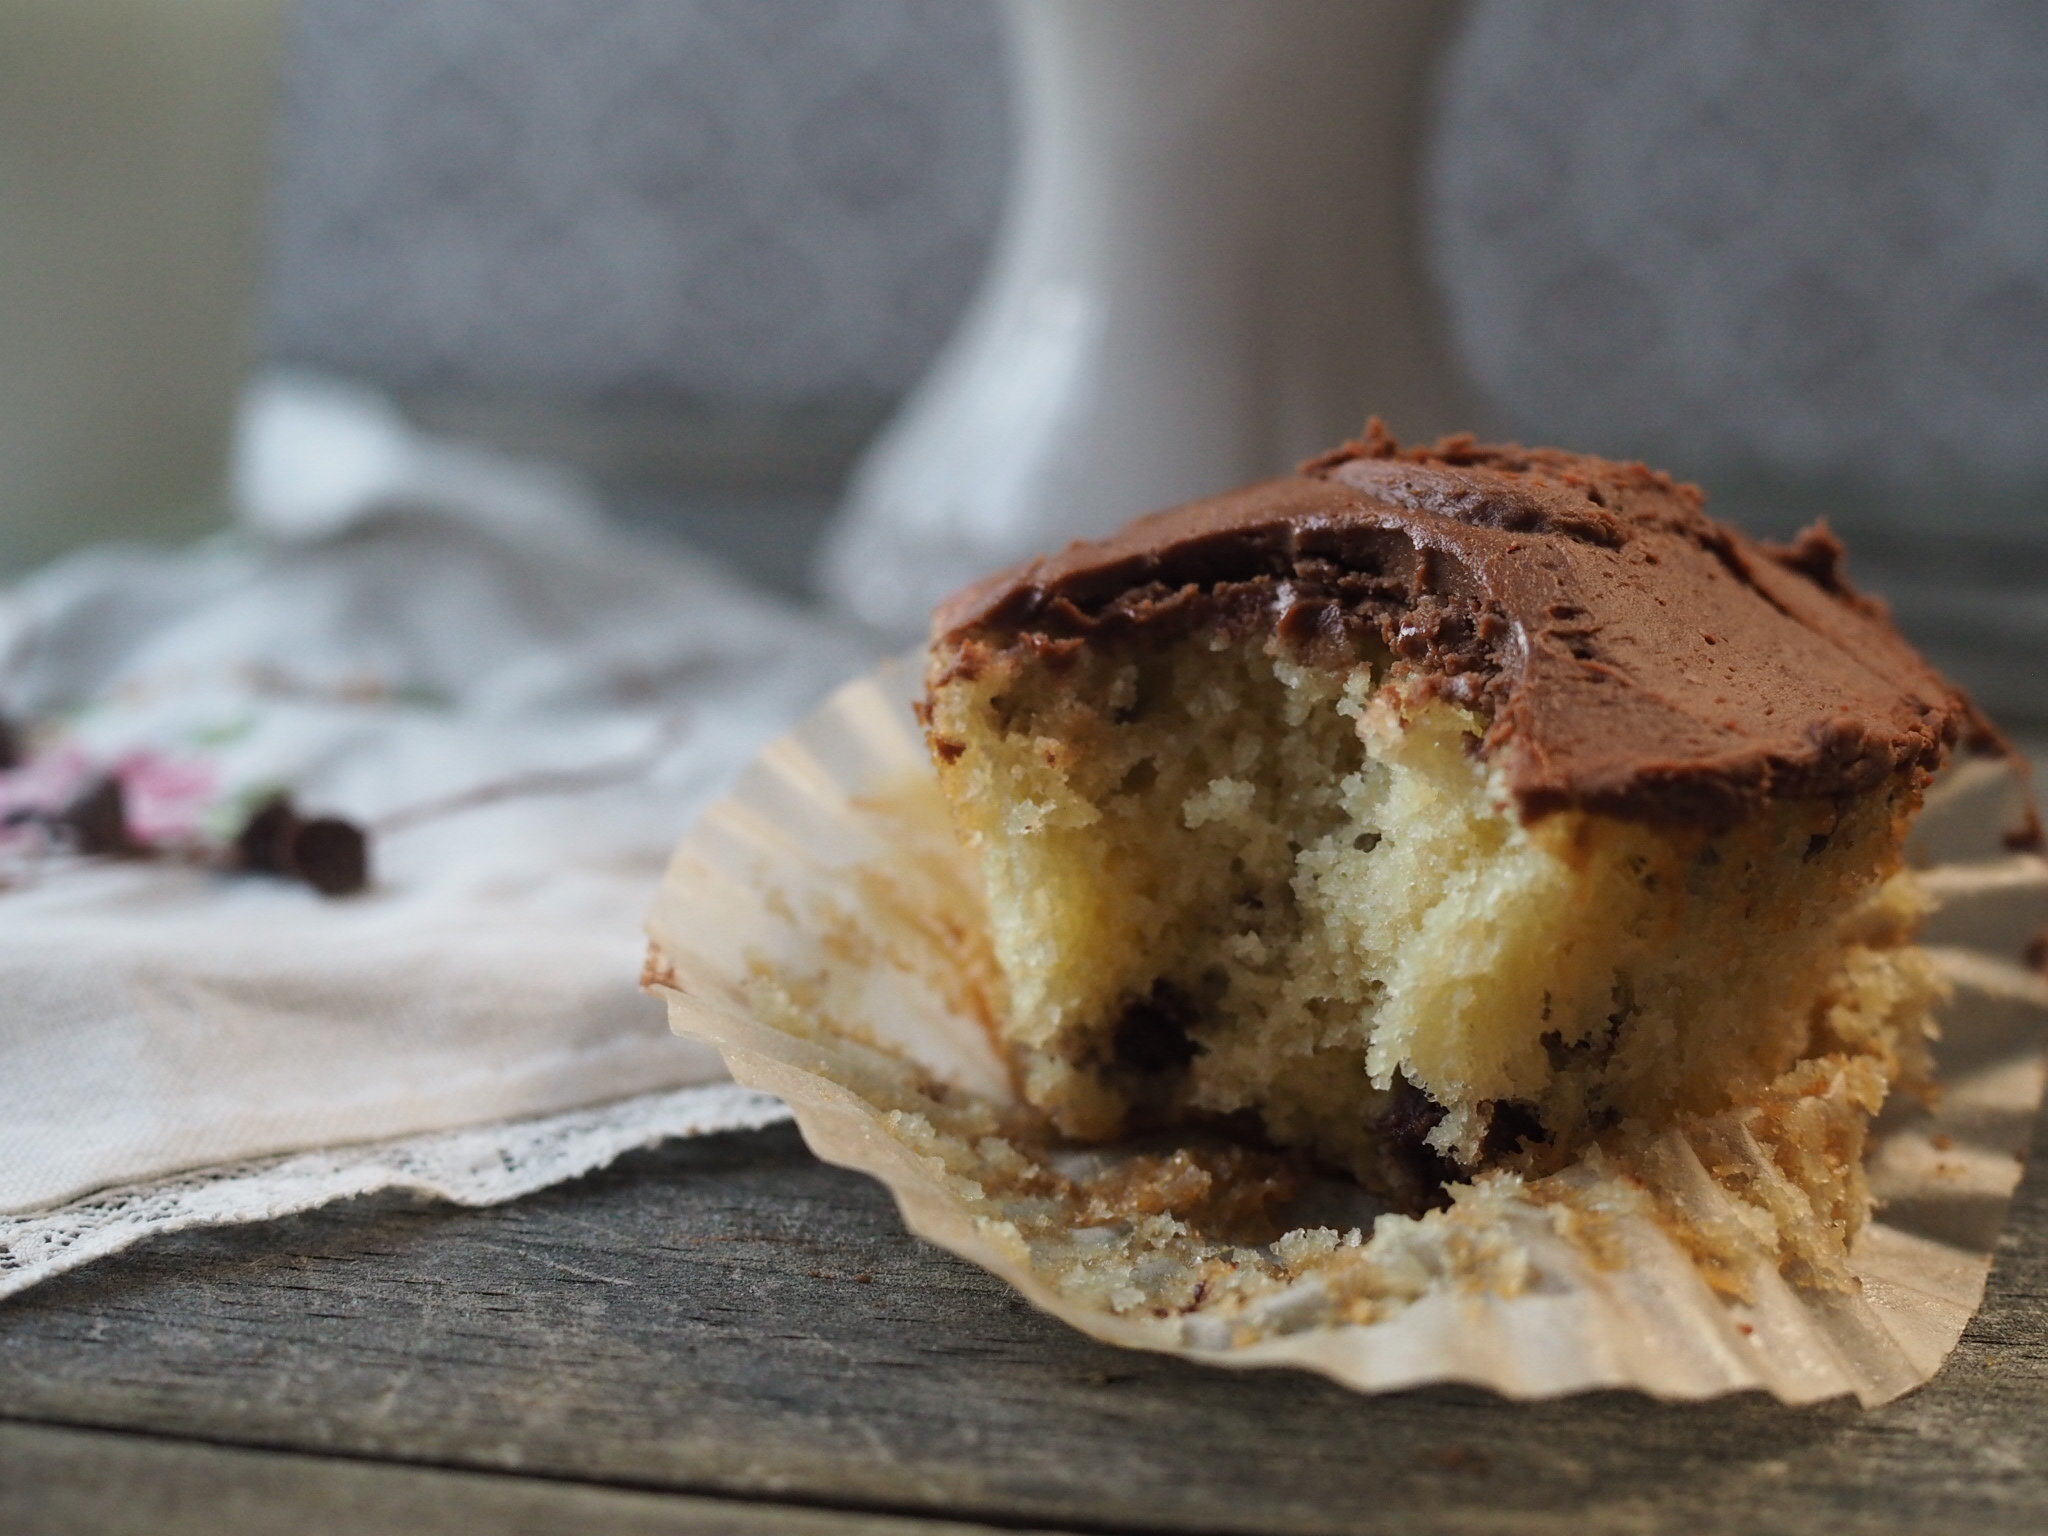
These chocolate chip cupcakes hit on both marks. The simple cake base receives a punch of sweetness from mini chocolate chips and a few tablespoons of orange juice in both the batter and frosting keep it bright, without tasting overly citrus-y. The frosting is so easy, you'll wonder why you ever popped open a can.
As for being easy to eat? Let's just say that most times in my household, I end up eating the majority of my bakes because the rest of my family isn't all that into dessert. These cupcakes, however, were devoured two at a time and didn't last the weekend. :D
Chocolate Chip Cupcakes with Quick Buttercream Frosting
Makes 20-24 cupcakes, depending on how full you fill the muffin cups.
Cake
- 2 1/3 cup cake flour (or 2 cups all-purpose flour + 1/3 cup cornstarch)
- 1 1/2 teaspoon baking powder
- 1/2 teaspoon baking soda
- 3/4 teaspoon salt
- 3 eggs (room temperature)
- 1 teaspoon vanilla
- 3/4 cup unsalted butter (room temperture)
- 1 1/3 cup sugar
- 2 Tablespoons orange juice
- 1 Tablespoon lemon juice
- Slightly less than 1 cup milk
- 3/4 cup mini chocolate chips
Preheat oven to 350 degrees Fahrenheit. Line a muffin pan with paper liners.
Measure out lemon and orange juice into a liquid measuring cup and add milk until total liquid is 1 cup. Set aside.
Using a wooden spoon or mixer, cream together butter and sugar until light and fluffy. Add eggs one at a time, making sure each egg is fully incorporated before adding the next. Add vanilla to mixture.
In a separate bowl or sifter, combine flour, baking powder, baking soda, and salt. If using bowl, mix together dry ingredients.
Starting and ending with the flour mixture, add flour and milk to egg/sugar mixture in alternating portions, fully incorporating each addition before adding the next.
Add chocolate chips and mix to combine.
Scoop batter into prepared pans, filling each cup about 3/4 full. Clean up any drips and place pans in the center of the oven and bake from 18-20 minutes or until a tester comes out clean and the top of the cake springs backs when touched.
After about five minutes, remove cupcakes from pan and cool completely on a rack before frosting.
Chocolate Buttercream Frosting
- 1 1/2 cups powdered sugar
- 1/4 cup salted butter, softened
- a pinch of salt
- 2 oz. unsweetened chocolate, melted
- 1 Tablespoon milk
- up to 1 Tablespoon orange juice
- 1 teaspoon vanilla
Melt chocolate in a double-boiler or microwave and allow to cool. Mix together powdered sugar, butter and salt until well-combined. Add melted chocolate, vanilla, milk and orange juice. Mix until well combined, adding additional milk or orange juice until desired consistency is reached. Frost cupcakes.
See the bottom of this post for a print-friendly button!!


Gingerbread Cake and Glühwein
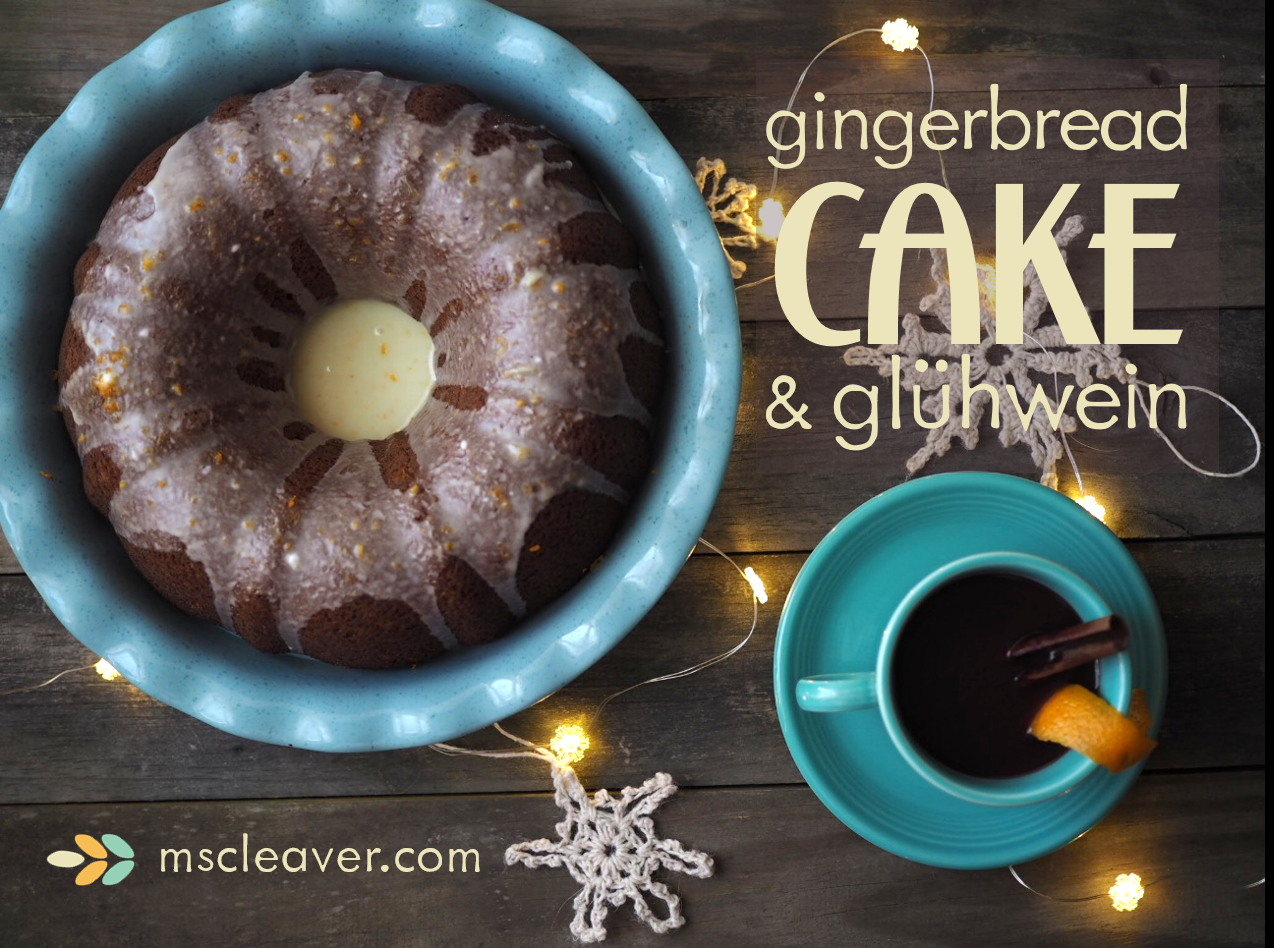
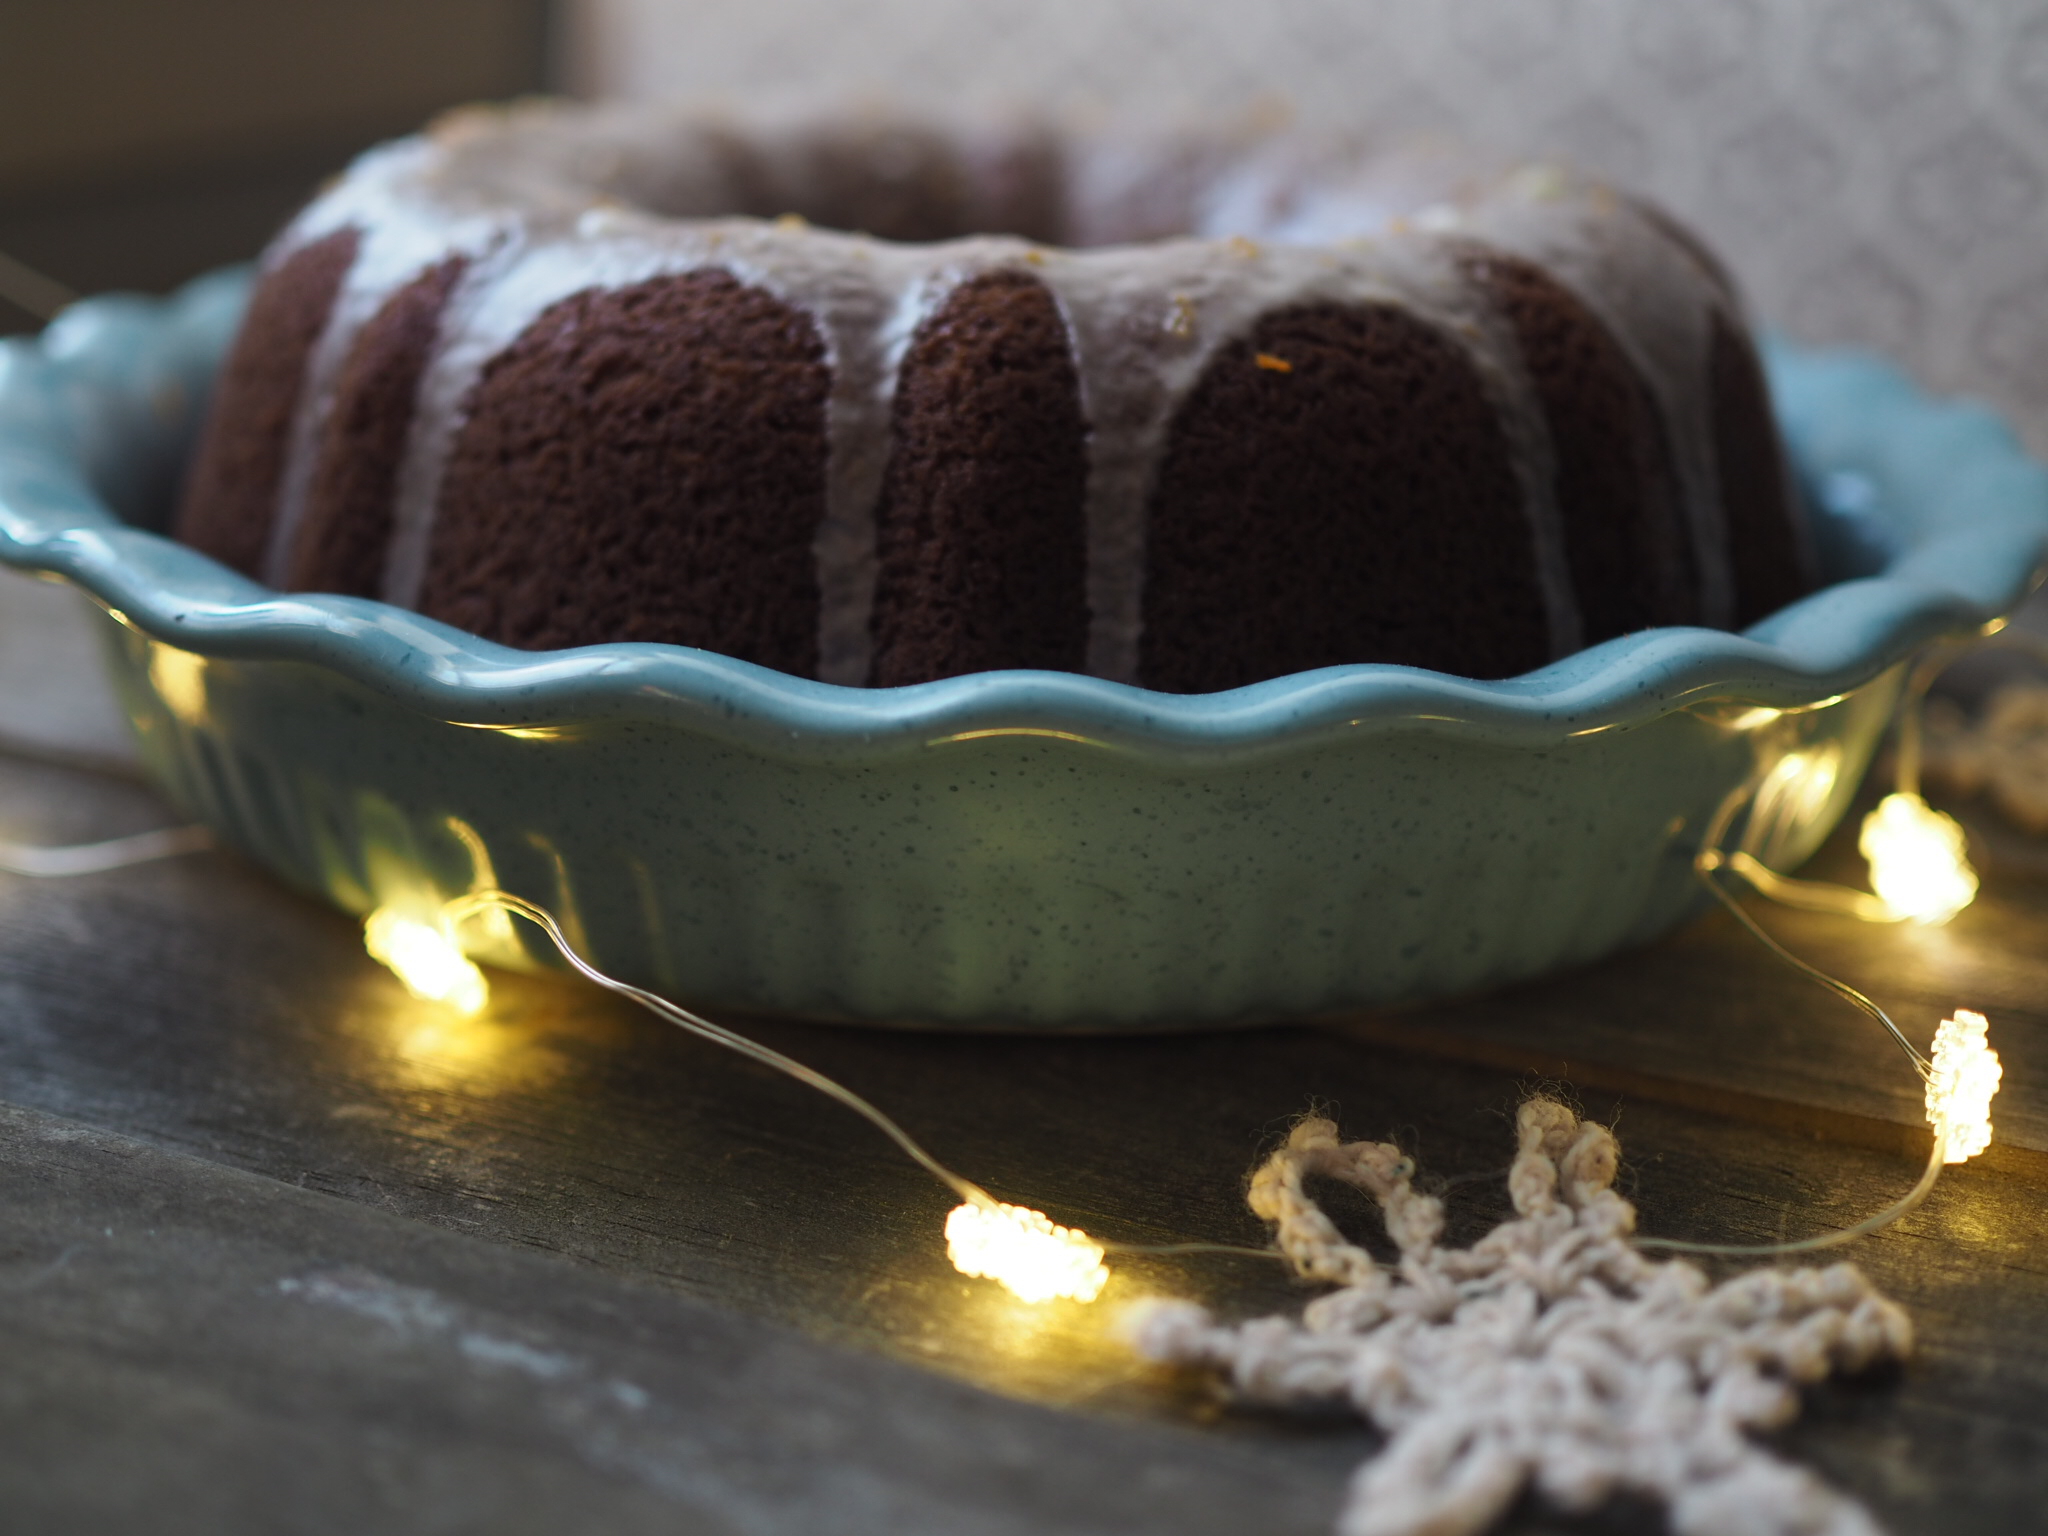

I love baking for the Holidays. There's just something about the flavors of winter I find so appealing , the combination of nutmeg and cinnamon and citrus. The depth of molasses and wine. That's why this pairing is perfect combination for any winter gathering, and since there's a lot of overlap in ingredients, they're easy to make together.
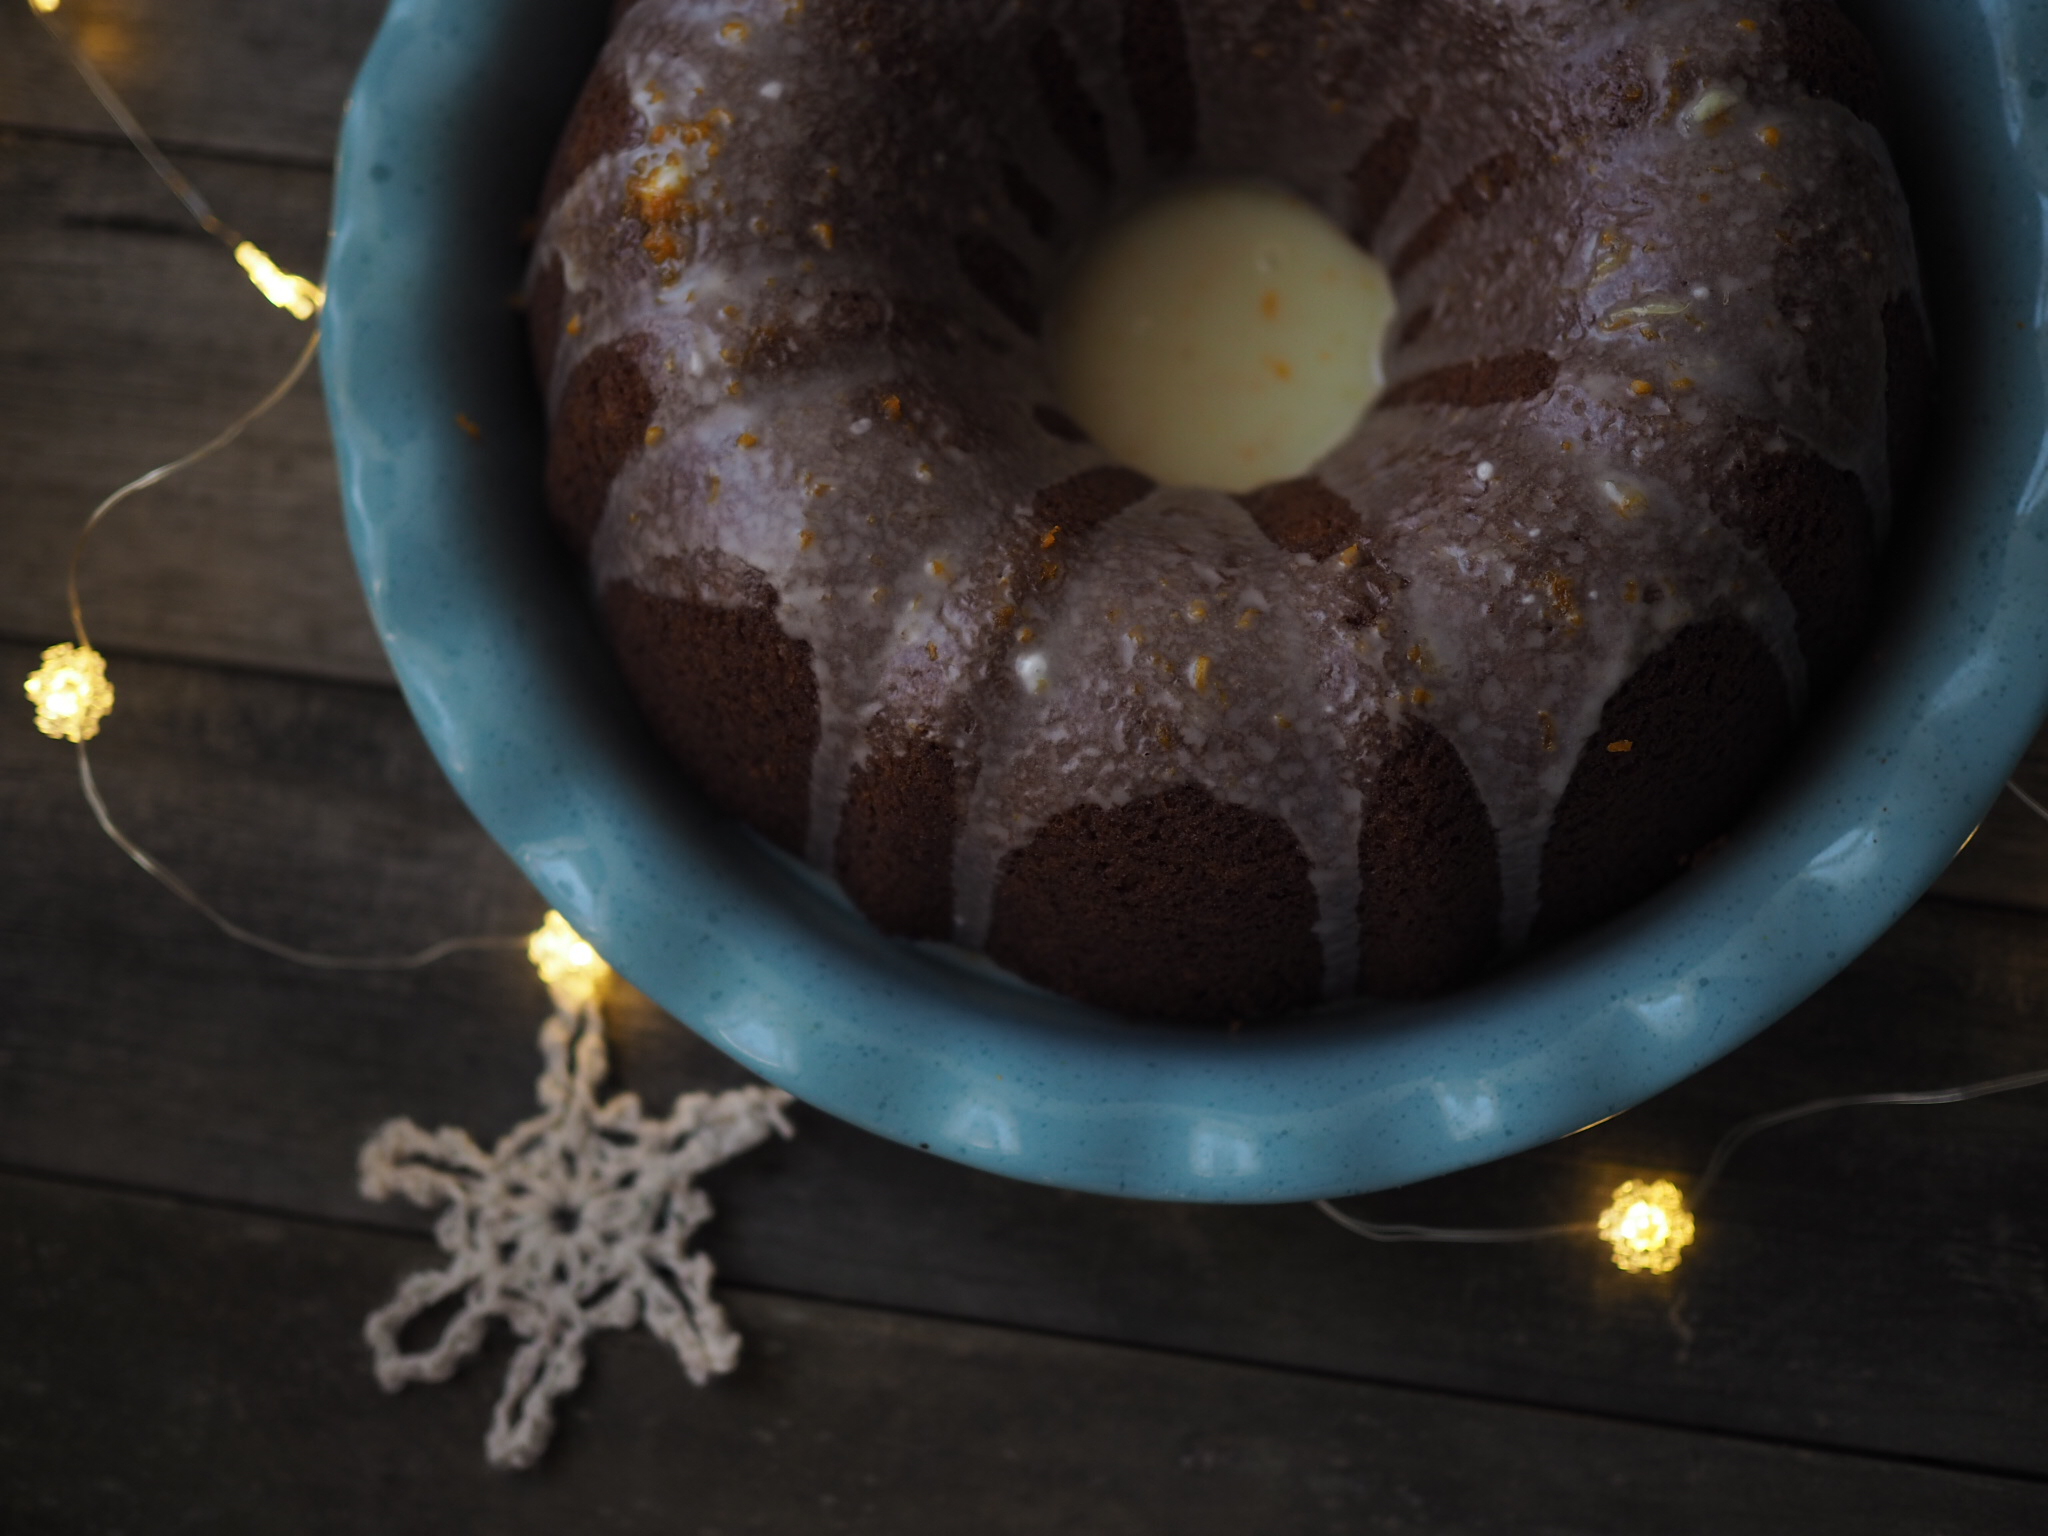
Gingerbread Cake with Orange Glaze
Serves 8-12
Gingerbread is an obvious choice for the holidays, but this take on the classic has a soft and light crumb, and isn't overly dense or spicy, as I find some gingerbread to be. The cake is best when the spices are allowed to meld for a bit, so make the day ahead, if possible. For a spicier cake, increase the amount of ginger, or replace powdered with fresh. You may also increase the amount of molasses, as desired.
For the Cake:
- 2½ cups all-purpose flour
- 2 teaspoons baking powder
- ¼ teaspoon baking soda
- ½ teaspoon salt
- 2 teaspoons ground ginger
- ½ teaspoon ground cinnamon
- ¼ teaspoon allspice
- ⅛ teaspoon freshly grated or ground nutmeg
- ½ cup molasses
- ½ cup brewed coffee, at room temperature
- 1½ sticks ( 1¼ cups) unsalted butter, at room temperature
- 1¼ cups light brown sugar
- 3 eggs + 2 egg yolks, at room temperature
For the Glaze:
- 1½ cups powdered sugar
- 2 Tbl milk
- 2 Tbl orange juice
- Zest of 1 orange
- pinch of salt
Preheat oven to 350 degrees F. Grease and flour or spray a 10-cup Bundt pan (I find Pam with Flour works the best for those tricky Bundt pans).
In a large mixing bowl, cream butter until smooth using a wooden spoon or mixer. Add brown sugar and cream until light and fluffy, making sure butter is fully integrated and there are no visible chunks. Add eggs to butter mixture one at a time, mixing in completely before adding the next egg.
In a separate bowl, shift together flour, baking powder, baking soda, salt, and spices.
In a small bowl or cup, mix together room temperature coffee with the molasses.
Add the 1/3 of the flour to the egg/butter mix, then 1/2 the molasses, 1/3 of the flour, the remaining molasses, then the remaining flour. Mix until just combined.
Pour batter into prepared pan and snap against the counter to remove any large bubbles. Smooth out the top with a rubber spatula. Place in center of oven an bake for approximately 50 minutes, or until a toothpick inserted into the center of the cake comes out clean.
Let cake cool in pan for about 7 minutes, then turn onto a cooling rack. Let cake cool completely, transfer to serving plate, and then glaze.
To make glaze: mix all ingredients, adding liquid slowly until desired consistency is achieved. Pour over cooled Bundt cake, making sure to allow glaze to drip down both sides. Scoop extra glaze out of cake center and re-drizzle as desired.
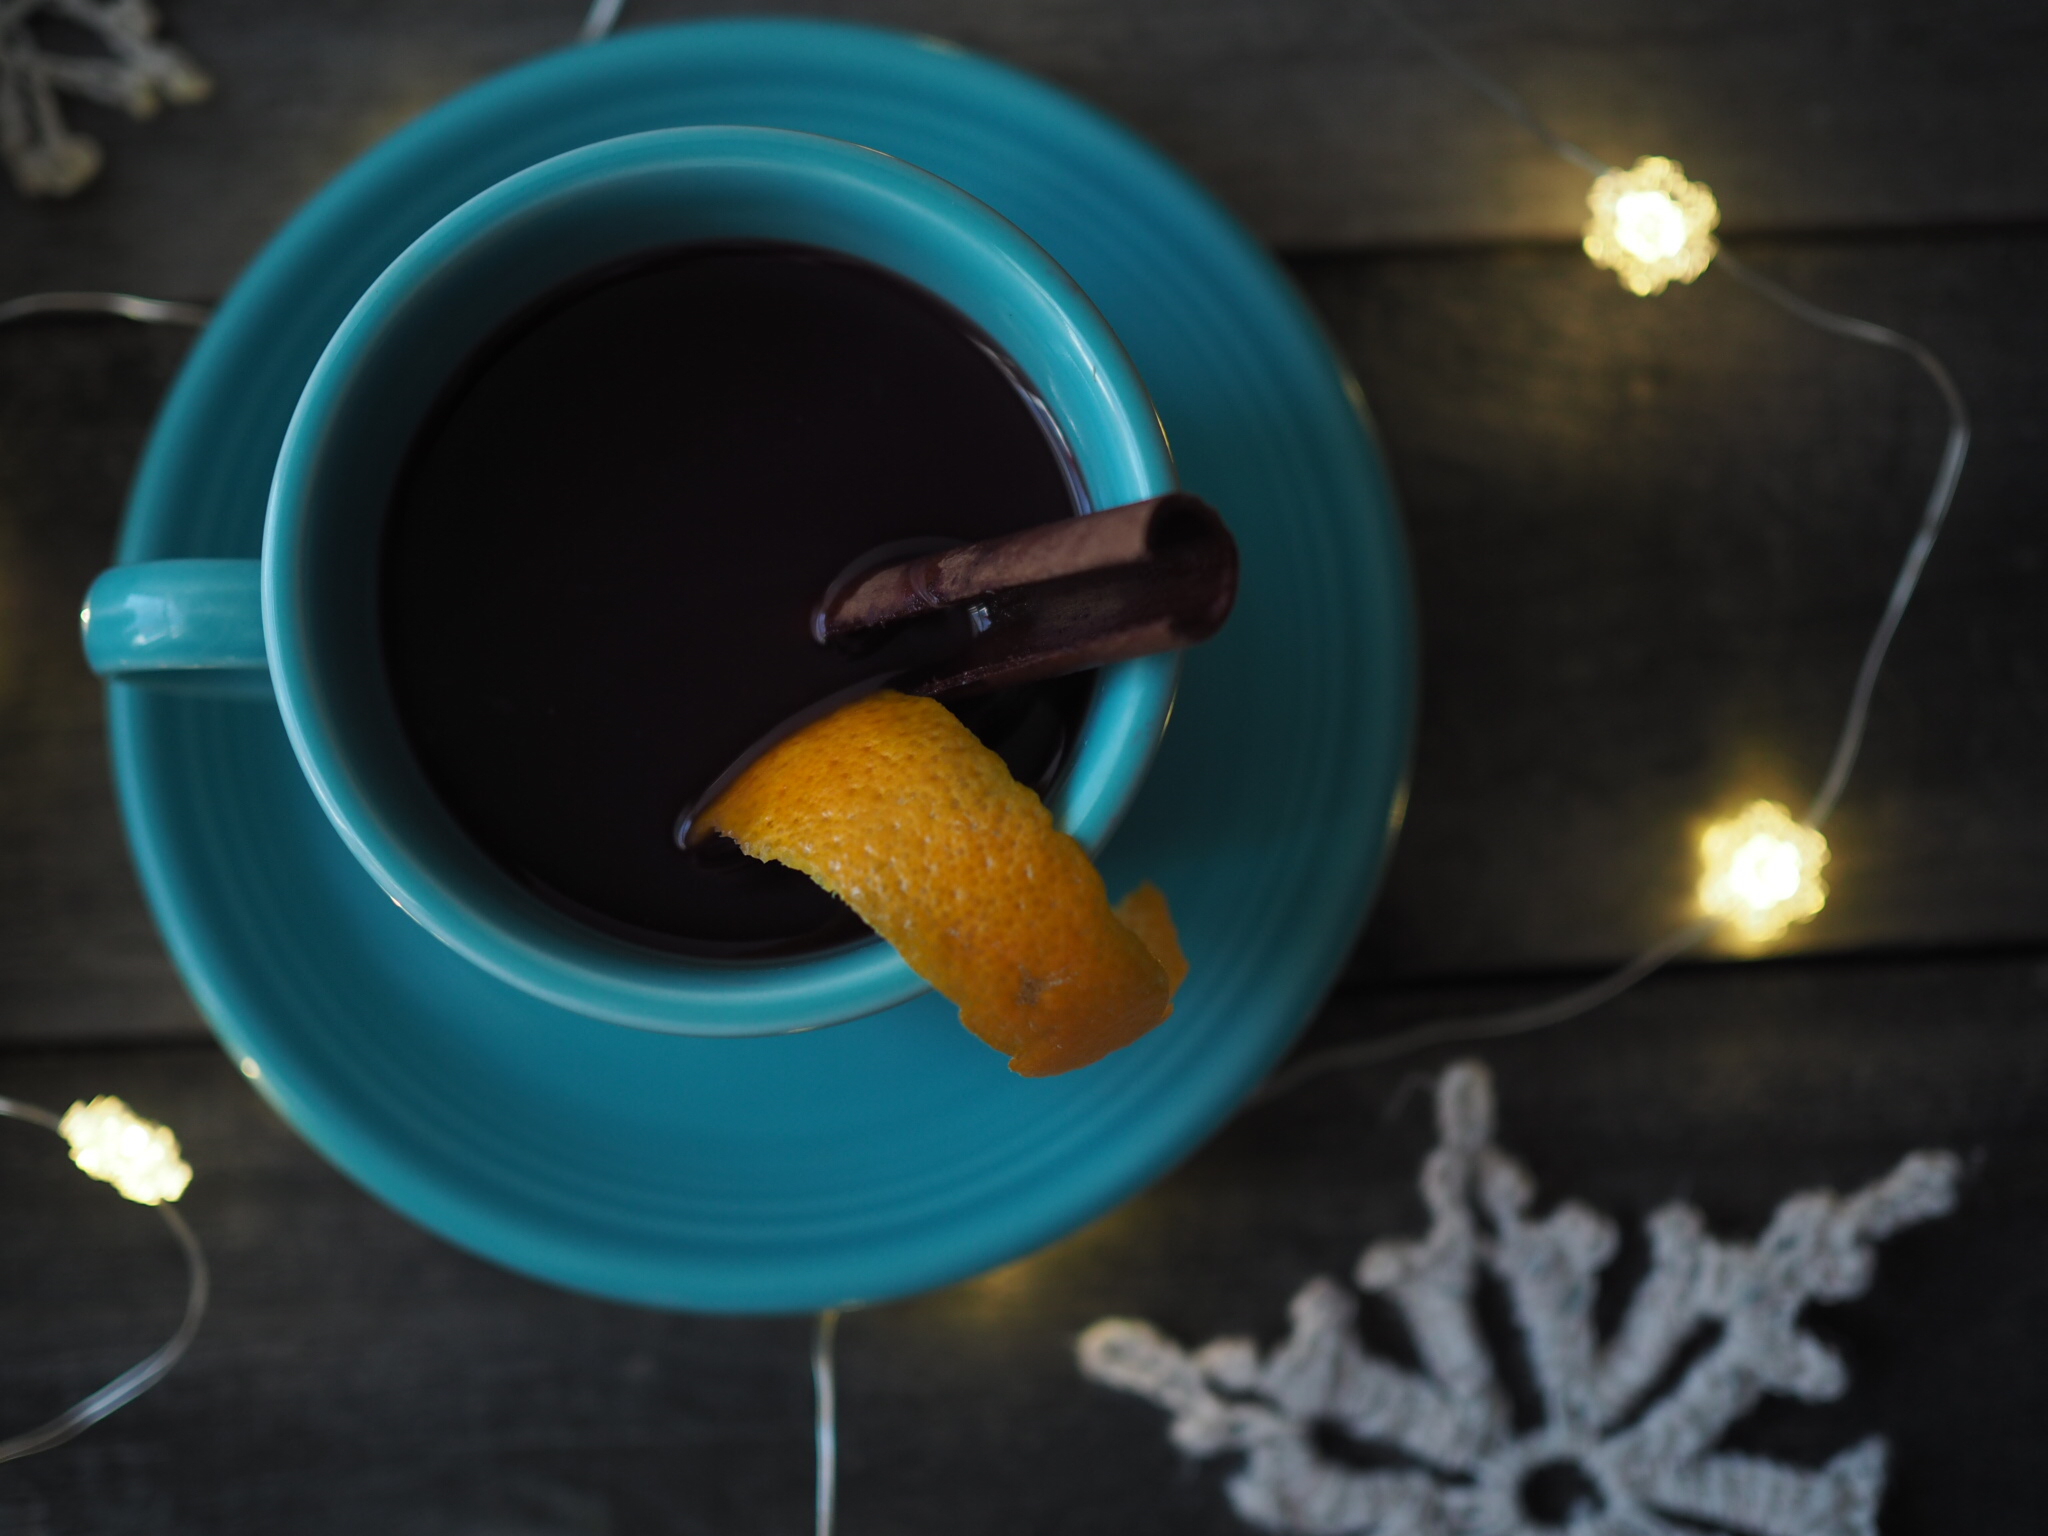
Glühwein, or German Mulled Wine, is perhaps less familiar, but a wonderful addition to winter gatherings. I discovered Glühwein when searching for mulled wine recipes, and then immediately emailed a German friend for her take on the tradition. I've merged her recipe with some I found online, but mulled wine is something that is easy to vary to meet your own tastes. Throughout my wine-mulling process, I kept running to Mr. Cleaver with a hot mug and saying "taste this." We quickly ran through the batch at my knitting group's annual Christmas fête, so I think my test-taster served me well.
Glühwein - German Mulled Wine
- 1.5 L dry red wine
- 2 1/3 cup orange juice (juiced oranges + pre-made orange jucie)
- 2/3 cup brandy
- 4-5 oranges, peeled (see instructions below) and juiced
- 1 lemon, peeled and juiced
- 4 cinnamon sticks
- 20 cloves
- 1/8 tsp freshly ground nutmeg
- up to 1/3 cup sugar, to taste
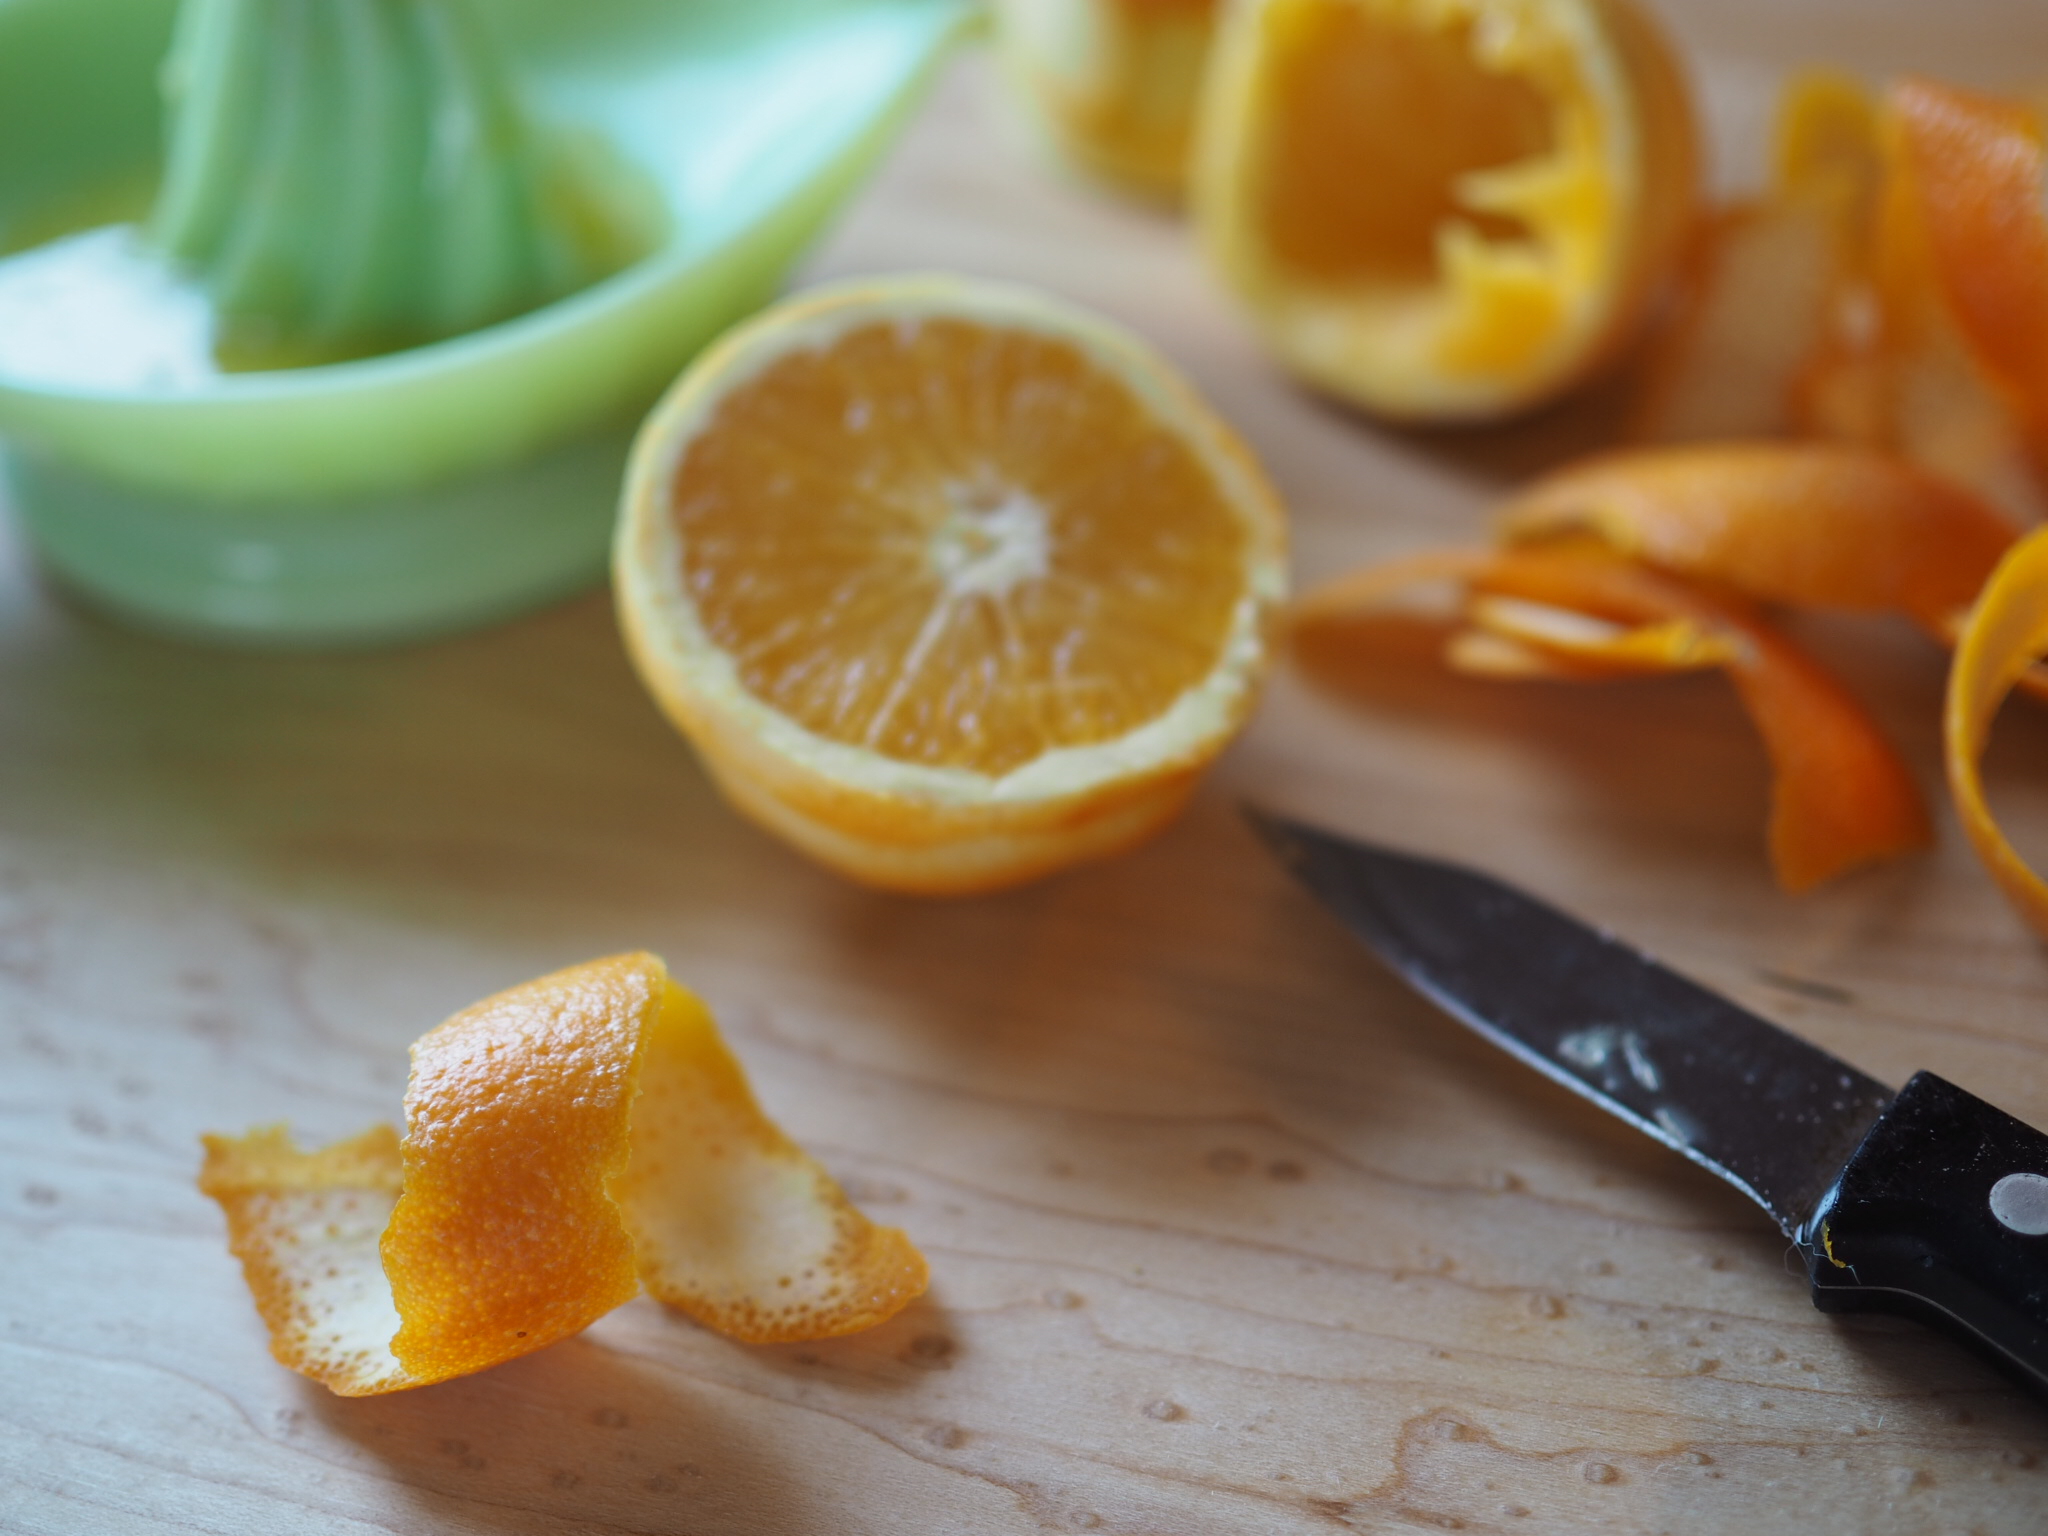
Using a paring knife or vegetable peeler, peel all citrus into wide strips, avoiding as much of the bitter white pith as possible. Juice all fruit, making up the difference with pre-made orange juice as needed. Reserve some peels for garnish.
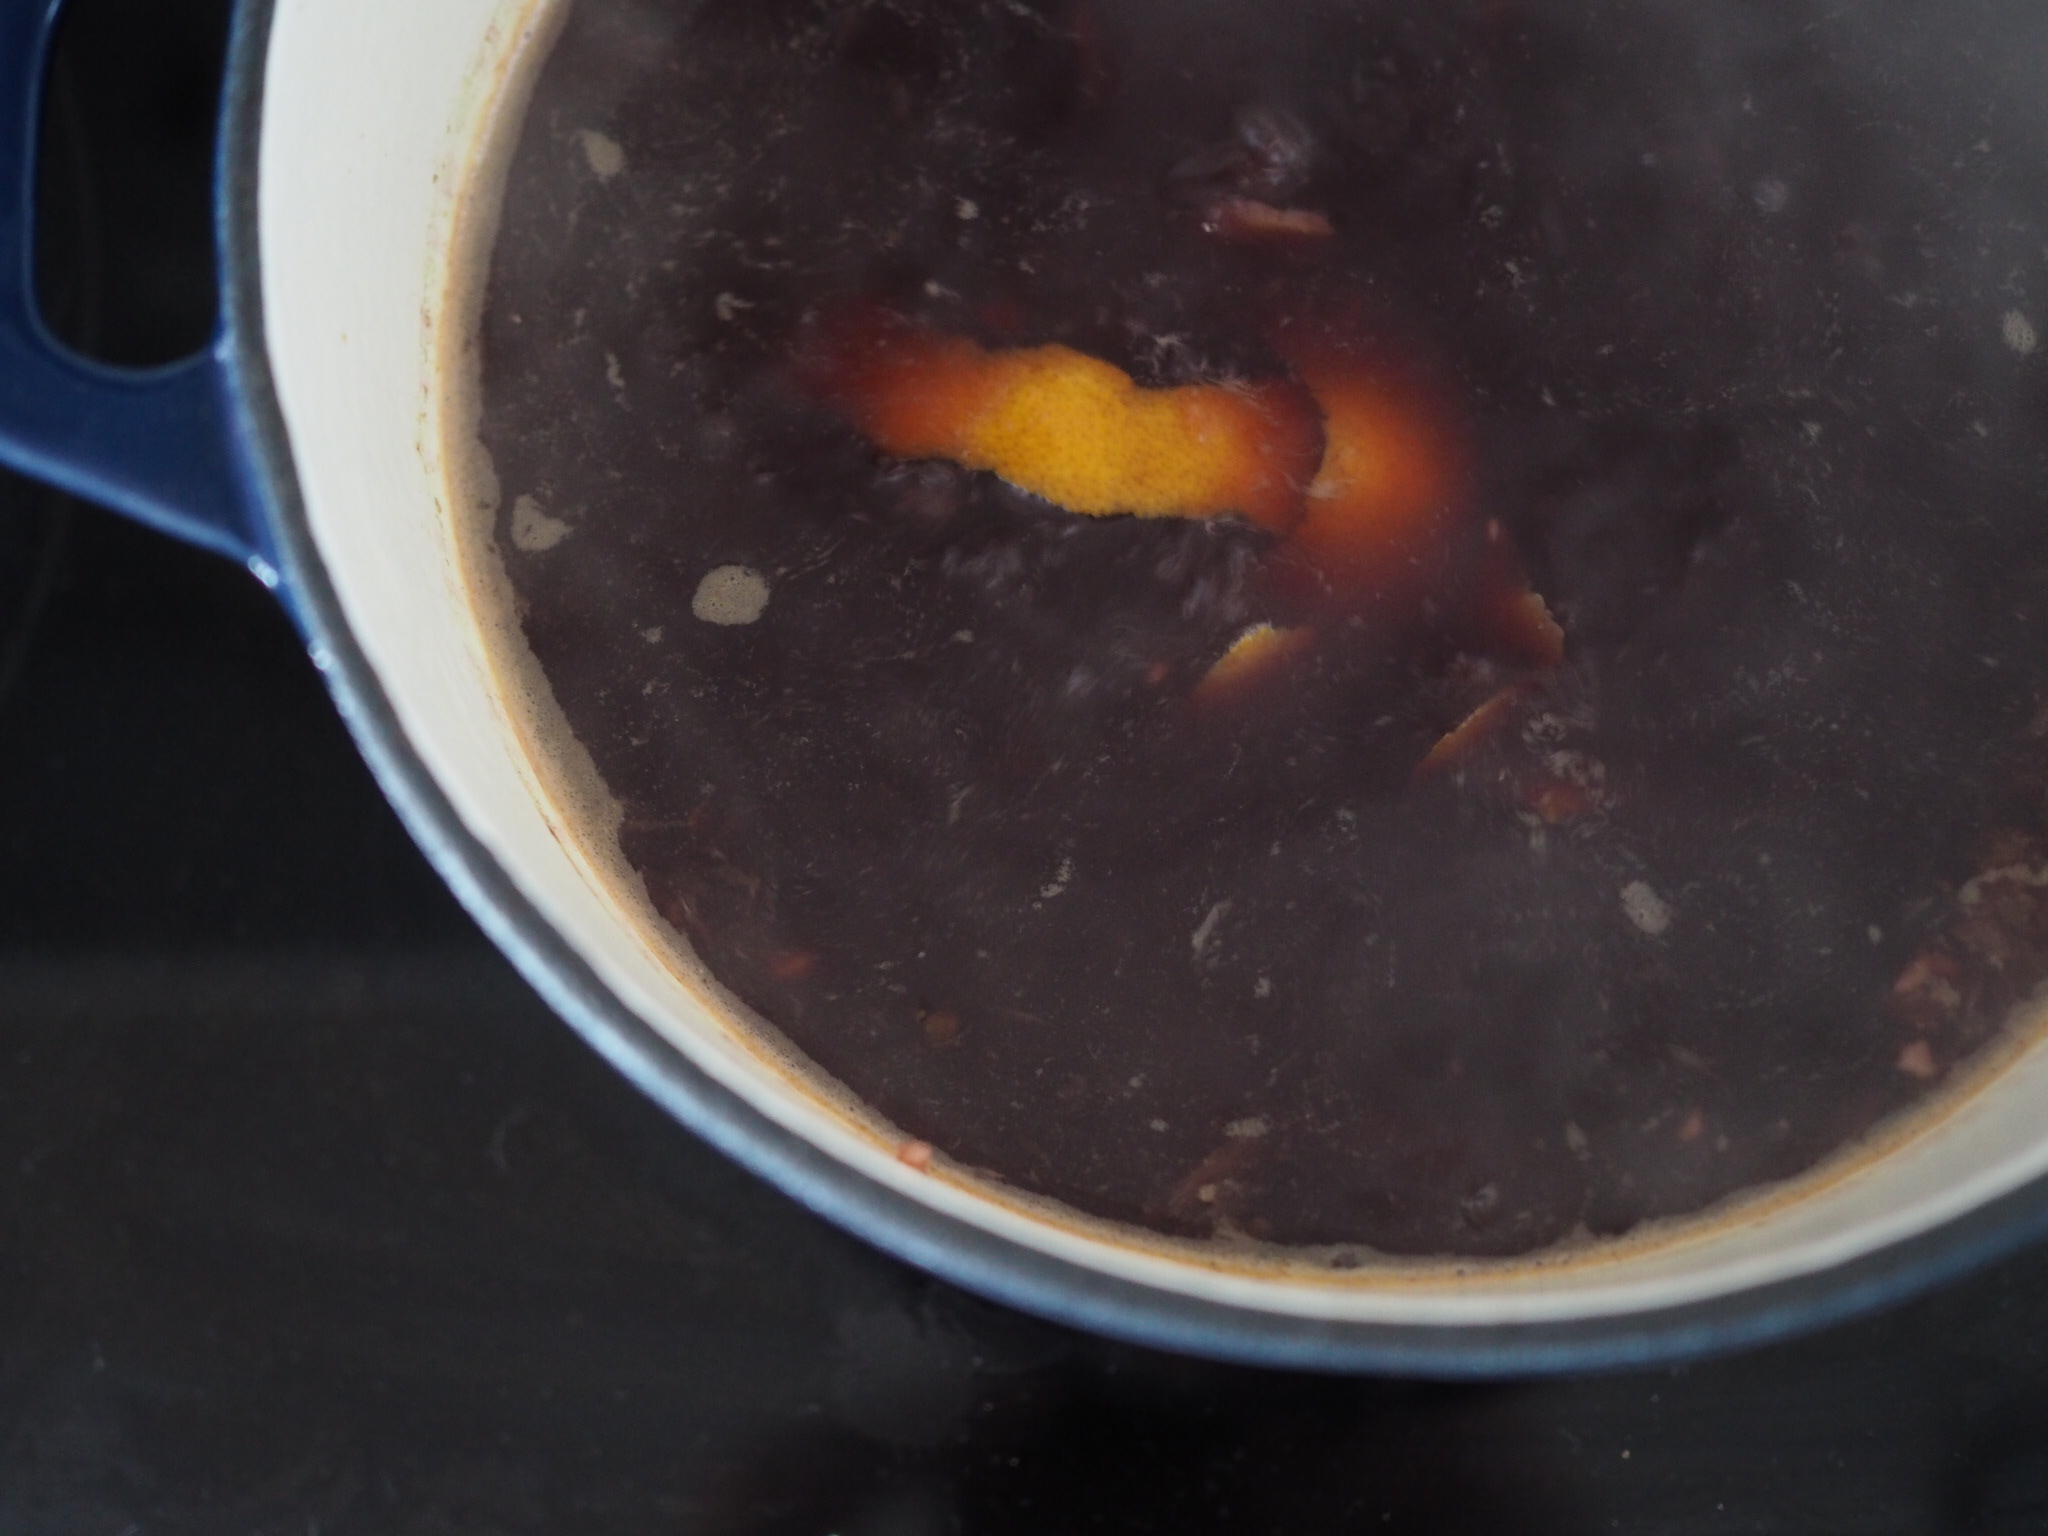
Combine wine, juice, remaining peels, and spices in a heavy covered stockpot. Bring pot to a low simmer. Add Brandy and continue to simmer. Add sugar to taste.
Serve hot, not warm.
What are your favorite holiday recipes? Share links below!!
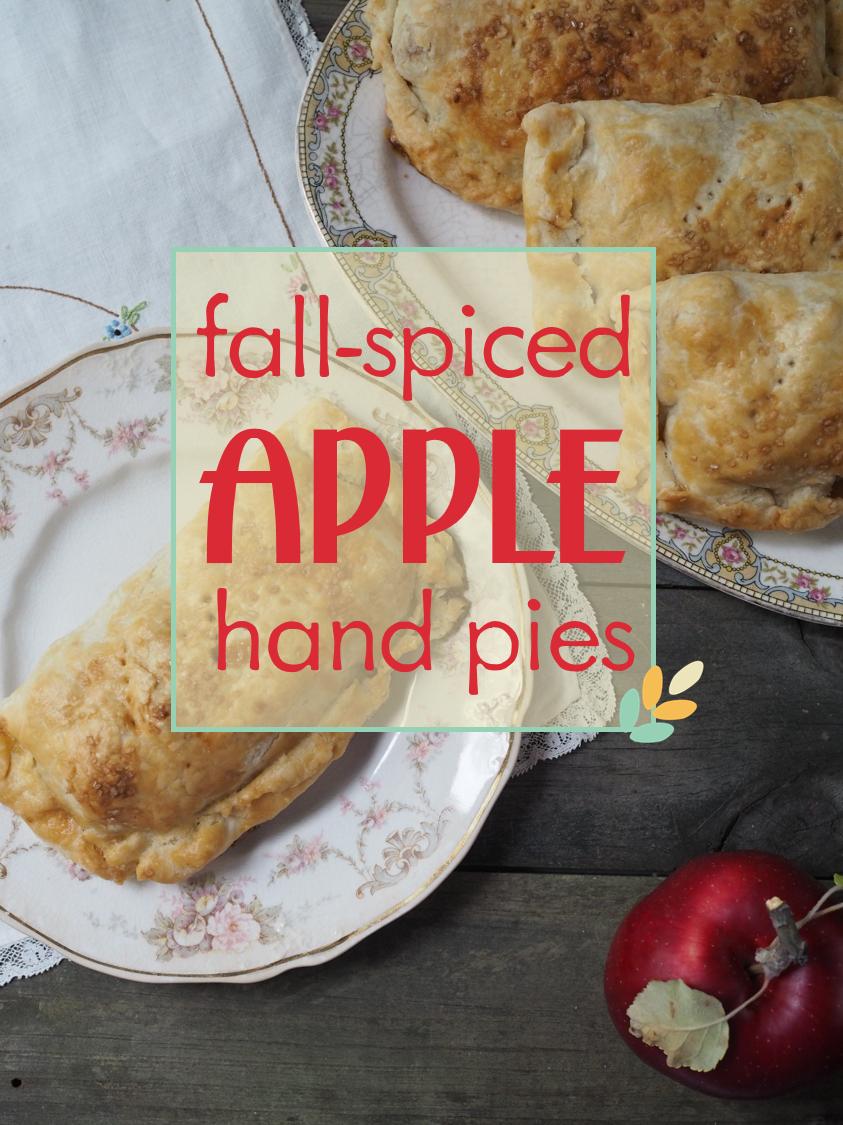
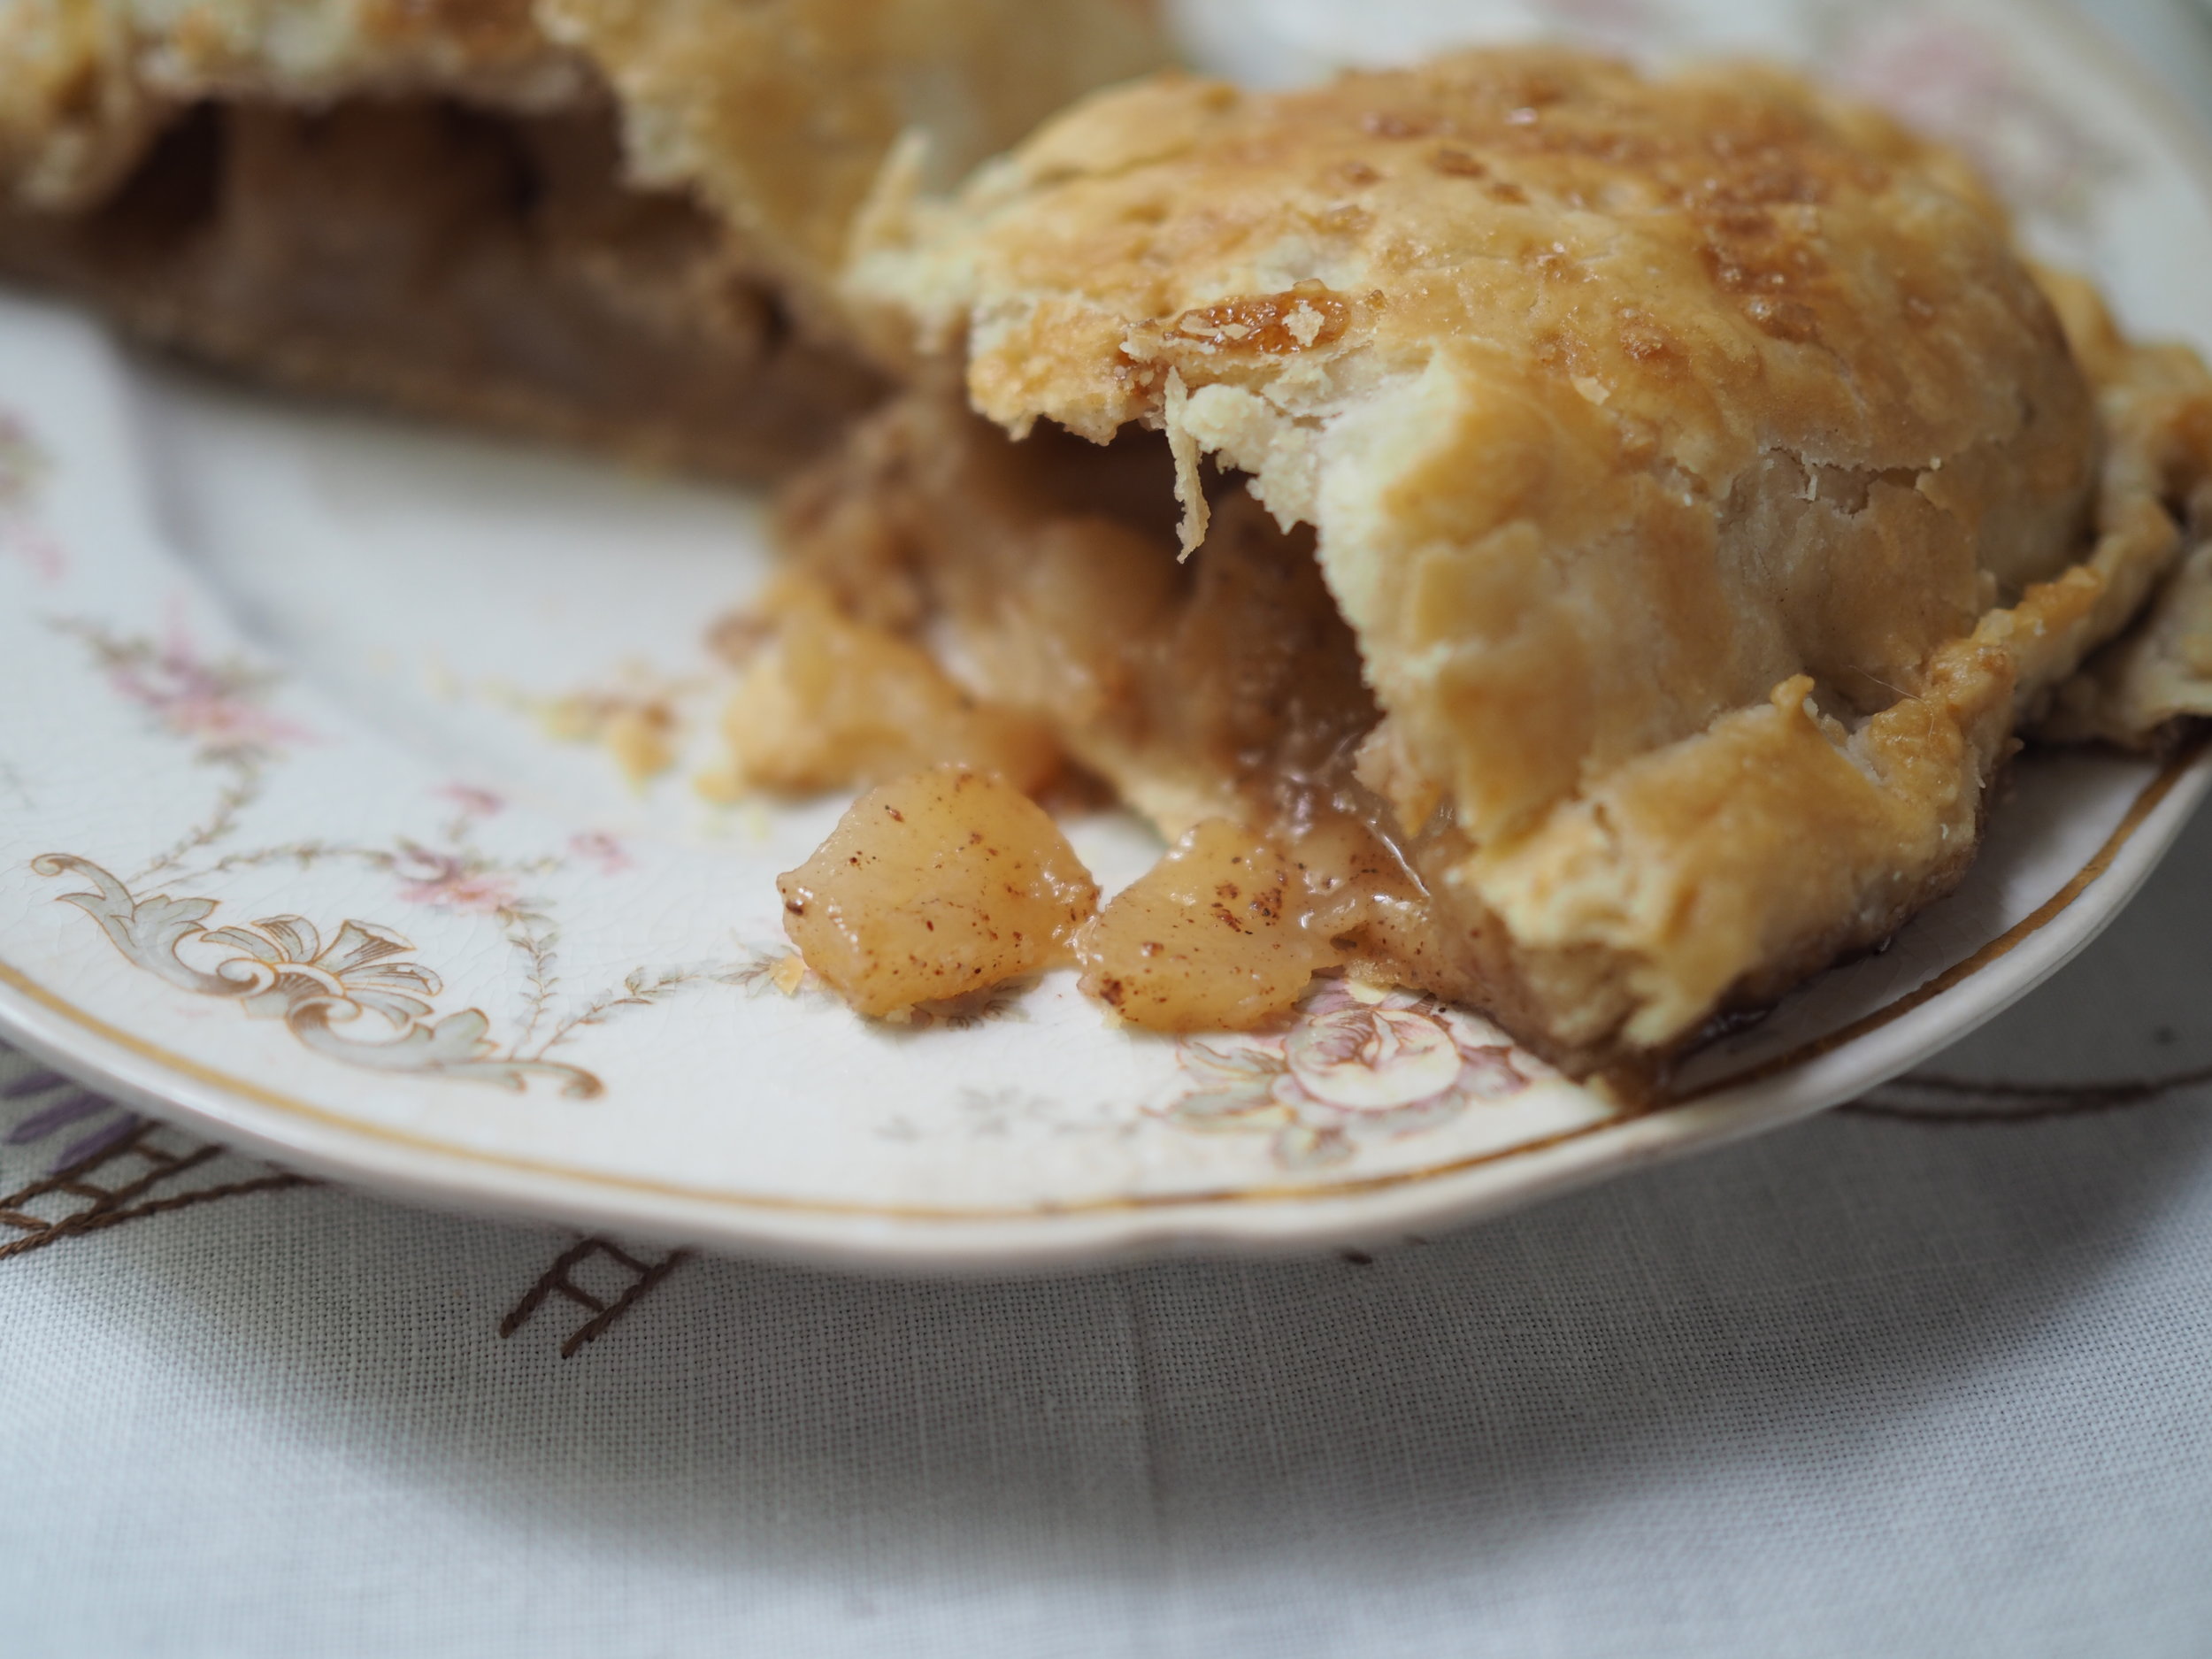
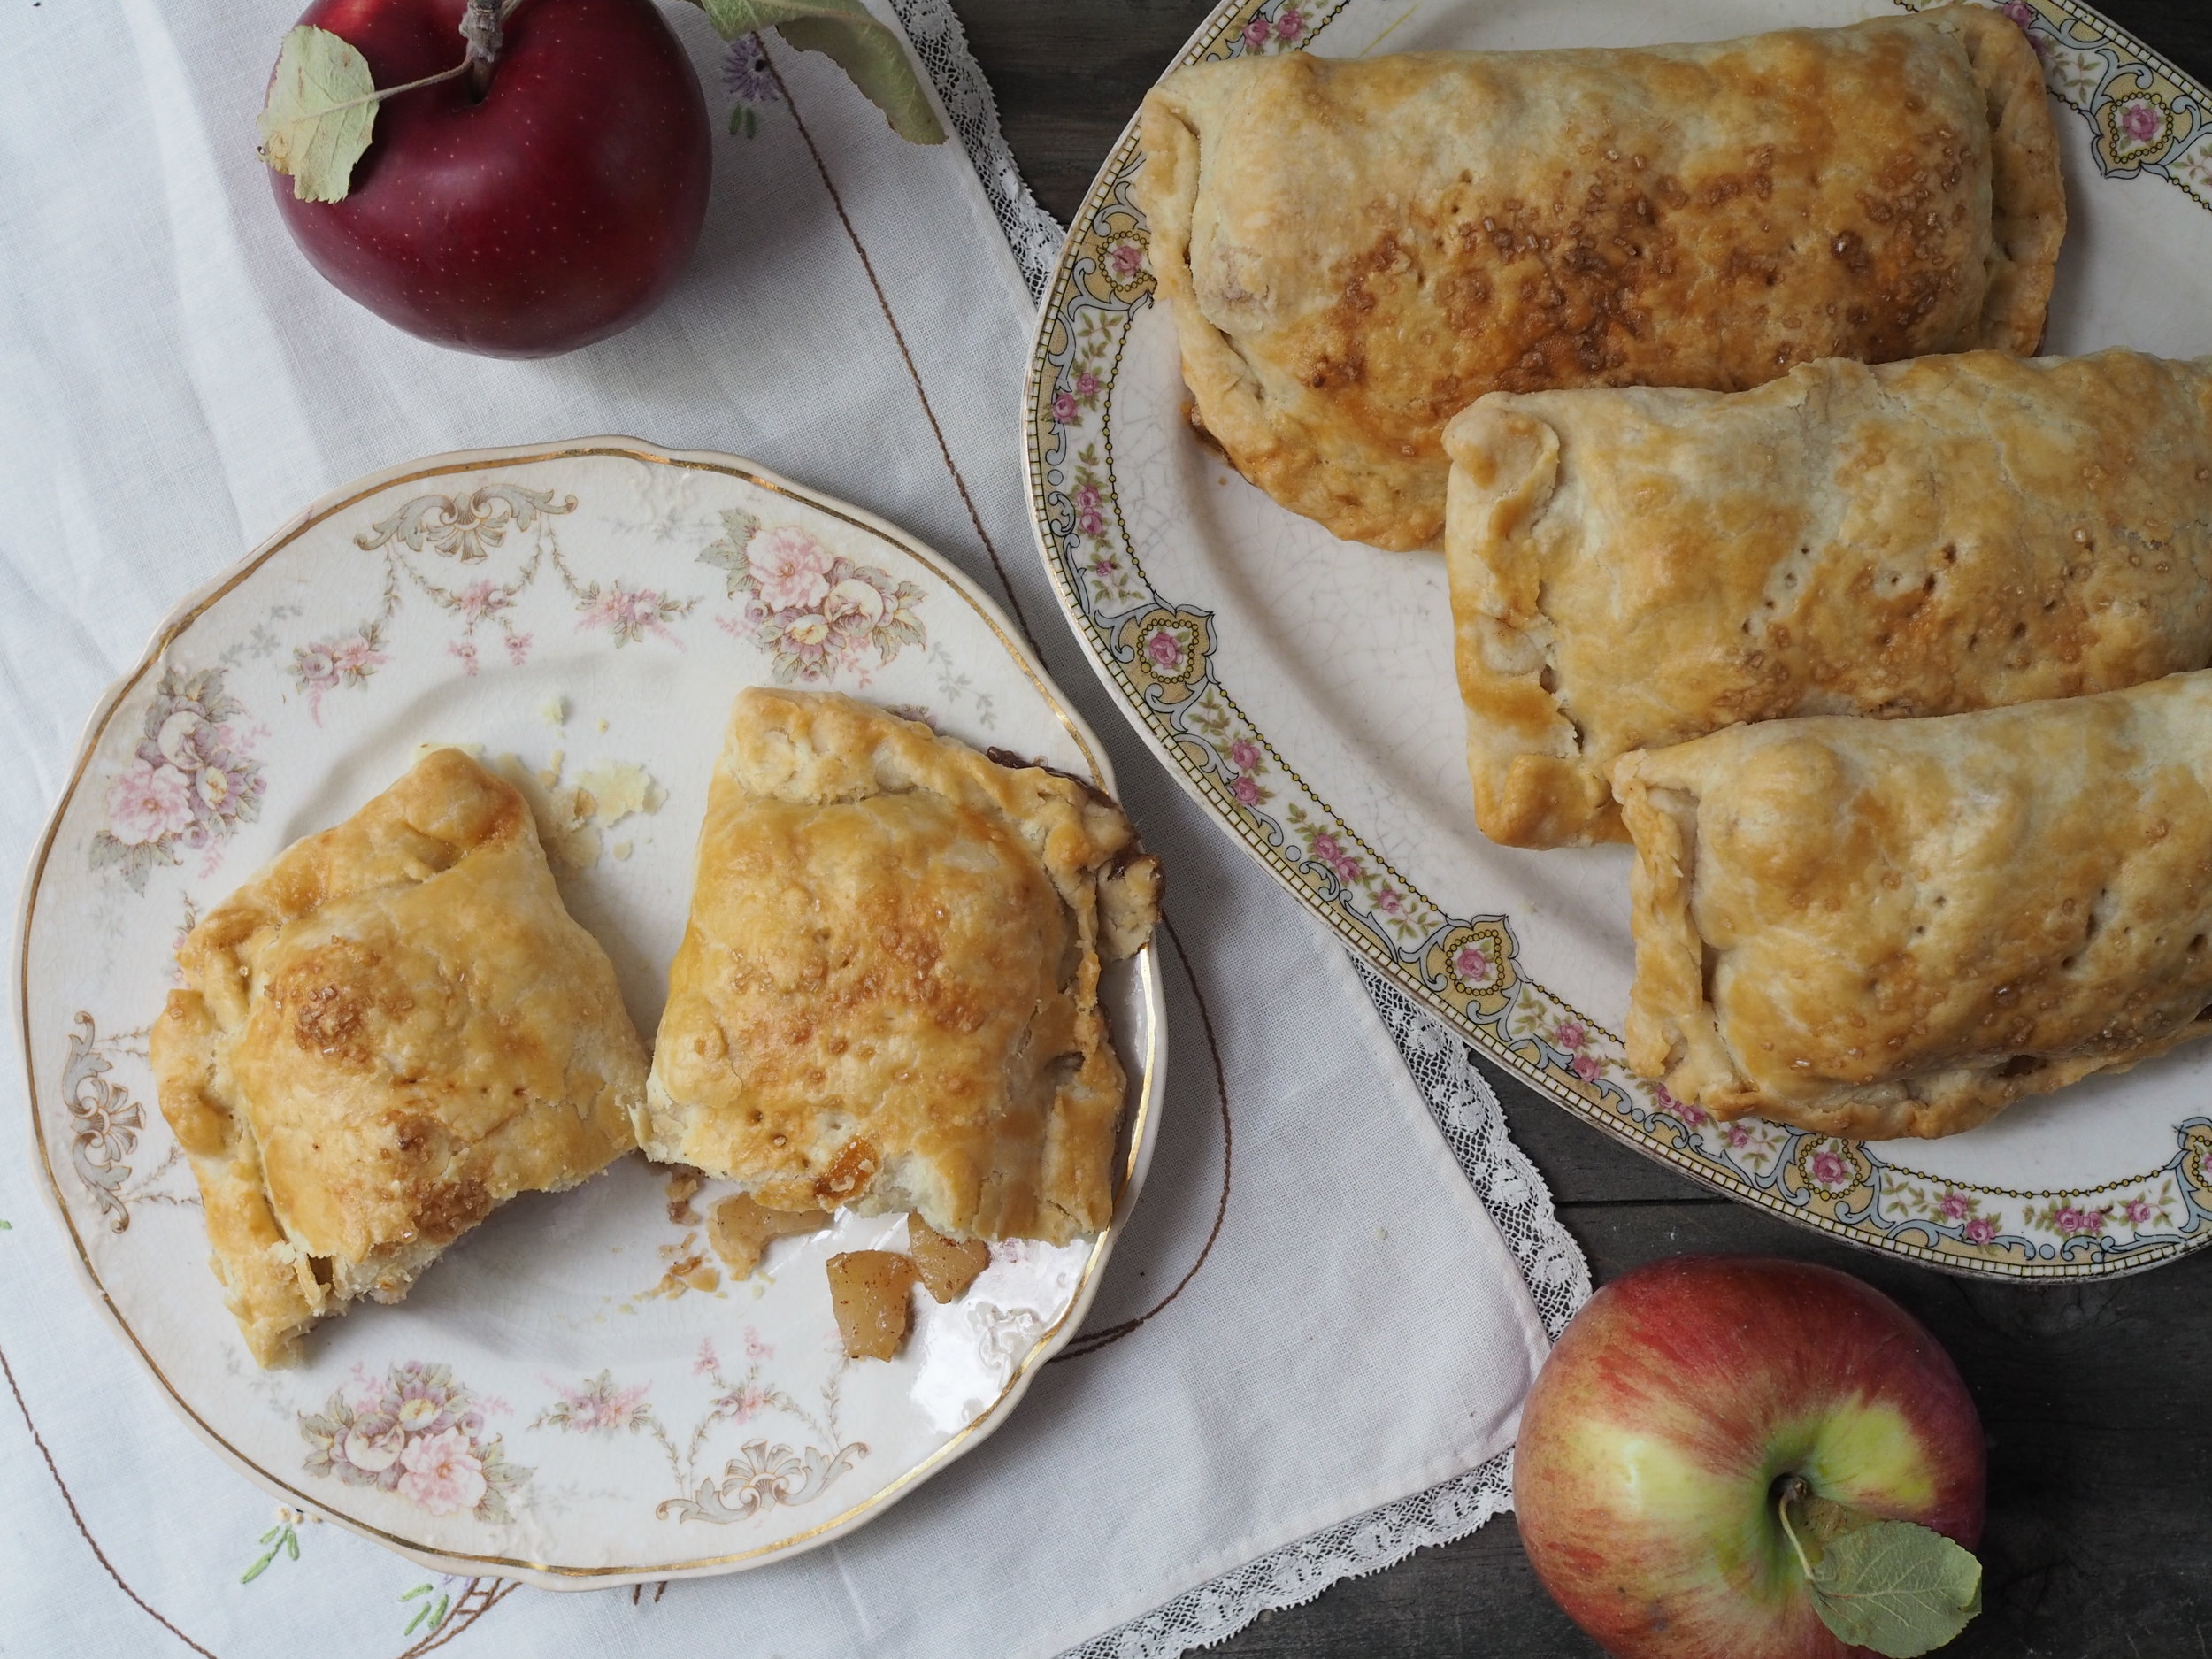
Fall-Spiced Apple Hand Pies

Fall-Spiced Apple Hand Pies
Serves 8
Crust
- 3 cups all purpose flour
- 1 1/2 teaspoons salt
- 1 cup shortening or unsalted butter
- 2/3 to 3/4 cup cold water
Filling
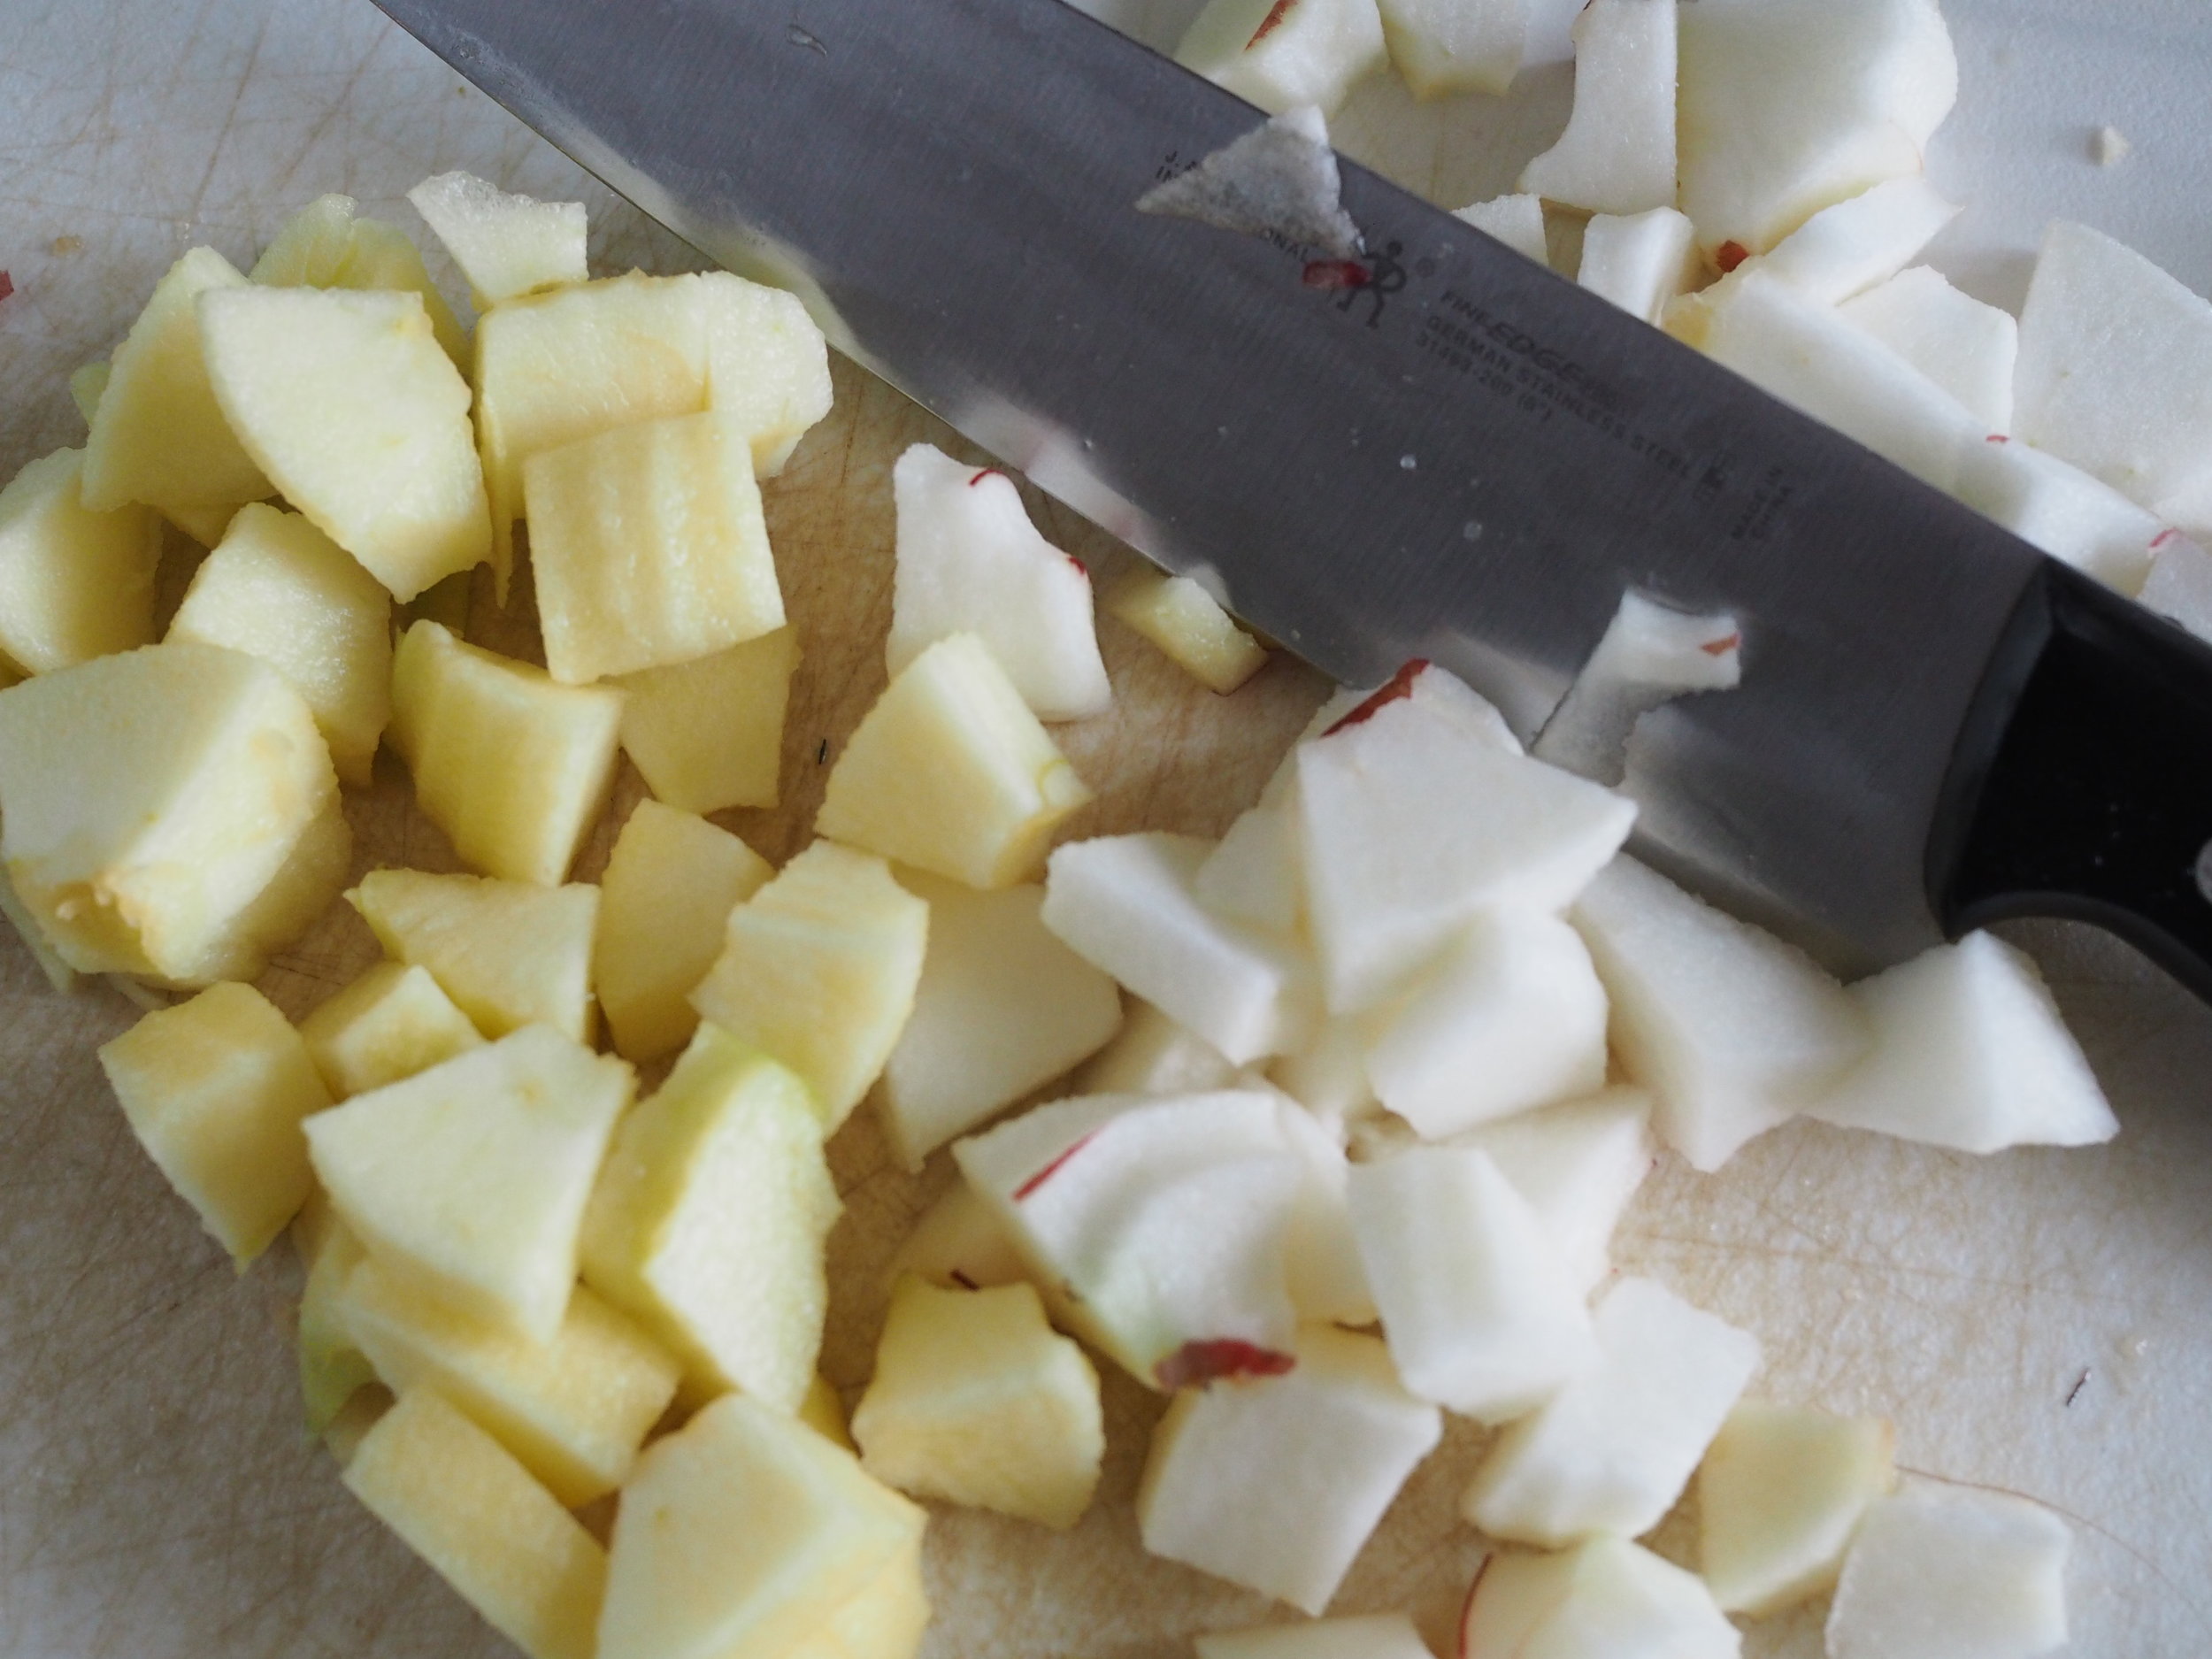
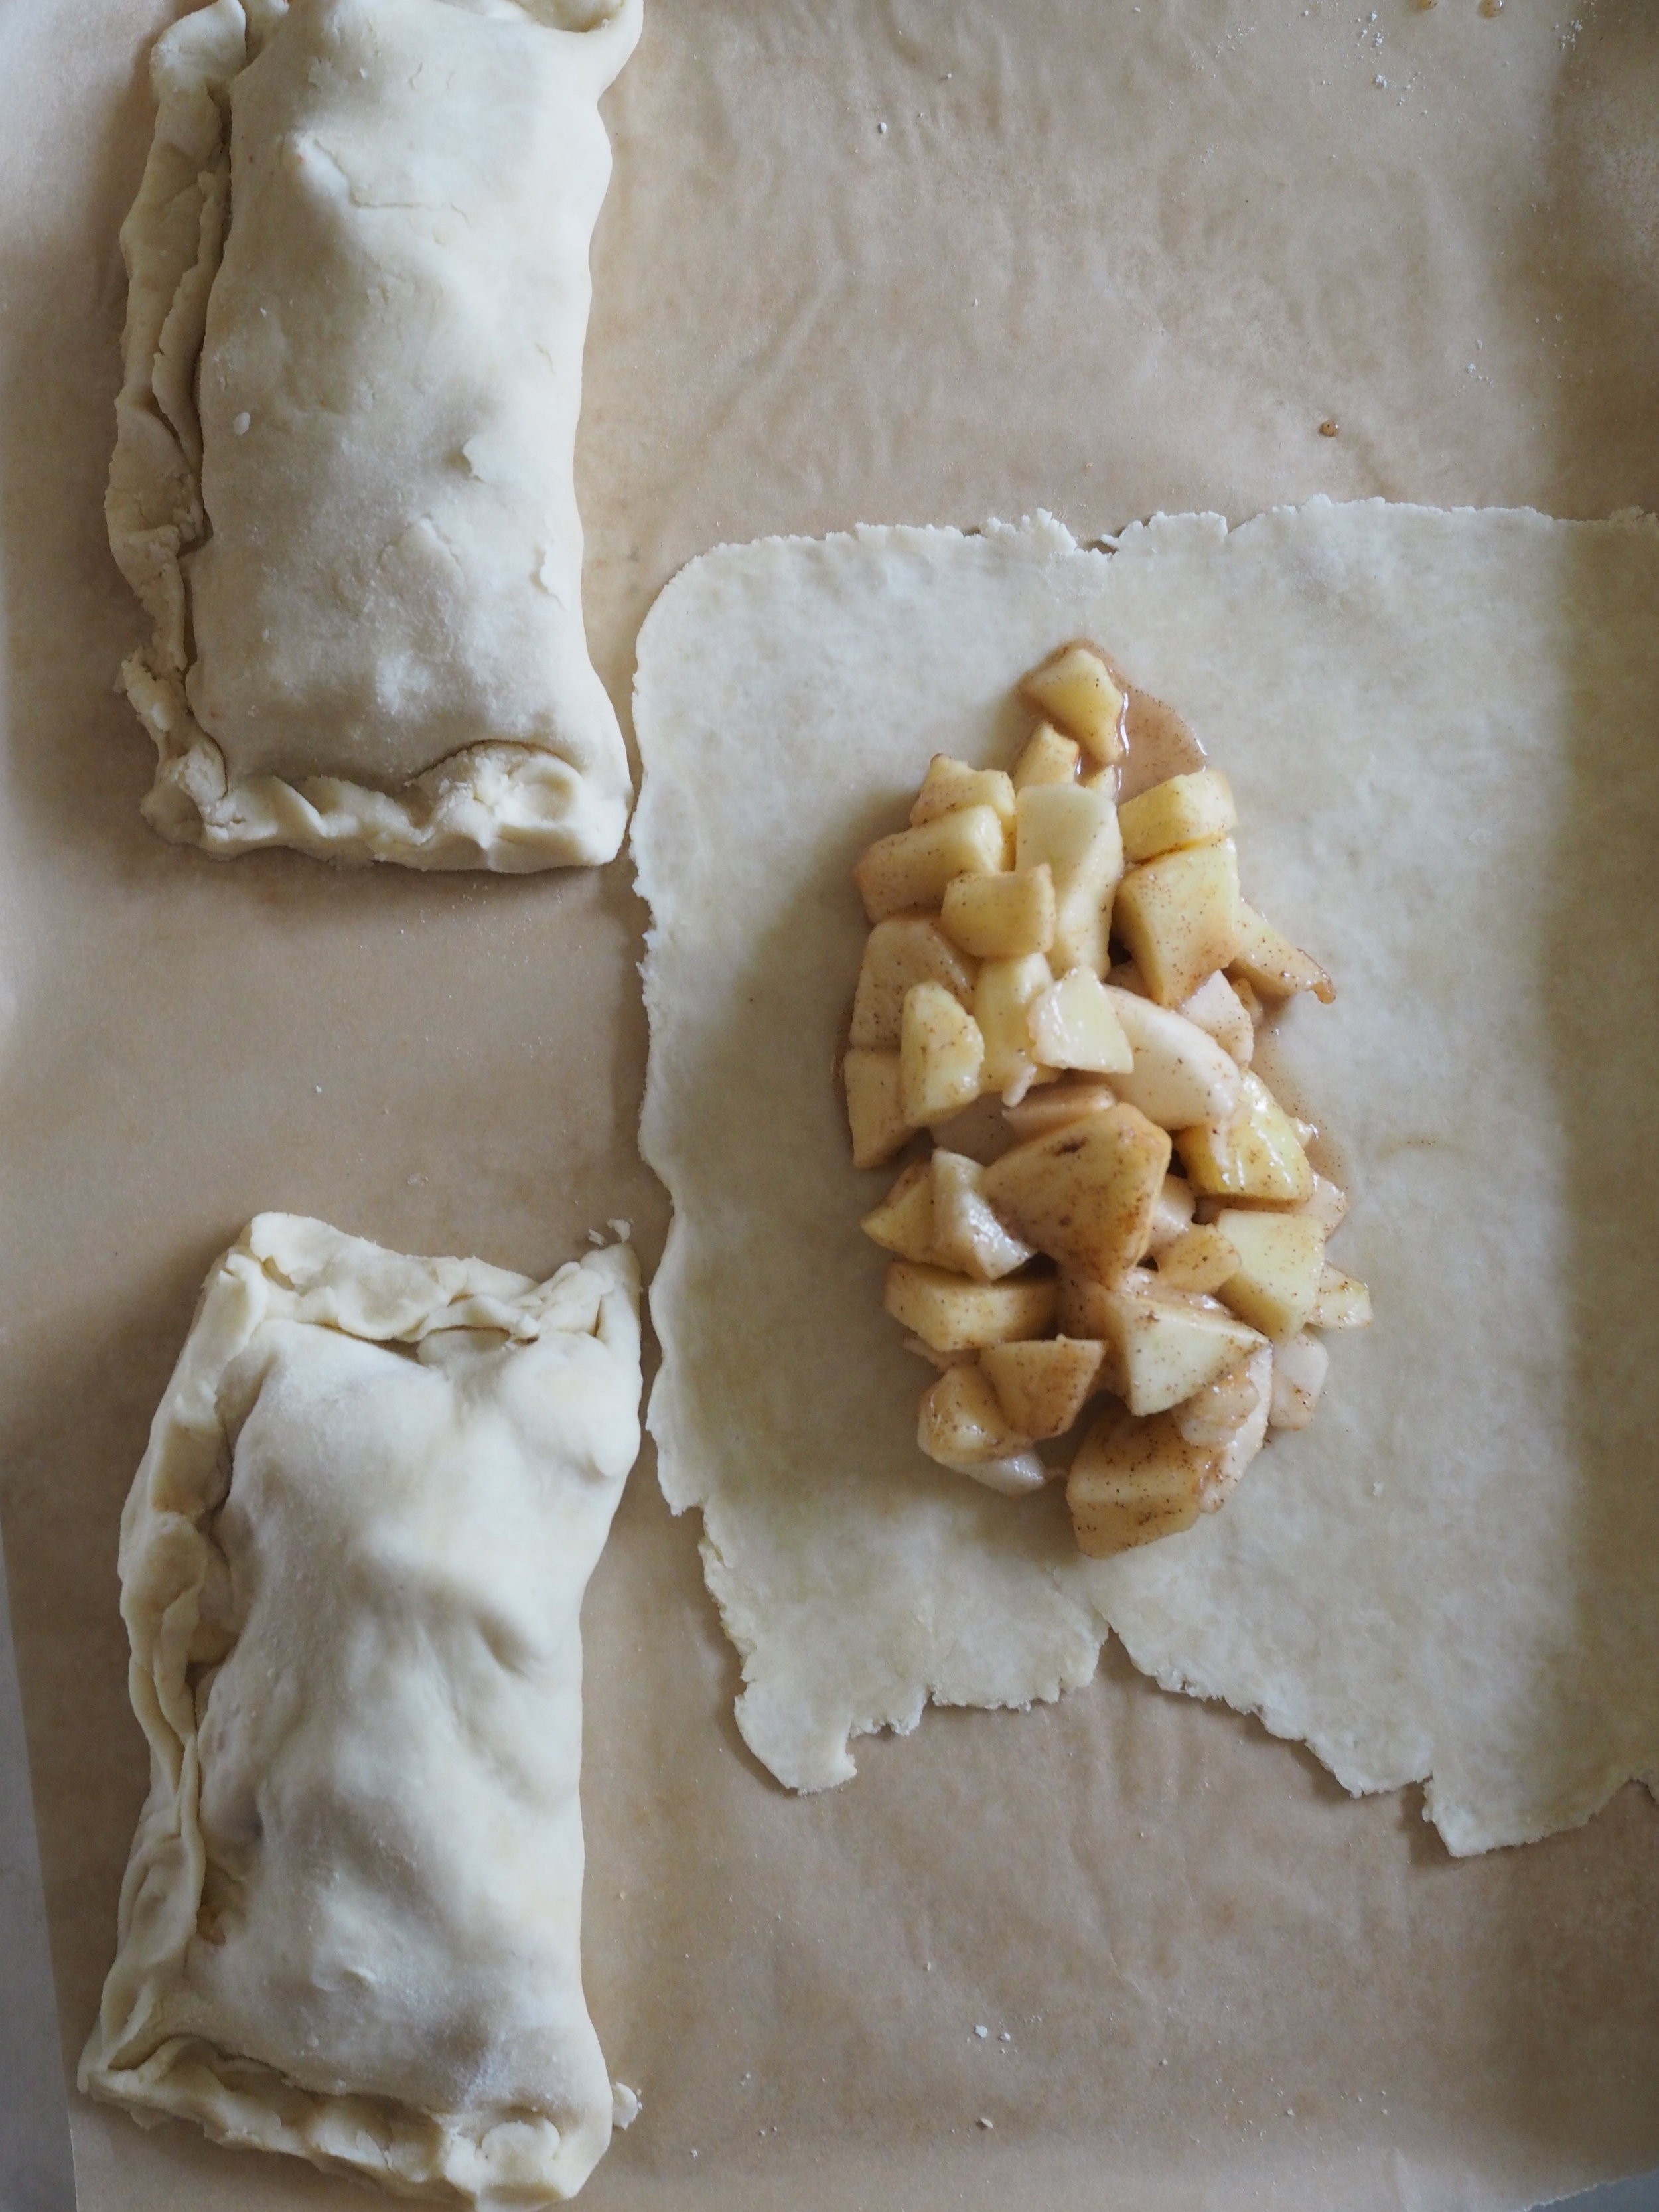
- 8 medium apples, I recommend a variety of firm apples. The photos above use Jonagolds and Macs.
- 2 Tablespoons lemon juice
- 1 teaspoon cinnamon
- 1/4 teaspoon nutmeg
- 1/2 cup granulated sugar
- 1/3 cup flour or cornstarch
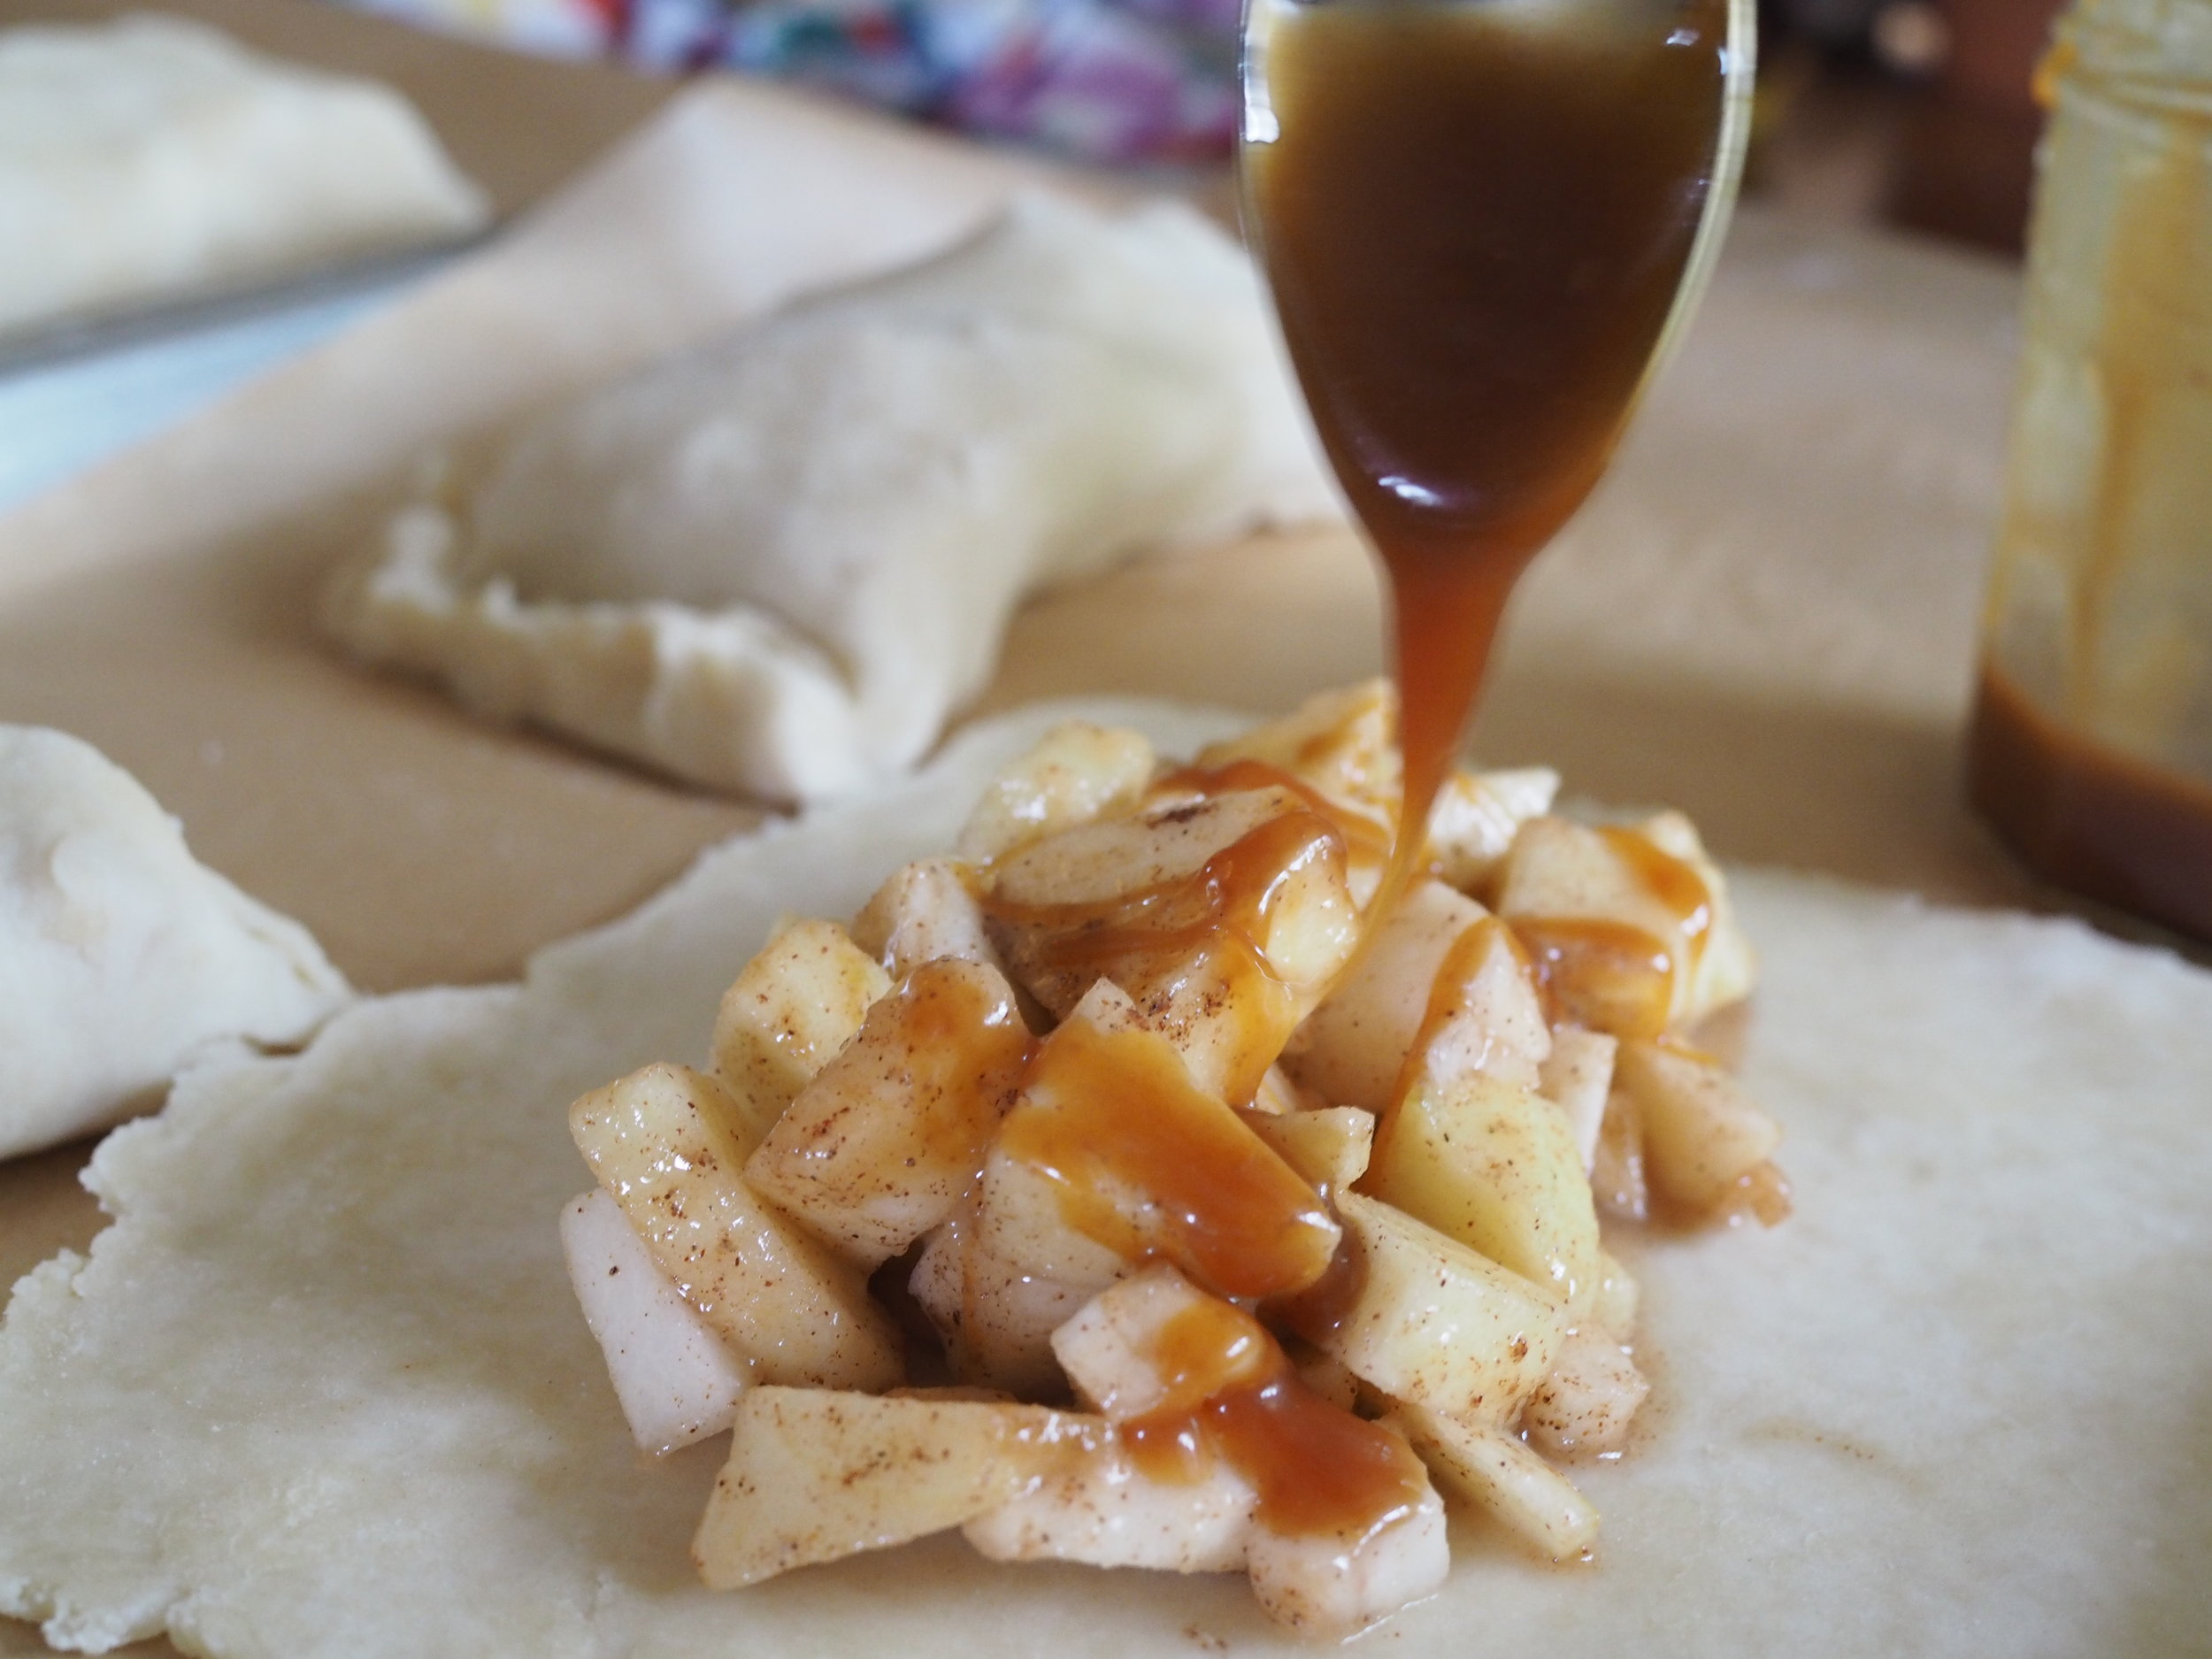
- Caramel sauce (optional) (I like the one from the Joy of Cooking)
Topping
- 1 egg whisked with a Tablespoon of water
- Demerara/raw sugar
Preheat oven to 350 Degrees F.
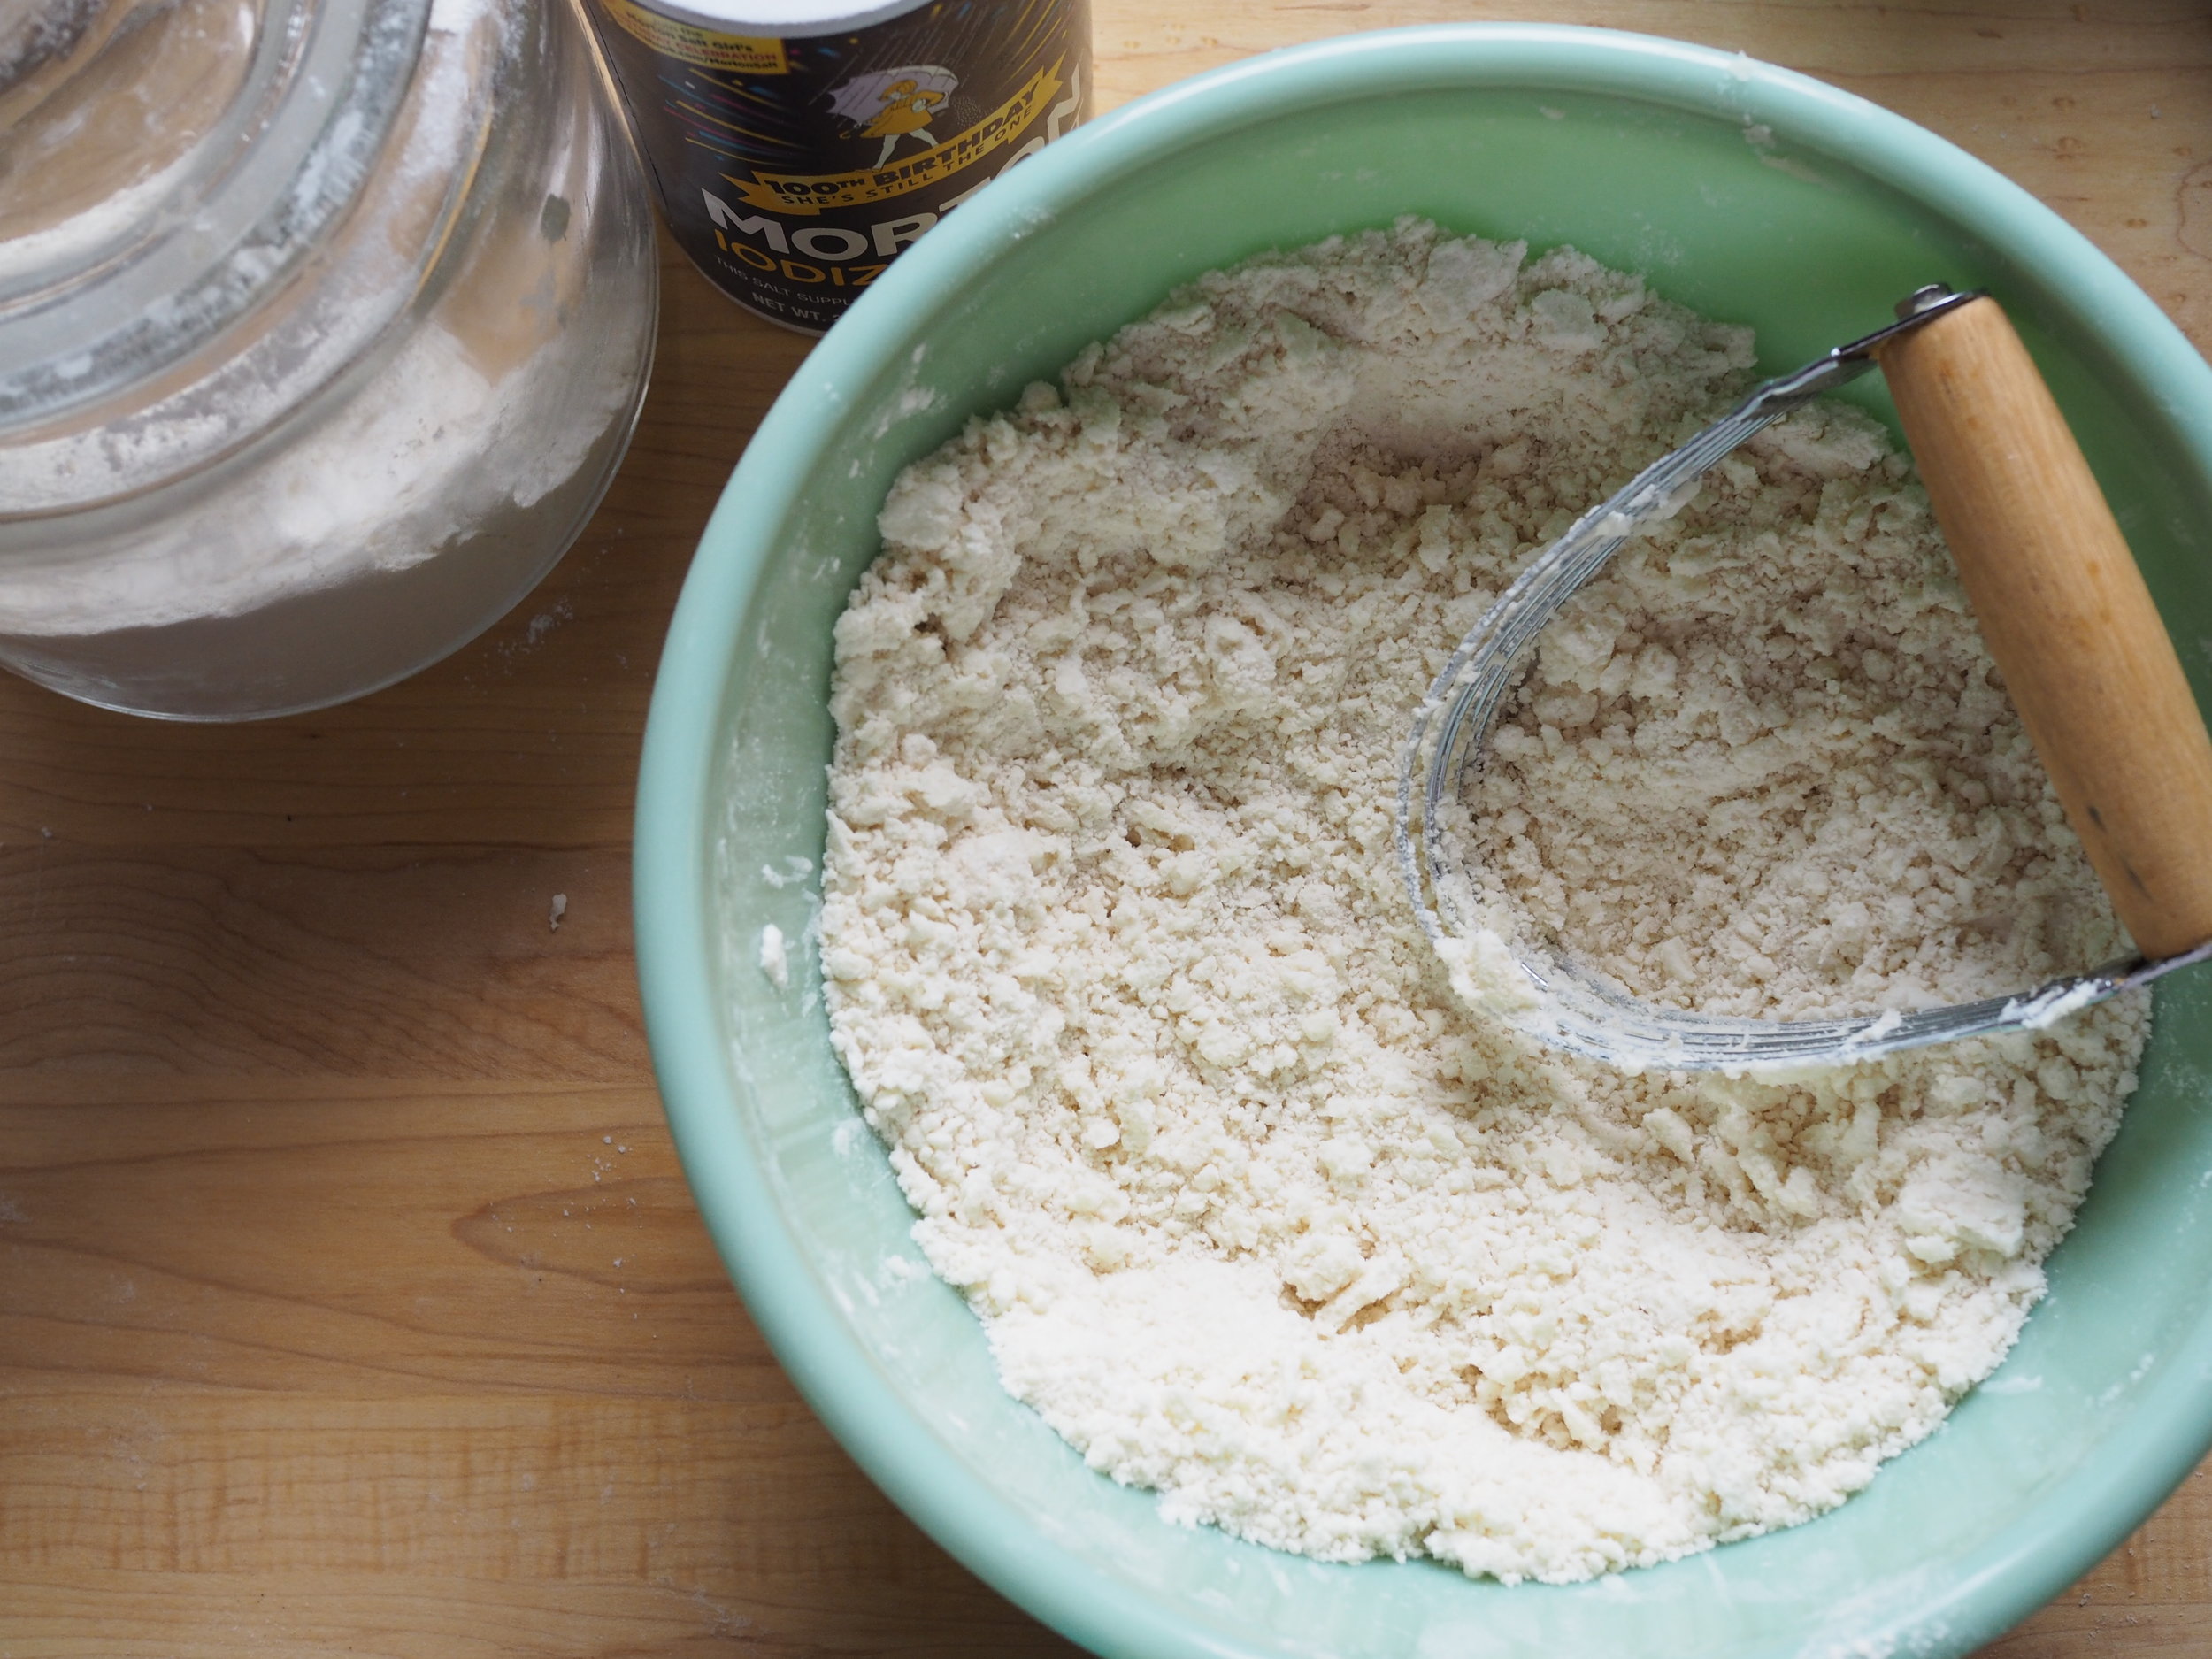
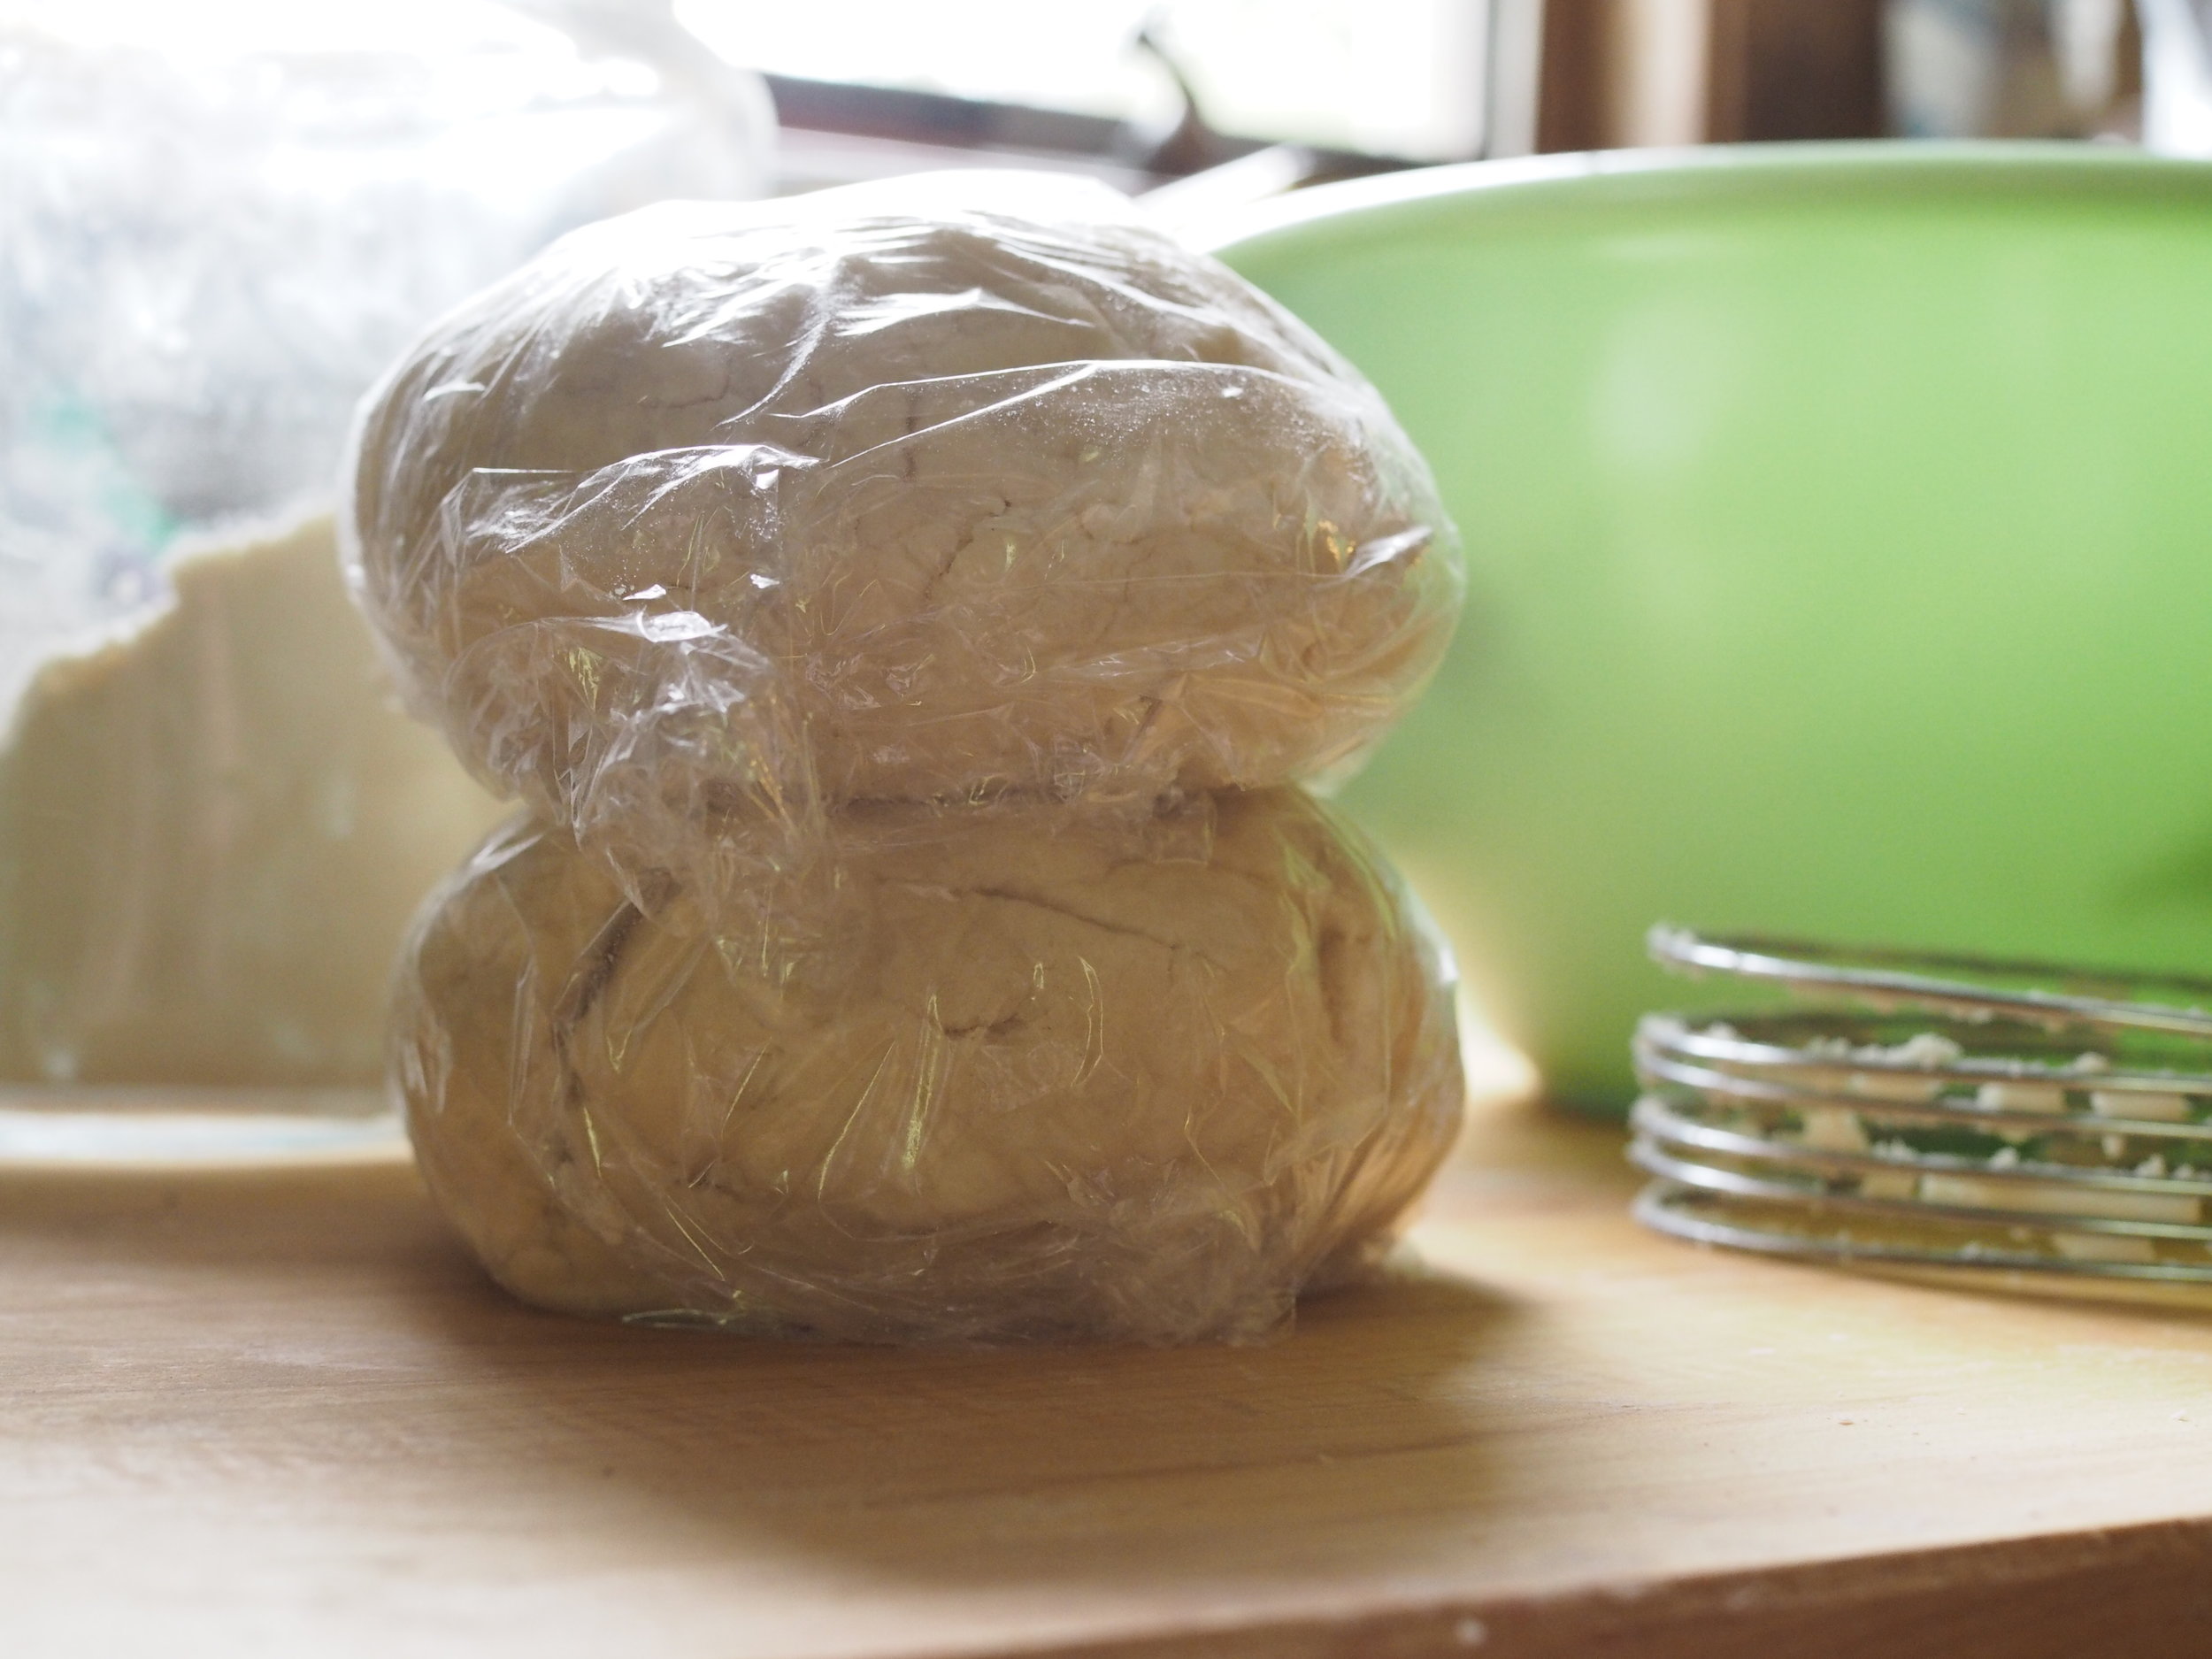
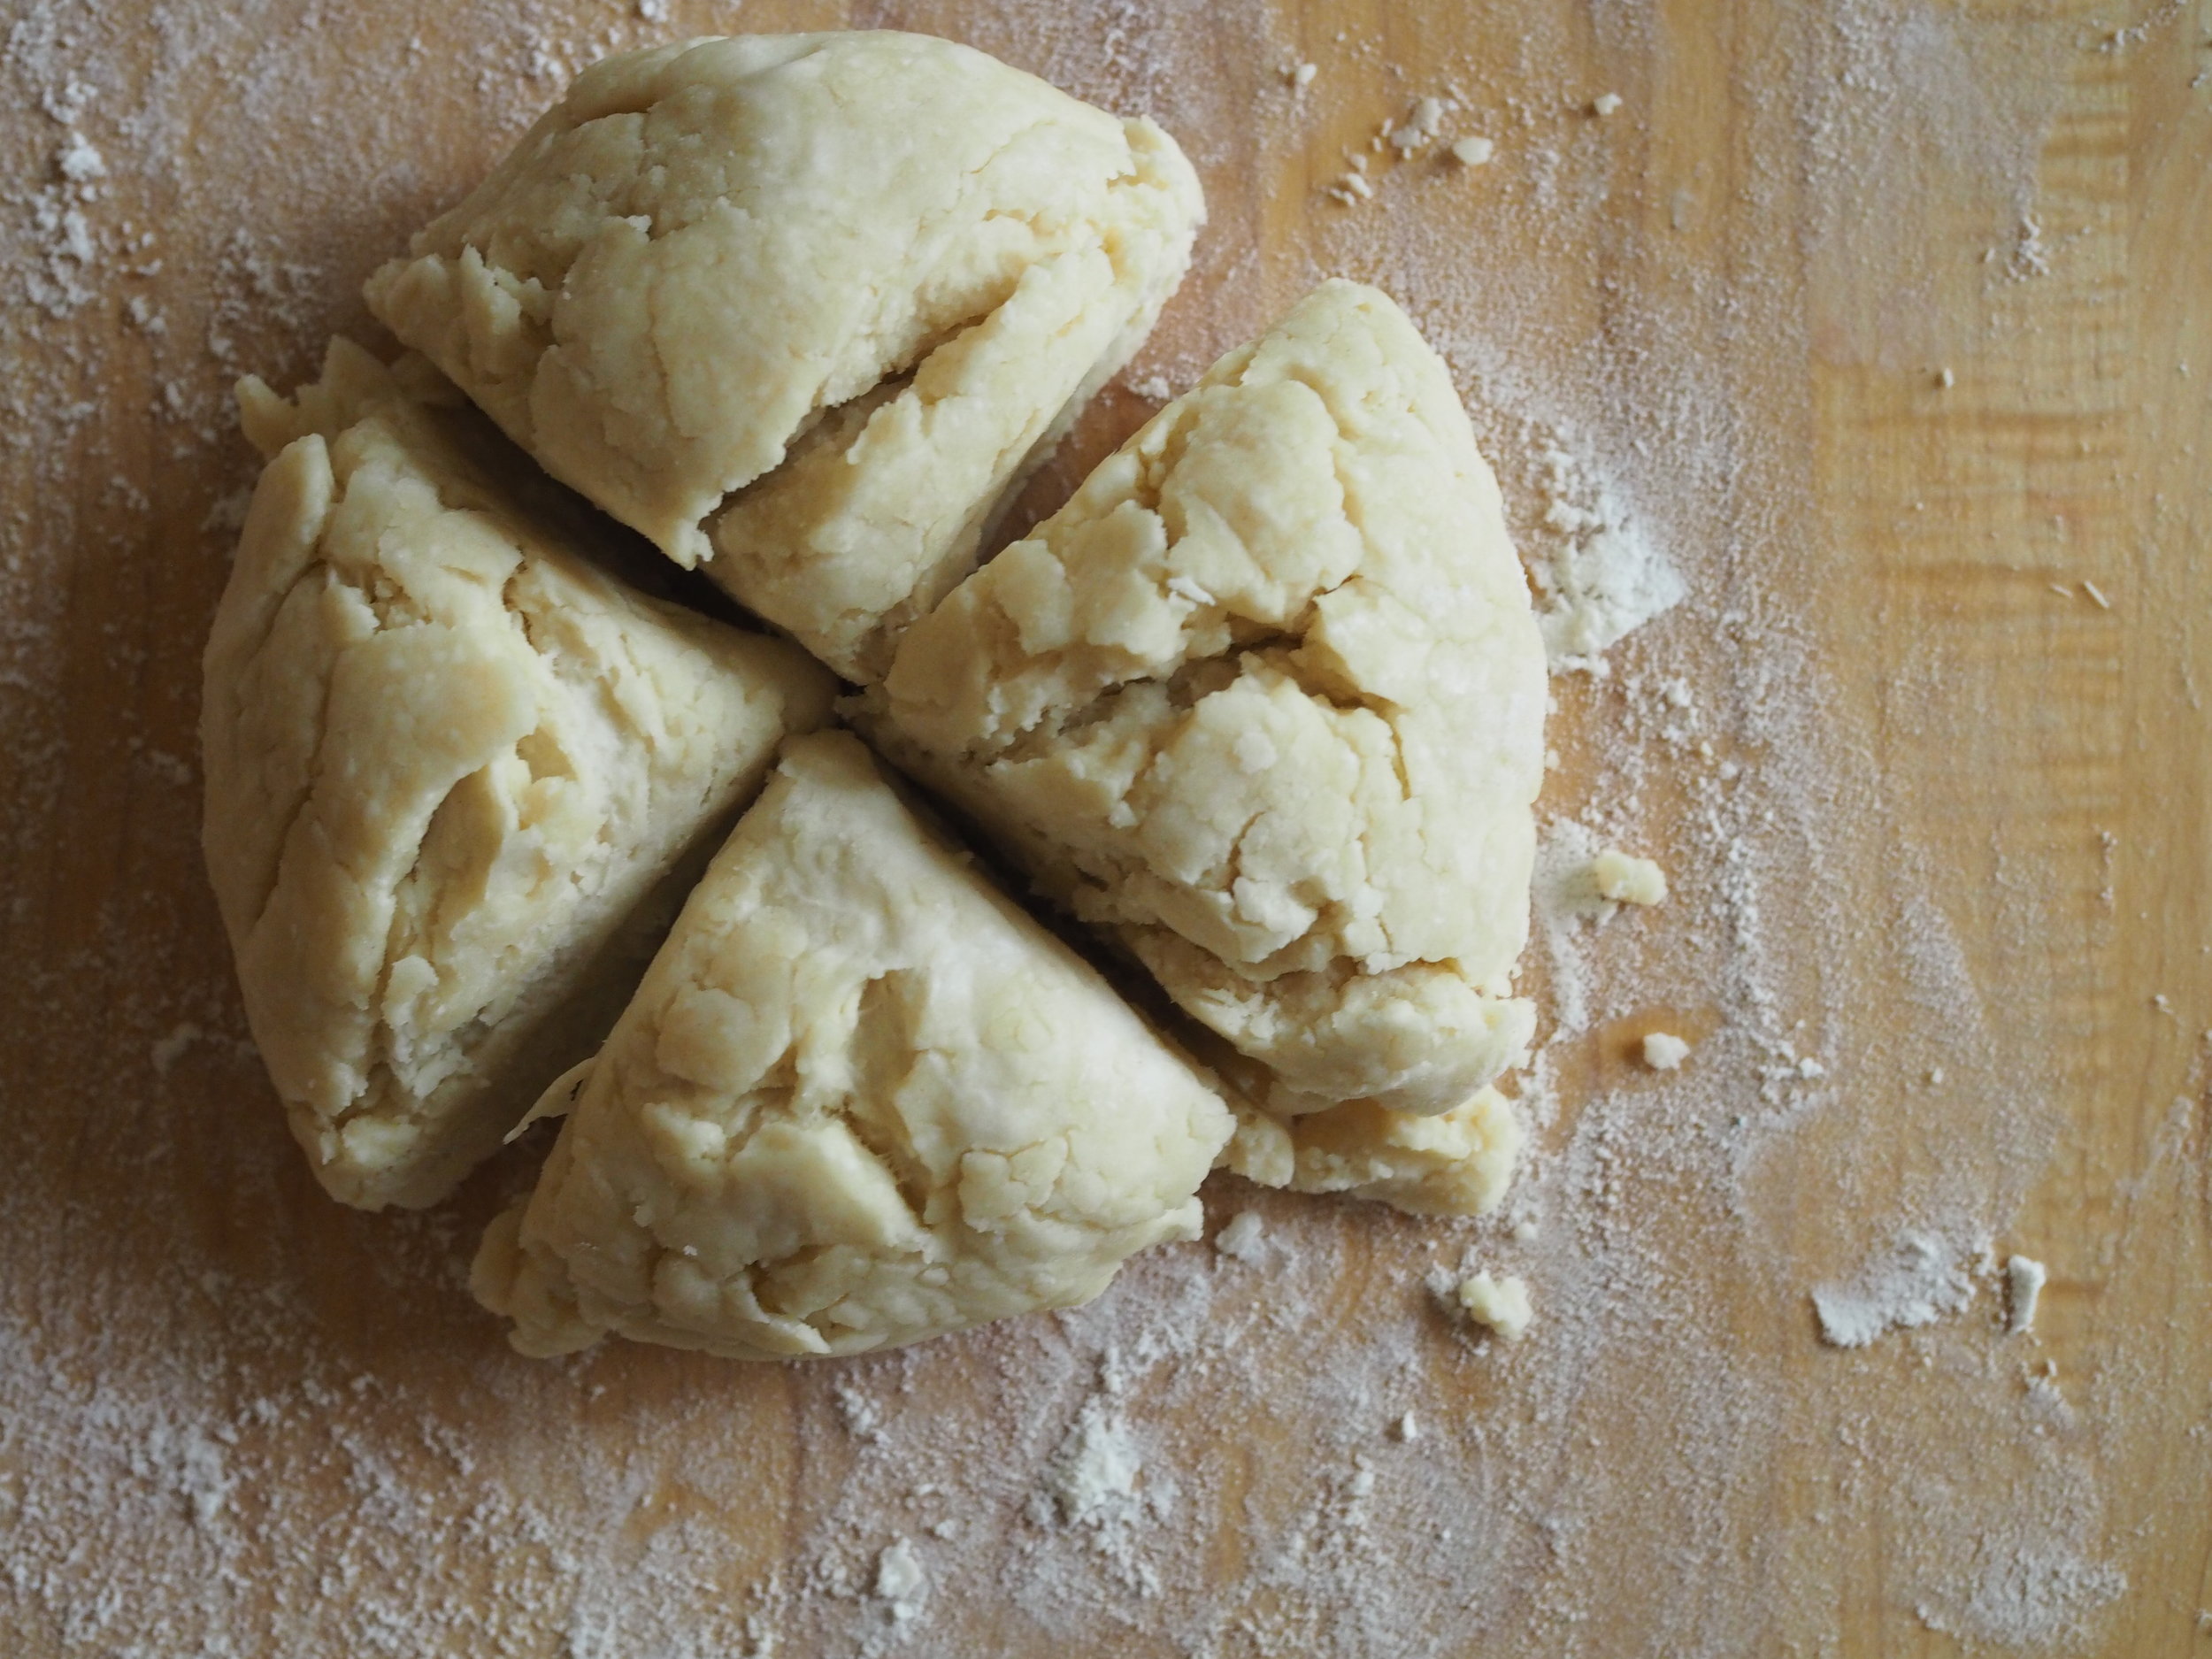
Make crust. In a large mixing bowl, combine flour and salt. Using a pastry cutter or food processor, cut in shortening until mixture resembles damp sand. Add water, a little bit at a time, until dough sticks together. You will want it slightly more elastic than crust for a pan pie. Break dough into two evenly sized pieces, wrap in plastic wrap, and place in refrigerator up to a day in advance.
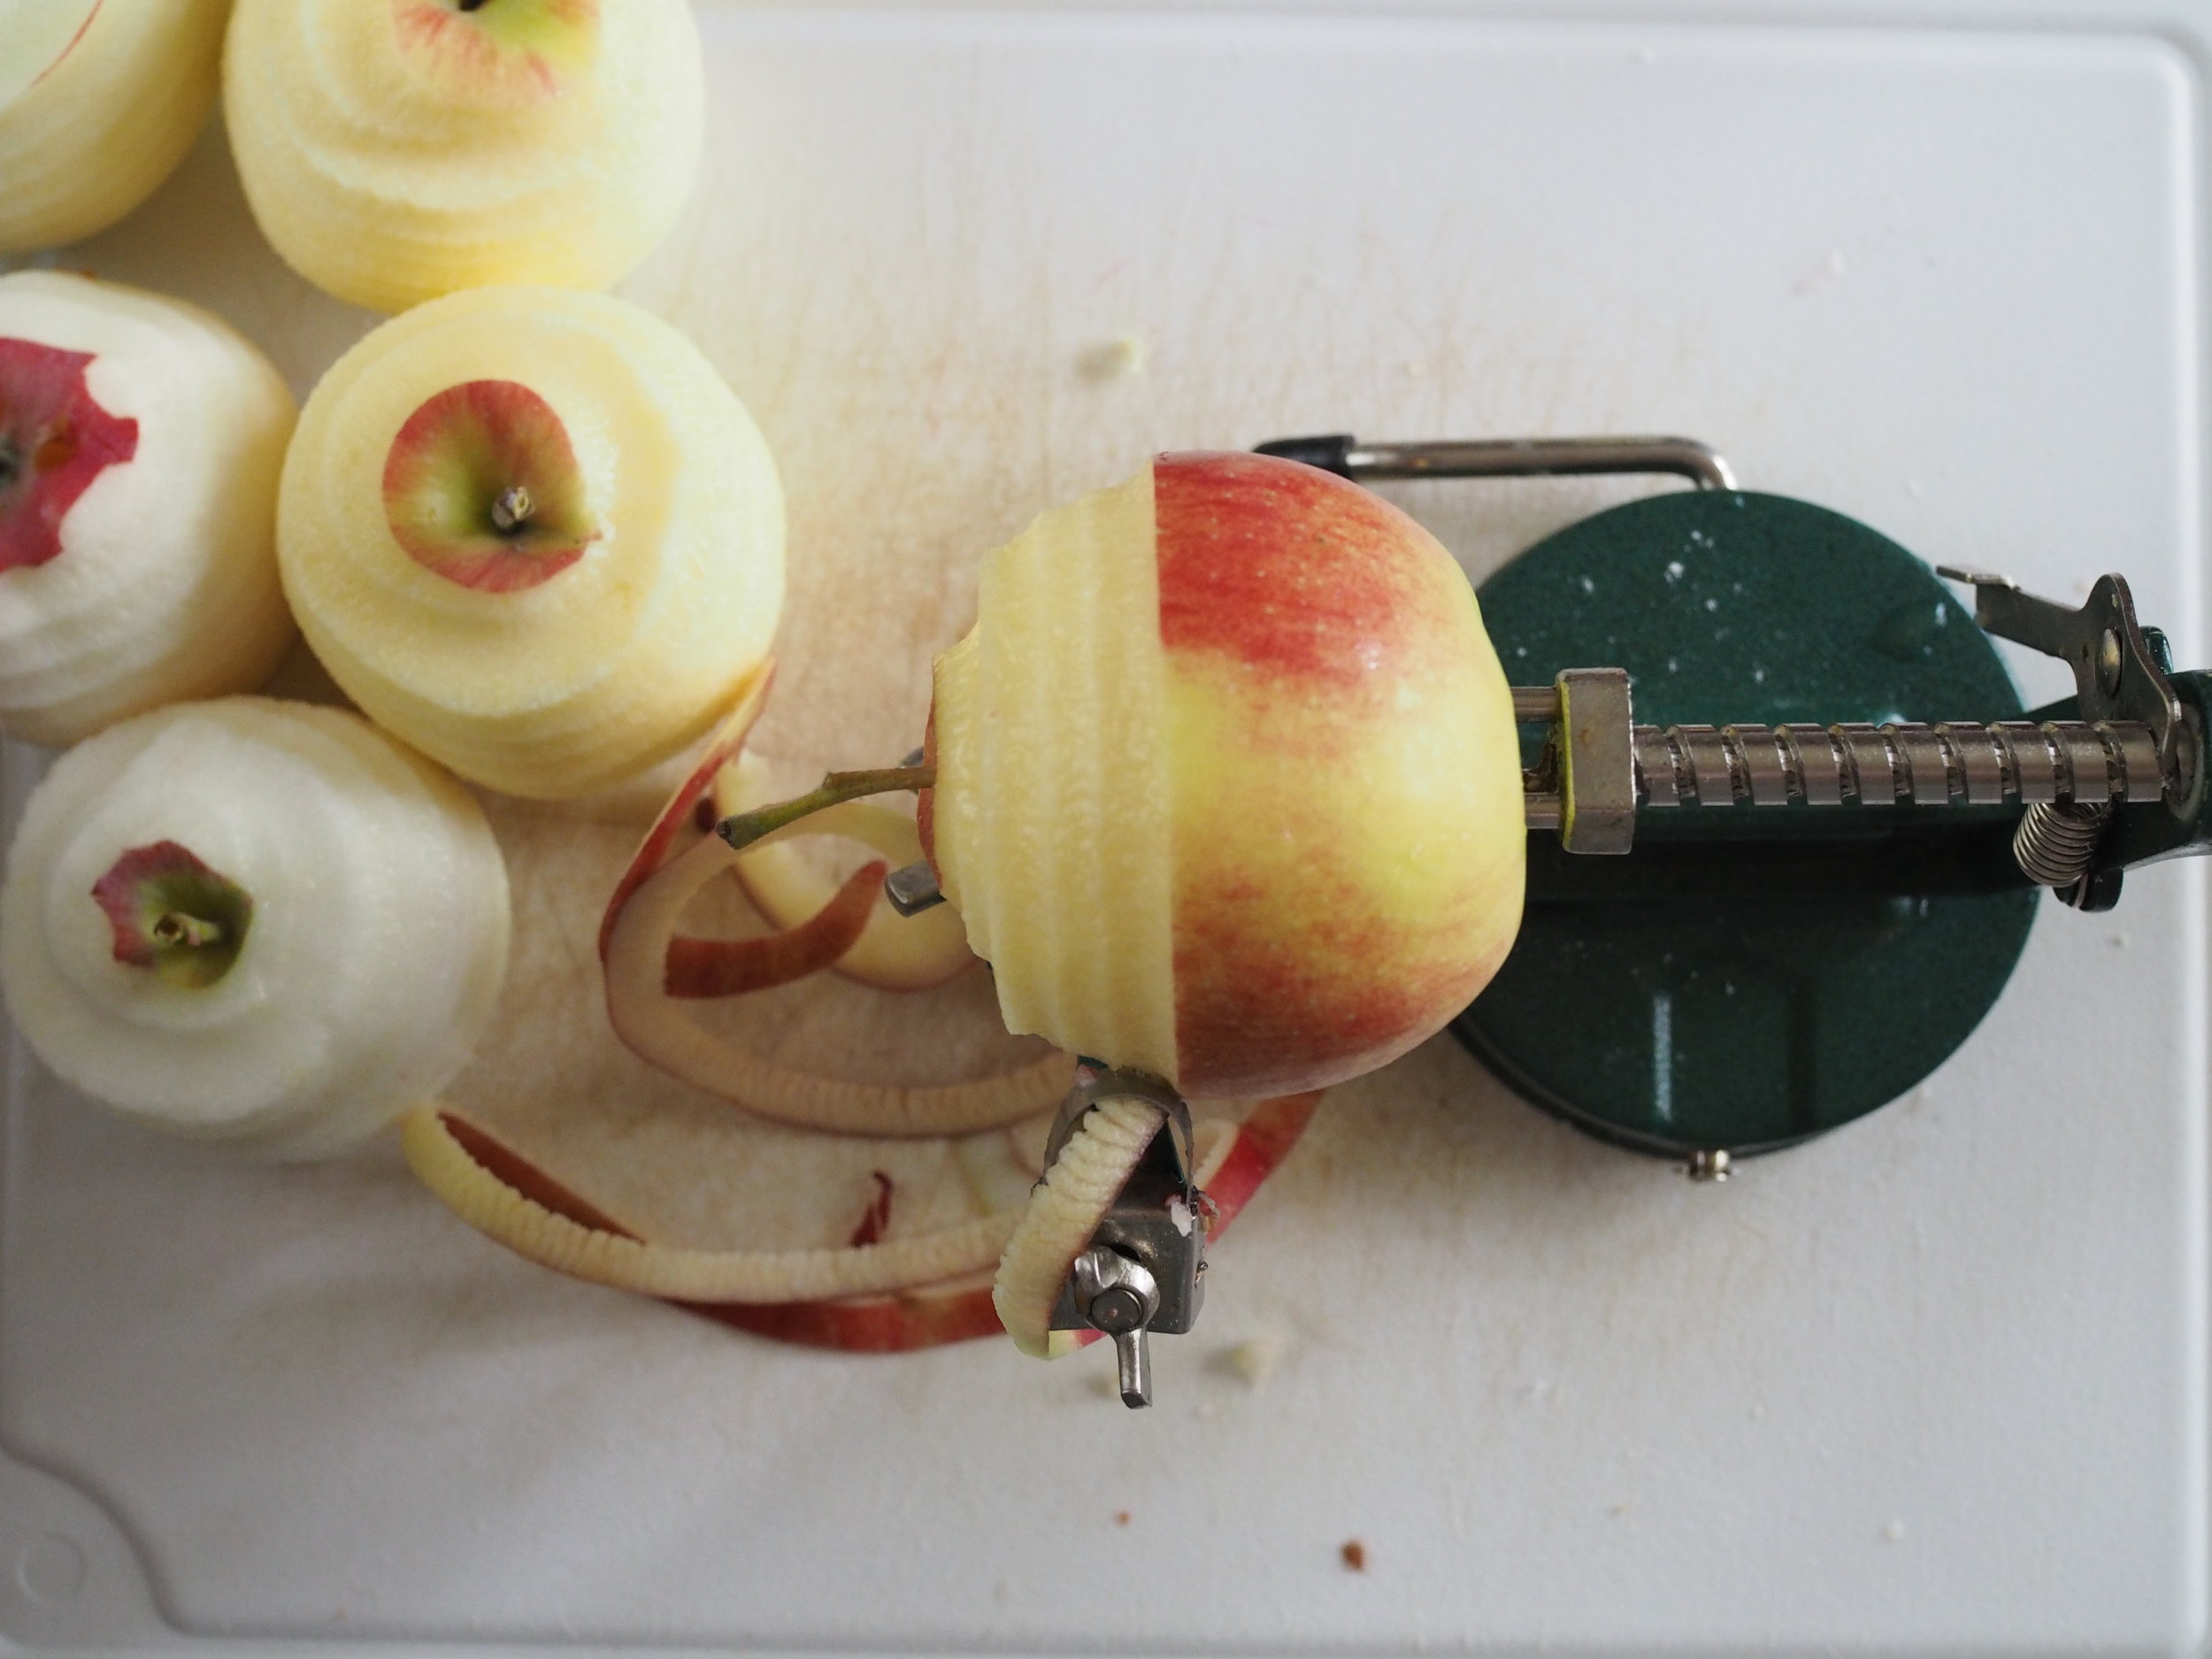
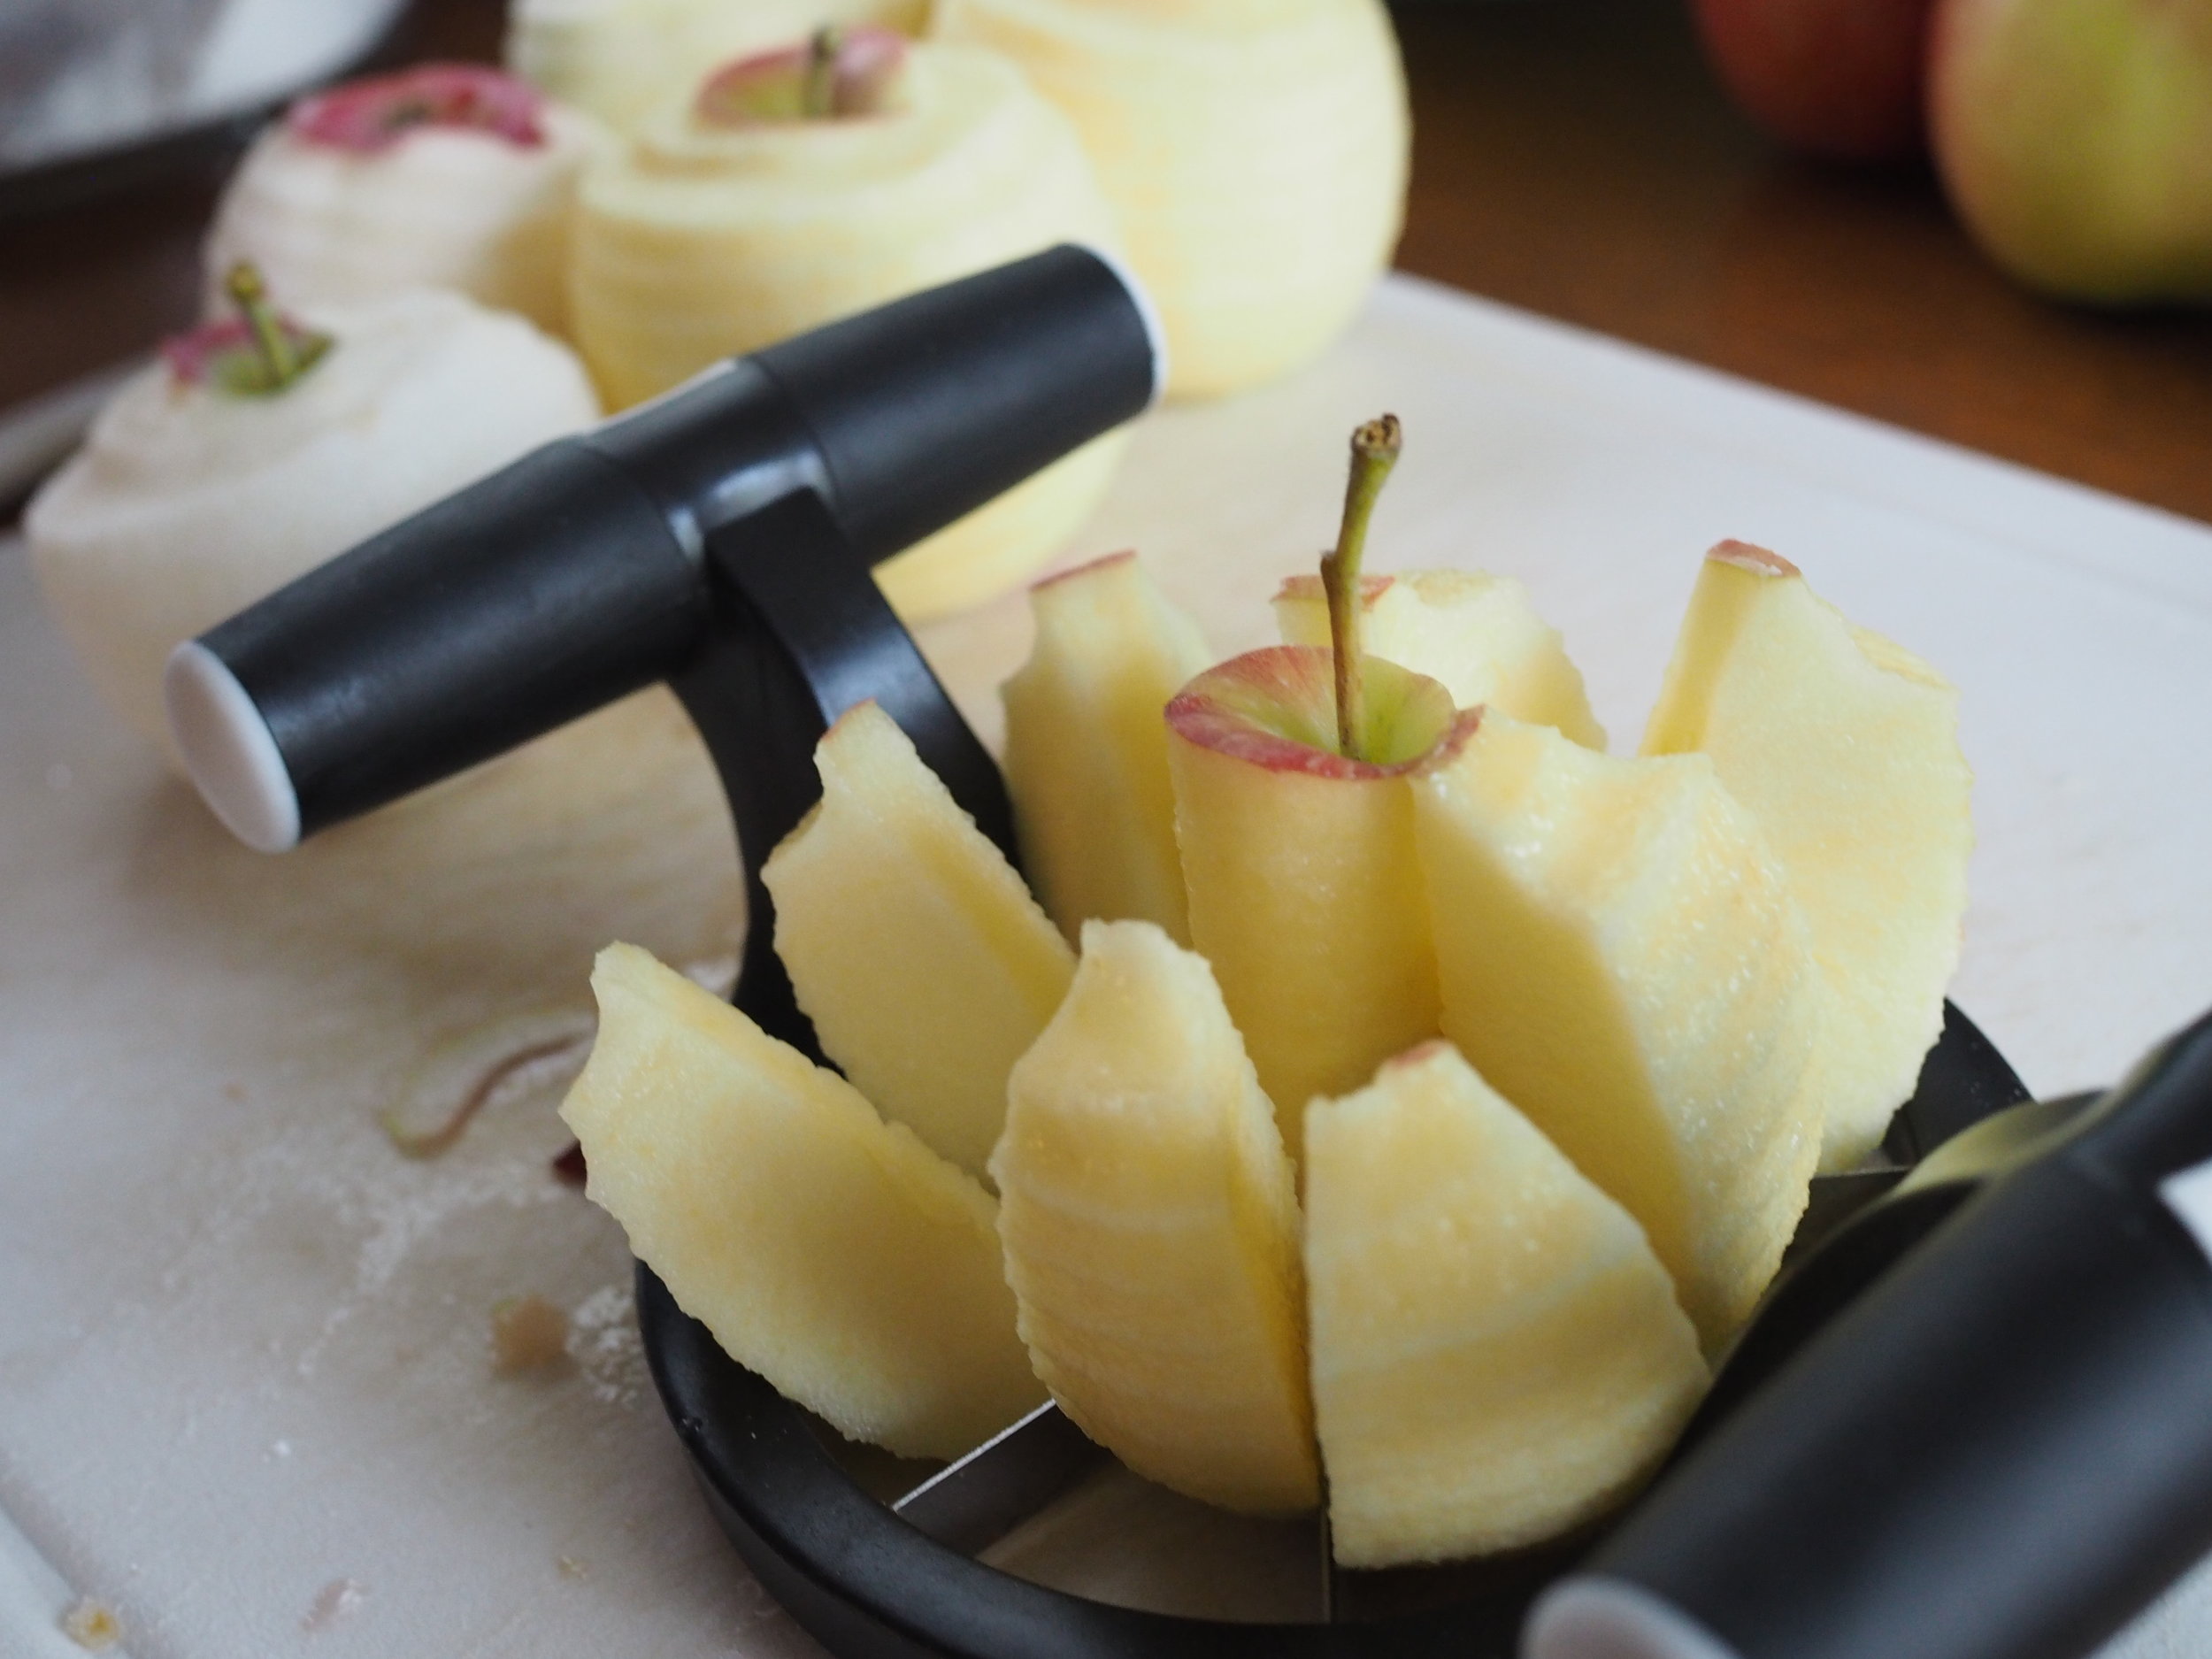
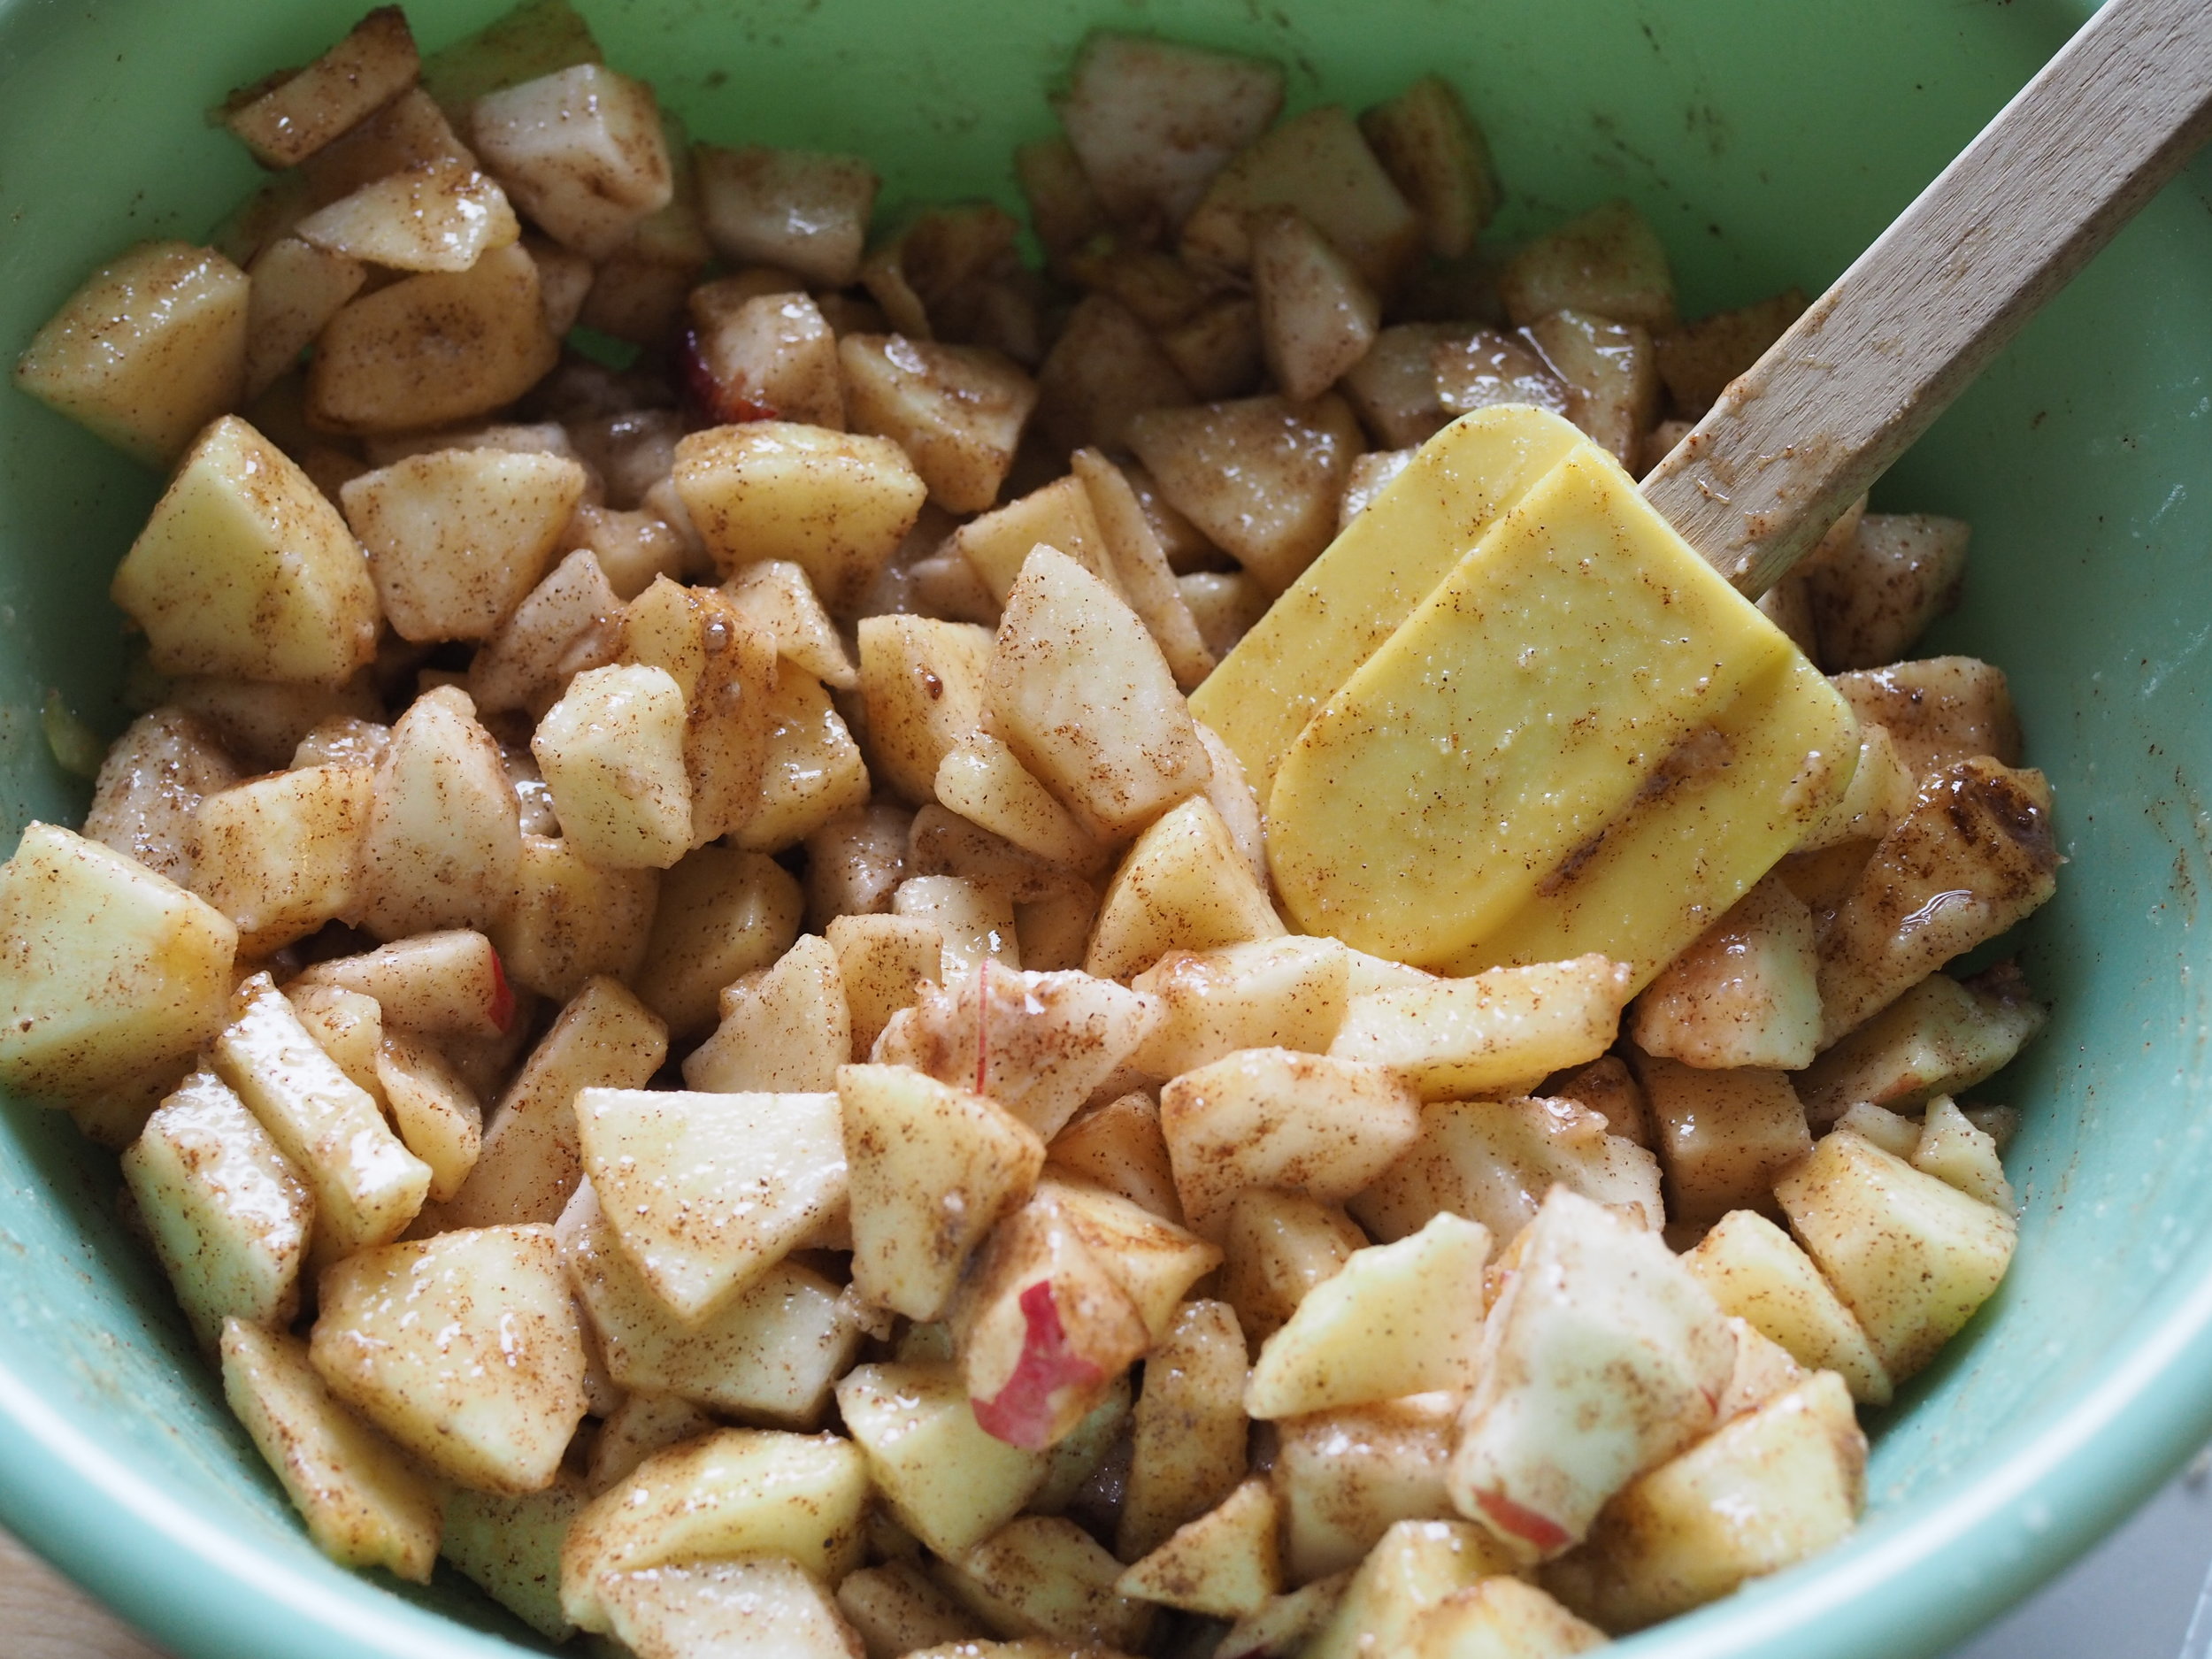
Prepare filling. Peel, core, and dice apples into small chunks. In a large mixing bowl, combine diced apples with lemon juice, cinnamon, nutmeg, sugar, and flour. Mix well, until all apple pieces are coated.
Line two rimmed cookie sheets with parchment paper.
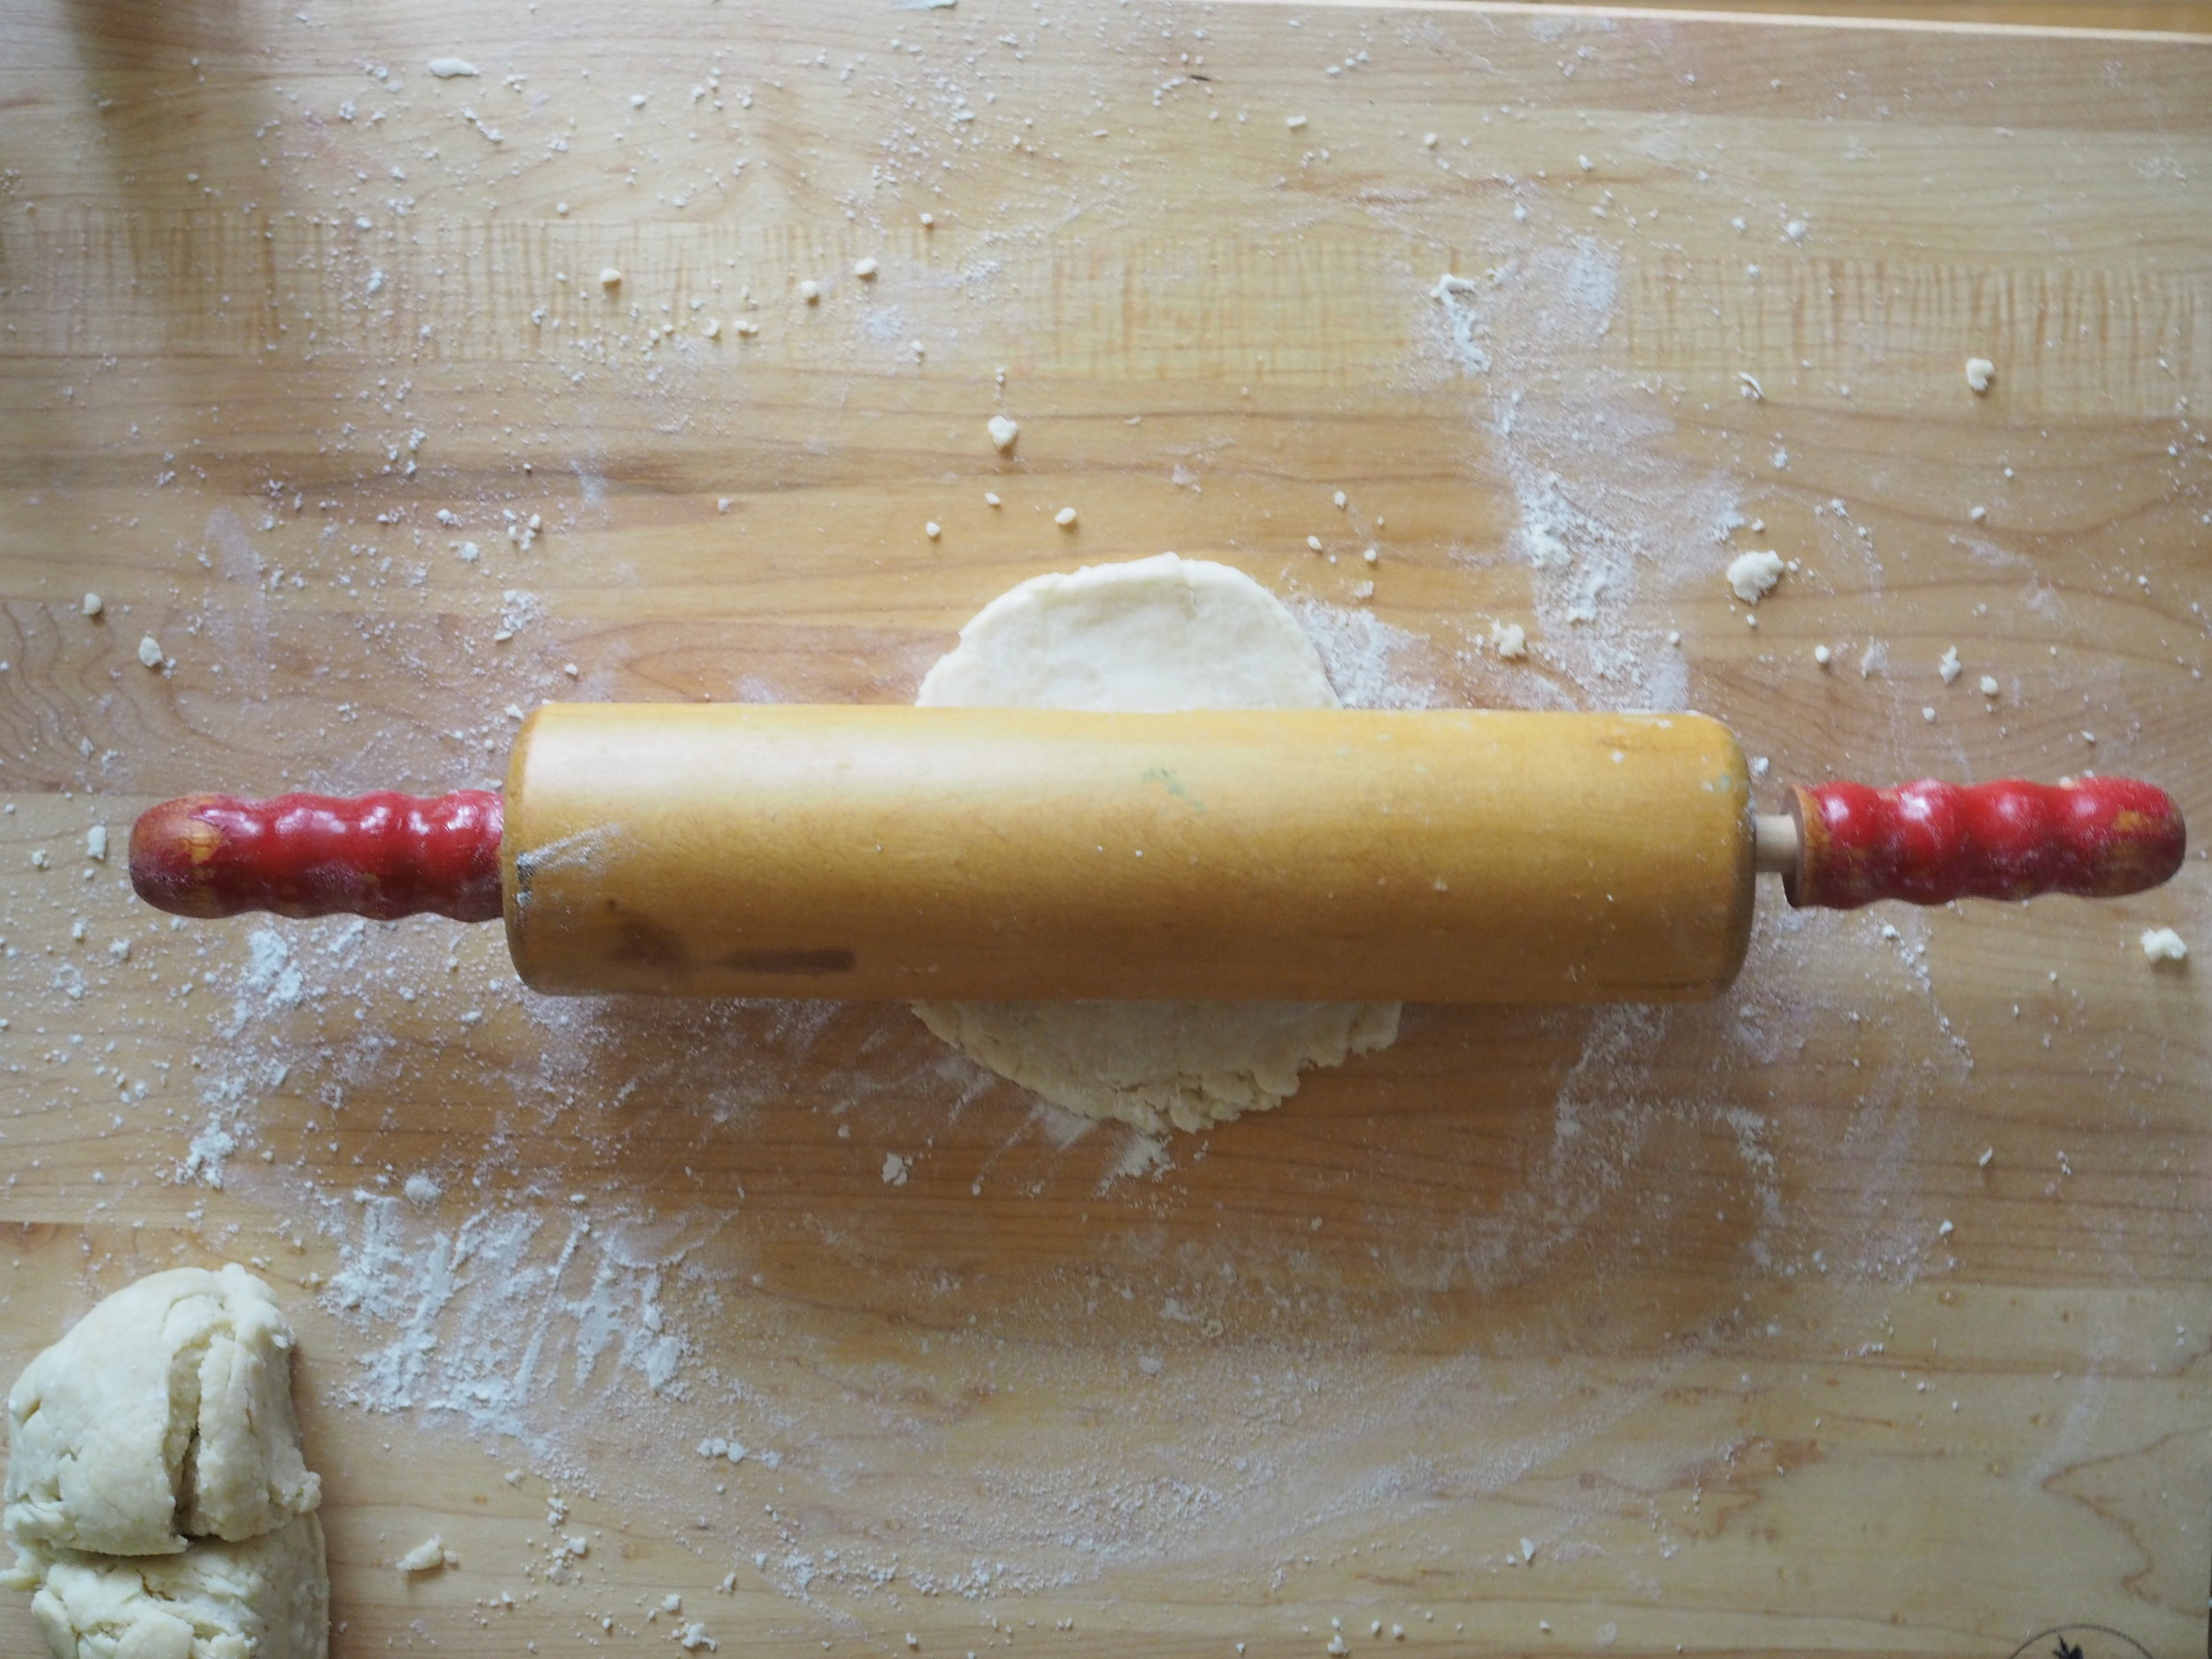
Remove crust from refrigerator. Cut each ball of dough into four equal pieces. On a well-floured surface, roll each piece of dough into a 7 to 8 inch square. Place dough on cookie sheet. Using a slotted spoon, scoop filling into the center of the square. If desired, drizzle caramel sauce generously over filling.
Fold dough over filling, so top portion of crust is about 1/4 inch shy of the edge of the bottom. Fold up bottom crust to meet top crust and pinch/crimp to seal. Repeat for remaining pies.
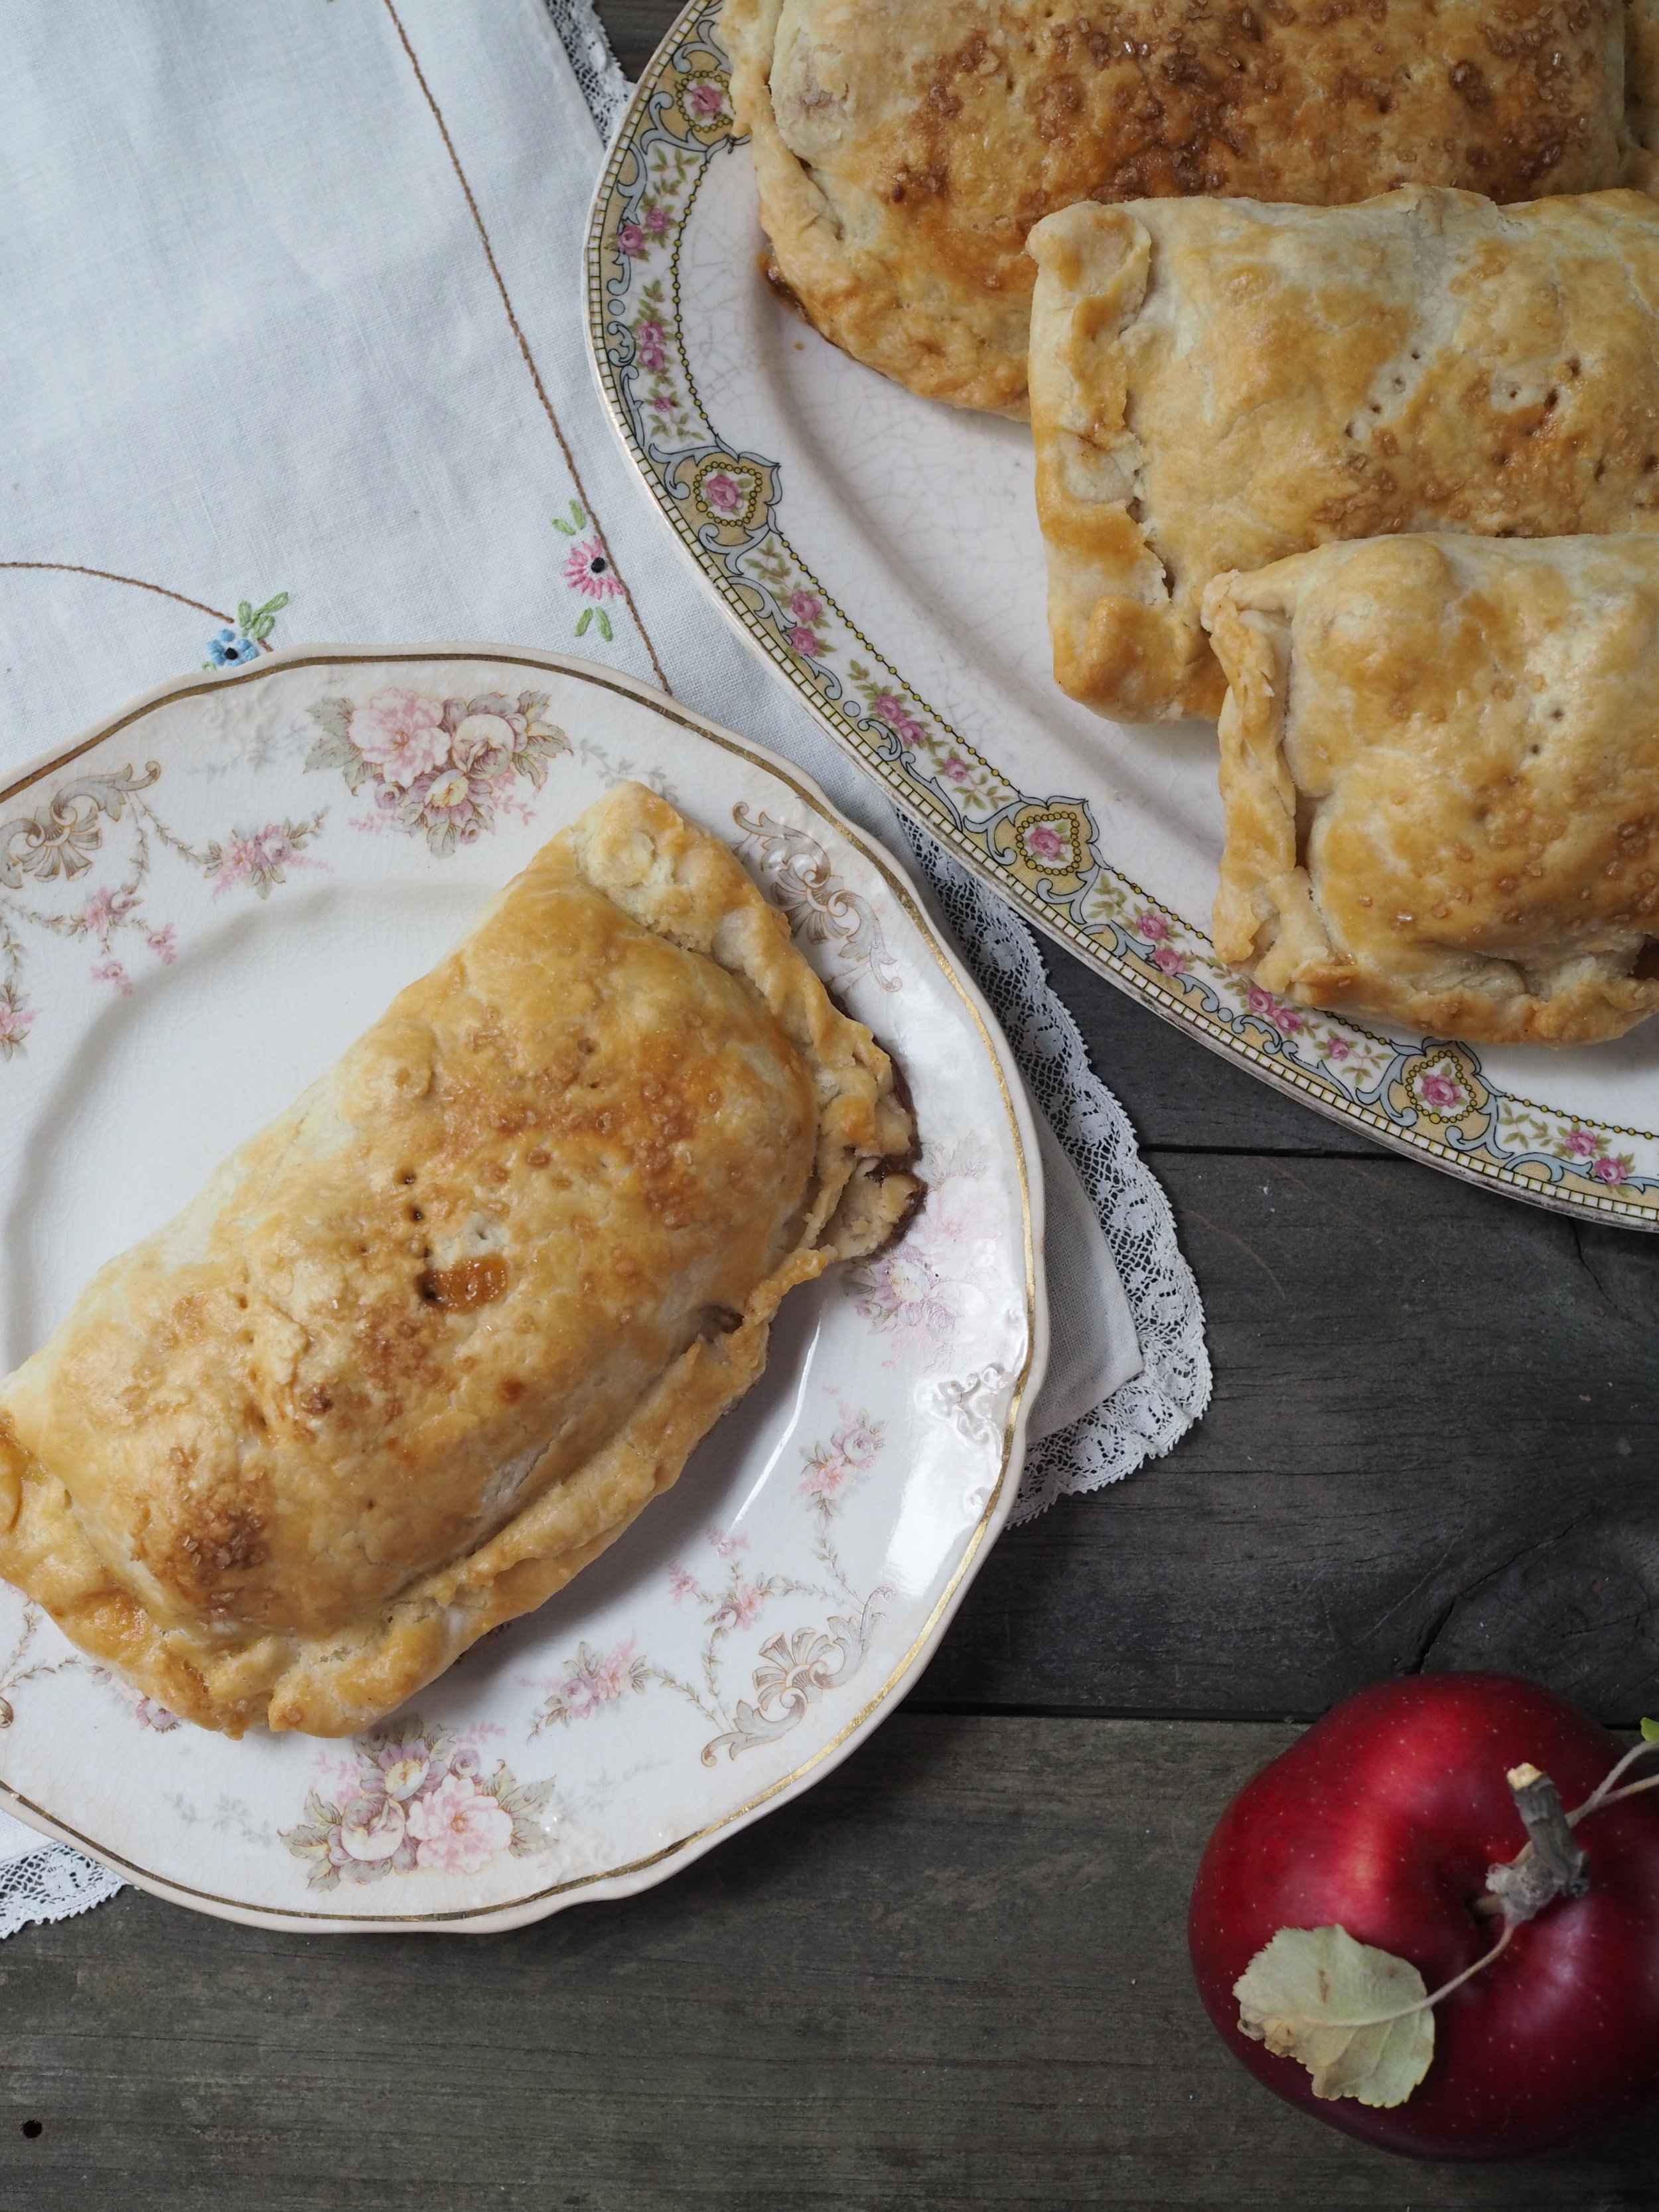
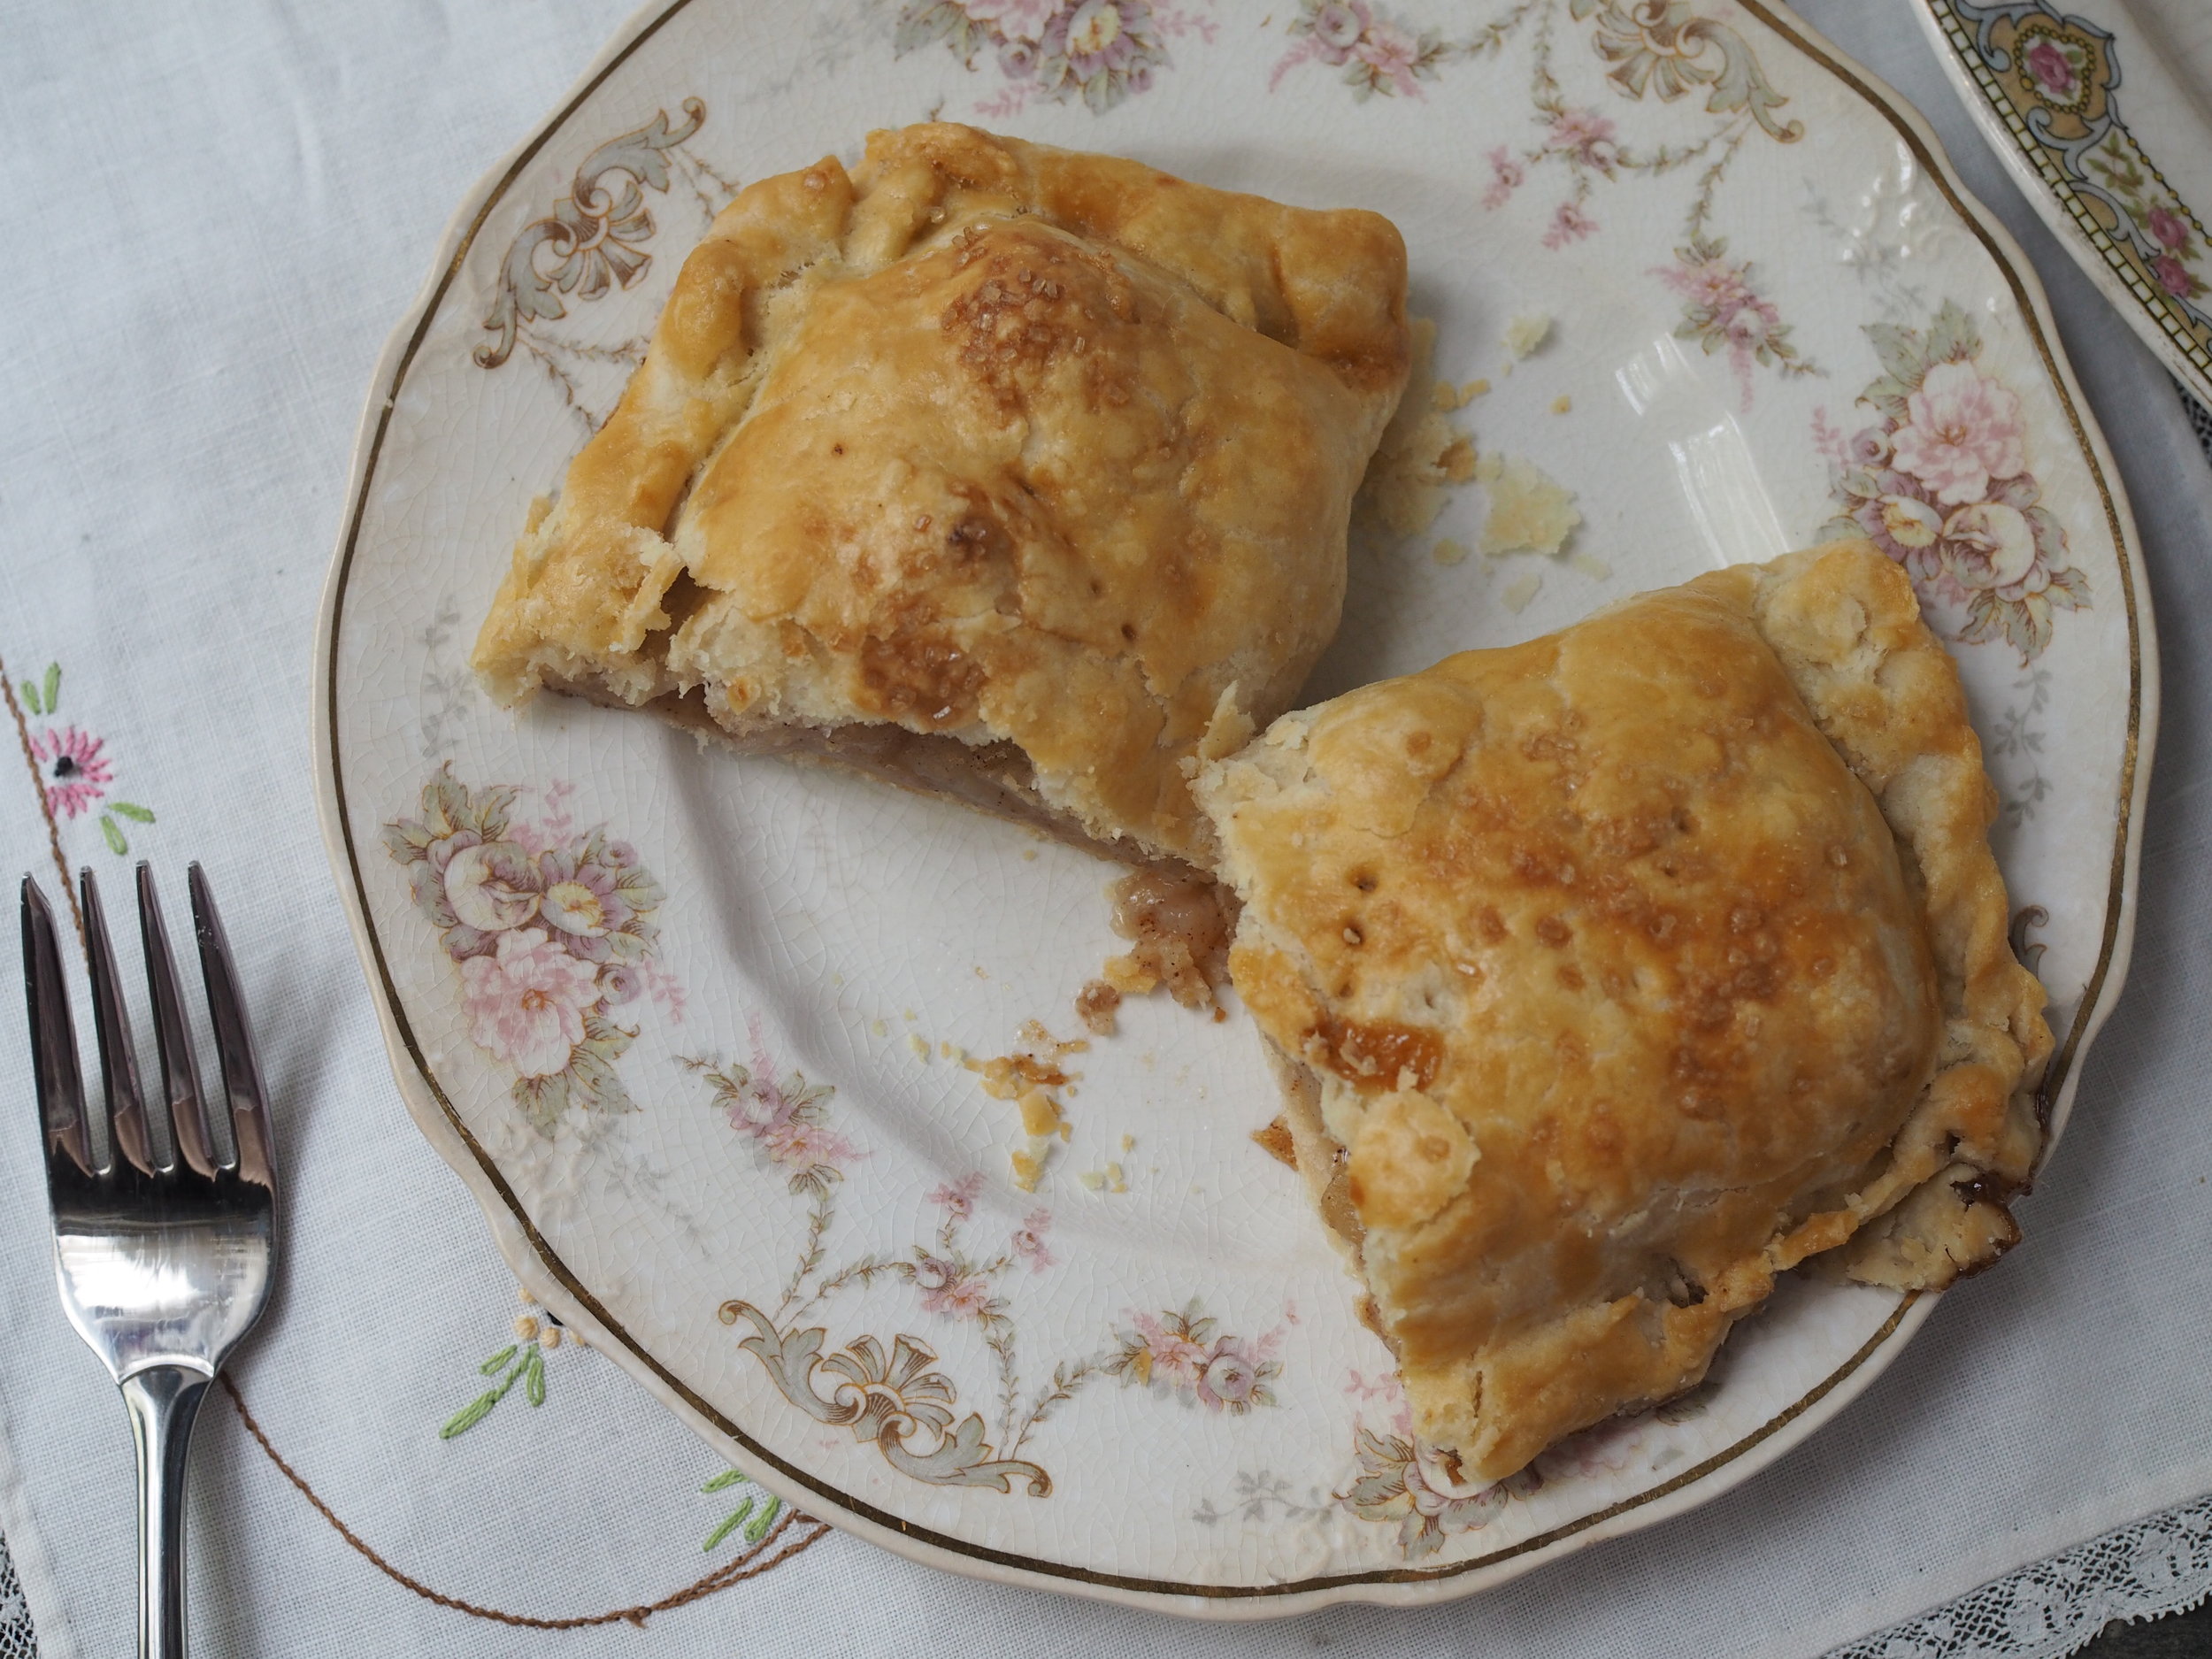
Whisk together 1 egg with 1 Tablespoon water. Brush egg wash generously over pies. Sprinkle the top of each pie with a small amount of demerara sugar.
Place cookie sheets in oven and bake for 45-50 minutes, until filling bubbles and crust is golden brown, rotating pans halfway through cooking time.
Cool pies on wire rack prior to storage. To store, wrap in tin foil and place in refrigerator for up to one week. Serve cool, or reheat for 10-15 minutes in a 350 degree F oven.
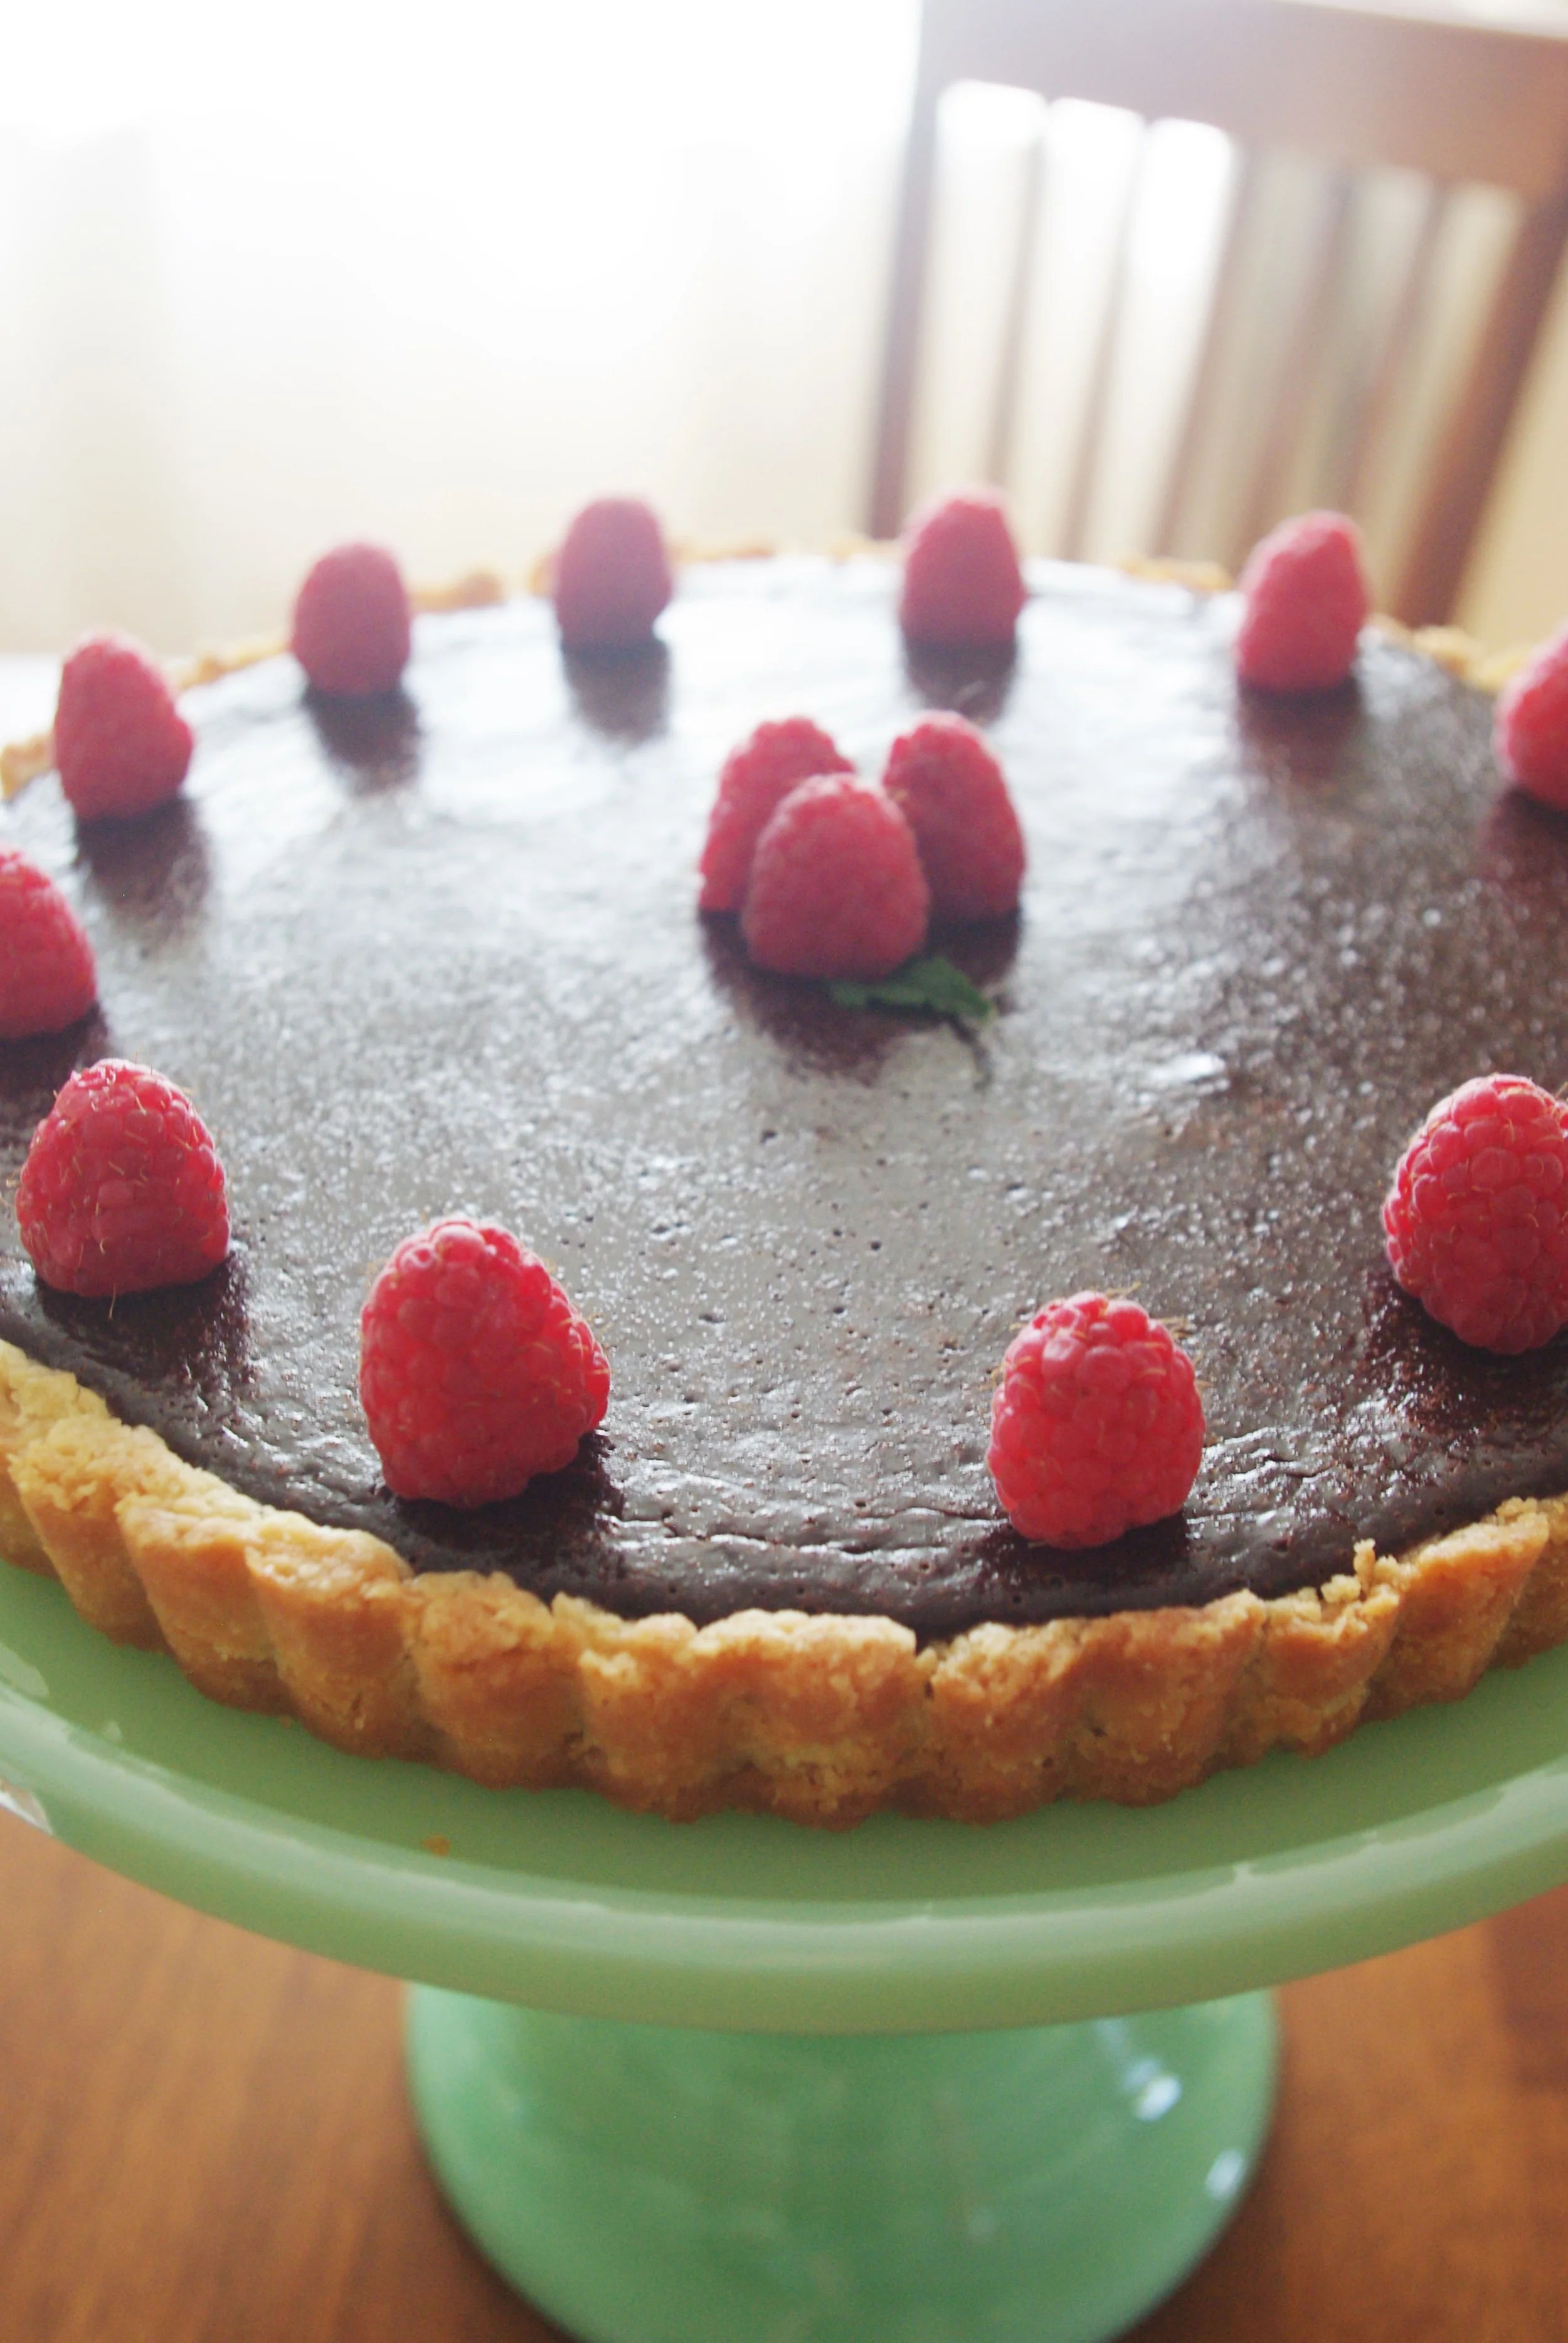
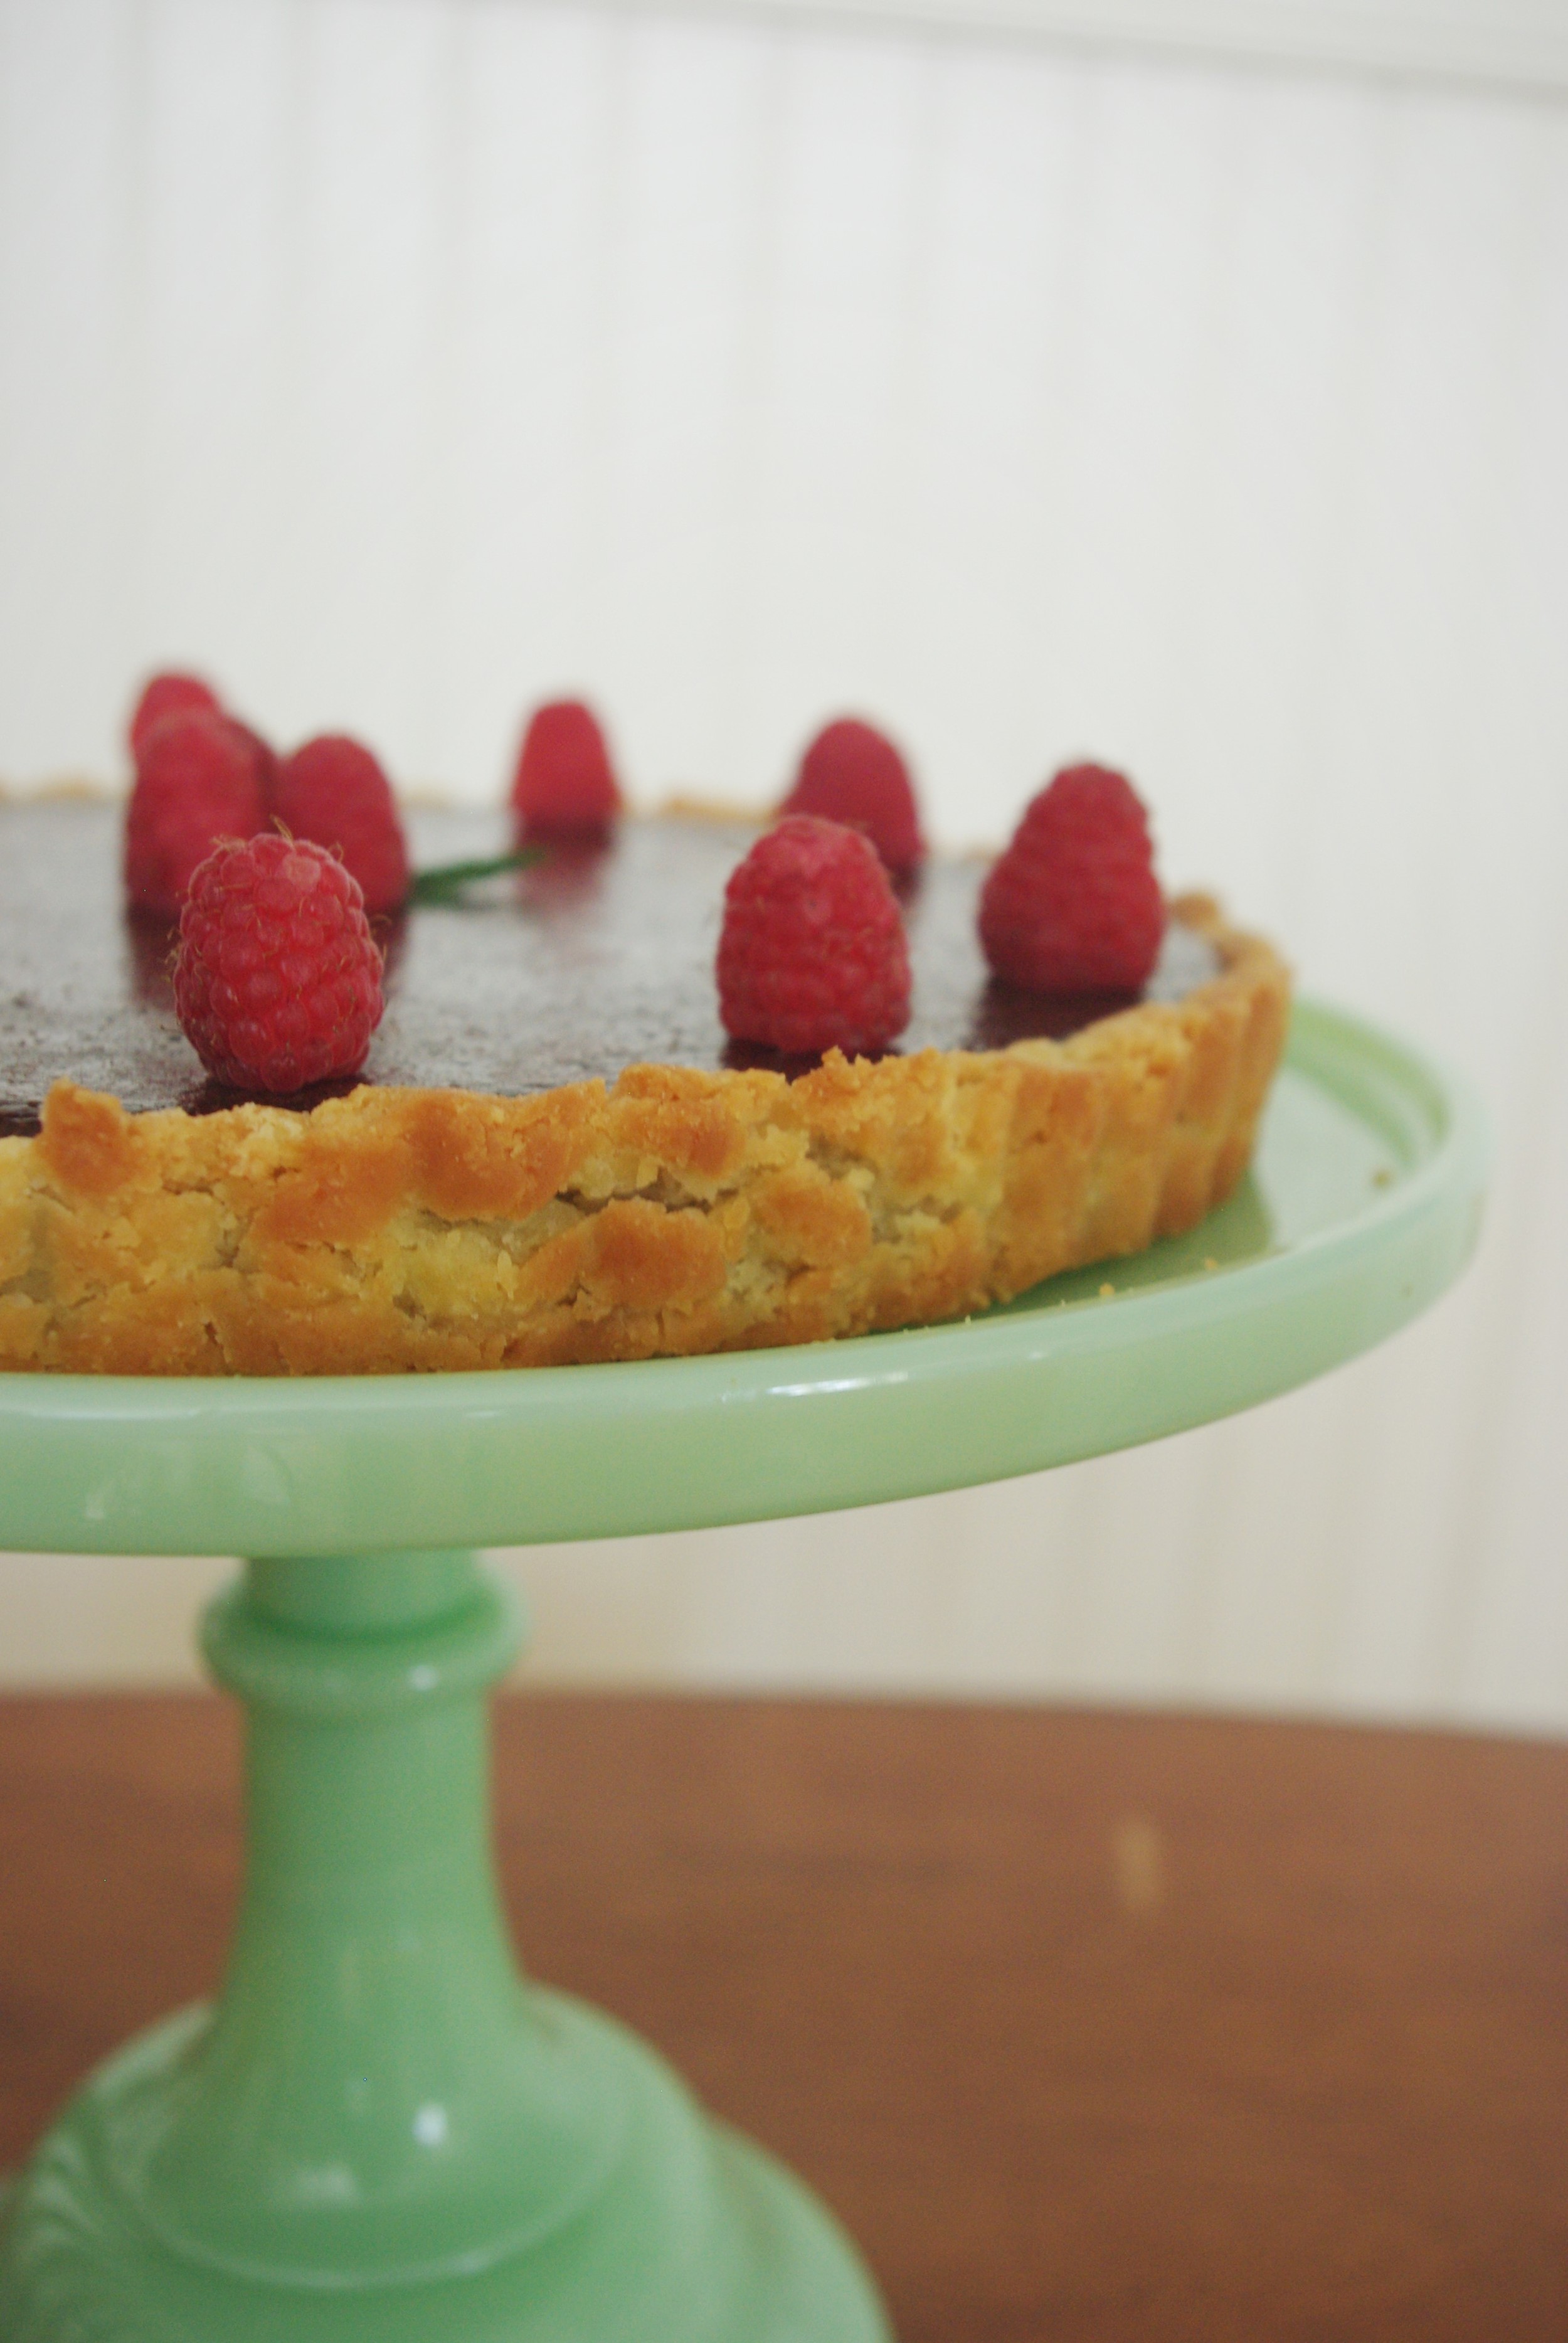
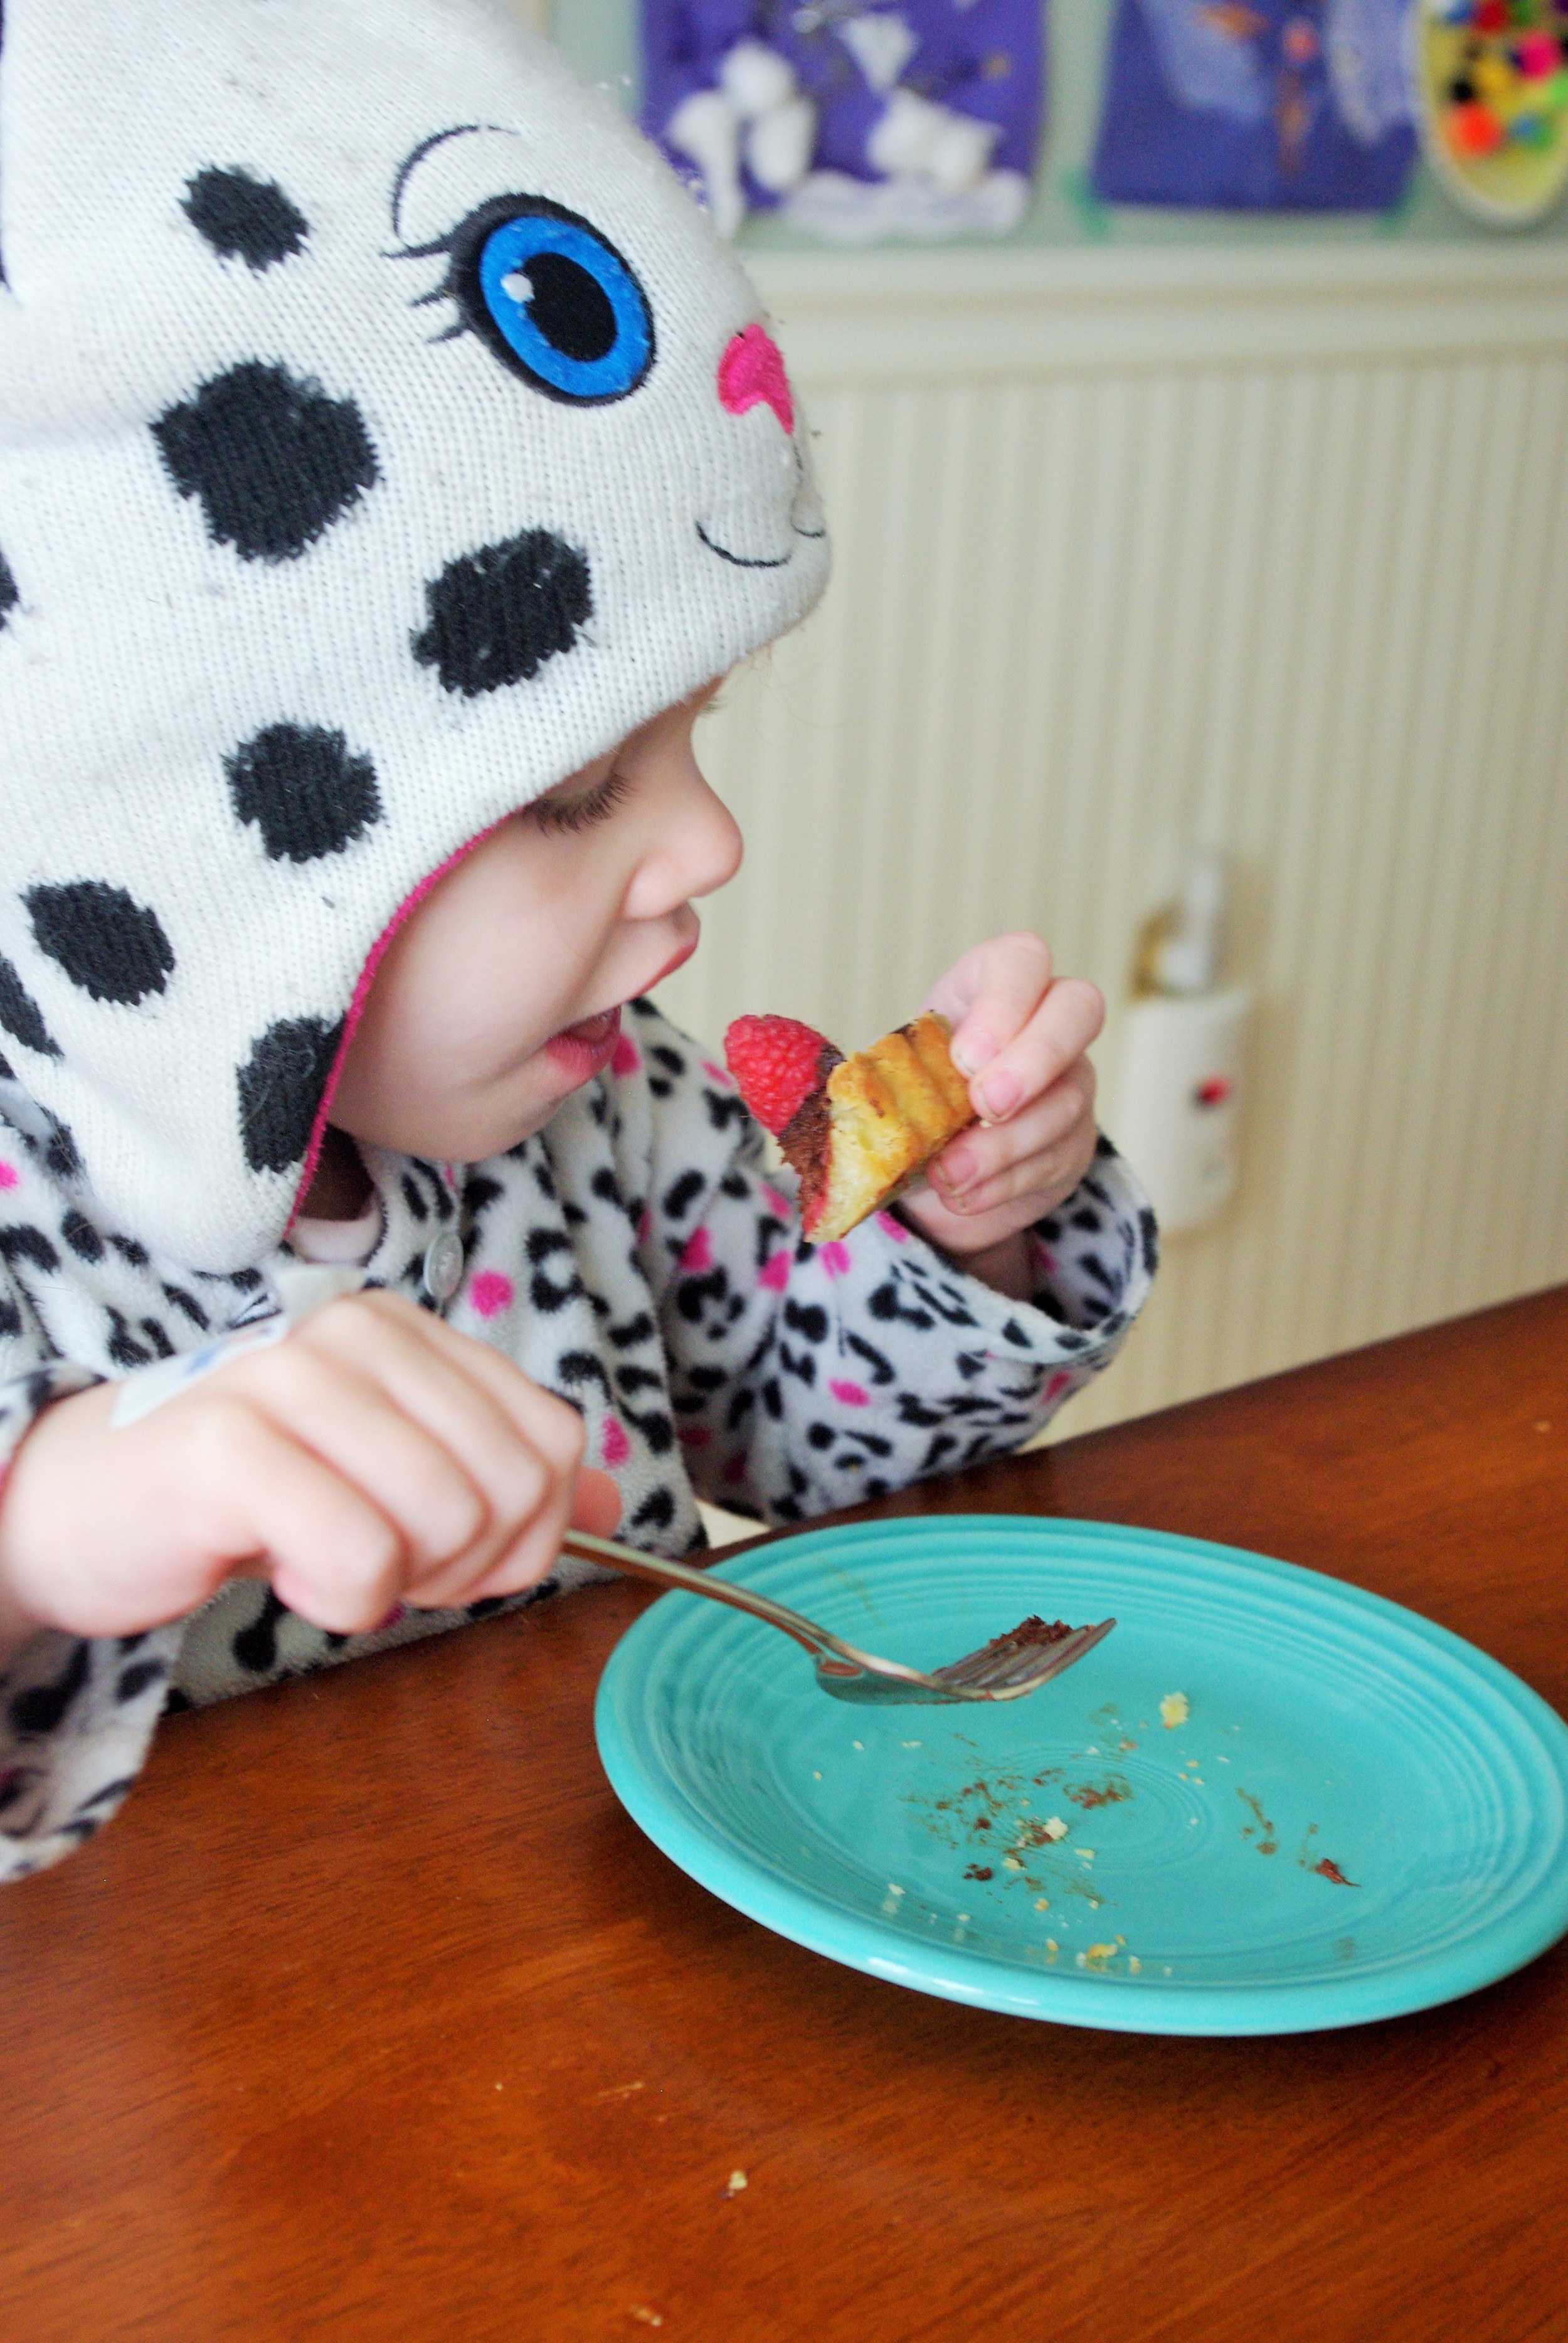
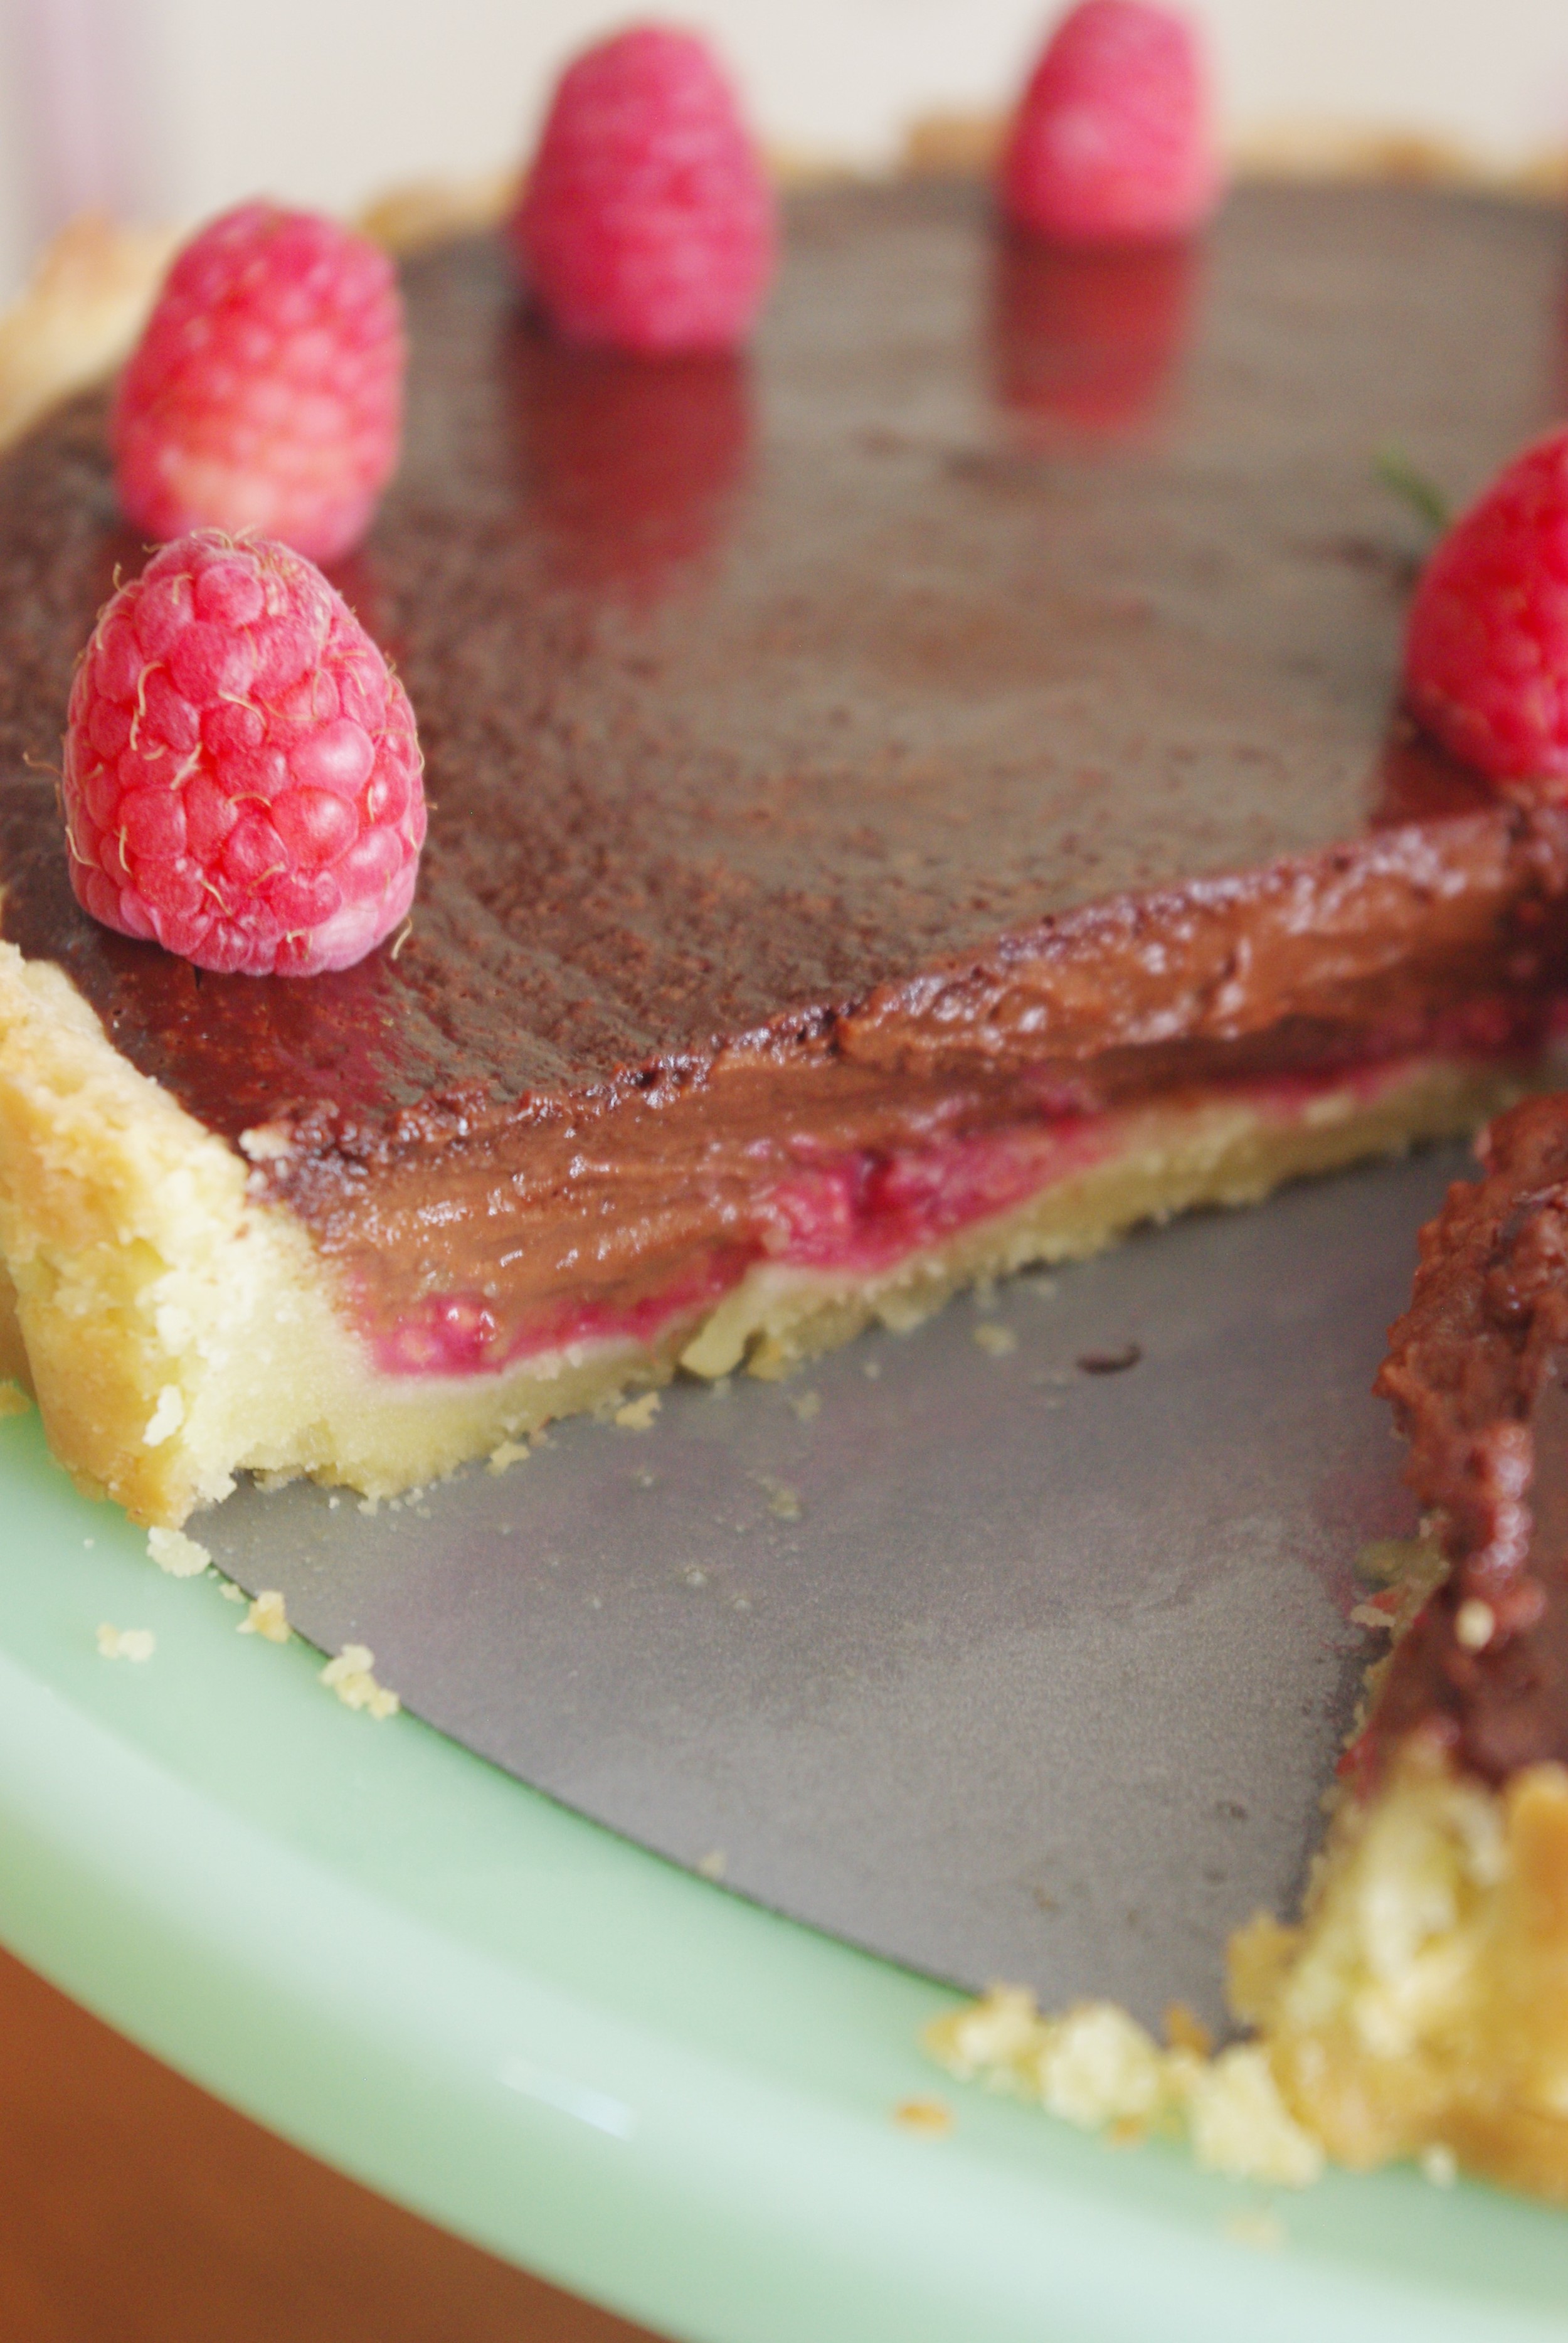
Recipe: Chocolate-Raspberry Tart with Shortbread Crust

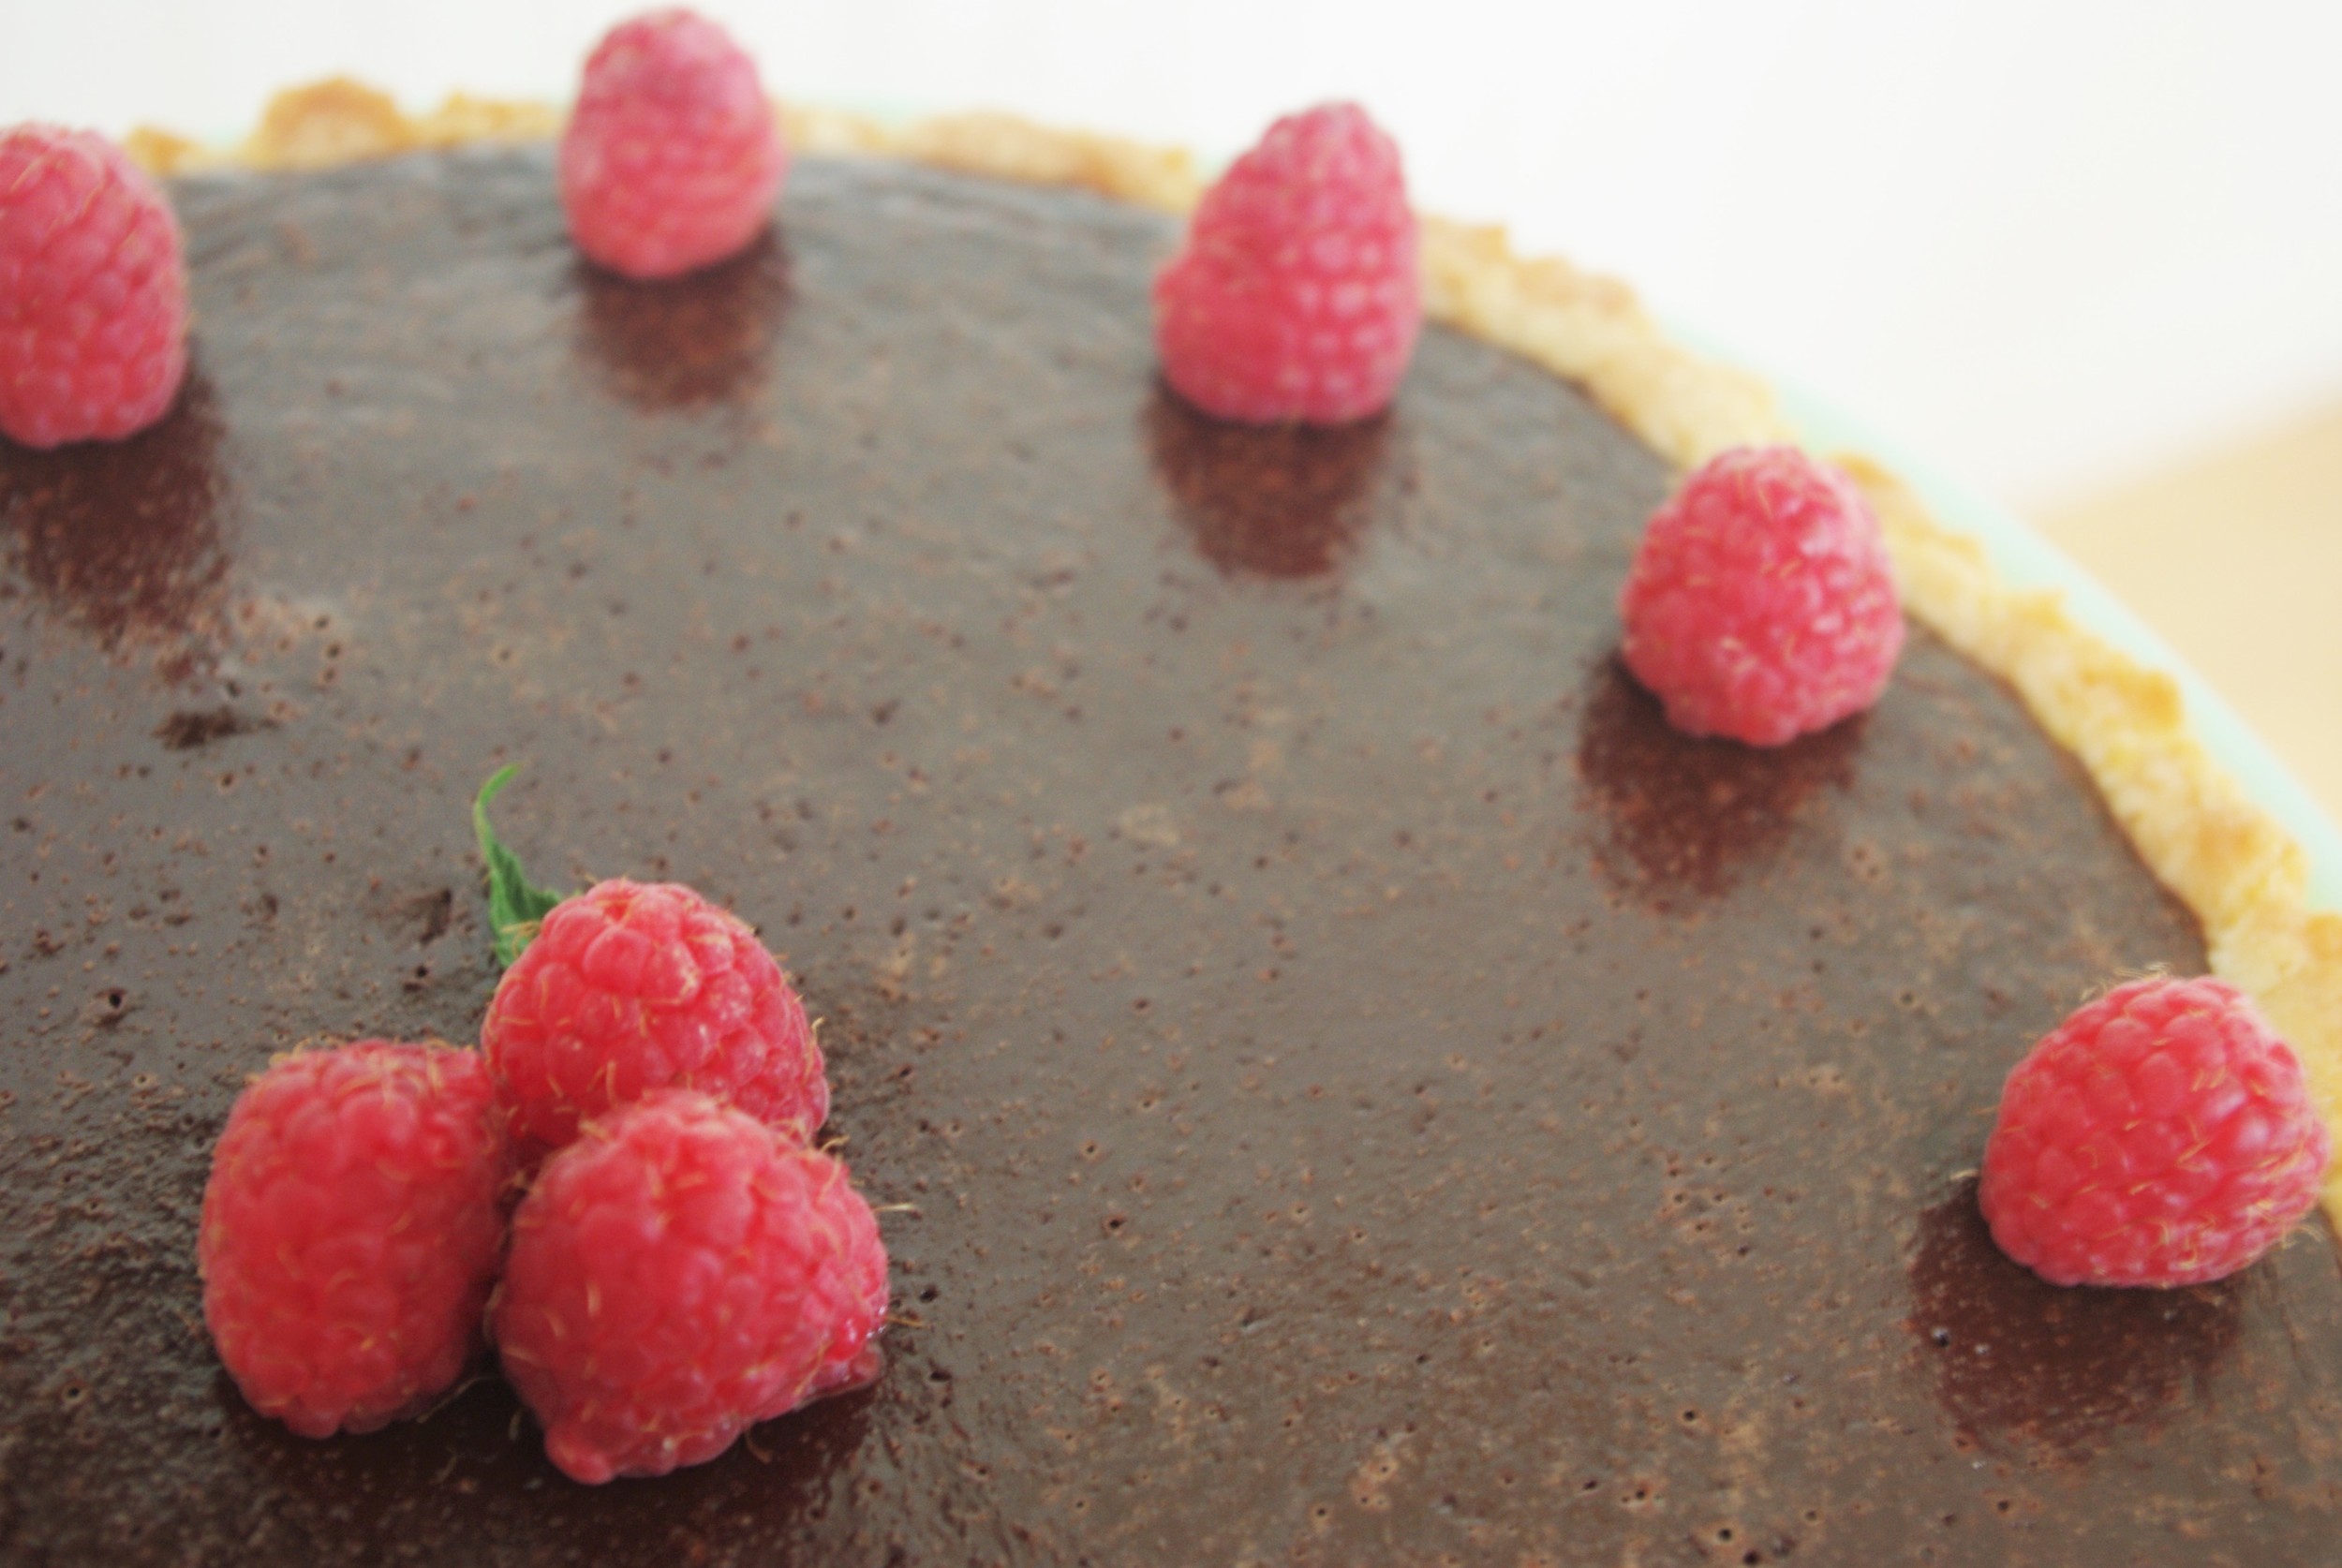
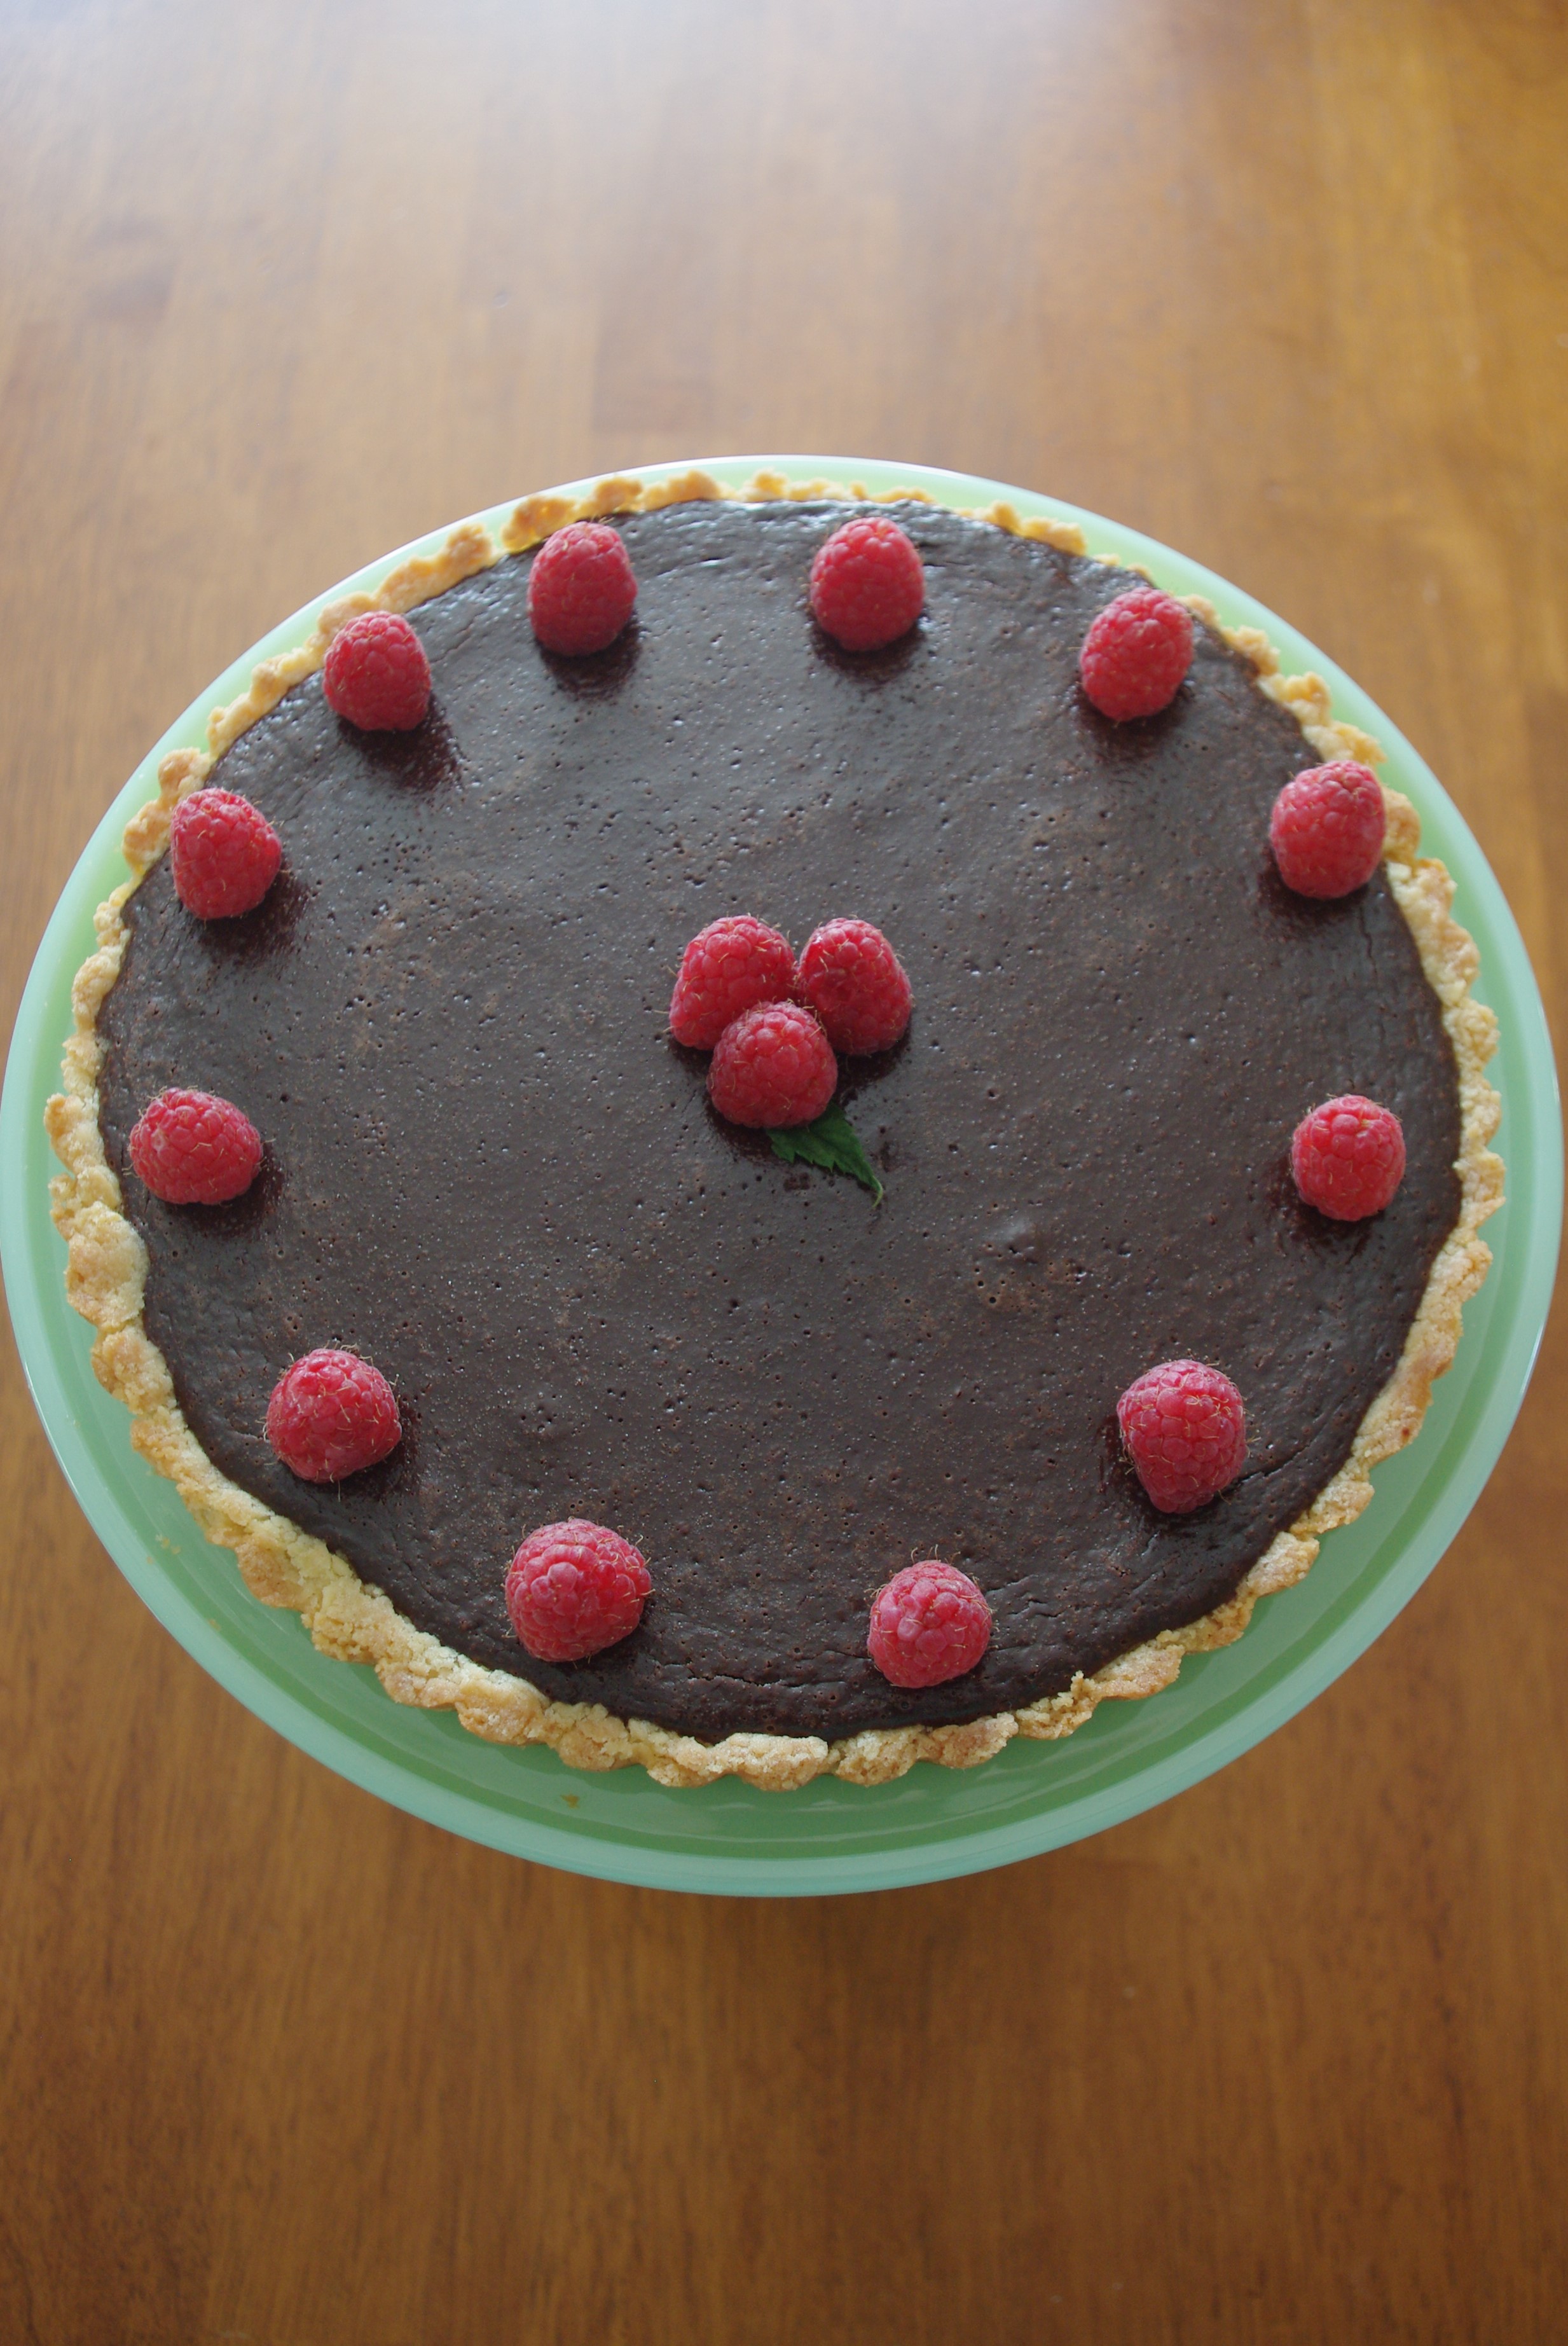

I was recently discussing my s'more pie with a friend who had made it sans marshmallows. We were talking about how the filling could work well with a variety of different toppings/fillings and I mentioned that I thought it would be particularly good with crushed raspberries and a shortbread crust.
A few pints of raspberries and one satisfied taste-tester later, here we are. :)
Chocolate & Raspberry Tart
Shortbread crust
- 1 ½ cups all-purpose flour
- 1 cup powdered sugar
- ½ teaspoon salt
- 1 ½ sticks cold butter, 6 ounces, cut in small pieces
- If your dough isn't holding together, you can add up to 1 egg
Chocolate filling
- 1 1/4 cups (10 oz.) heavy cream
- 9 ounces bittersweet chocolate chips (not more than 65% cacao if marked)
- 2 large eggs
- 1 teaspoon pure vanilla extract
- 1/4 teaspoon salt
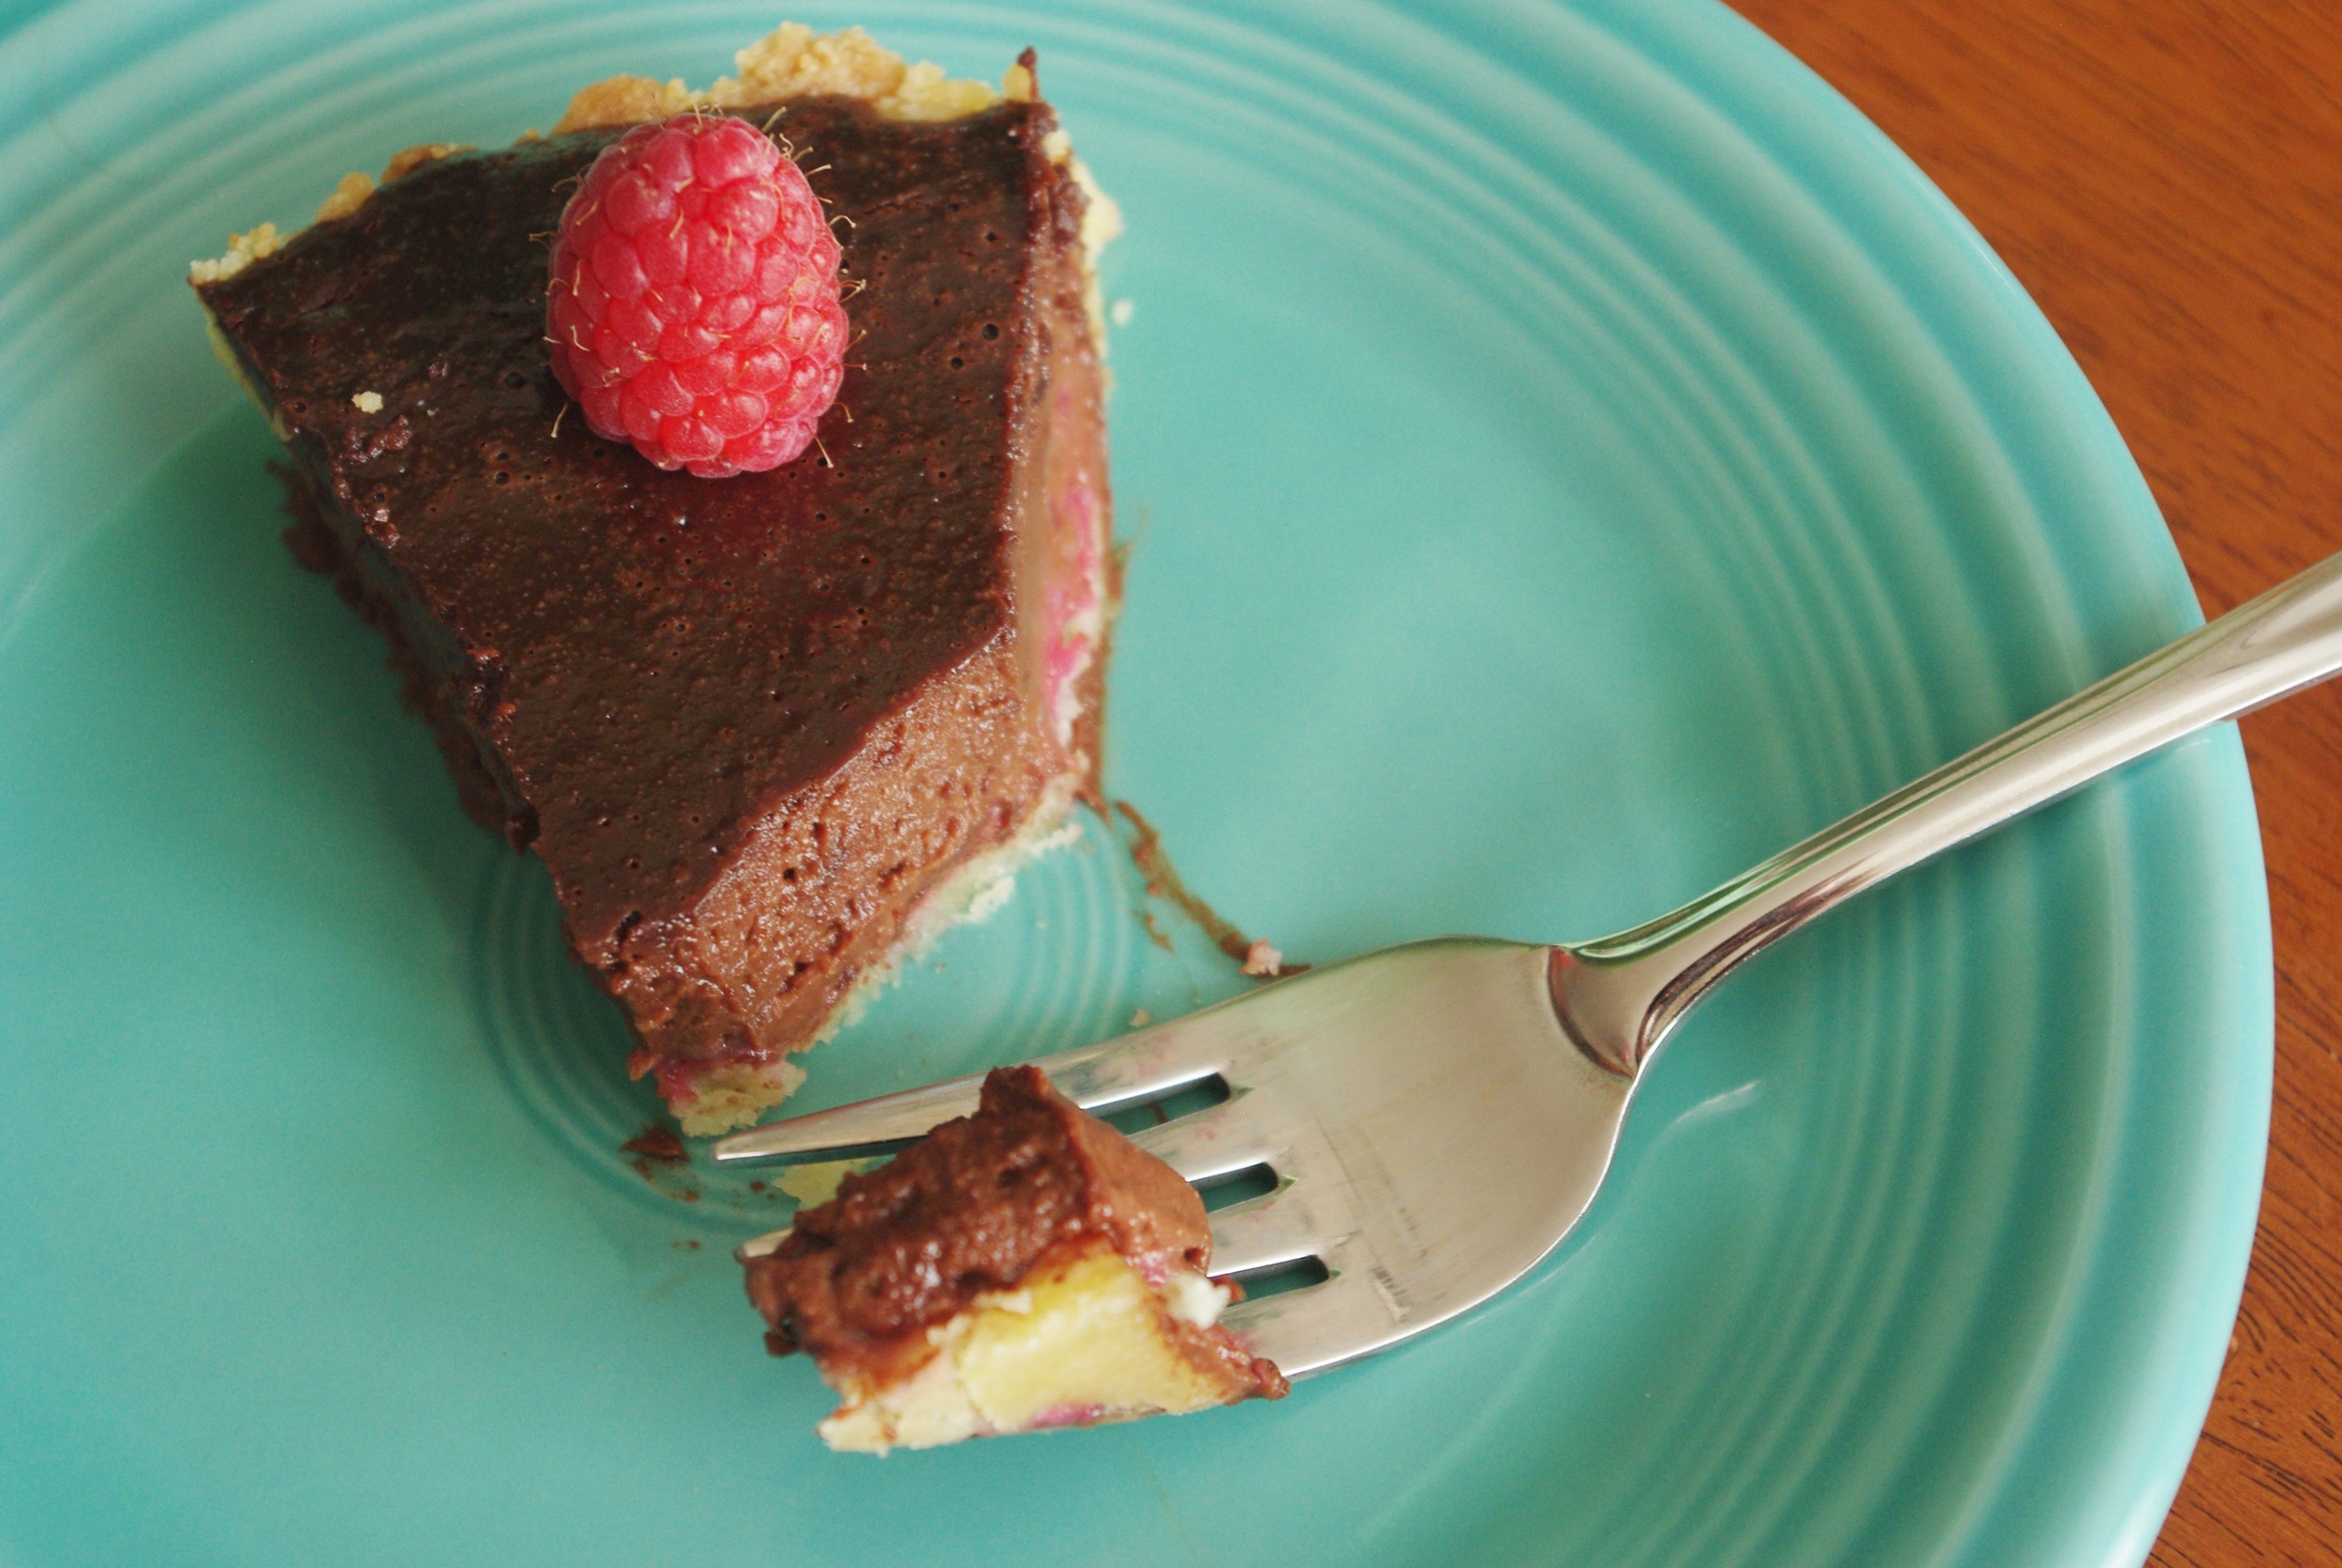
- 1 1/2 pints fresh raspberries, plus more for decoration (~2 pints in total)
NB: depending on the size of your pan(s) you may not need all the dough or filling.
Make and "Blind Bake" Tart Shell
Make and Blind Bake Tart ShellSpray a tart pan, or several mini tart pans with cooking spray. Combine crust ingredients with a pastry cutter or food processor, until the mixture clumps, if needed, add up to one egg. Using fingers, press dough evenly into tart pan bottom and up sides past edge of pan. Prick the dough with a fork, line crust with foil and fill with pie weights/rice/beans etc.
Cover crust and chill for 1 hour. Preheat oven to 375˚F.
Place tart pan(s) on a baking sheet and bake for 10-15 minutes or until golden brown. Cool completely.
Make Filling
Bring cream to a boil, then pour over chocolate in a bowl and let stand 5 minutes. Gently stir until smooth. Whisk together eggs, vanilla, and salt in another bowl until frothy, then fold into melted chocolate.
Set aside about dozen raspberries for decorating (or 1 per mini tart ) Crush the remaining raspberries in a sieve to drain the excess juice and spread crushed berries along the bottom of the cooled crust and then pour filling on top.
Bake until filling is set about 3 inches from edge but center is still wobbly, 20 to 25 minutes. (Center will continue to set as tart cools.) Cool completely in pan on rack, about 1 hour.
Remove from tart pan and decorate with remaining raspberries.
If kept at room temperature, chocolate will have a mousse-like texture, chilling the tart in the refrigerator will give it a firmer texture.
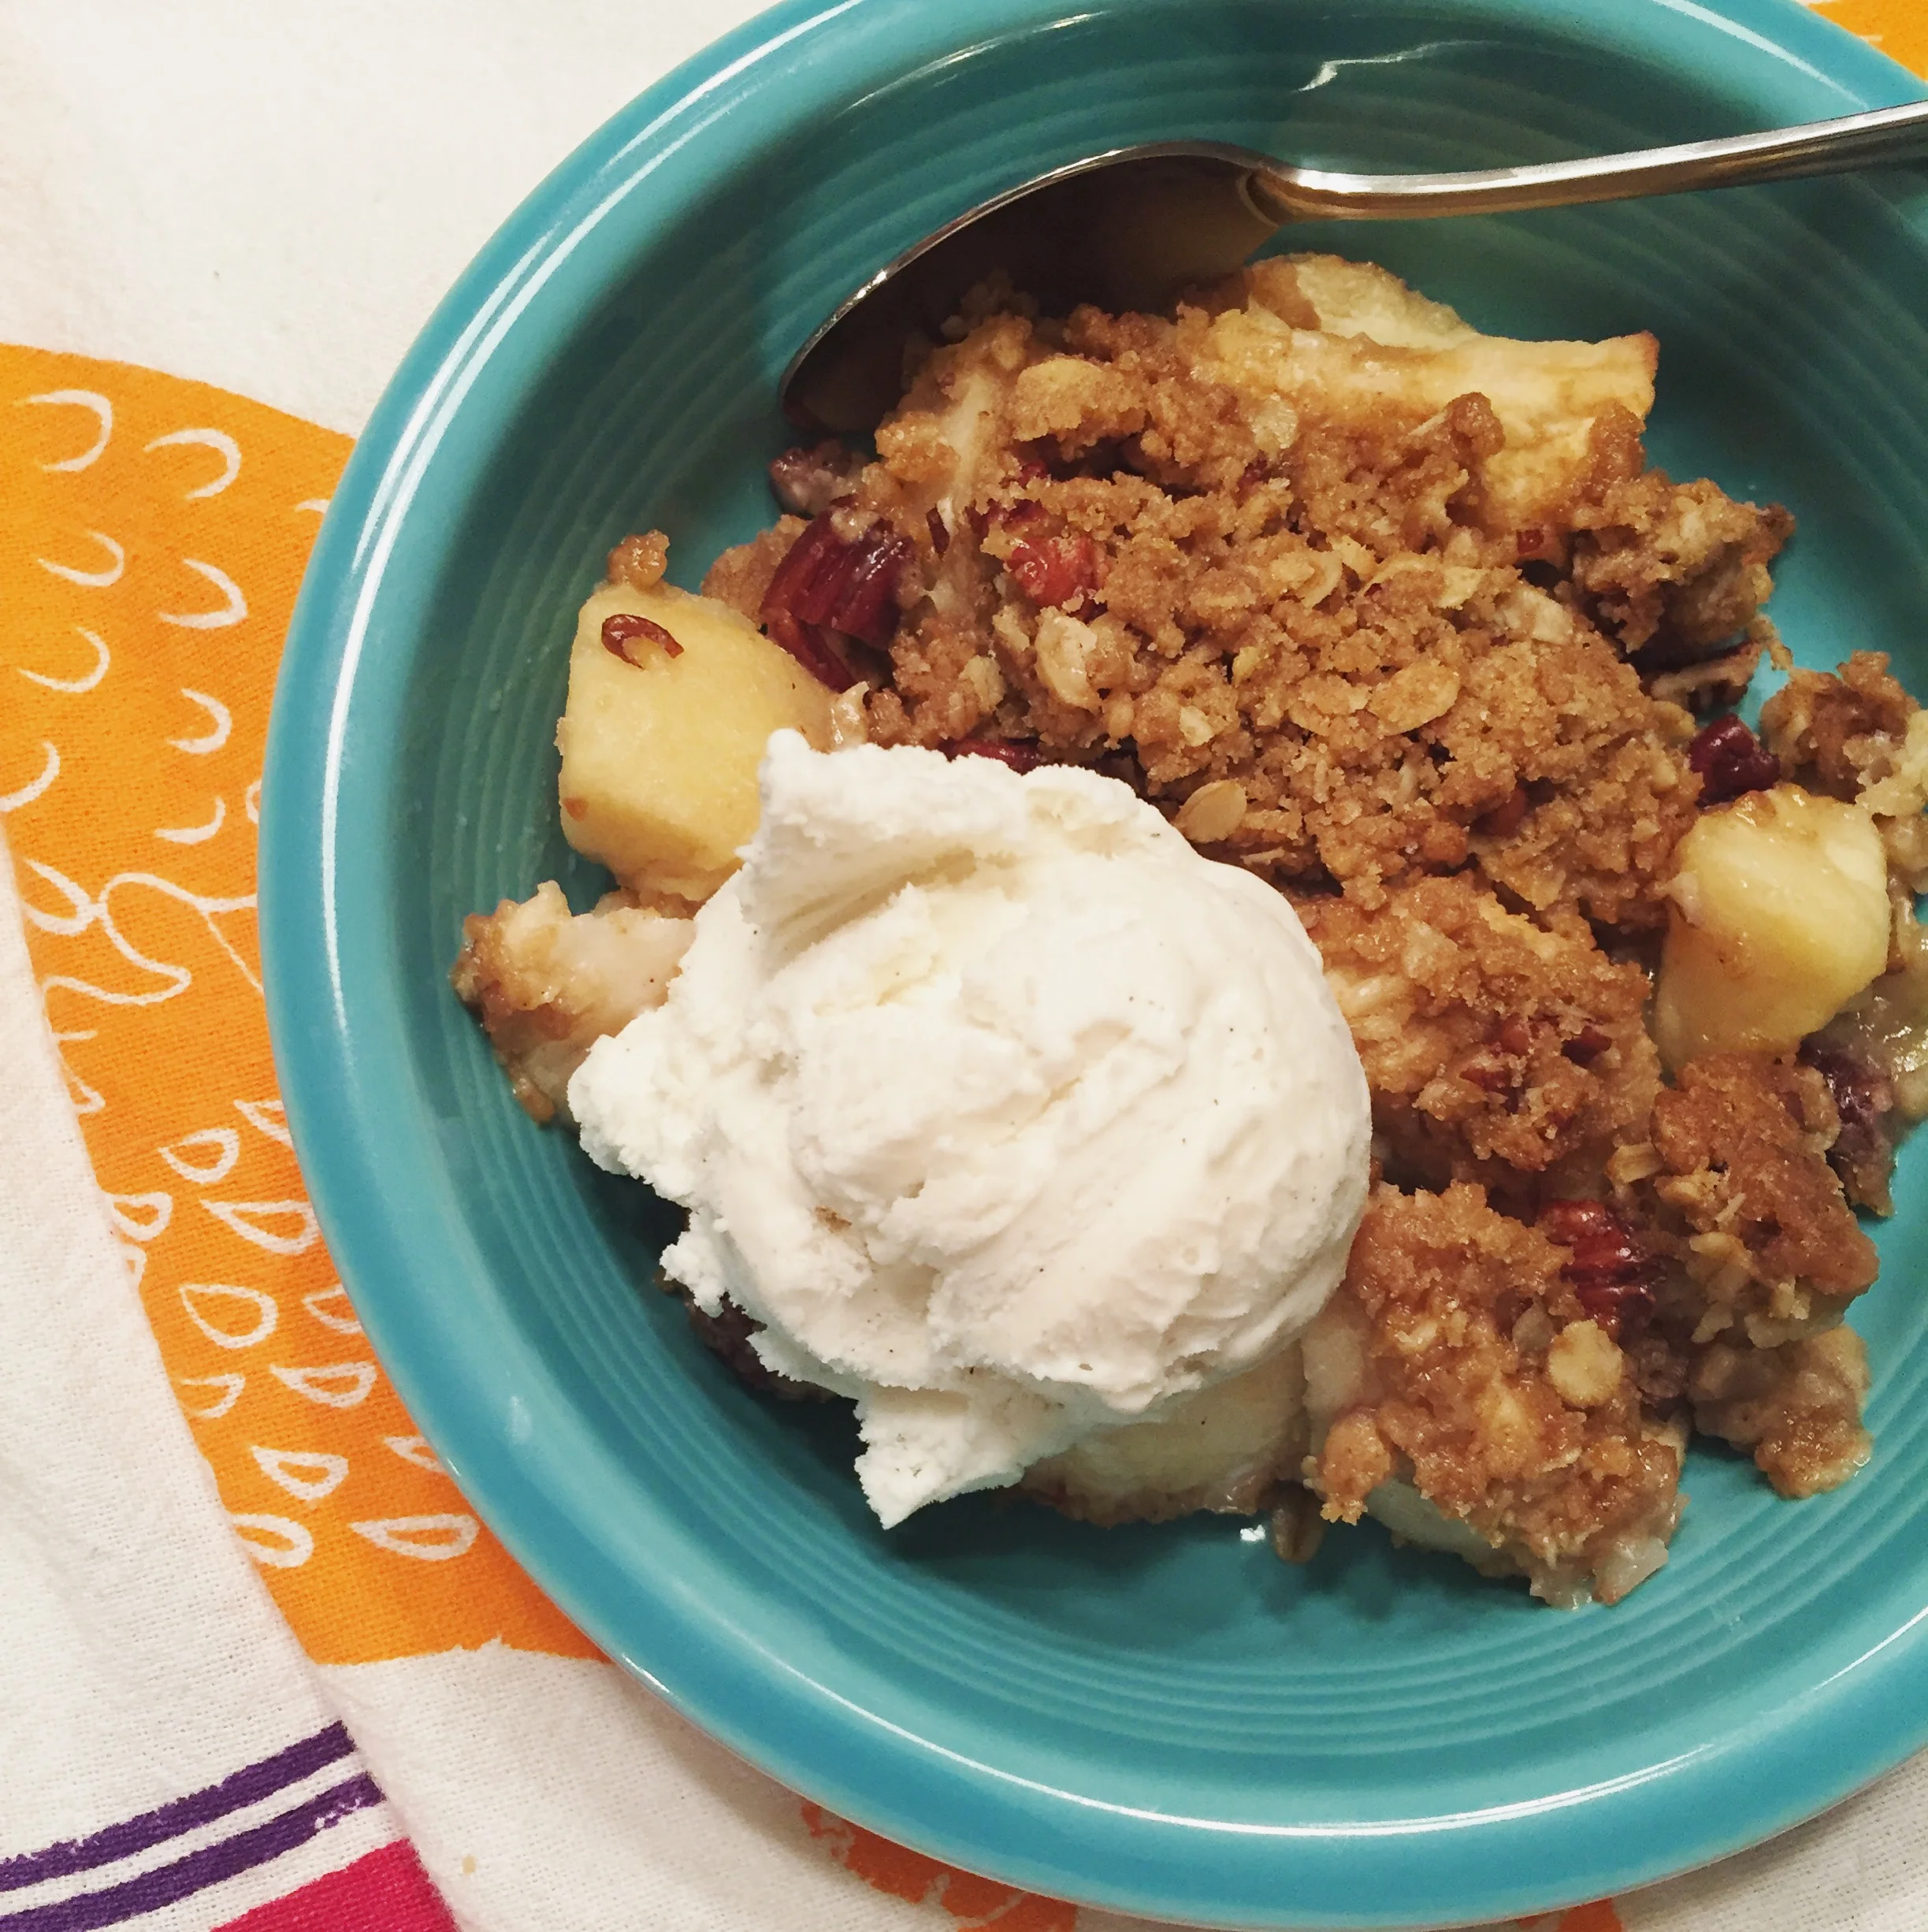
Pecan Oatmeal Apple Crisp (and Apple Abundance)


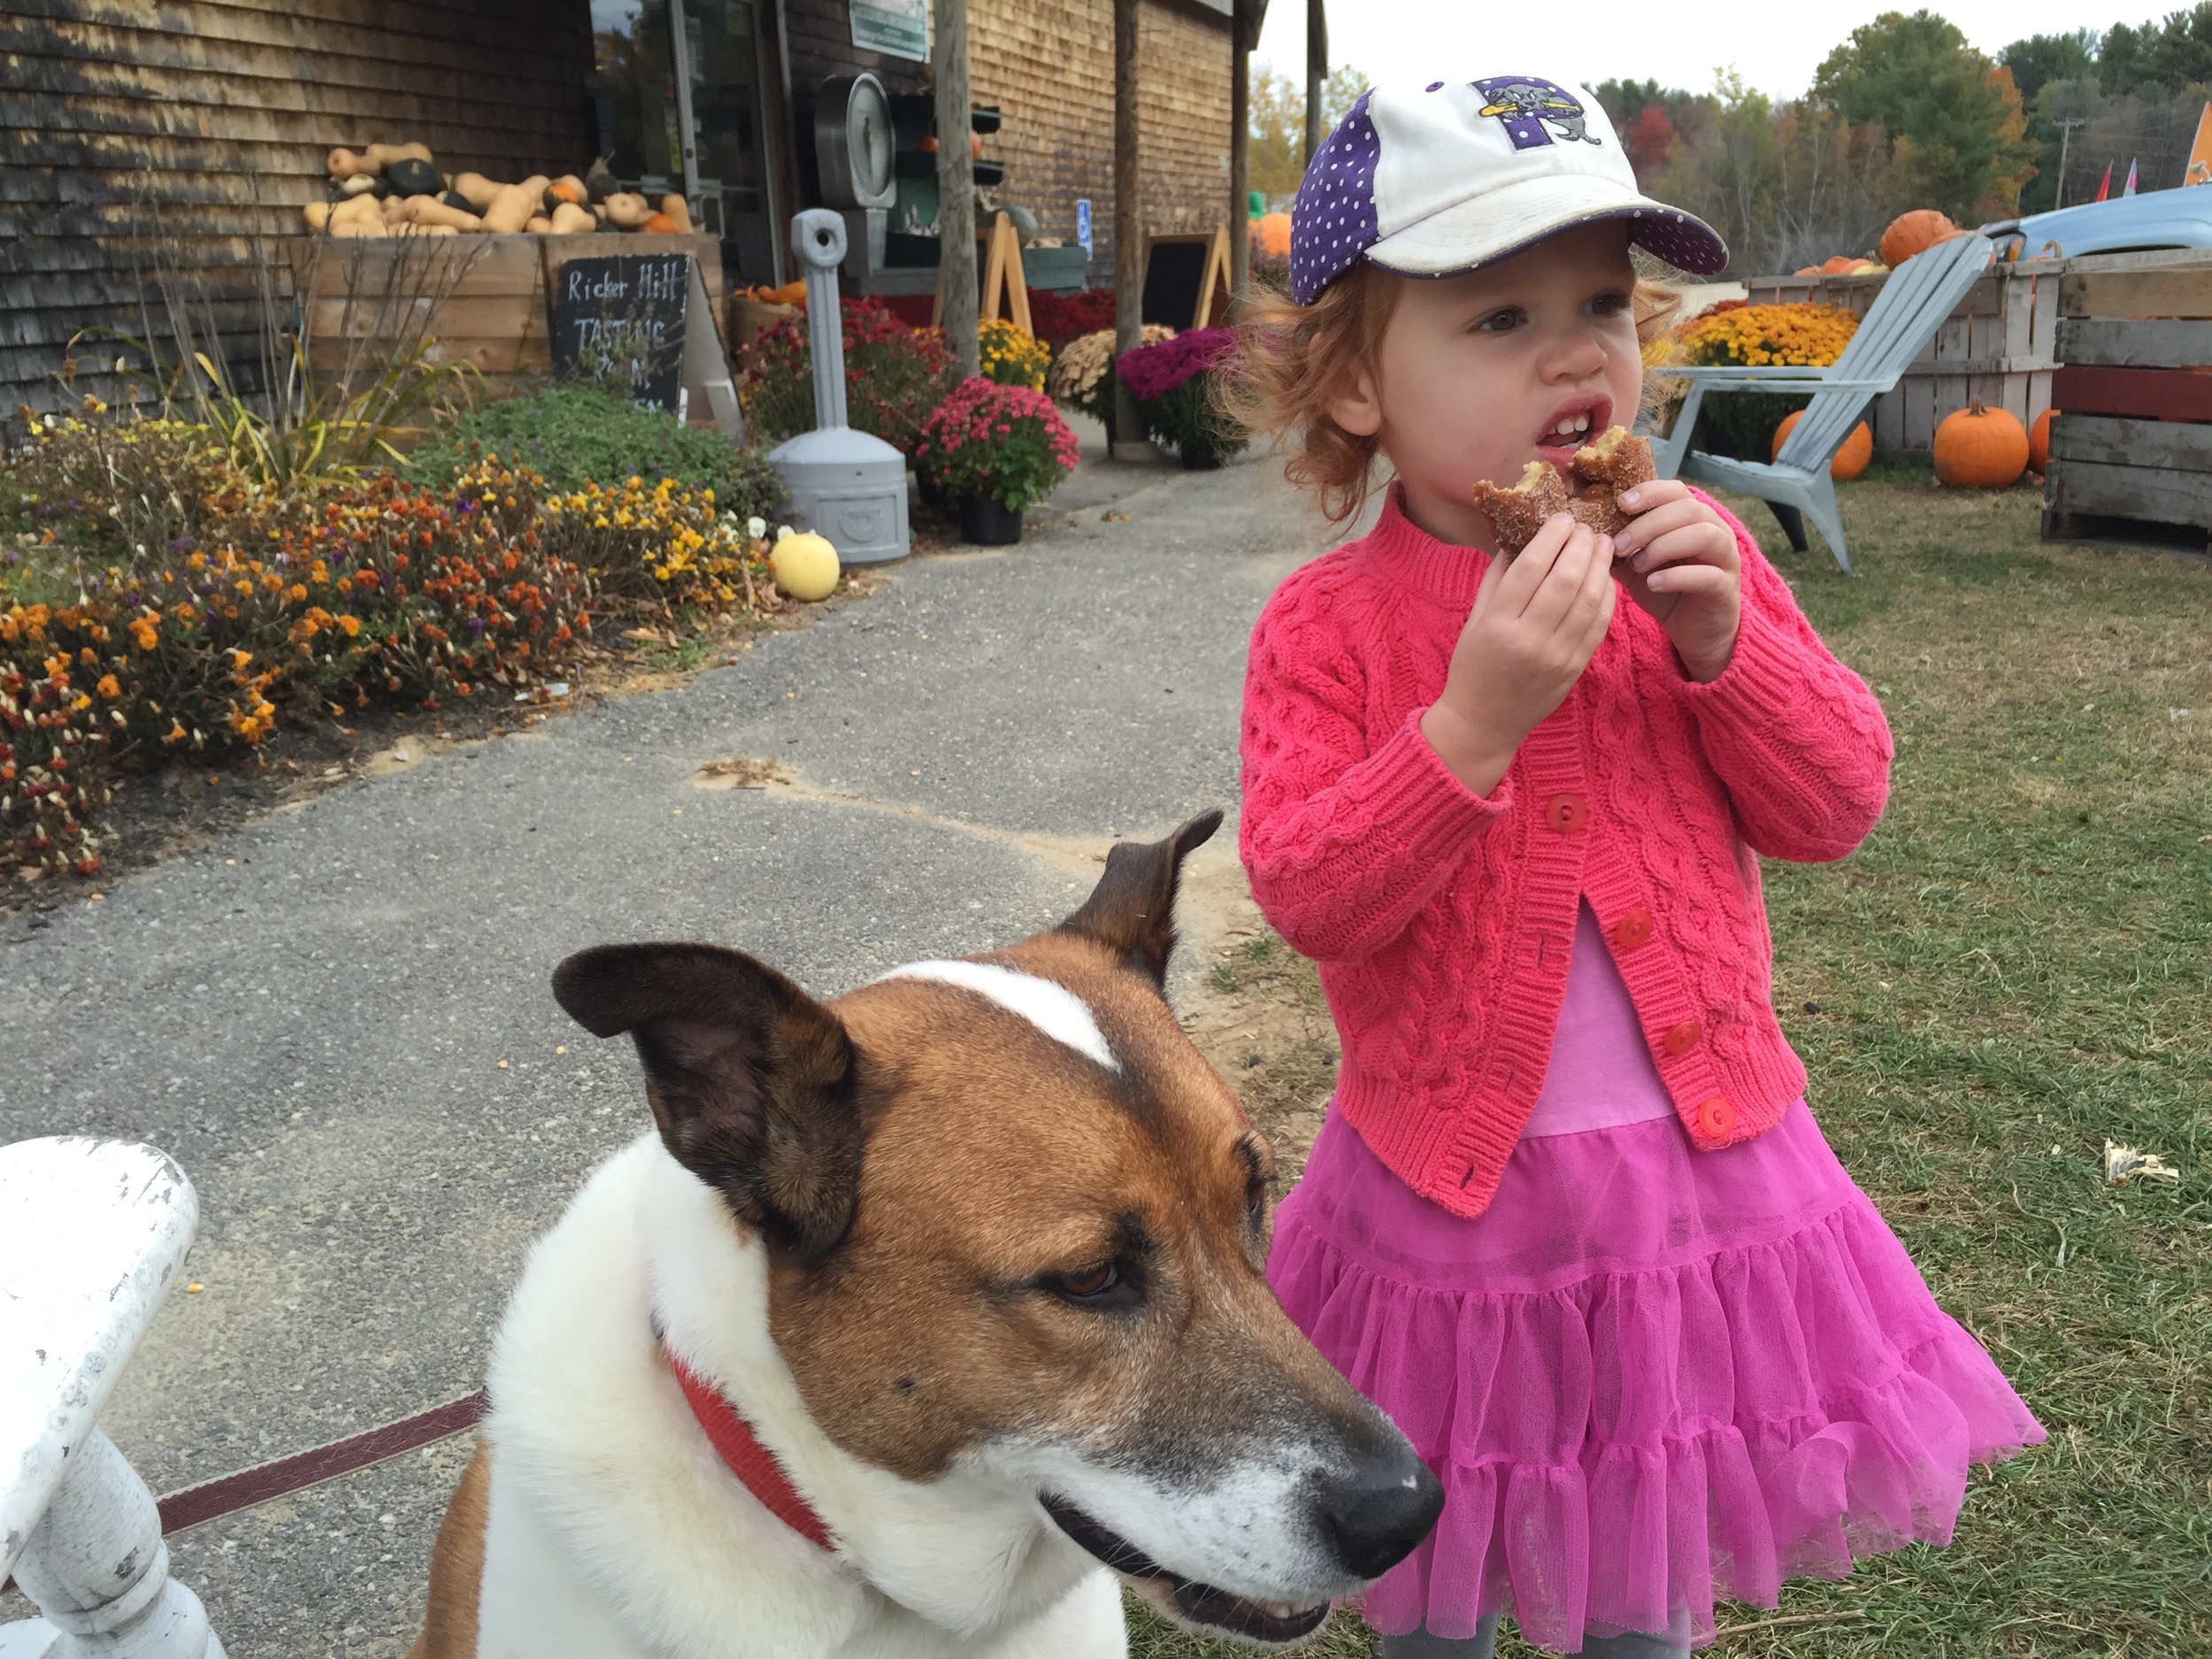

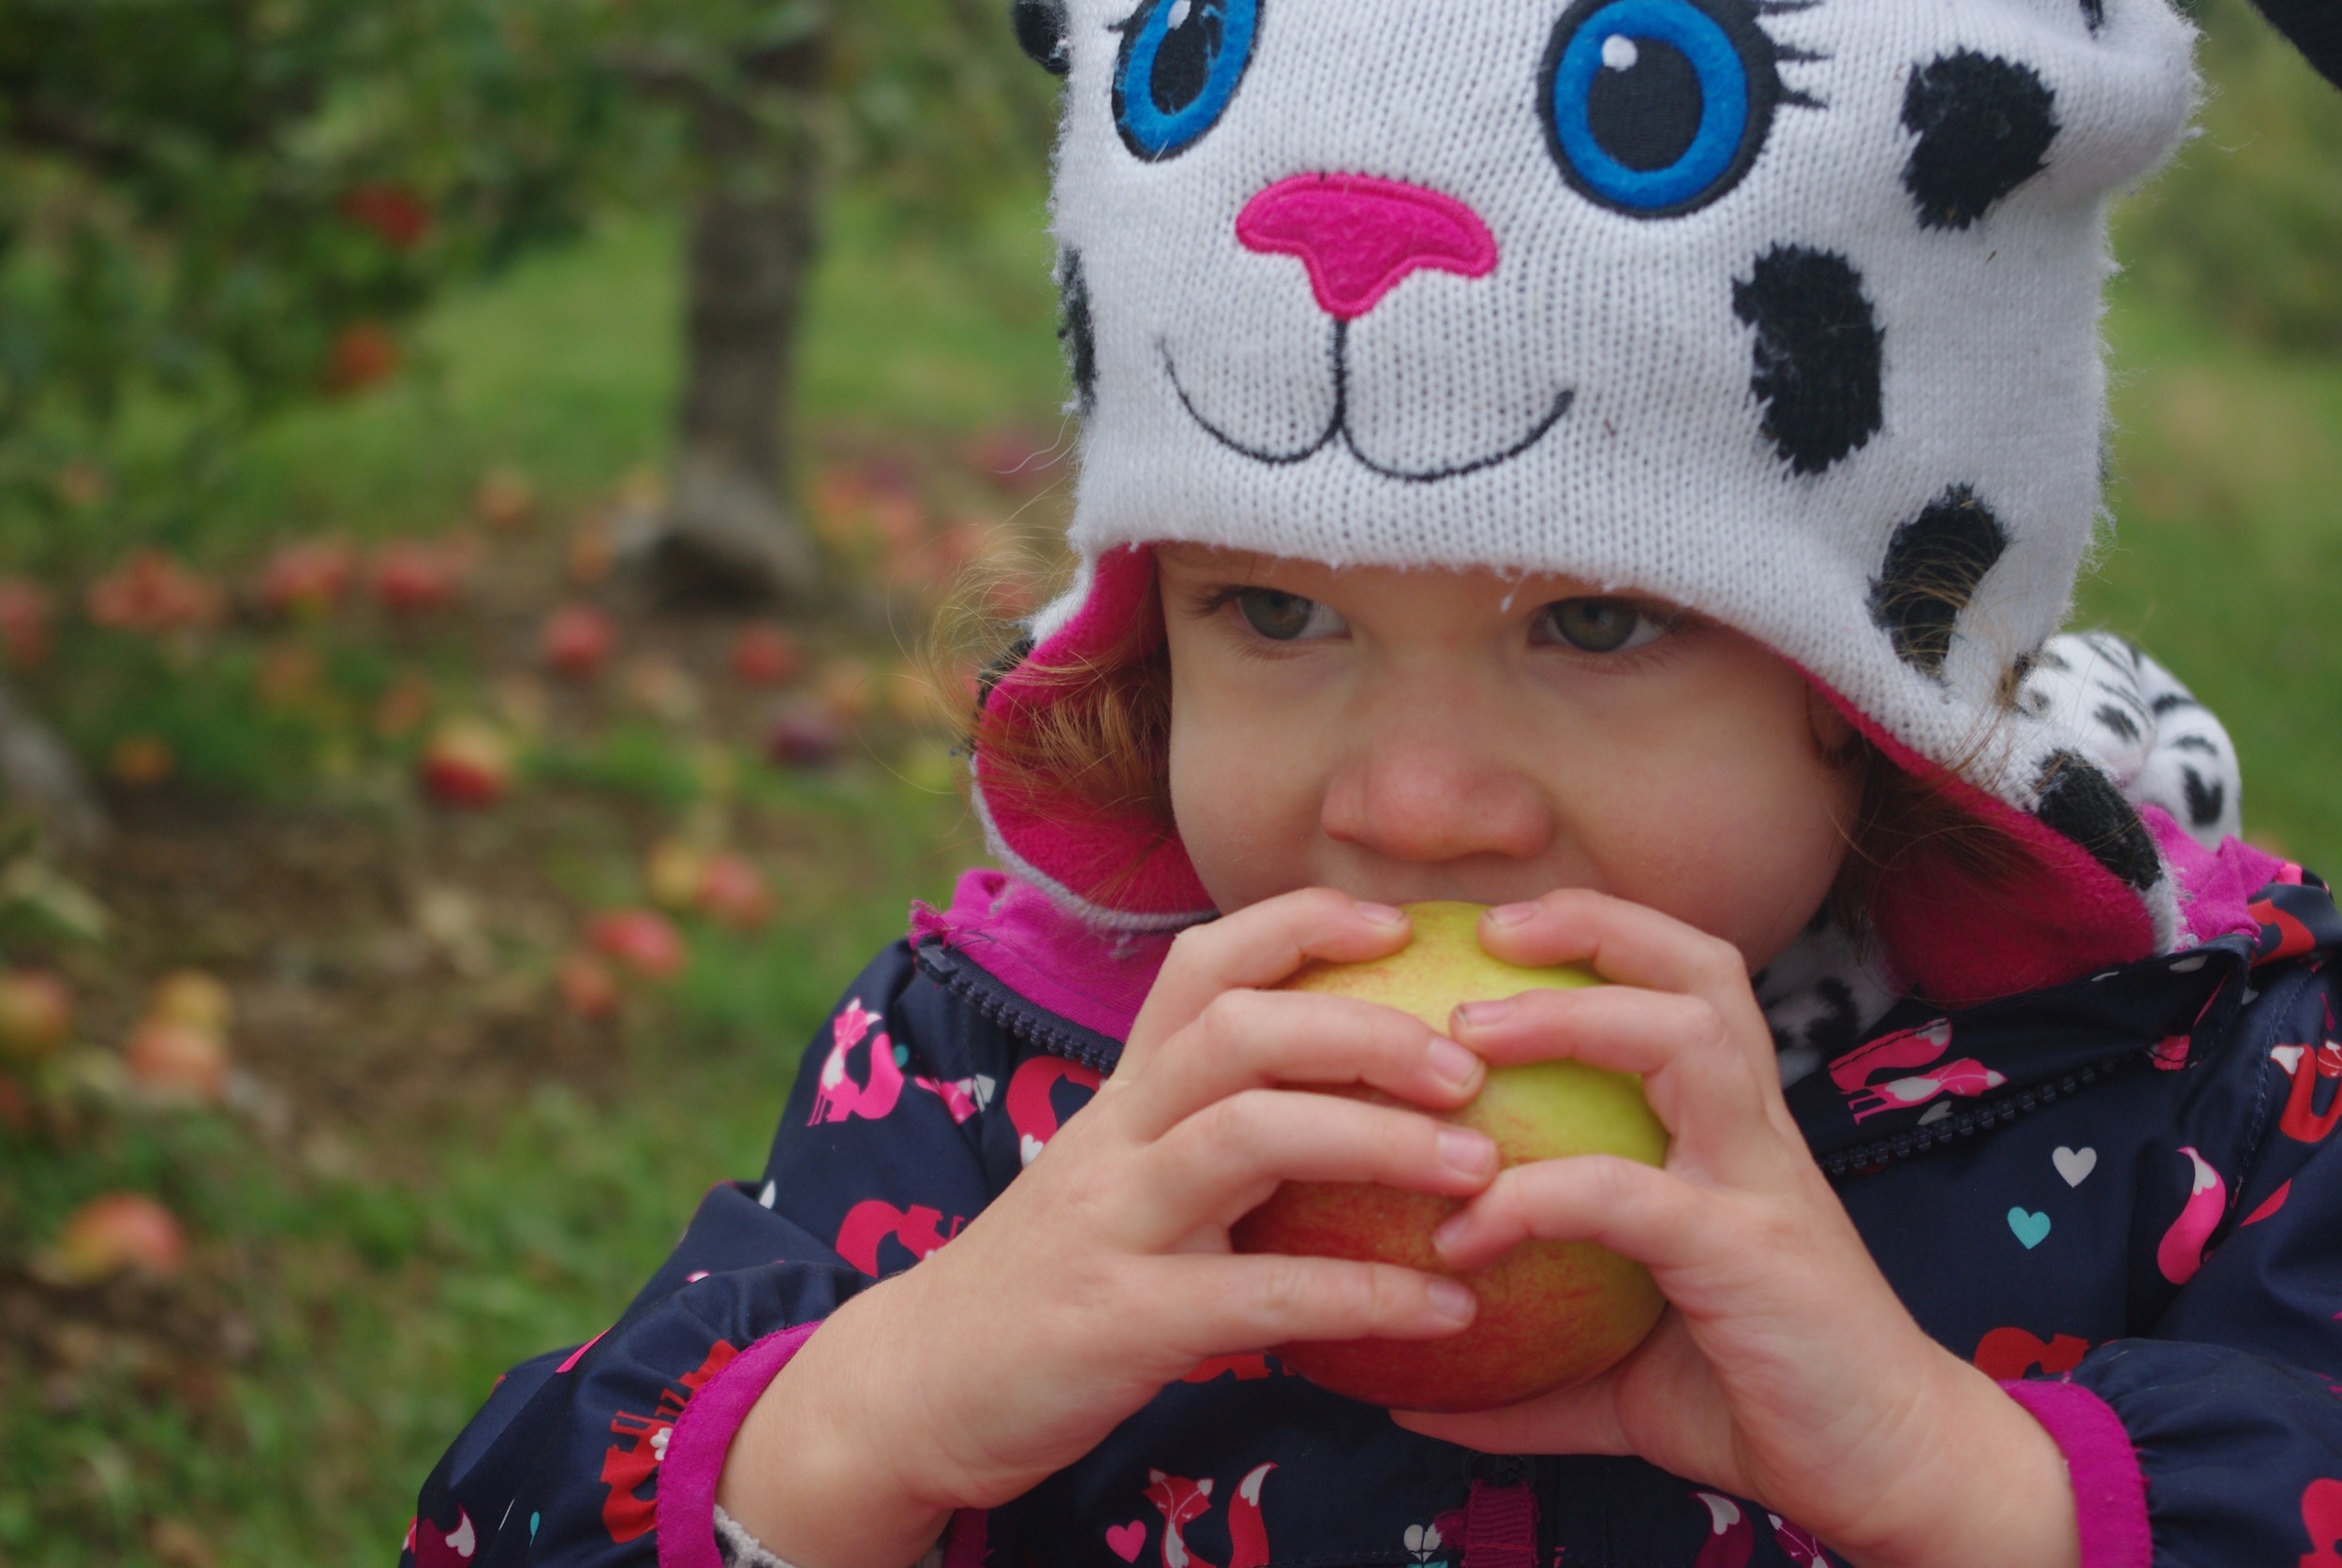


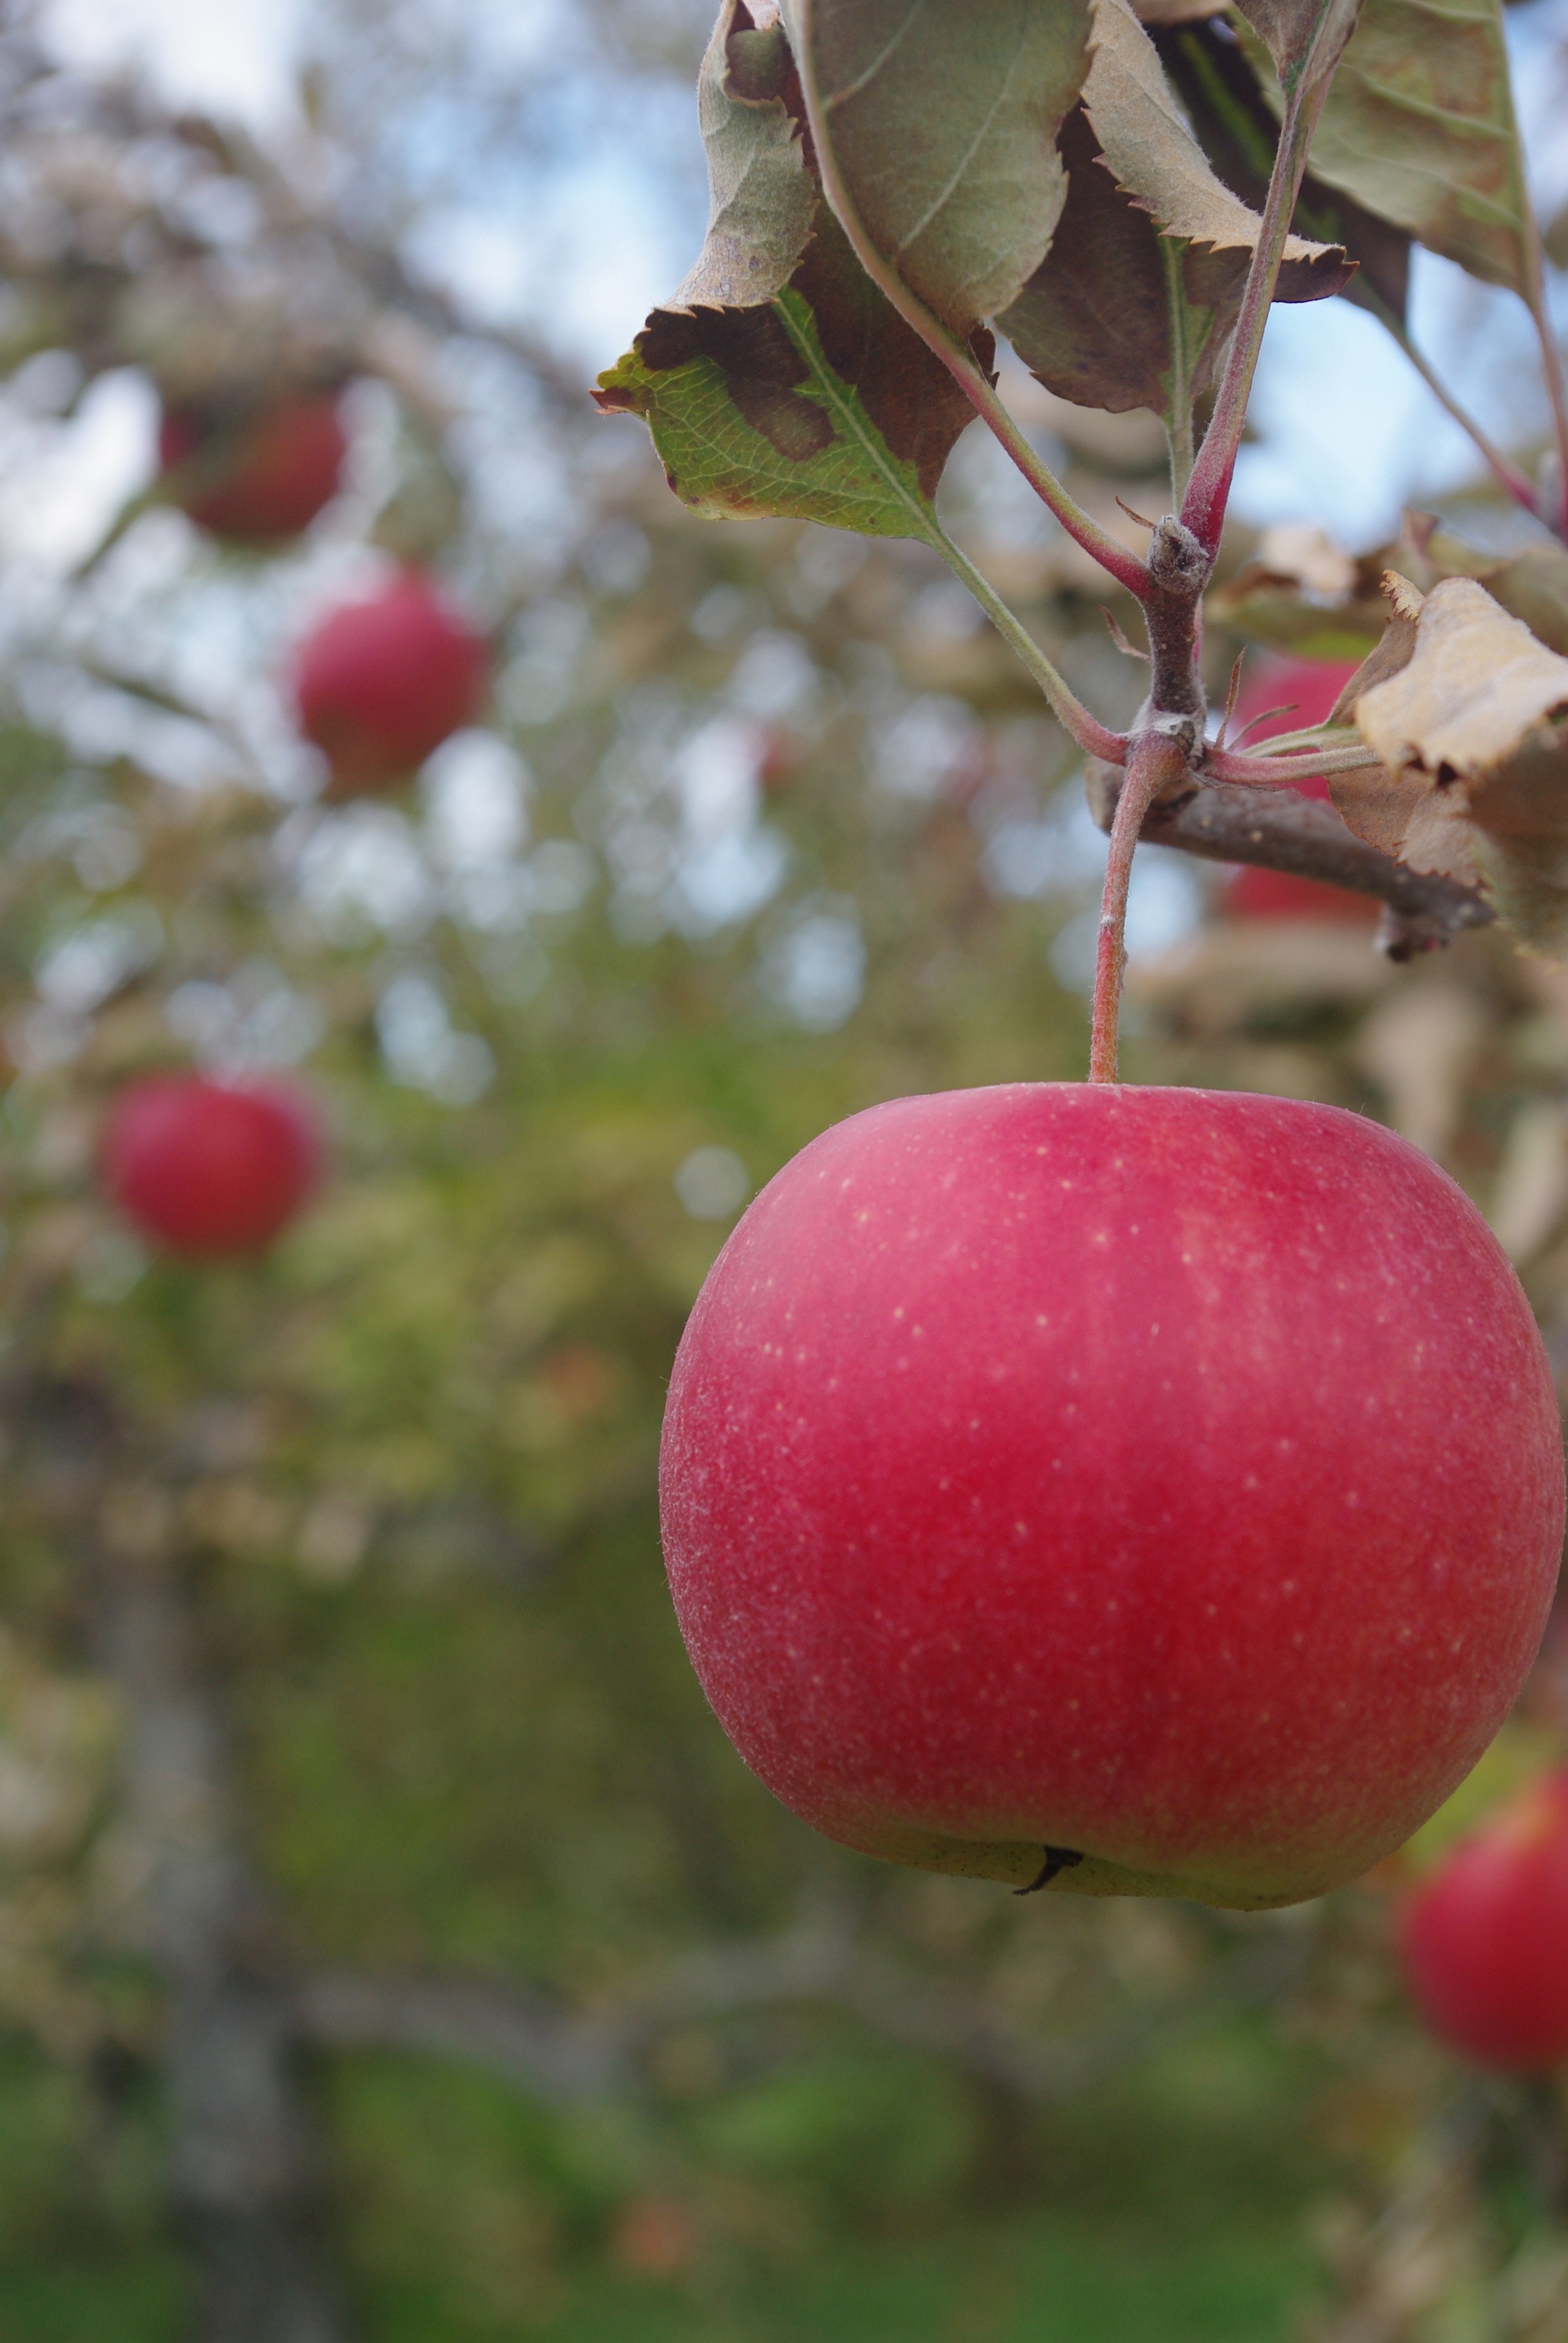


So we went a little overboard on the apple picking this year and picked a ton on our annual trip to Ricker Hill a few weeks back. (also we went on a weekday, so we had the full run of the bounce houses to ourselves and had to take advantage of that!) So even after two sizable pies, I still had about a bushel left and no gumption to make more pie, and so, enter crisp! This recipe is a mashup of three different ones, so it has a little bit of everything in it, which makes it totally delicious.And it's a big batch recipe (3 Qt baking pan), so it means that I'm down to only 2 dozen apples now!!
Filling
- ~10 apples, peeled and chopped
- 3 Tbl sugar
- 1.5 Tbl cornstarch
- 1/2 tsp salt
- 3 Tbl orange juice
Topping
- 1 to 1 1/2 cups flour (Up to 1/2 cup can be whole wheat)
- 1/2 cup rolled oats
- 1/2 cup packed brown sugar
- 2 Tbl white sugar
- 1/4 tsp salt
- 1/4 tsp nutmeg
- zest of 1 lemon
- 1.5 sticks salted butter, softened
- 1 cup chopped pecans
Preheat oven to 350 Degrees F
Place all filling ingredients into a 9x13 (3 QT) baking pan and mix together. Adding more apples as needed to fill pan.
In a separate bowl, mix all topping ingredients, except nuts, together until they make a consistency like wet sand. Mix in nuts as desired. Sprinkle topping loosely over apple mixture.
Bake for ~ 50 minutes until topping is browned and apples are soft.
Serve warm with ice cream