Adding A Ribbon Backing to Your Knit Button Band

Adding Ribbon to a Knit Buttonband.png

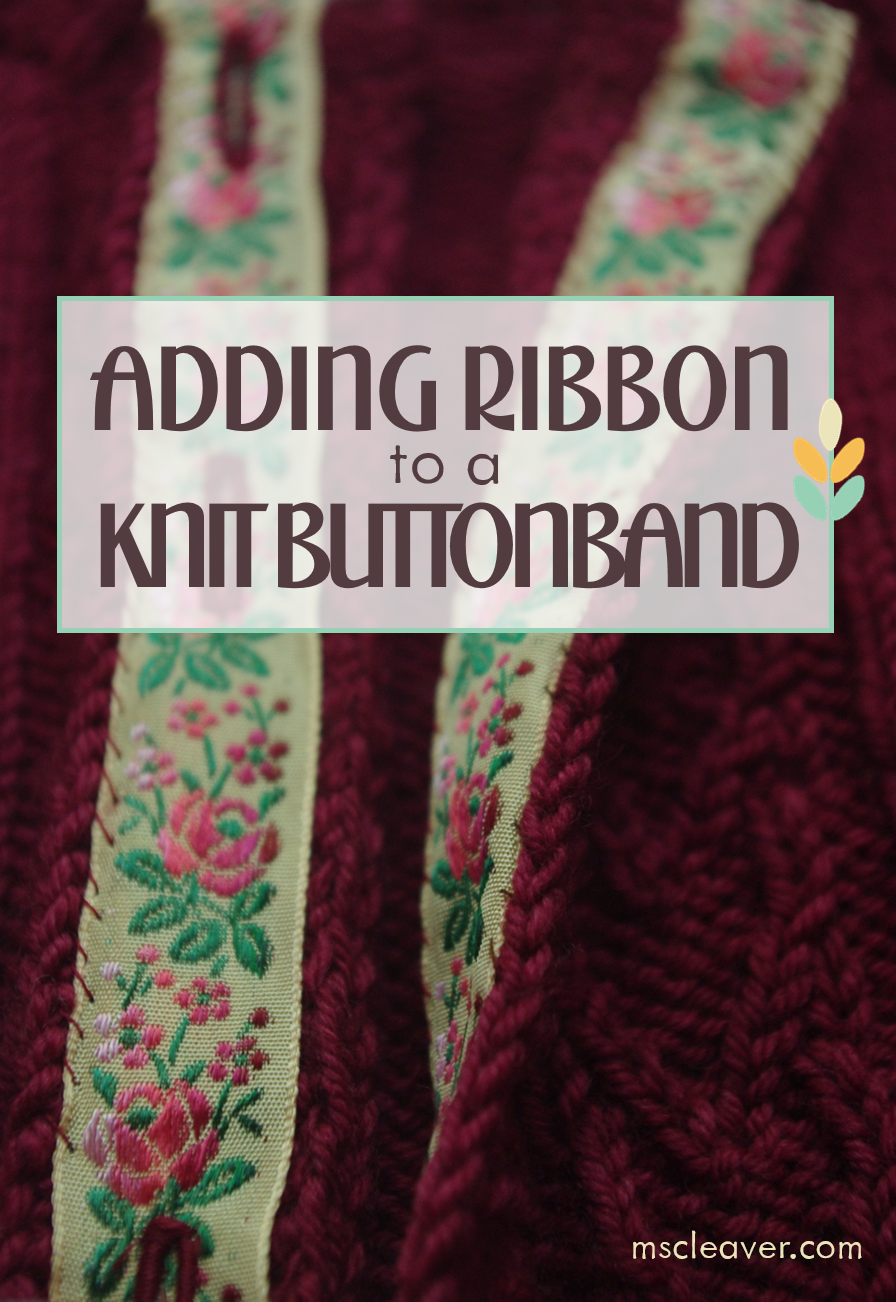
Why Reinforce A Button Band?

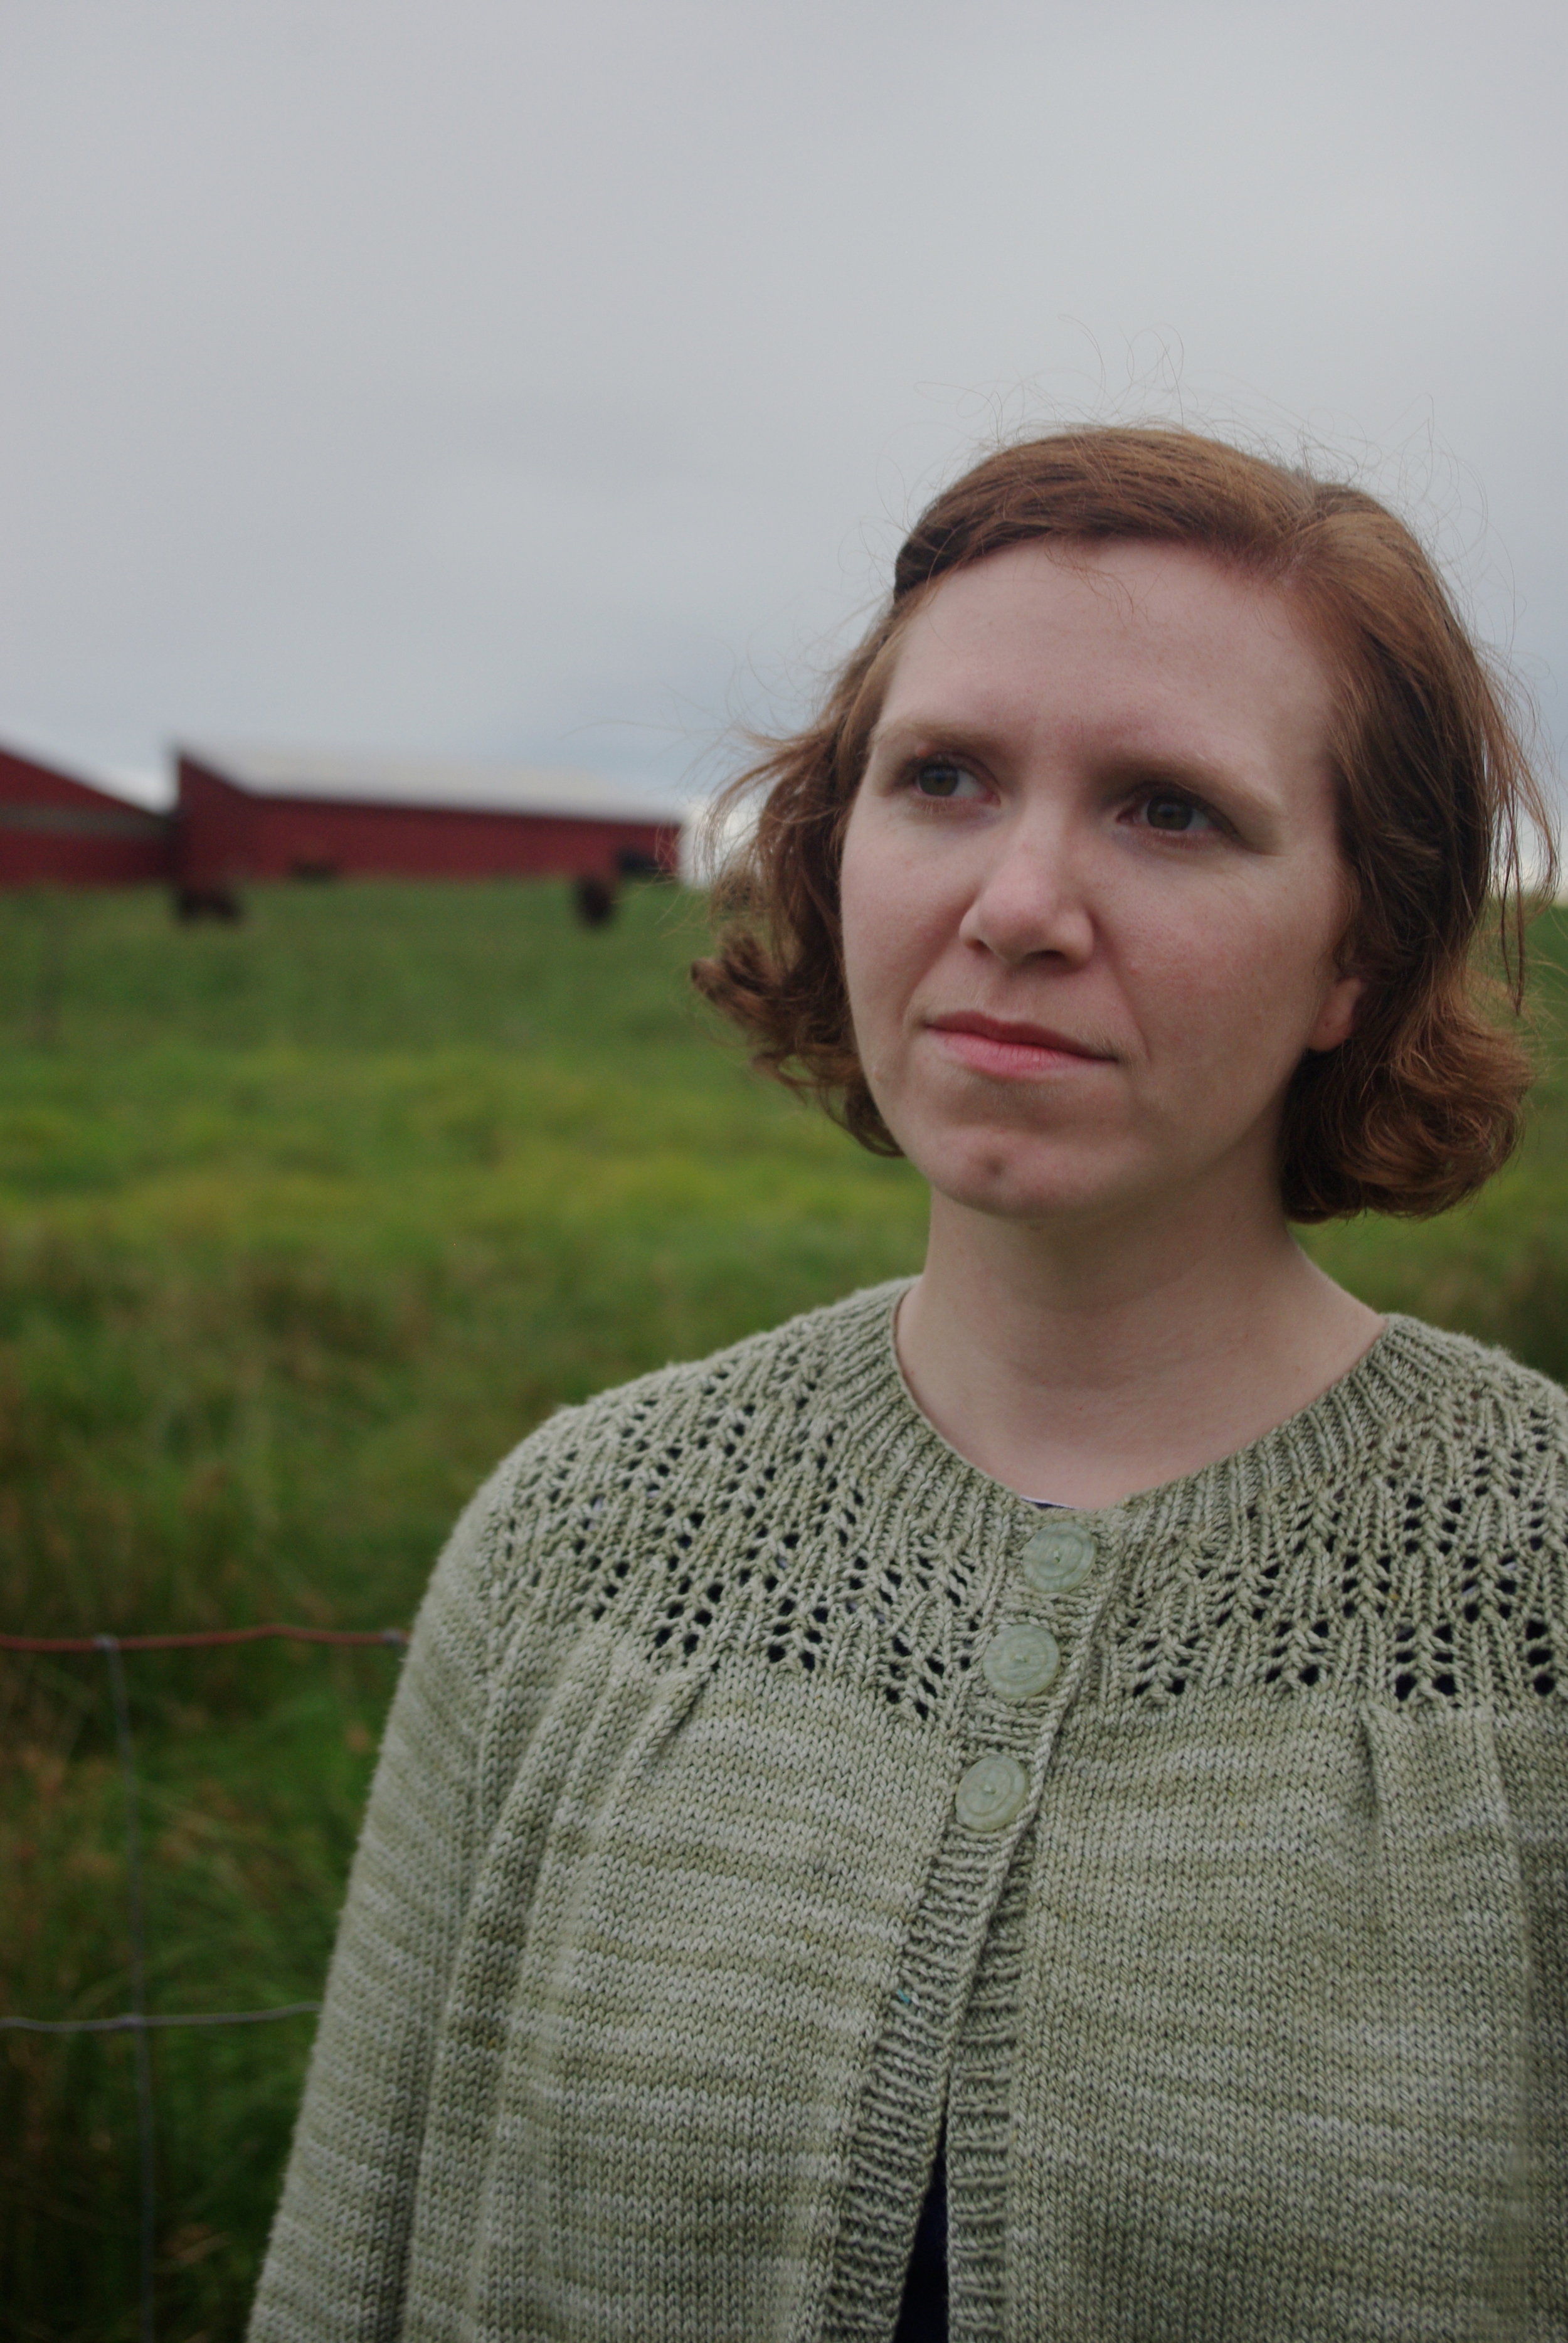
Both of my recent pattern releases, Lady Heartrose and Prairie Wife, suggest that you use ribbon to reinforce the button bands. If you're one of those knitters who hates finishing, you may think why bother?  You certainly don't have to, most of my sweaters to date don't have any kind of reinforcement, but there are several reasons to consider it. 

  1. It will keep your fabric from curling (though ribbing may already take care of that).
  2. It will help prevent gaping at the bust if you intend to button up.
  3. It will help prevent the button band and button holes from getting stretched out over time.
  4. If it's a steeked piece, it can cover up the cut ends of yarn. 
  5. It's a nice little surprise inside the cardigan and looks really pretty!

What Supplies Do I Need?

  1. Your blocked cardigan.
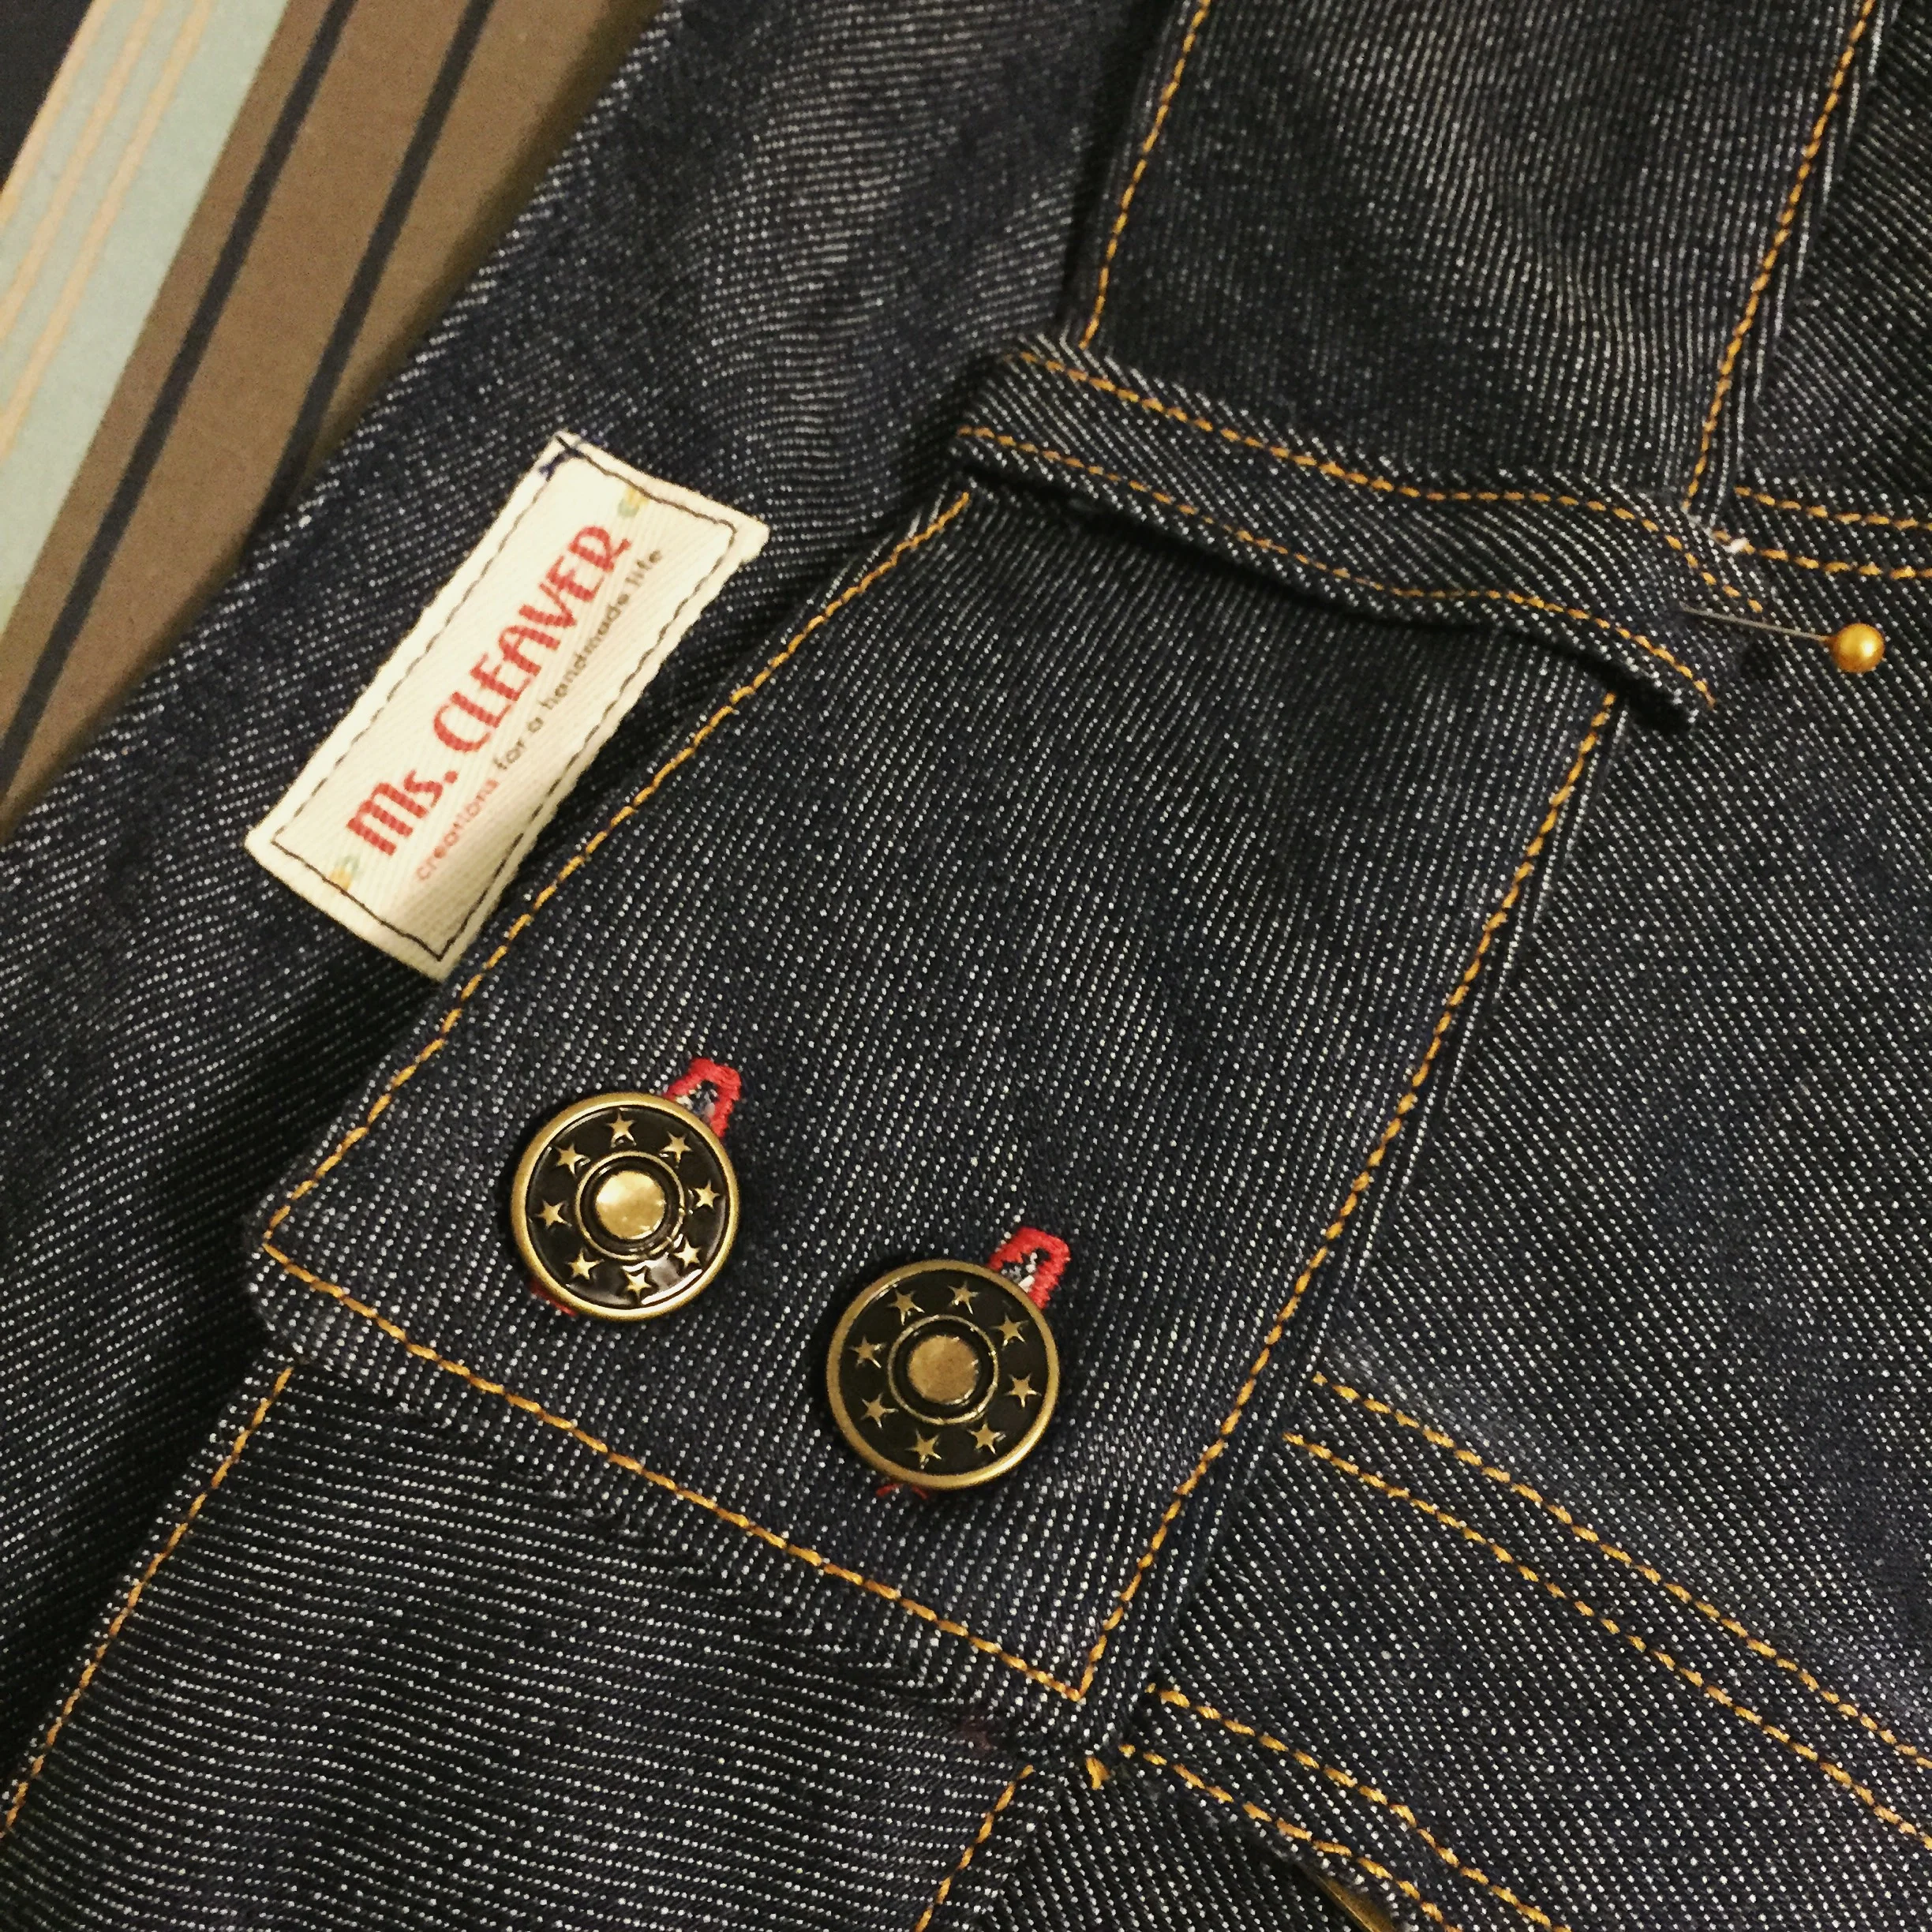
  2. Approximately 2 yards of a sturdy ribbon, such as Petersham, Grosgrain, or other firmly woven ribbon, that just as wide or slightly less wide than your knit button band. If you're doing something like a long sweater coat, measure the length first. (The ribbon used in this post is from Vintage Ribbons on Etsy). 
  3. A sewing machine with buttonhole capabilities. (You could always sew the buttonholes by hand, but this tutorial won't cover that).
  4. The buttons you are planing to use. 
  5. Needle and thread to match your yarn.
  6. Pins or clips.
  7. Seam ripper or button hole cutter.
  8. Fray Check (optional).
Adding A Ribbon Backing to Your Knit Button Band

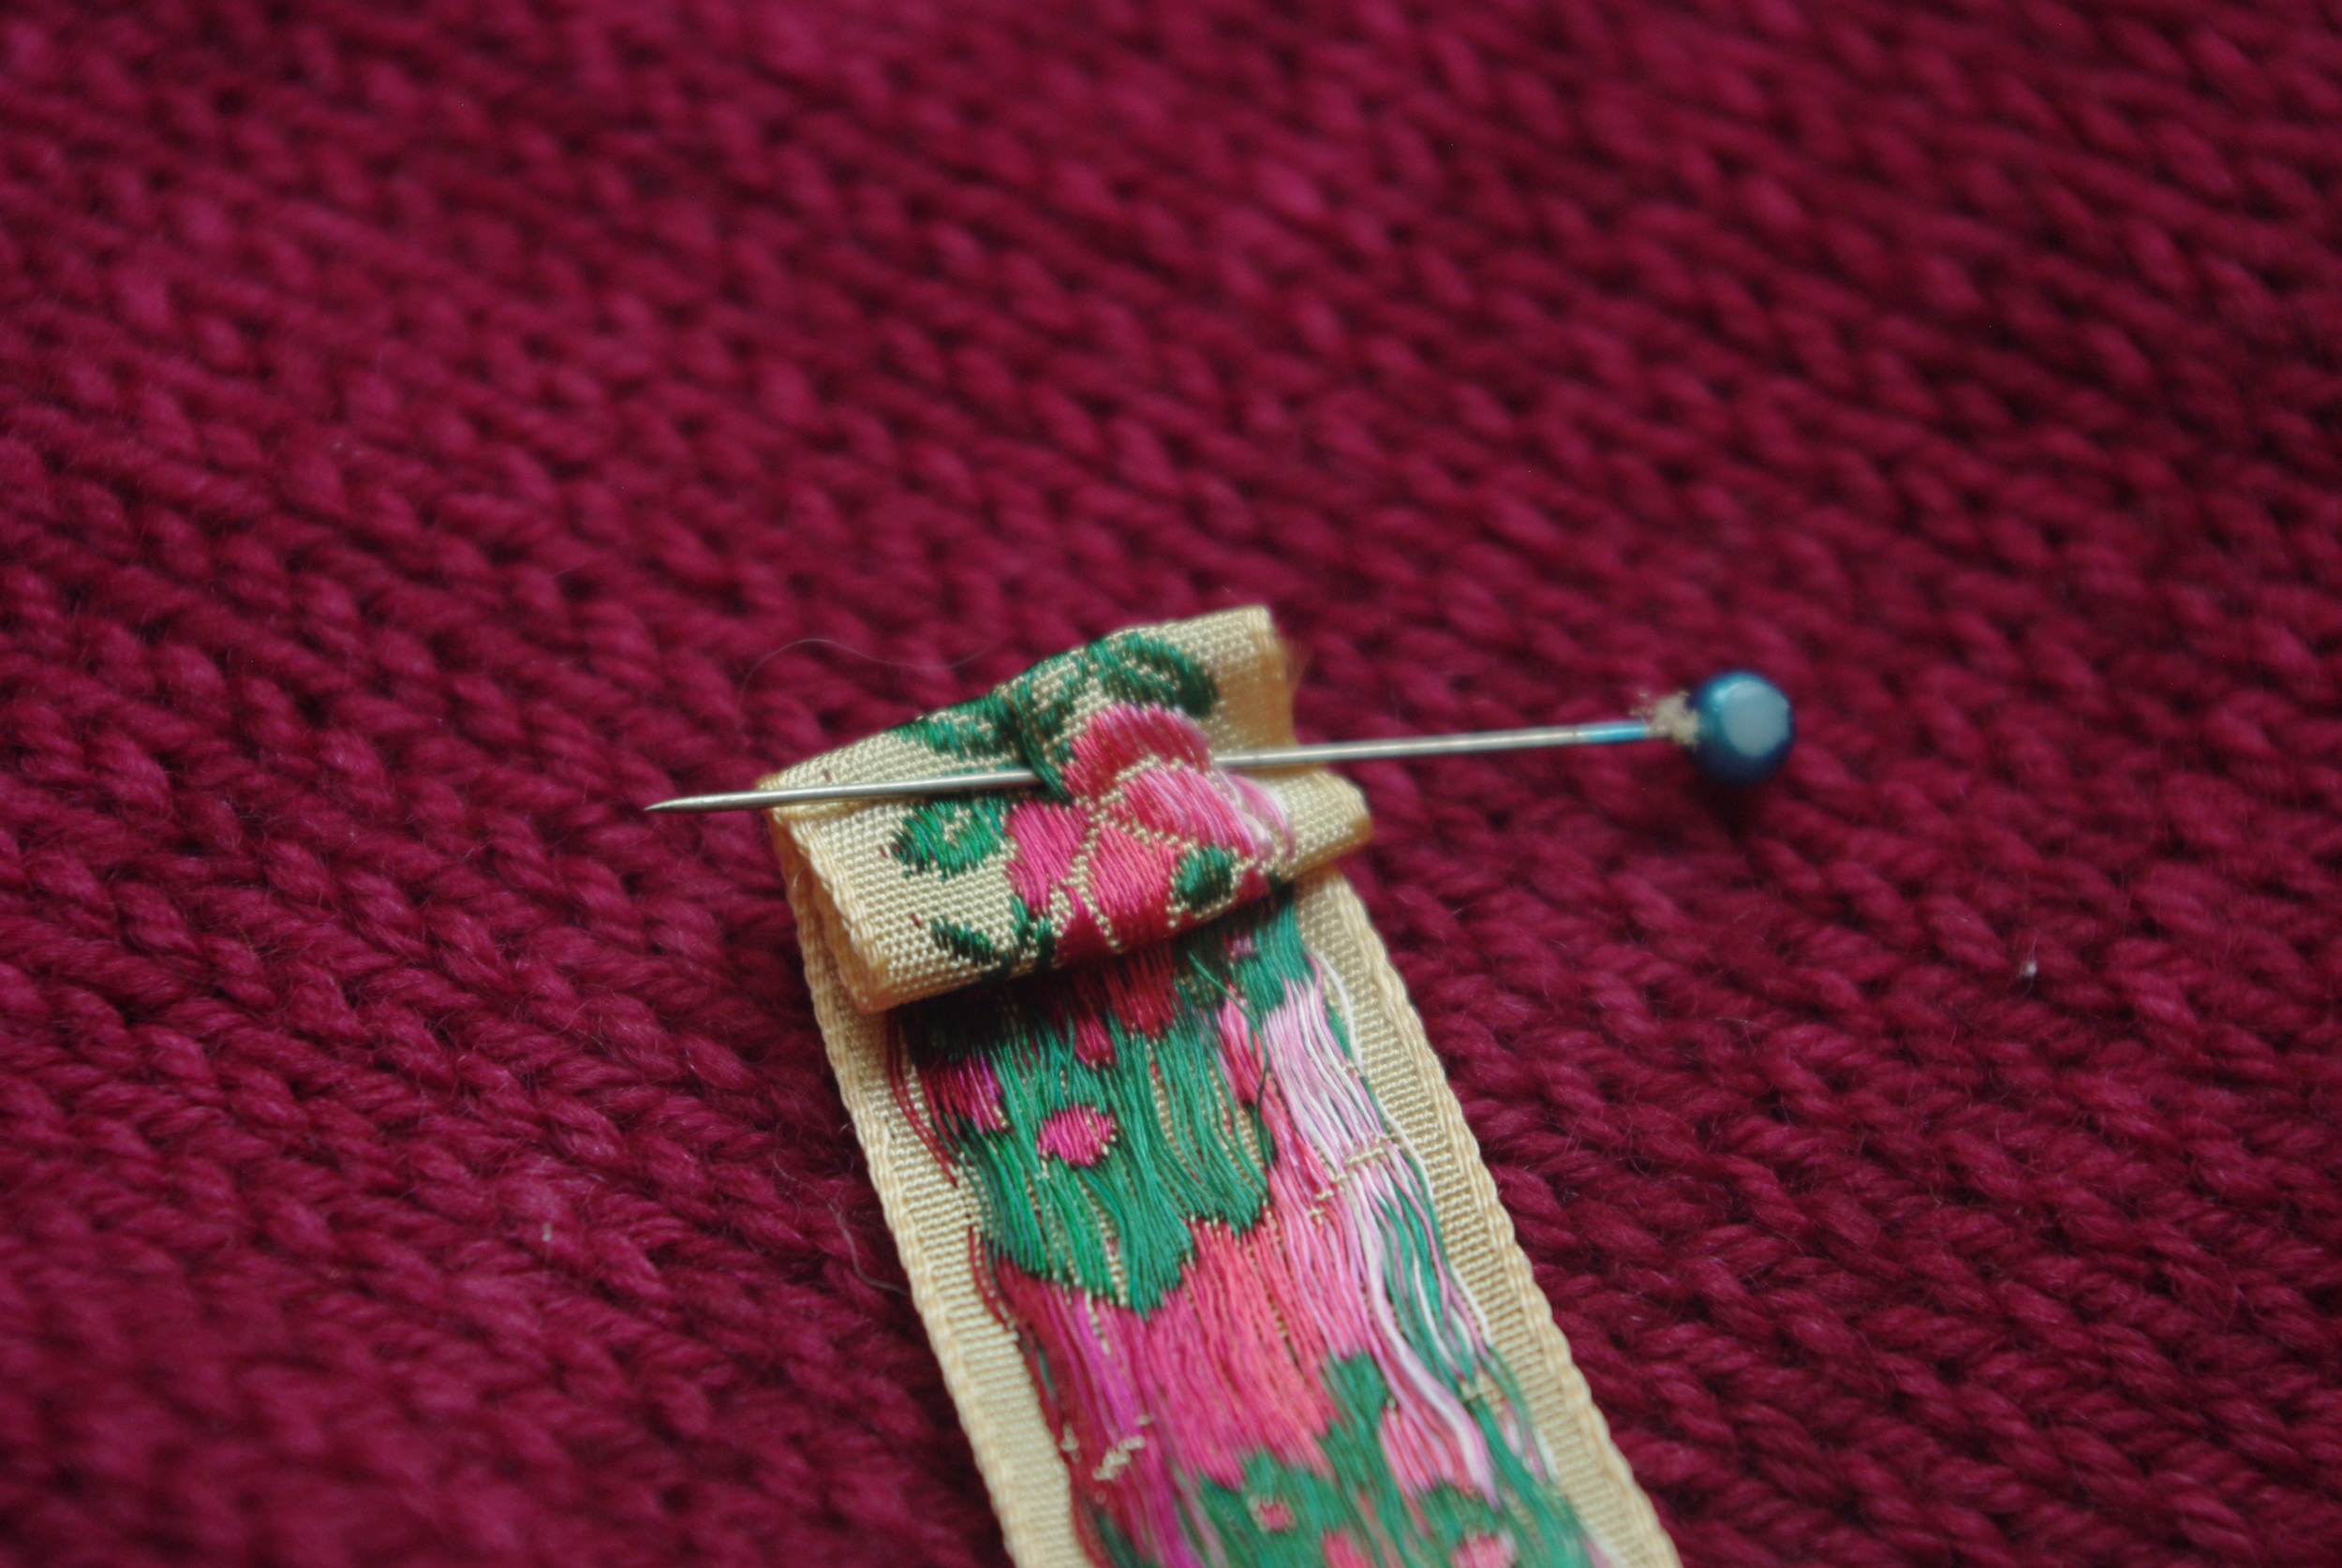
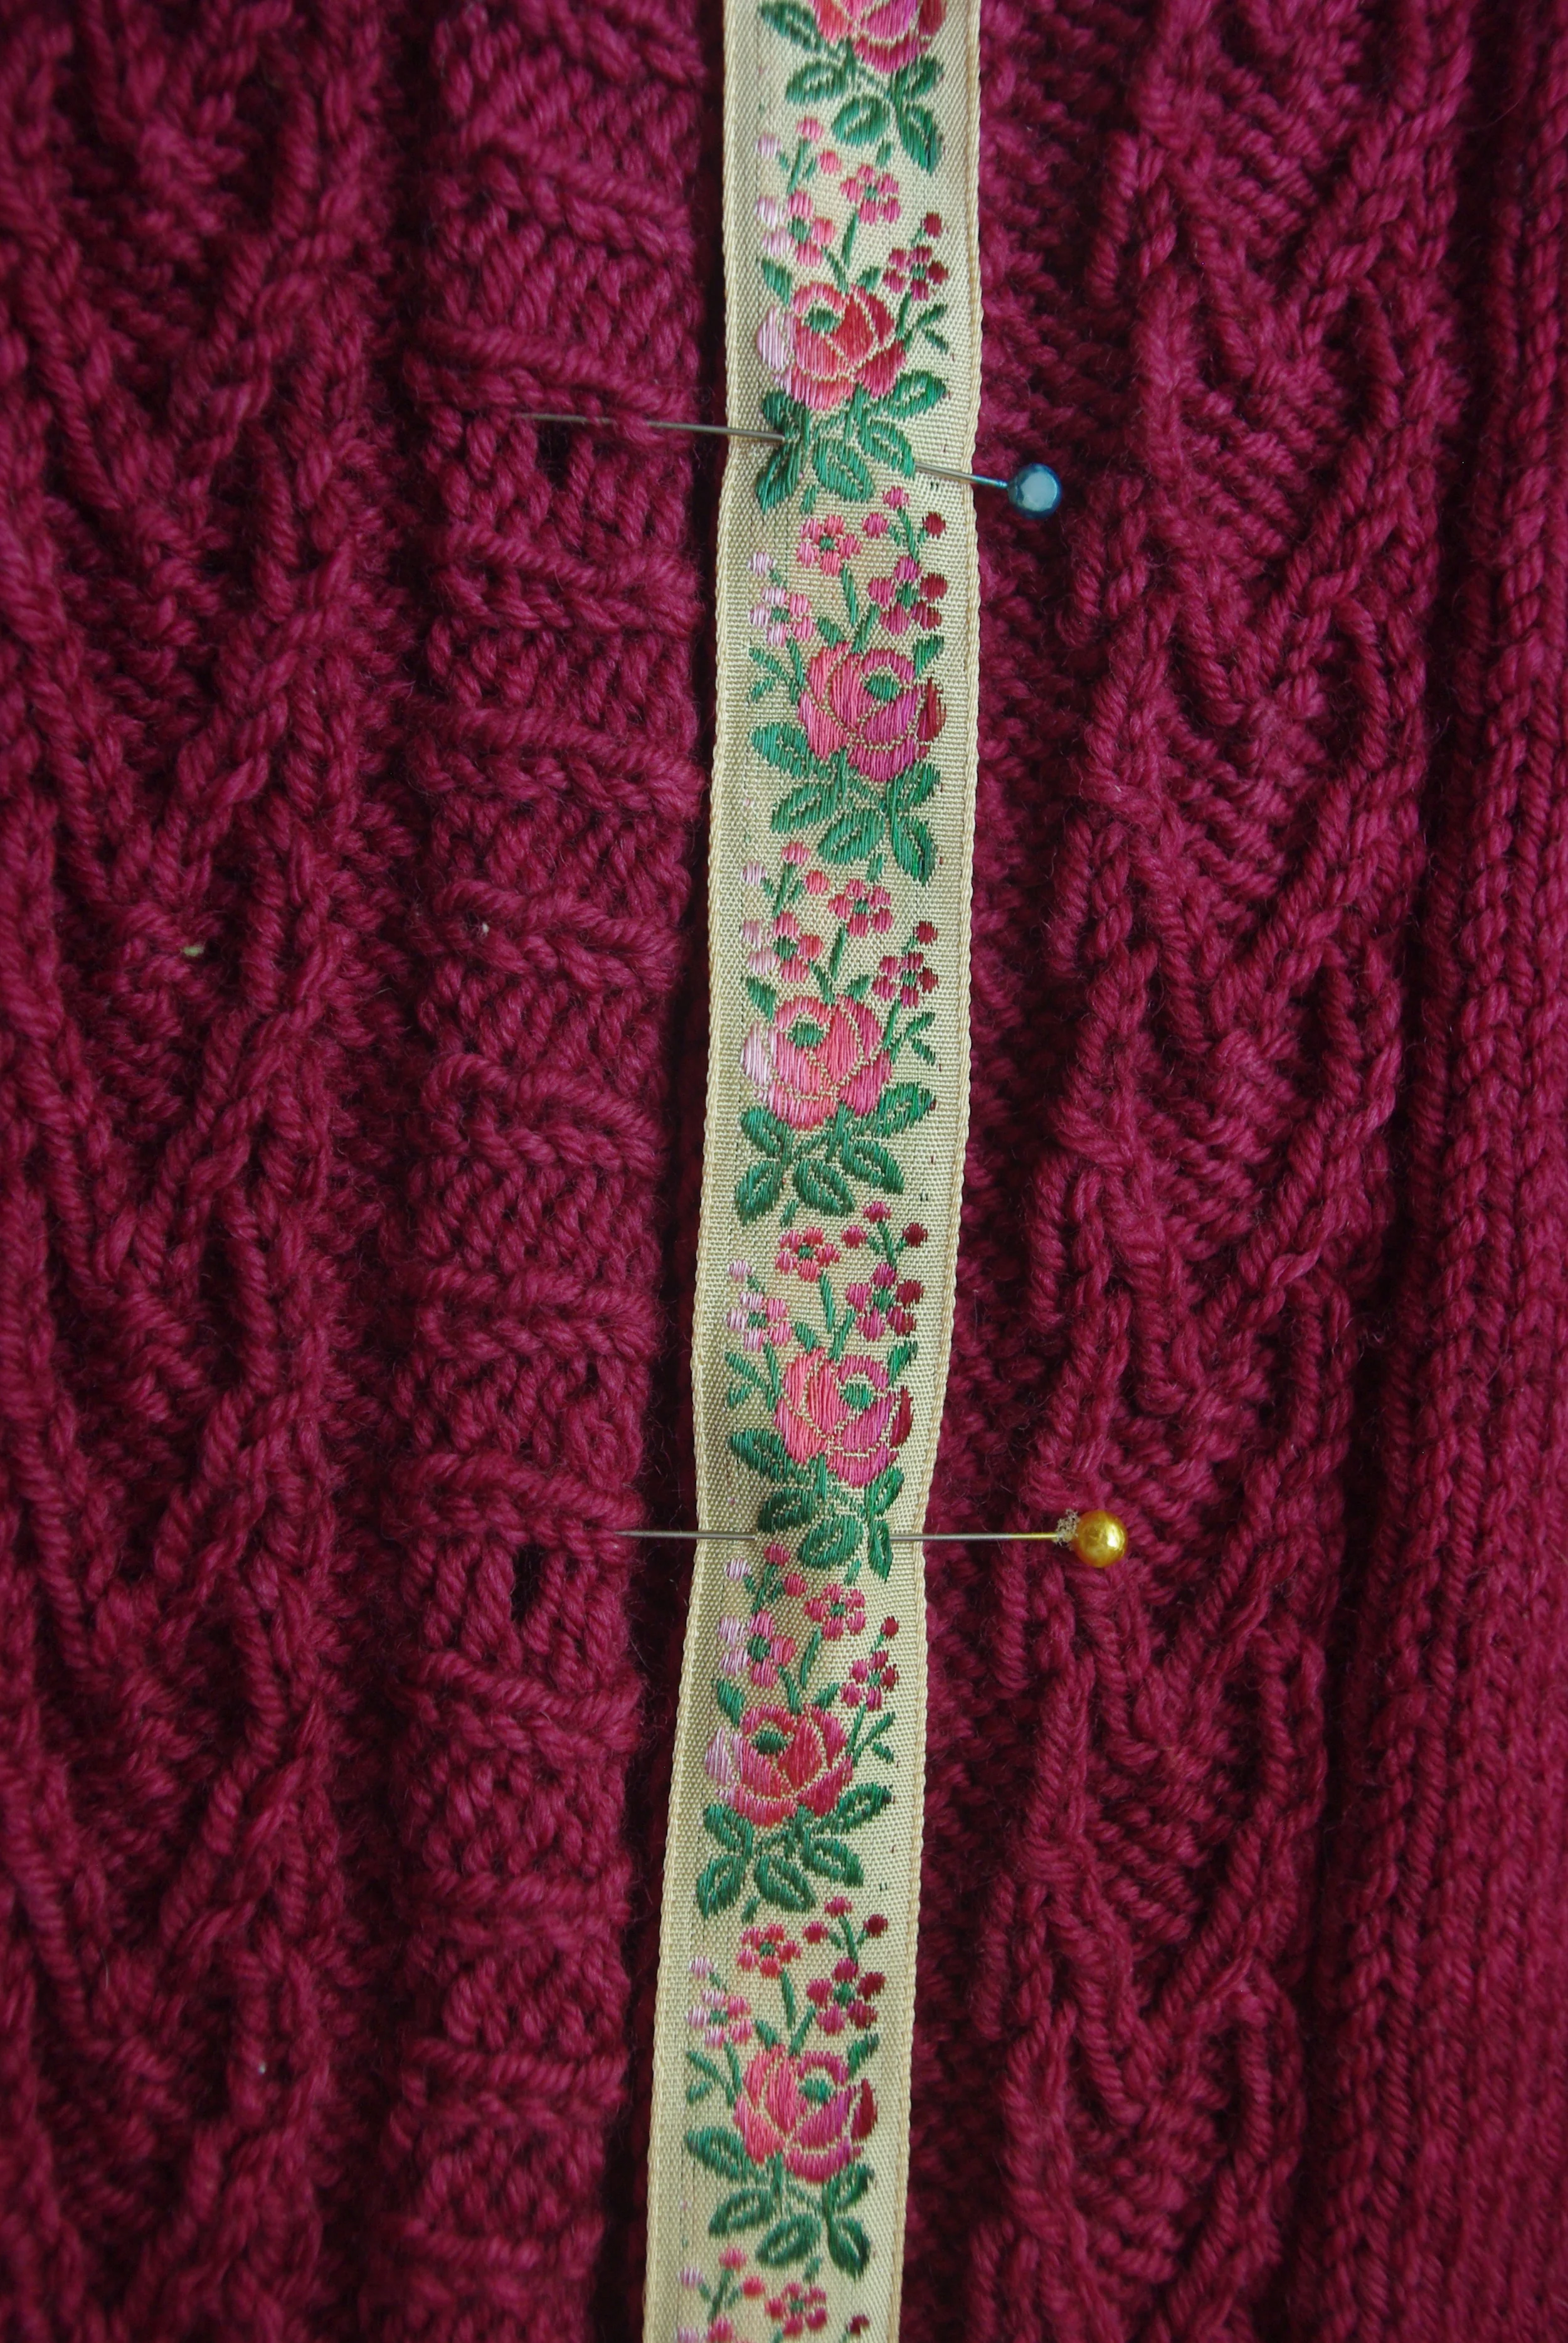
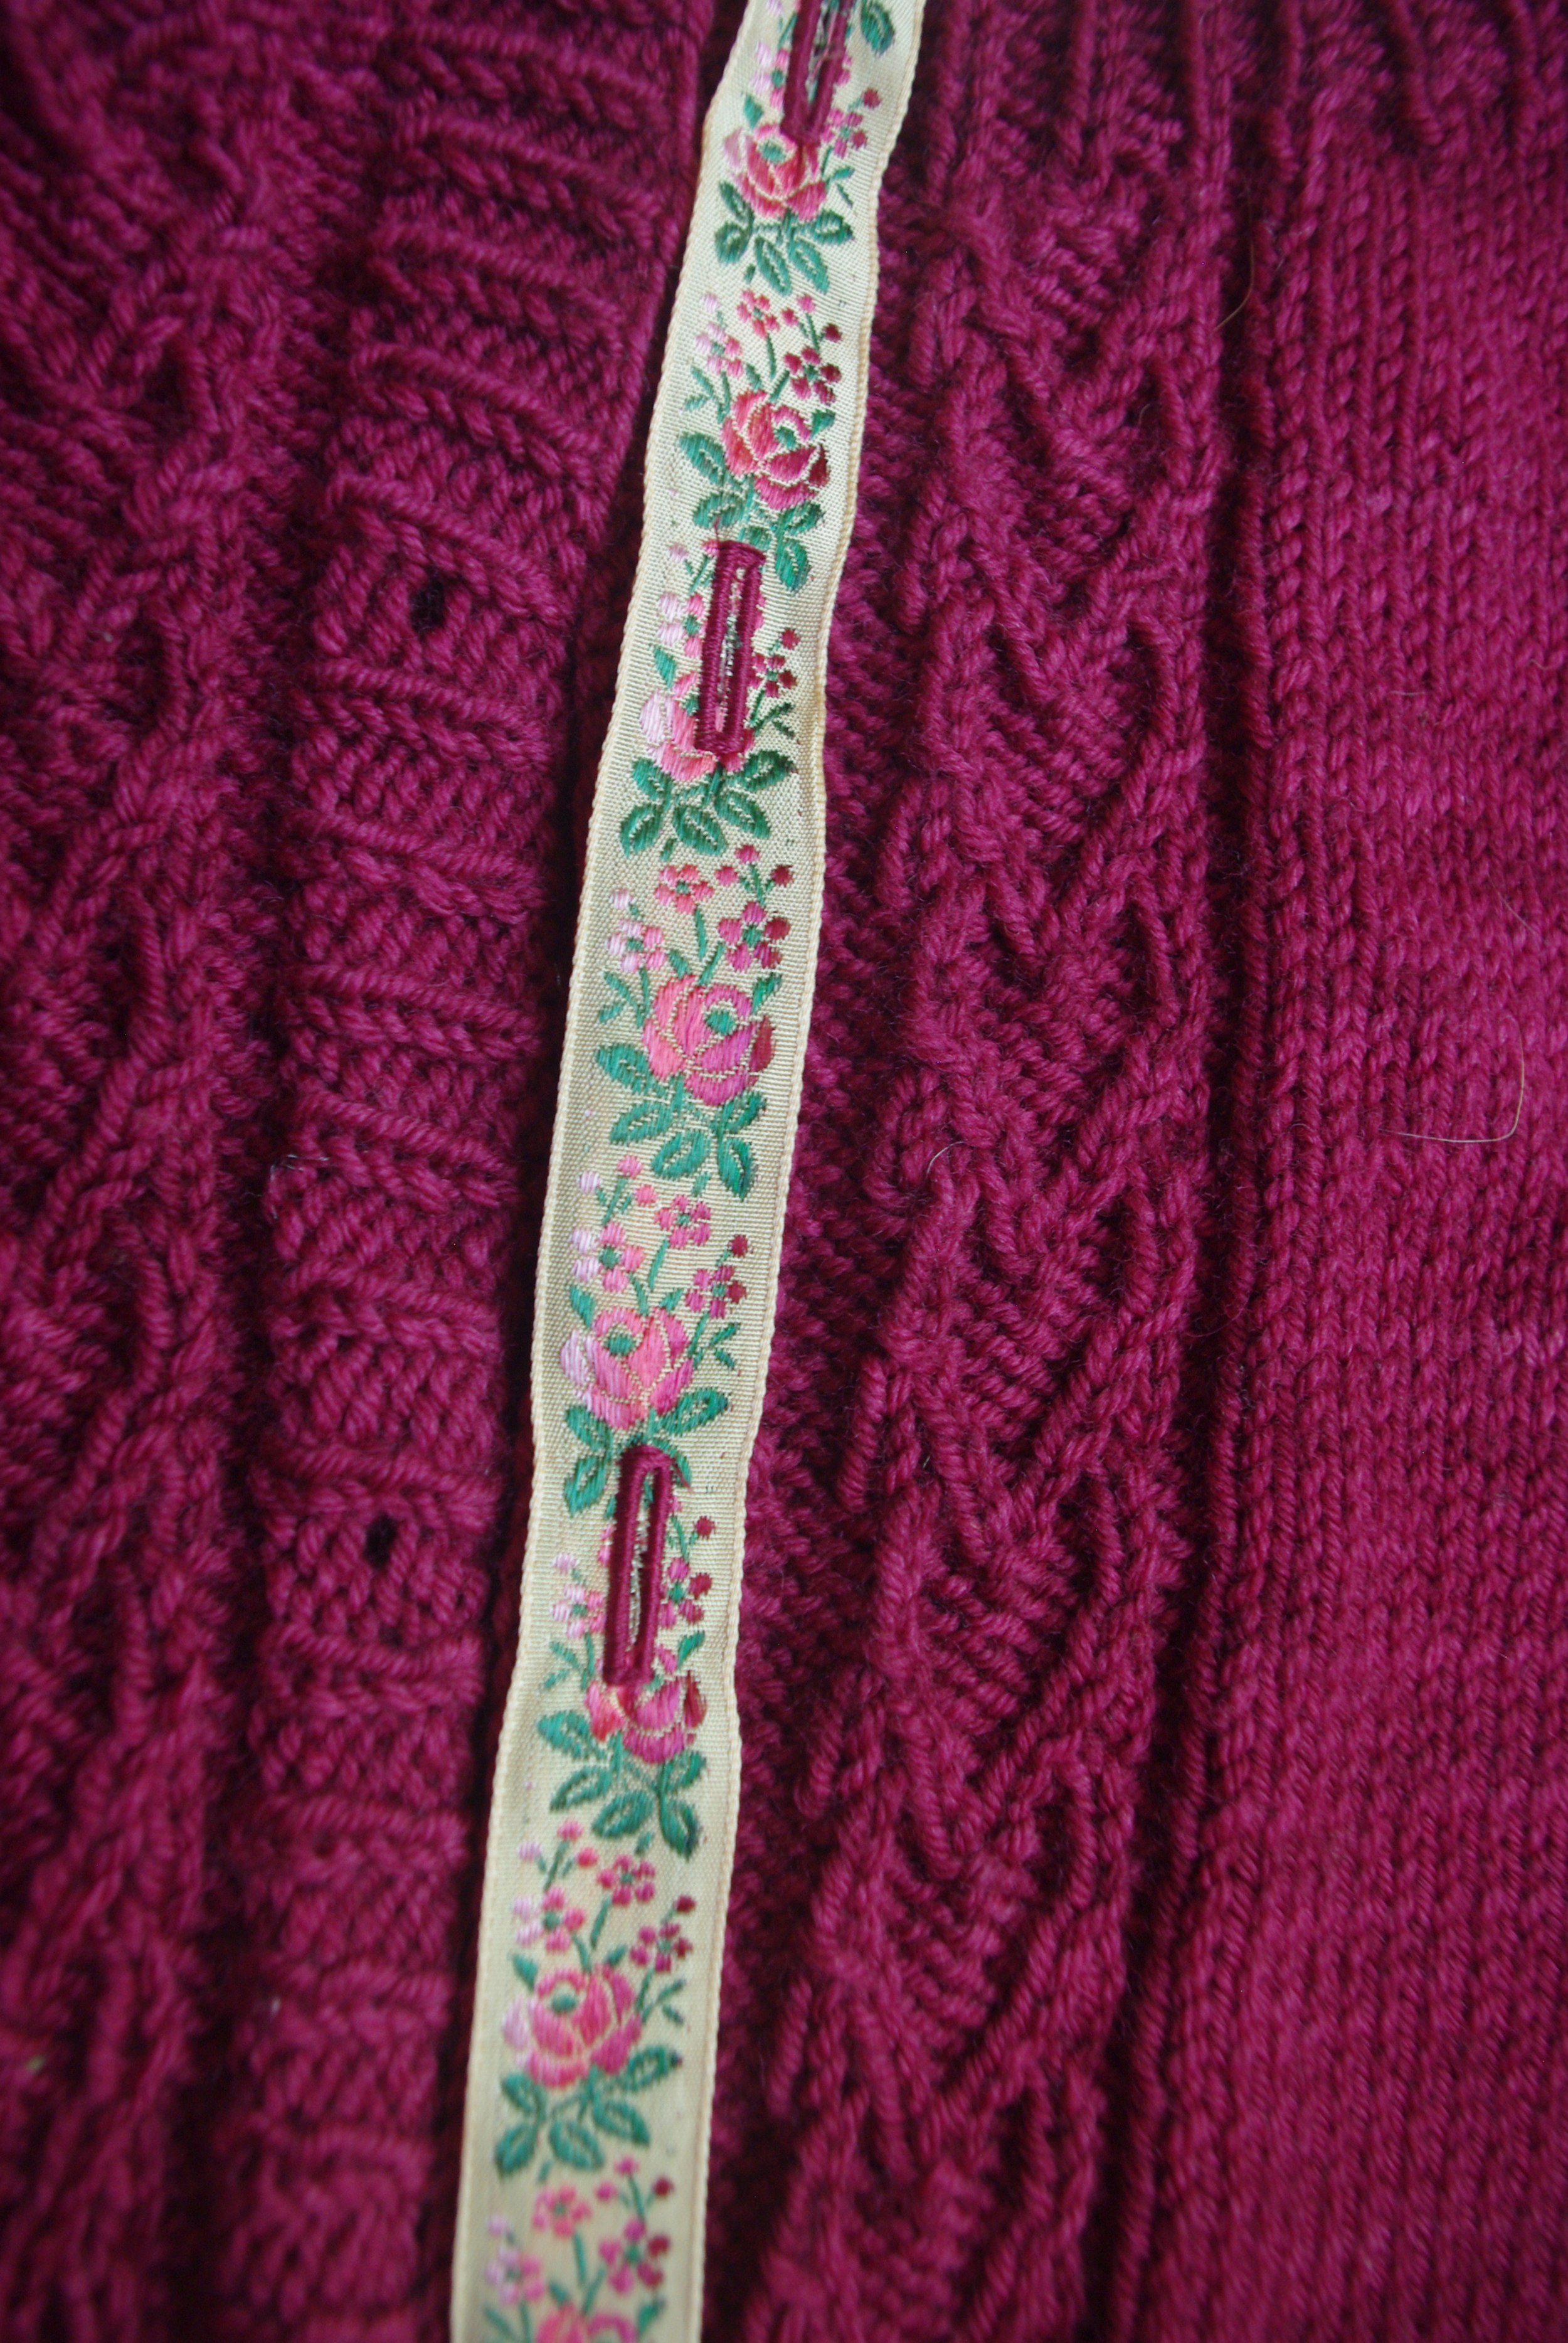
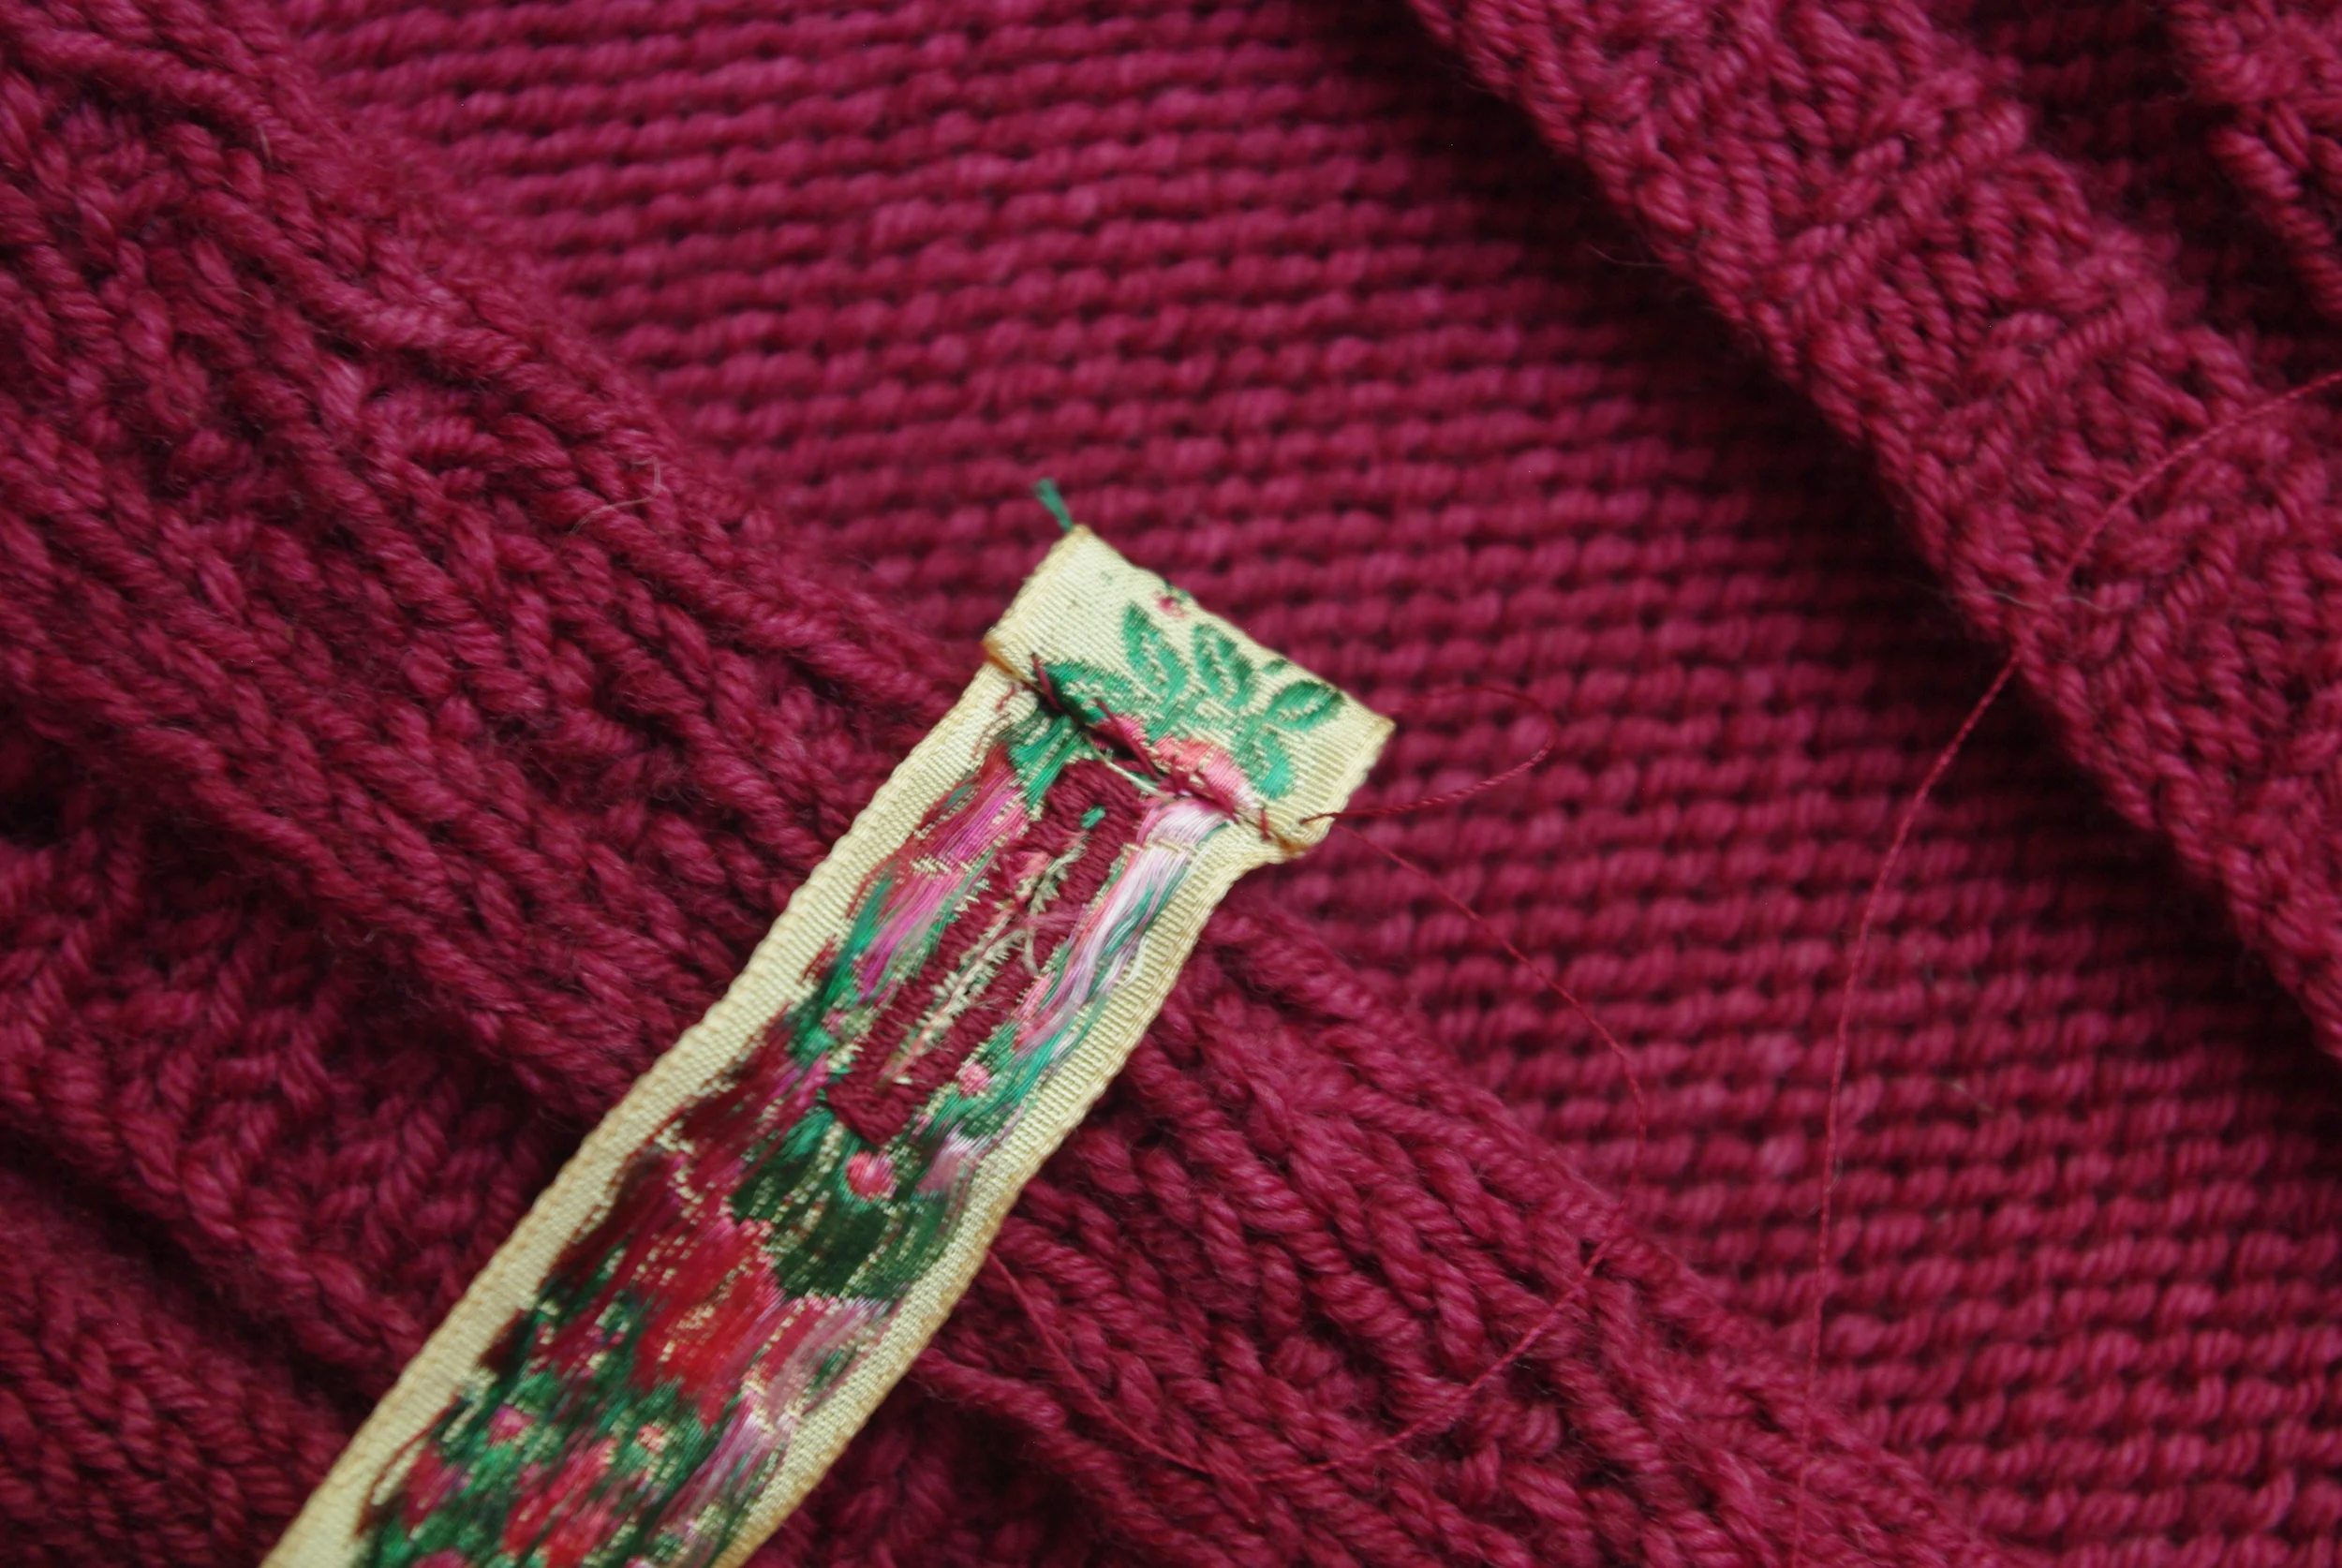
Measuring and Marking your Ribbon

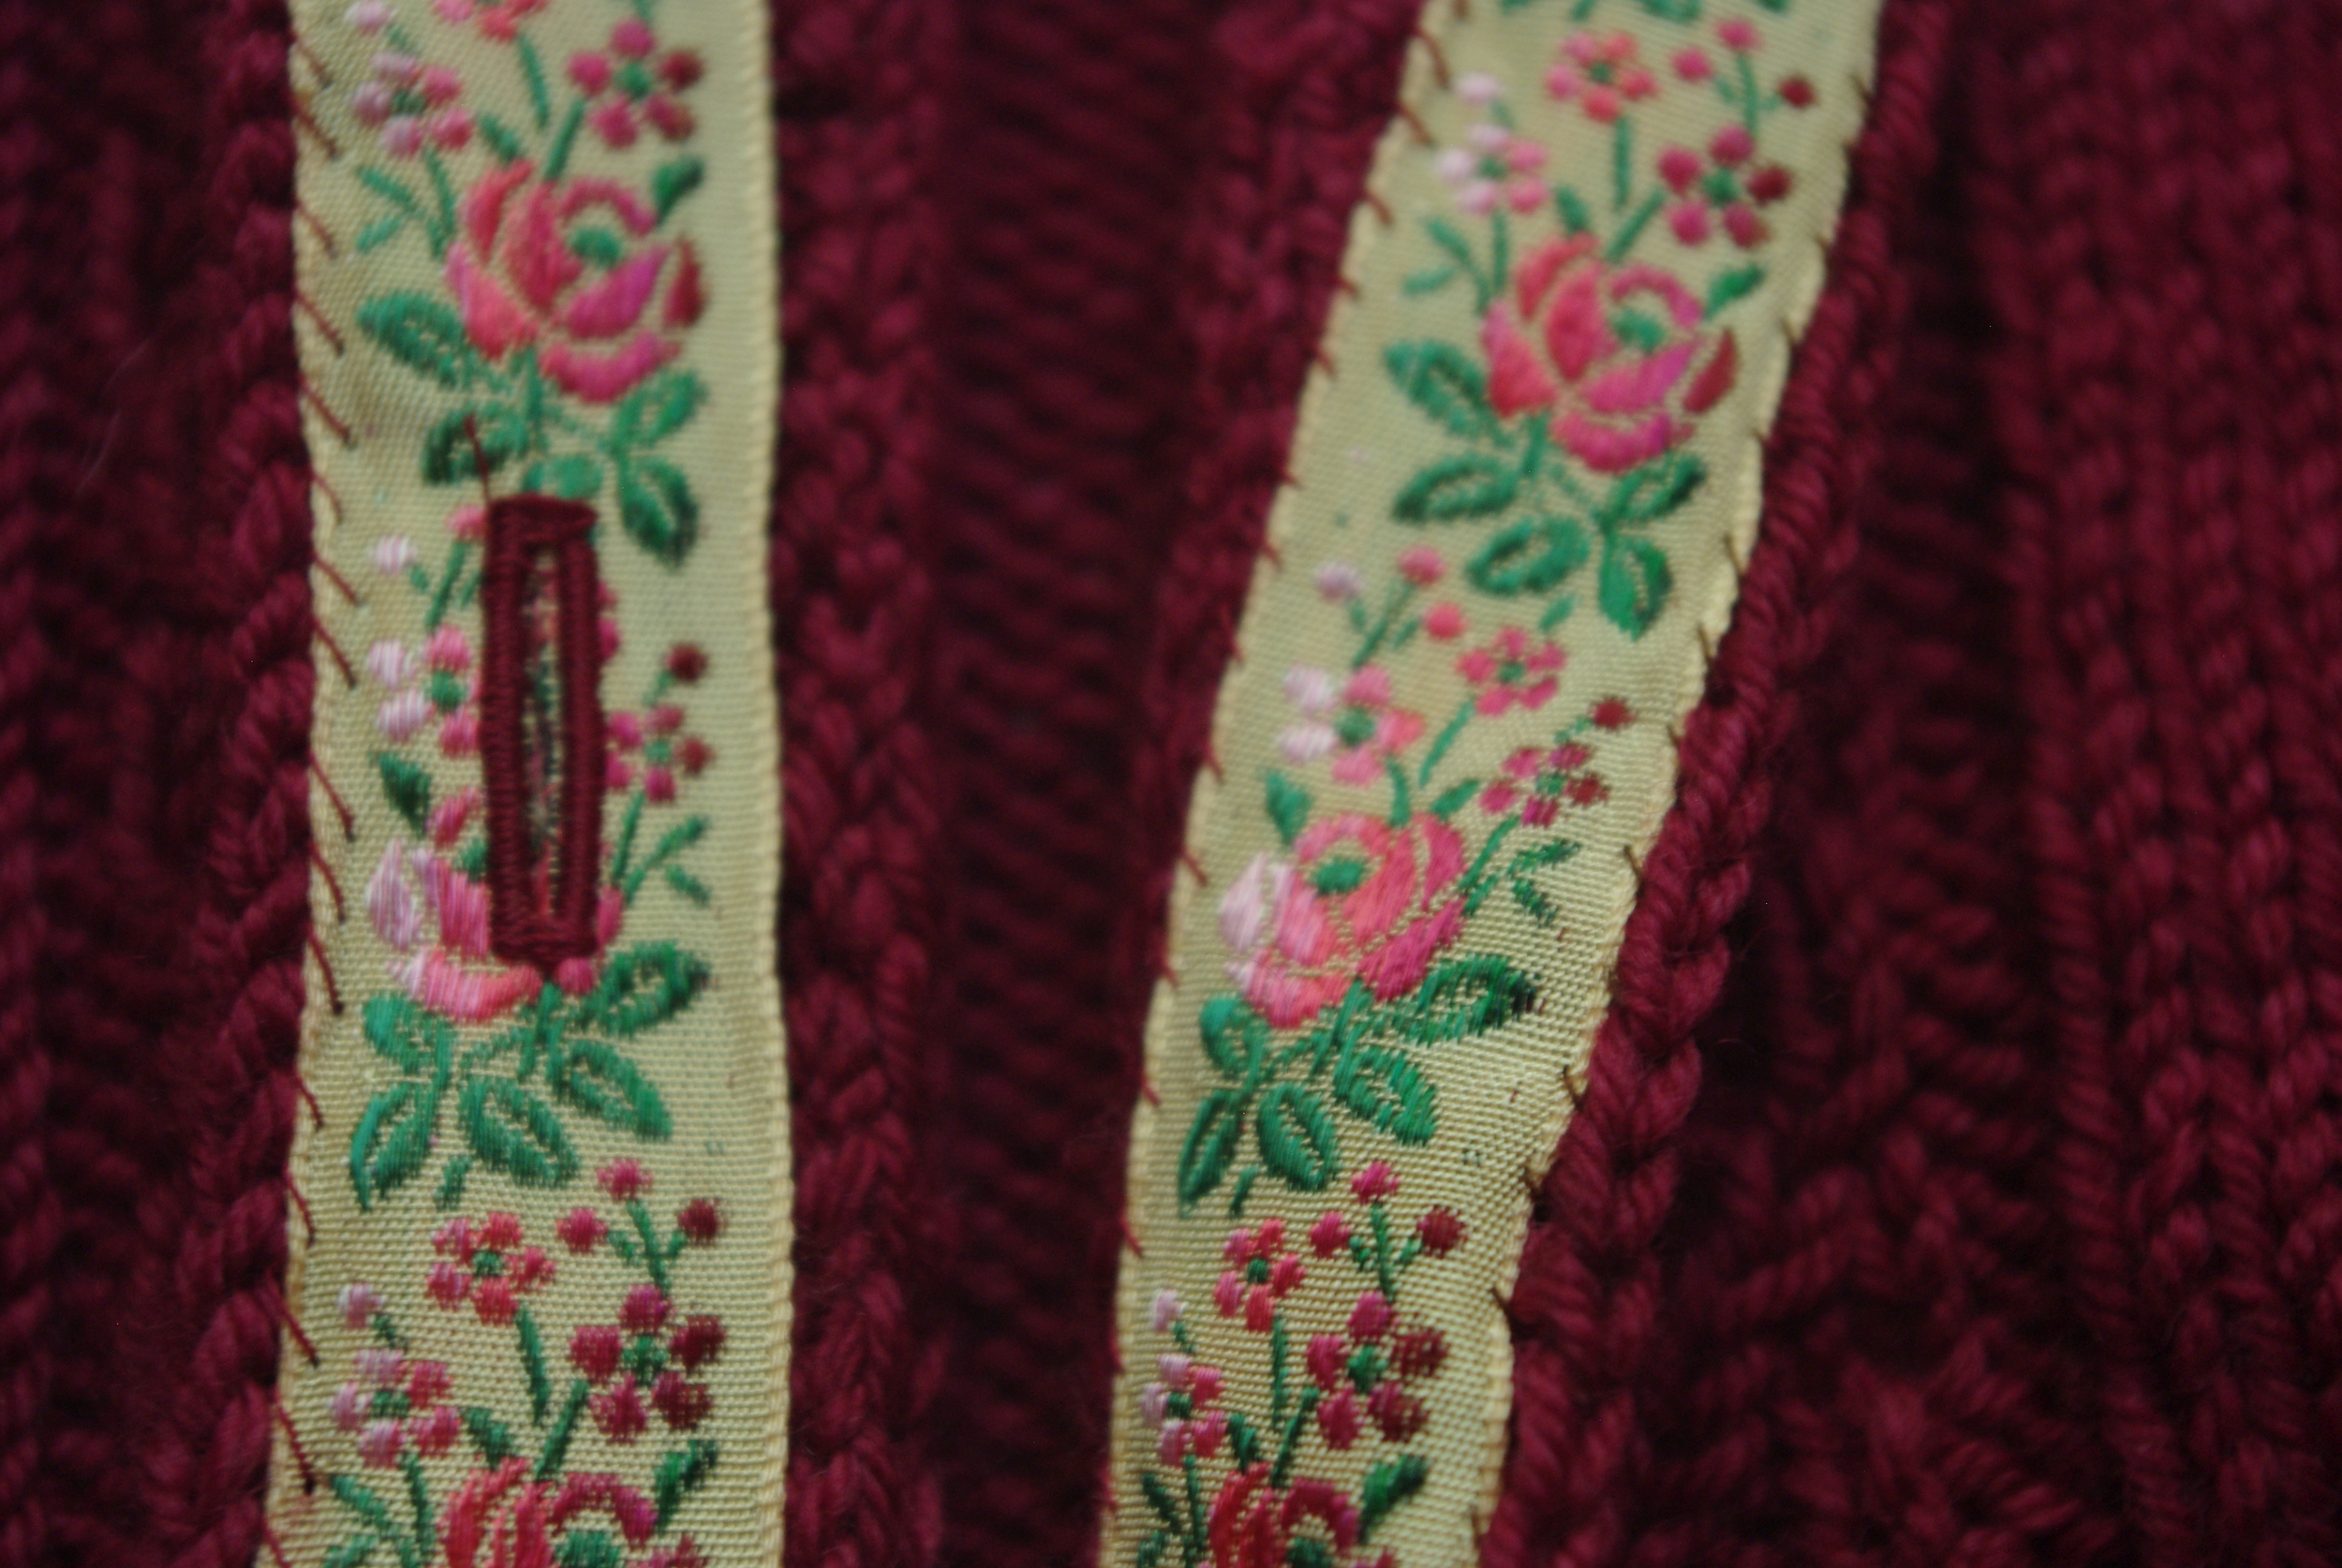
The first thing to do is measure, cut and mark your ribbon. To measure, lay your finished and blocked cardigan on a flat surface. It's very important that the piece is blocked, otherwise the band may be too short. Match the length of your ribbon to the length of the knit band and add an extra inch or so to each side, enough that you can fold it under to make a neat edge (as seen above). Cut a second piece of ribbon to the same length and set aside. The unmarked ribbon will be used to back the button side of the cardigan. Now we'll mark the buttonhole side.

With the ribbon flat against the buttonhole side. Place a pin at the top of each knit buttonhole. If you have a patterned ribbon, you may be able to use the pattern to make your placement more exact/even, but it's more important that the pins line up with the actual knit buttonholes.

Adding A Ribbon Backing to Your Knit Button Band

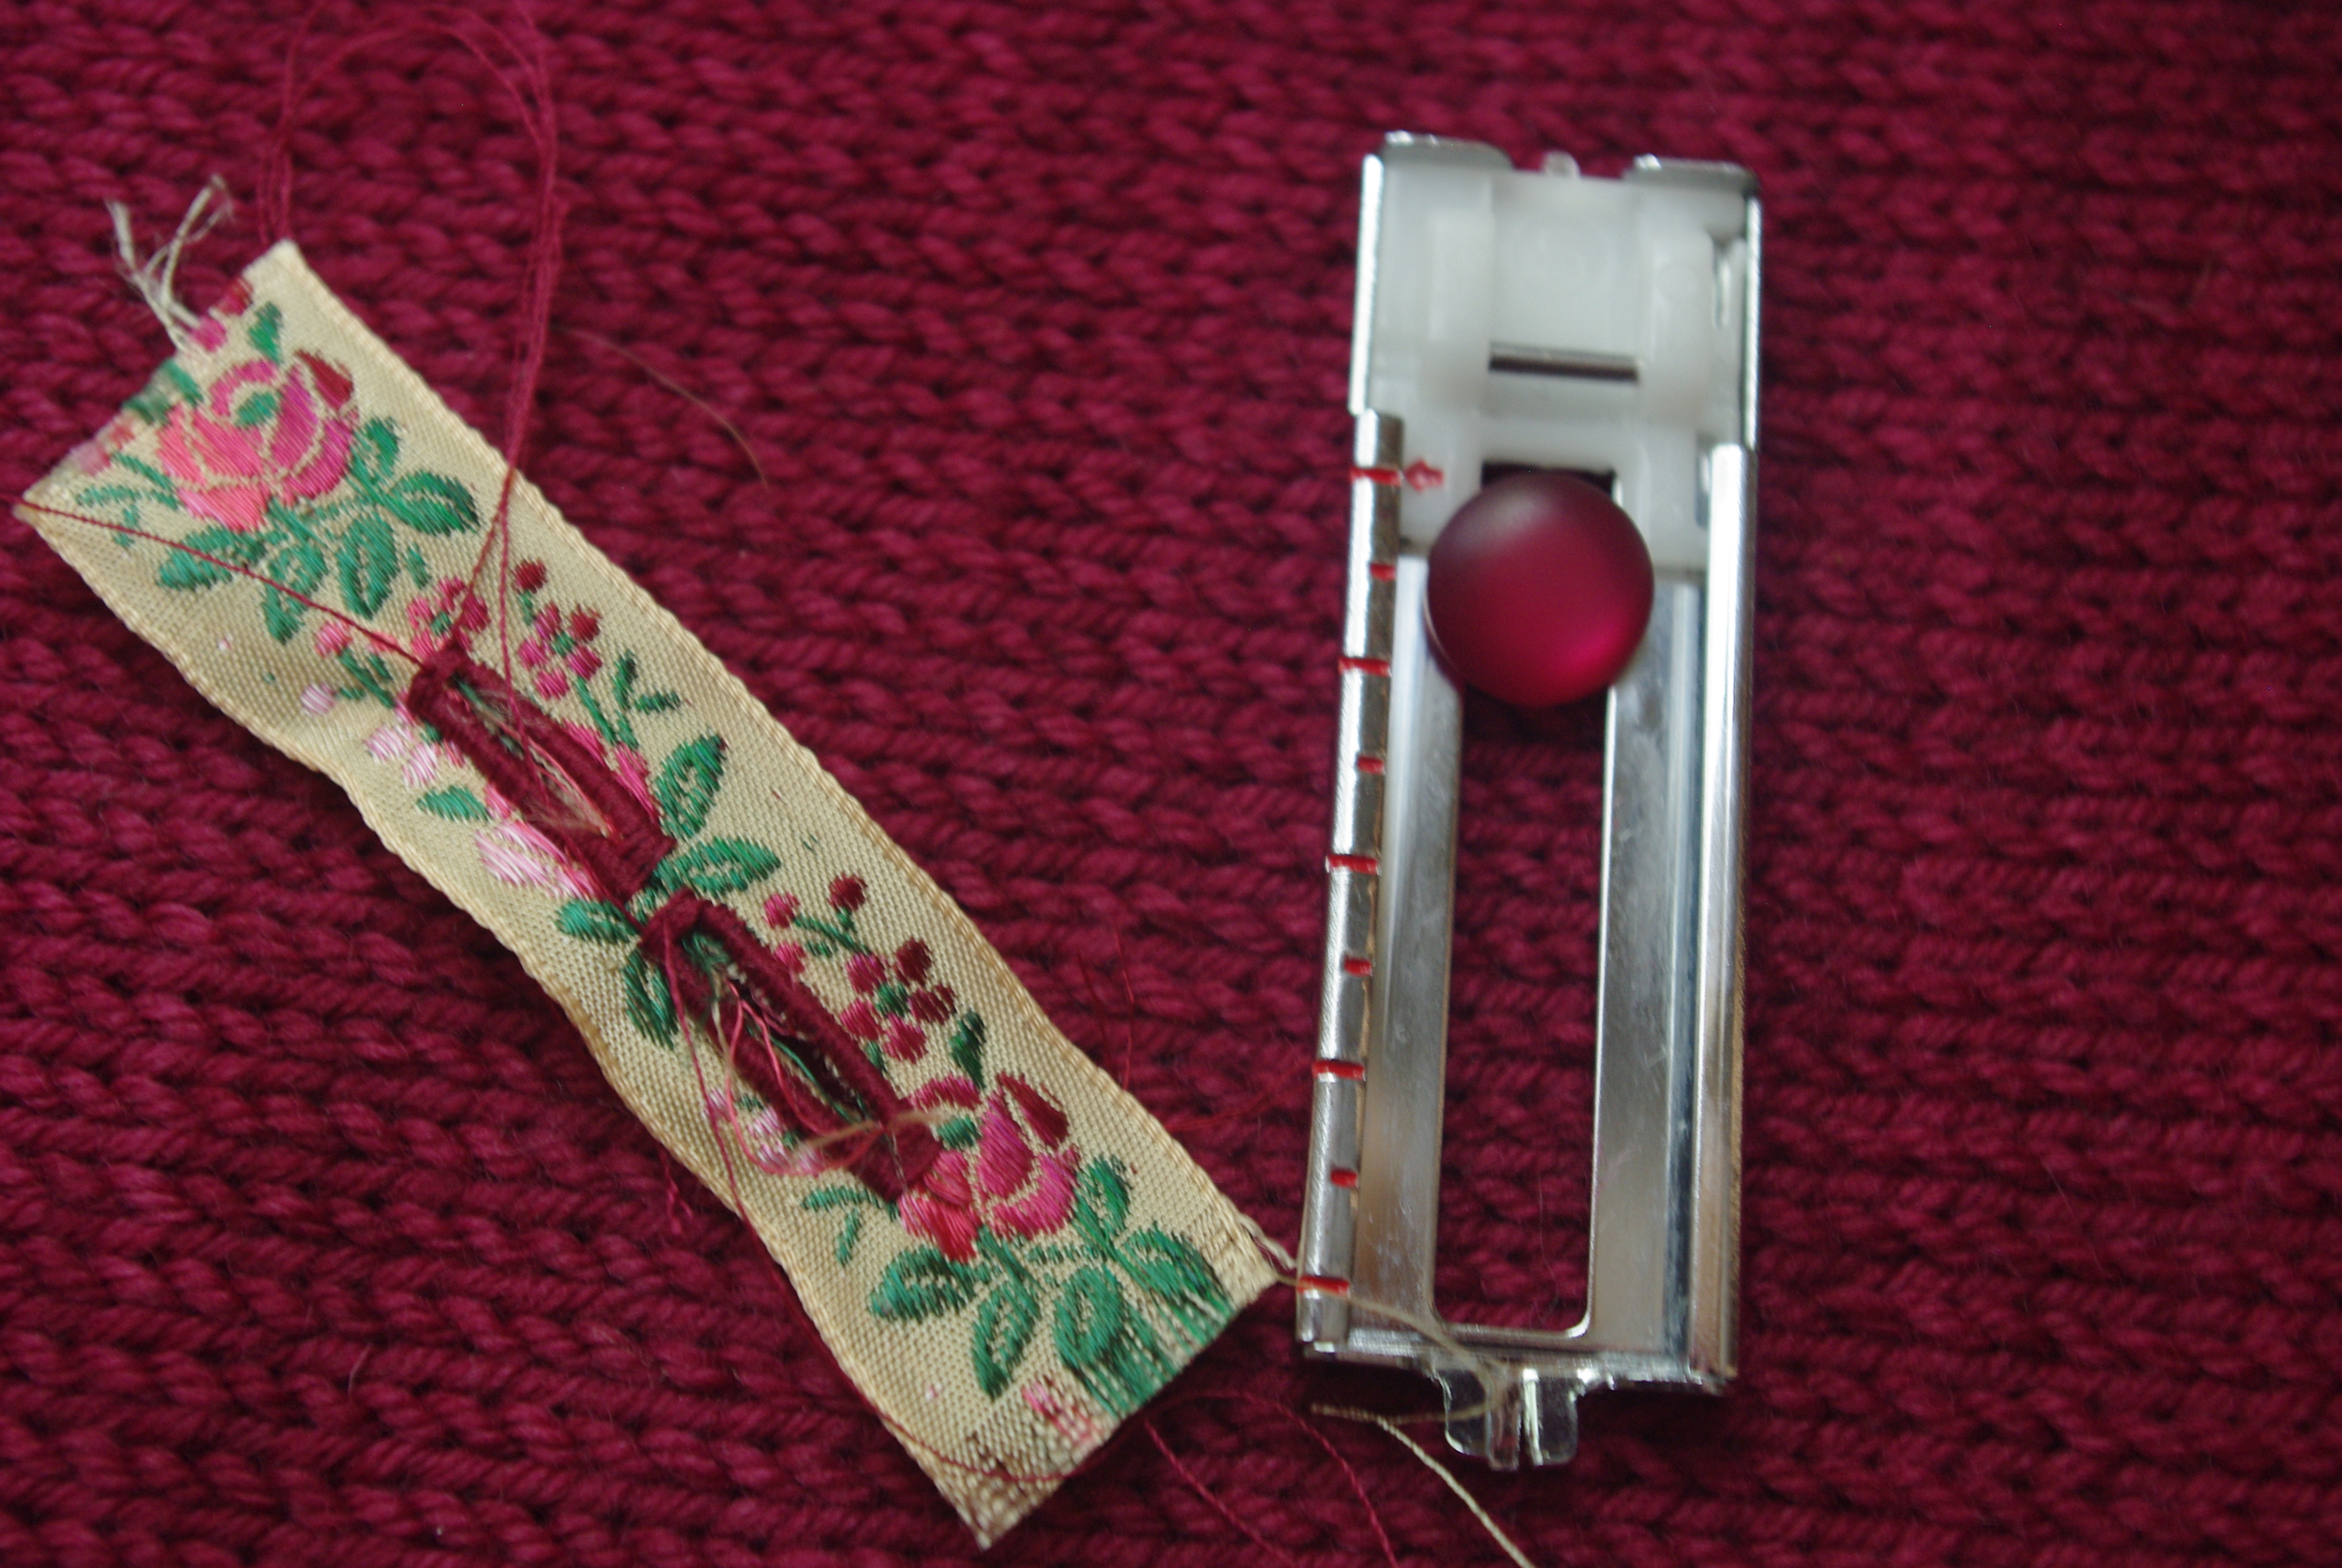
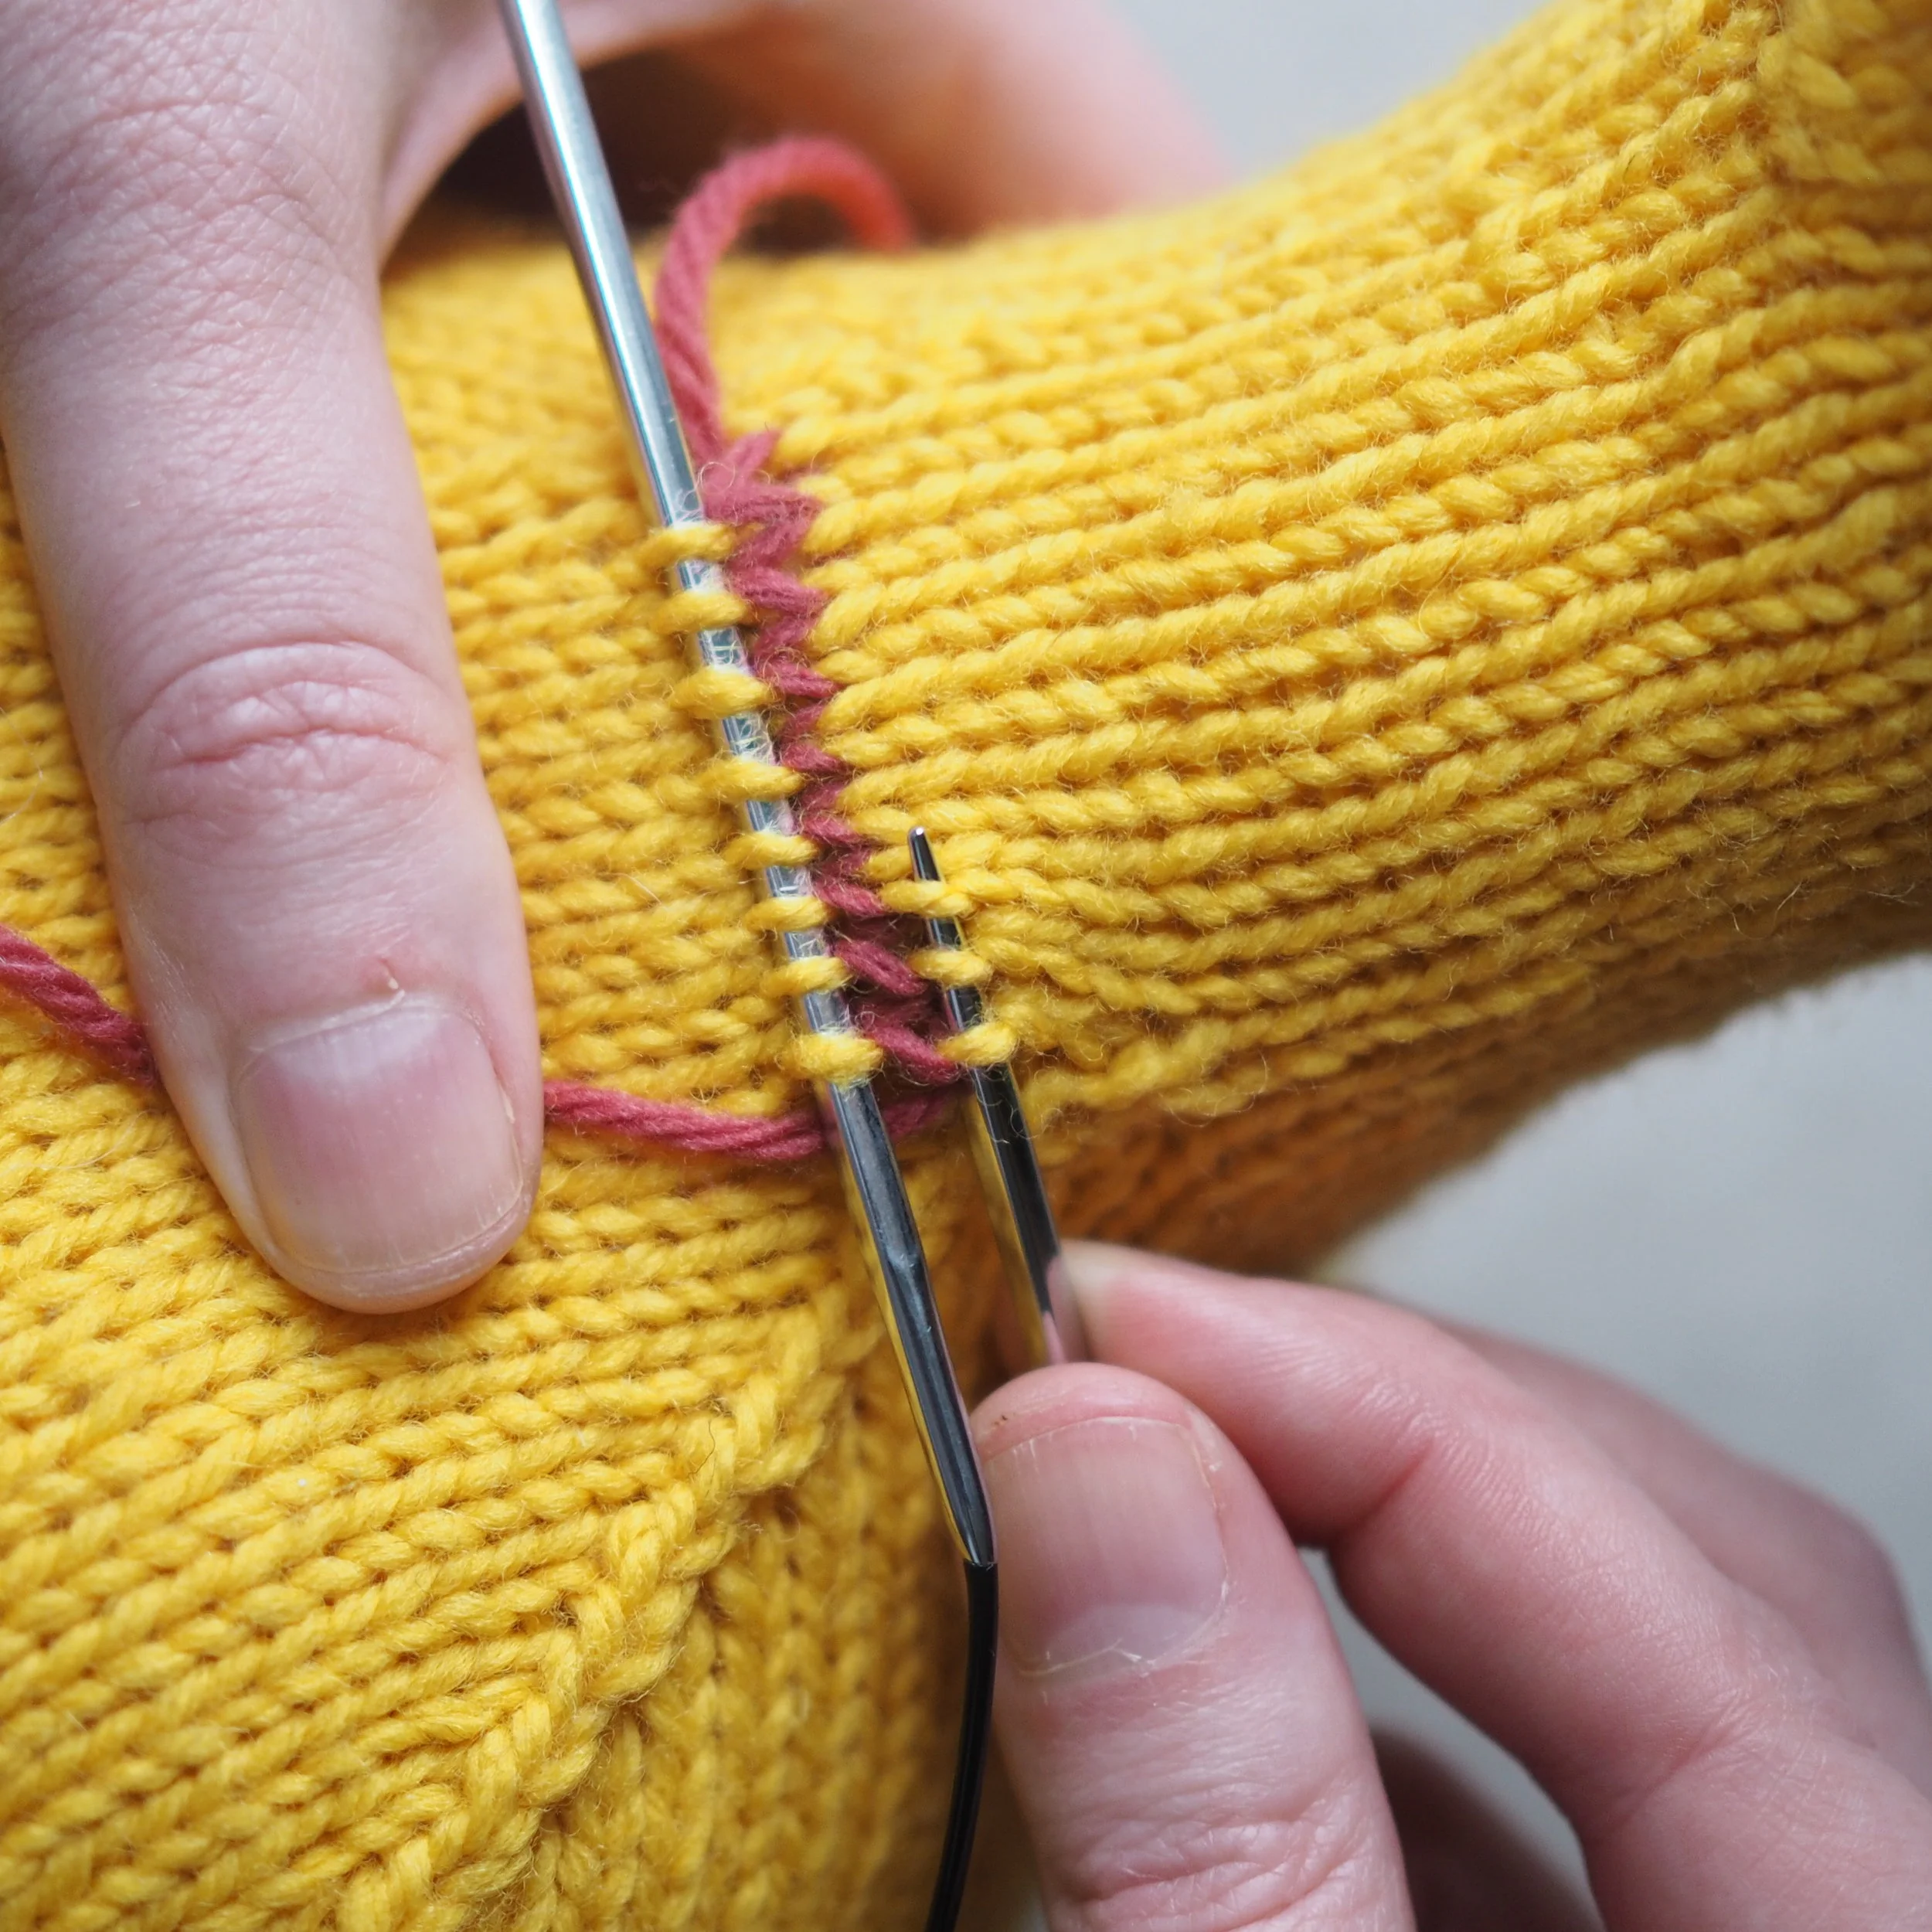
Testing the Buttonhole Size

Using a scrap piece of ribbon and the buttonhole feature on your machine, test out your buttonhole size to make sure the button can fit through easily. The ribbon button hole is likely to be a lot longer than the knit one. 

Once you have confirmed the proper size, mark the ends of the buttonhole on your ribbon (the top being the pin you already put in). 

Use your machine and sew the buttonholes on the ribbon.

Adding A Ribbon Backing to Your Knit Button Band

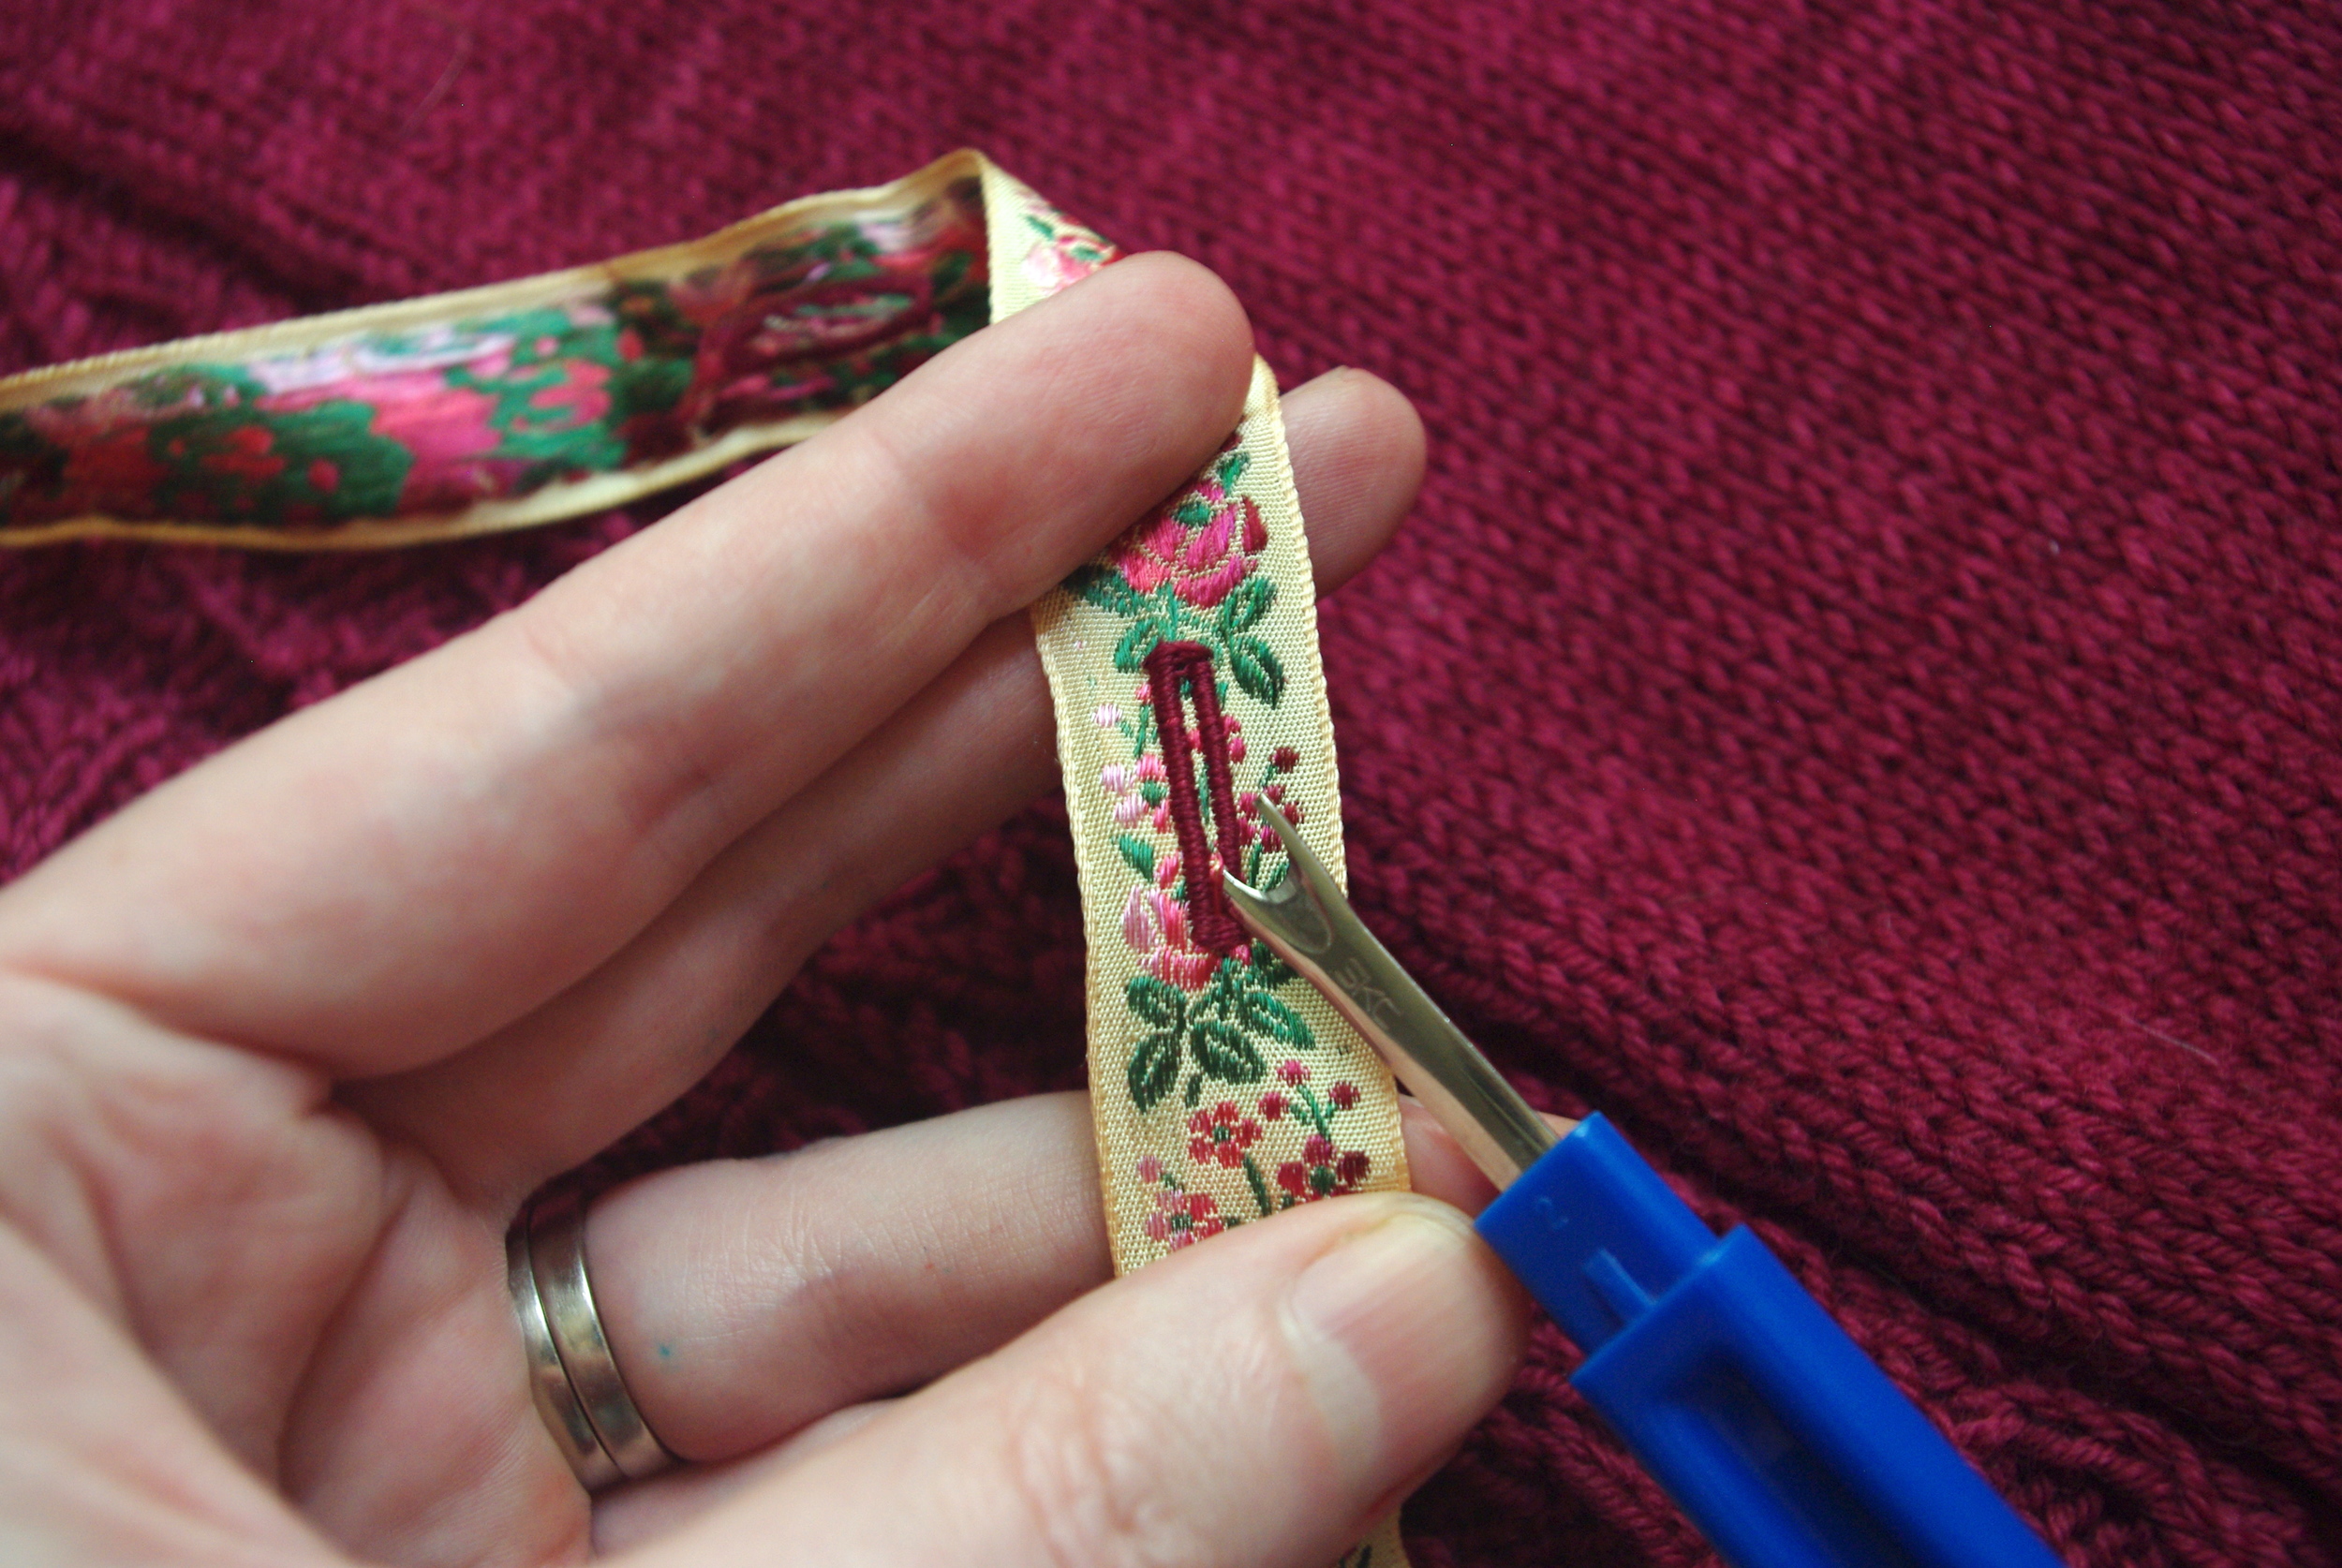
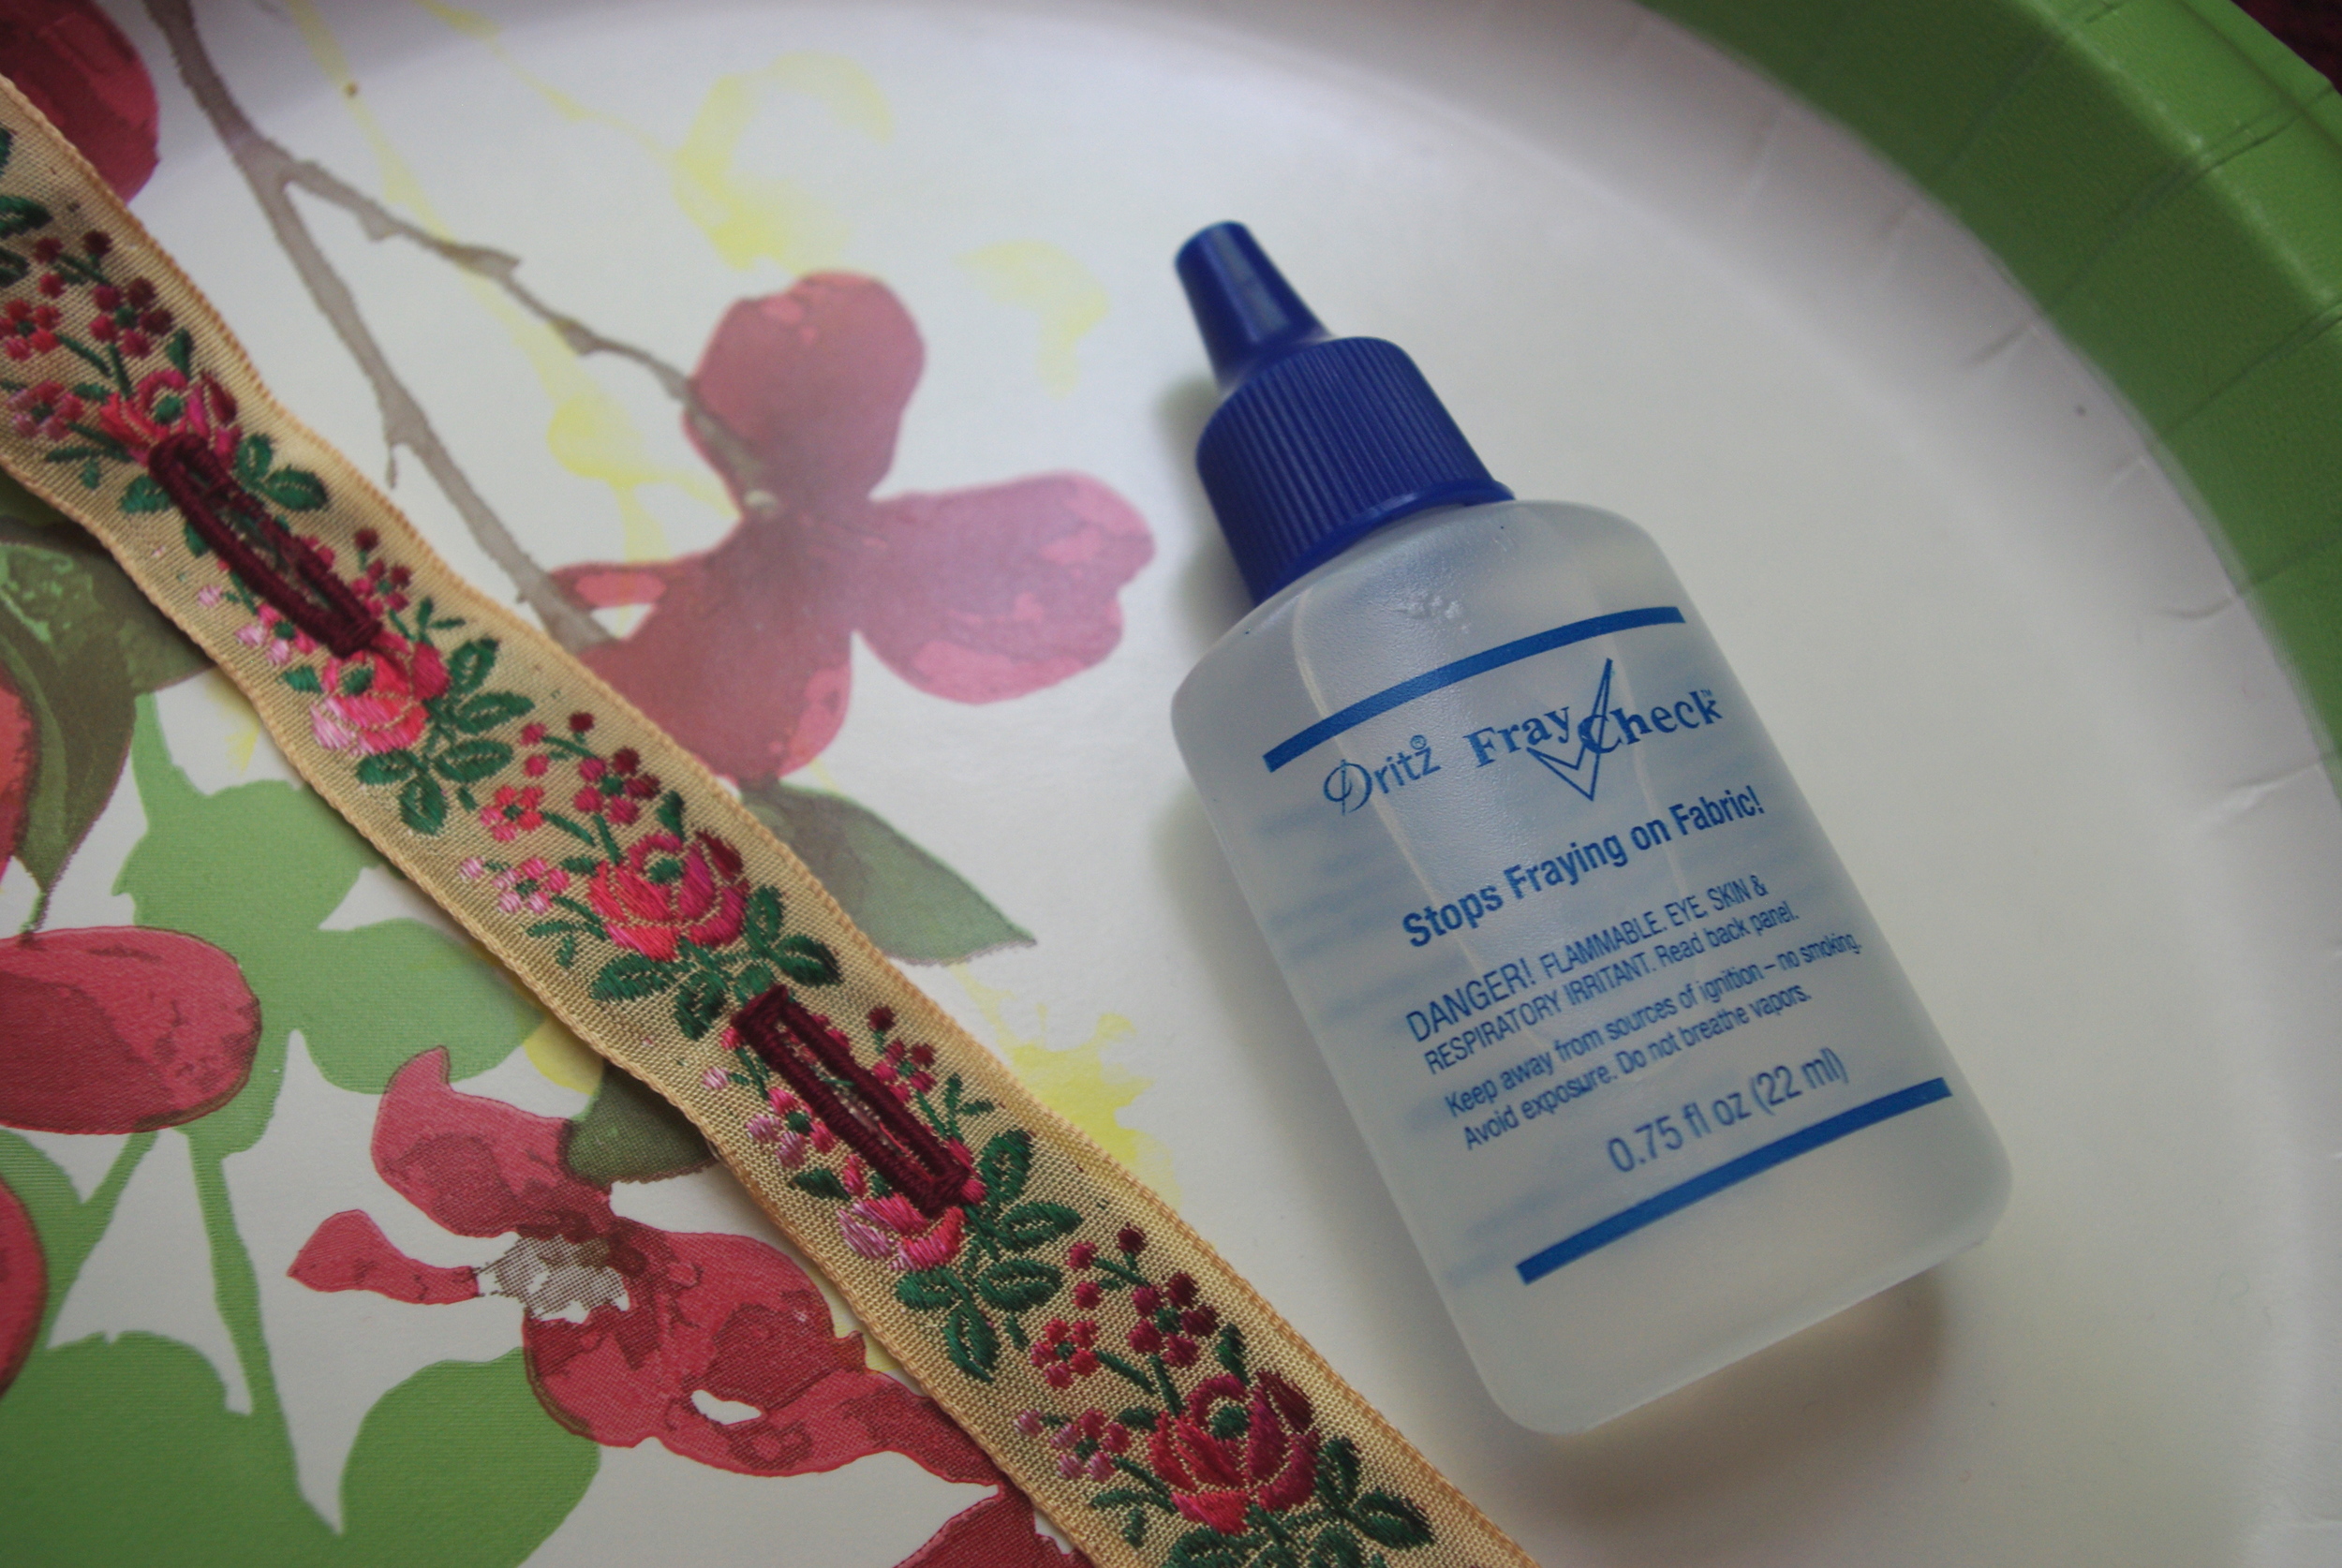
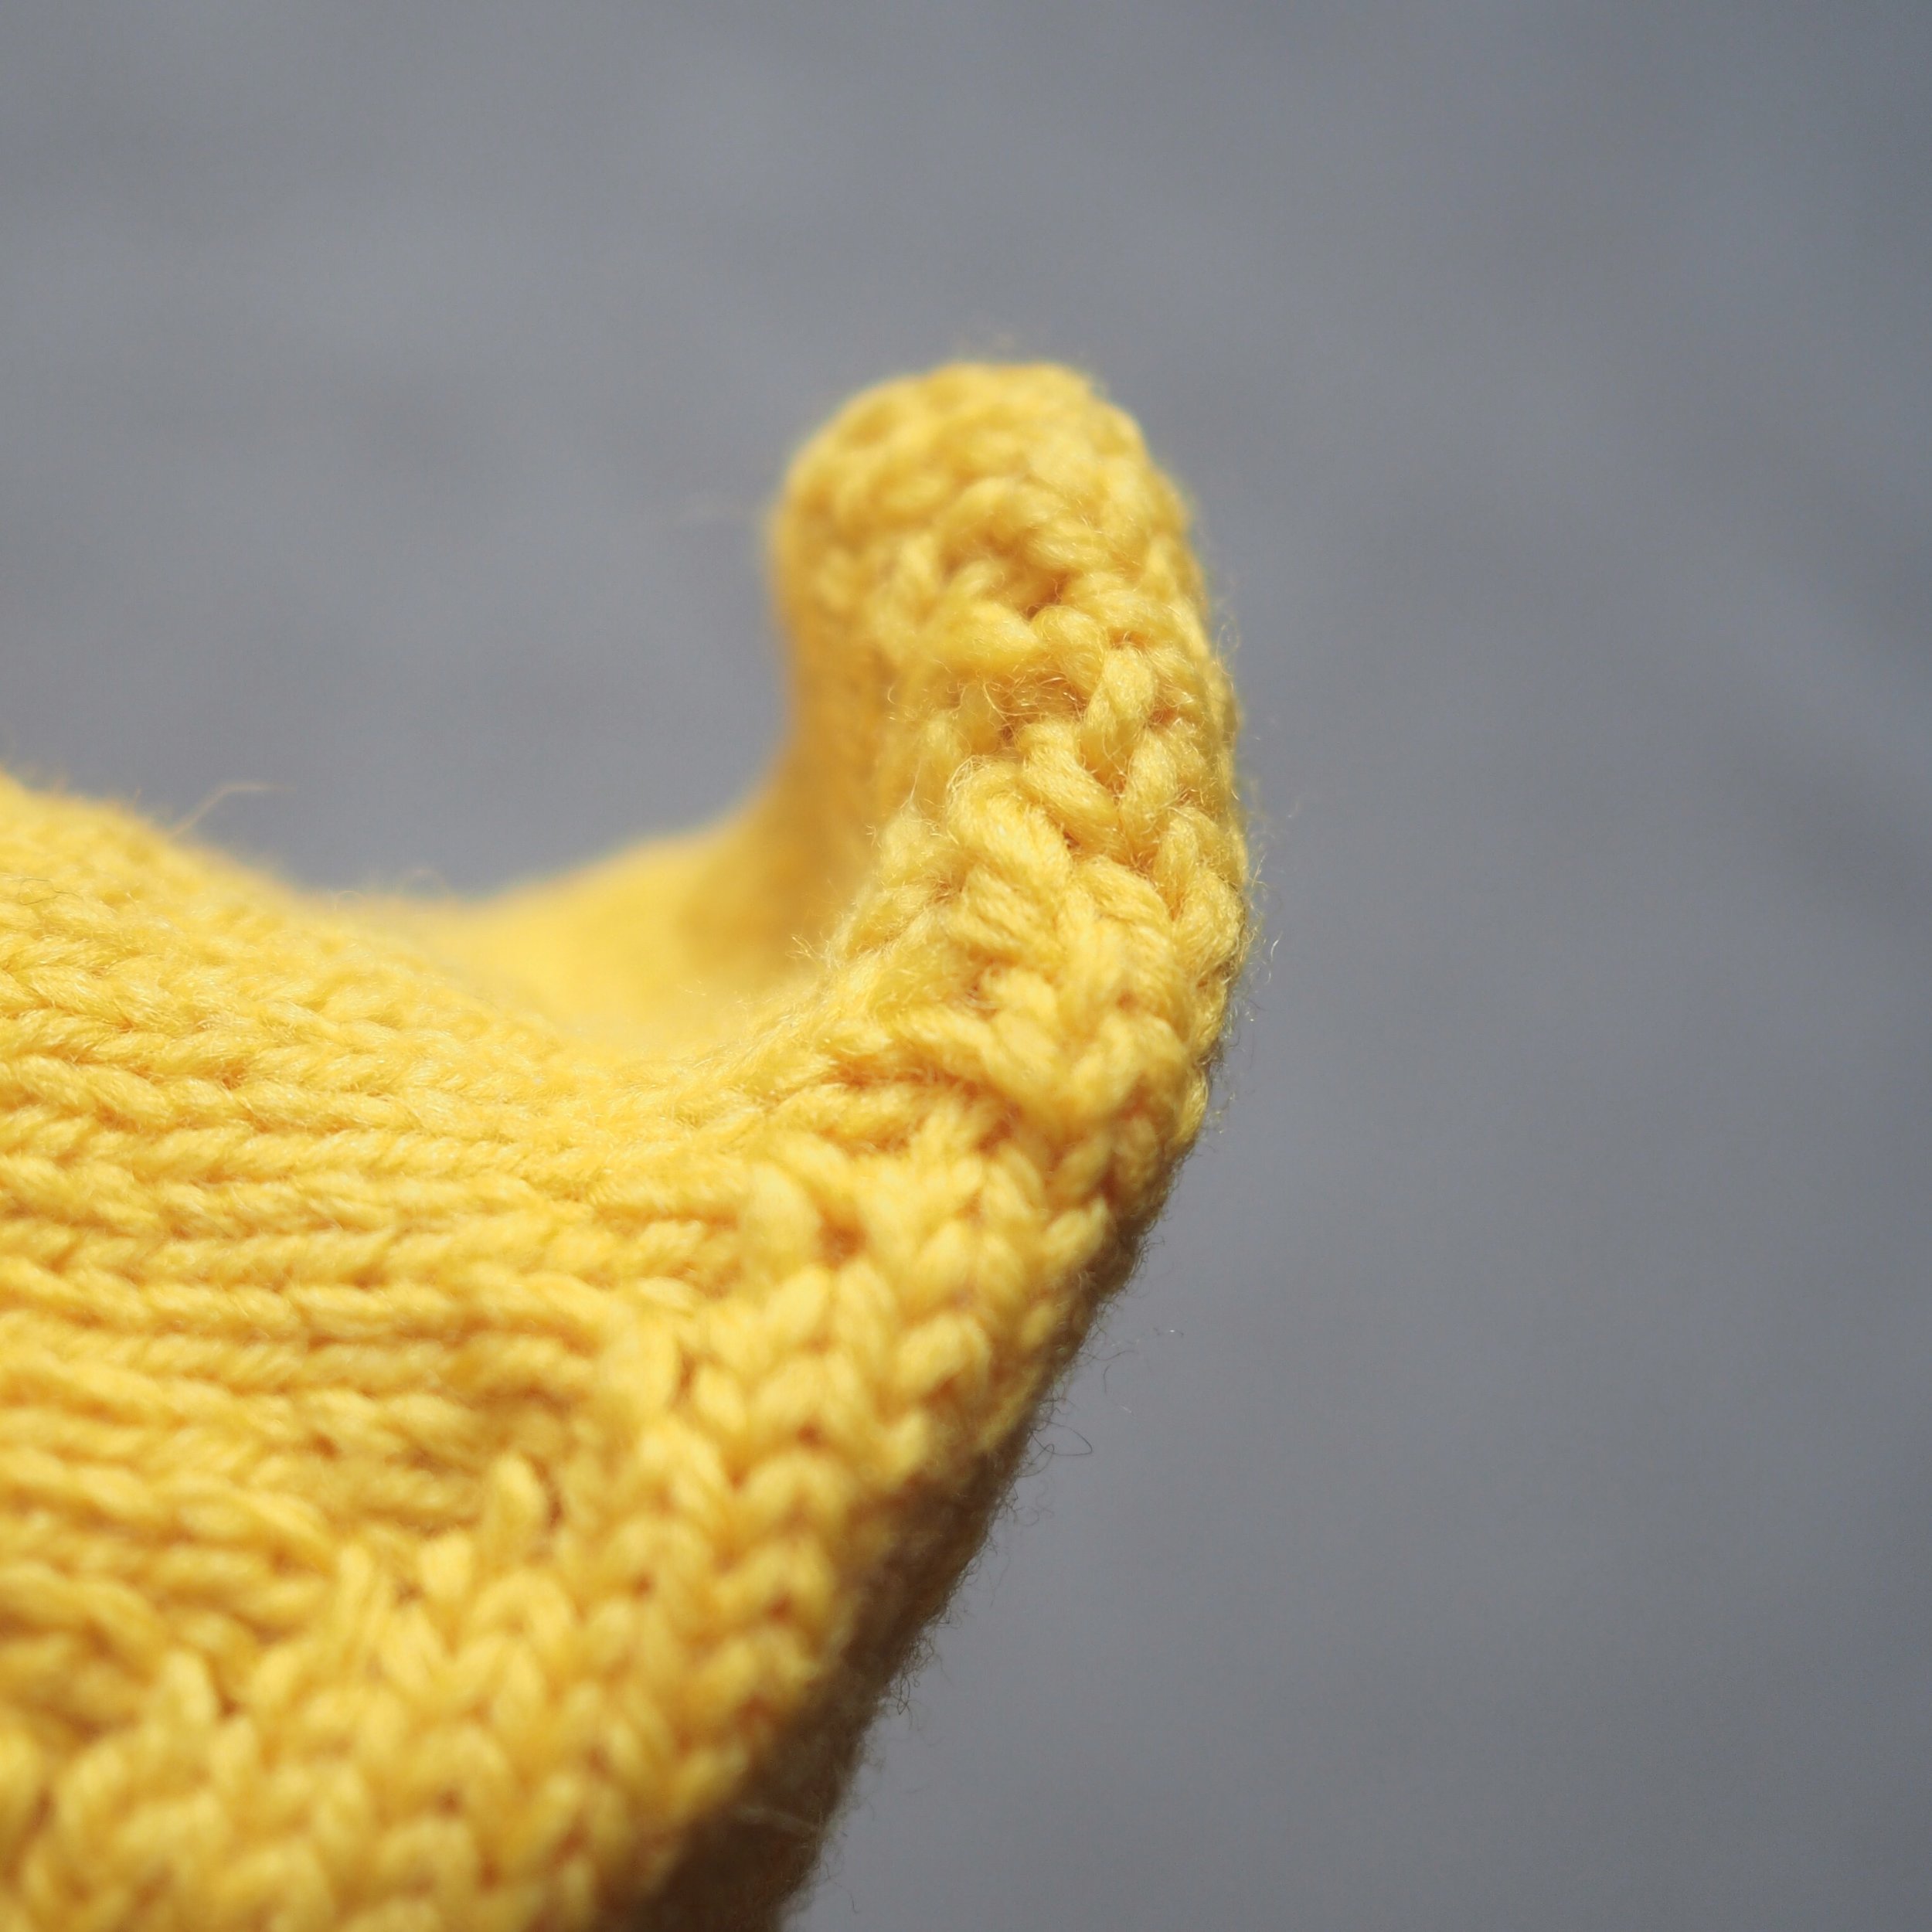
Finishing the Buttonholes

Before you slice into them, double check that your buttonholes still line up. If they do use a seam ripper or buttonhole cutter to open up your buttonholes. Adding a drop of fray check to the buttonhole as desired. Set aside to dry if using fray check for the recommended amount of time. 

Adding A Ribbon Backing to Your Knit Button Band

Attaching the Ribbon to the Sweater

Fold over the top and bottom of the ribbon, whip-stitching closed as desired, then making sure that the buttonholes line up and both the ribbon and the button band are flat, pin or clip the ribbon to the inside of the button band. Starting on the outside edge, whip-stitch ribbon to knit fabric. To help keep the stitches even, use the knit fabric as your guide, here I did one stitch per knit row. Work your way down the outside edge and up the inside edge, making sure the ribbon lays flat. Unless your button band is very wide, there's no need to tack down the ribbon buttonhole around the knit buttonhole beyond securing the ribbons at the edges.

For more detailed instruction on how to whip-stitch see DMC's embroidery guide).

Repeat process for button side. 

Sew on buttons on across from buttonhole and you're done! Enjoy wearing your snazzy-looking and sturdy button bands!

Adding A Ribbon Backing to Your Knit Button Band


Fair Times, Fun Times

Cumberland County Fair
IMGP3700.JPG
Cumberland County Fair
2015-10-02 10.06.50-1.jpg

I think I say this every year, but I love fair season so much.

This is a big turn around from my feelings on the county fair when I was a kid, and never got to go on any rides and had to represent my dance studio on hot awful concrete stages, or at it's least appealing, that one time in high school I volunteered to do an anti-drug puppet show from beneath a folding table. Then, the fair was always an obligation, but as a grown-up - it's way more fun, and as a parent? A blast!

A grand time was had by Cleavers young and old, but Little Miss Cleaver, who is tall enough now to ride the rides, had the best time of all I think. She particularly wanted to ride the Ferris Wheel, and had a blast going up and down and up down. The Carousel took second place in her affections, I think. 

Speaking of placing things, I knocked another item off my bucket list by winning a blue ribbon at the county fair. I entered in two categories - pie (other) and coffee cake (quick). My Blackberry Pie with Lemon Streusel got me the coveted blue ribbon and my Prize Coffee Cake netted my a third prize (knocked down by "Way too much cinnamon" and my inclusion of some wheat flour which made it "heavy"). My efforts also netted me a check for a cool $8. Not too bad for my first try. It appears that if you want the really  big ribbons you have to go in for the sponsored contests, so I may try my hand at one of those next year. 

 We petted all sorts of animals and marveled at giant pumpkins, ate junk food, got poop on our shoes, and braved ourselves against the chill. Another fantastic day at the fair. 


Introducing: Prairie Wife

Prairie Wife design by Leah B. Thibault for Ms. Cleaver Creations

Sometimes, a yarn and a design just come together like toast and jam. This, for me, is one of those designs. Earlier this year I was contacted by Shalimar Yarns to see if I'd like to do some work with their yarn. A week or so later, I had a sweater's worth of Breathless DK in Silver Sage to work with. This is a ridiculously beautiful yarn, and an utter joy to work with, so I wanted to do it justice with the design. I ended doing way more swatching than usual to get the drape just right. 

I've long been collecting images of pioneer women with the intent of doing some designs around it, and that came to the fore here. I've been especailly entranced by the work of South Dakota painter Harvey Dunn, and the western painting of N.C. Wyeth. Prairie Wife was specifically influenced by Wyeth's The Homesteaders (left) and Dunn's The Prairie is My Garden (right). 

The Homesteaders
The Prairie is My Garden

I wanted to capture the feel of these images, do homage to the grace and strength of these pioneer women,  as well as make some nods to western fashion. So I started off the design with the yoke and back box pleat, which is borrowed from Western/cowboy shirts, but made it knitterly and feminine by the inclusion of a floral-inspired lace motif. The pleats and loose-knit fabric keeps its breezy and swingy, while 3/4 sleeve keep your hands free for work. 

I don't know if I'm allowed to say this about my own patterns, but I adore the way this one turned out, which was even better than it originally was in my head. 

Prairie Wife is worked in pieces from the bottom up, with the collar and button bands picked up and worked after seaming. The shaping is all done with the pleats, so the body is simple back and forth Stockinette stitch, until you get to the armsceye/yoke. 

Again, a big thanks to Bristol Ivy for the lovely photos (complete with cows!) and Martha Wissing for the technical editing. 

Pattern Details 

Sizes

Bust Circumference: 33¼ (34 ¾, 36 ¼, 39 ¼, 44 ½, 46 ¼, 50, 53 ¾)”/ 84.5 (88.5, 92, 99.5, 113, 117.5, 127, 136.5)cm. To be worn with 2-3”/5-8 cm of positive ease.

Sample knit in size 39 ¼, with approximately 2”/5 cm of positive ease. (Wondering about ease?- Check this post out!)

Yarn

4 (4, 4, 5, 5, 5, 5, 6) skeins Shalimar Yarns Breathless DK in Silver Sage [75% Merino, 15% Cashmere, 10% Silk]; 270 yds (247 m) per 141g or approximately 1042 (1088, 1145, 1217, 1307, 1336, 1422, 1489) yards of DK weight yarn.

Purchase

Prairie Wife is available for purchase for $7.00 USD via the following methods:

Ravelry  //  Ms. Cleaver Creations  //  Love Knitting (coming soon)

Really love swingy A-line sweaters? FOR ONE WEEK ONLY - get both Prairie Wife and Lady Heartrose for $10.50 (Discount automatically applied to Ravelry purchases. Already have Lady Heartrose? The discount will still apply! Offer good until 10/8/15)

Ravelry  //  Ms. Cleaver Creations


Introducing: Lady Heartrose

Lady Heartrose designed by Leah B. Thibault for Ms. Cleaver Creations

I've already written a fair amount about Lady Heartrose, which has been way too long delayed by other deadline knitting, but I'm pleased to finally release it out into the world!

A companion to the pint-sized Heartrose, the grown up version is a ladylike A-line cardigan with slighty puffed 3/4 to bracelet length sleeves and the same sweet heart cable down the front. It buttons all the way down if you wish, but can also be worn buttoned at the top-only for maximum swing, as shown here. 

The pattern is knit from the bottom-up seamlessly, with raglan-style sleeve. The button band is then picked up and worked last. The cable elements are confined to the starts and rends of rows, which,  when combined with the simple, seamless construction, would make this a great beginner/car/ tv-knitting sweater. 

The sample is knit up in the soft and drapey Swans Island Washable Wool DK in Malbec, a rich wine-like color, that suits this more grown-up version. 

A big thanks to Bristol Ivy for the photos and Martha Wissing for the technical editing. 

If you really love A-Line sweaters, wait for a second pattern announcement and special discount coming later this week! (Don't want to miss a pattern? Sign up for the newsletter!)

Pattern Details 

Sizes

Bust Circumference: 34 (36, 37 ¾, 39 ¼, 40 ½, 42 ½, 46 ½, 50)”/ 86.5 (91.5, 96, 99.5, 103, 108, 118, 127) cm. To be worn with 1-2 inches of positive ease.

Sample knit in size 39 ¼, with approximately 2”/5 cm of positive ease. (Wondering about ease?- Check this post out!)

Yarn

9 (10, 10, 11, 11, 12, 13, 14) skeins Swans Island Washable Wool DK in Malbec/EWS205 [100% Washable Organic Merino Wool]; 140 yds [128 m] per 50g or approximately 1210 (1310, 1390, 1450, 1515, 1600, 1775, 1940) yards of DK weight yarn.

Purchase

Lady Heartrose is available for purchase for $7.00 USD via the following methods:

Ravelry  //  Ms. Cleaver Creations  //  Love Knitting (coming soon)

Want to knit a matching adult/kid set? Get the pair for $3.oo off the individual prices! (Discount automatically applied to Ravelry purchases. Already have Heartrose? The discount will still apply!)

Ravelry  //  Ms. Cleaver Creations


Mini Makes

I just finished knitting/finishing two adult sweaters and my next big sewing project is a button up Archer shirt for myself, but before I dive into what is going to be another involved project, I wanted to bang out a few quick mini-makes for some more instant gratification.  

Darlingside Tee
Darlingside Tee

Band Tee for LMC.

To say that we are fans of the band Darlingside in the Cleaver household would be a massive understatement. We love this band. Ever since Mr. Cleaver and I saw them on 207 back in 2012, we've been hooked and have seen them in as many local shows as possible. Our household also probably counts for 5% of the hits on their youtube videos. And thus, through frequent exposure, they have become Little Miss Cleaver's favorite band too. If we ask her what she wants to listen to, she will almost always say "Darlingside." Unfortunately, they don't make band shirts in size 4T. Fortunately, I know my way around an exacto knife, a stencil sponge, and a sewing machine. 

The image is from the cover of their album Pilot Machines, and I thought the balloons would be perfect for a kid. So I traced the image unto a file folder and cut it into two stencils, one for the balloons/ strings and one for the body. I cut up an old shirt of mine into a Made by Rae Skinny Tee, stenciled it on, sewed it up, and there you go! A mini Fangirl tee. We're seeing the band at a show in September and I'm hoping to get them to sign it for extra cool factor.  

While I'm at it, here's a video of my current favorite Darlingside song. LMC's favorite is this one or this one

Dying Playsilks
Dying Playsilks

Playsilks

LMC and I recently dyed some playsilks with Kool-Aid and managed not to accidentally dye anything else except our fingers- success!  The silks came from dharma trading company and I used this tutorial from Knitty to pick my Kool-Aid packets. I had made a blue and green one a while back that get heavy use as ballet skirts and super-capes, so it's nice to have the full rainbow to choose from now.

Hobby Horse
Hobby Horse
Hobby Horse

Hobby Horse

Lastly, a few weeks ago, we picked up a bunch of books at Goodwill to refresh our collection, which included a pop-up version of the Nutcracker. In one panel, one of the children had a Hobby Horse. I said something along the lines of "I could make that,"  resulting in daily requests from LMC  for Mommy to make her a horse.  Fortunately, I had a free pattern already pinned on Pinterest, and all the supplies I needed in my stash. Except for a dowel, which means that LMC can sweep and play at the same time!  Of course now, Little Miss Cleaver thinks that I have the magic ability to just make anything (which kinda cool), but I can't mention that I'm considering making anything for her, because she demands I sew it now (even if the fabric is still uncut). 

What have you been making?


The Penultimate Weekend of Summer

Ocean Park Beach
Ocean Park Beach
Ocean Park Beach
Ocean Park Beach
Ocean Park Beach
Ocean Park Beach
Ocean Park Beach
Ocean Park Beach
Ocean Park Beach
Ocean Park
Ocean Park
Ocean Park
Ocean Park
Ocean Park
Ice Cream
SUP
Sand Angel
Ocean Park Beach
Makin S'mores
Maine Wildlife Park
Maine Wildlife Park
Maine Wildlife Park
Maine Wildlife Park
Maine Wildlife Park
Maine Wildlife Park
Little Bear
Maine Wildlife Park
Maine Wildlife Park
Maine Wildlife Park
Maine Wildlife Park
New Bone

How it is already September? The local schools start back up this week and when I dropped Little Miss Cleaver off at daycare they had changed all the decorations to leaves and pumpkins. Don't get me wrong, I adore Autumn, it's my favorite season, but summer seems to go so darn fast! It doesn't help that it doesn't start feeling like summer until July, but still. 

I have kept to my goal of taking more time off this summer and we seem to manage two weekends worth of activity in every one (having a kid that gets up at 5 AM helps there). I took a half-day Thursday and all day Friday off, so we could do this penultimate weekend of summer right. 

We took LMC to our favorite beach, which she adored. Splashing in the water, playing in the sand, screaming and running from imaginary lobsters. Mr. Cleaver and I aren't huge beach people, being easily burned, but her joy at it, makes the multiple sunscreen applications and big hats worth it. We lost a sand shovel in the tide and the tide gave it back. We took a beach break for shuffleboard and burgers and ice cream and then returned for more surf and sand angels. The weather was perfect and it was a glorious day.

Sunday, we grabbed a discount pass from our local library (Libraries are awesome!) , LMC picked out her fancy new kitty-cat party dress and we went to the Maine Wildlife Park. We saw all sorts of critters, but if you ask her about it, LMC will tell you all about the turkey that she tried to feed popcorn and that bit her finger and that she told it no more biting. (She's fine, didn't break skin, just scared her.) Both mornings ended with an insta-crash in the car seat and an epic nap at home.

Good summer living if you ask me.

A Walk in the Marsh

Fore River Sanctuary
Keeping Watch
Fore River Sanctuary
Queen Anne's Lace
Crab Apple at Fore River Sanctuary
Crab Apples at Fore River Sanctuary
A Good Smell
Crab Apples at Fore River Sanctuary
Fore River Sanctuary
Grasshopper at Fore River Sanctuary

It's just one of those things. When something is so available you never think to take advantage of it, because it's always there. The opposite of the shamrock shake/limited time only effect. 

I drive by the Fore River Sanctuary twice daily, it was in the background of my wedding photos. but I never actually hit the trails until a few weeks ago.  Truly, I've been missing out.

Mr. Cleaver and I both agreed that we'd need to come back in the Fall, (there's not a lot of shade on the trail, so it gets hot) and maybe LMC will be interested in walking more than just the bridges (so much riding on shoulders!).

We only walked a small portion of the trail (see riding on shoulders comment above), but it was worth it even for that. 


Pintucks and Popscicles

Oliver + S Family Reunion Dress sewn by Ms. Cleaver
Popsicle Sticks
Oliver + S Family Reunion Dress sewn by Ms. Cleaver

I don't sew as much for Little Miss Cleaver as I thought I would, or would like to really. I've made a number of little "ballet skirts" that get plenty of wear, but not too much beyond that.

I'll admit that some of it is hesitation on my part. LMC is developing strong feelings about what she wants to wear (yes to tutus and leopard print pants), and more often than not, when I pull out a mama-made dress, her response is, "I don't like that." Of course other days, she totally wants to dress up like Olivia. So there's a balance, but I'm a little gun shy about spending a bunch of time making something she won't wear. 

This dress however was motivated by the fact that my 2.5-year-old is crazy tall for her age, and is solidly in 3T tops and some 4T bottoms and I have a number of adorable Oliver + S patterns that cap out at size 4. So I felt like I needed to get sewing. 

This fabric/pattern combo has been sitting on my to-cut pile for quite some time and I thought now was the time to do it. The fabric was one of the fancy quilting cottons from JoAnn's and the pattern is Oliver + S's Family Reunion Dress. I cut it out in a 3T, with the 4t length, and it's actually fairly big on her, so it looks like I have a little more leeway to sew these patterns up than I thought. 

My only previous experience with a paid Oliver + S pattern was the Birthday Party Dress I sewed for LMC's first birthday (so long ago - sniff!). I thought the end result was lovely, but the construction was a bit fiddly. And I'd say the same for this one, there are certain parts of the directions you just have to trust and "go with it" and hope that it works out in the end.

For example, in this dress you sew half the shoulder seam right sides together and the other half wrong sides together. The odd half ends up getting covers up the collar facing. The folding plackets/attaching hem facing is a bit confusing too, but works if you follow the directions. The only place I ran into a construction issue was when I clipped the corners after attaching the hem facing to the button plackets. I over clipped, and had to re-seam, meaning my bottom edges are slightly curved instead of square.  

In the end, it came together nicely. I finished my inside seams with zig-zagging and added a little Miss Cleaver tag. The only change I'd make is that I wish I had done my top-stitching in a deep pink/red instead of the pale pink I used.

When I had the pieces cut out LMC insisted I sew it right then (which, not happening kiddo) and when I had it sewn but didn't have the buttons attached, she asked me to finish it so she could put it on, so I have hope that she'll actually like this one. She did wear it this weekend, but then changed into her Wonder Woman t-shirt halfway through the day, so you never know. At least Mr. Cleaver thinks it's cute, he told me so.


A Drawer-full of Accomplishment

More underwear!!!

When I said sewing your own underthings was addictive, I wasn't kidding - because now I have a drawer full of shiny new me-made underwear. Laundry takes a bit more diligence, but other than that, I'm pretty thrilled with the outcome.

All in all, it's three Watson Bras with two matching pairs of undies for each bra. The undies started from the Watson pattern, but I've hacked it up enough now to pretty much call it my own. It takes me about 2 hours to sew up a bra and less than 30 for the undies (if I'm paying attention). Even after all this sewing though, I still haven't quite got my elastic tension down. I think it could be more snug around the leg and for the last bra, I went down a band size, which fits better. I've cut out my patterns on cardstock for future use, though everythign is so dependent on the fabric, that you never know.

The purple version you've seen. I sewed the sporty turquoise one next and the lace version last. For the lace version, which is my absolute fave. I tea-dyed the lace and elastic with good-old Lipton's, about 8 bags or so worth. It make we want to buy a cheap pot and do some more dying in the future. For the lace band I underlined it with the milliskin, but the lace stands on its own for the other parts. It's so comfy. 

I'm pretty well stocked up for now, but i would like to try my hand at an underwire bra next. But first I have some fall wardrobe sewing for me and LMC to do! (Dresses for her, buttons-up and jeans for me!)

Watson Bras and Undies sewn by Ms. Cleaver
Sporty Watson Bra and Undies
Mauve and Lace Watson Bra Sewn by Ms. Cleaver
Mauve and Lace Watson Bra and  Undies Sewn by Ms. Cleaver
Sporty Watson Bra sewn by Ms. Cleaver
Lilac Watson Bra and Undies Sewn by Ms. Cleaver