This series is designed to help you learn the basics of knitting technique in a way that will smoothly transition your skills to future projects. To best use this guide, don’t try to make anything meaningful at first. Spend at least an hour making a few oddly-shaped bits of knitting about 10-12 stitches wide and 10 rows high (I call them gerbil coasters) before you dive into a real project. The key to even-looking knitting is developing muscle memory in your hands, so practice each technique several times until you get the hang of it. Remember that this is supposed to be fun, so if you’re feeling frustrated, take a break and come back to it later.
When you feel comfortable with the techniques in the series, I’ve designed a pattern, The Itty Bitty Knitty Kitty, specifically for brand new knitters. The Kitty is designed to be made up of several small parts, so if you don’t like the way a piece is looking, there’s no harm in tossing it aside and starting again.
More of a print than screen reader? The complete series (including the Itty Bitty Kitty Pattern) is available as a PDF, printed booklet, and complete kit to get you started off with high quality materials.
The stitch from which knitting gets its name, the knit stitch (combined with the purl stitch) is the basis of all knitting. For now, we will focus on the knit stitch only. Something that is worked with all rows knitted (where the back and front look the same) is called Garter Stitch. There are two main styles of knitting Continental Style/“Picking” or English Style/”Throwing.” Both work equally well. I’ll be showing Continental Style because that’s how I knit (I also think knitting Continental makes it easier to keep an even gauge, and is more efficient and ergonomic, but that’s just my opinion).
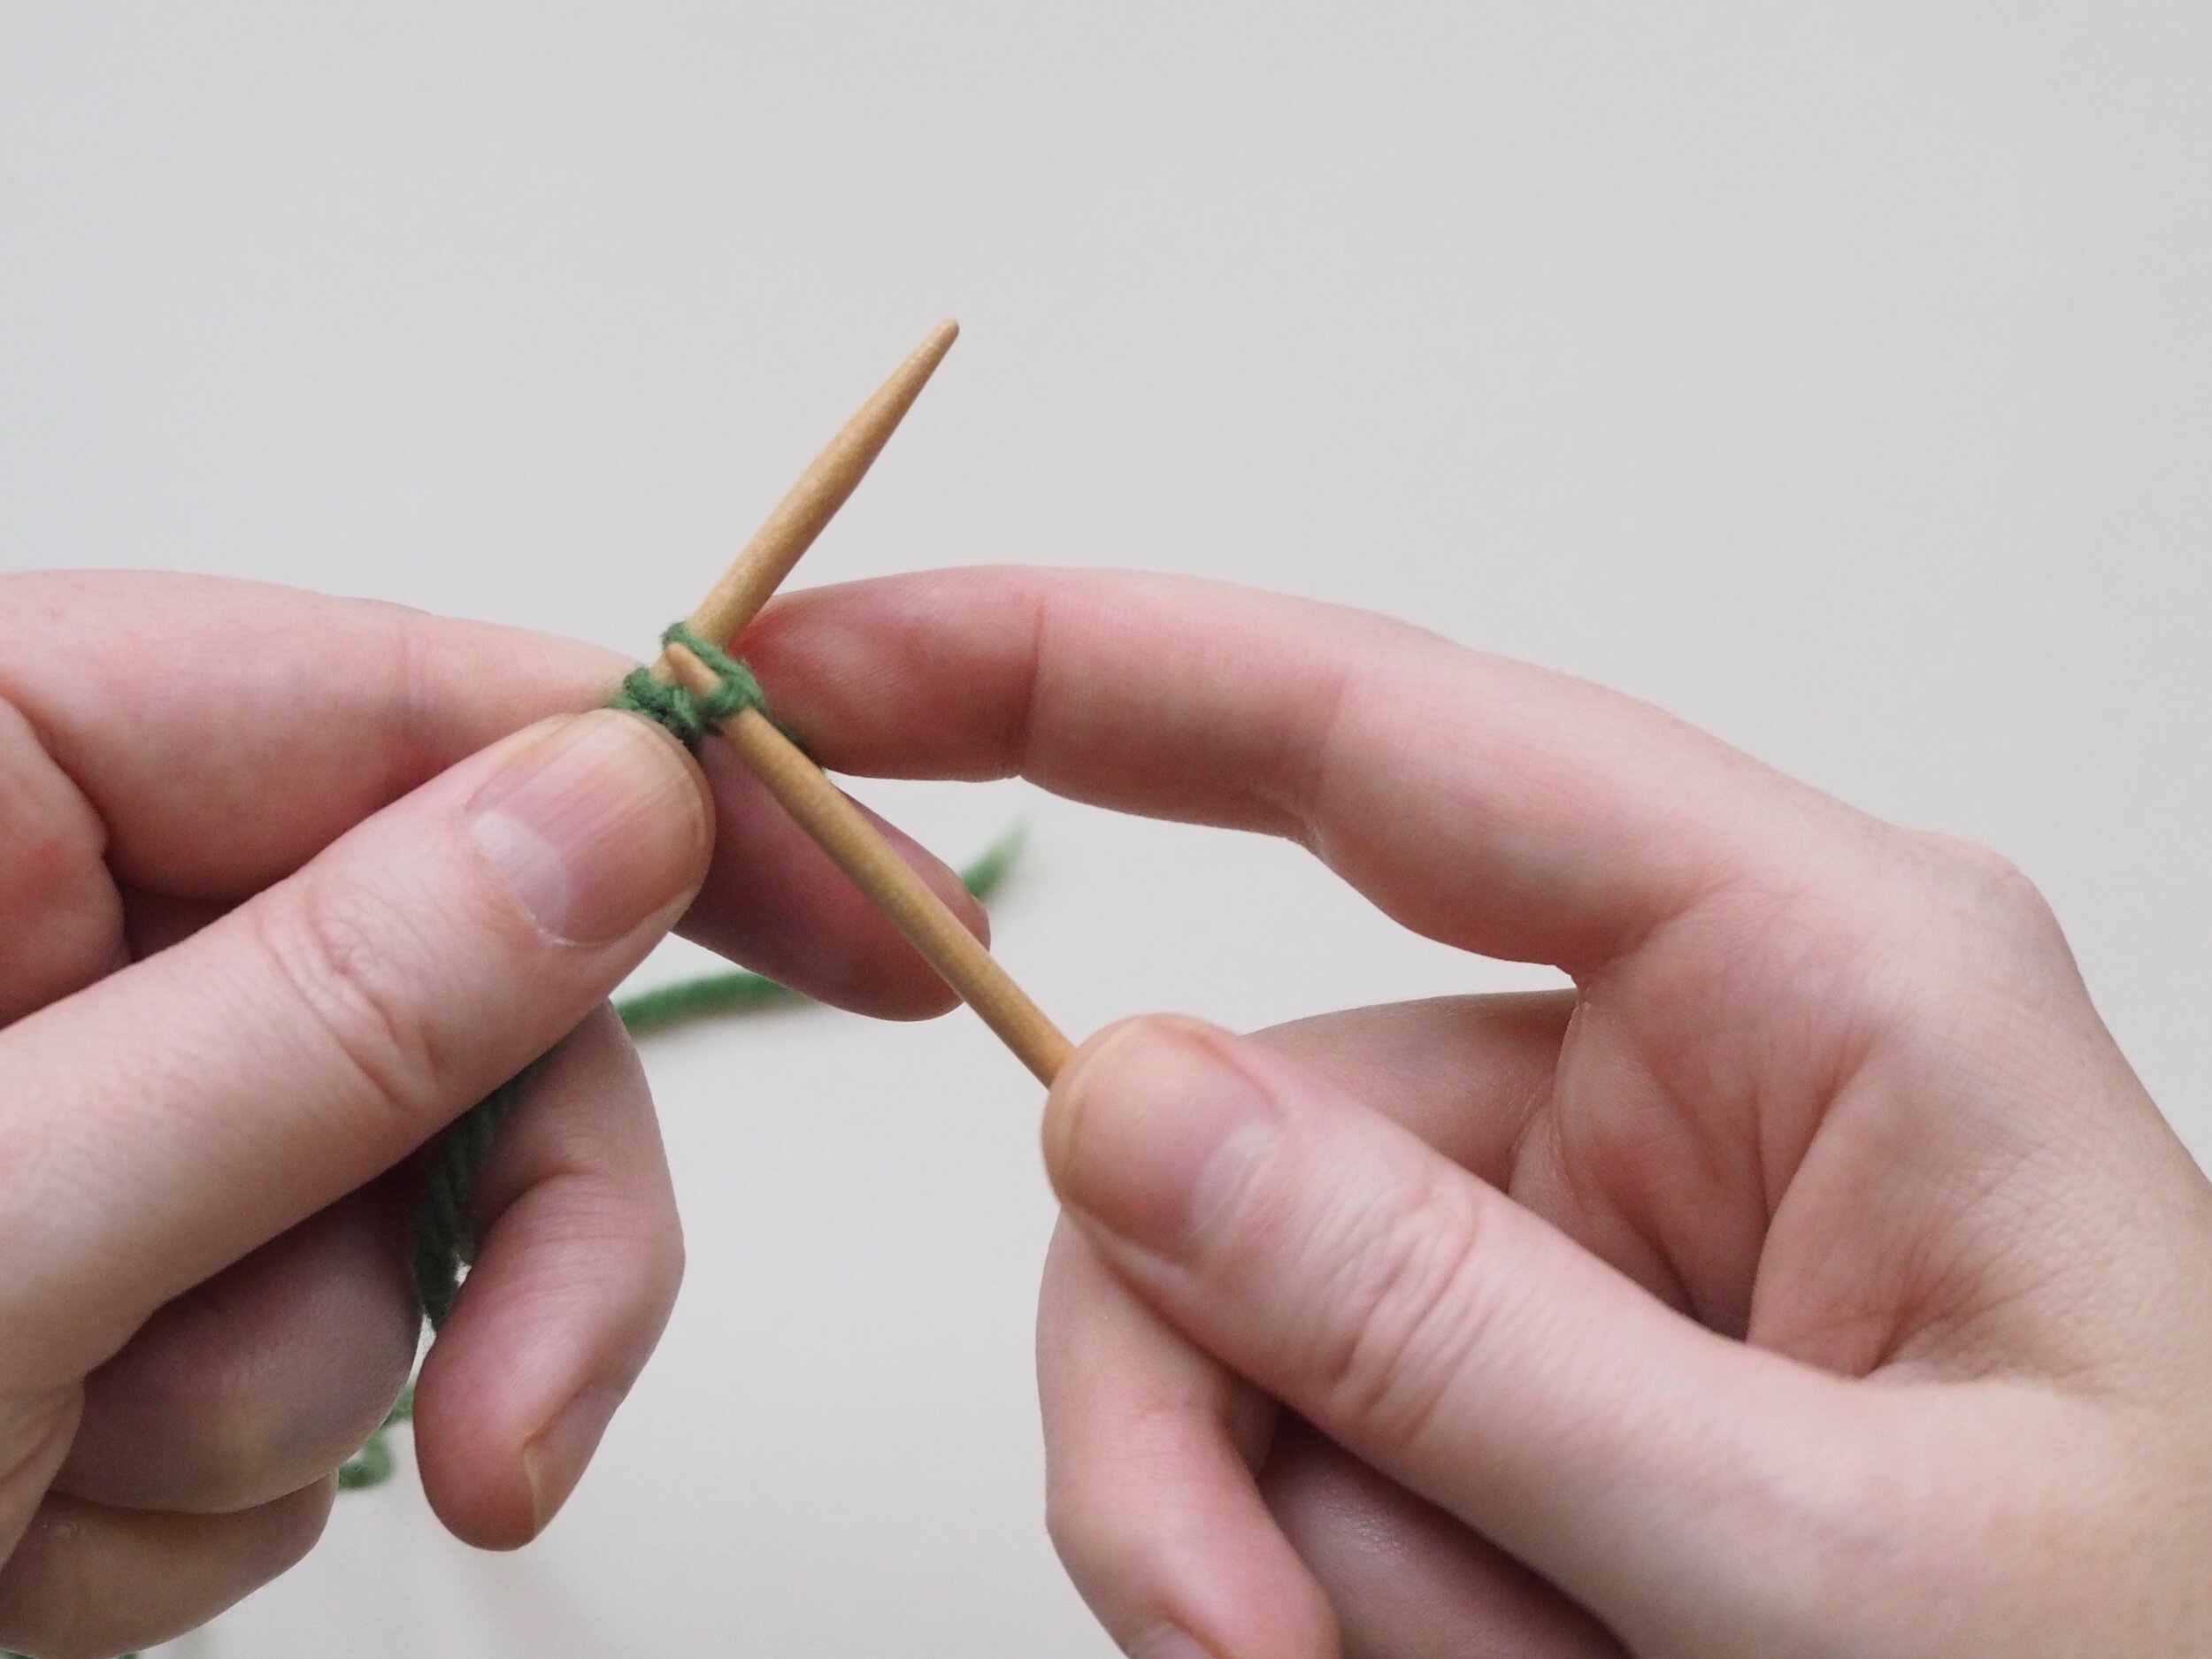
1. Tension the Yarn
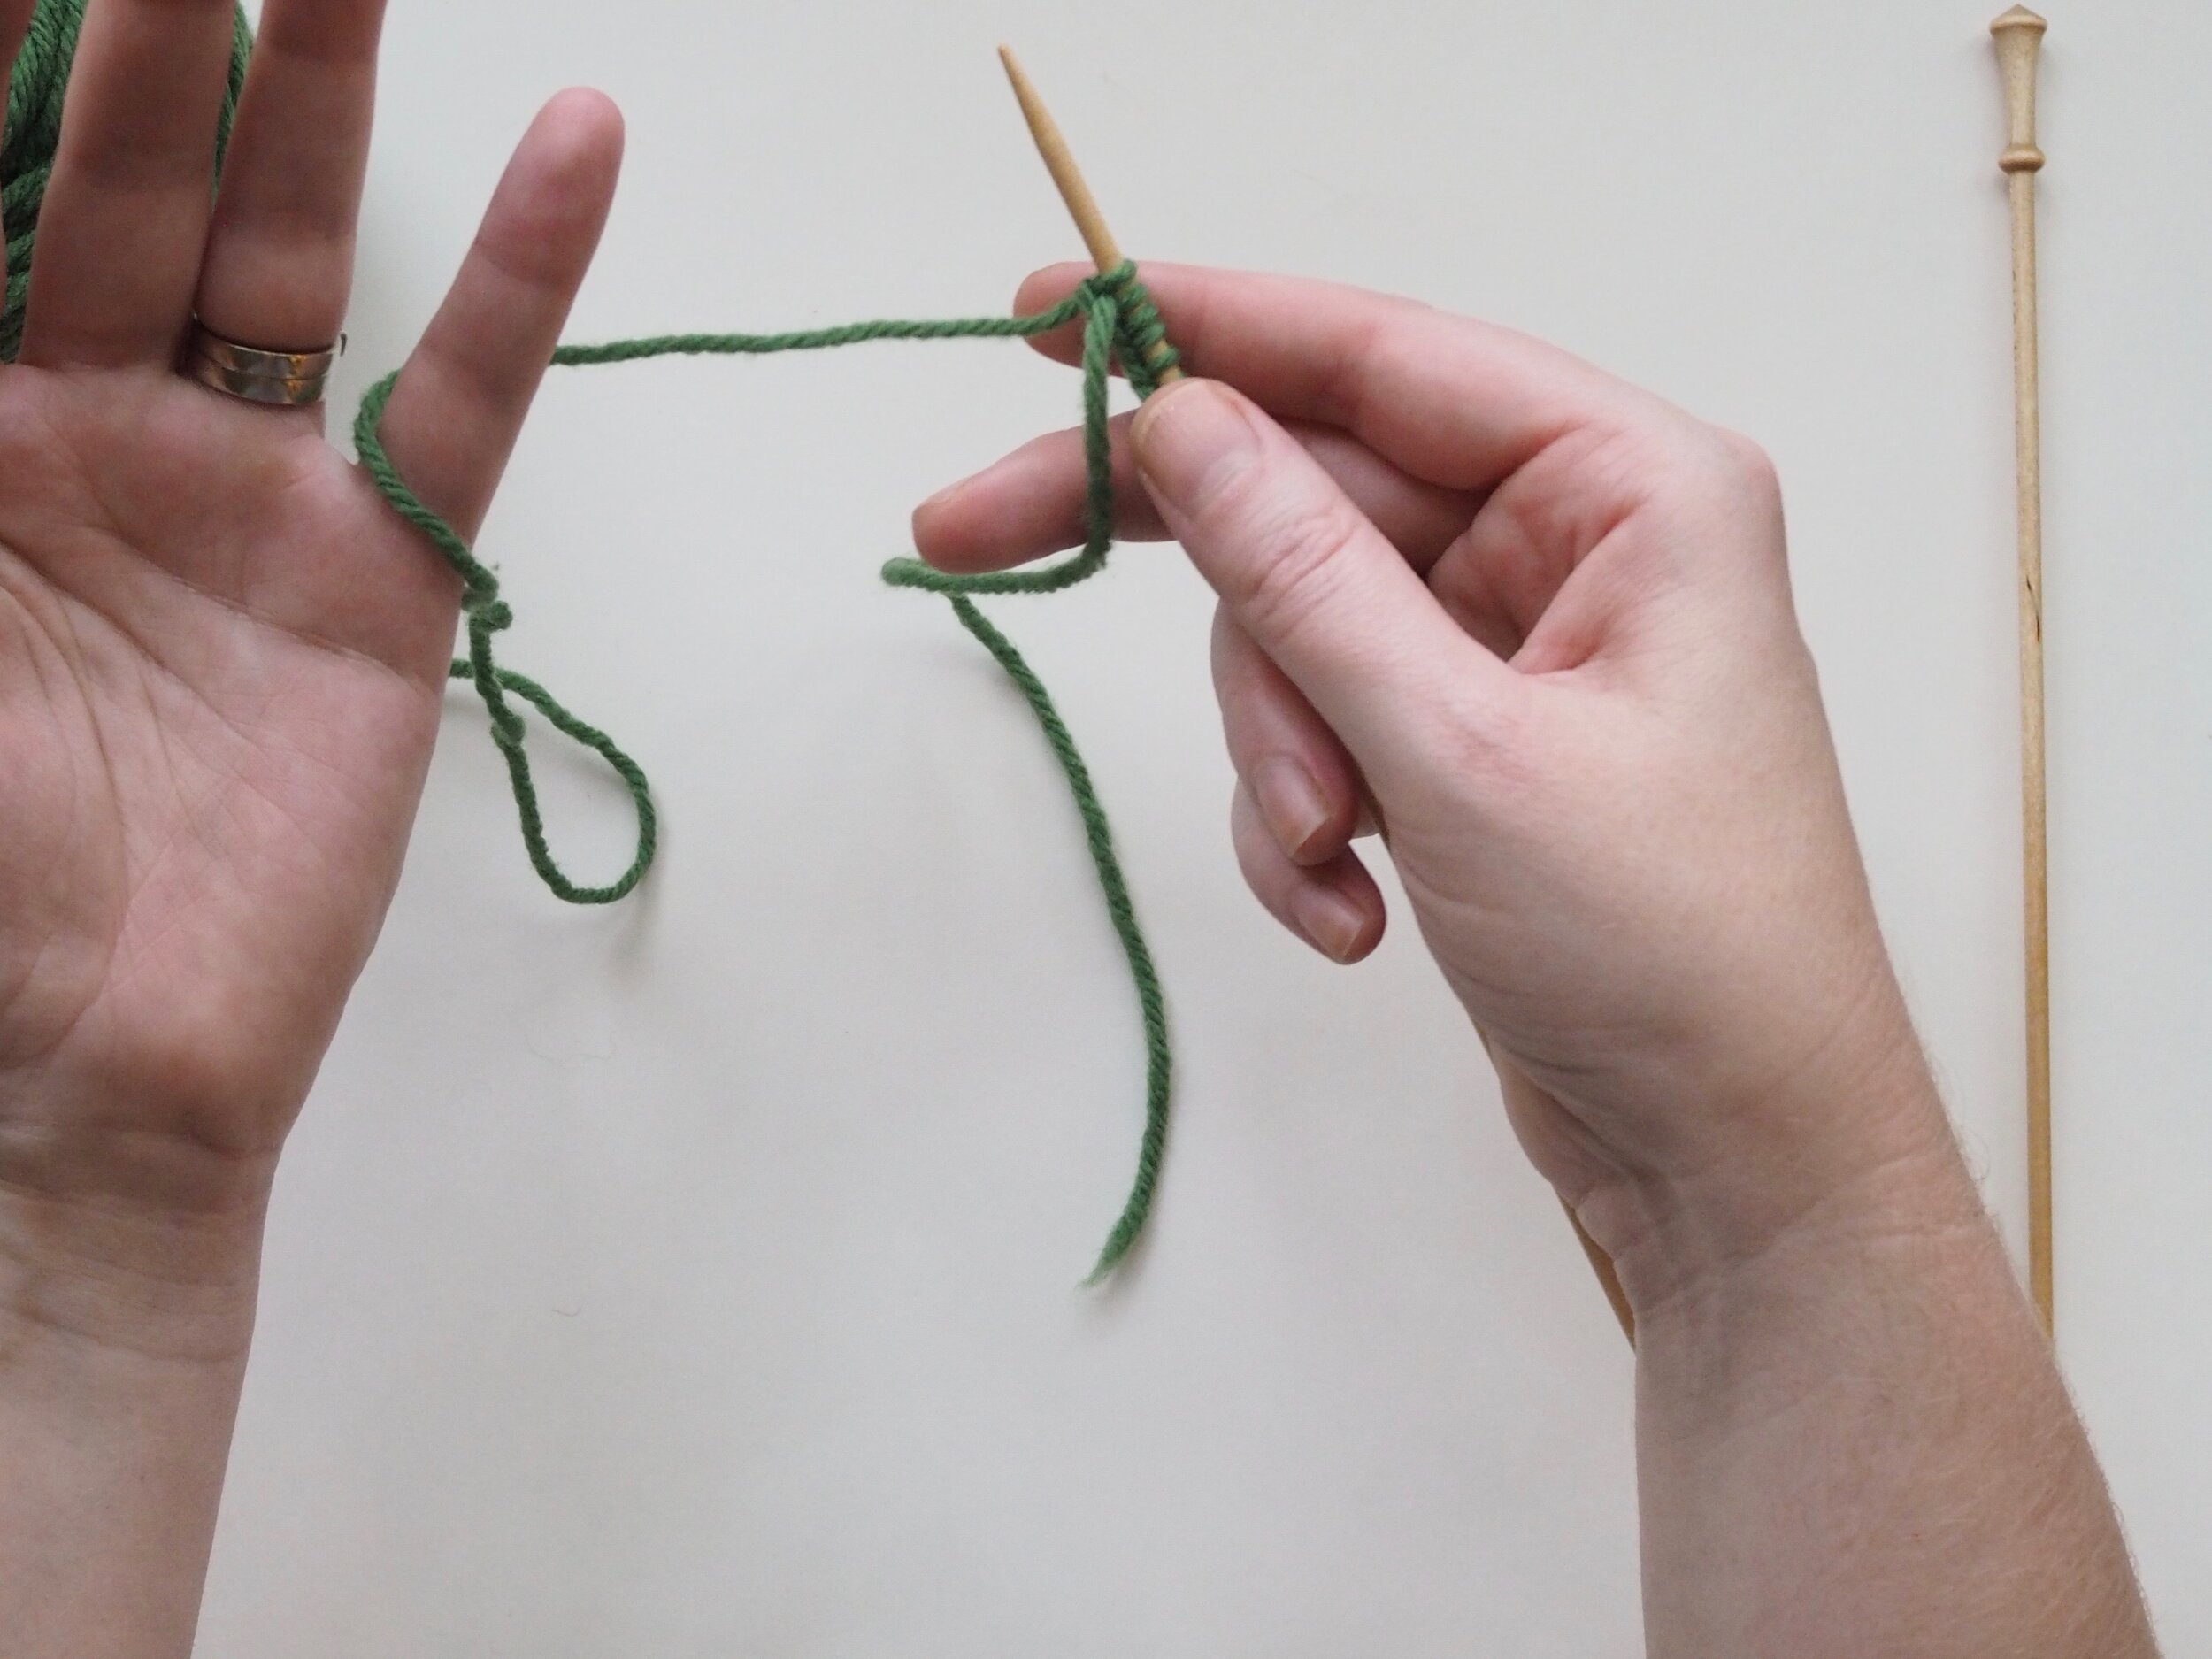
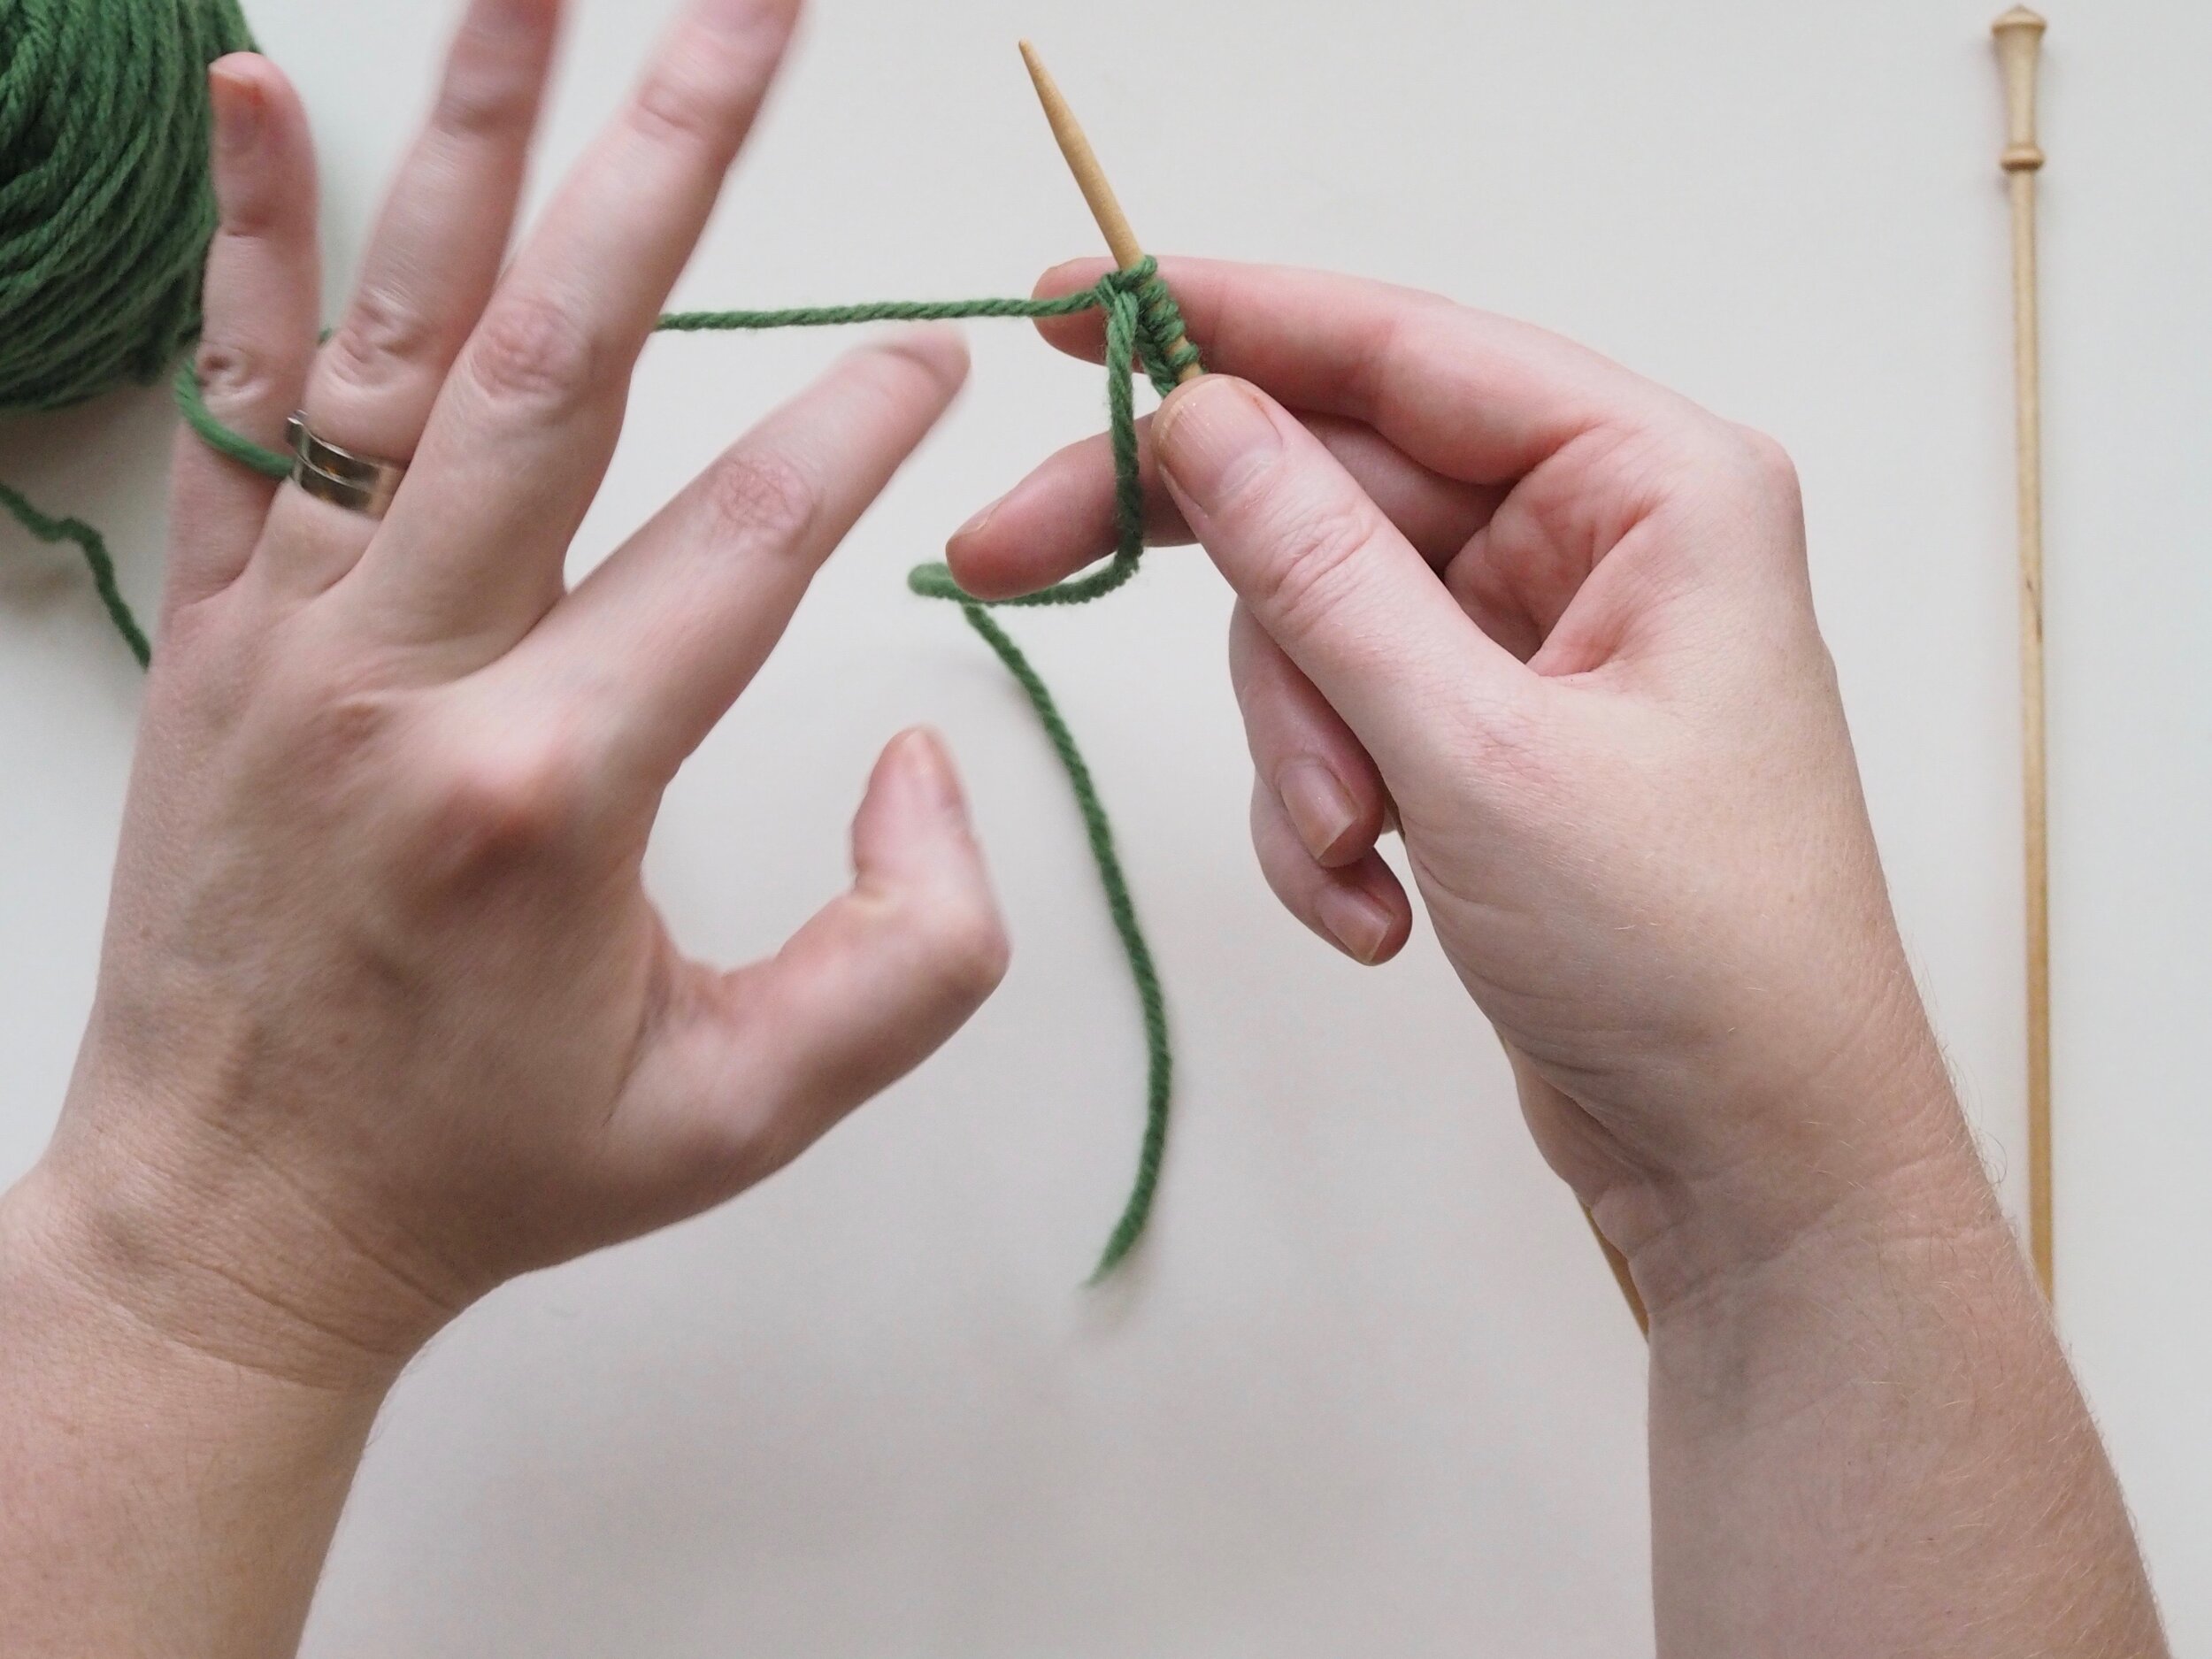
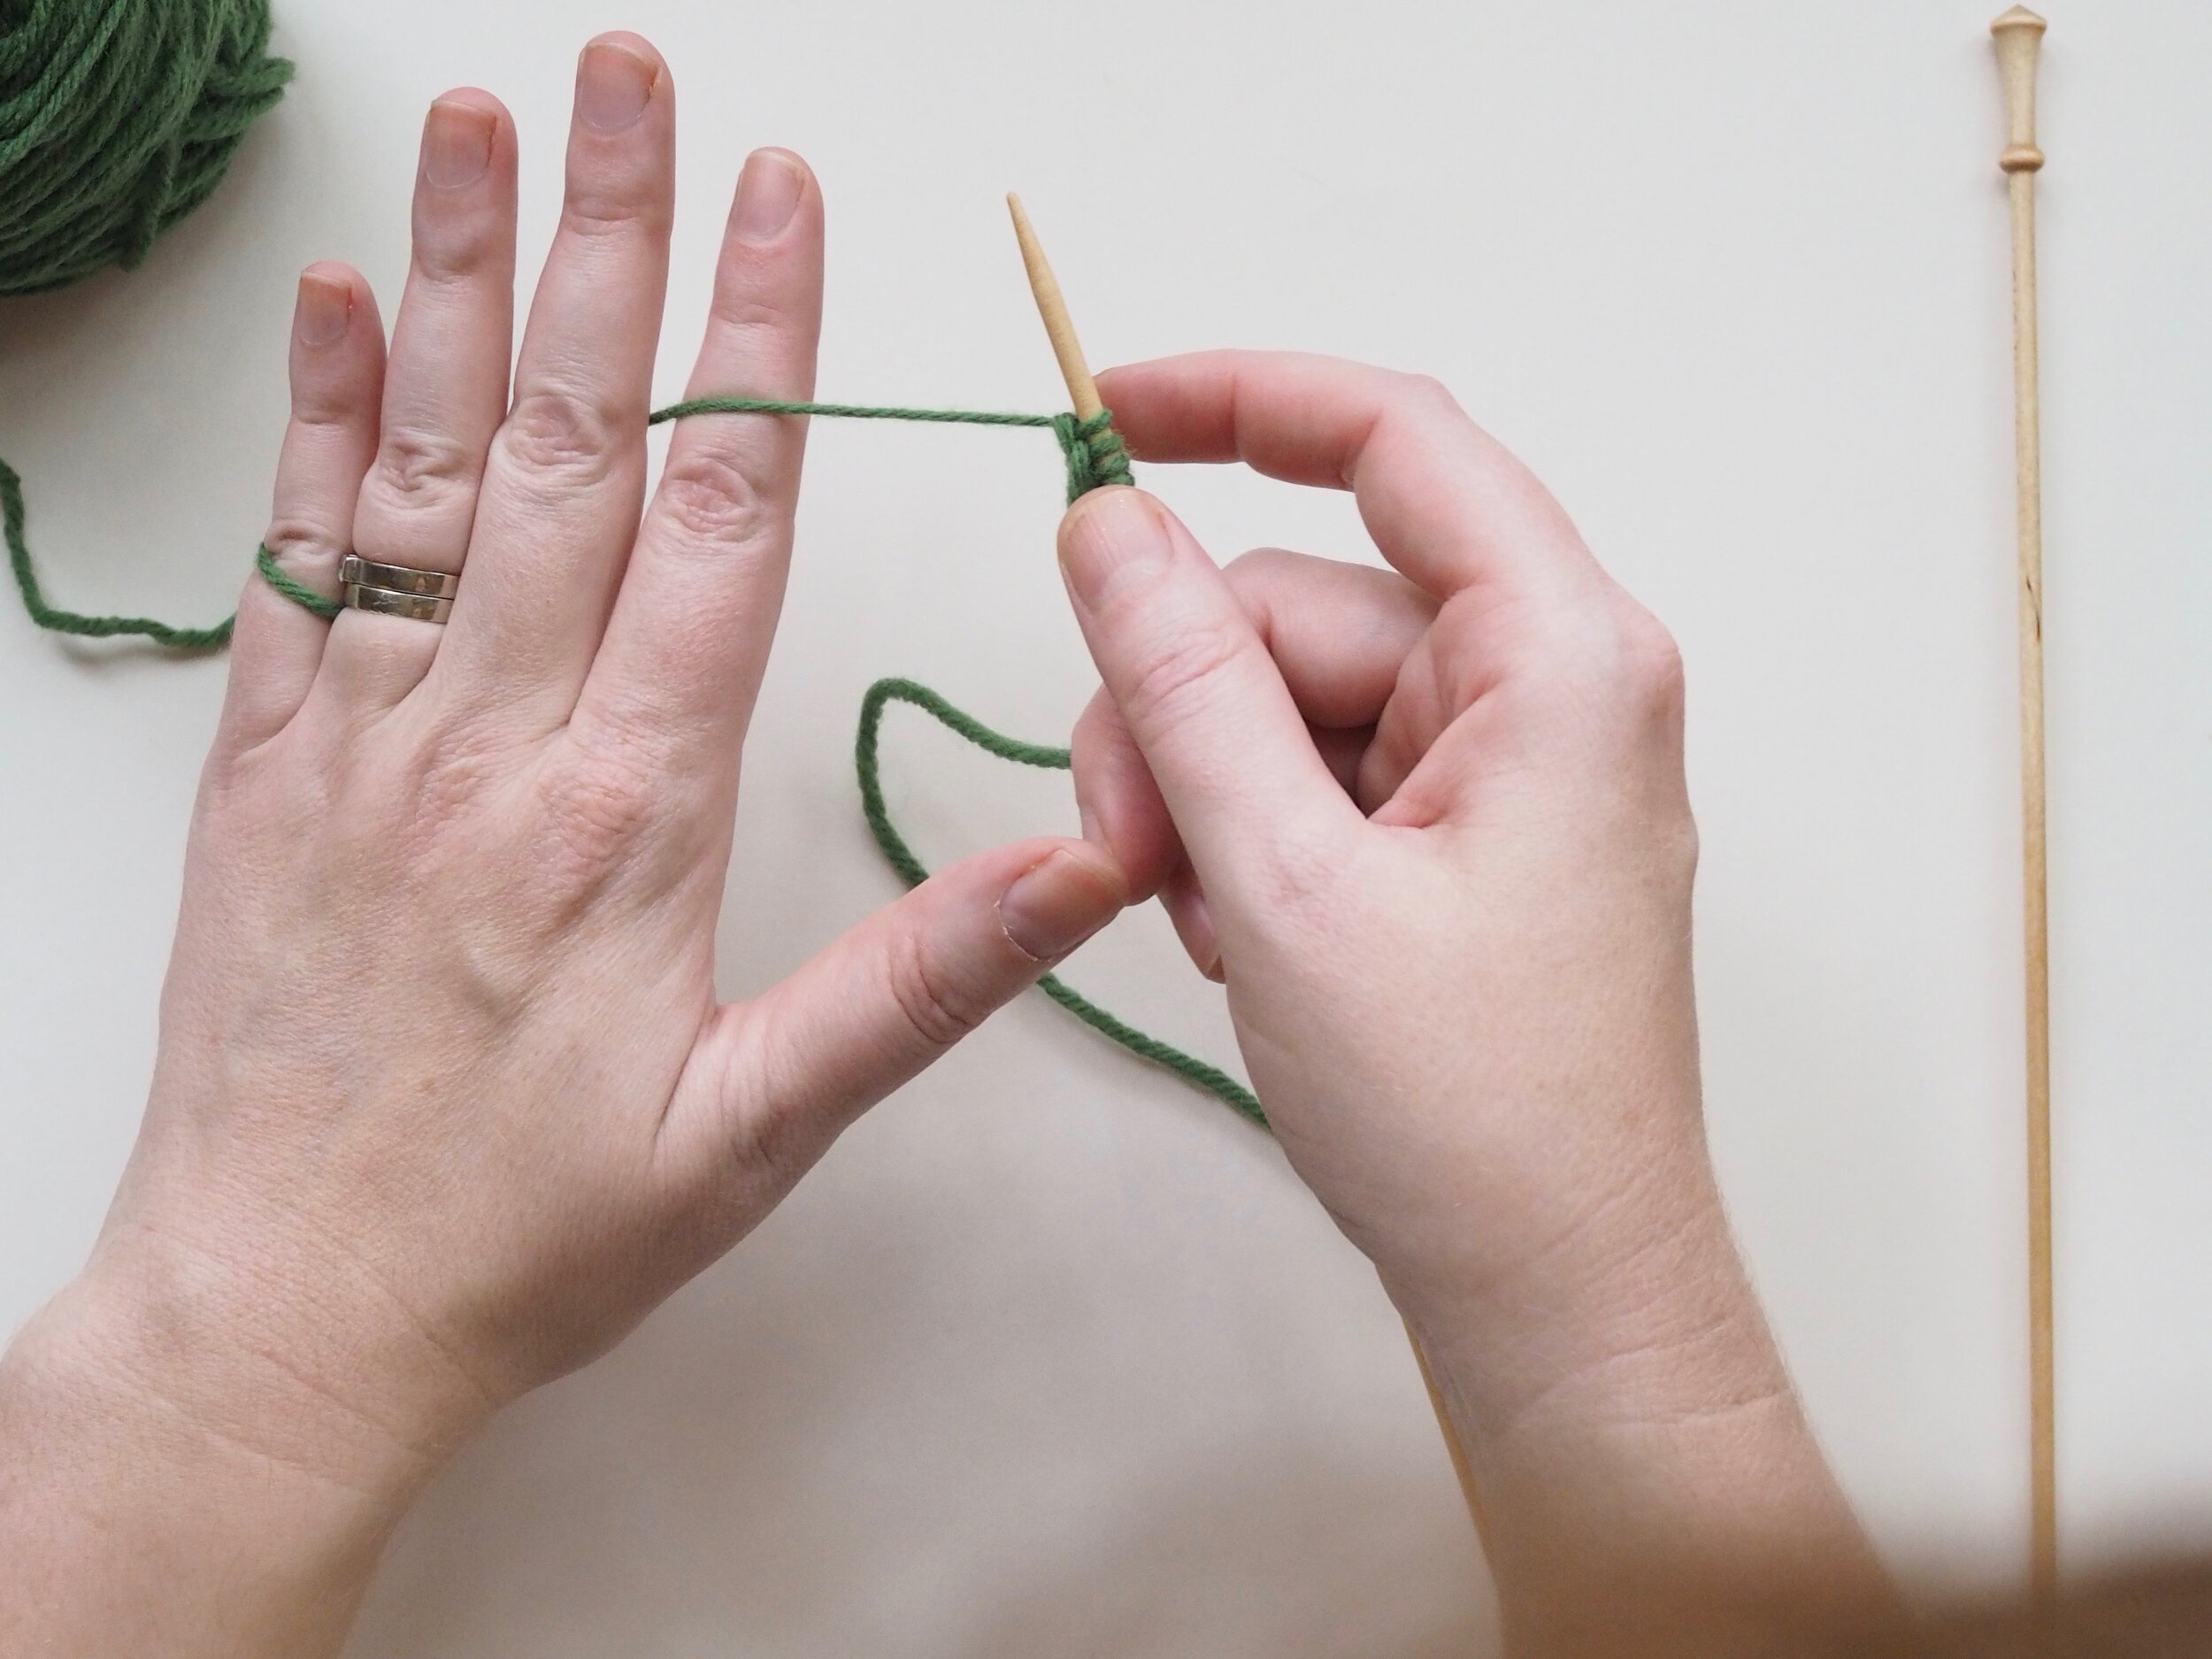

Make sure you have about 1 yard of yarn pulled out between the cast-on needle and the ball. (a) At about a hand’s width away from the needle, drape the end of the working yarn (the strand closest to the ball) over the pinky finger of your left hand with your palm up. (b) Flip your palm down so the yarn forms a loop around your pinkie and (c) scoop up the strand near the needle with your index finger so it rests on the back on the finger. (d) Pick up your cast-on needle with the thumb, middle, and ring finger of your left hand and adjust yarn around your fingers so it is slightly taut as it runs from needle to index finger to pinkie. The yarn should be BEHIND the left hand needle. Pick up the empty needle in your right hand.
2. Form a Knit Stitch
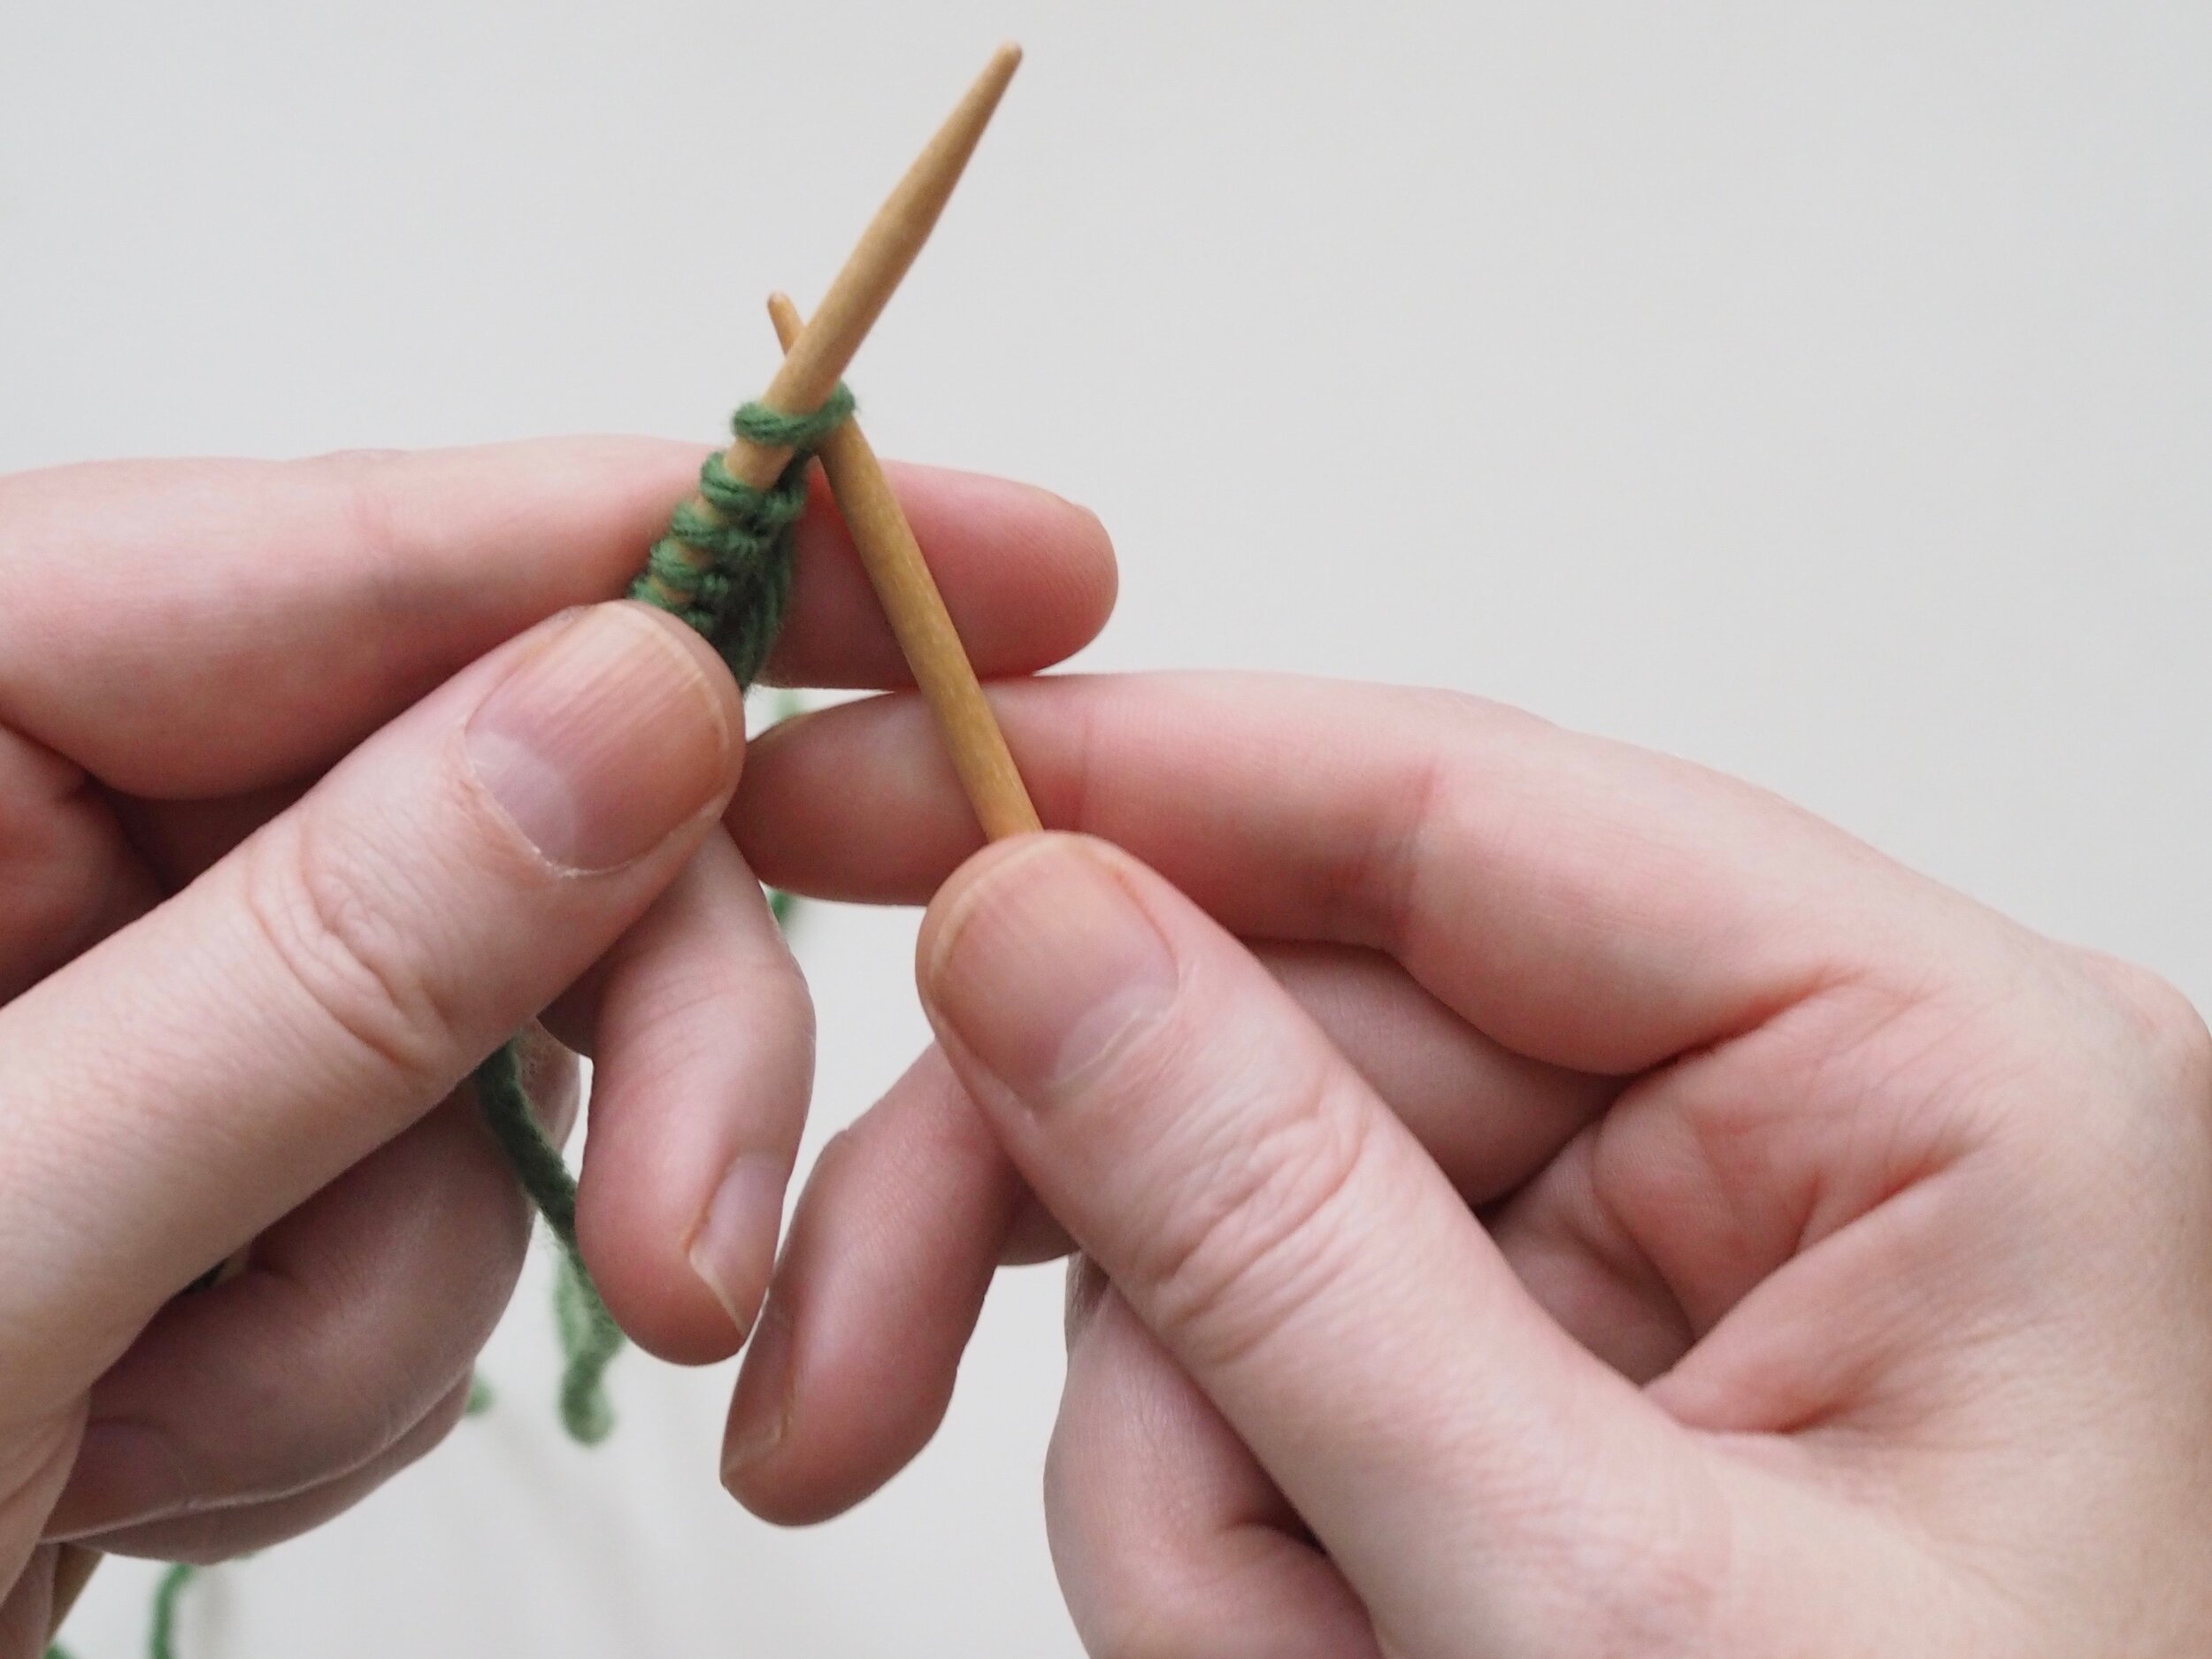
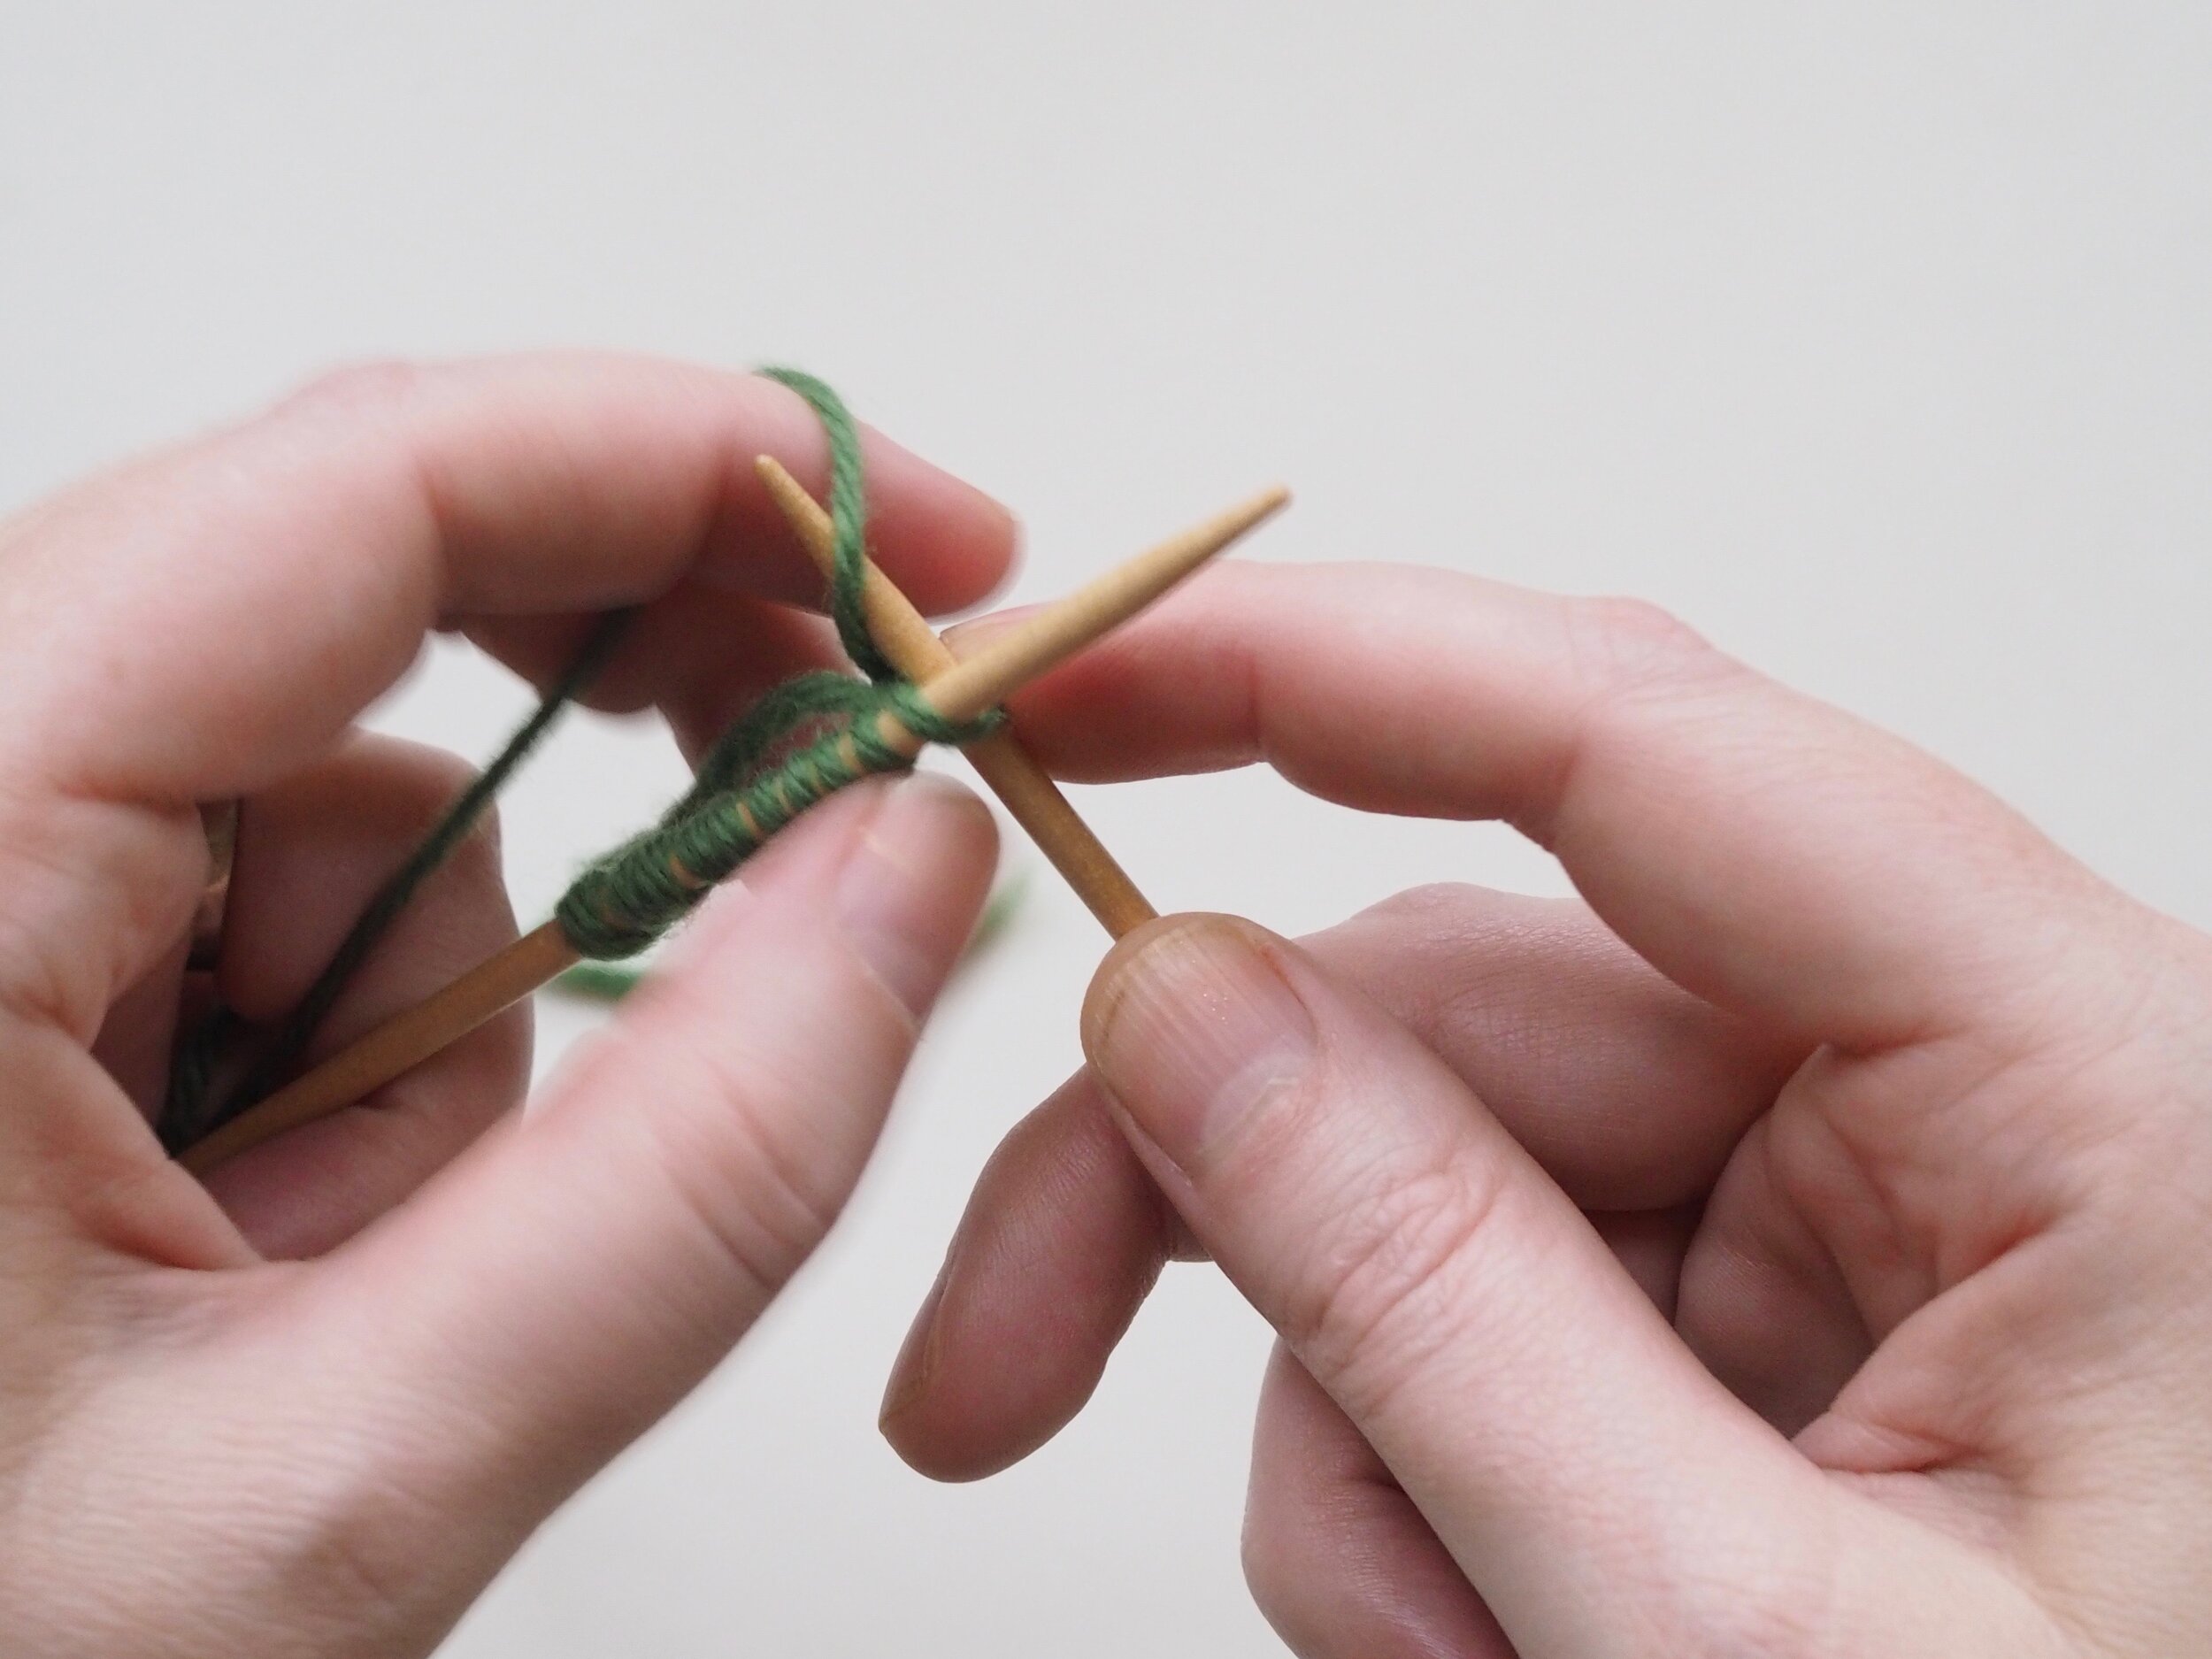
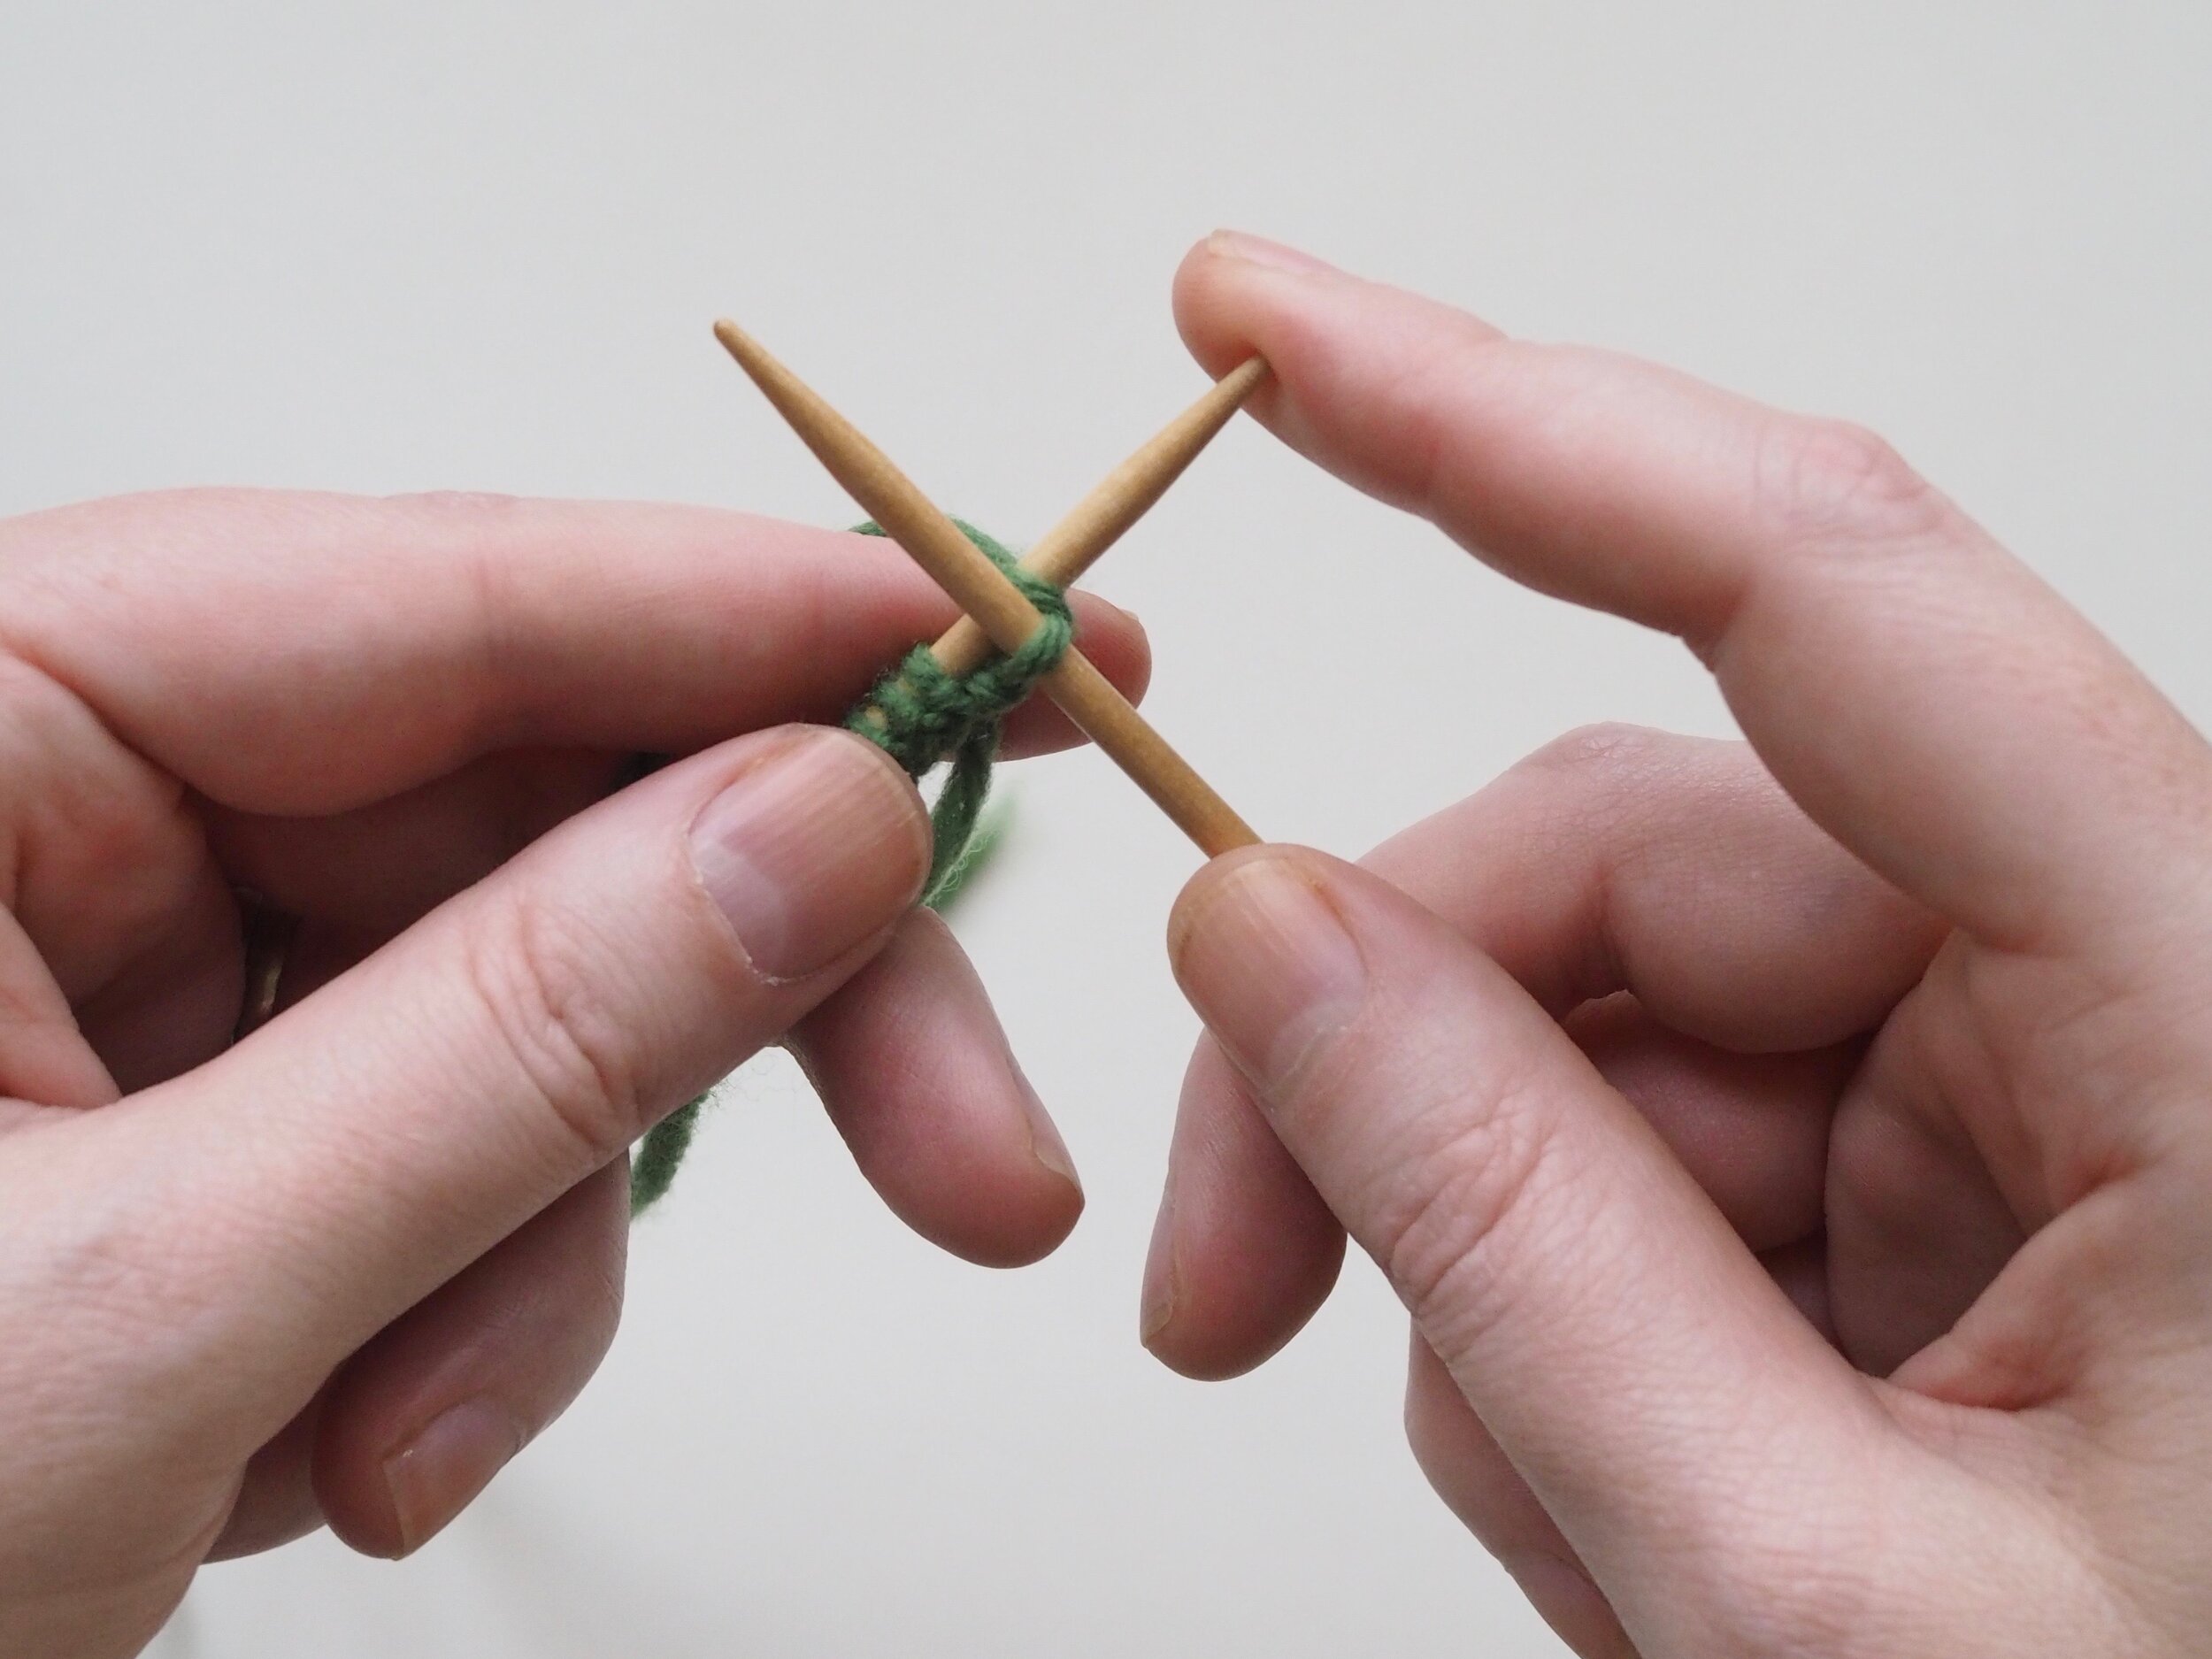
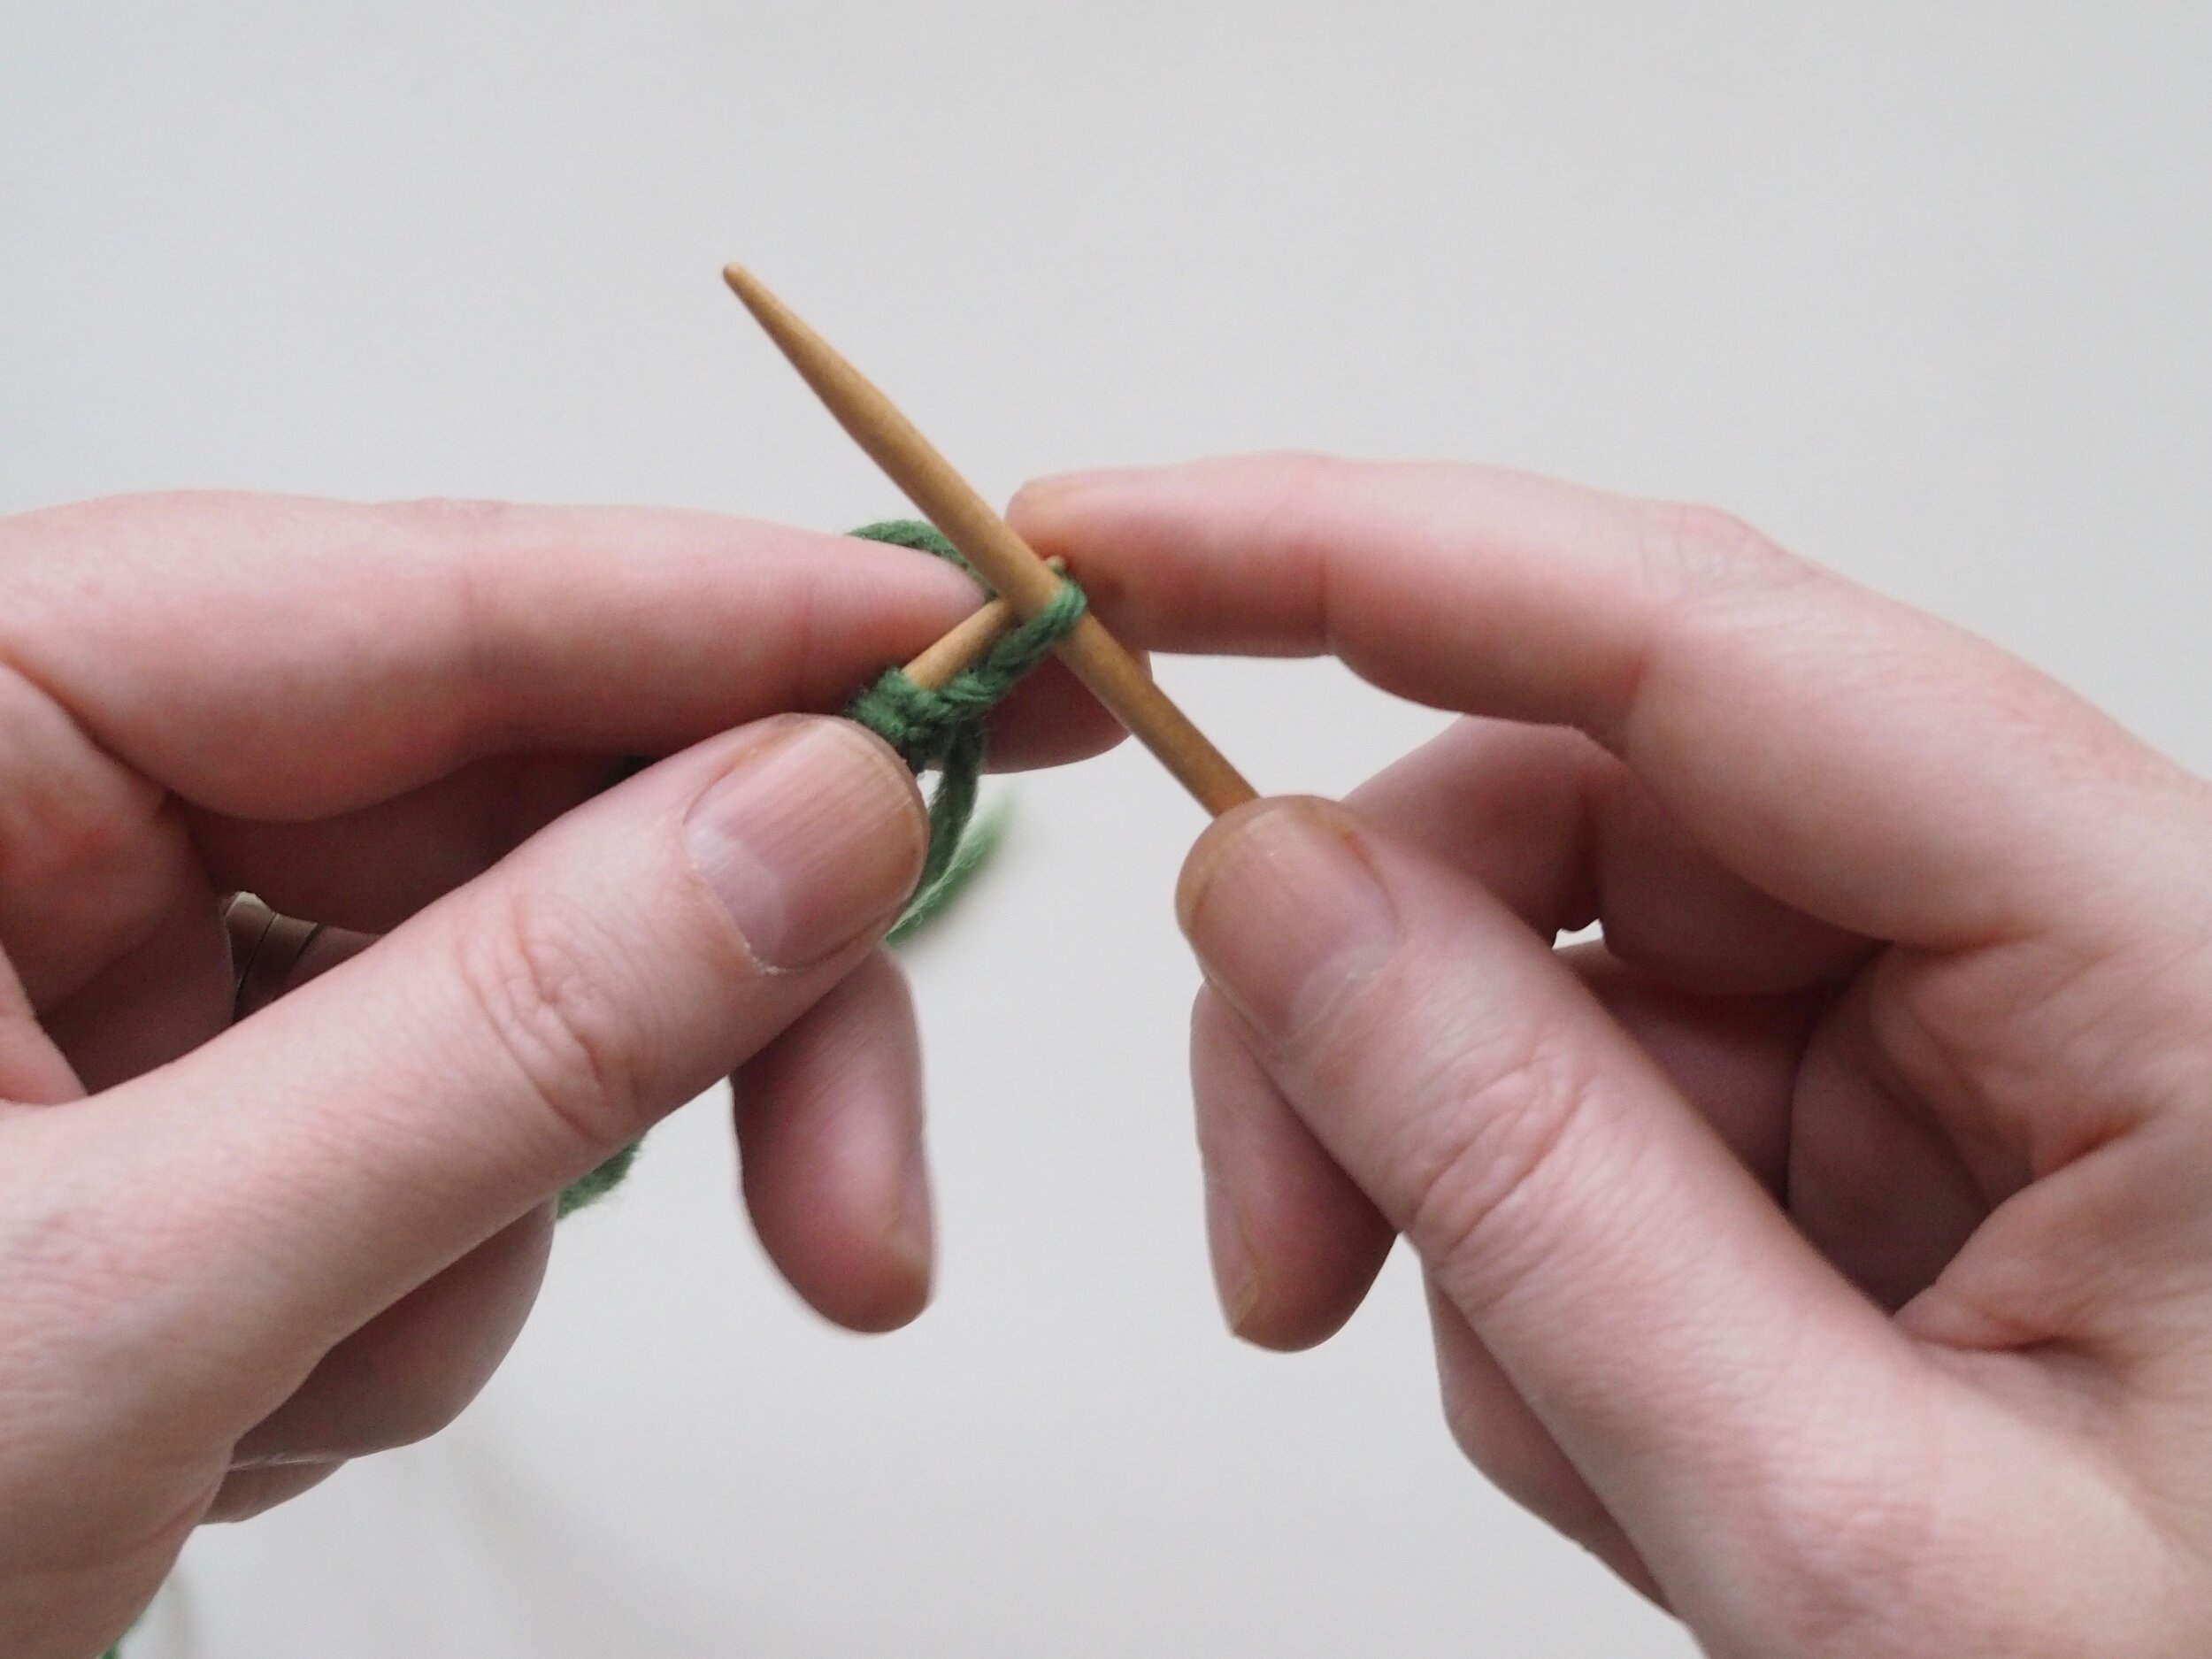
(a) Insert the tip of your right-hand (RH) needle into the front (from palm to fingertip) of the loop closest to the end of the left-hand (LH) needle. (b) Slide the tip of the RH needle out past the yarn strand running over your left index finger, then scoop the RH needle tip toward your palm, “picking" up the yarn strand and (c) pull it through that first loop. You should now have a new loop on the RH needle. (d) Using your right index finger to push the LH needle down, (e) slide the old loop off the LH needle and let it drop. You’ve just knit your first stitch!!
Repeat Step 2 until you’ve worked all the stitches on your LH needle. Move the empty needle to your RH and the full needle to your LH and keep going!
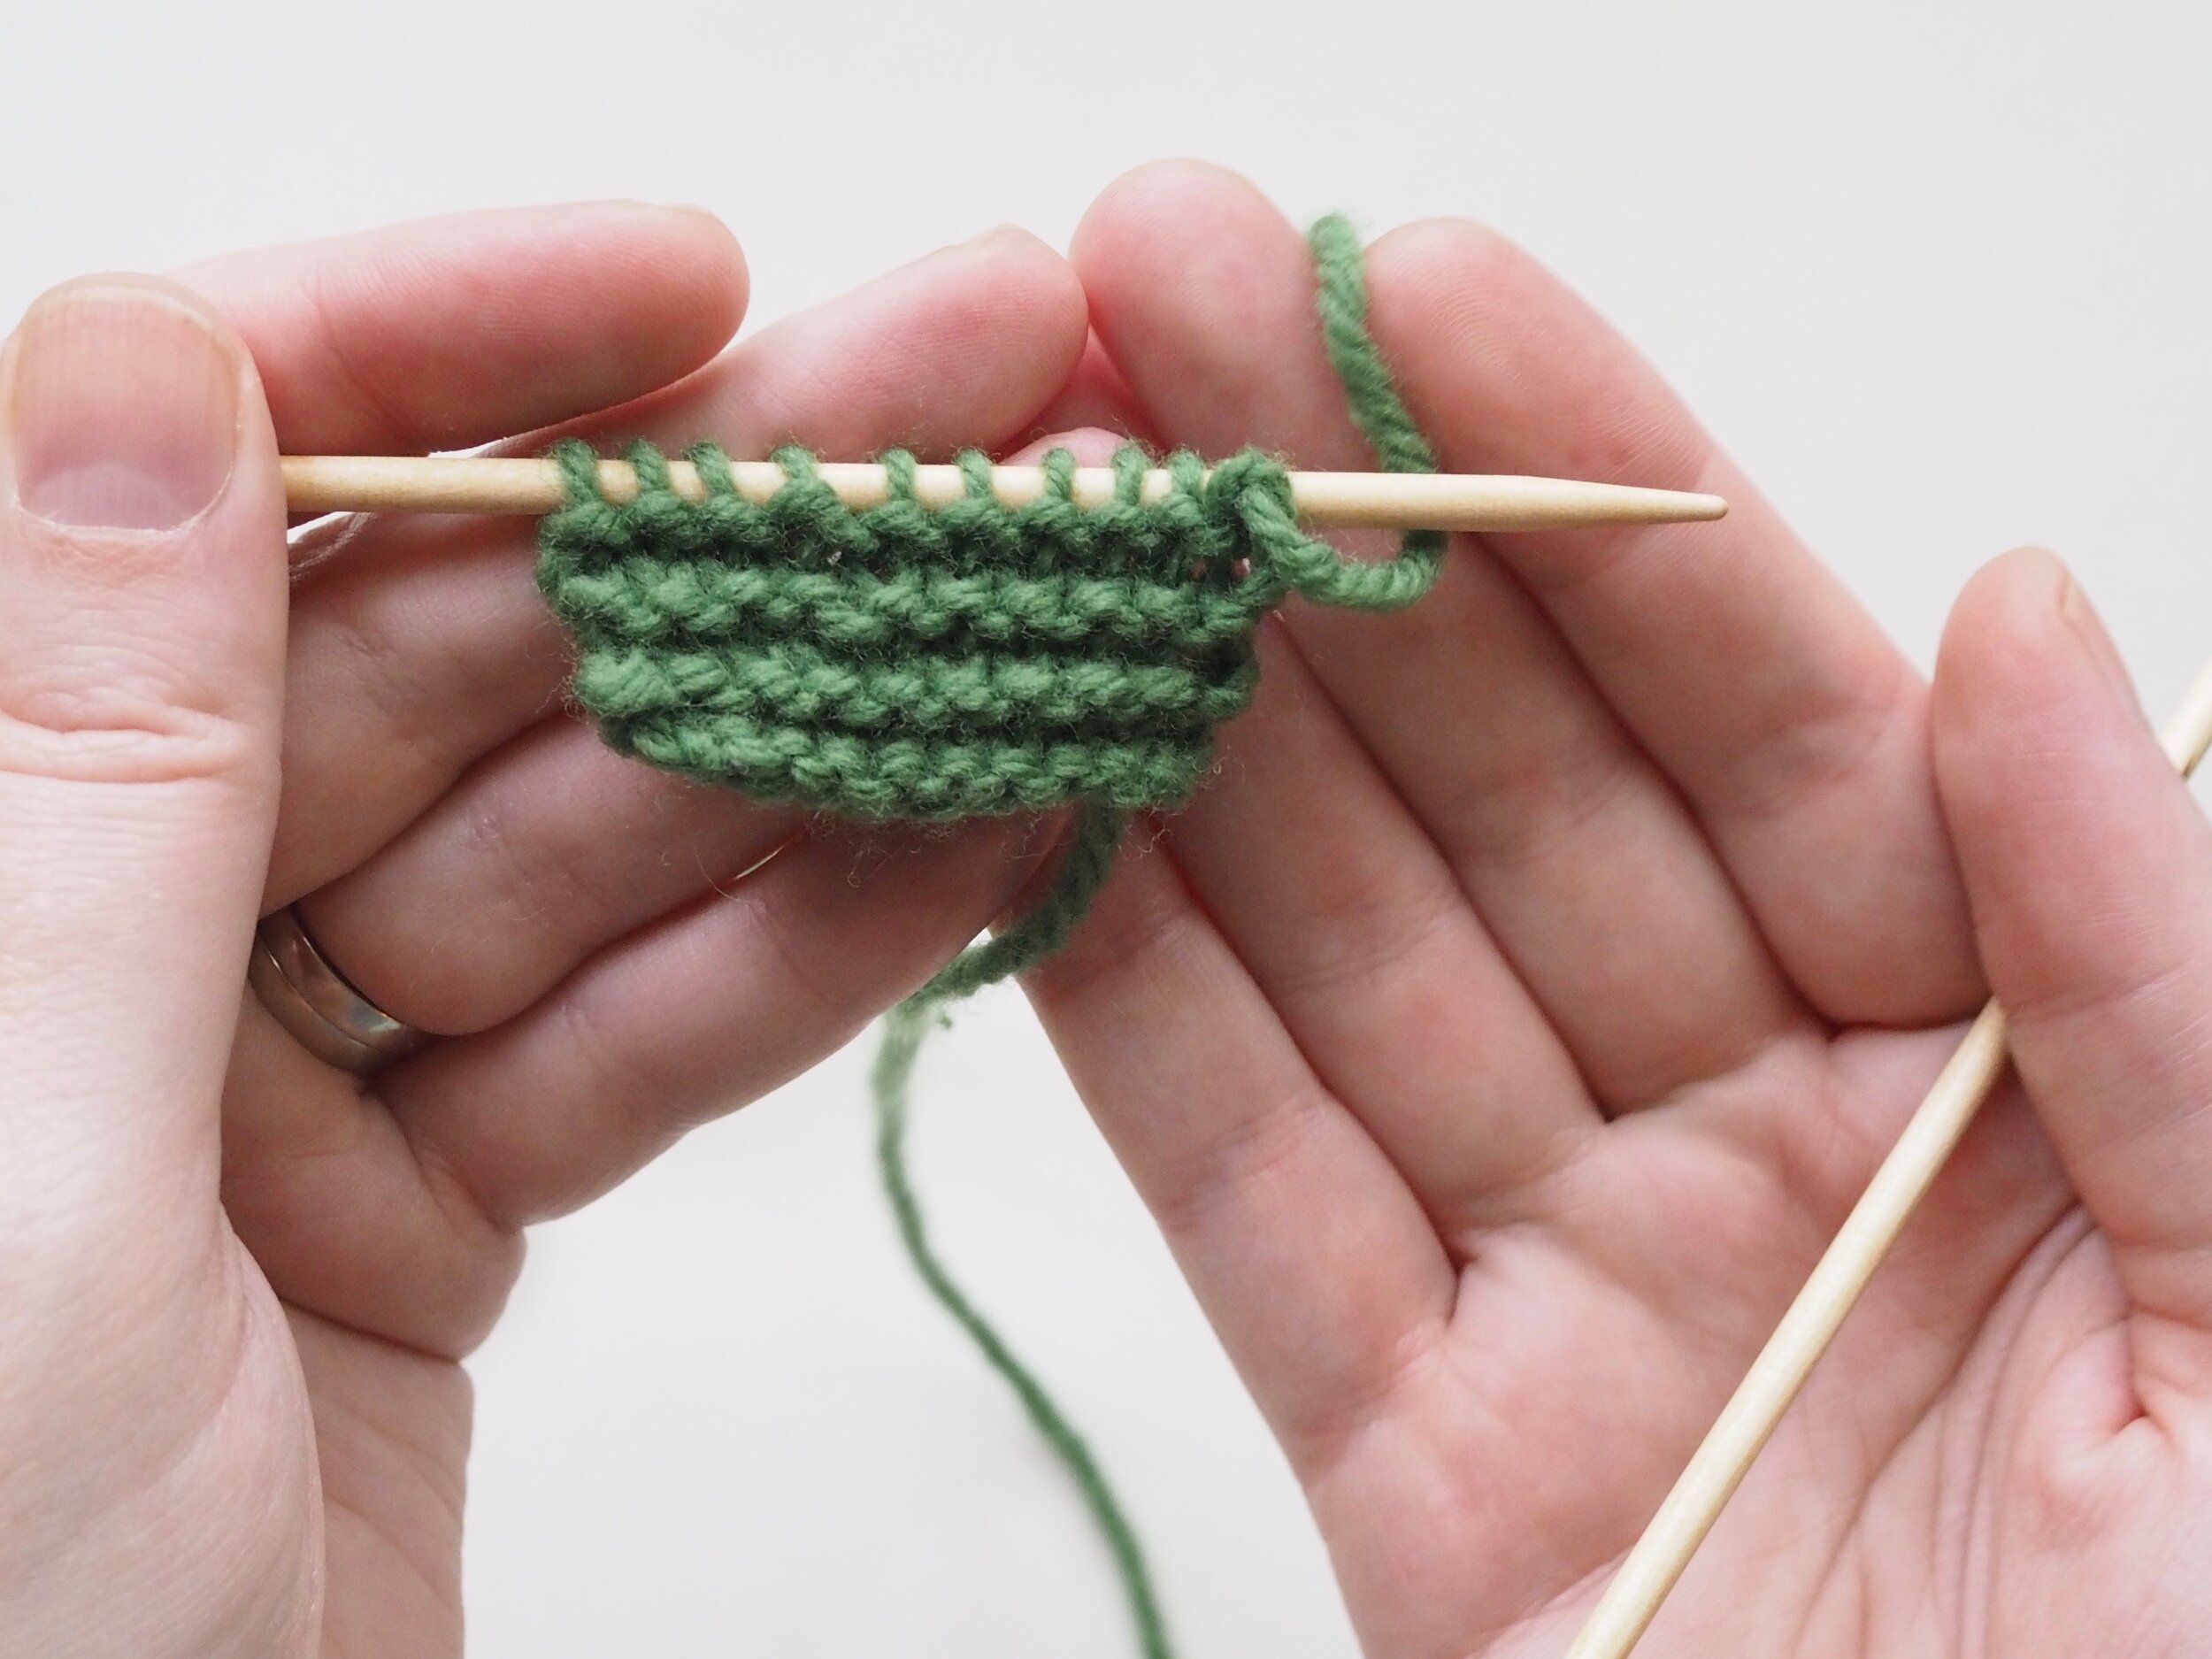
NB: To count the number of rows you have worked in Garter Stitch, look at the front of your work (the tail from the cast on will be on the RH bottom edge). Each row of “bumps” or Garter ridges (above the cast on edge) equals two rows knitted. In Figure 2f, there are 6 rows knitted