This series is designed to help you learn the basics of knitting technique in a way that will smoothly transition your skills to future projects. To best use this guide, don’t try to make anything meaningful at first. Spend at least an hour making a few oddly-shaped bits of knitting about 10-12 stitches wide and 10 rows high (I call them gerbil coasters) before you dive into a real project. The key to even-looking knitting is developing muscle memory in your hands, so practice each technique several times until you get the hang of it. Remember that this is supposed to be fun, so if you’re feeling frustrated, take a break and come back to it later.
When you feel comfortable with the techniques in the series, I’ve designed a pattern, The Itty Bitty Knitty Kitty, specifically for brand new knitters. The Kitty is designed to be made up of several small parts, so if you don’t like the way a piece is looking, there’s no harm in tossing it aside and starting again.
More of a print than screen reader? The complete series (including the Itty Bitty Kitty Pattern) is available as a PDF, printed booklet, and complete kit to get you started off with high quality materials.
Materials
To start with, I suggest the following materials:
US Size 5 or 7 (3.75 mm or 4.5 mm) straight (single point) knitting needles in wood, bamboo, or metal.
Wood and bamboo are the most “grippy”
Metal is more slippery, but solid
I do not recommend plastic, as it has a tendency to bow.
A Worsted Weight Yarn in 100% Wool
Wool yarn is the most forgiving to work with at first. Some inexpensive options for 100% wool yarns are available from Brown Sheep, Lion’s Brand and Quince & Co. in the US. My personal preference is for Brown Sheep Nature spun Worsted, which is used in these photos.
Avoid cotton (it’s inelastic) and any hairy Angora/Alpaca/Mohair) or specialty yarns (hard to see stitches).
A wool/acrylic blend is preferable to straight acrylic, but either will work.
Want to save yourself a shopping trip? Pick up my Knitting 101 Kit!
The Long Tail Cast On
1. Estimate the “Long Tail” length
As the name indicates, you’ll need a long tail of yarn to work this cast-on. To estimate of the length of the tail, estimate 1-2” of tail for each cast-on stitch (the bigger the needles, the longer the tail). Over time you’ll get better at guessing the tail length. Better to have too long of a tail, which you can cut, than too short a one.
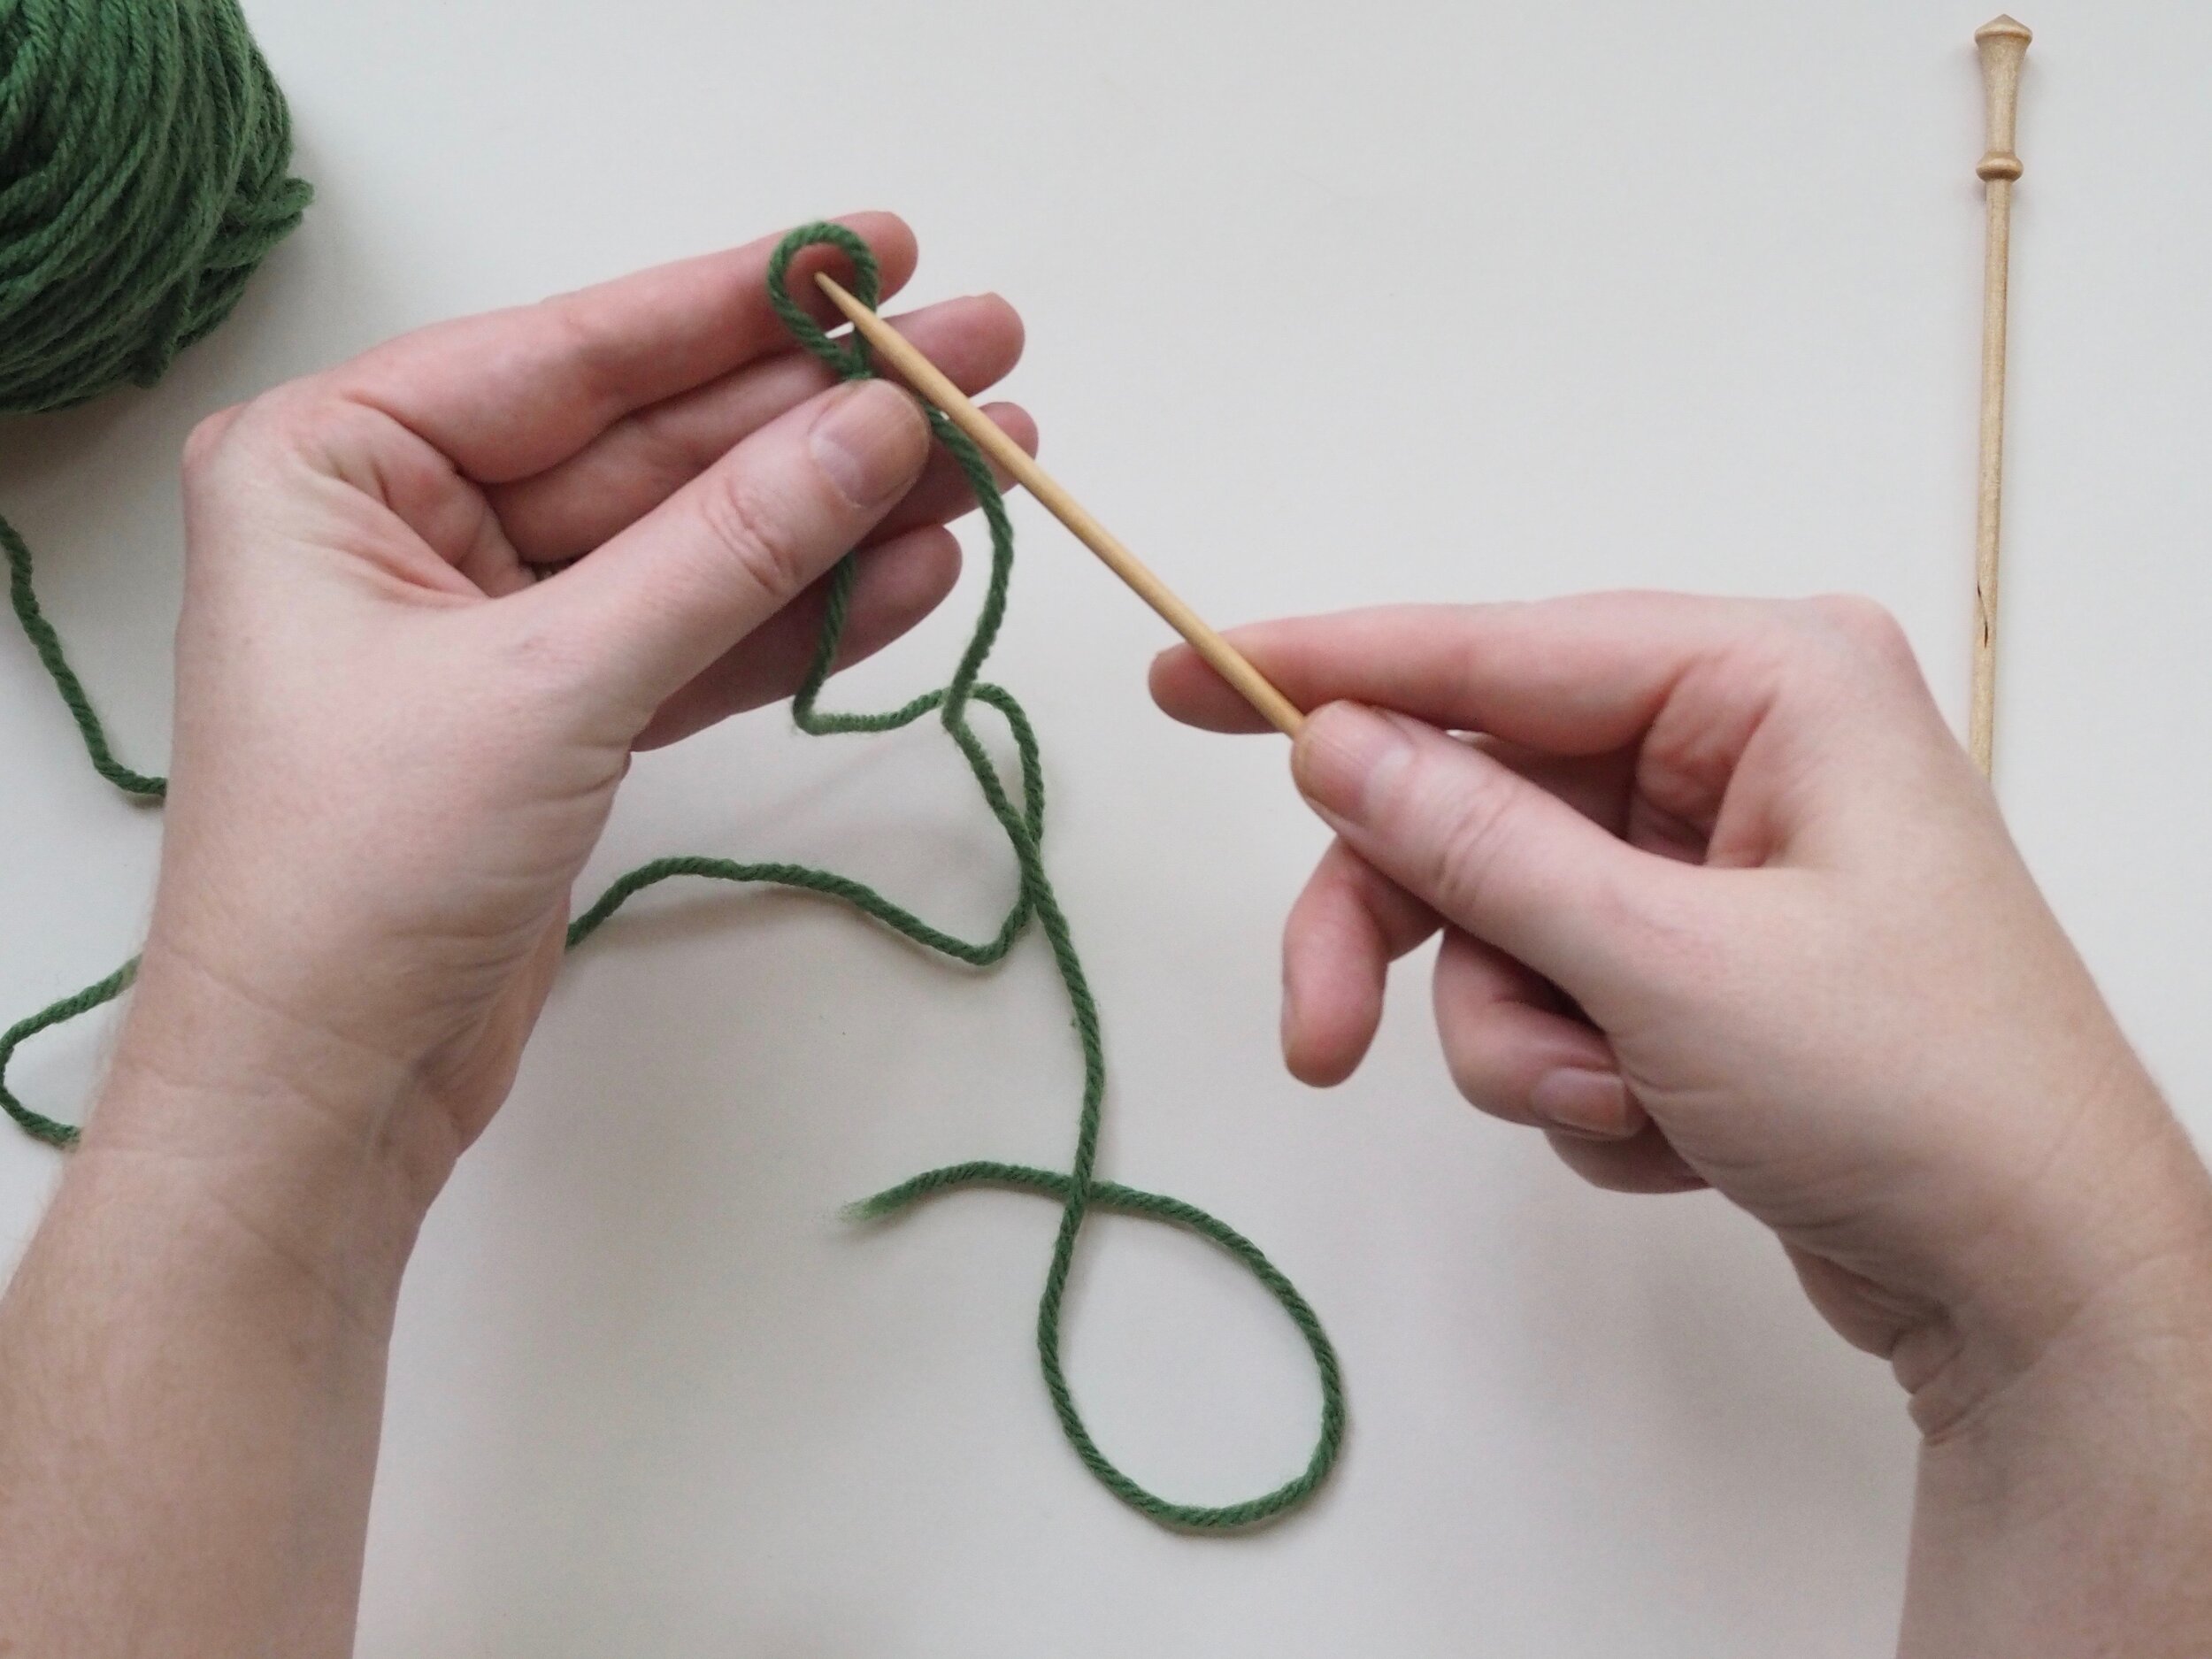
2. Form a Slip Knot

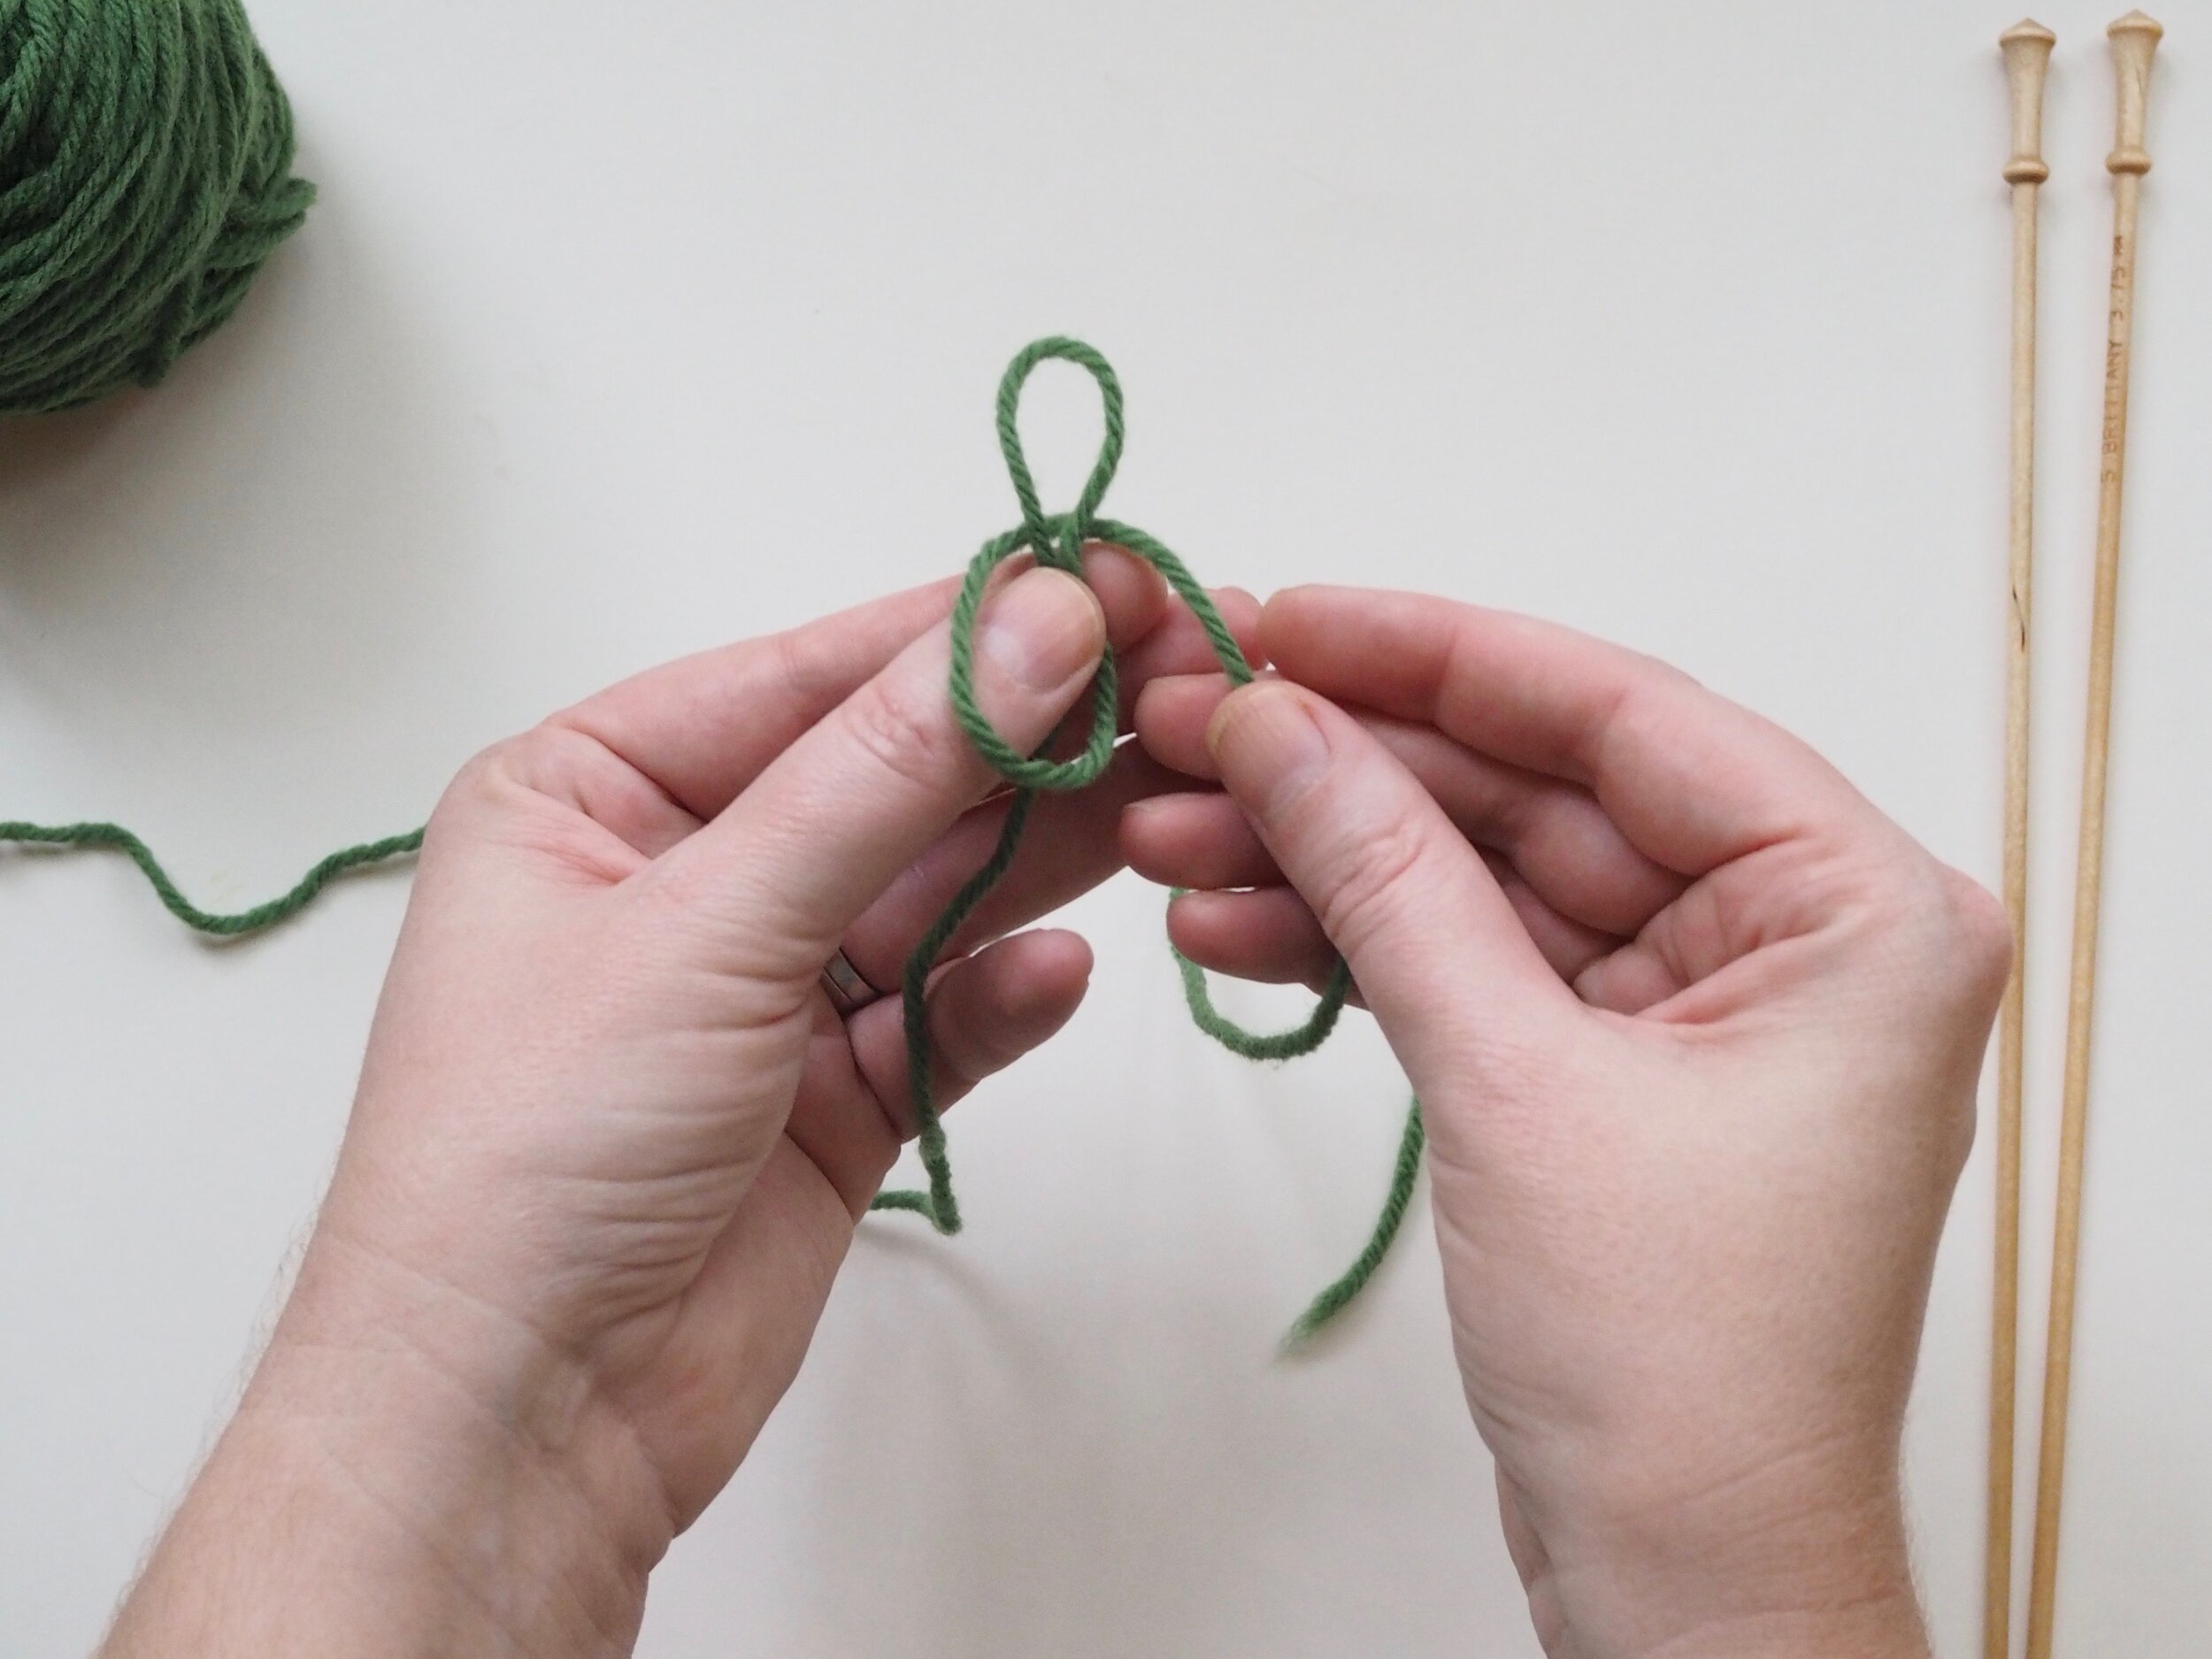

(a) Fold the yarn in half, forming the top of a loop, so the tail (the half of the loop that is not attached to the ball/skein of yarn) is the length you estimated in step one. (b) Wrap the tail around the folded yarn, and then (c) pull the tail through the loop you just made, forming a slip knot. (d) Pull on the tail, until the loop closes to a size slightly larger than your needle.
3. Insert your Needle into the Slip Knot
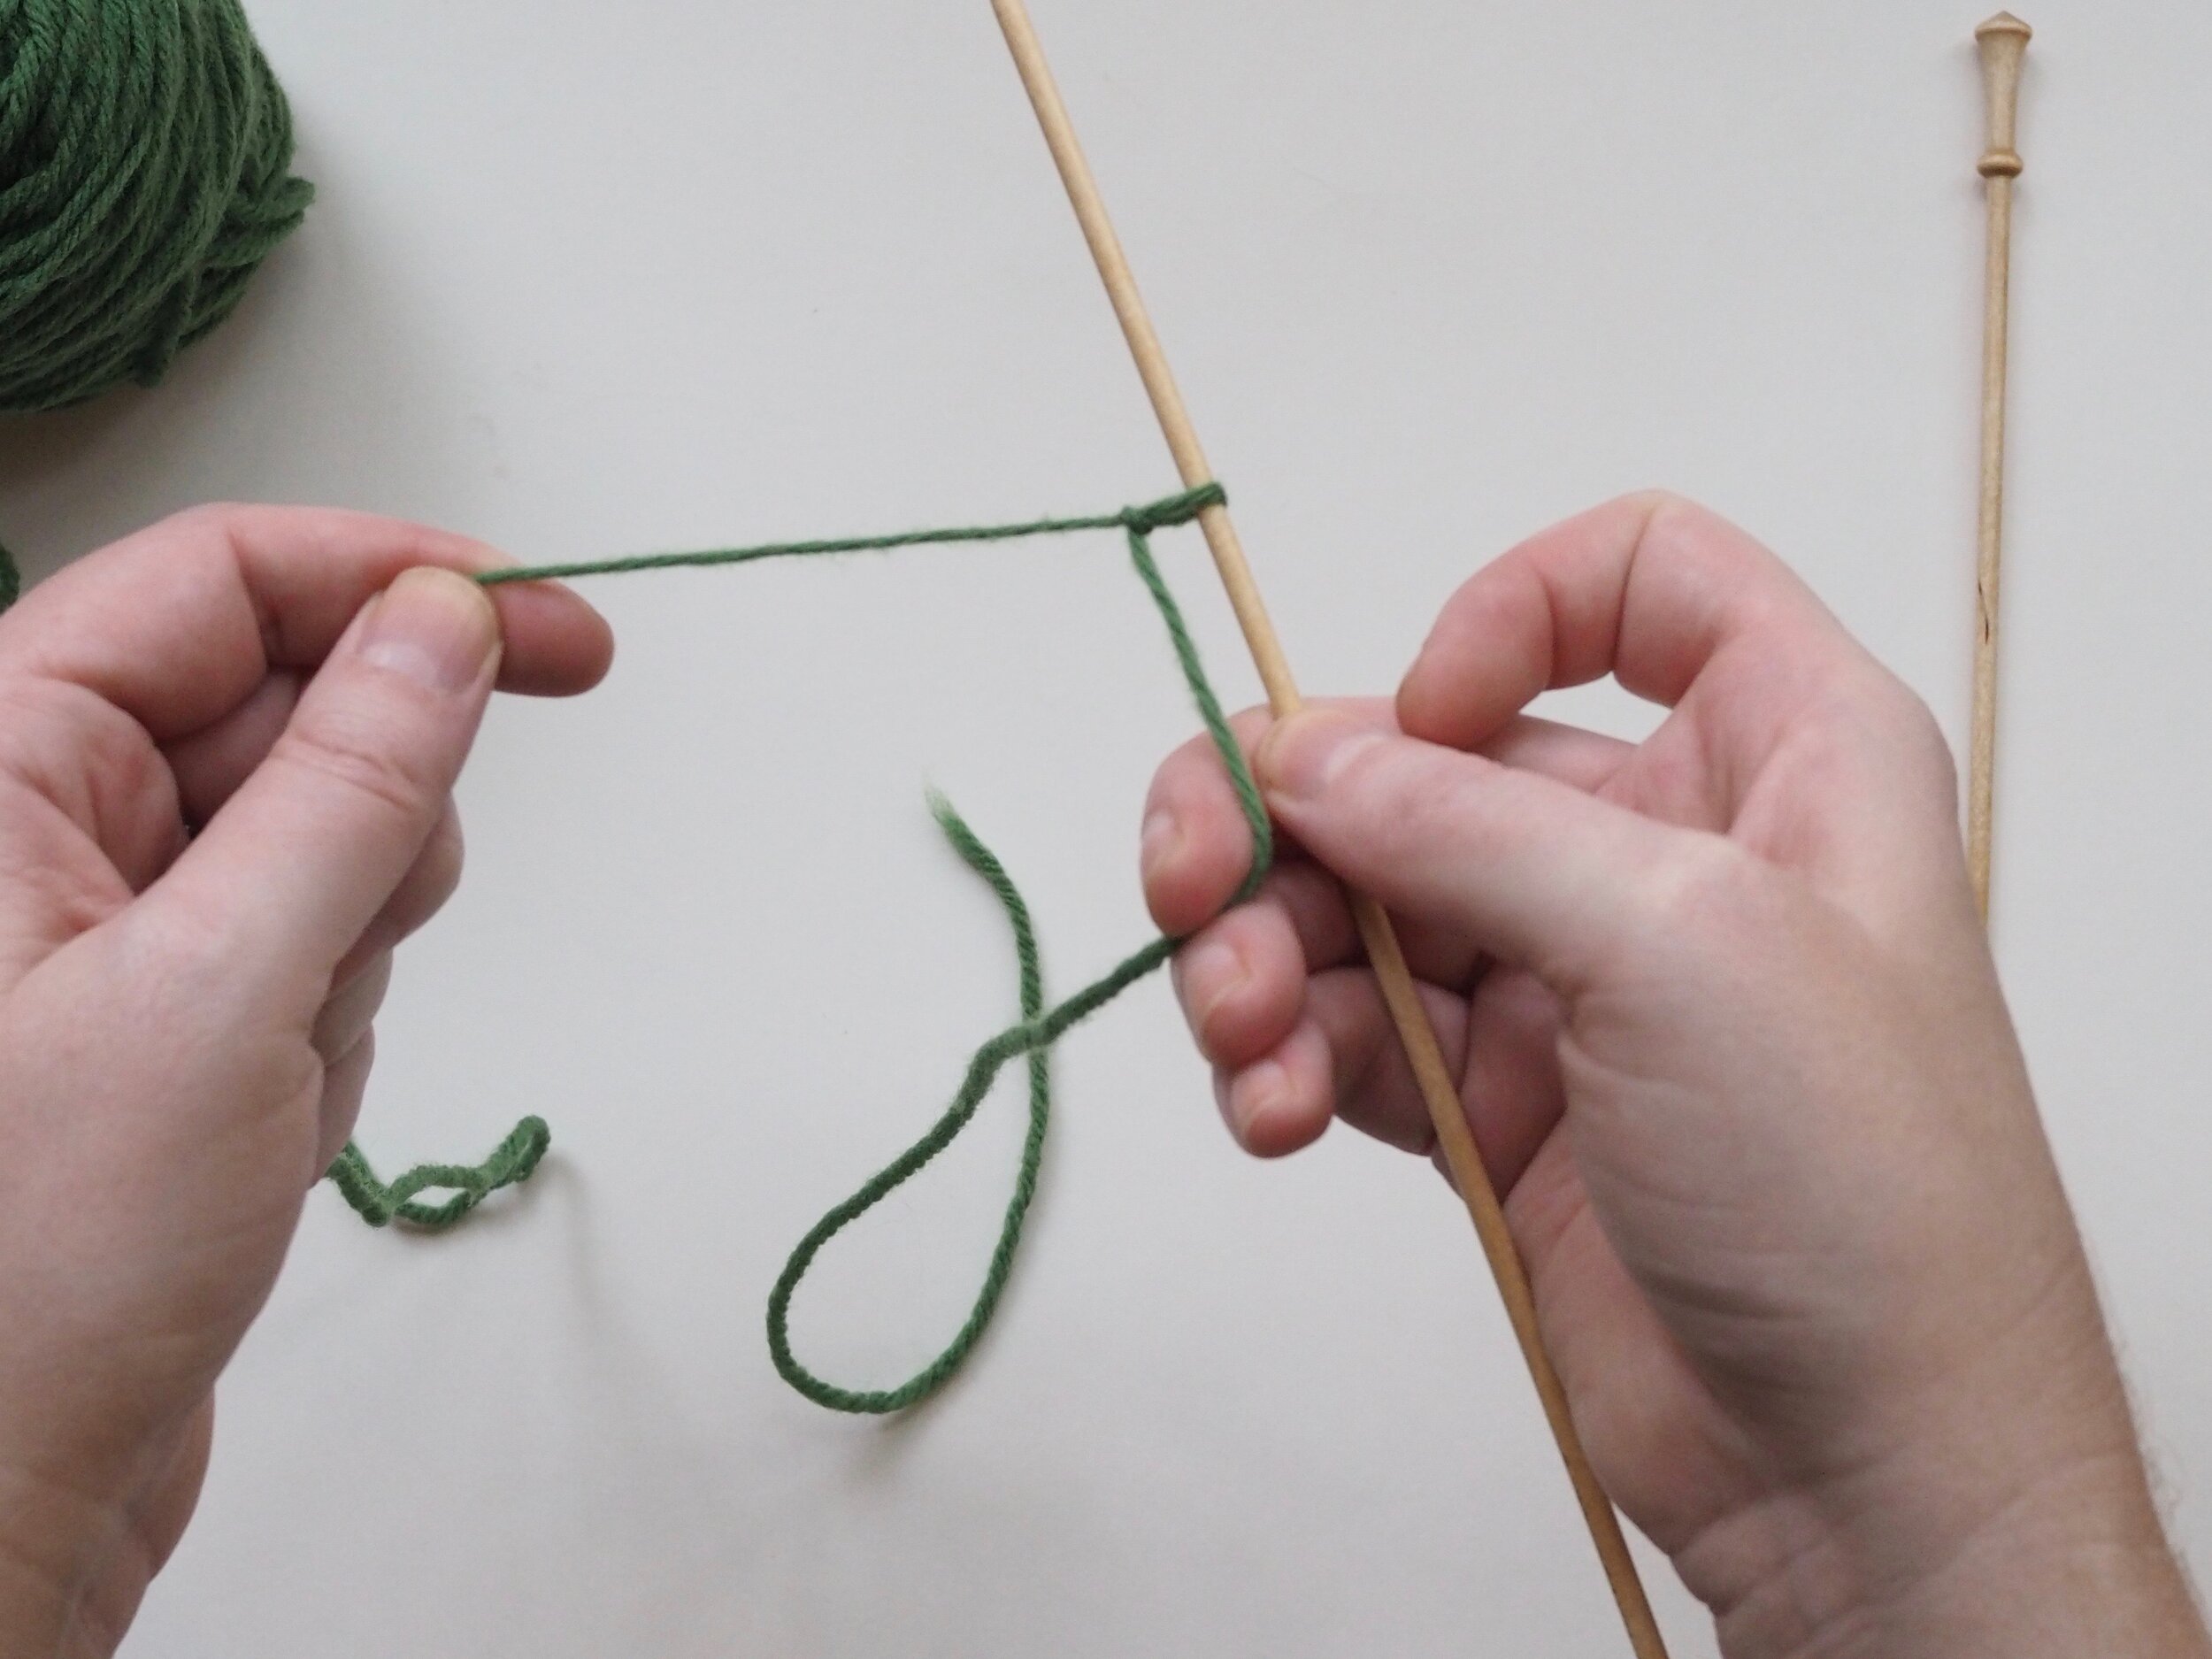
(a) Insert the tip of your needle into the slip knot and (b) pull until the loop is snug, but not tight.
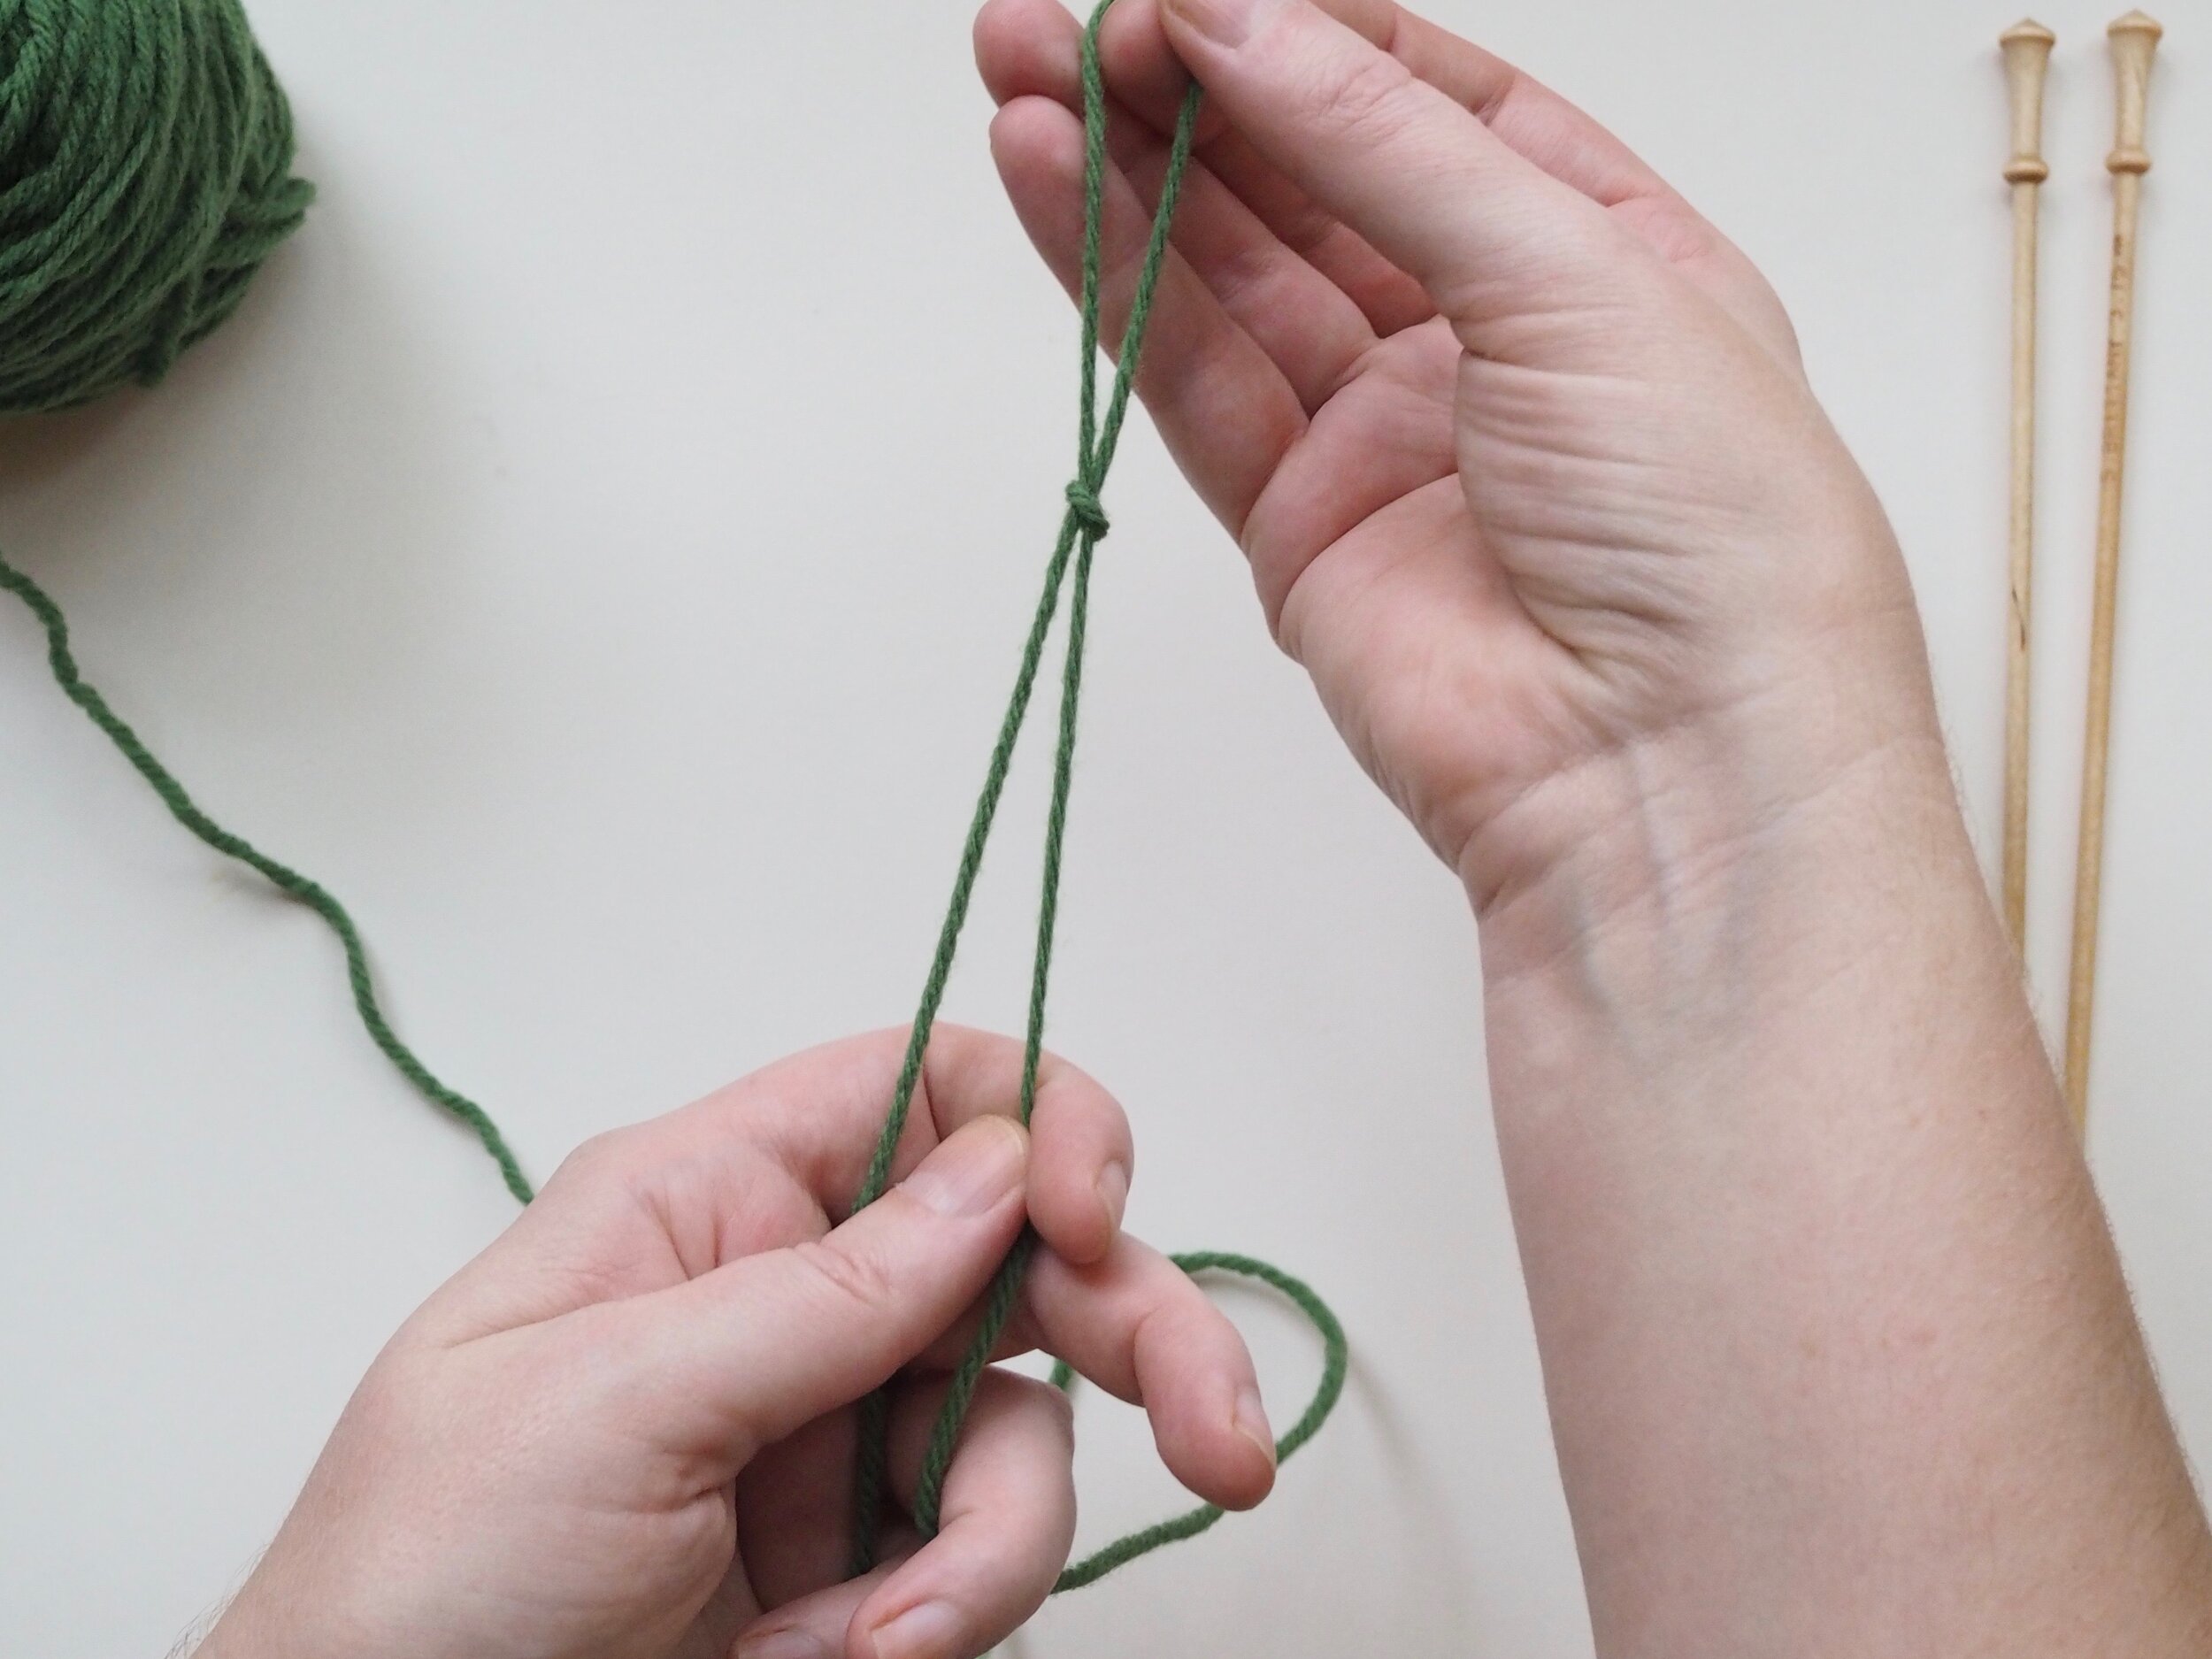
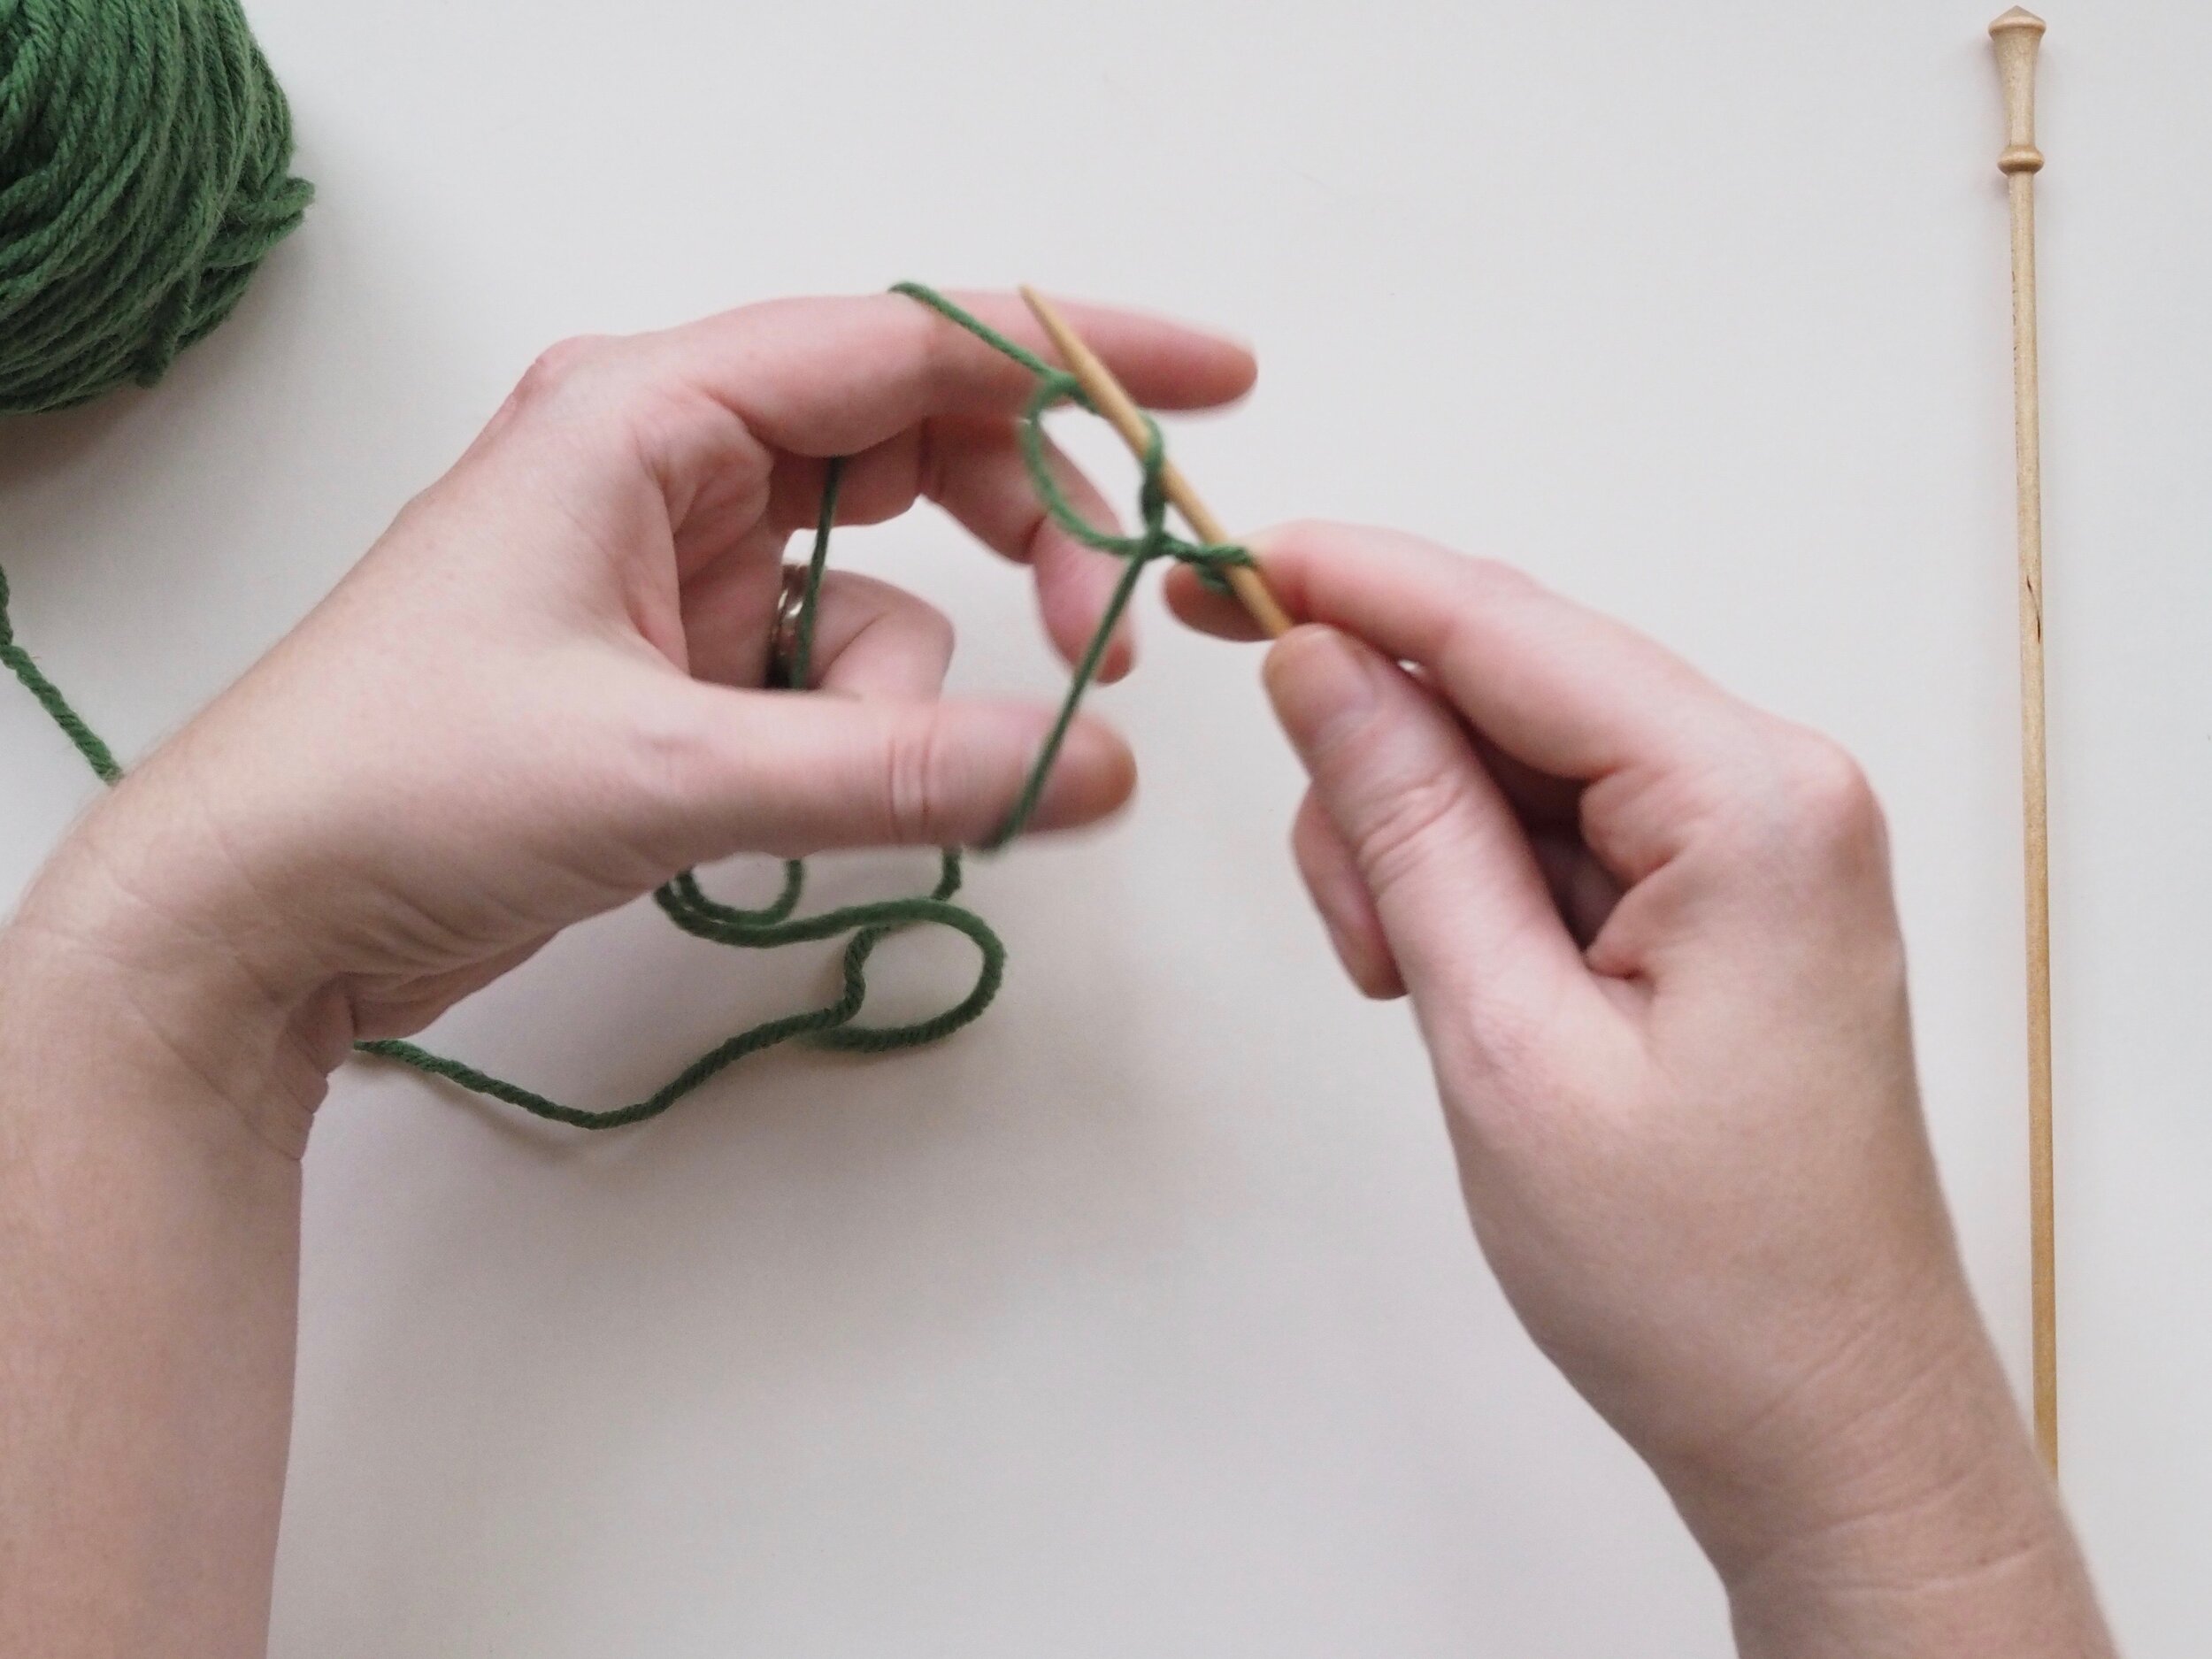
4. Tension Yarn in Your Left Hand
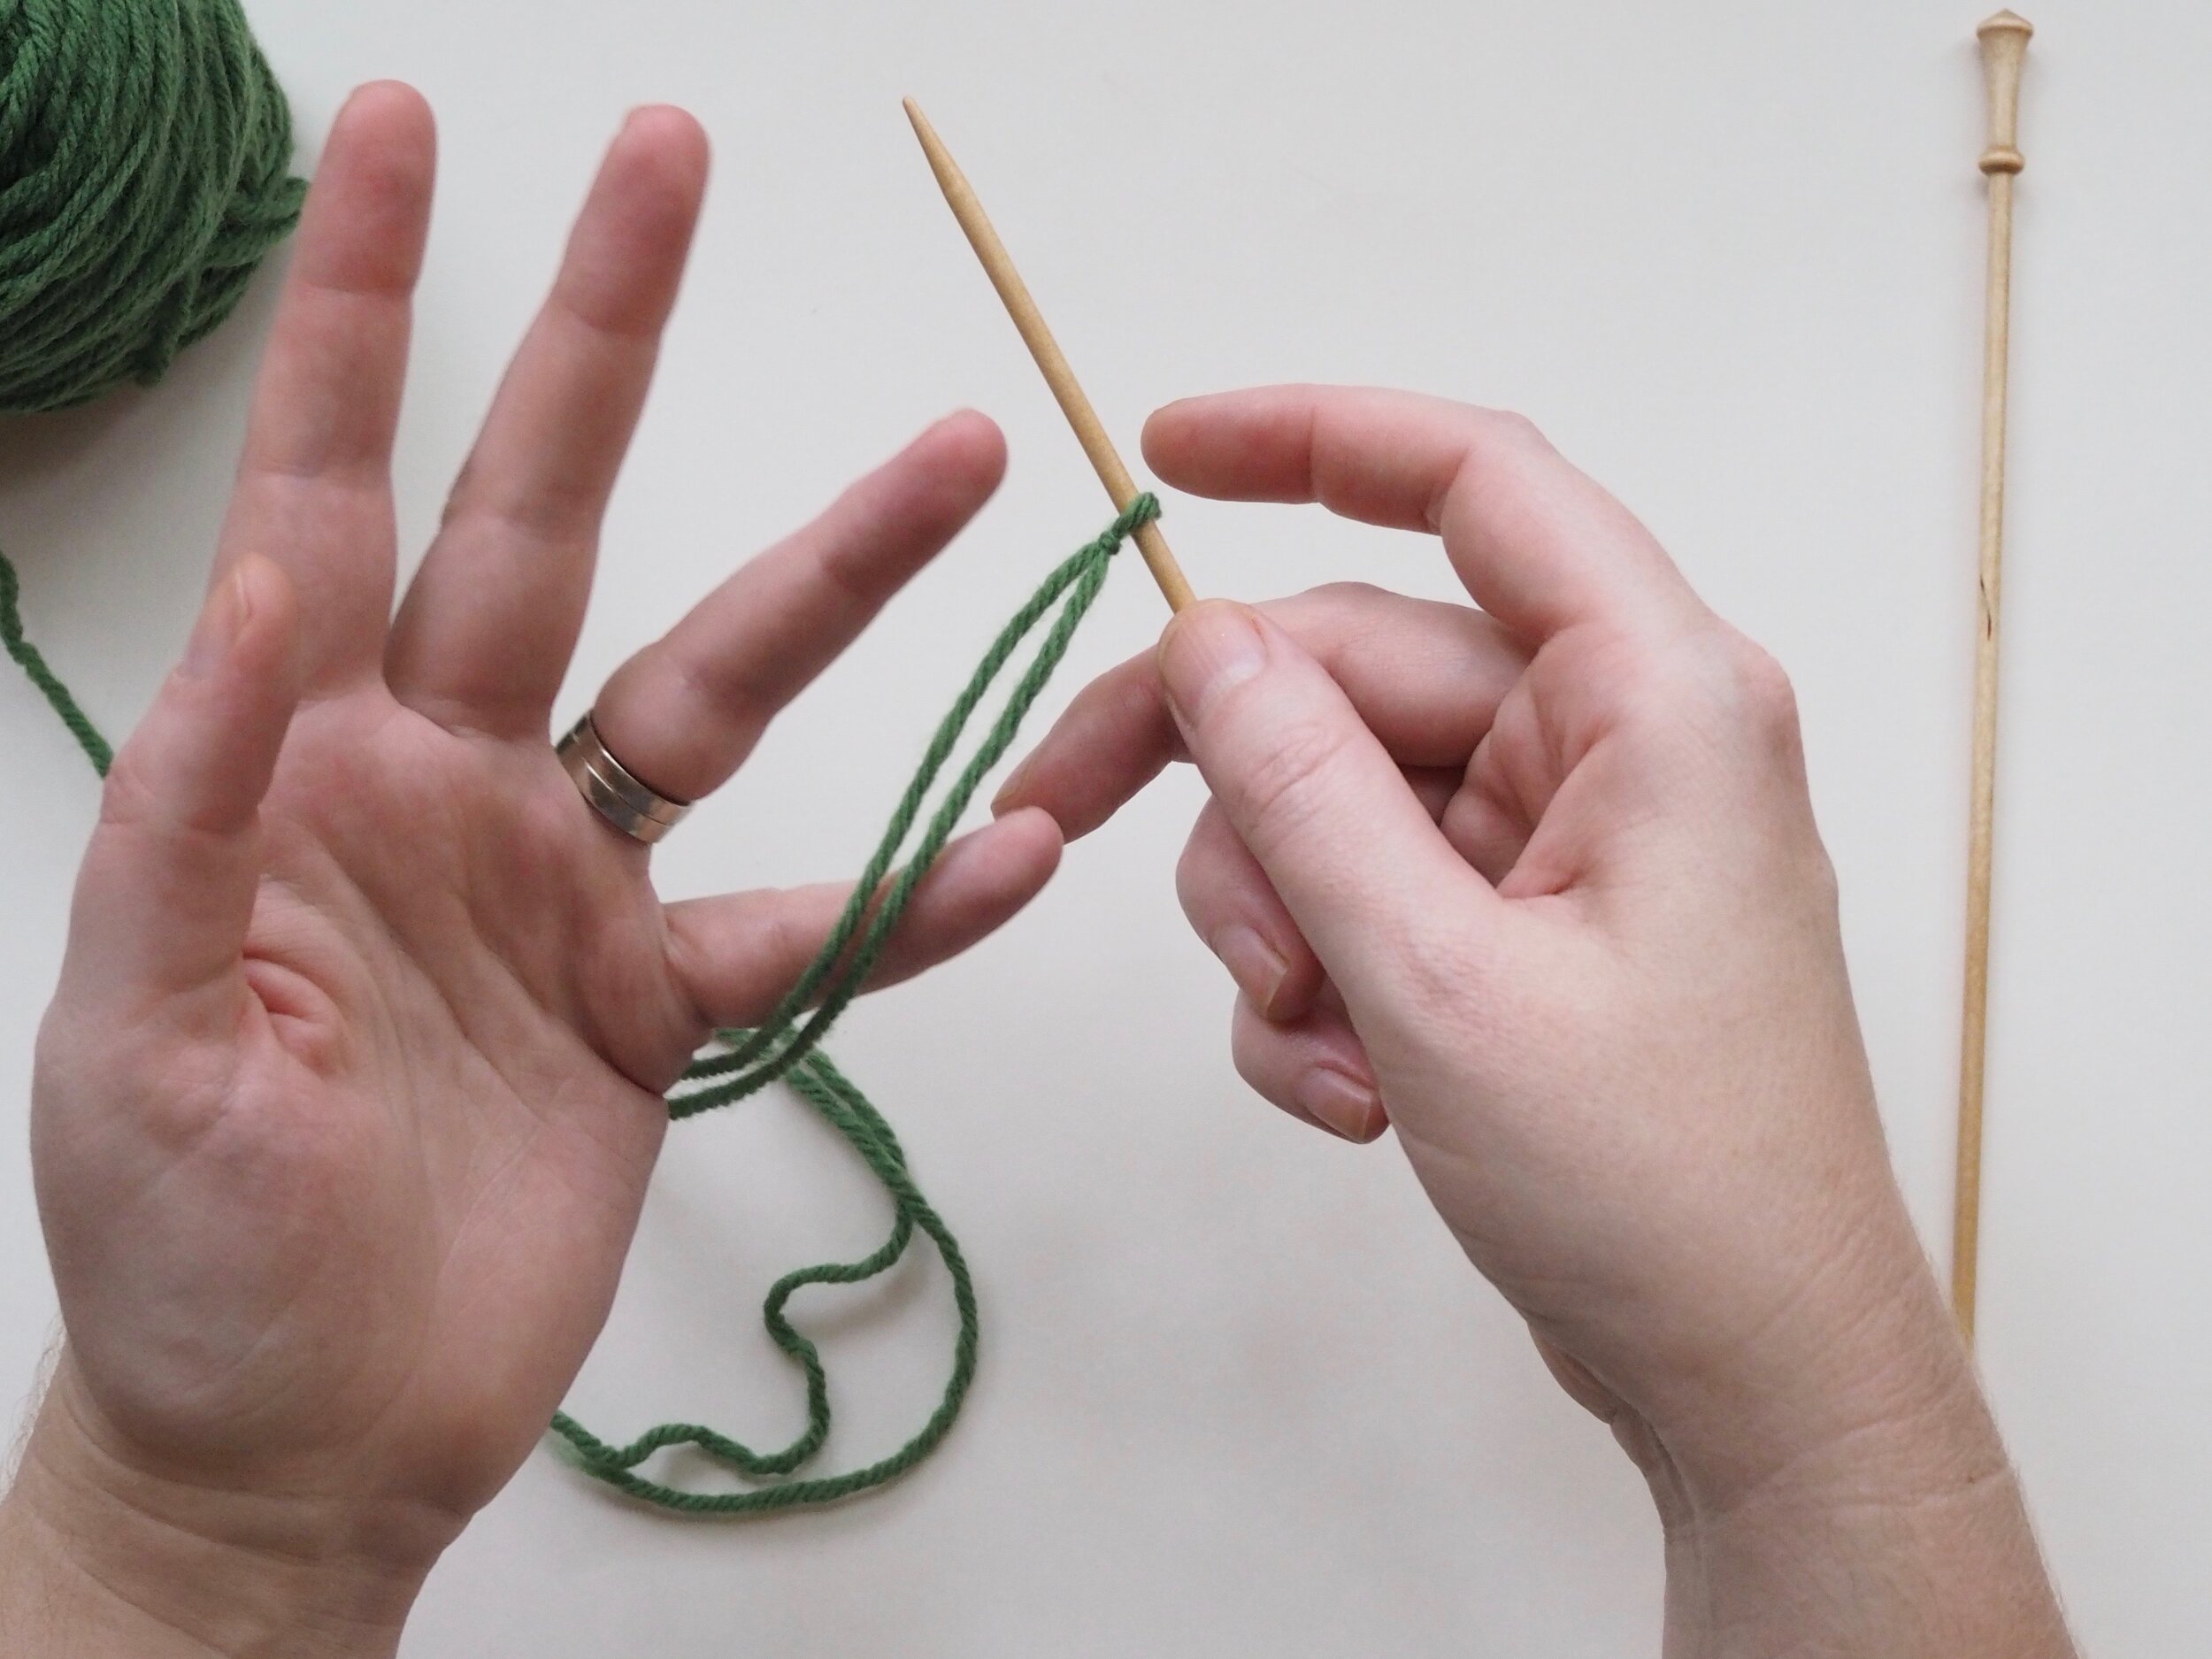
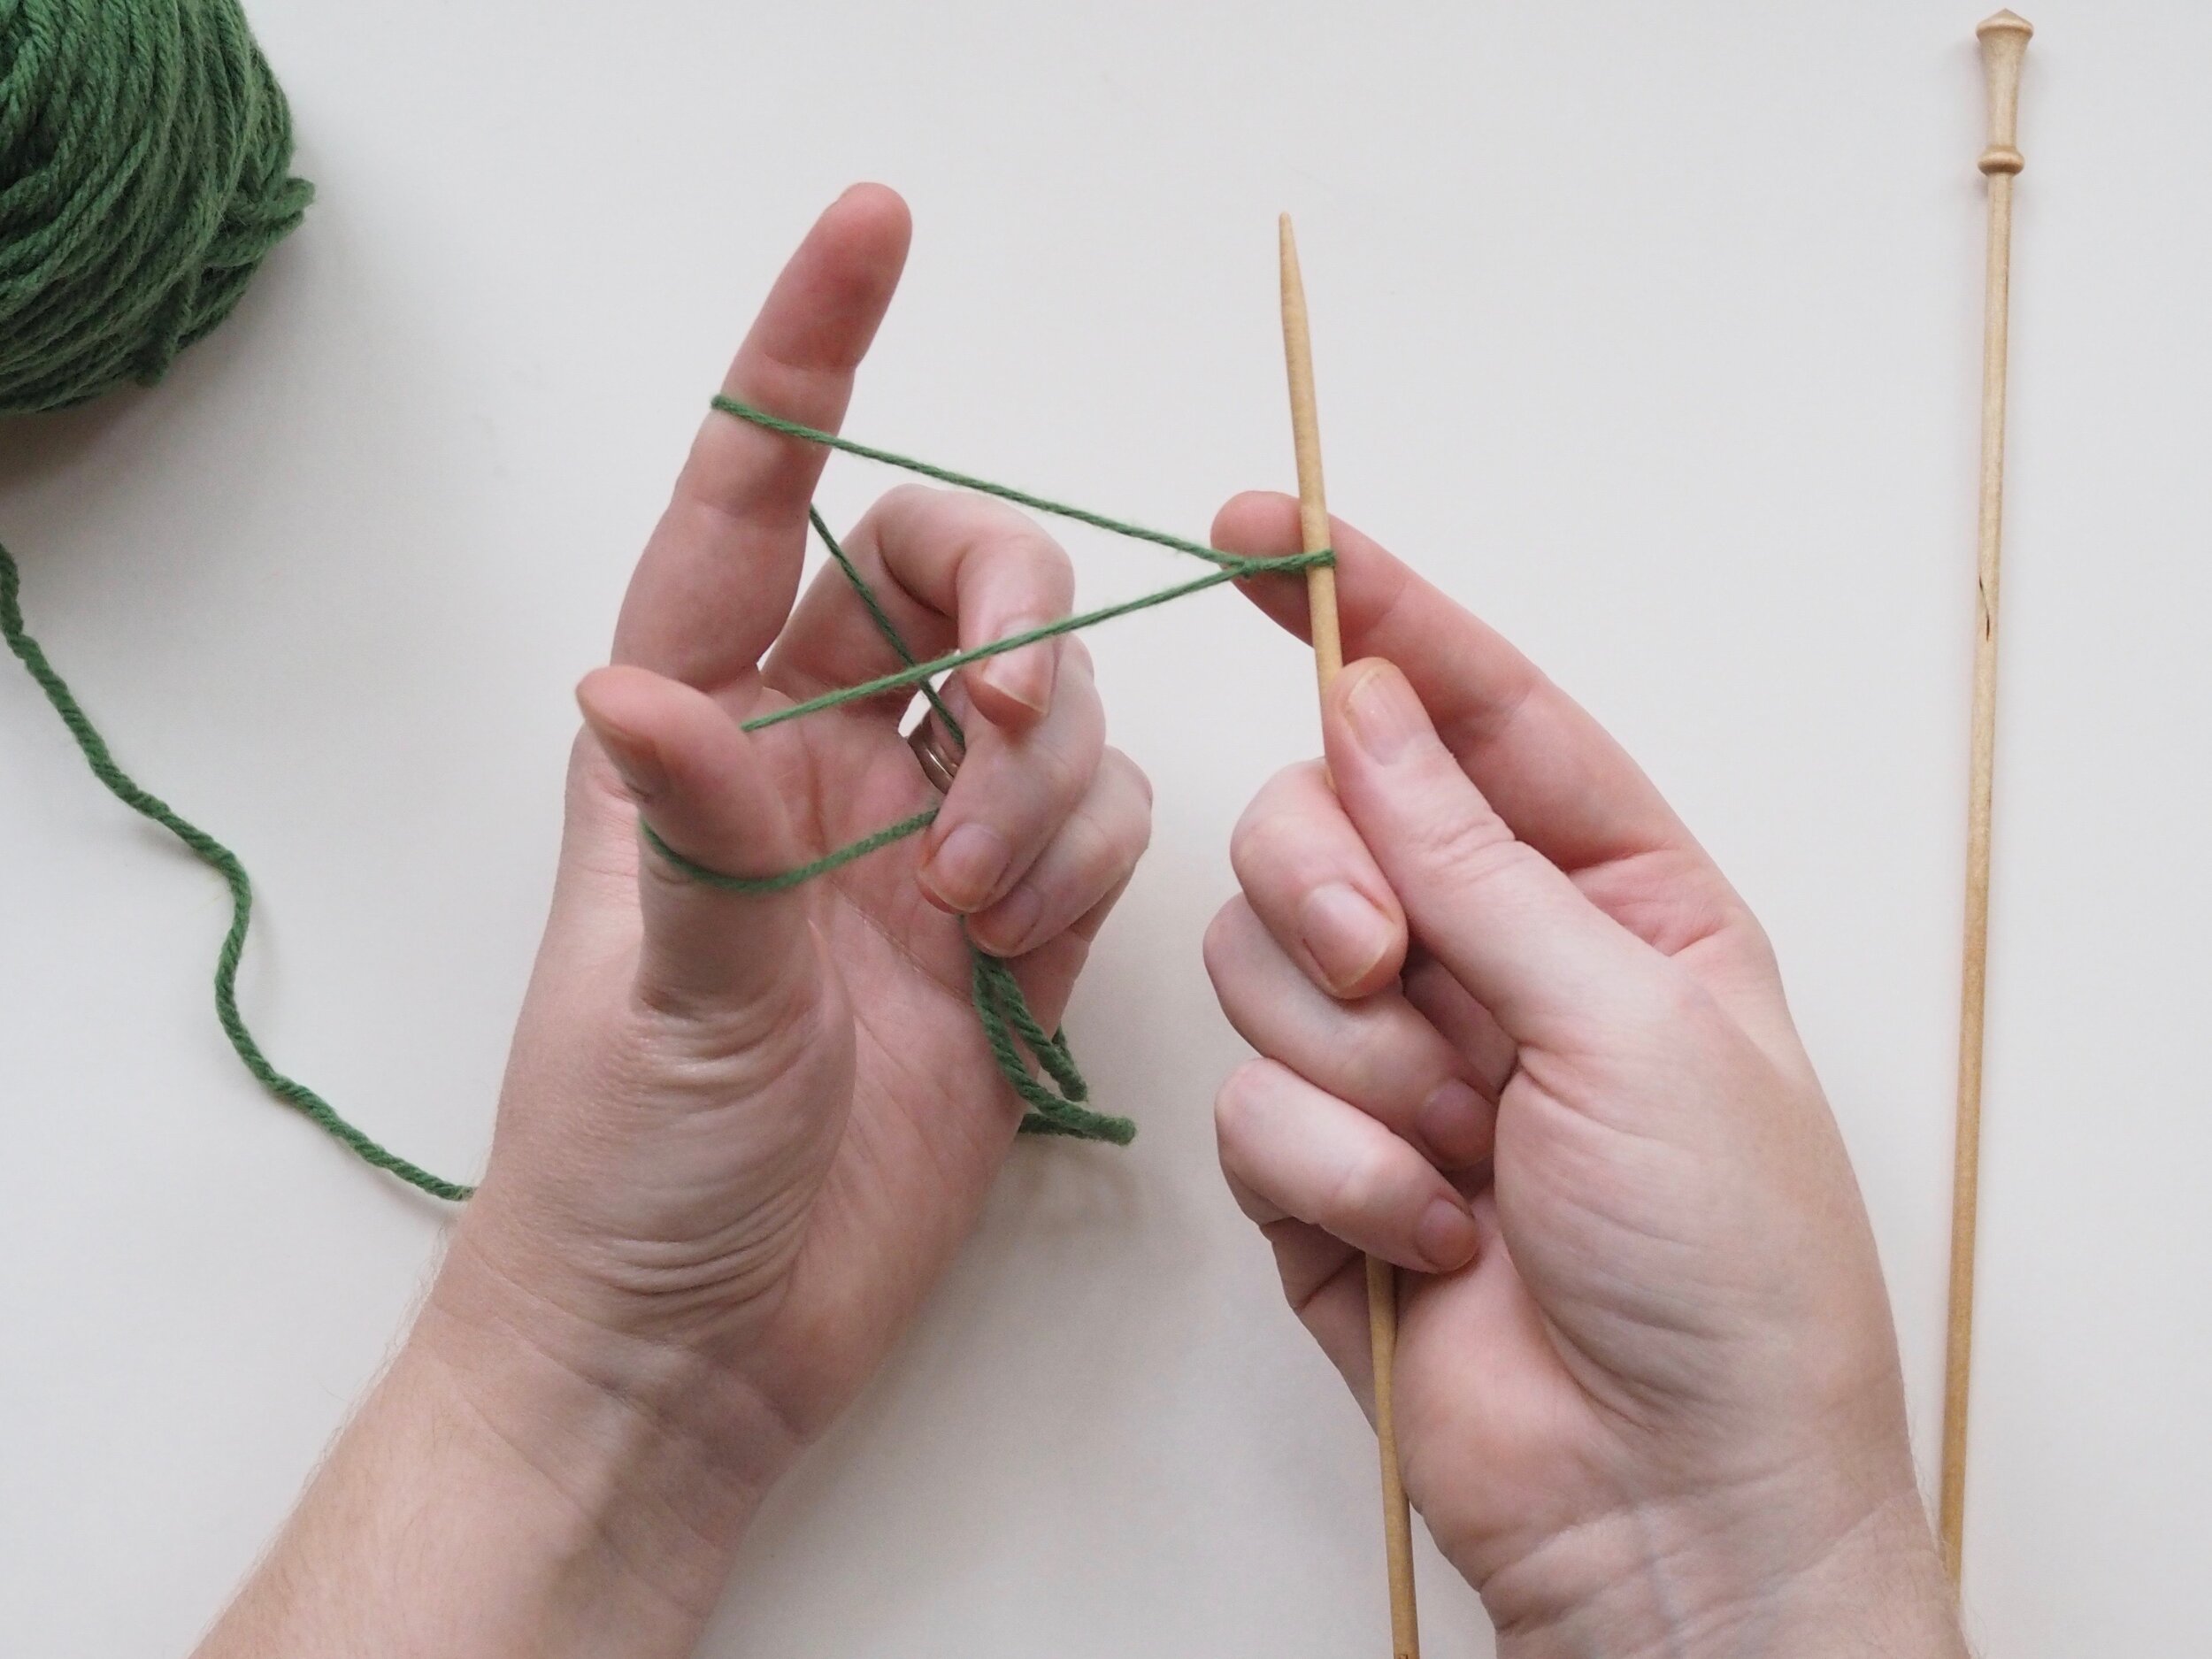
(a) With the needle above your left hand, pinch the tail and the yarn attached to the ball (the working yarn) with the pinkie/ring/middle fingers of your left hand so they are lying parallel to one another, with the tail on the right side. (b) Slide your thumb and index finger in between the two strands (above your middle finger and below the needle), forming a diamond shape. The working yarn should be behind your index finger and the tail should be behind your thumb. (c) Pull the needle down toward your palm, forming a loop around your thumb.
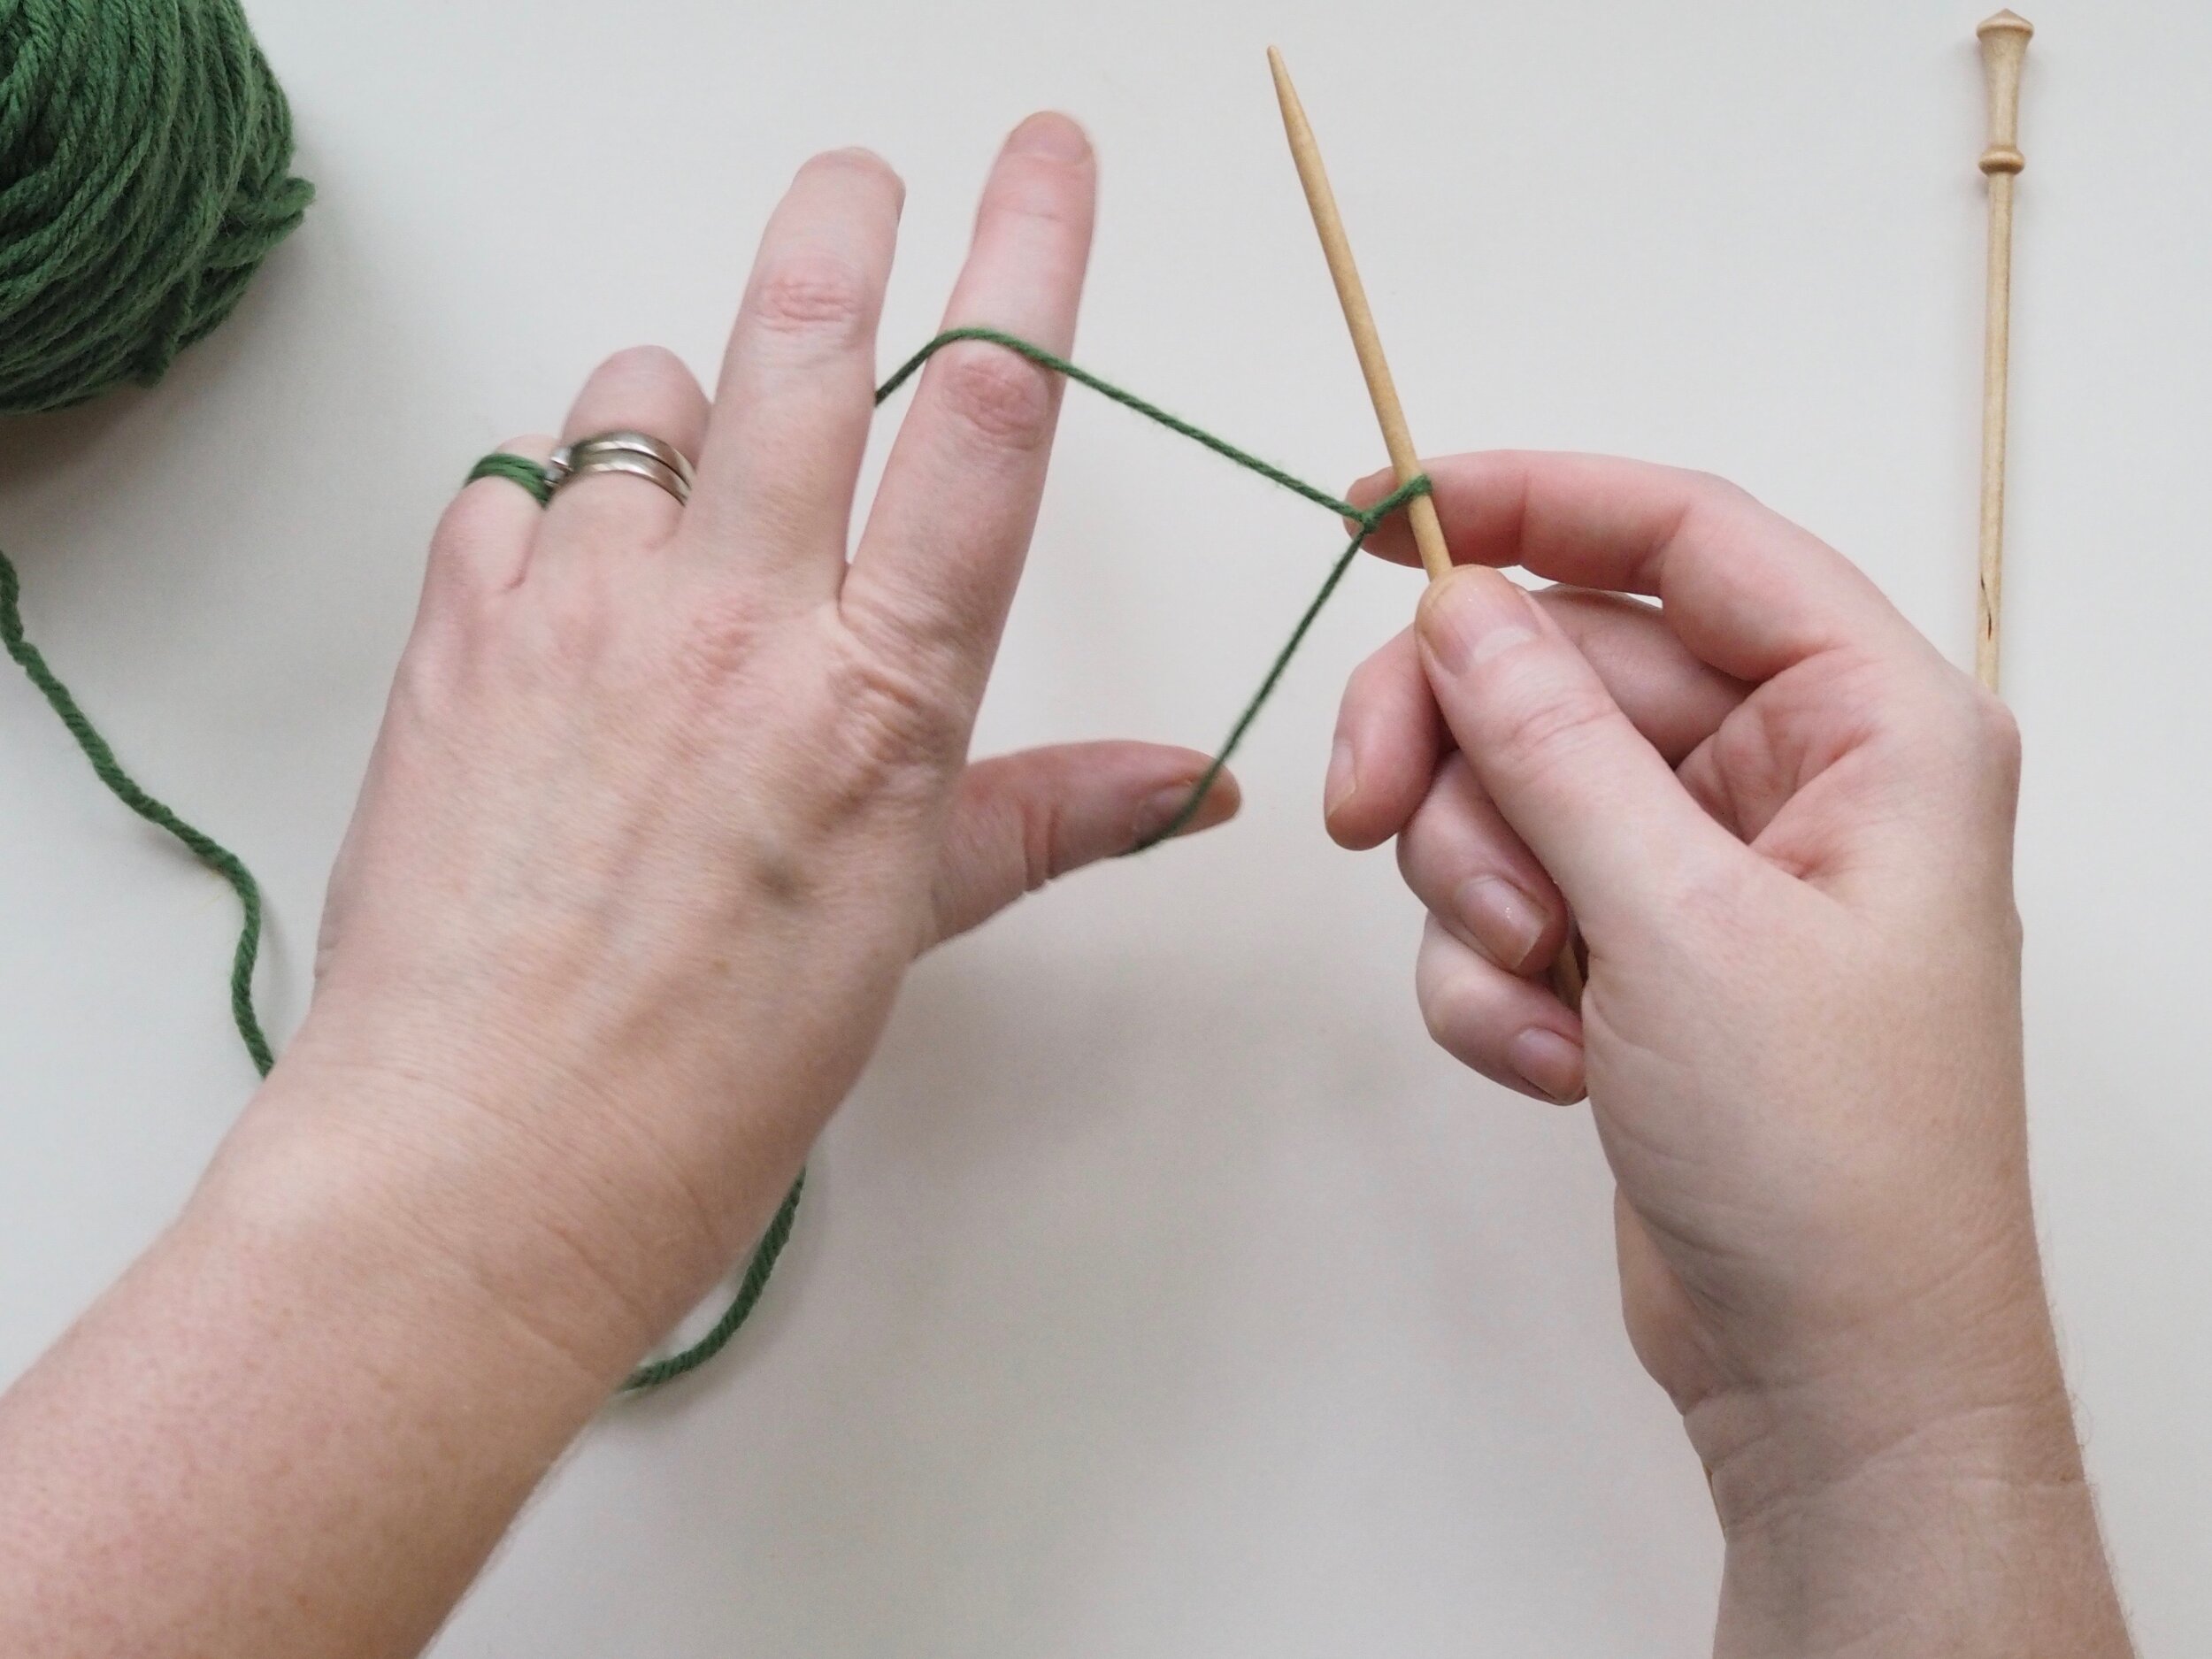
5. Cast on a Stitch
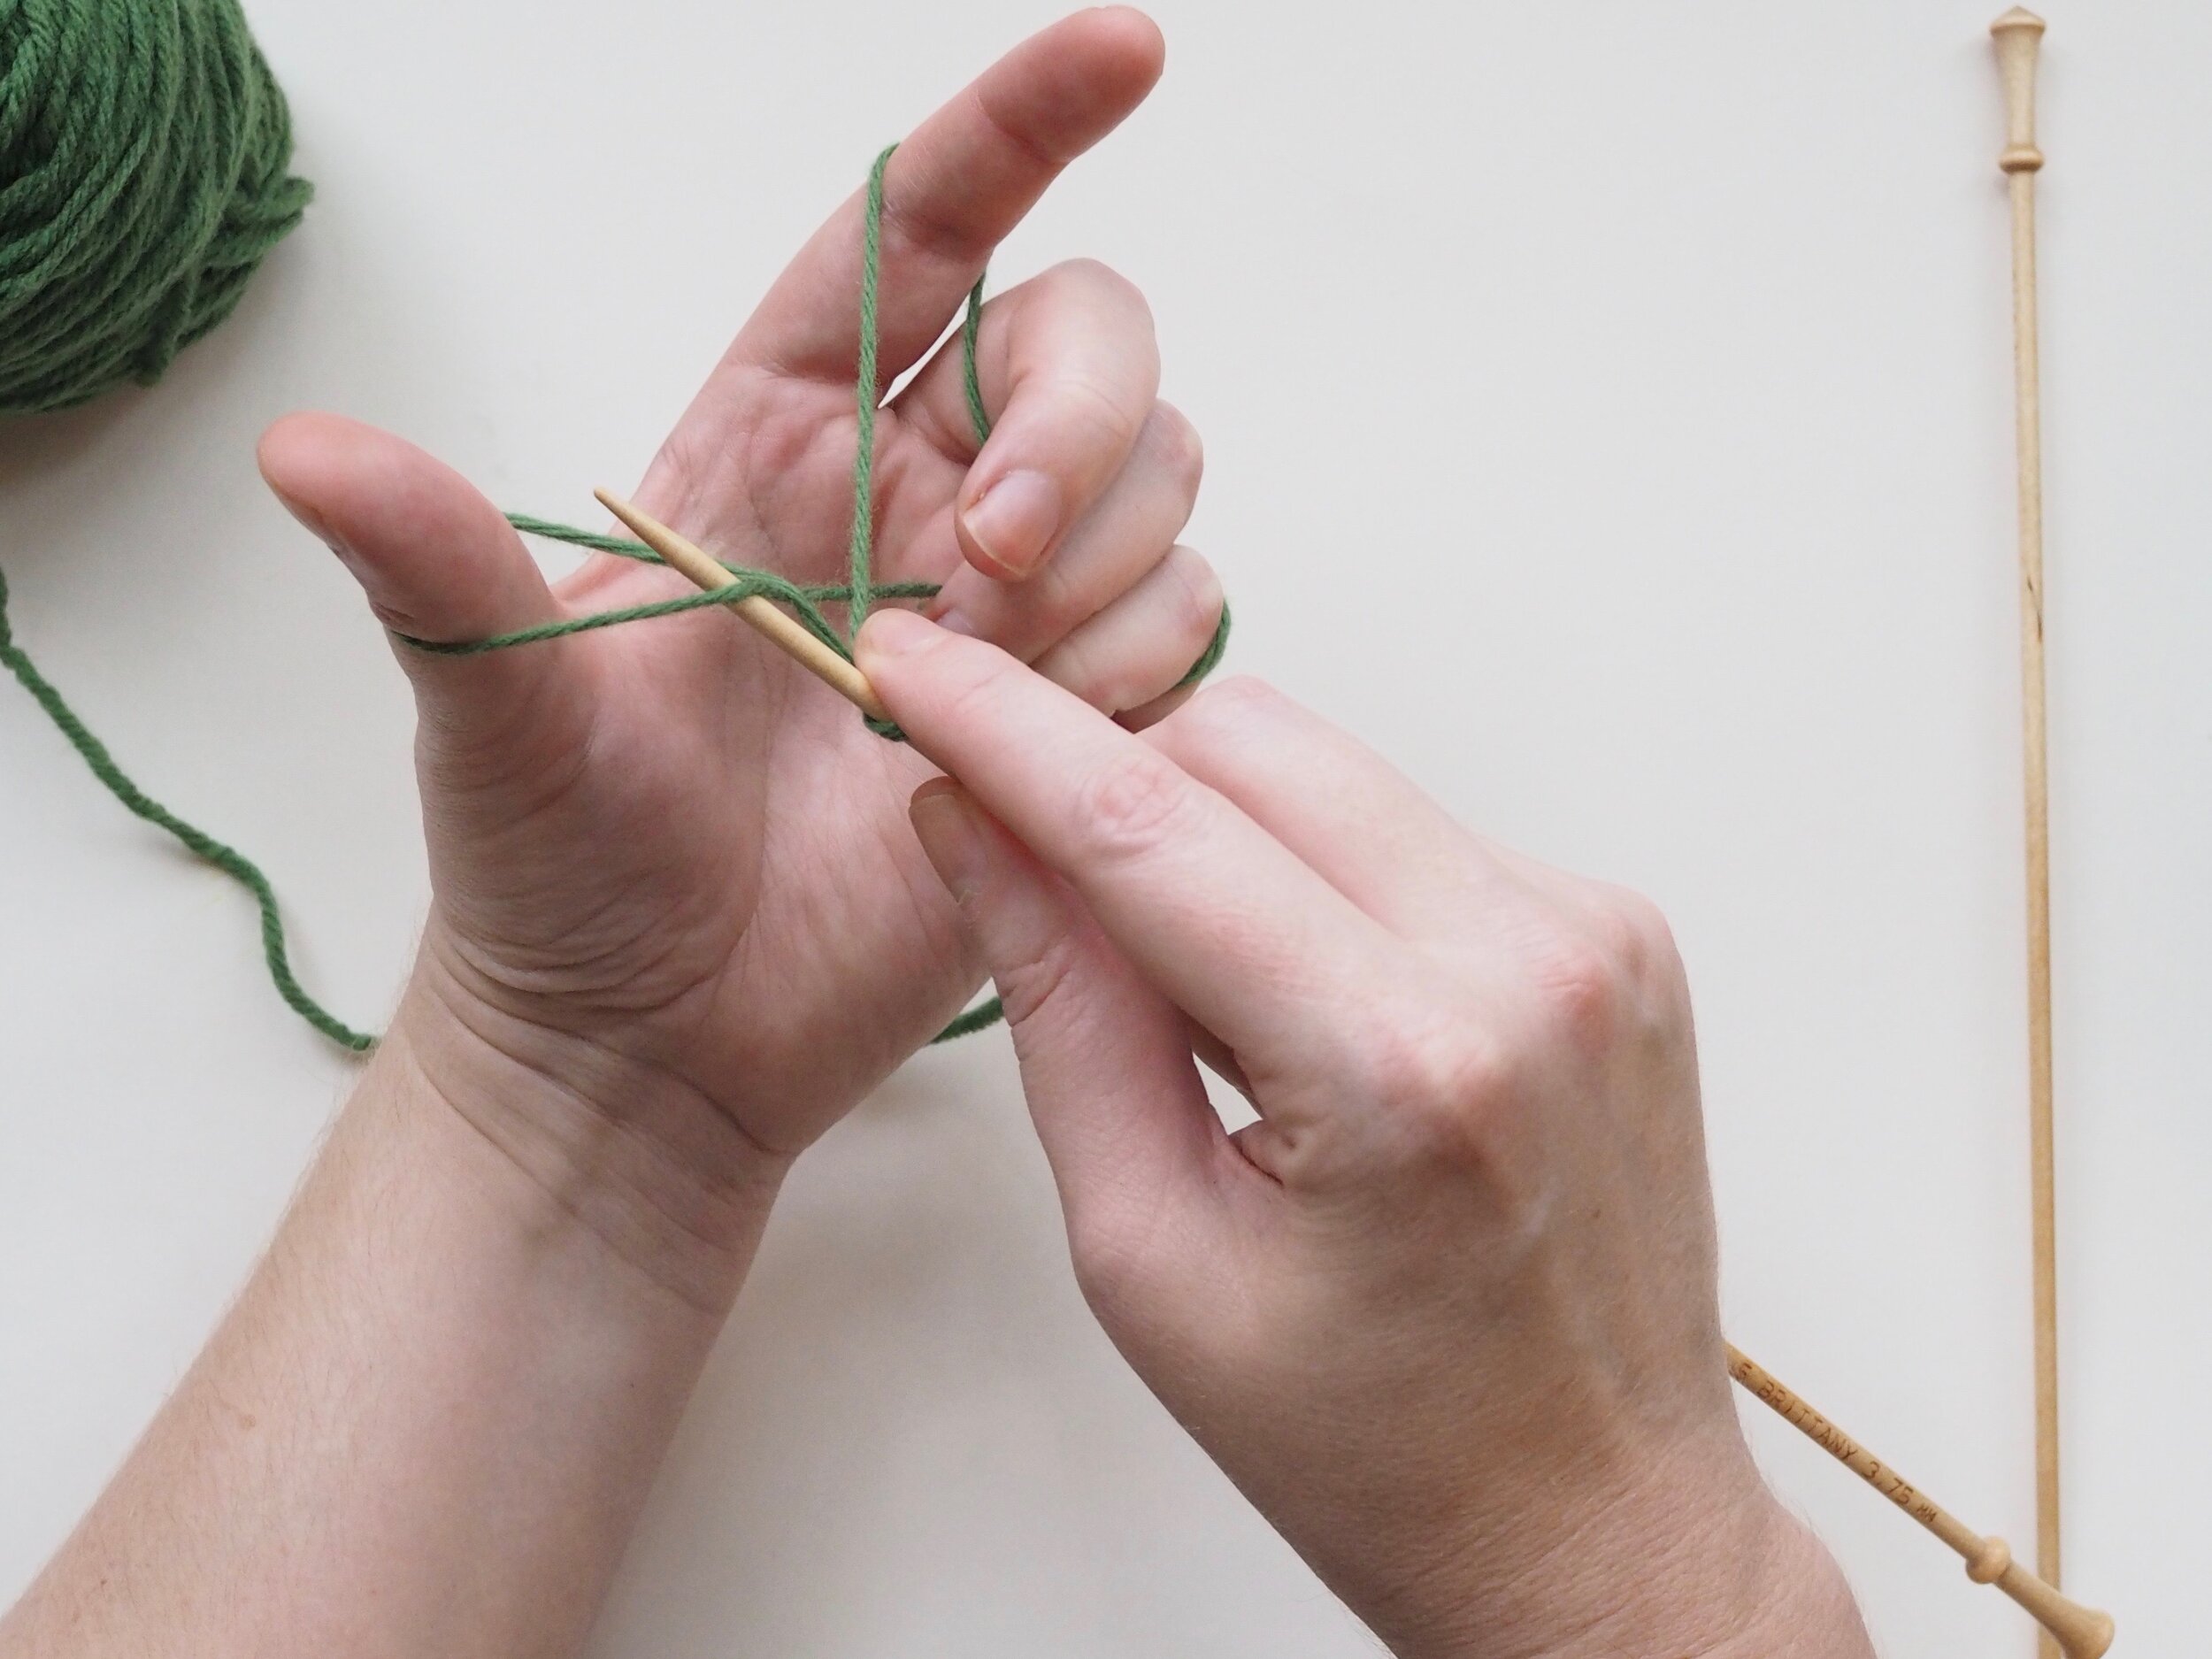
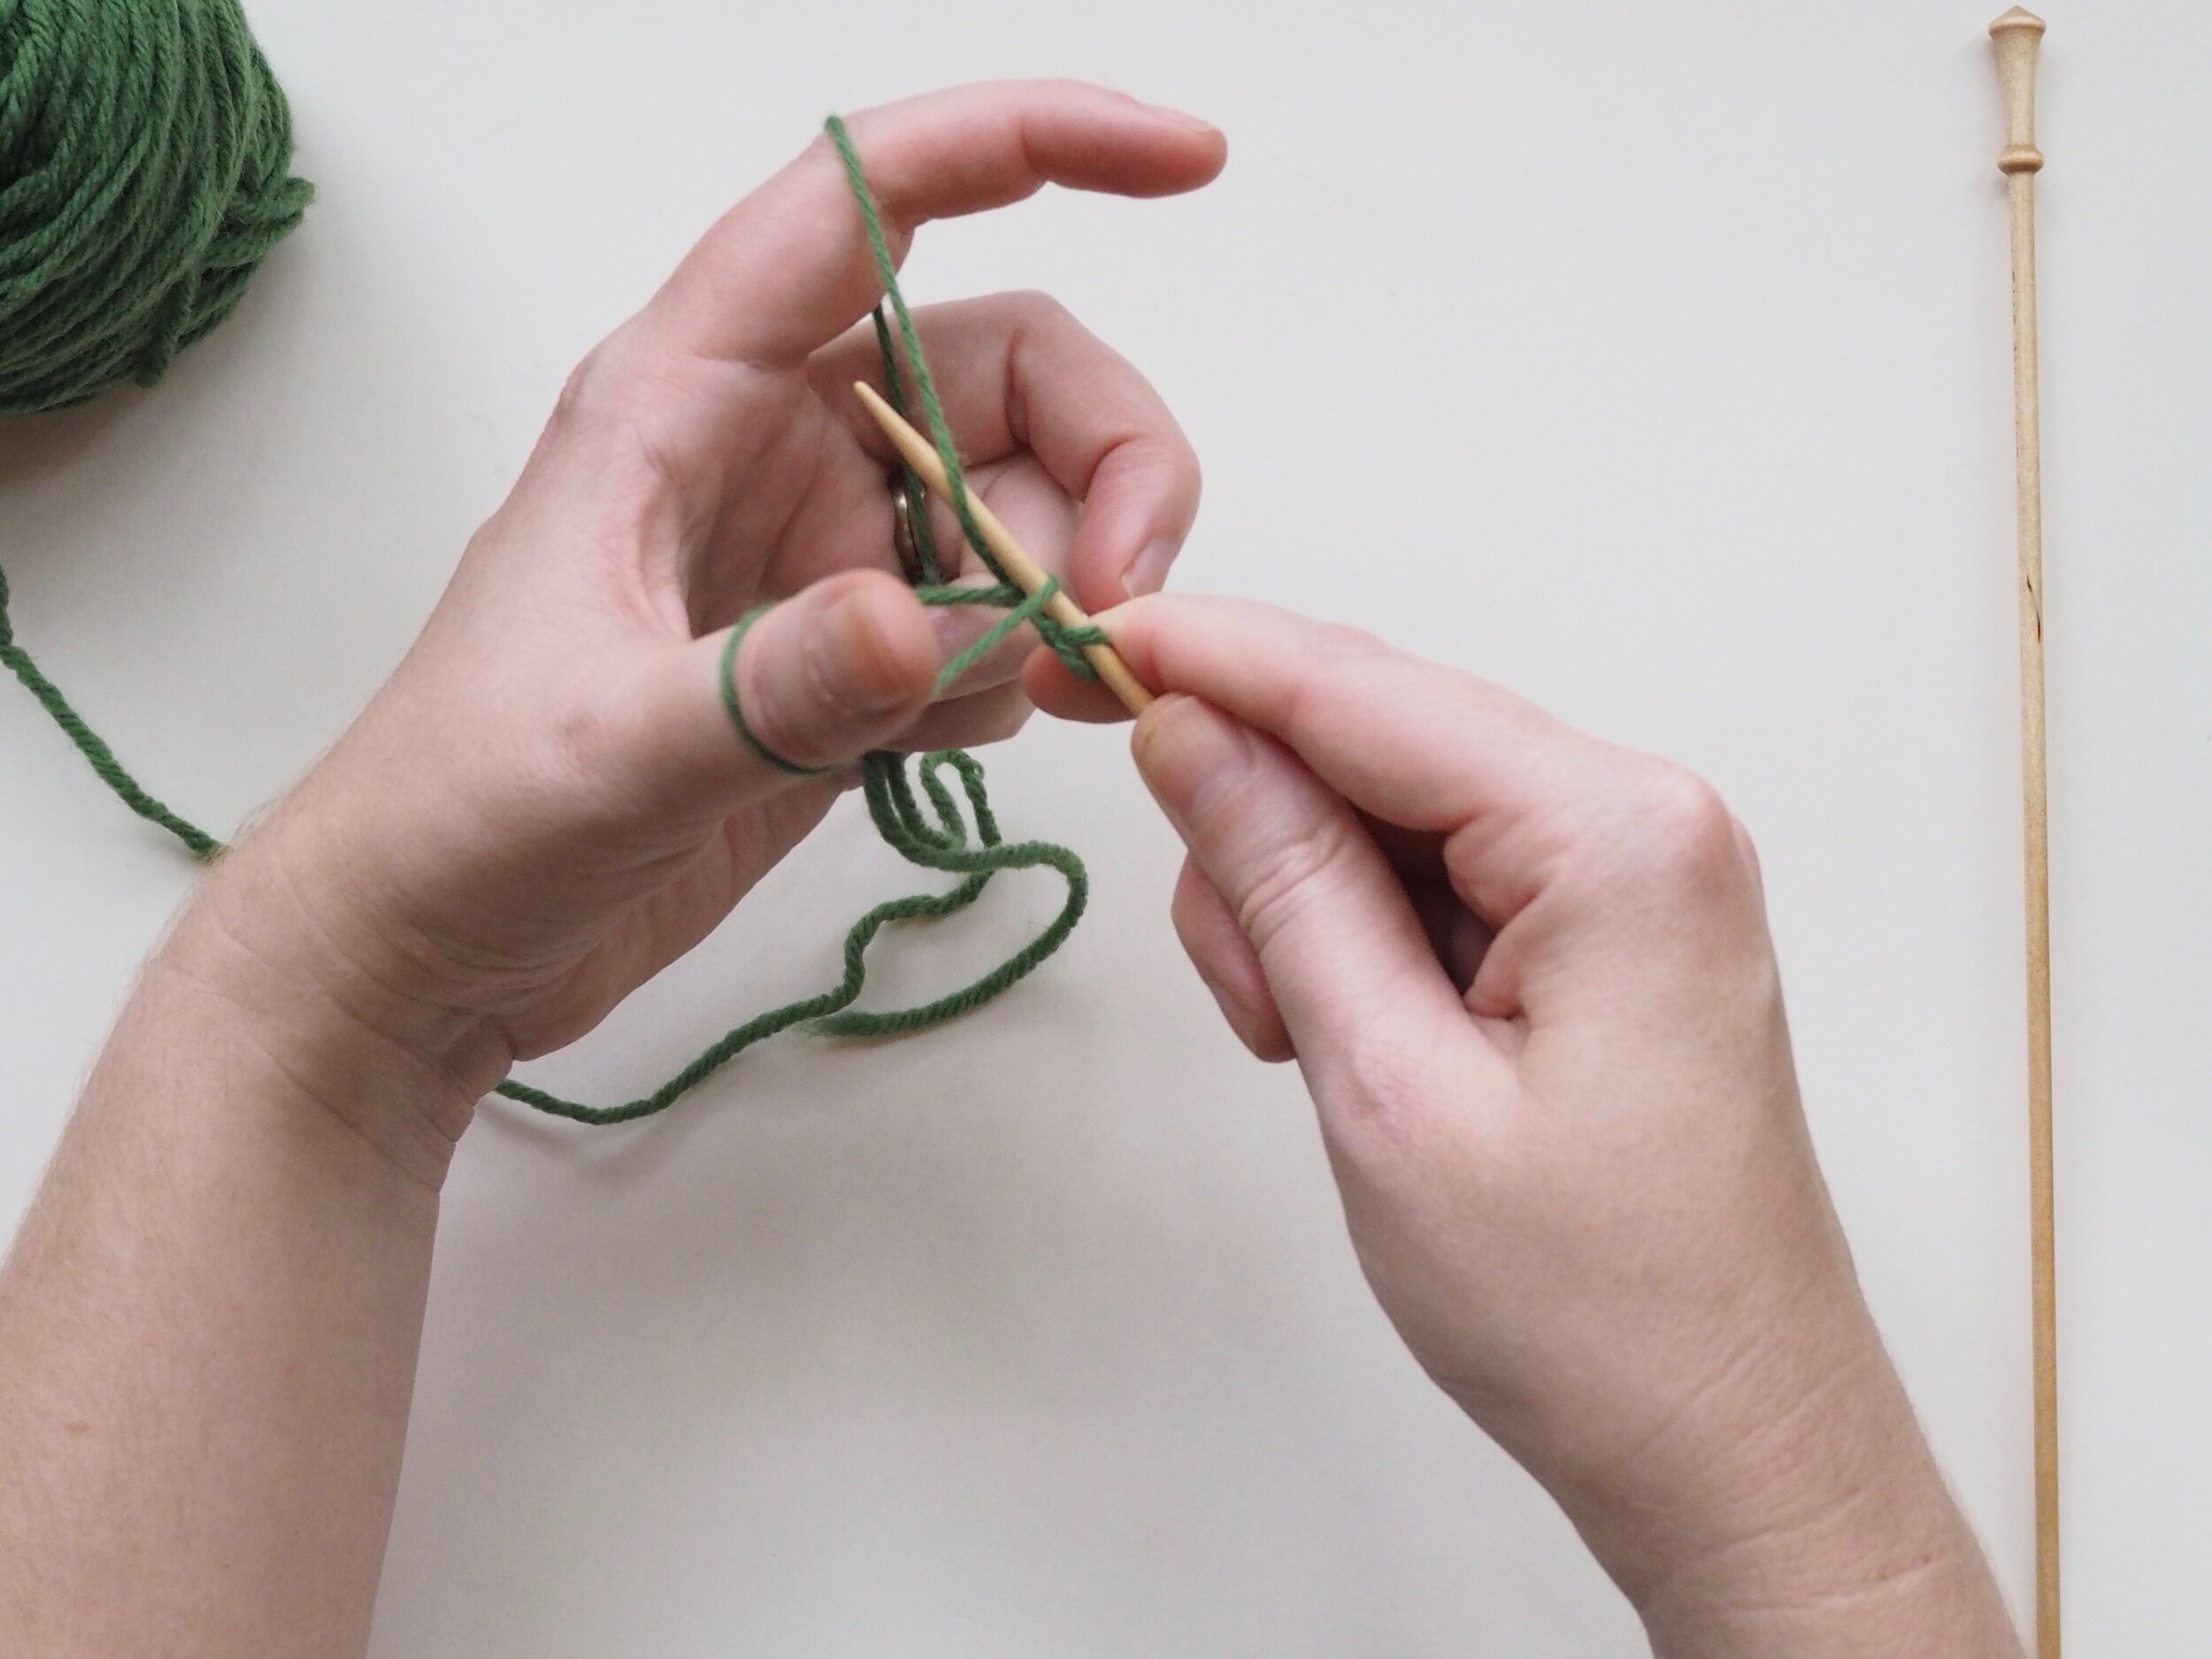
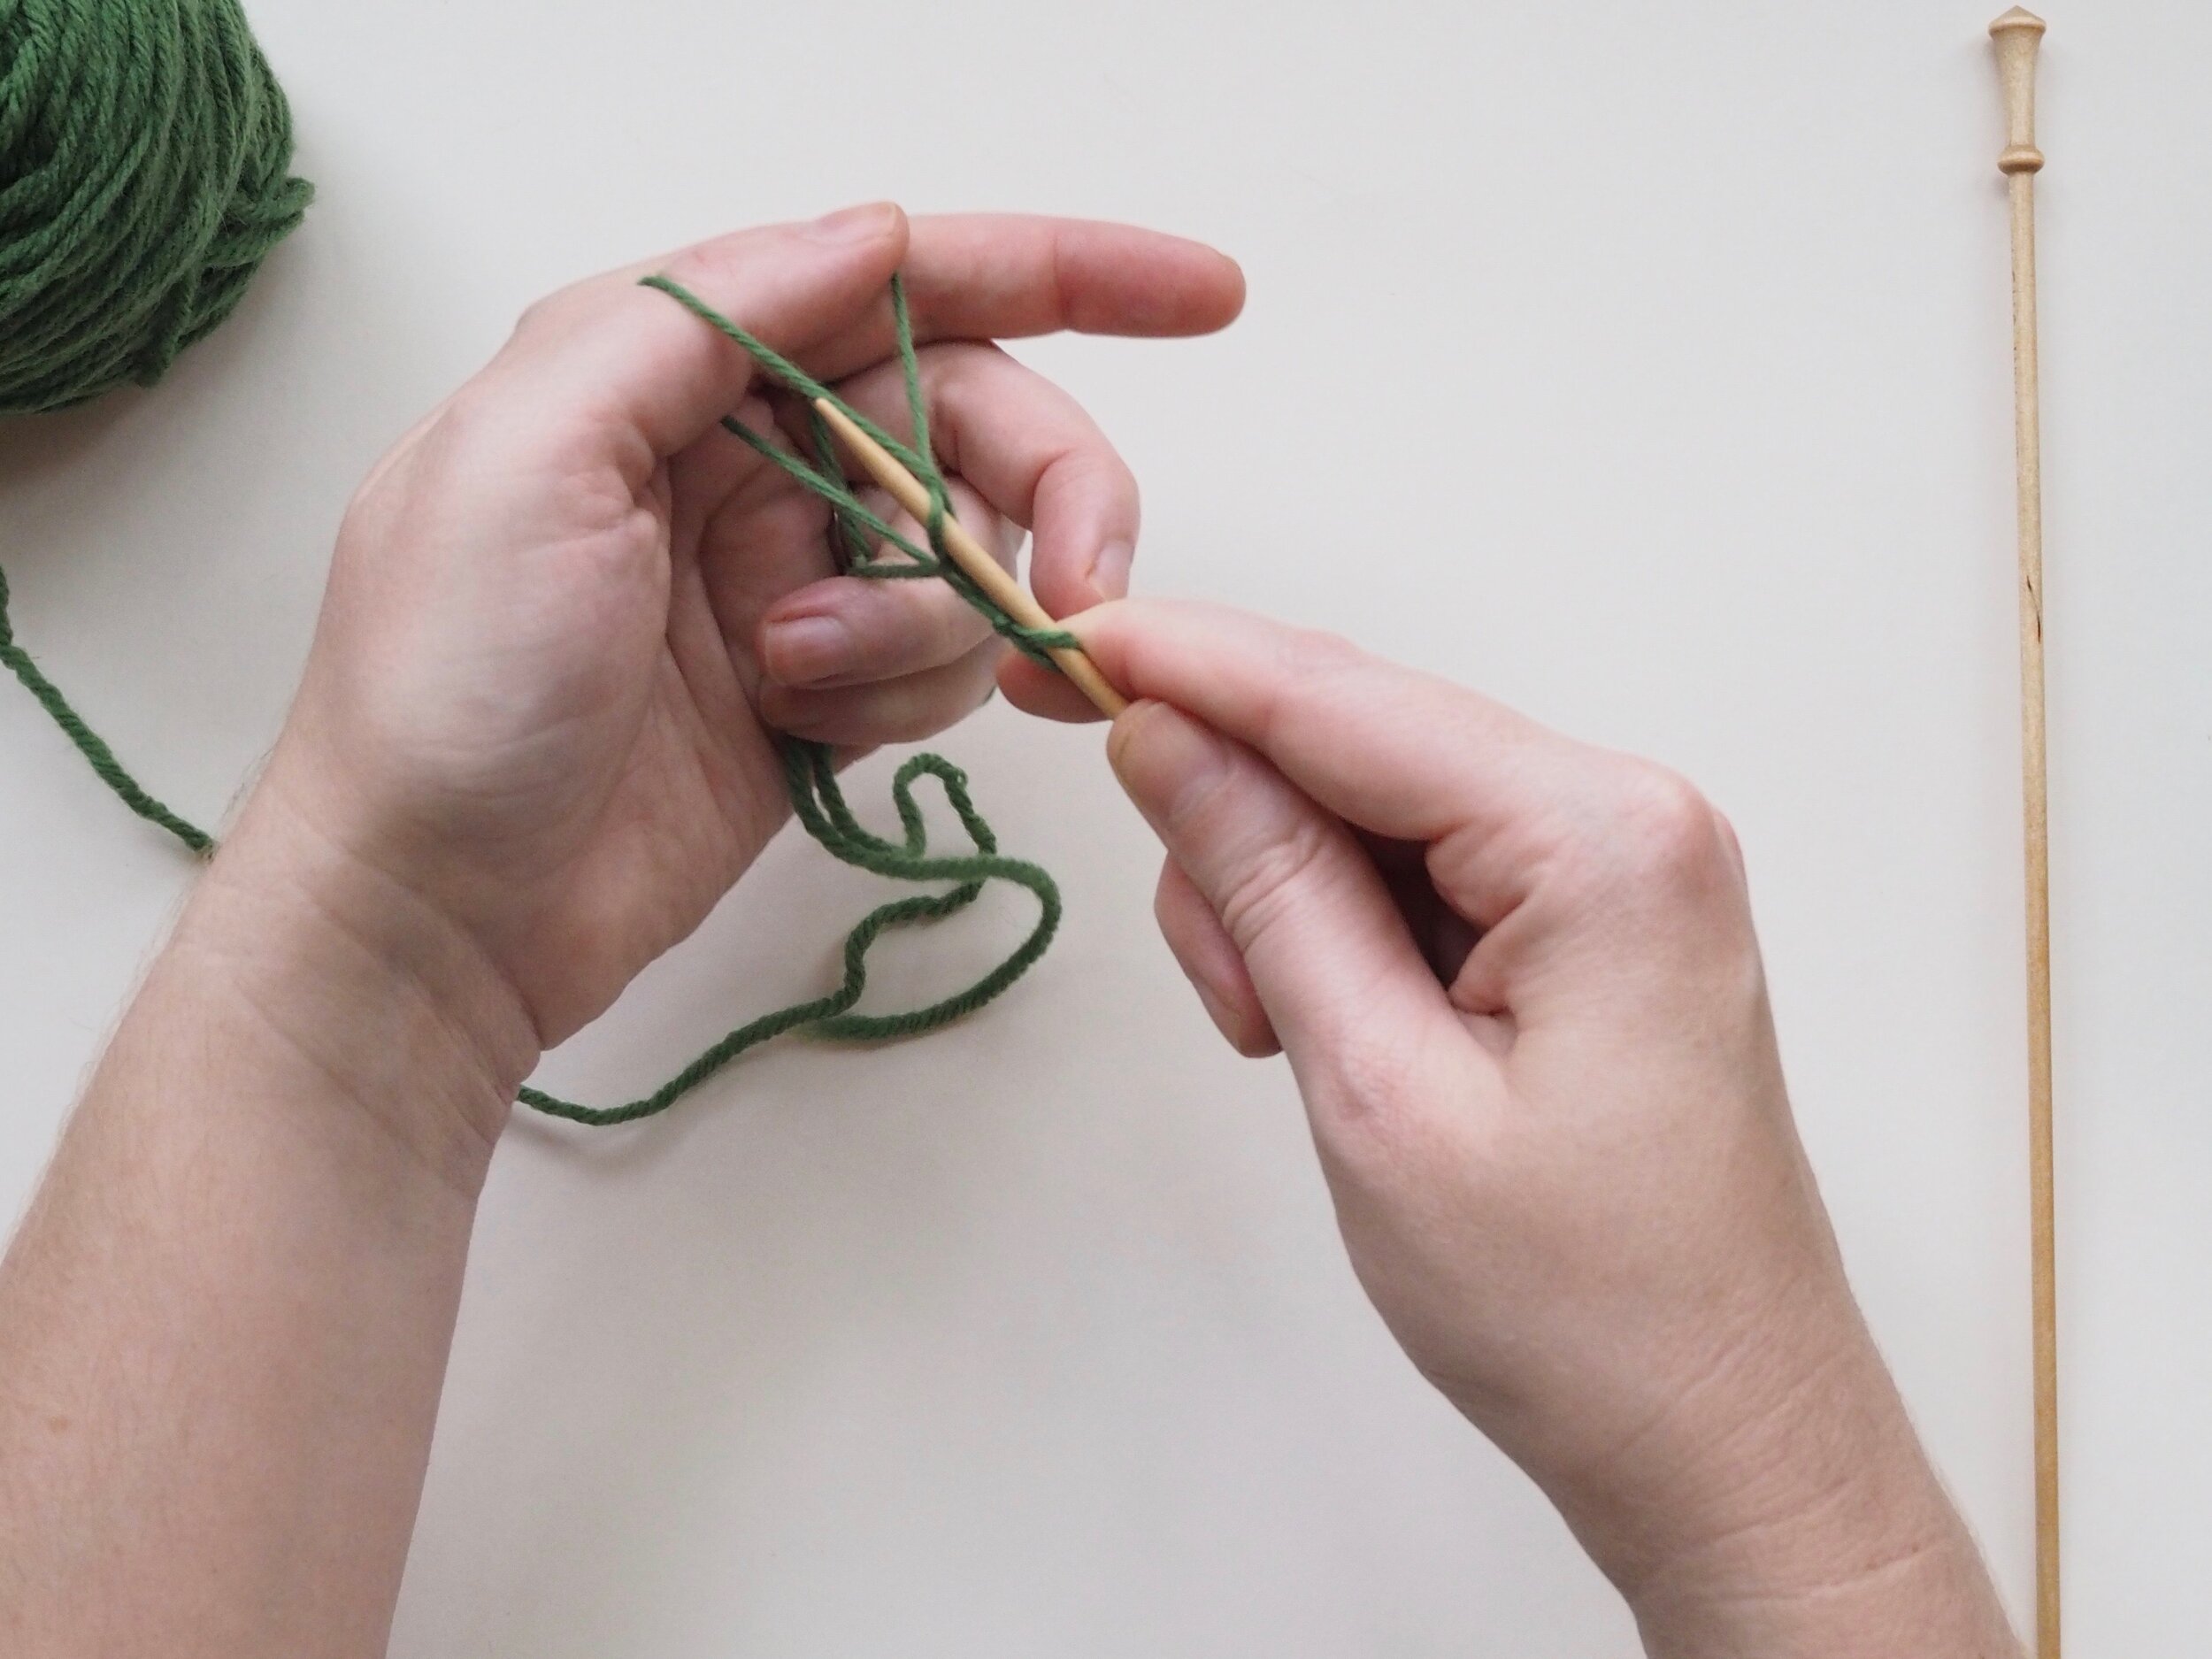
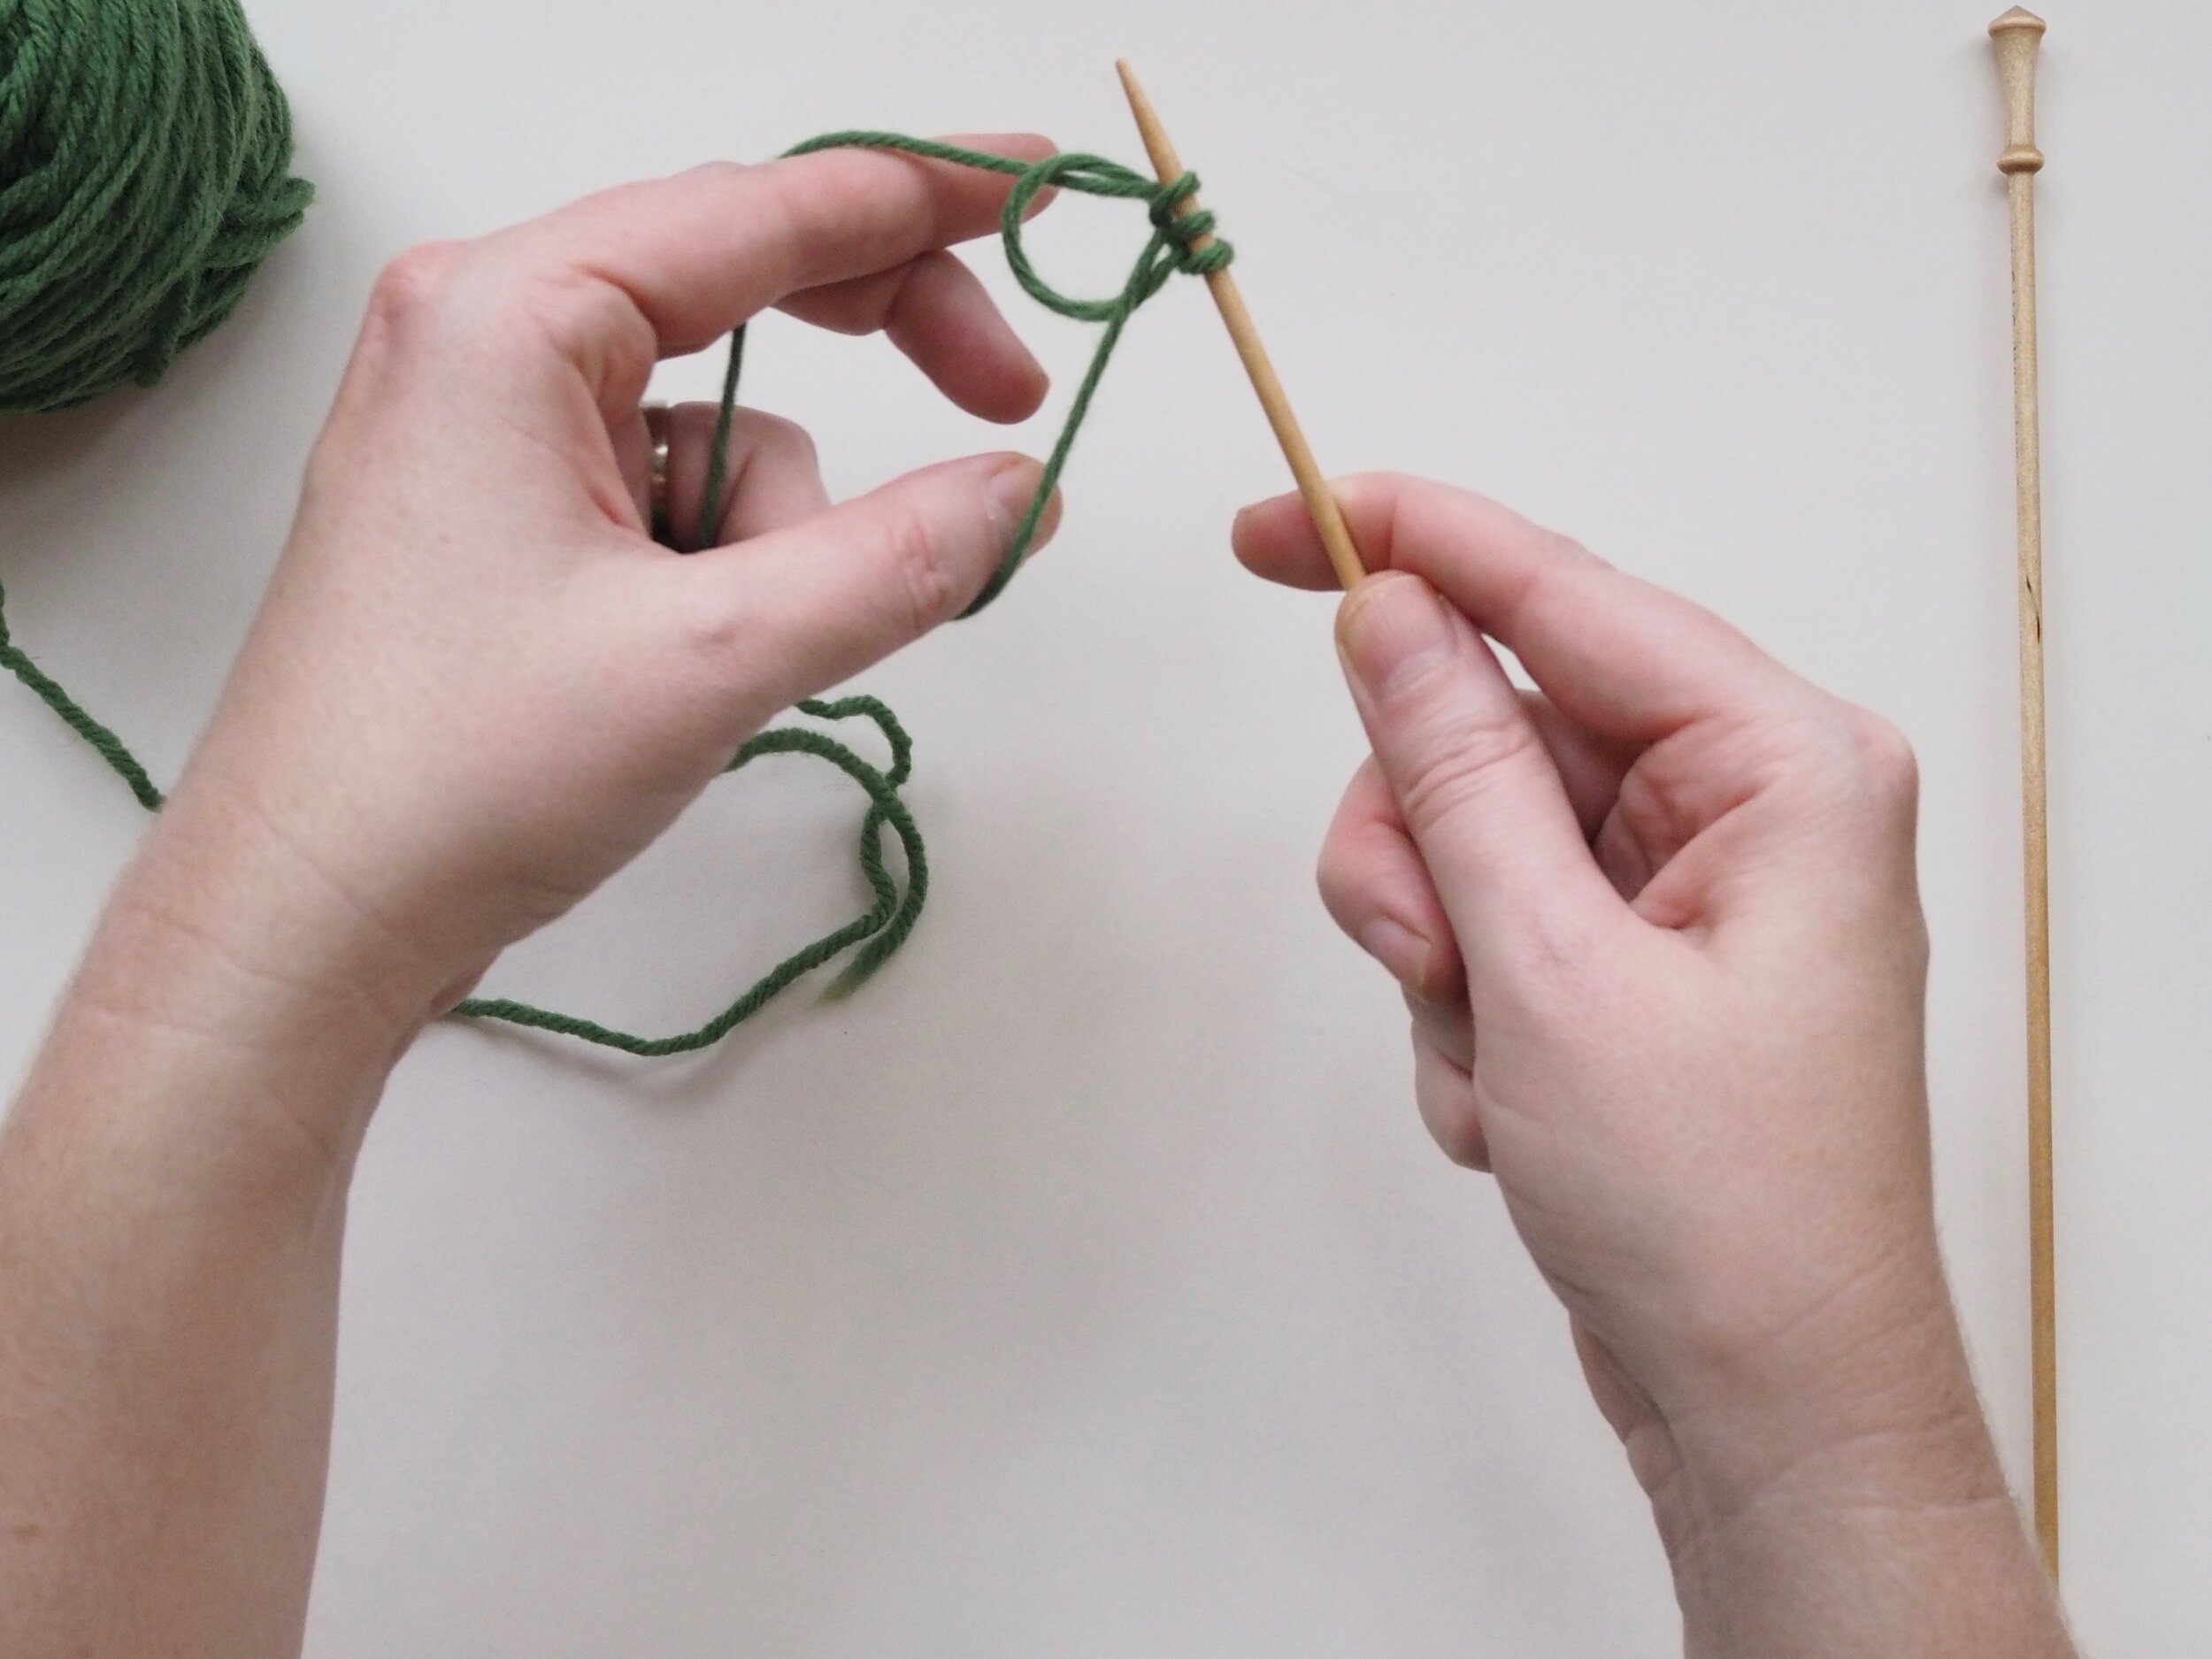
Keeping your thumb and pointer finger in a firm “L” shape, (a) insert the tip of the needle into the bottom of the loop on your thumb, going from palm to fingers, then (b) coming from fingers to palm, scoop up the strand on your index finger and (c) pull it through the loop on your thumb. (d) Drop the thumb loop over the edge of the needle and (e) pull to secure – again, going for snug, not tight. You have now cast on one new stitch.
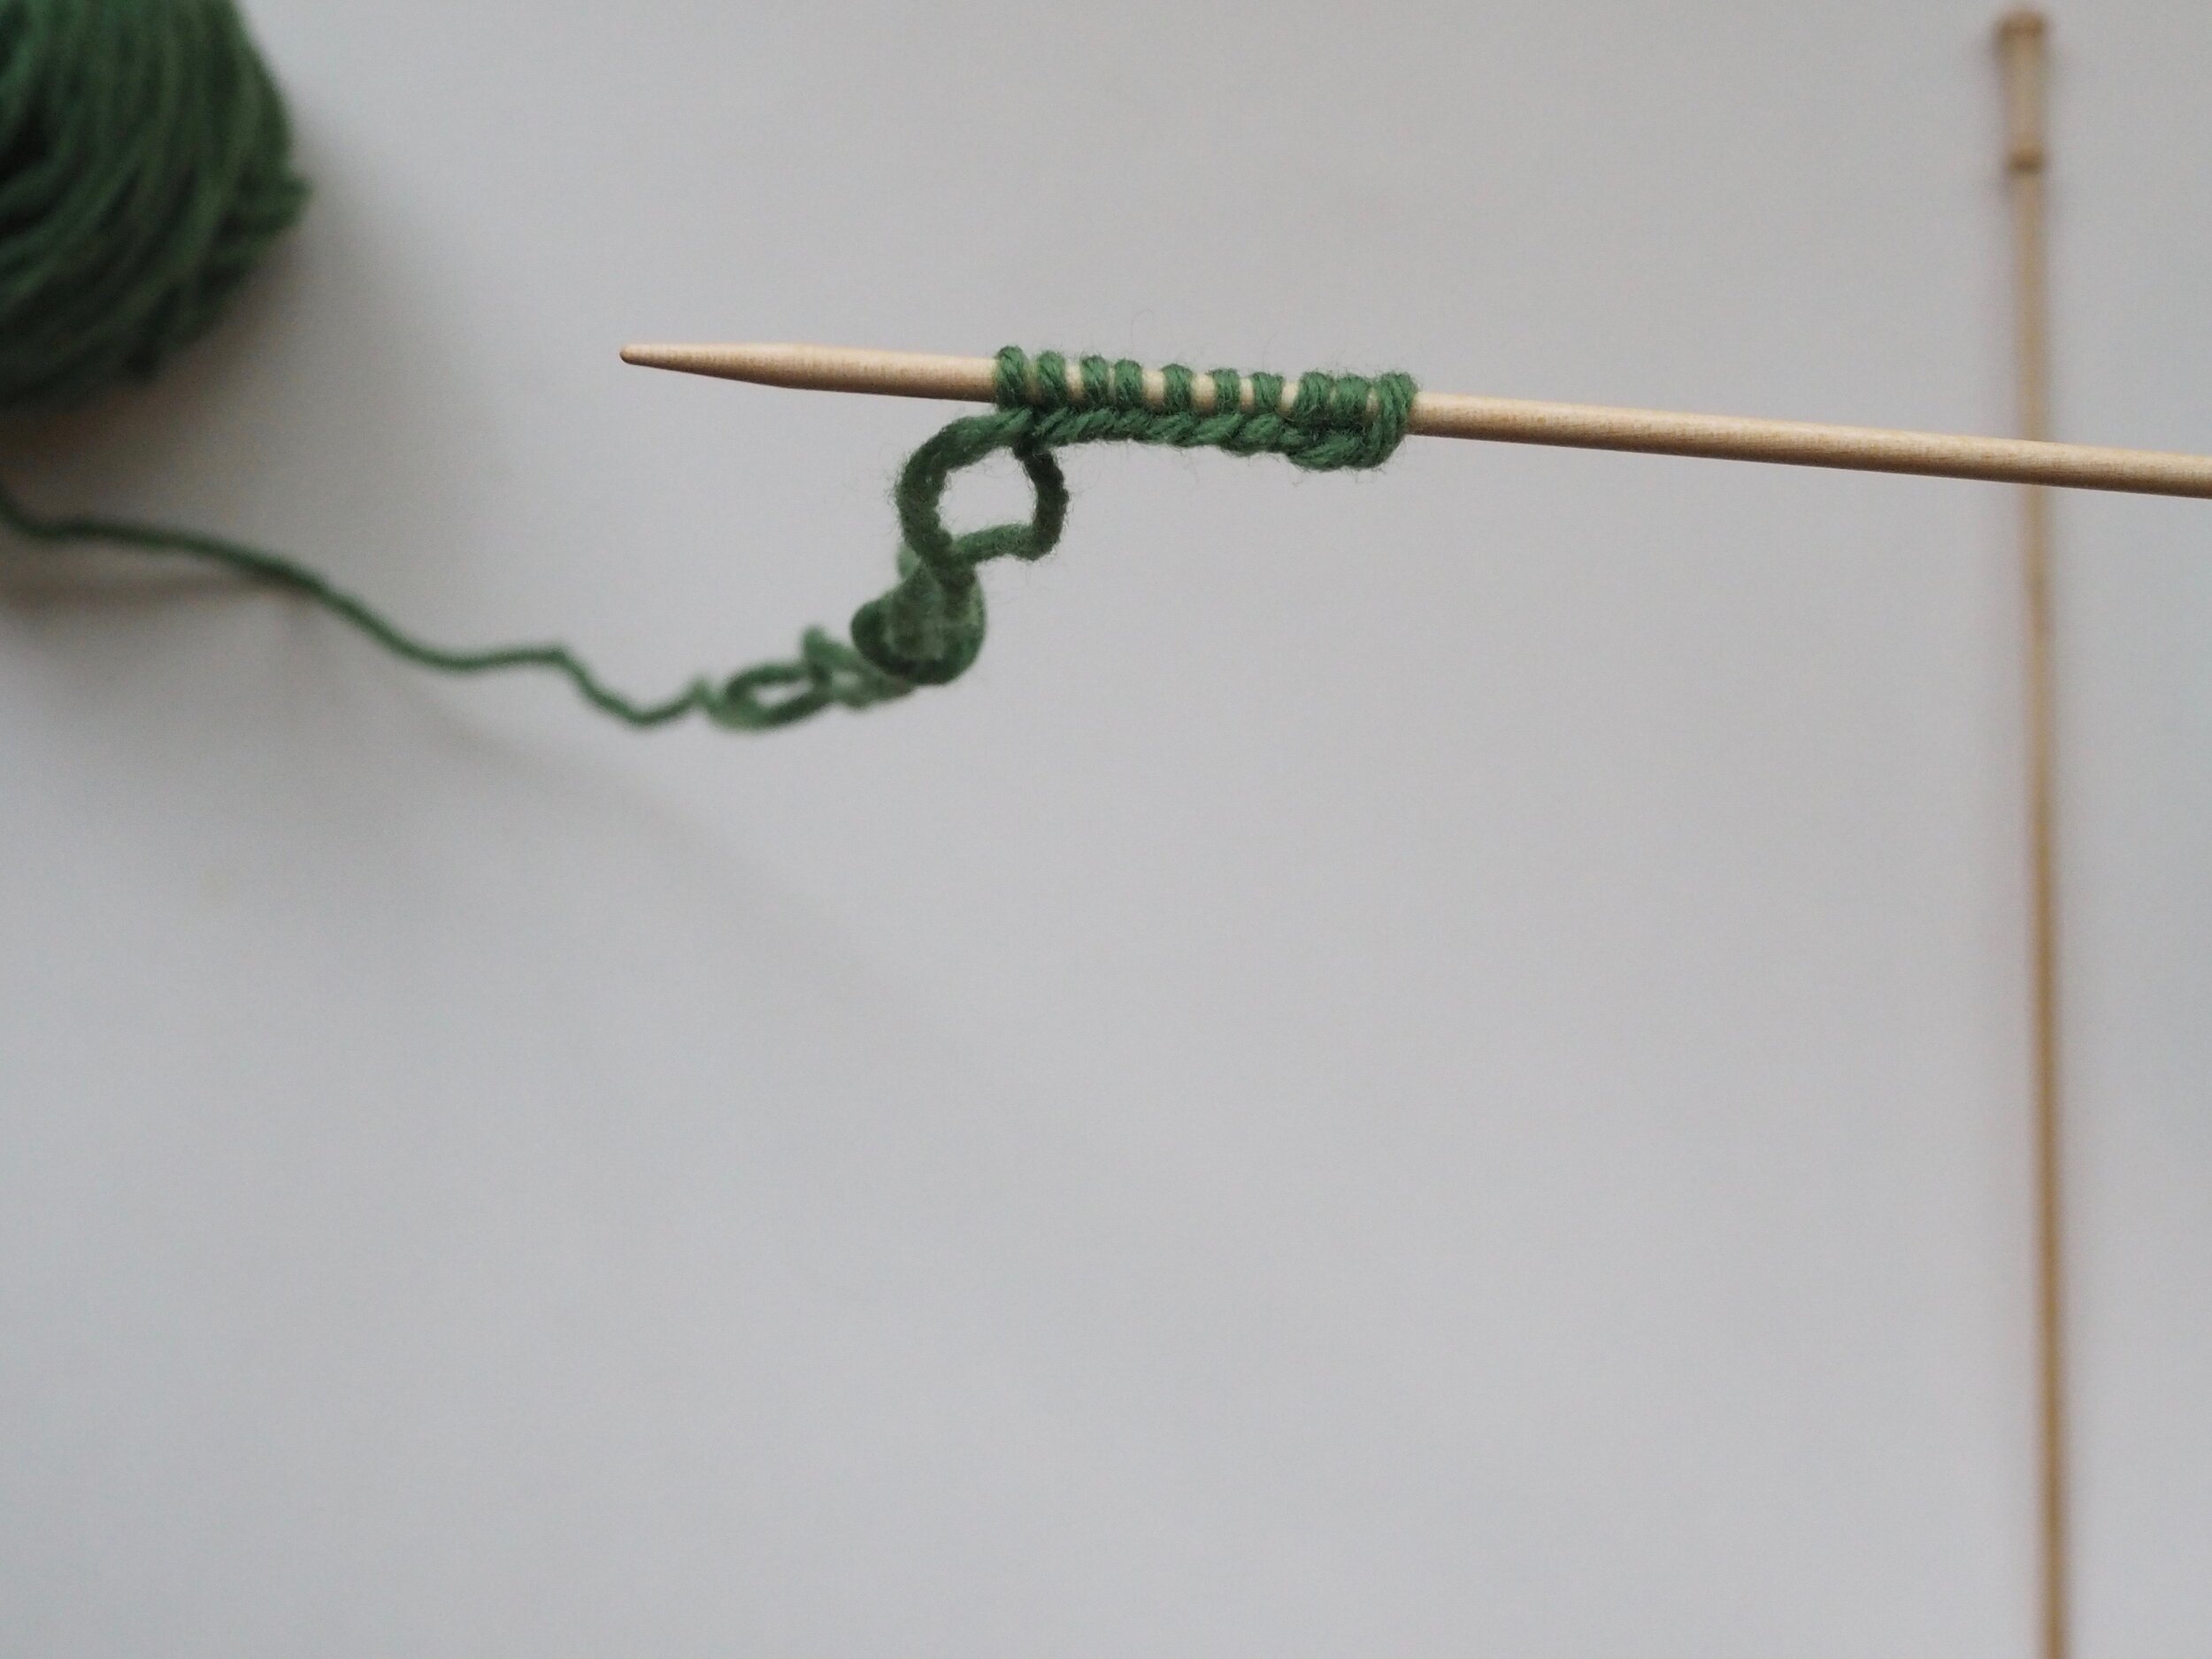
Repeat Step 5 until you have the desired number of stitches cast on. When counting stitches, include the initial loop you made with the slip knot. There are 10 stitches in Fig. 5f.