Domenic Duck KAL - Afterthought Prep, Pick Up and Finishing!

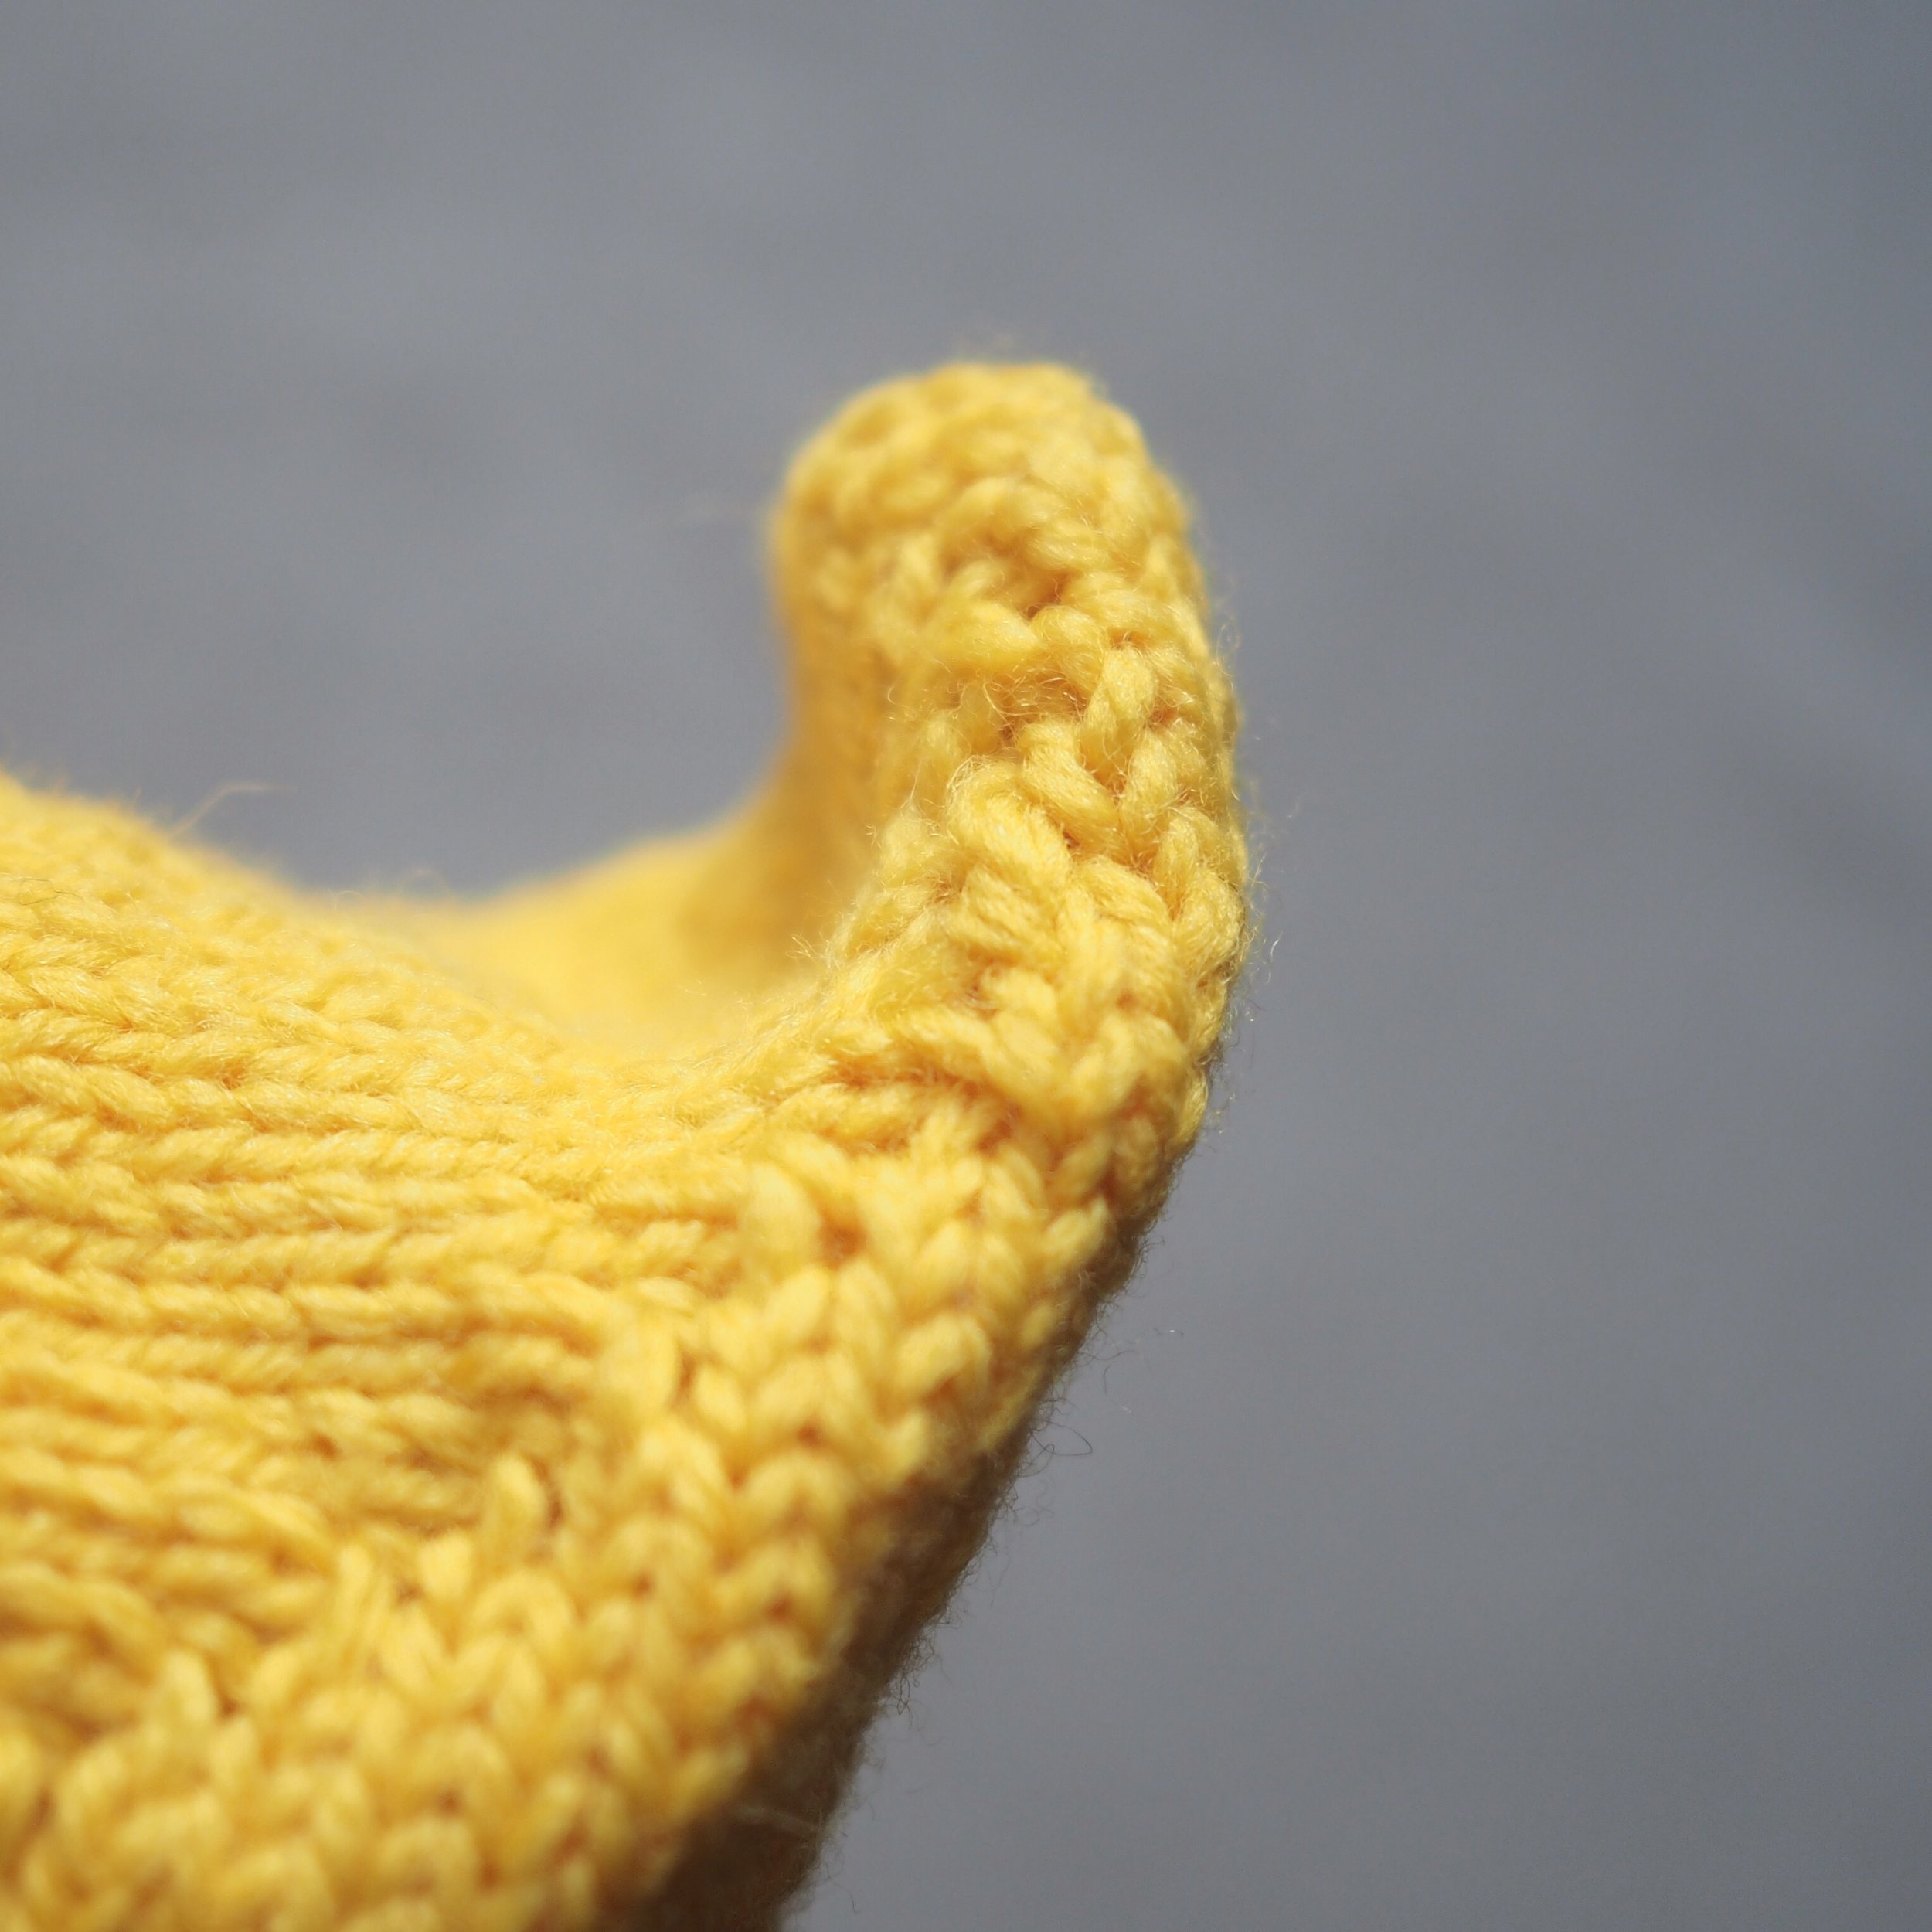
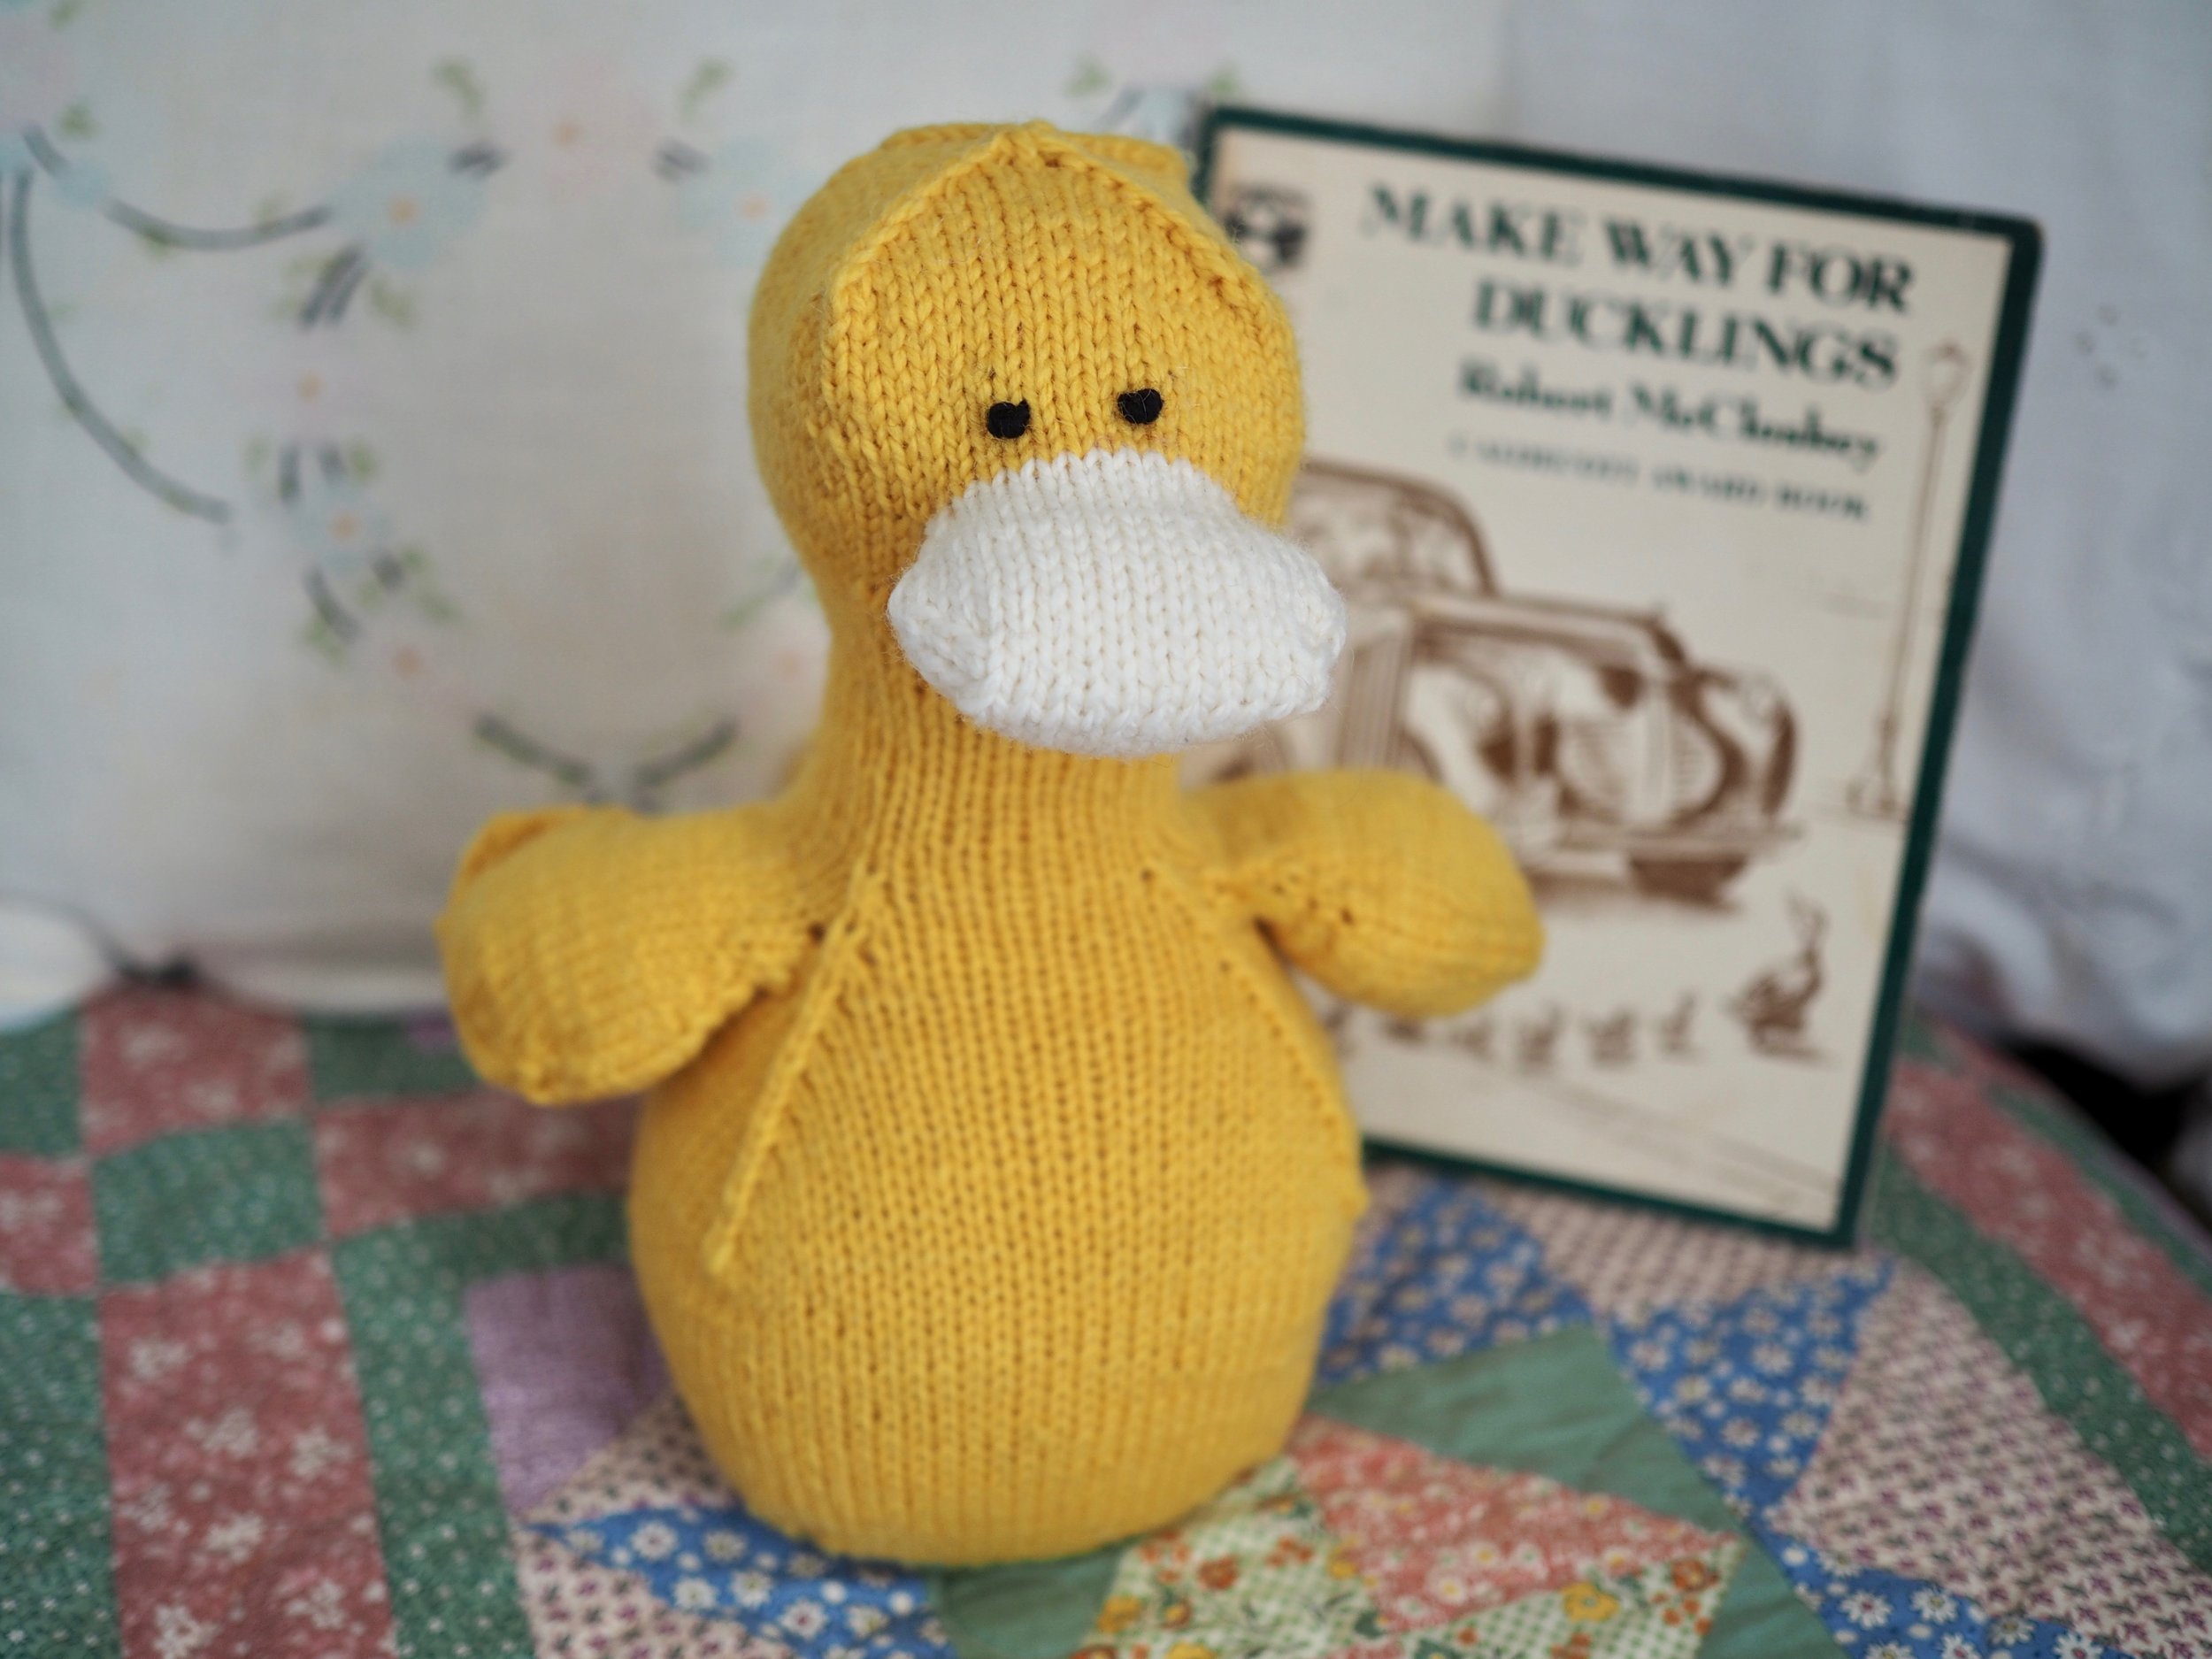
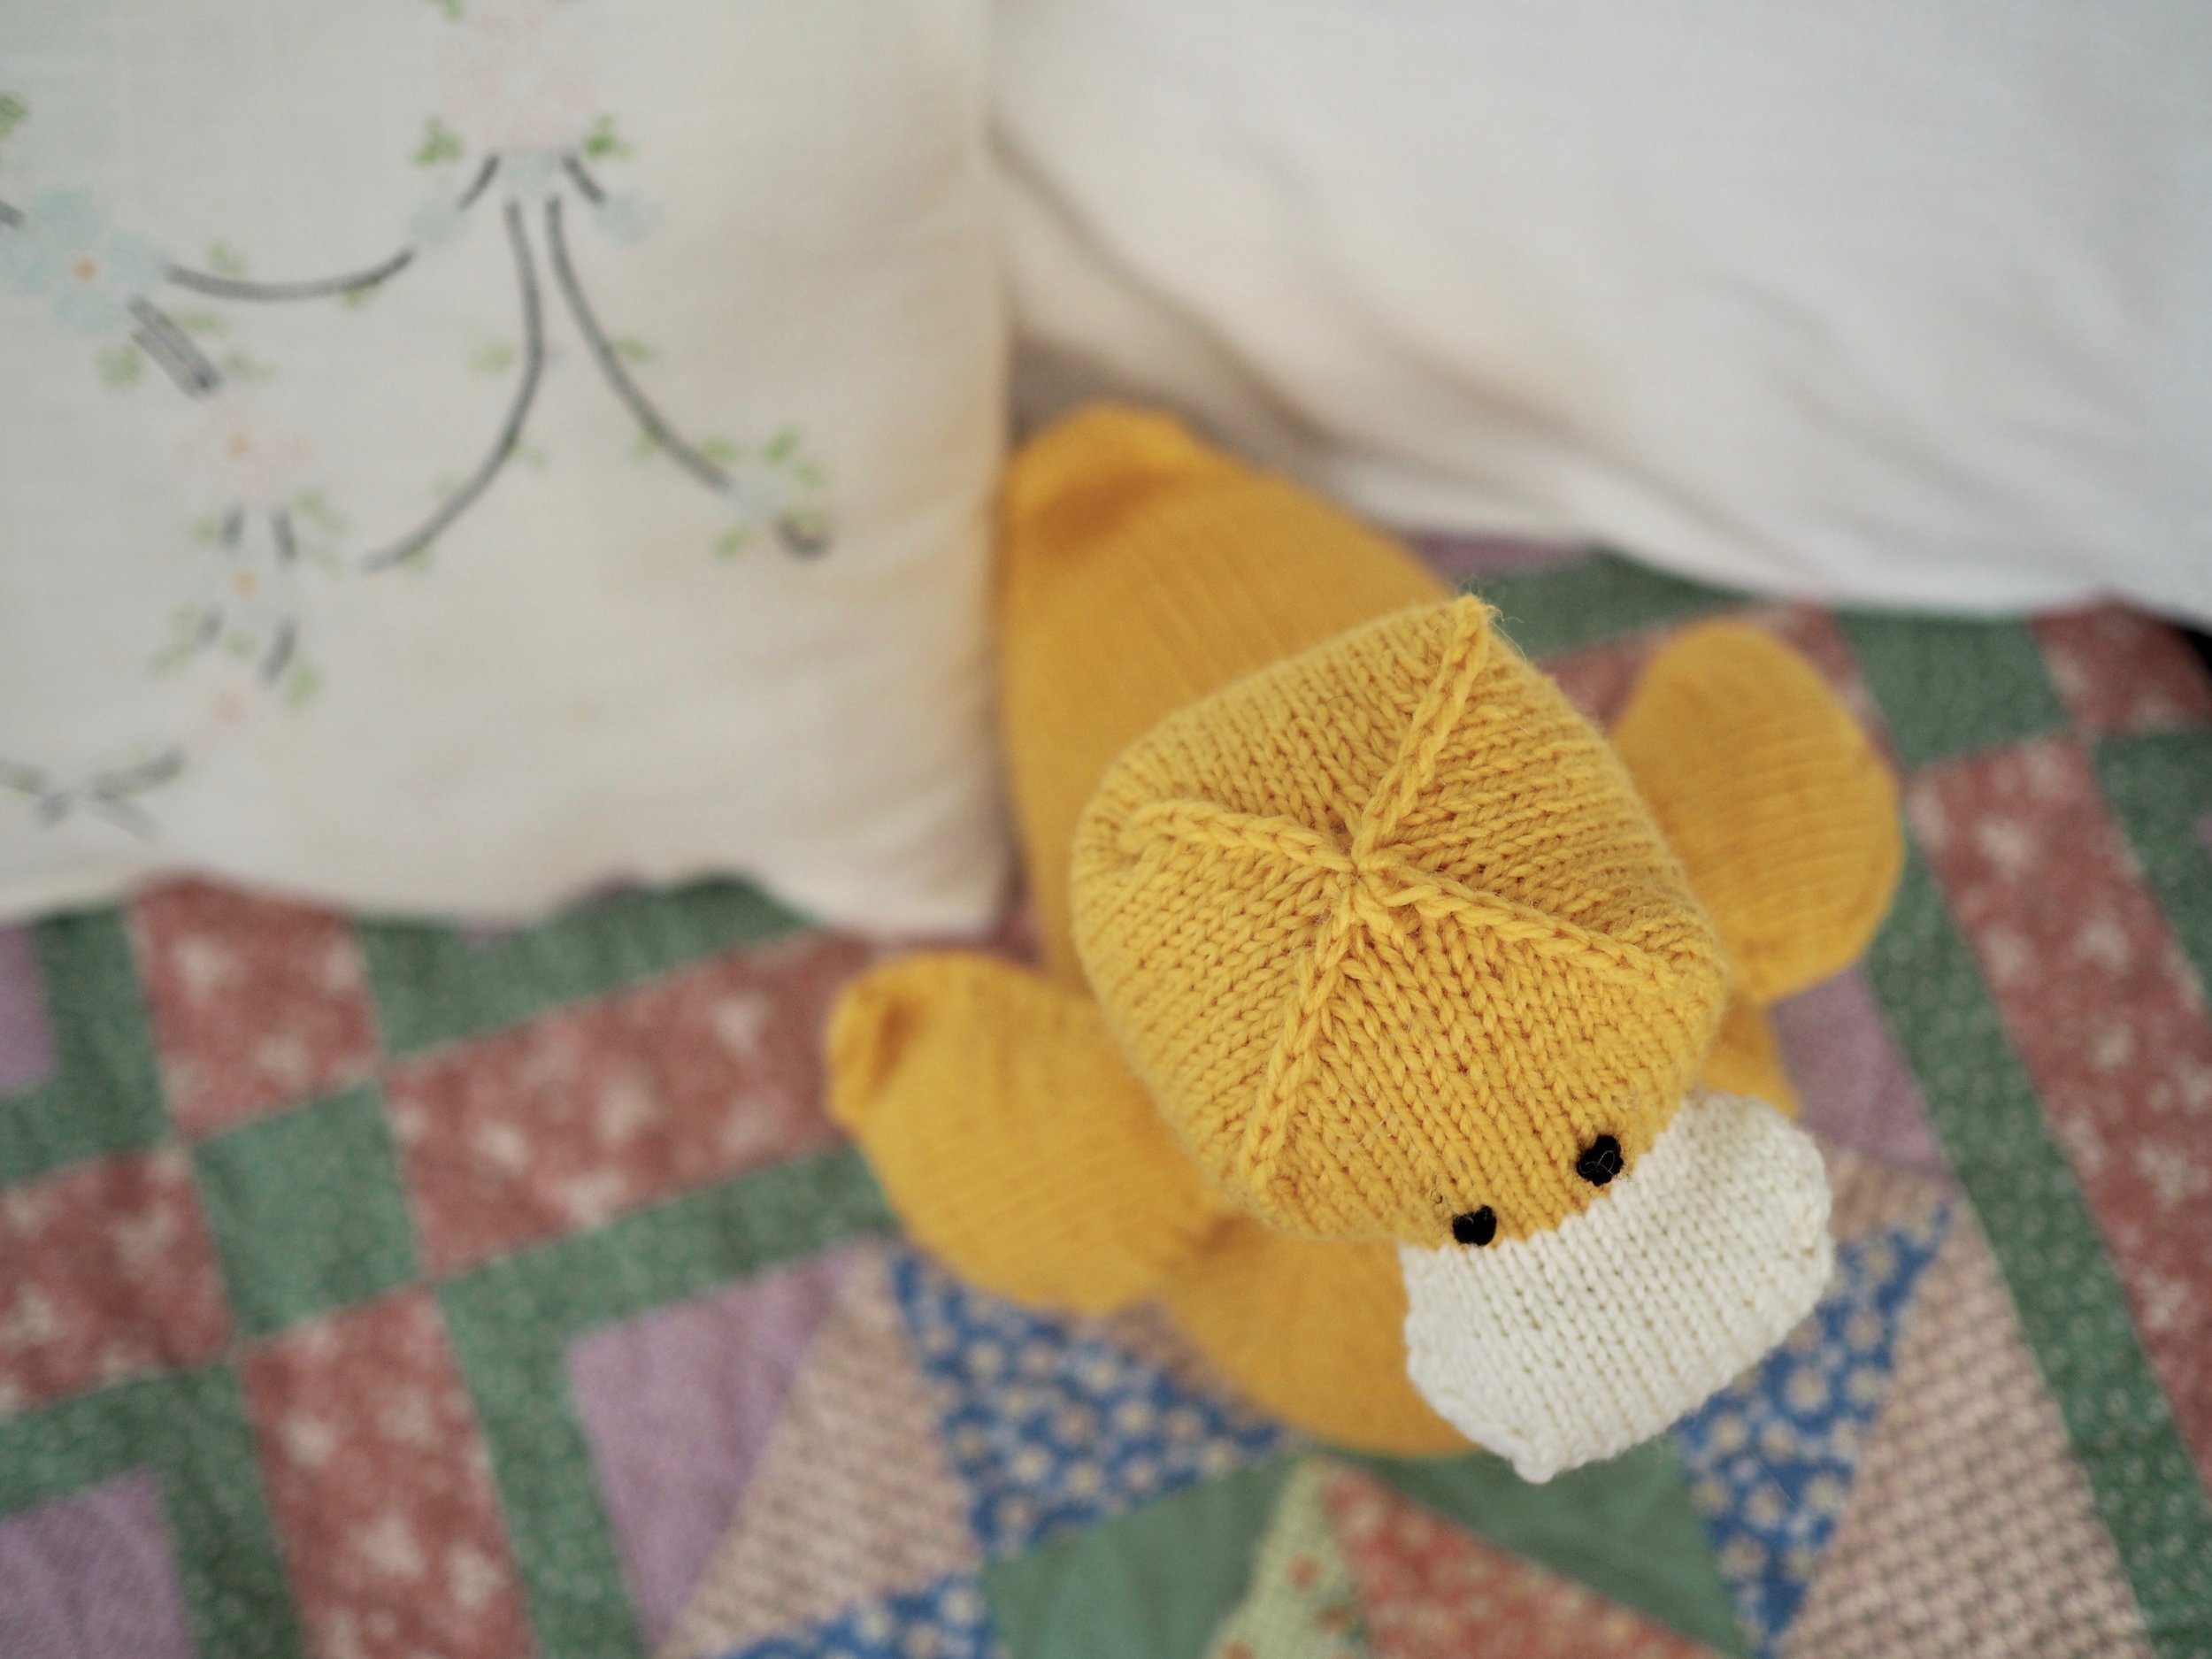
Today we're going to move from something ressembling a wide wooden shoe to something more duck-like. 

As before, click on any gridded photo for a larger version. 


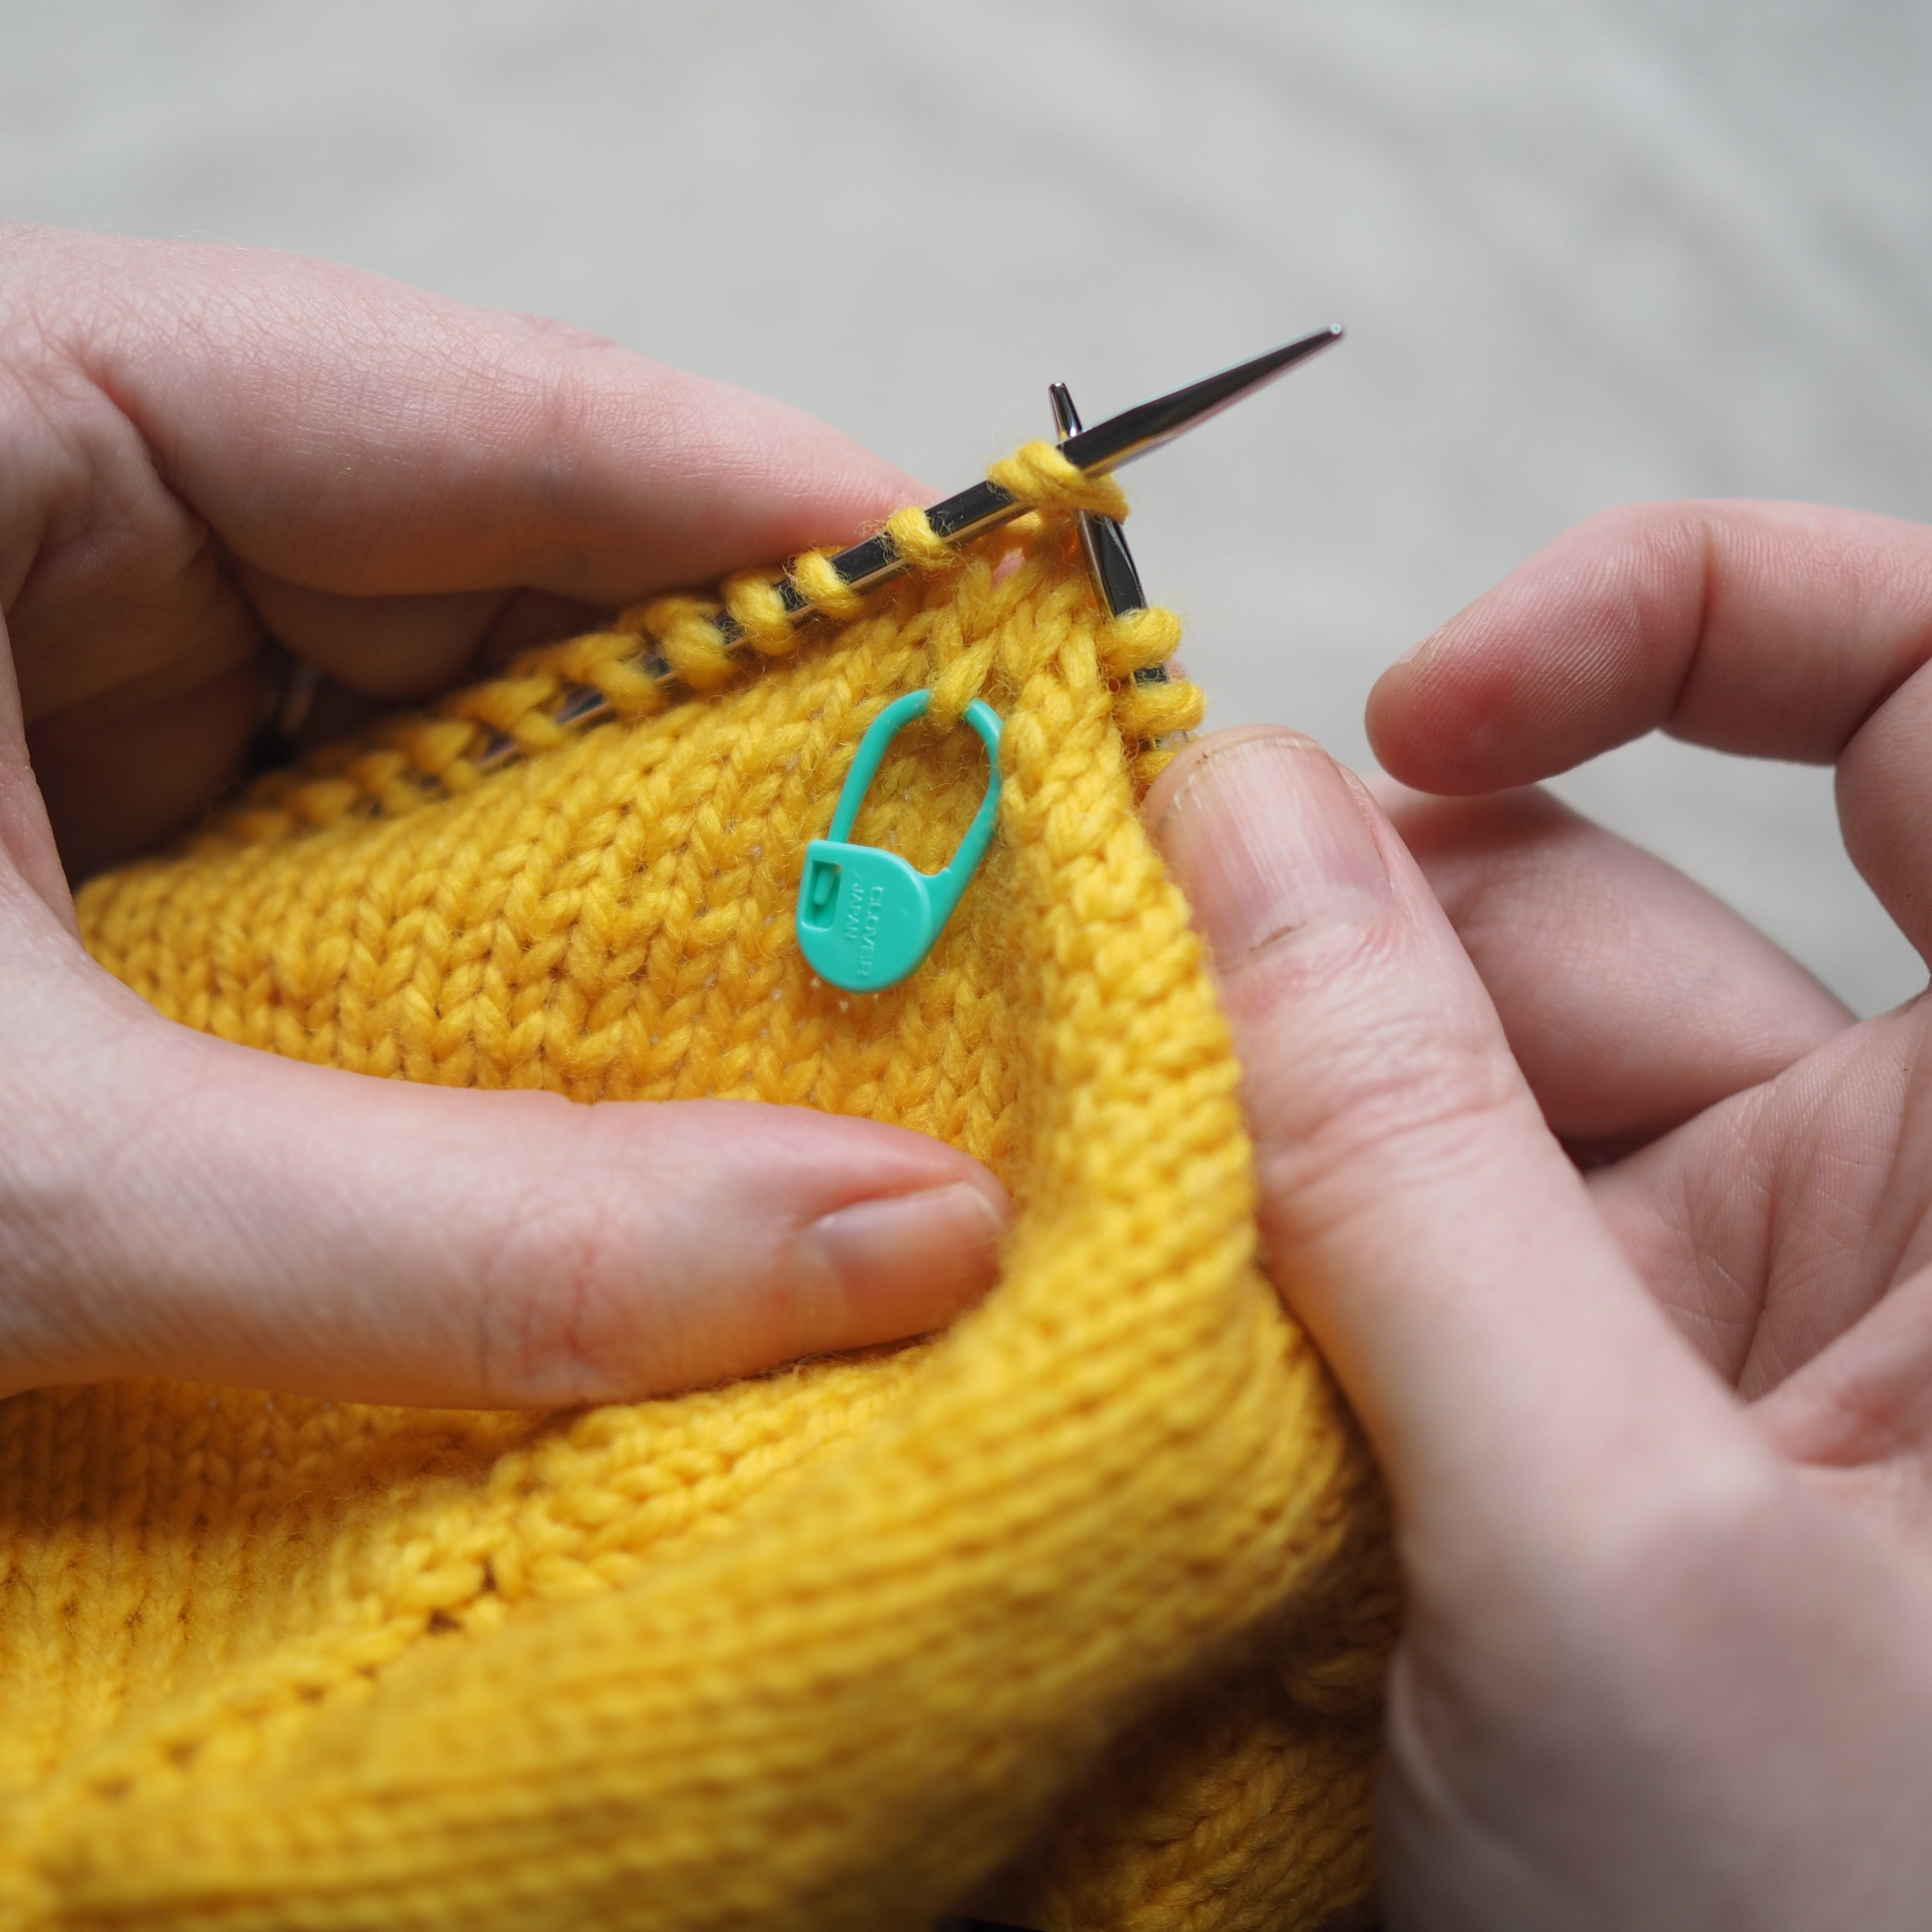
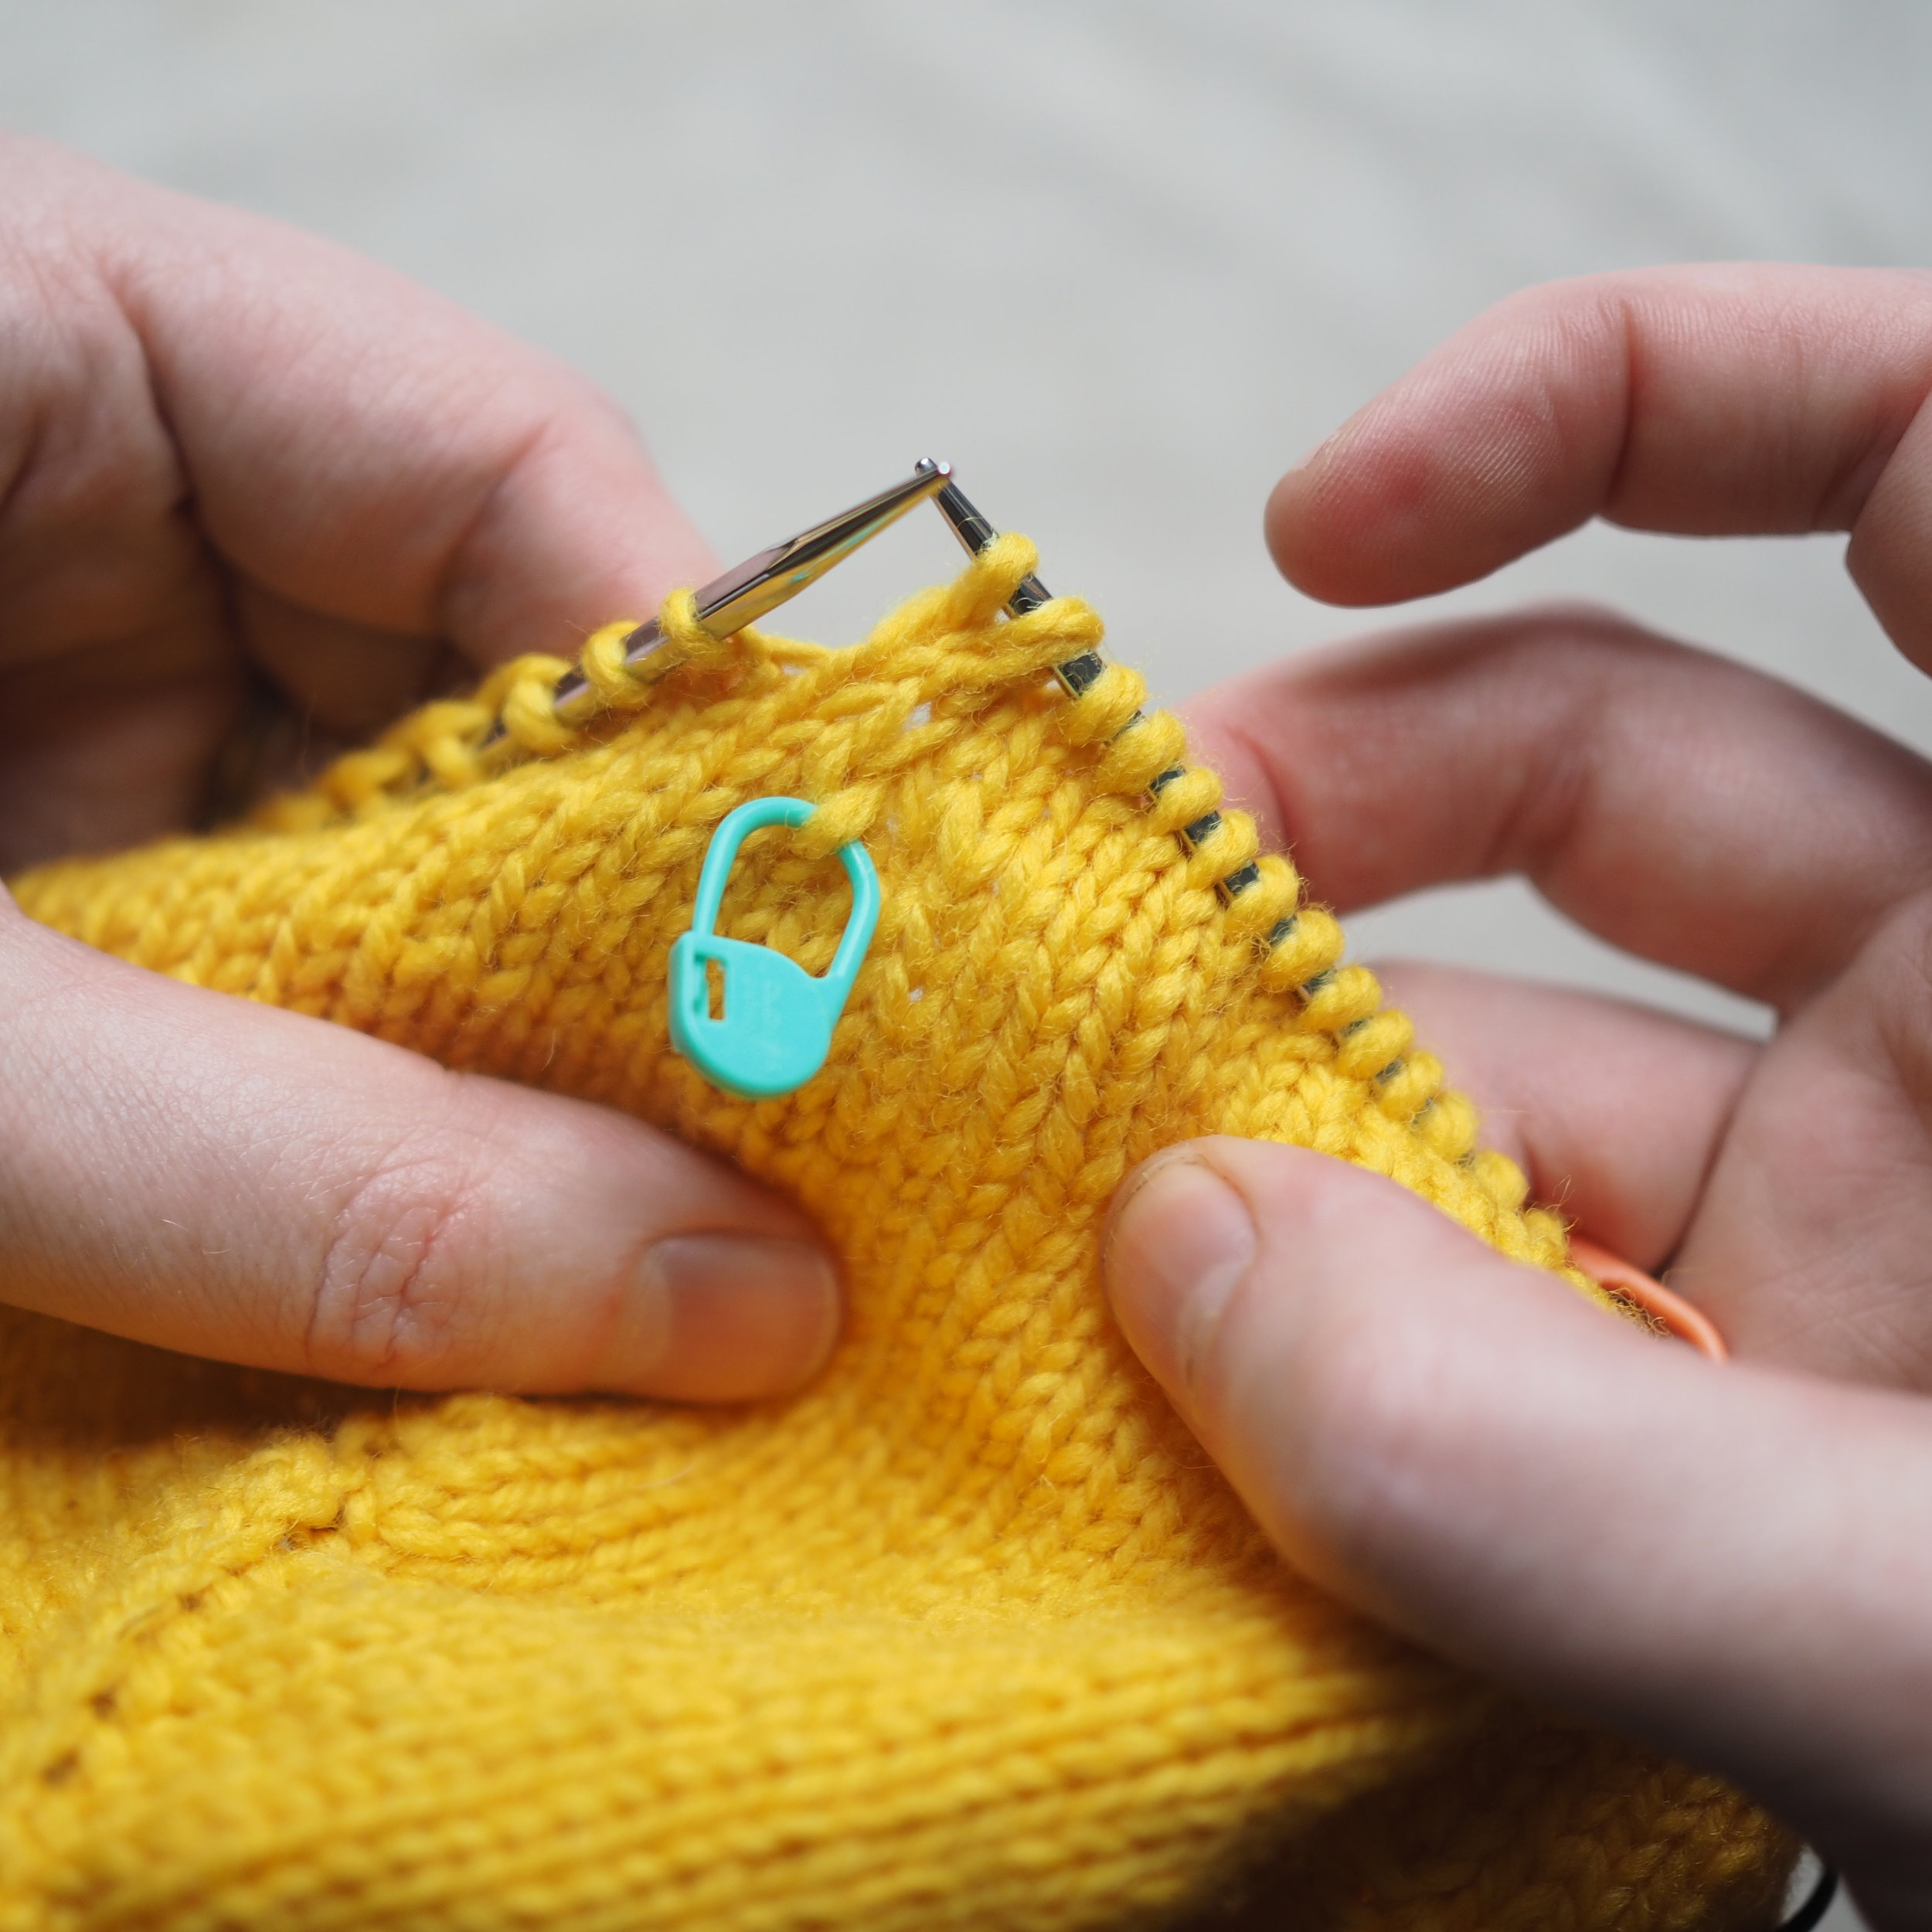
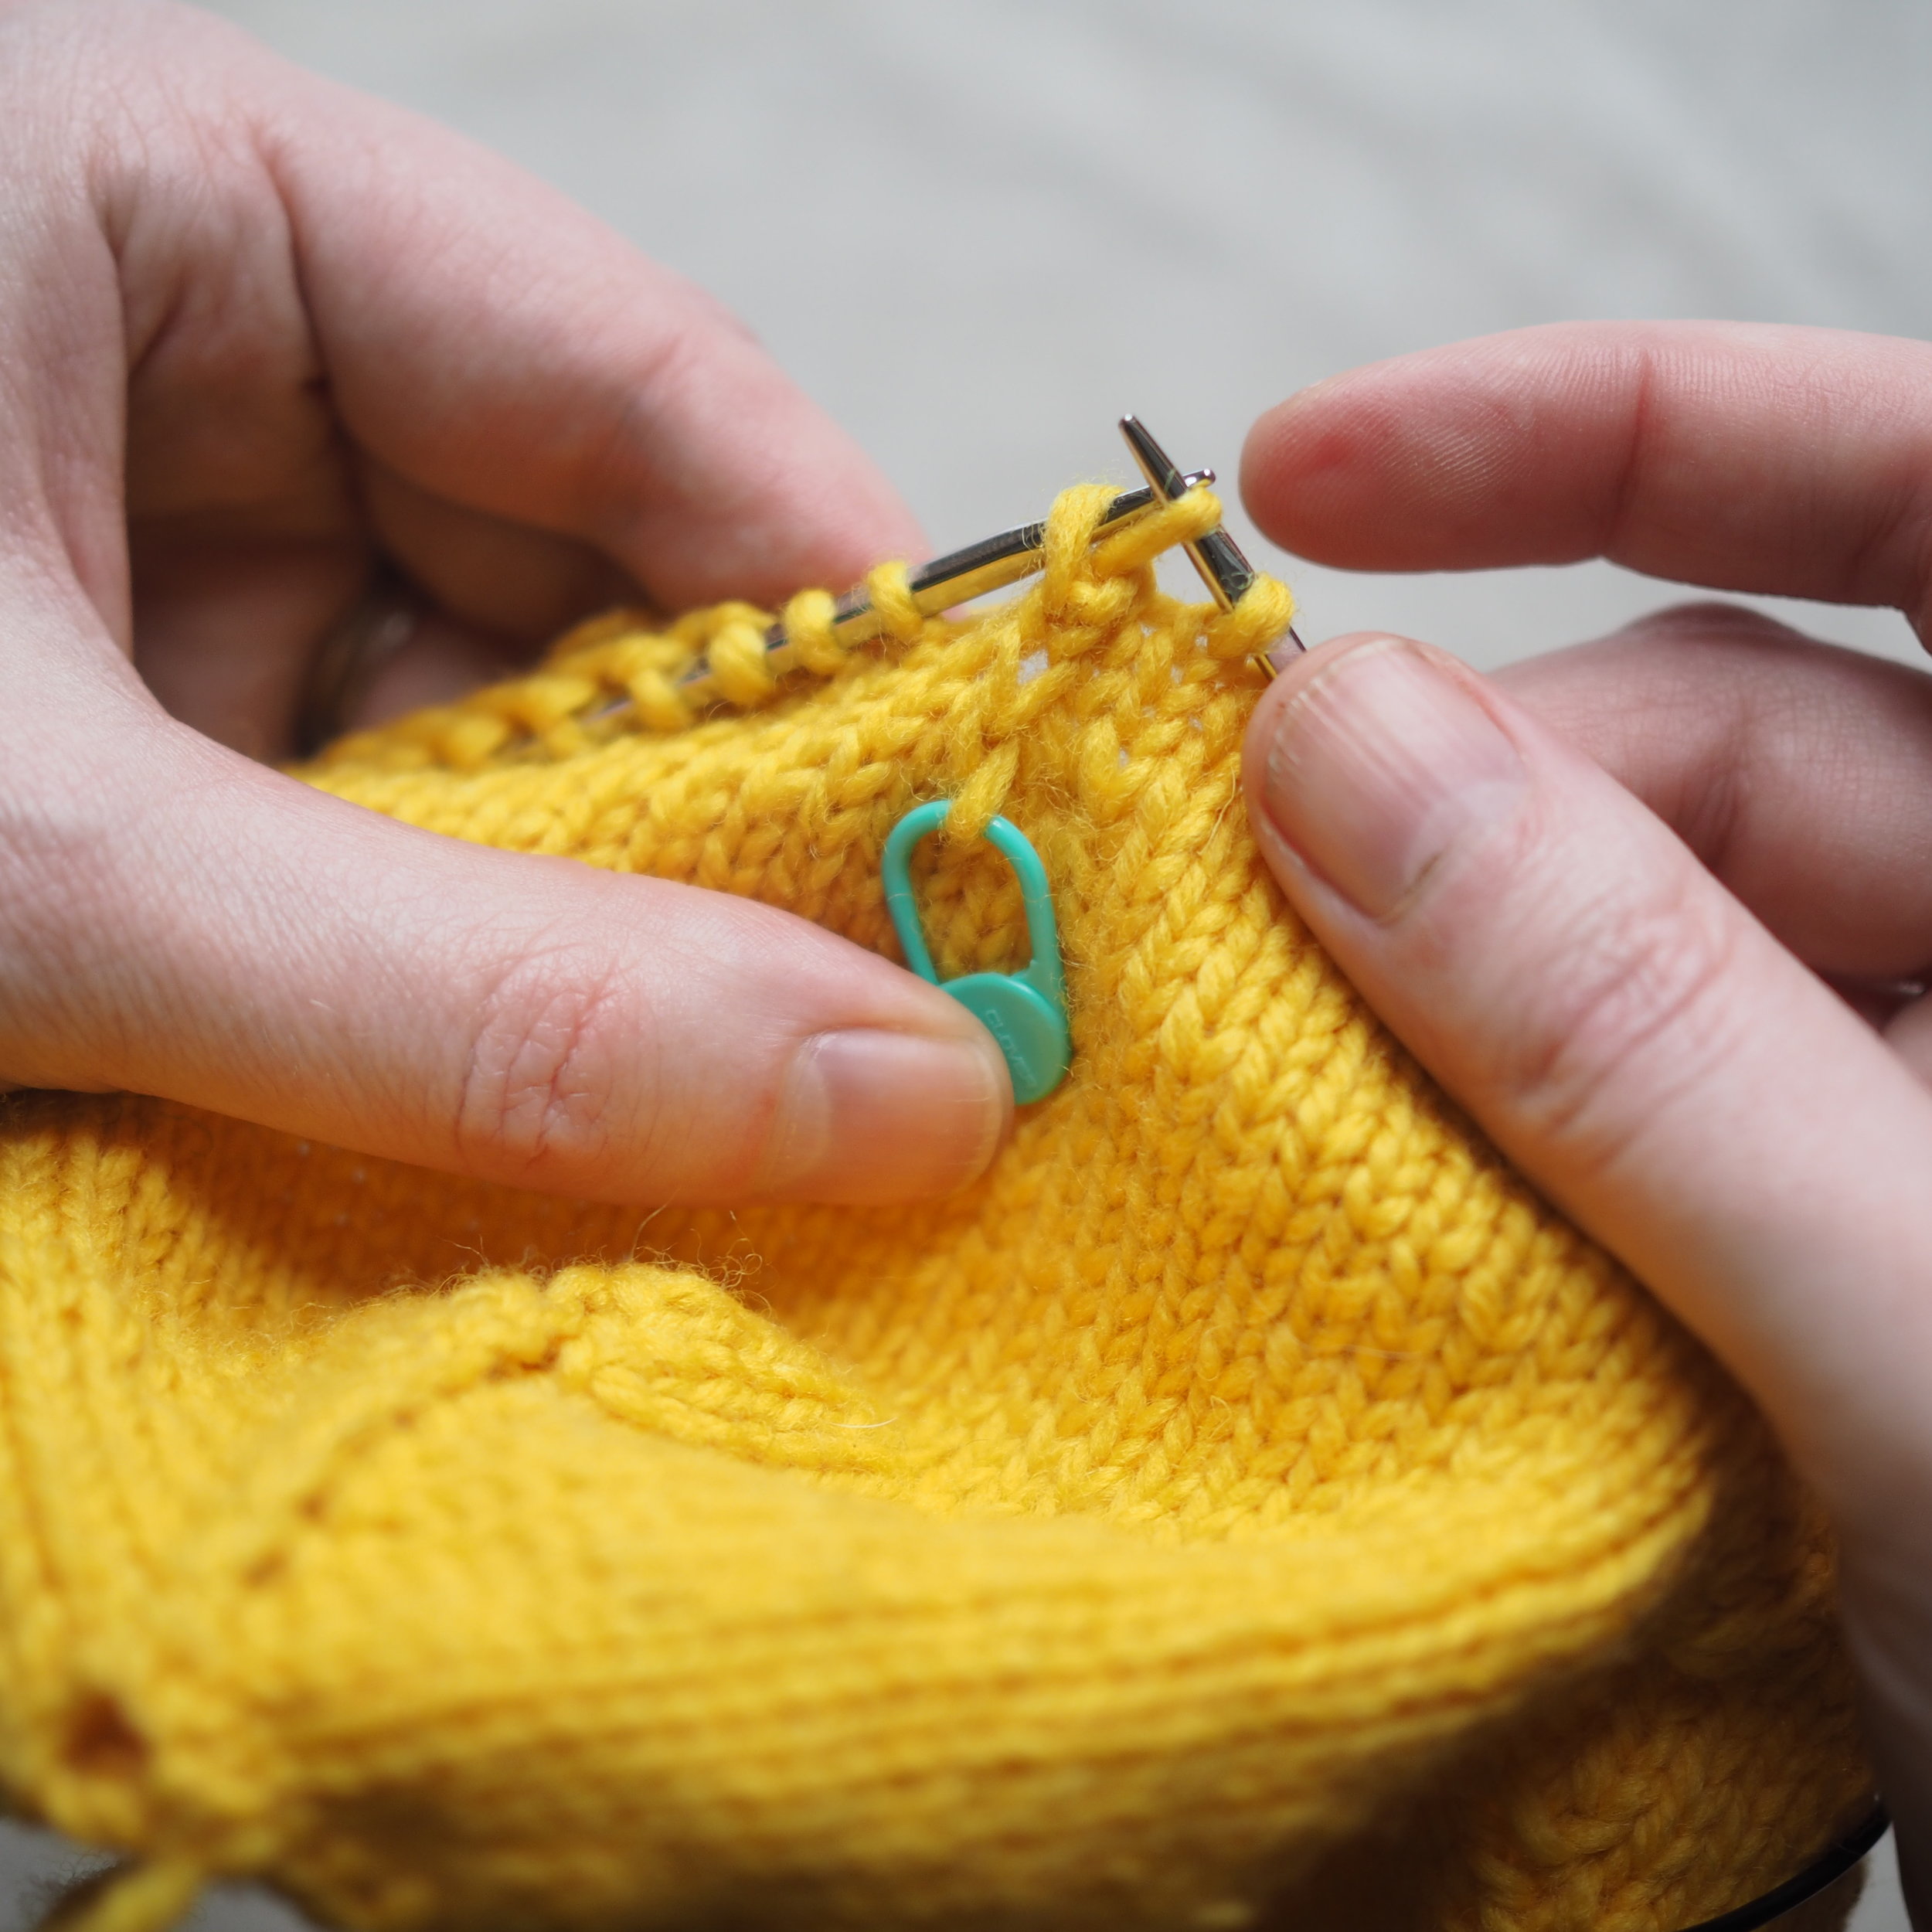
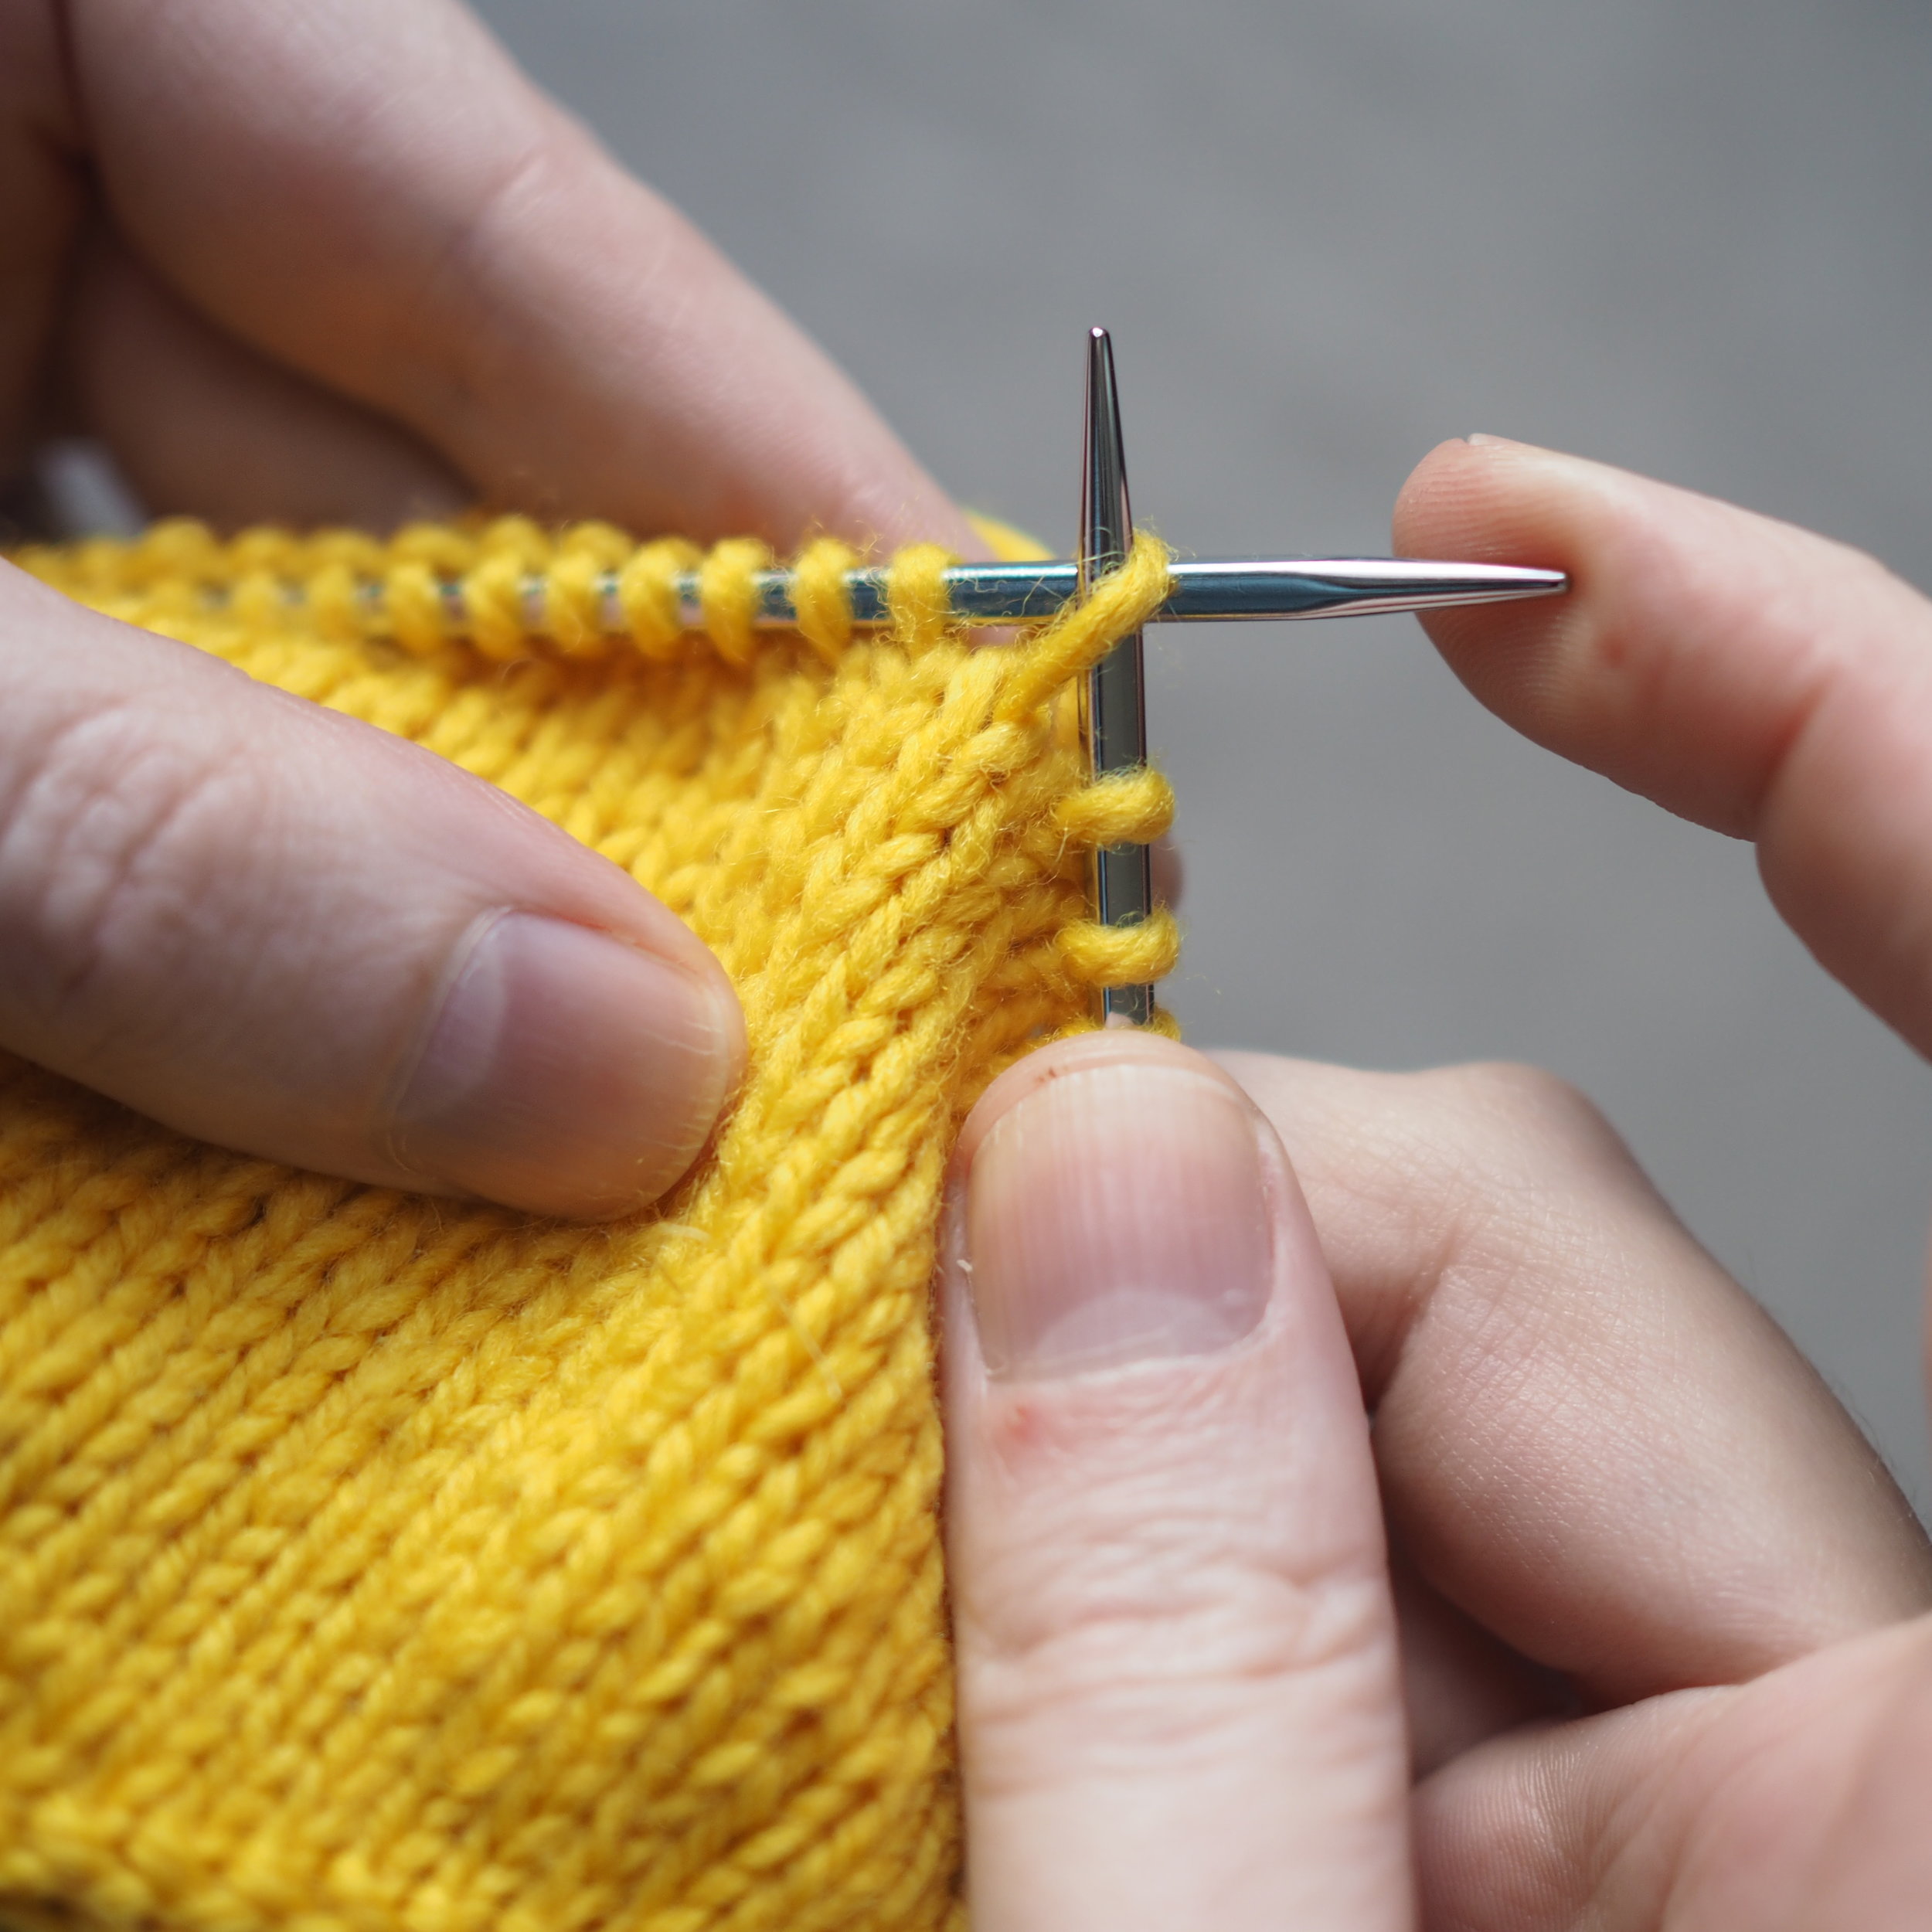
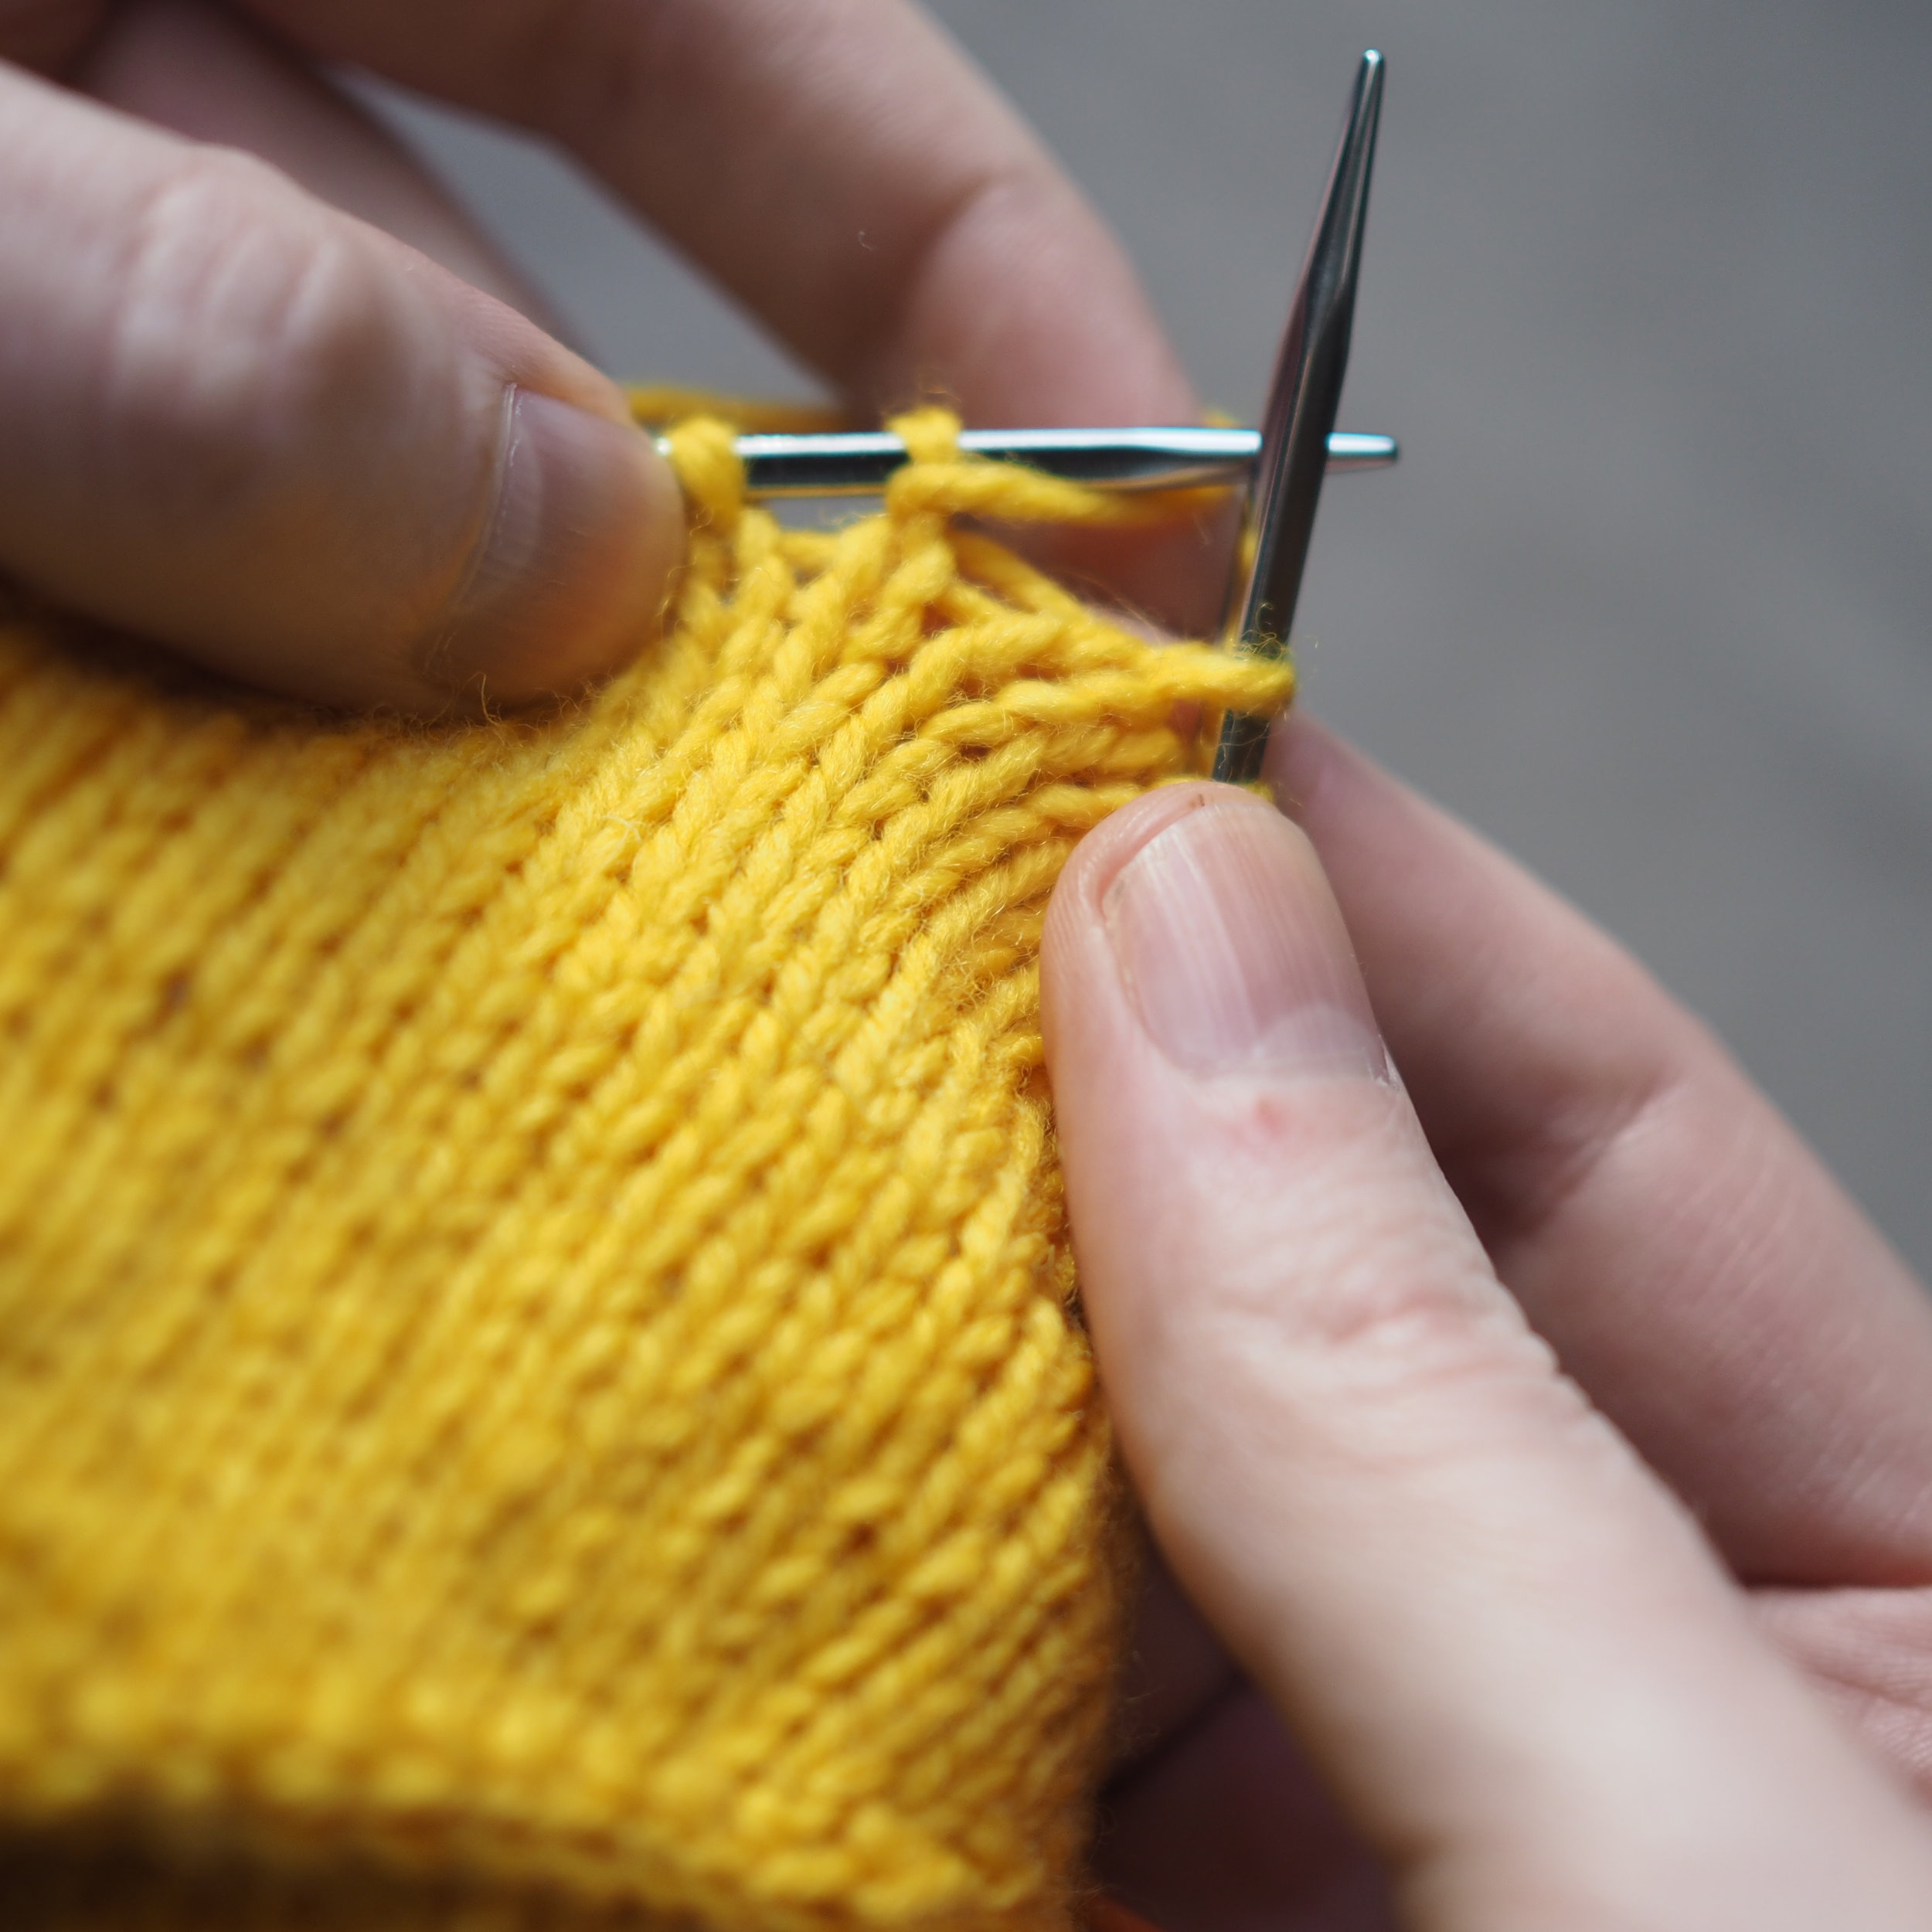
Centered Doubled Decreases (cddc)

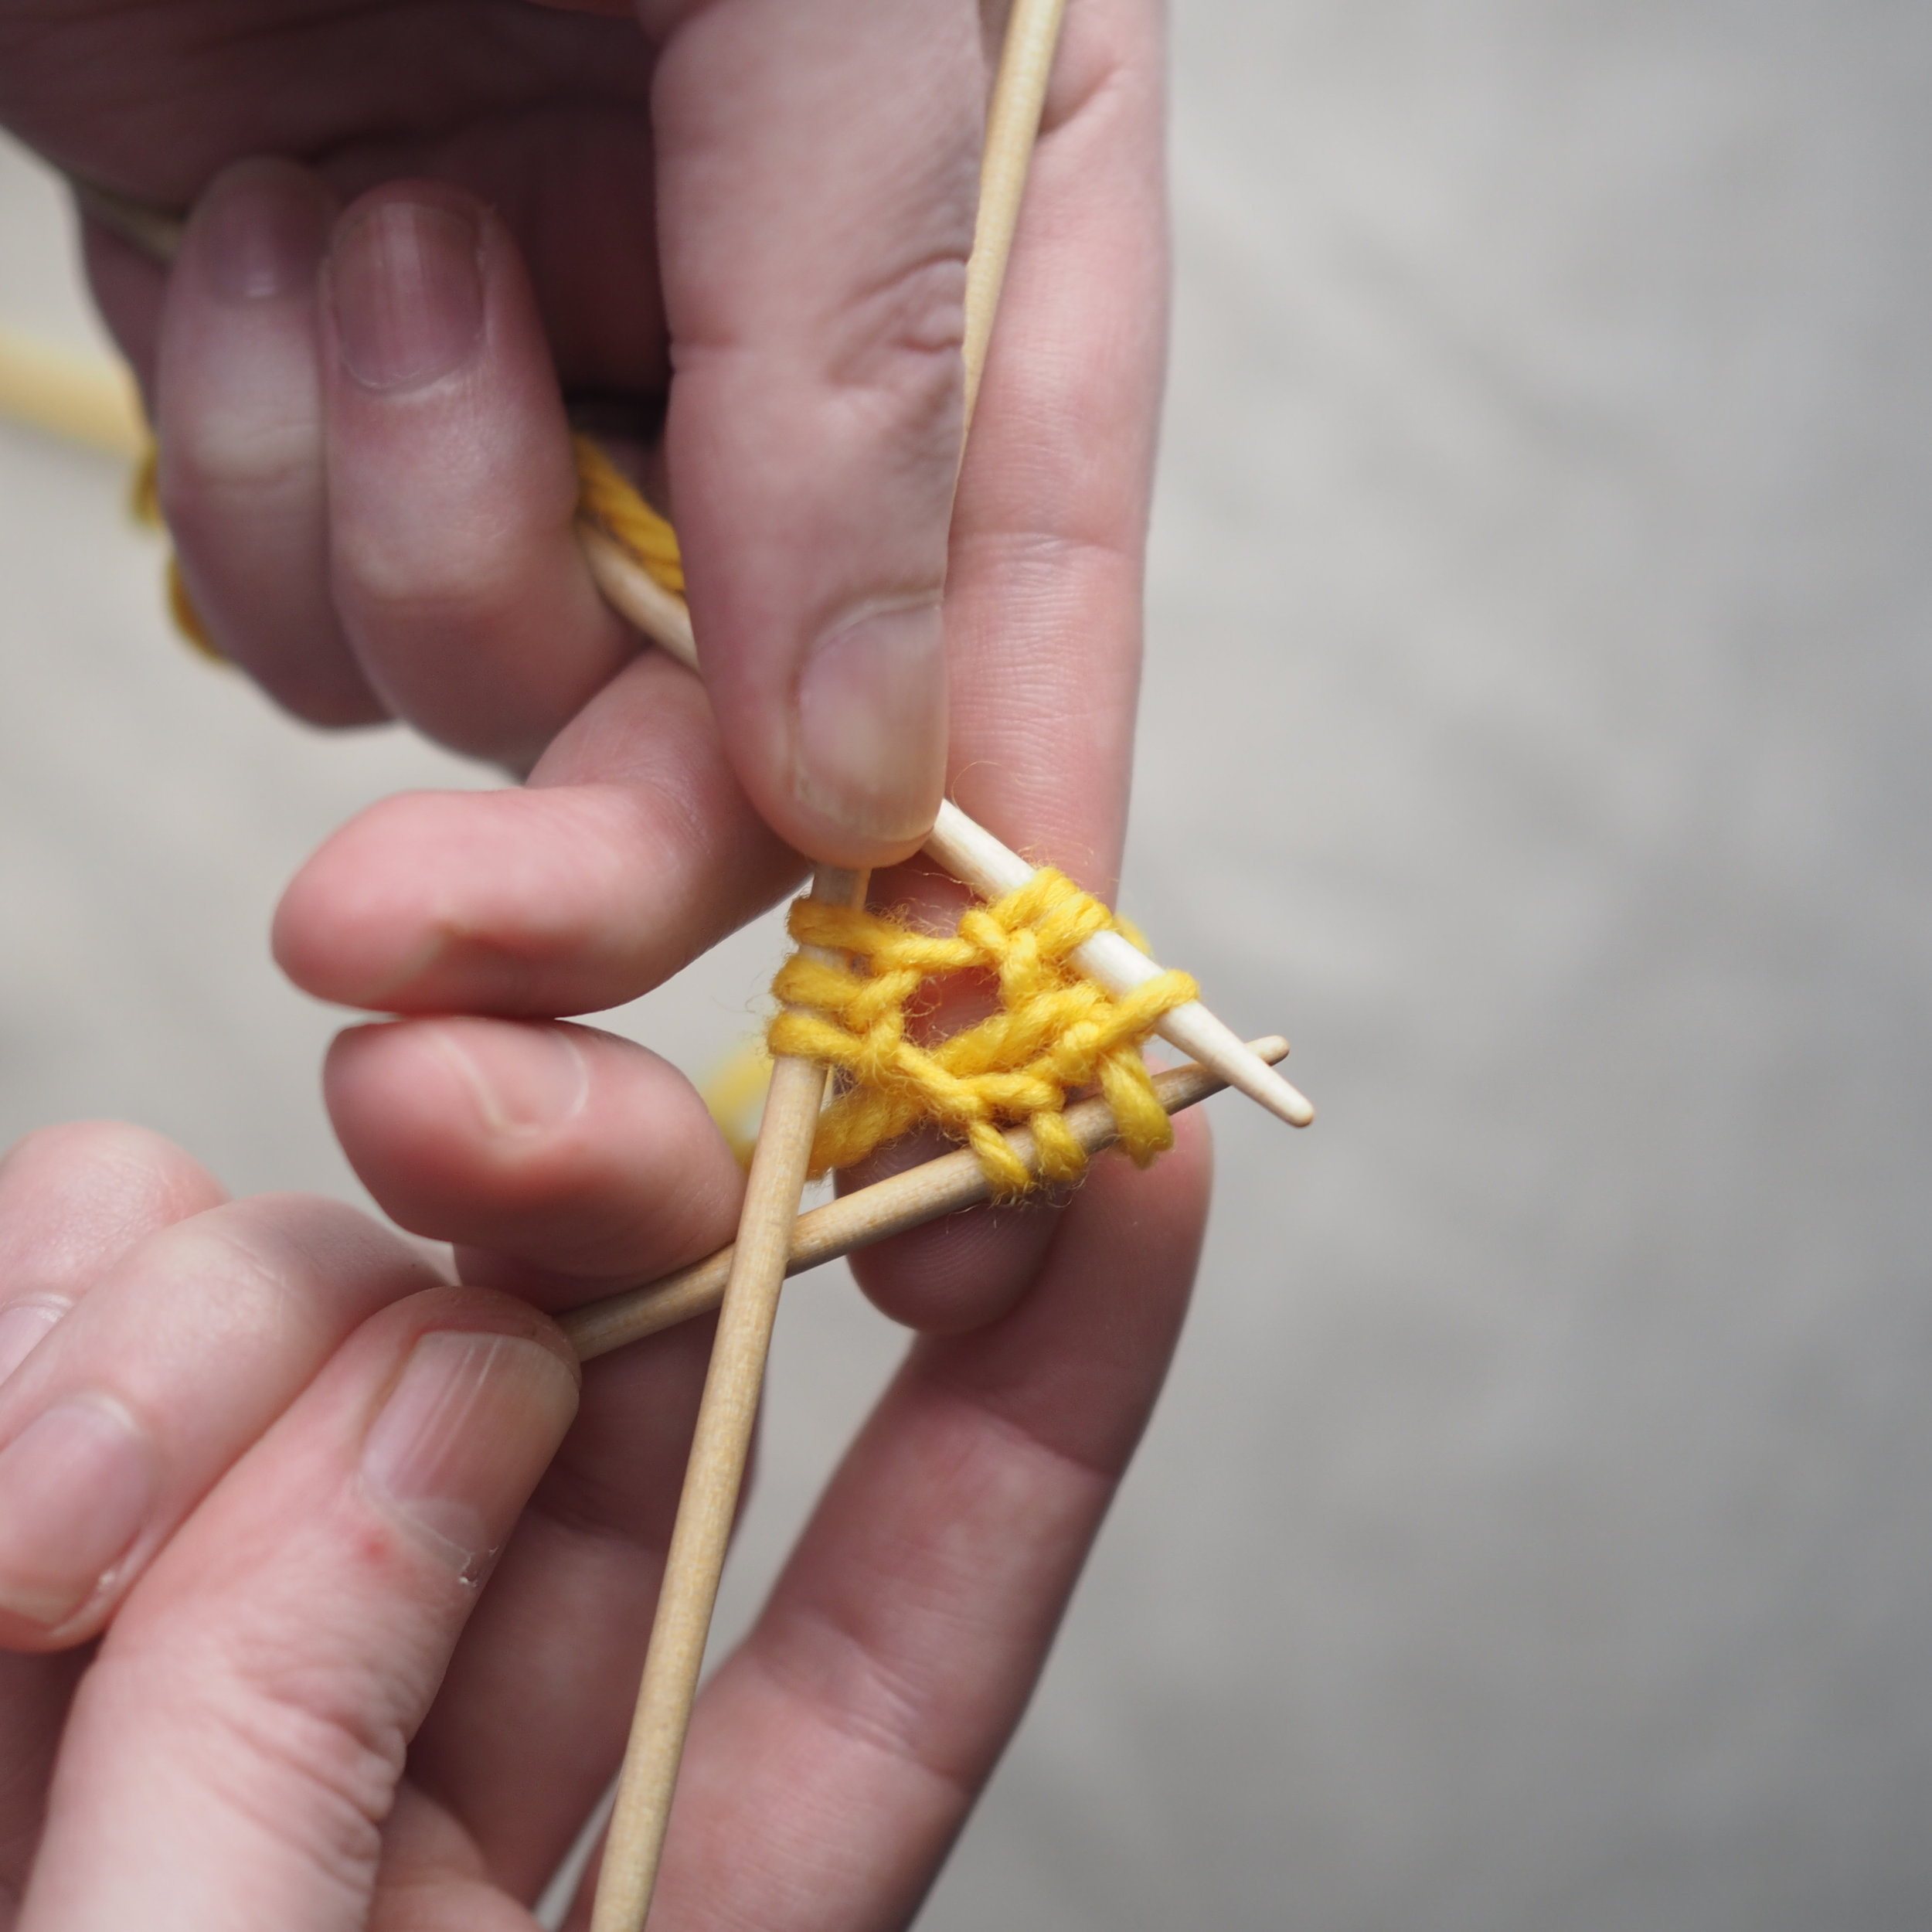
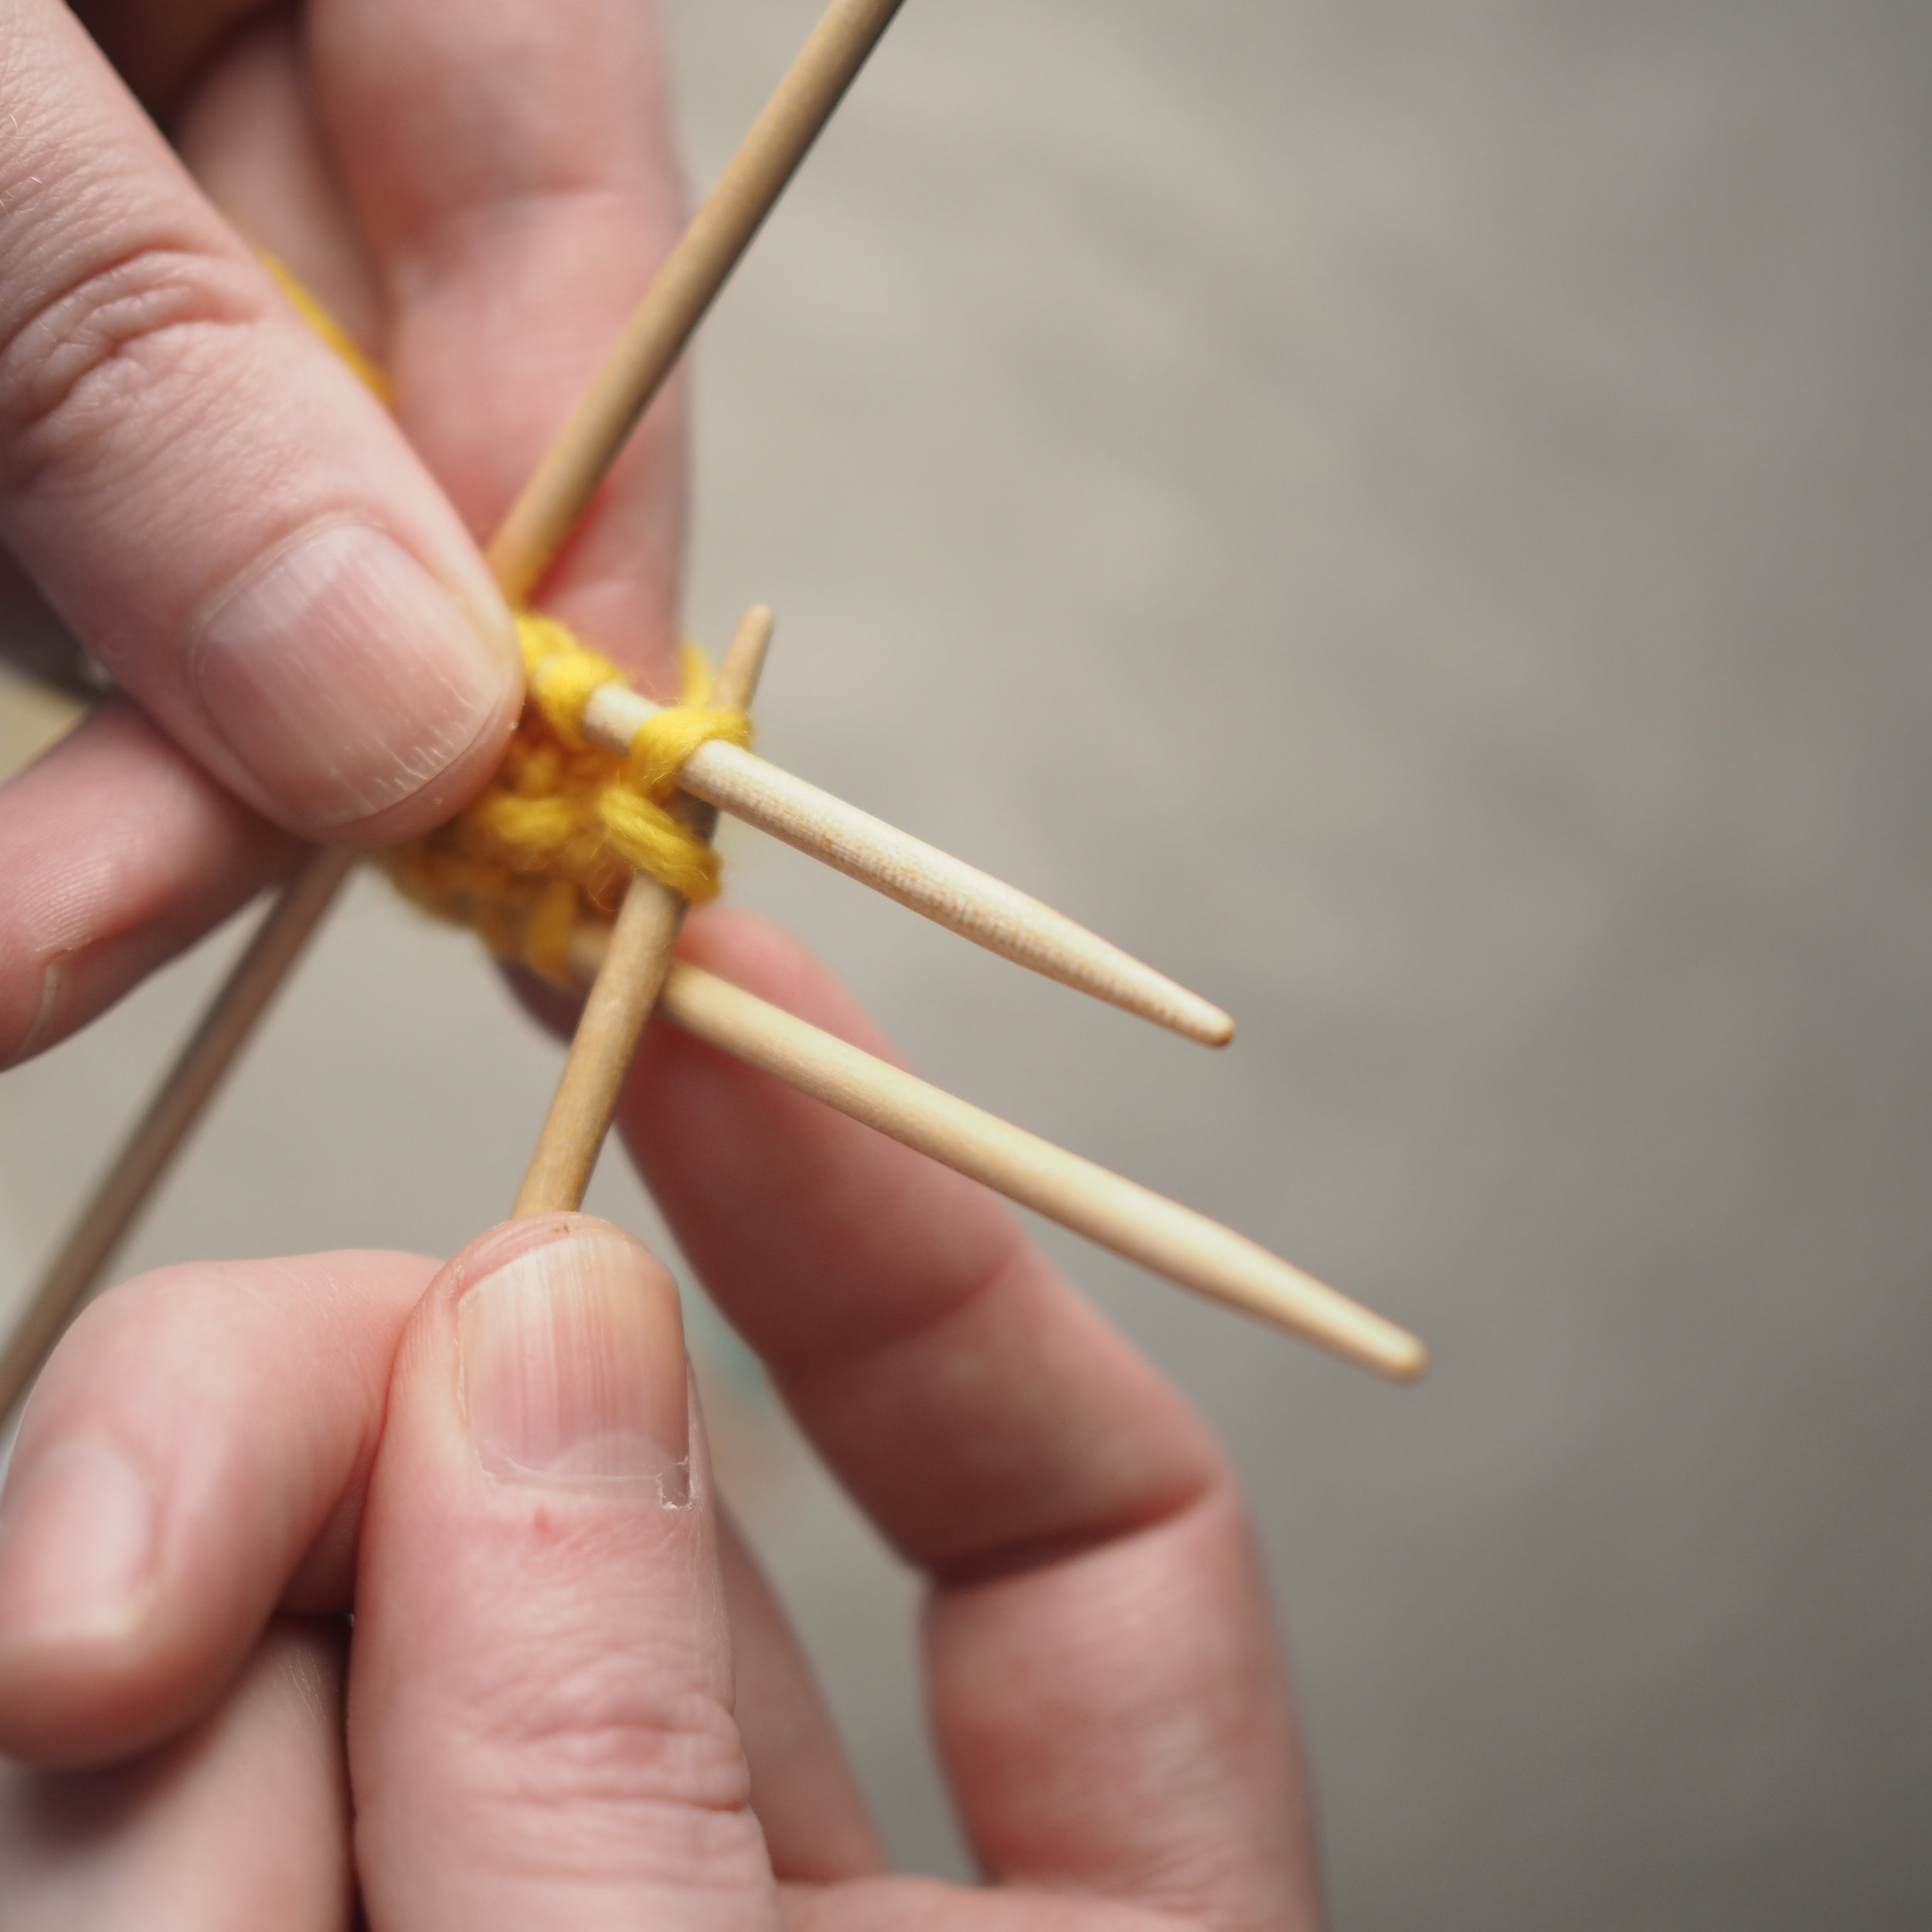
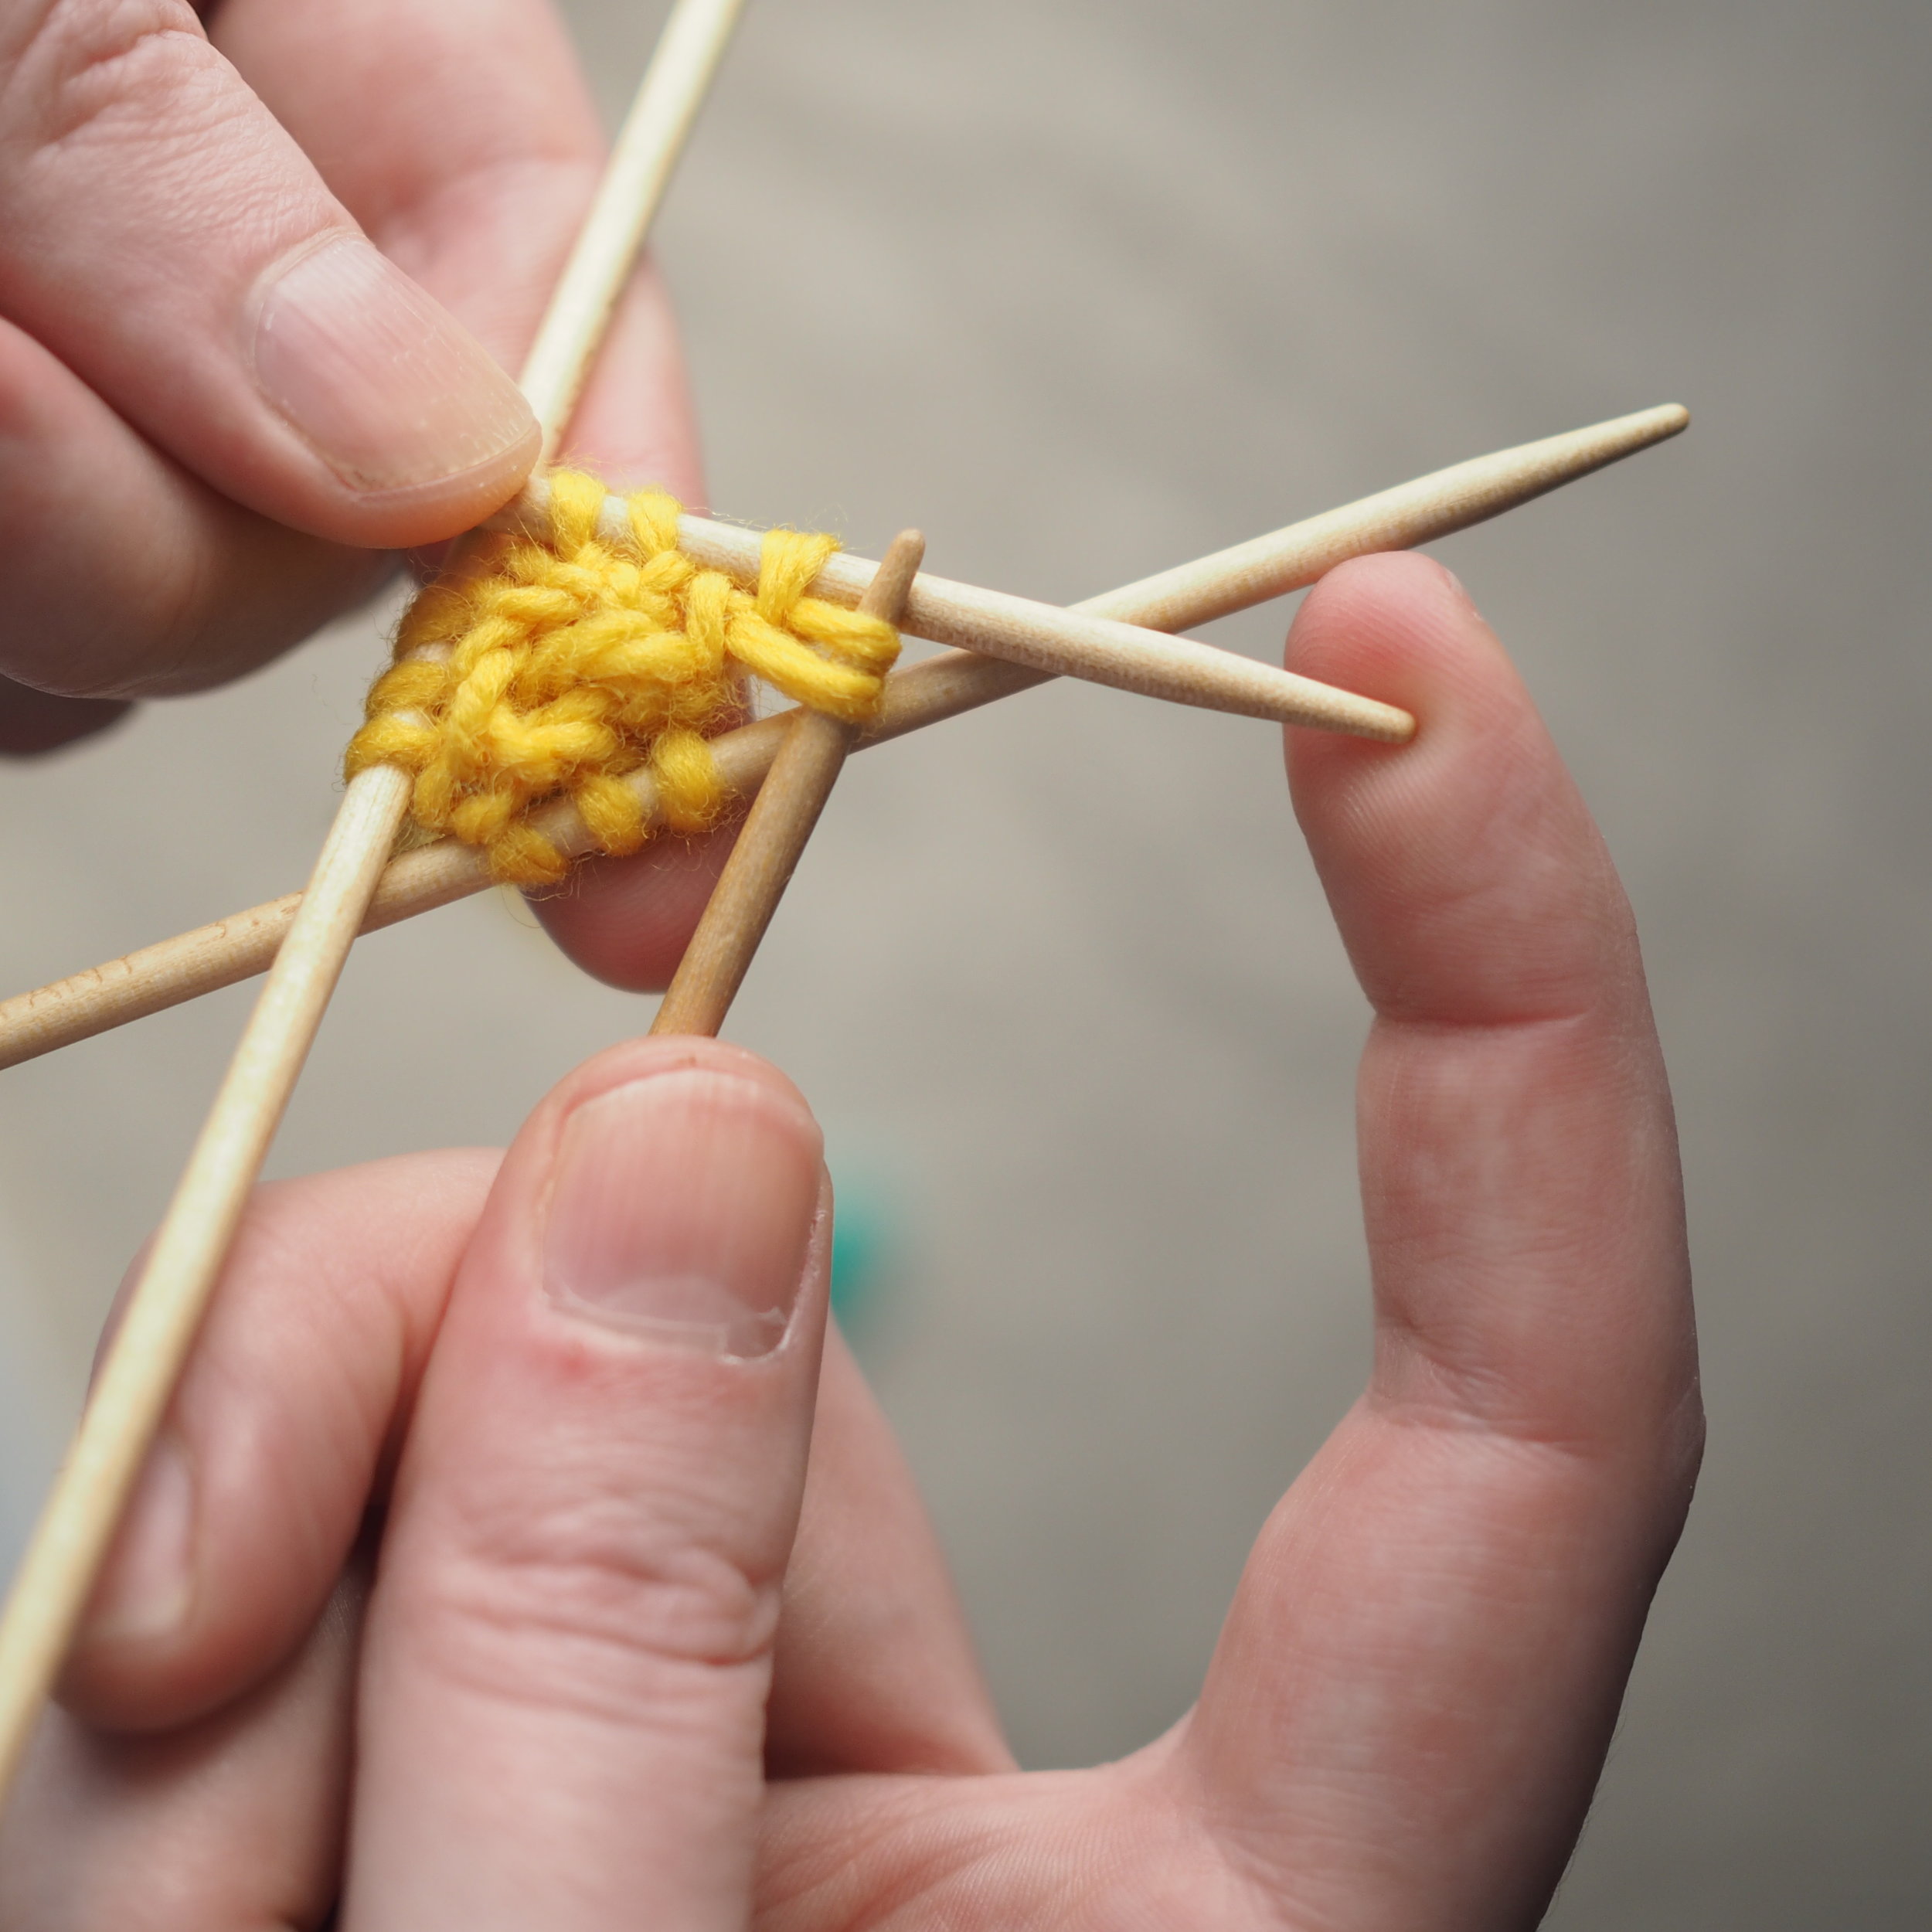
A centered double decrease (cddc) decreases two stitches with center stitch making a clear line up the middle. Work a cddc as follows:

  1. Work until there is one stitch before the marked stitch
  2. Slip the unworked stitch and marked sts together as one, as if you were knitting them
  3. Knit the next stitch normally
  4. Pass the two slipped stitches over the knitted stitch.

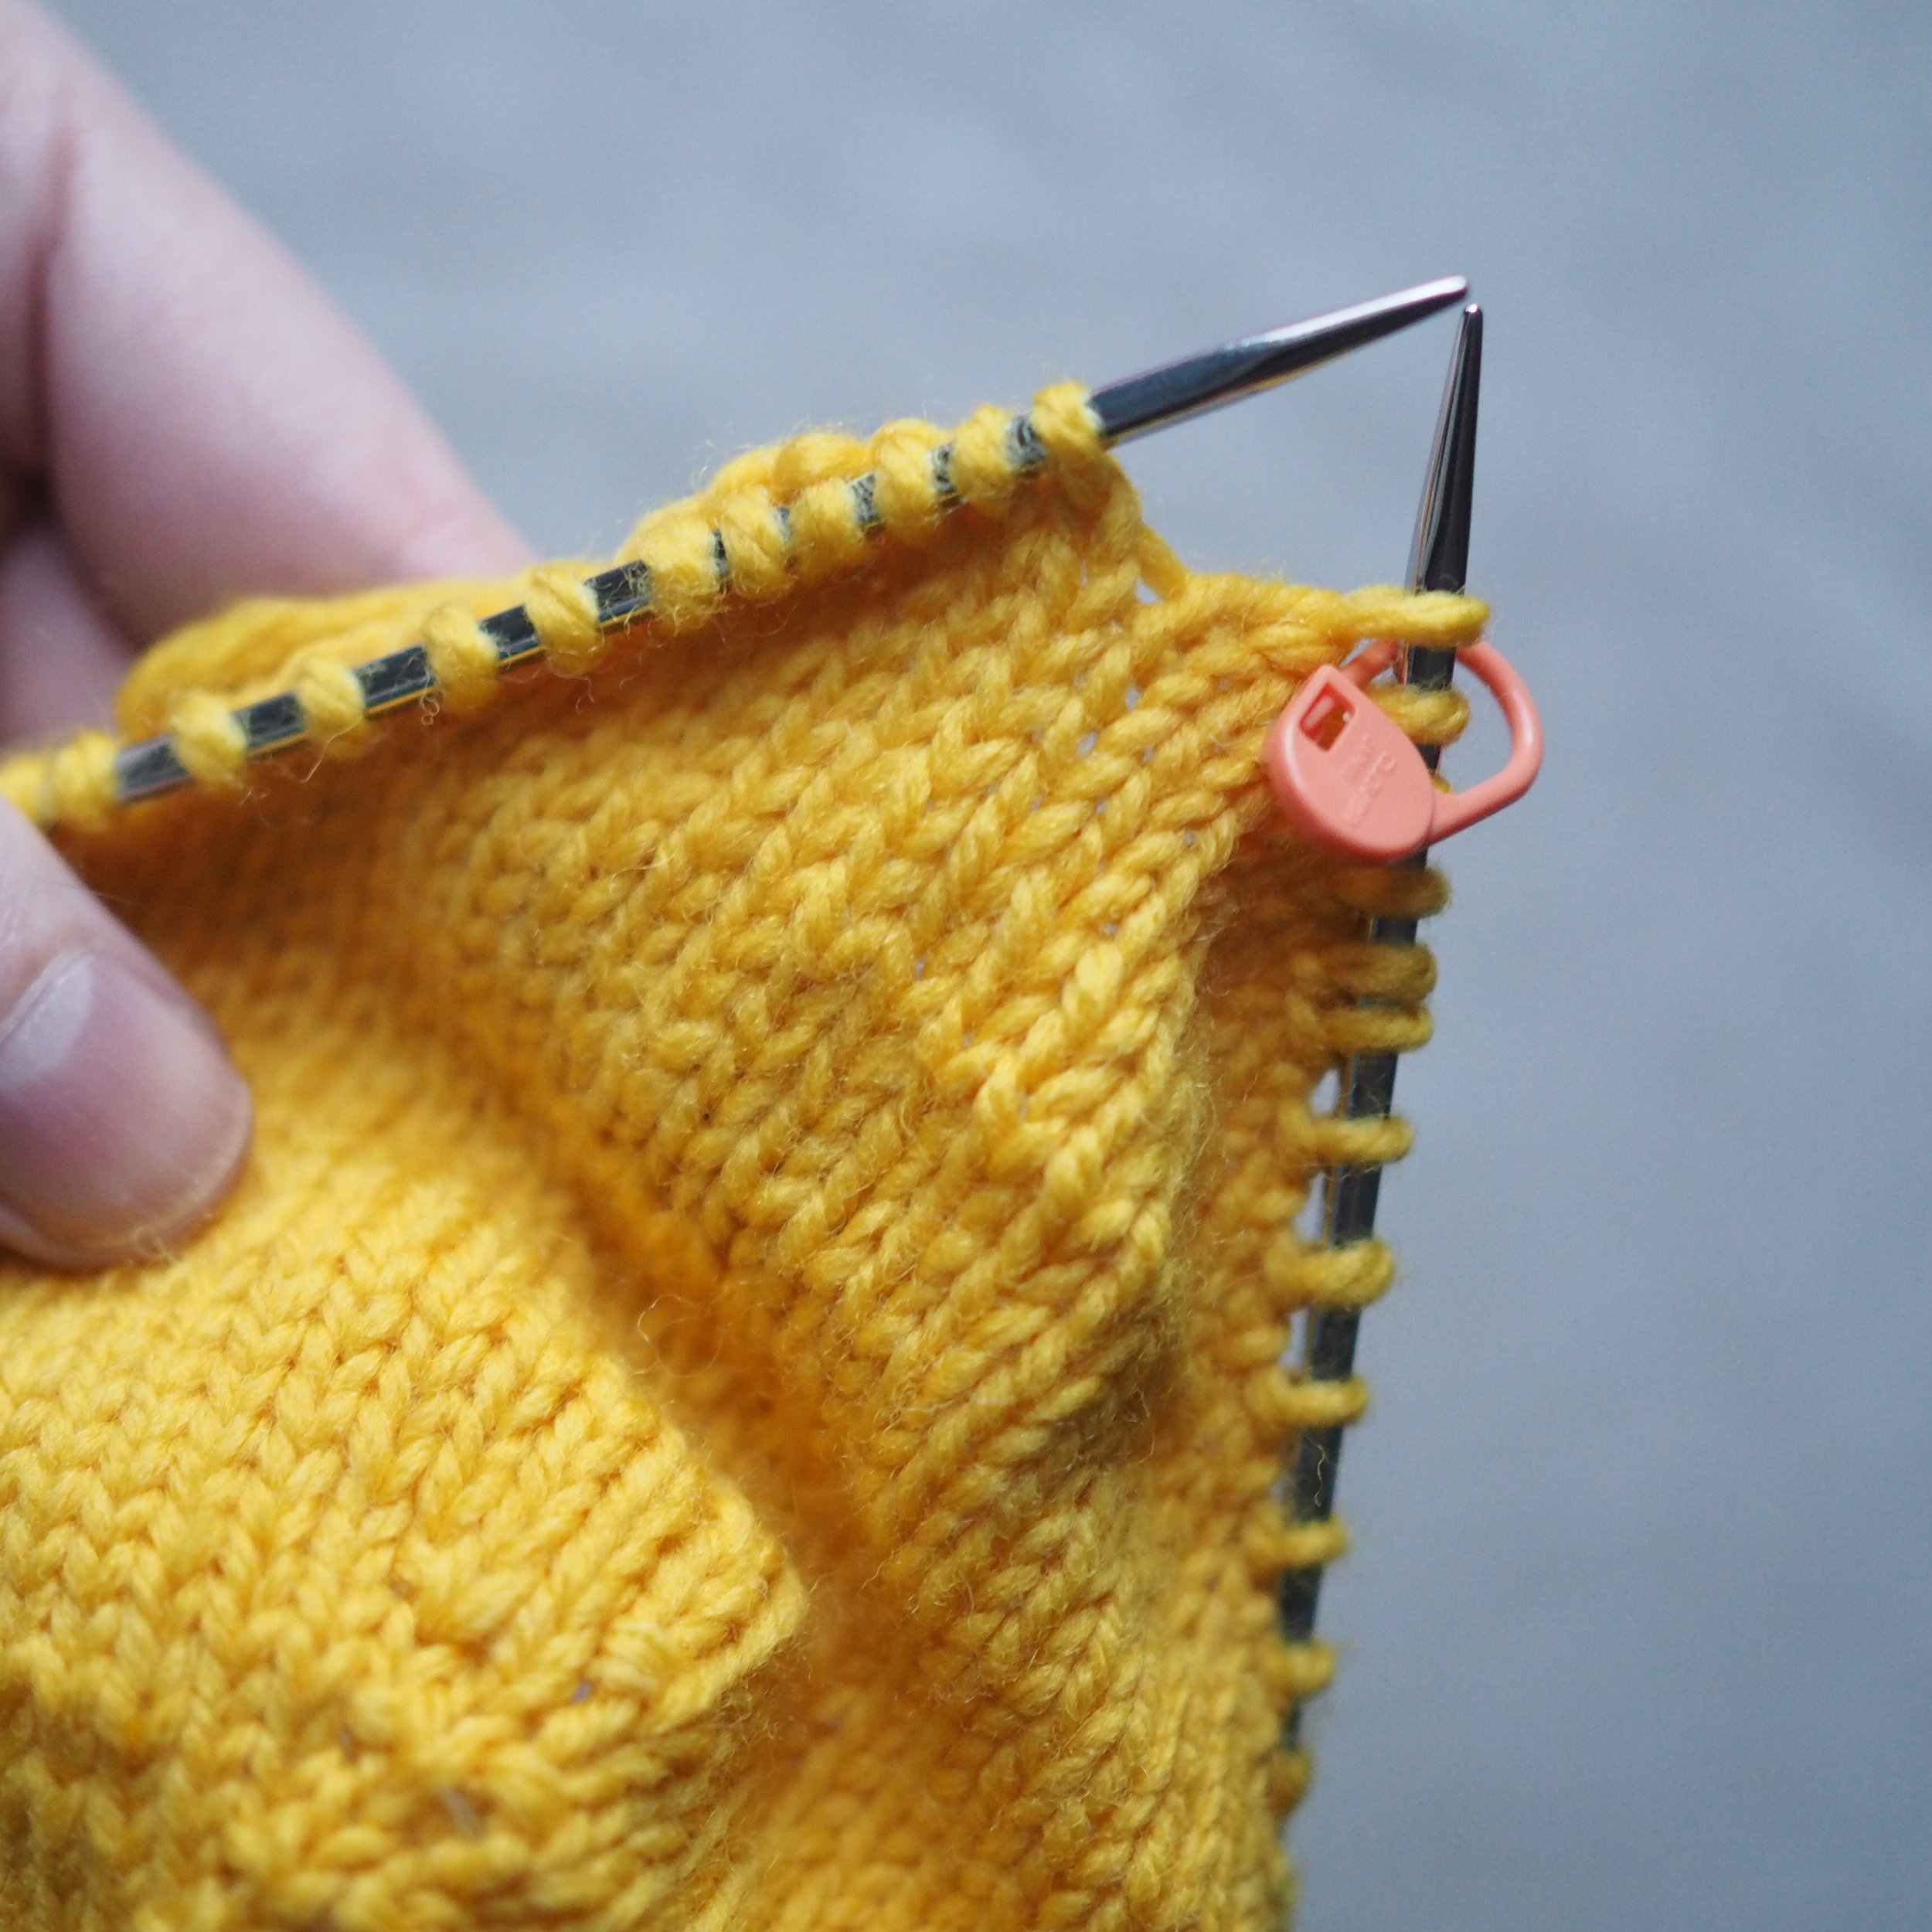
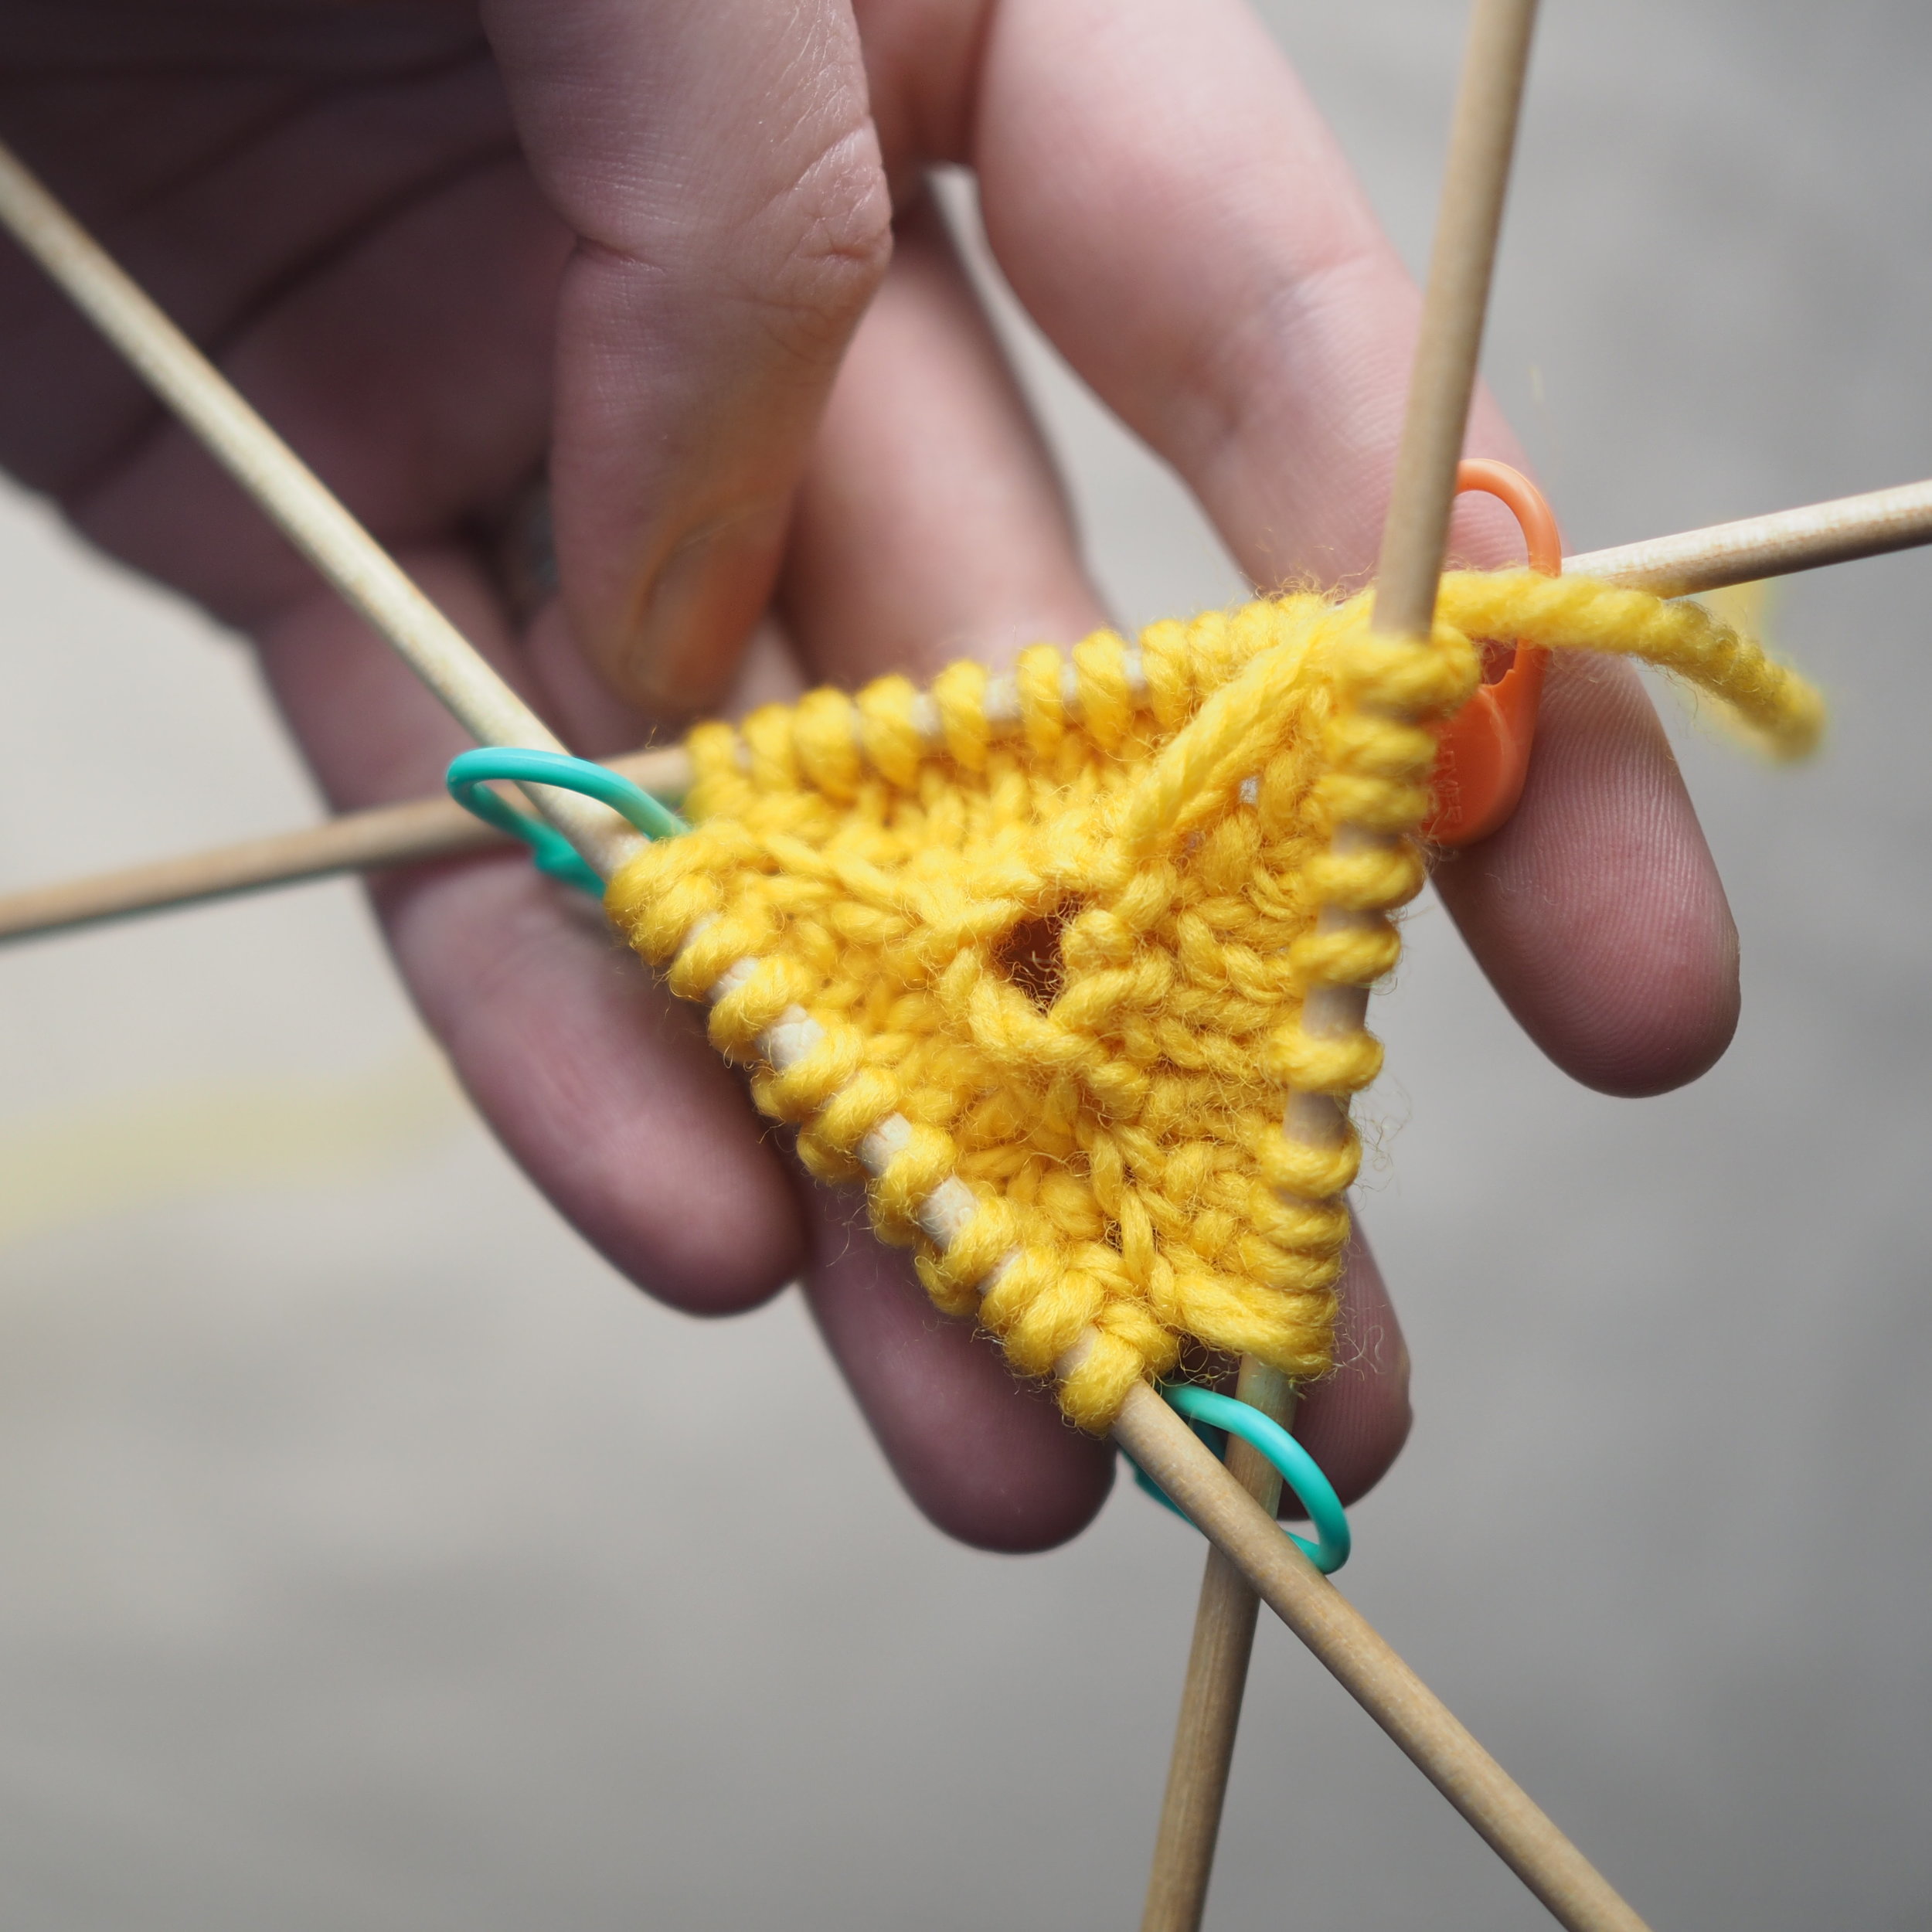
The line of the center of the decreases should be pretty clear to follow, but feel free to move up the stitch marker if you find it helpful. 

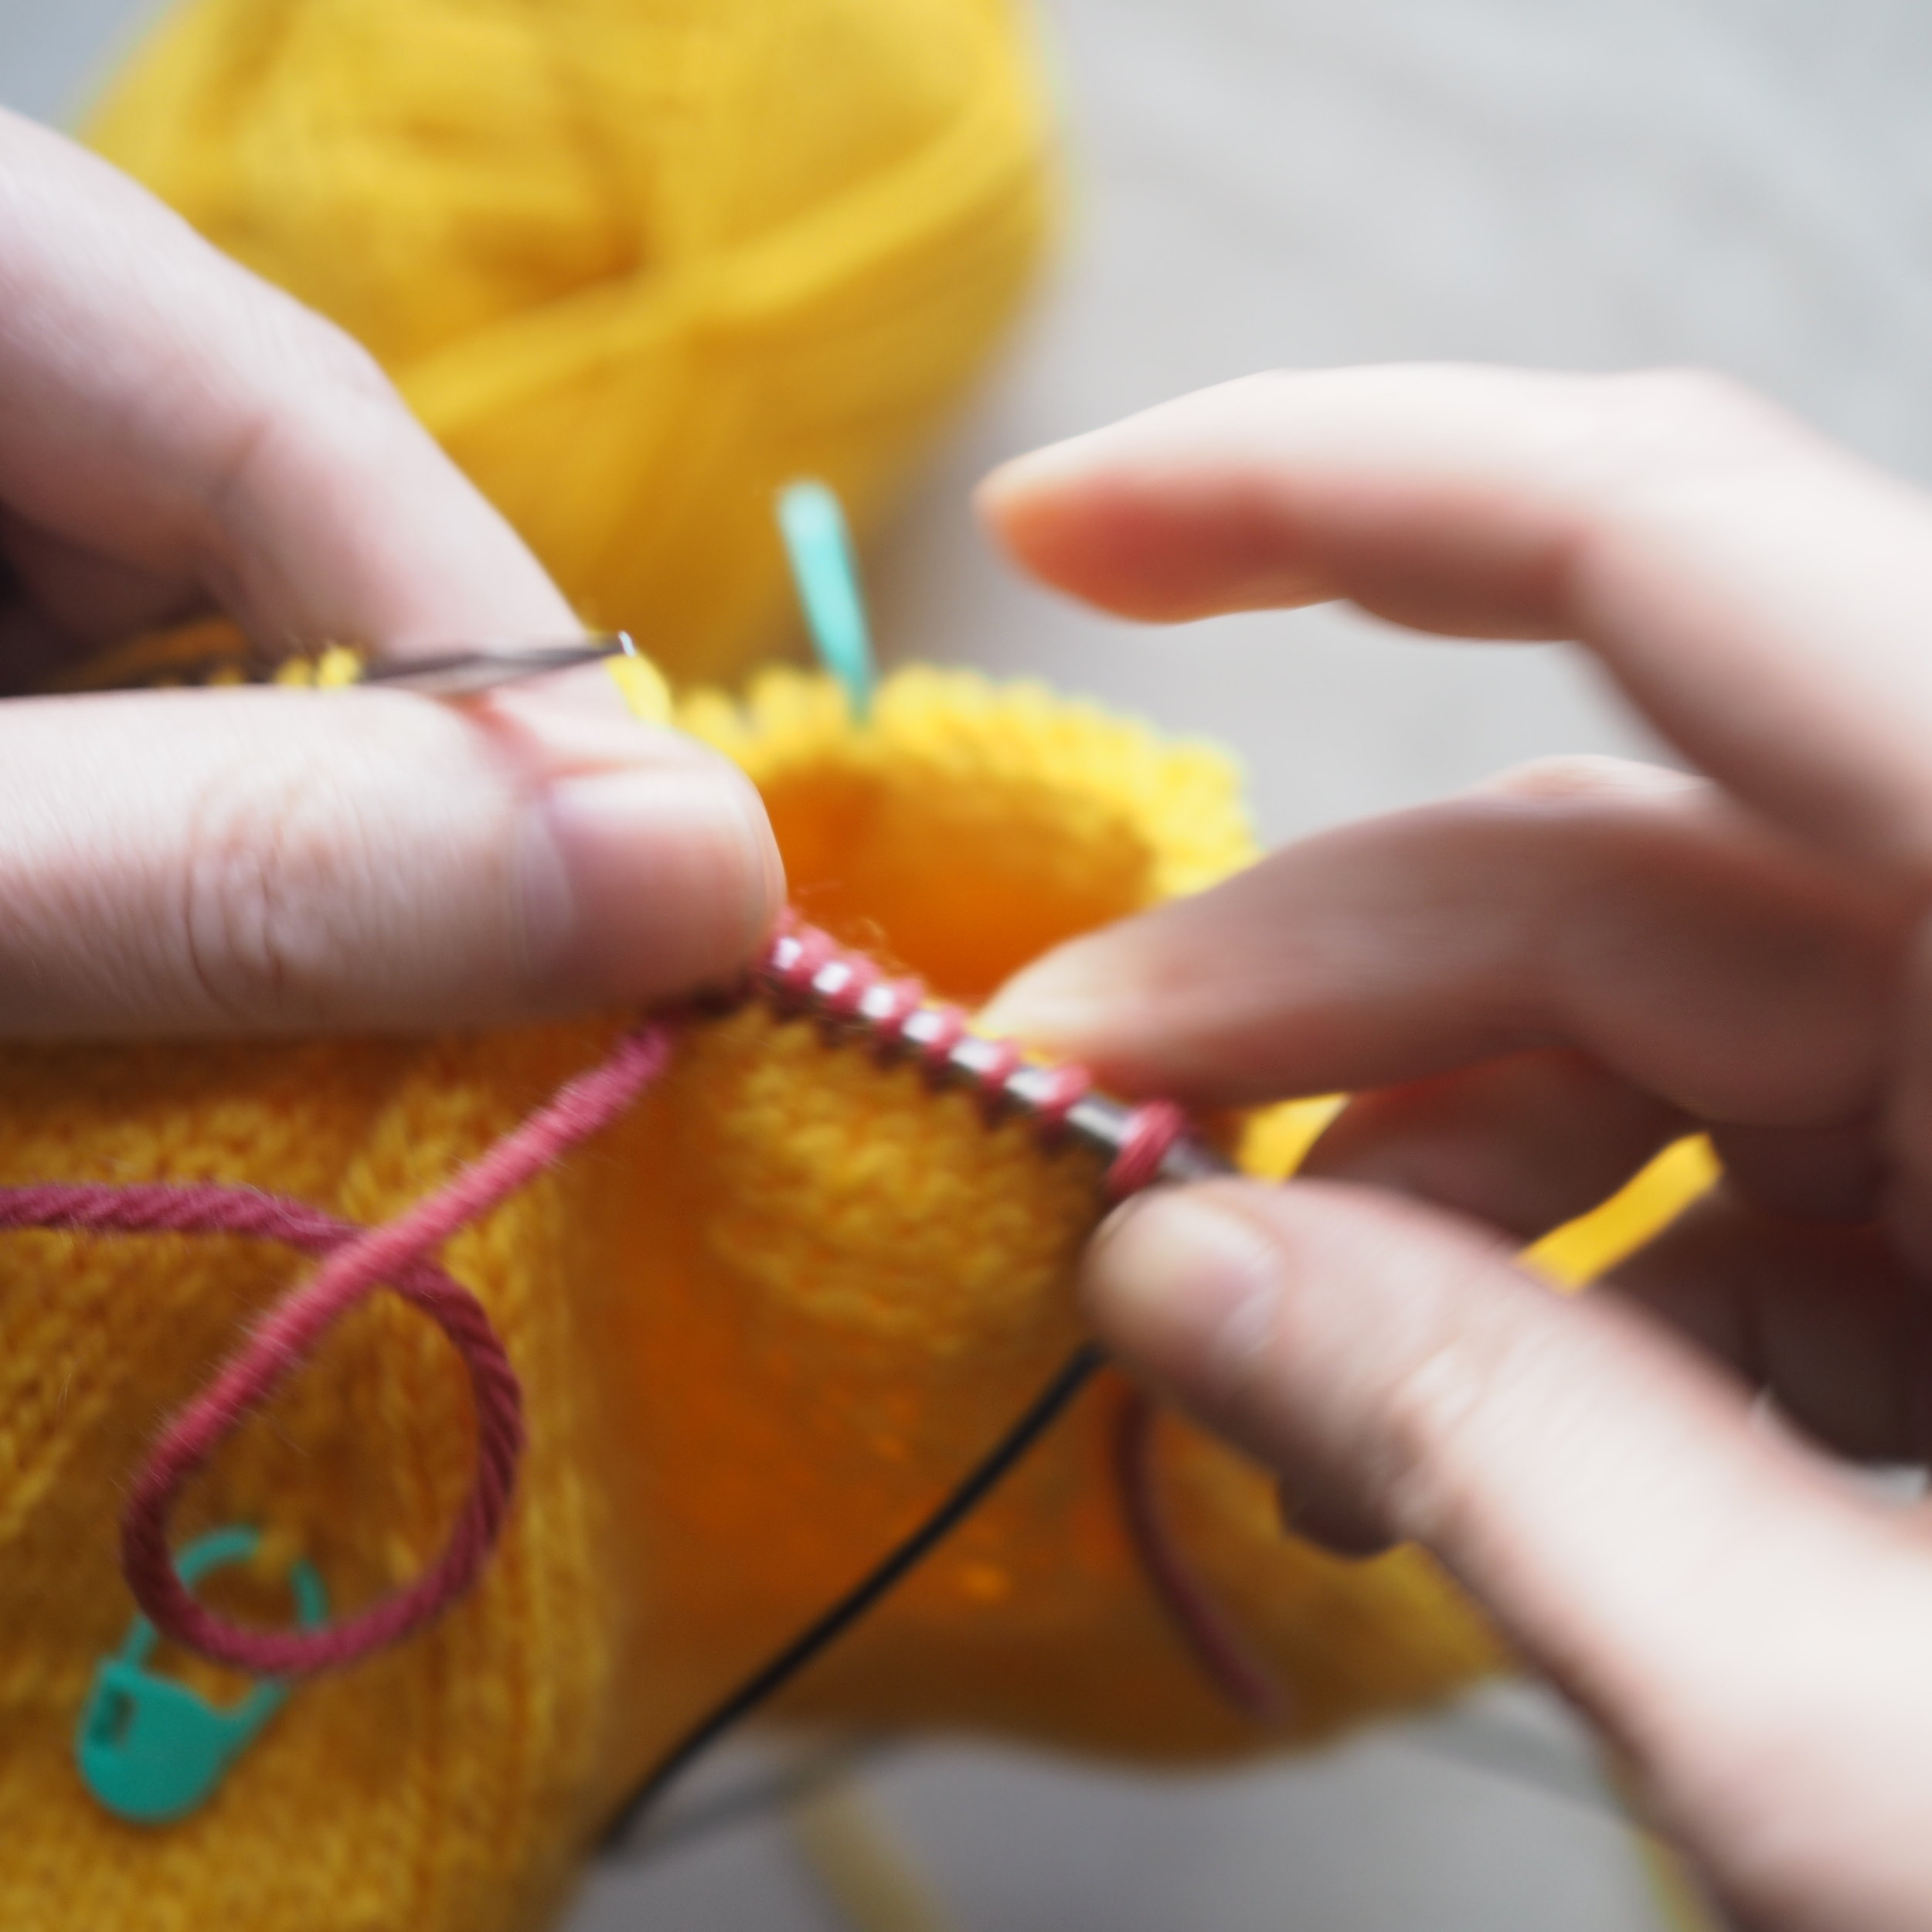
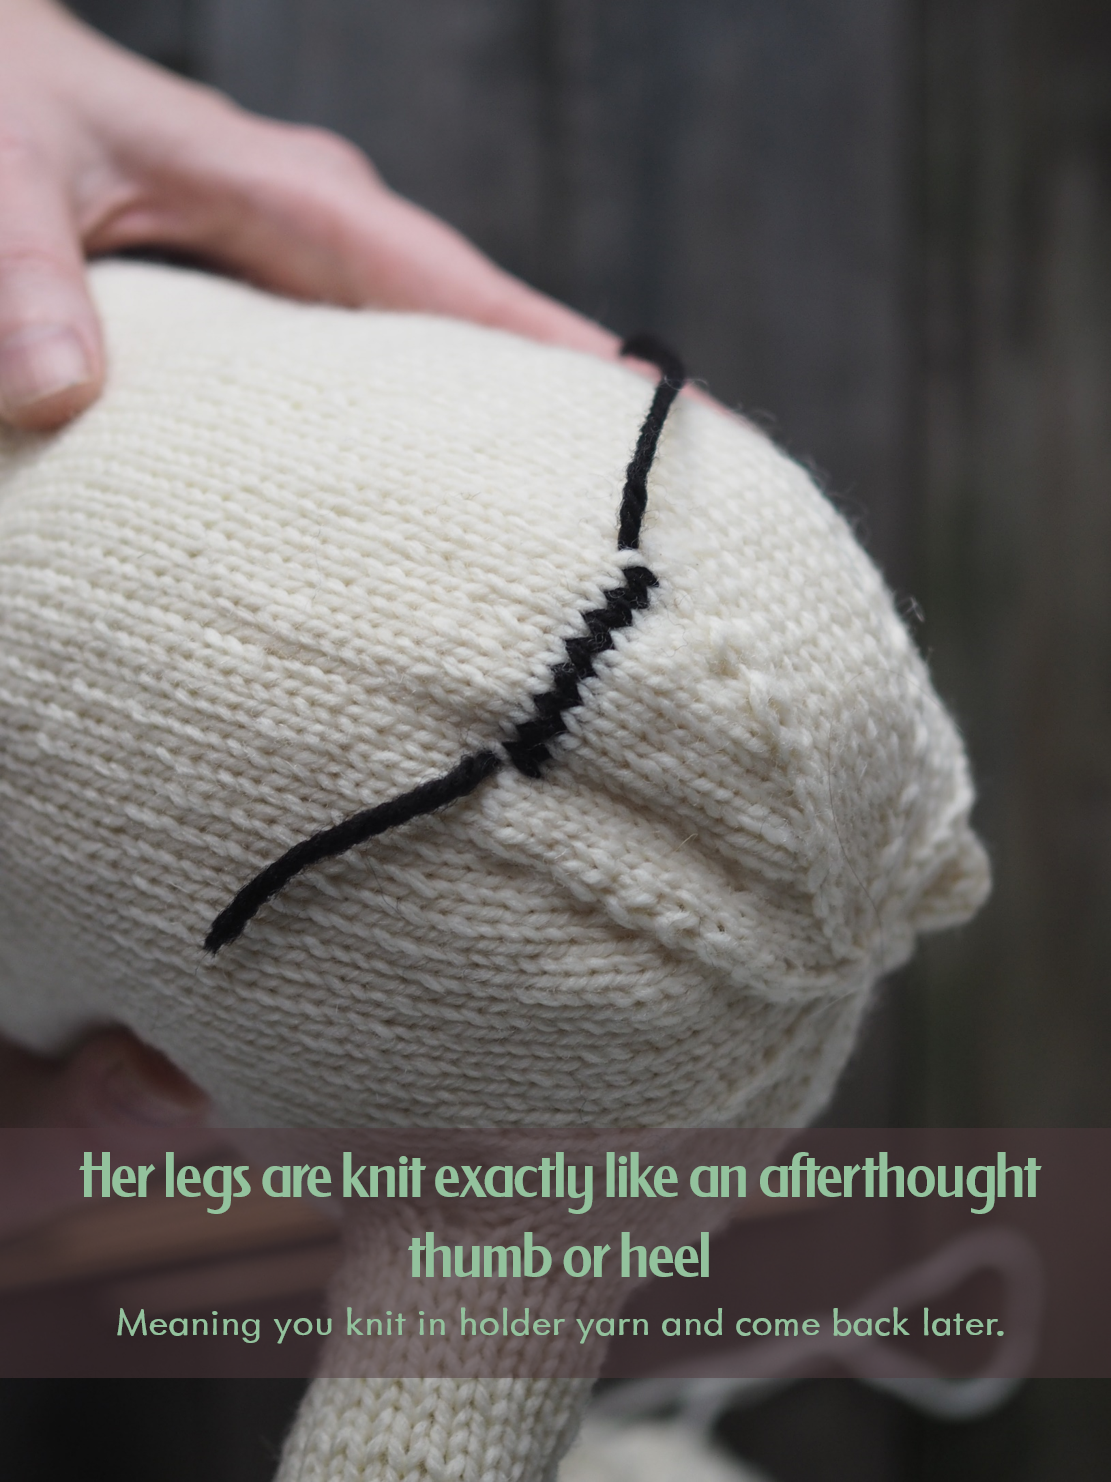
Preparing for an Afterthought Appendage

I like working wings/legs/etc in an afterthought style, because it means that the appendage is firmly attached to the body, no grafting or seaming needed. Meaning it stands up all the stronger to any grabby hands. 

To set up for an afterthought:  

  1. Put down your working yarn, but do not cut. 
  2. Knit the correct number of stitches in scrap yarn.
  3. Slip sts in scrap yarn back to left hand needle.
  4. Knit the stitches again with working yarn and carry on as usual. 

I like to keep the tails of the scrap yarn on the outside of the body, as this helps when you need to pick it out. 

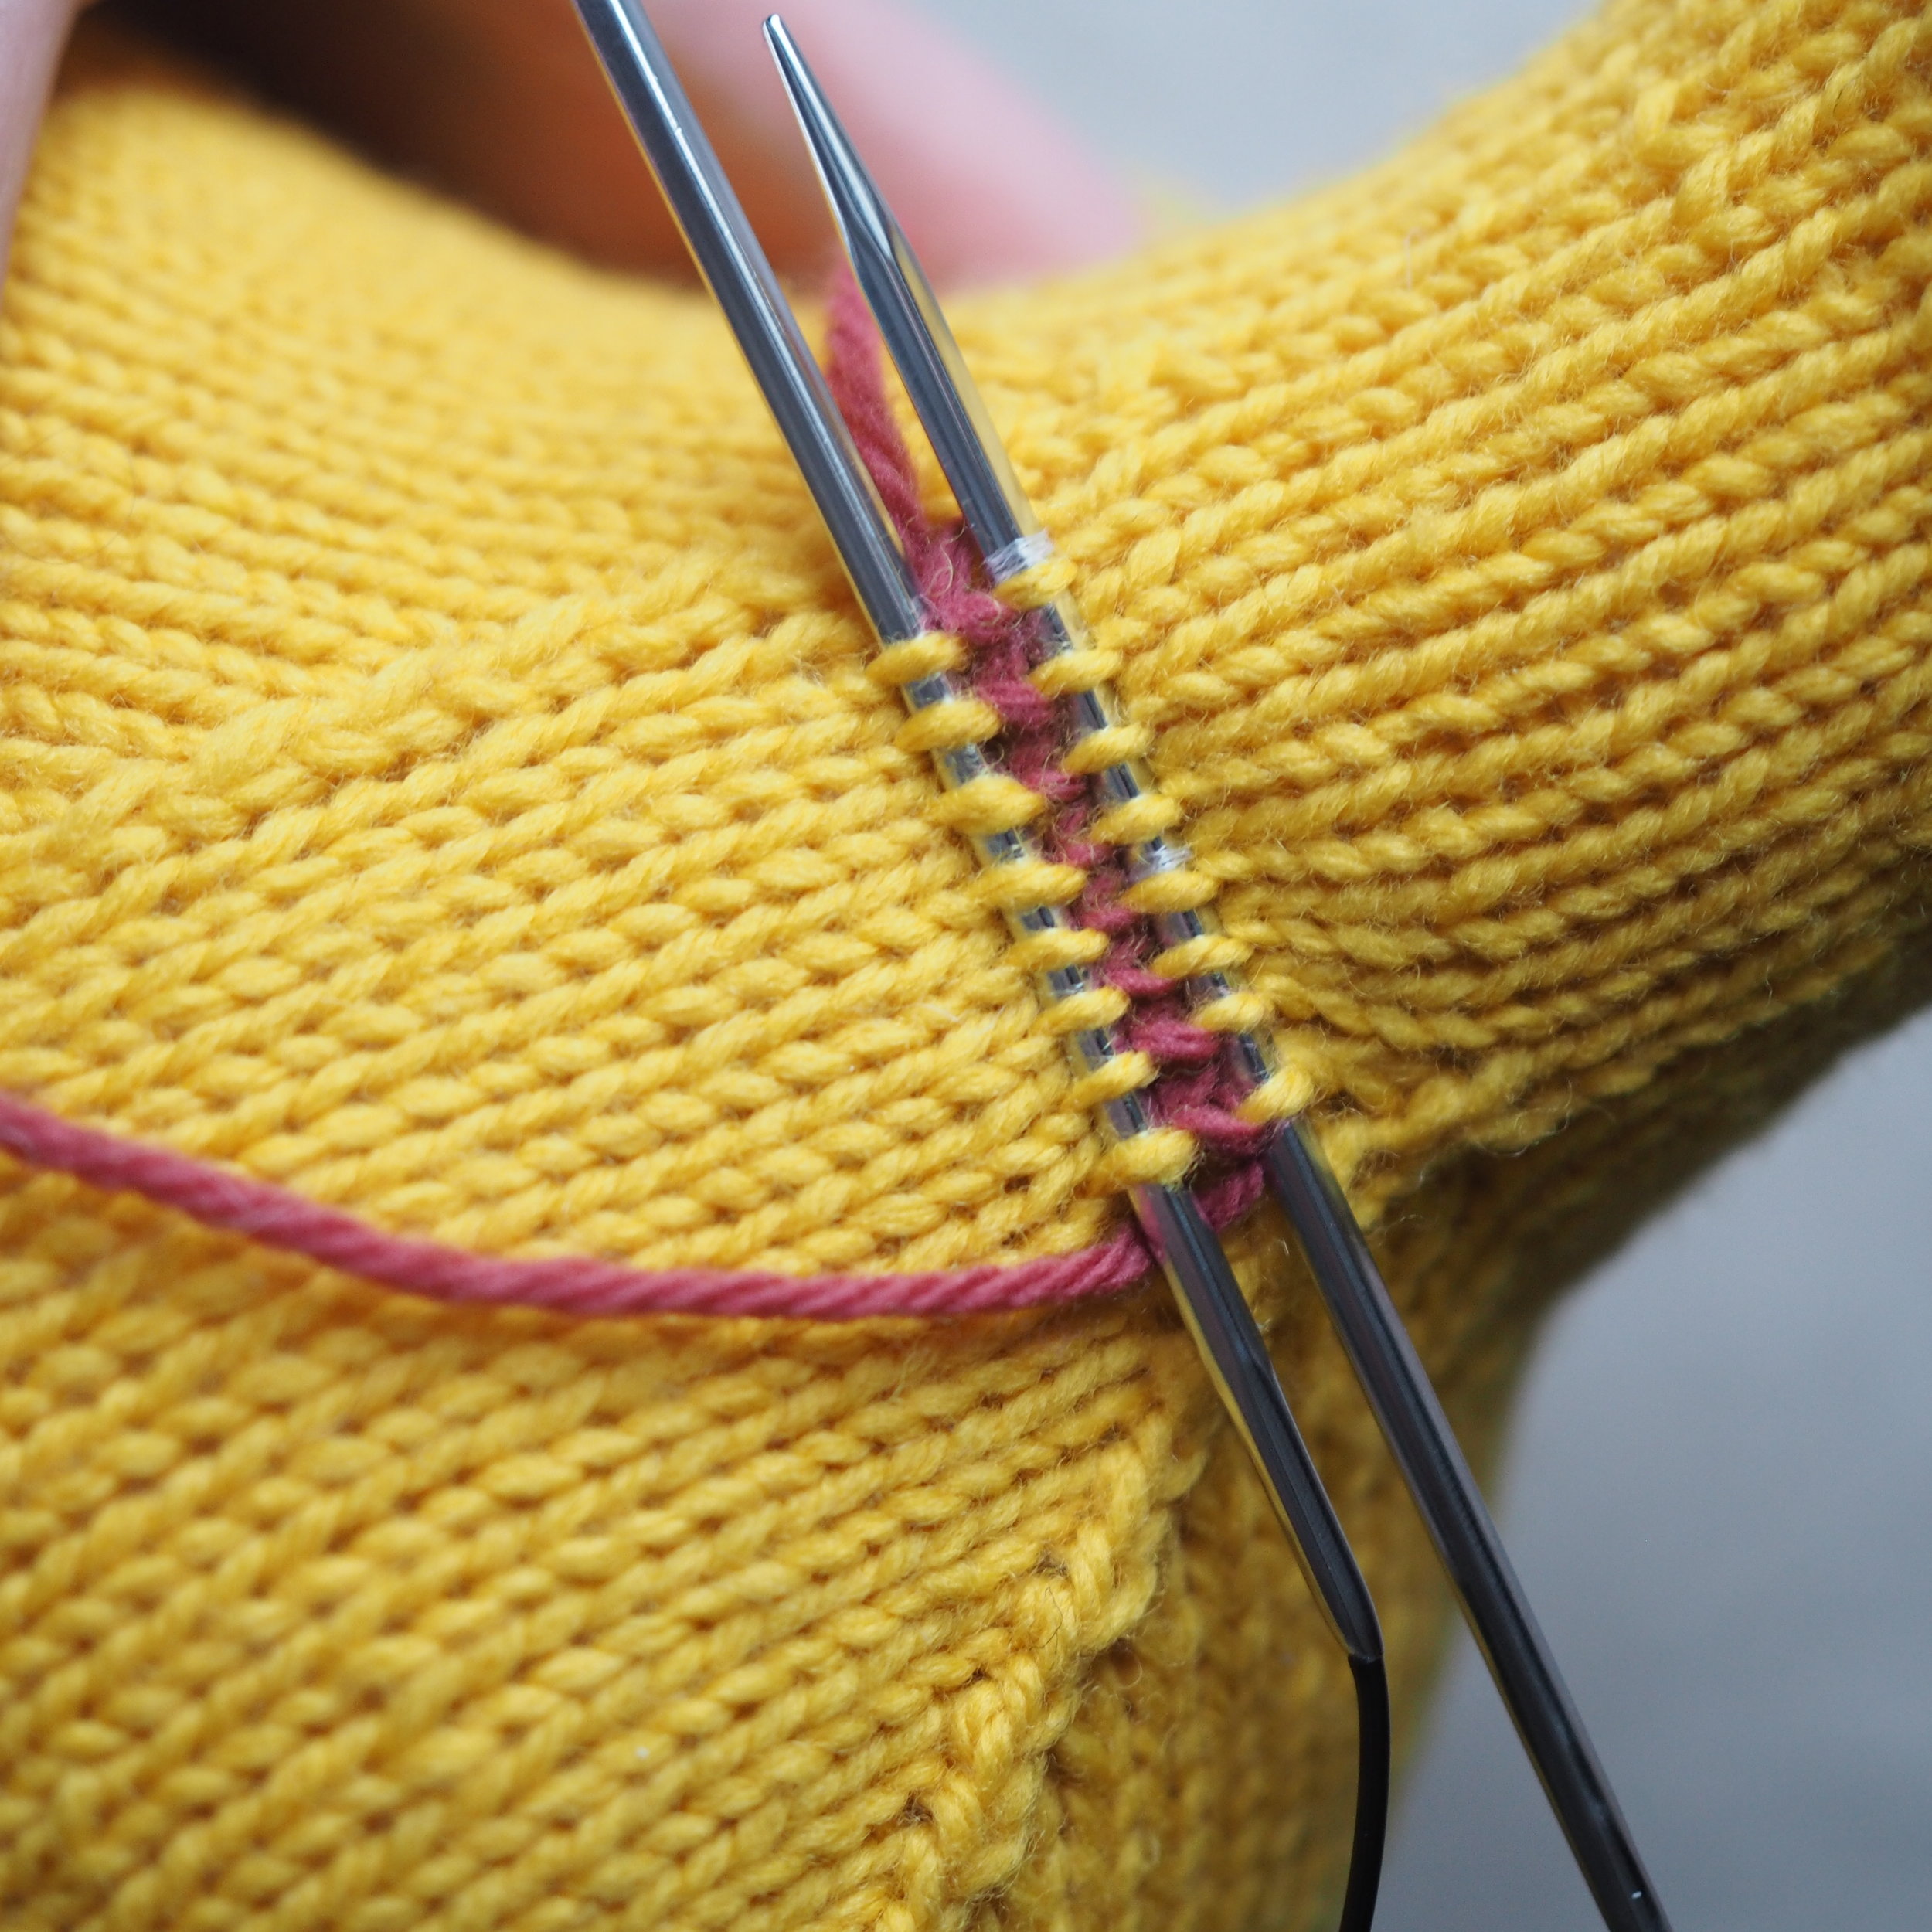
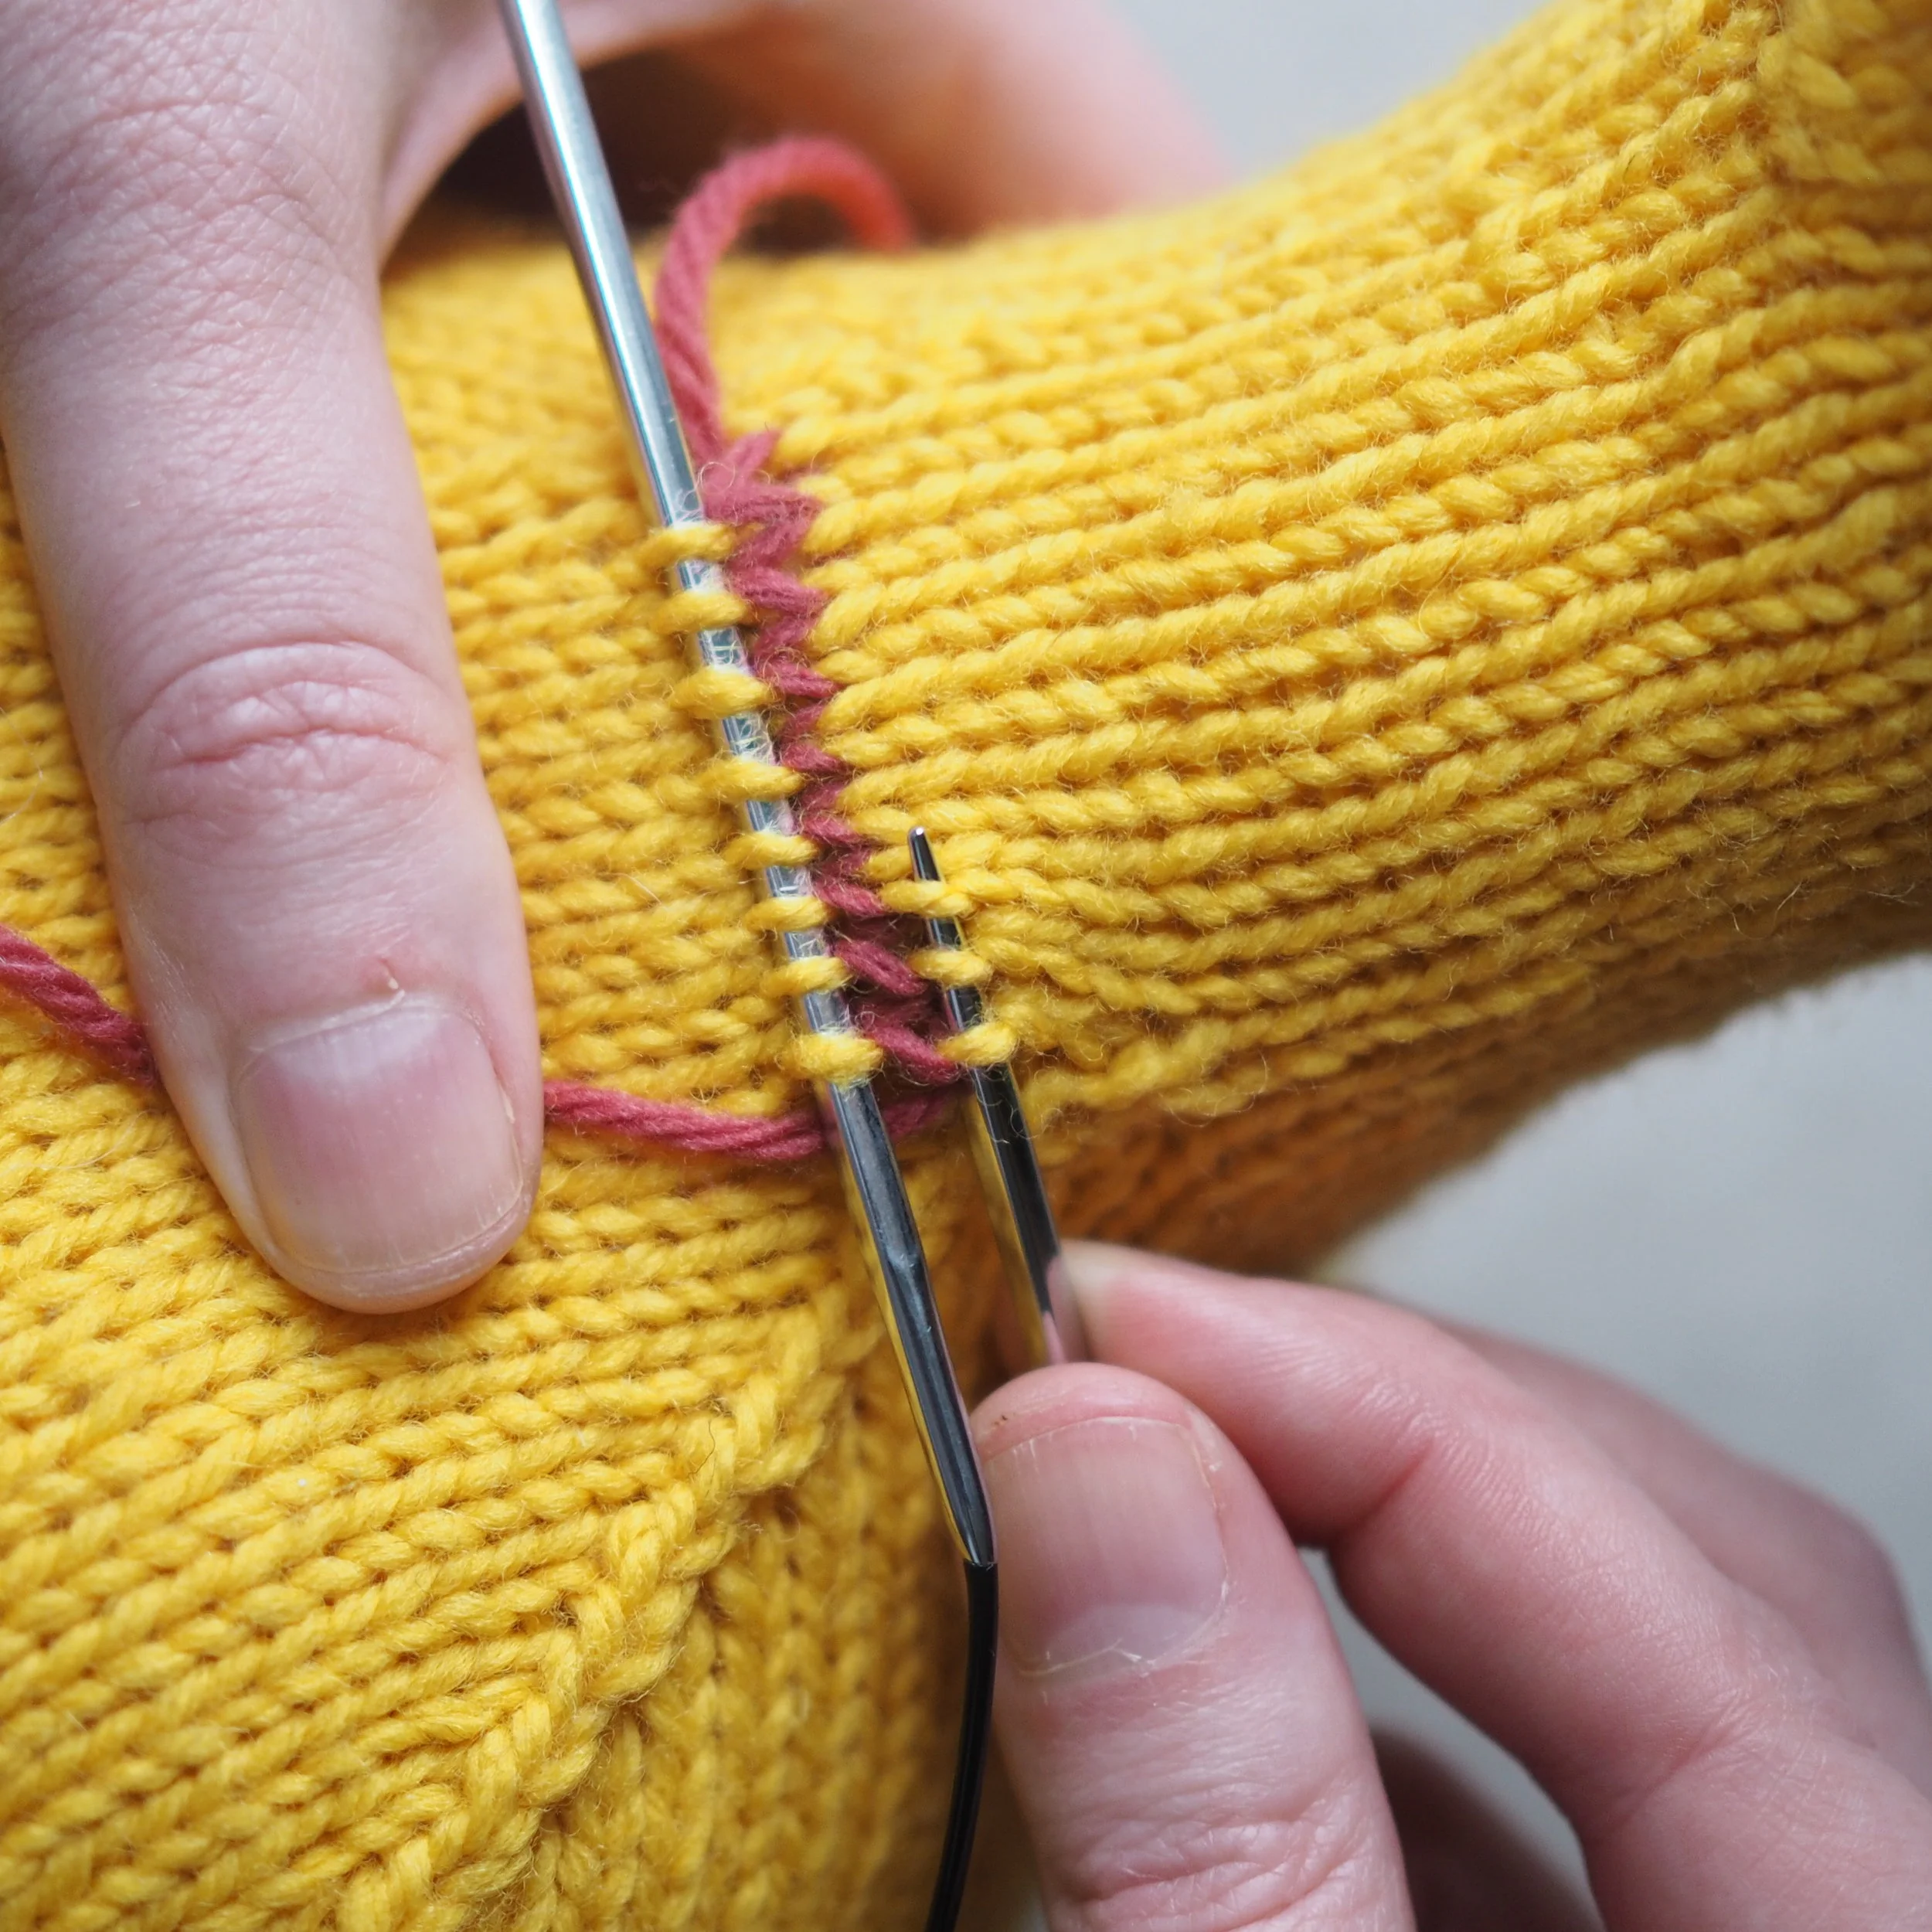
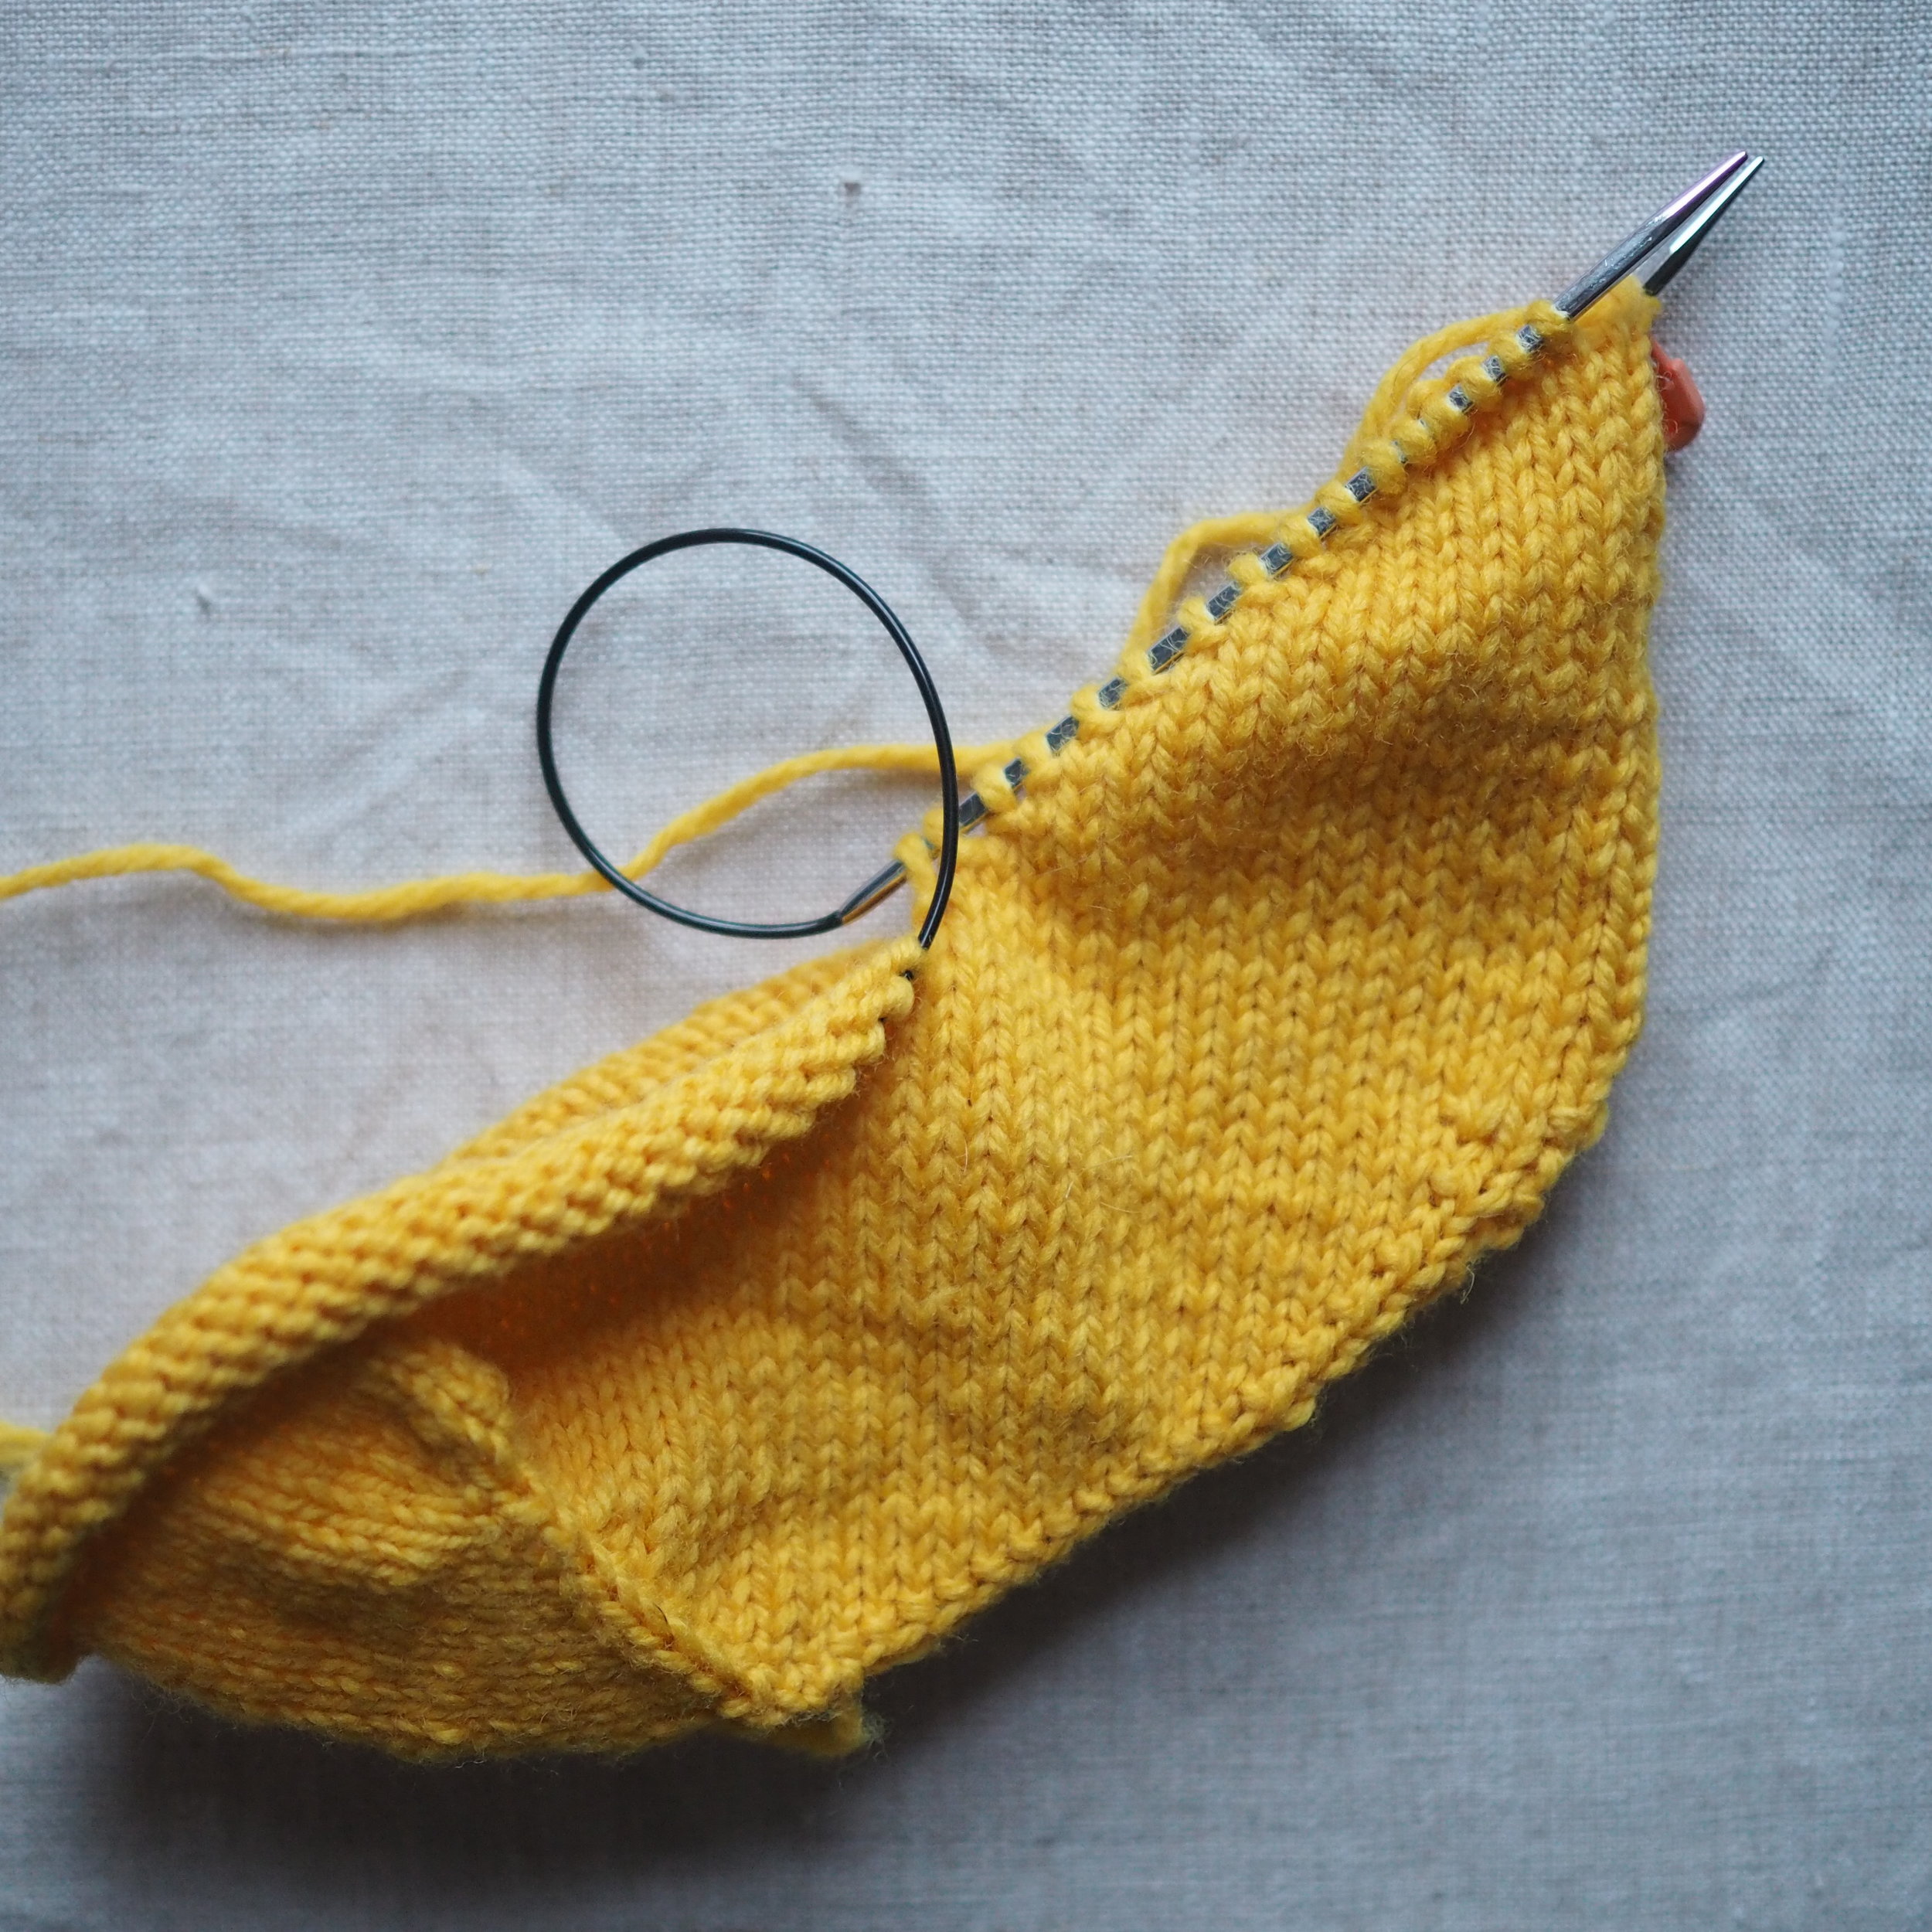
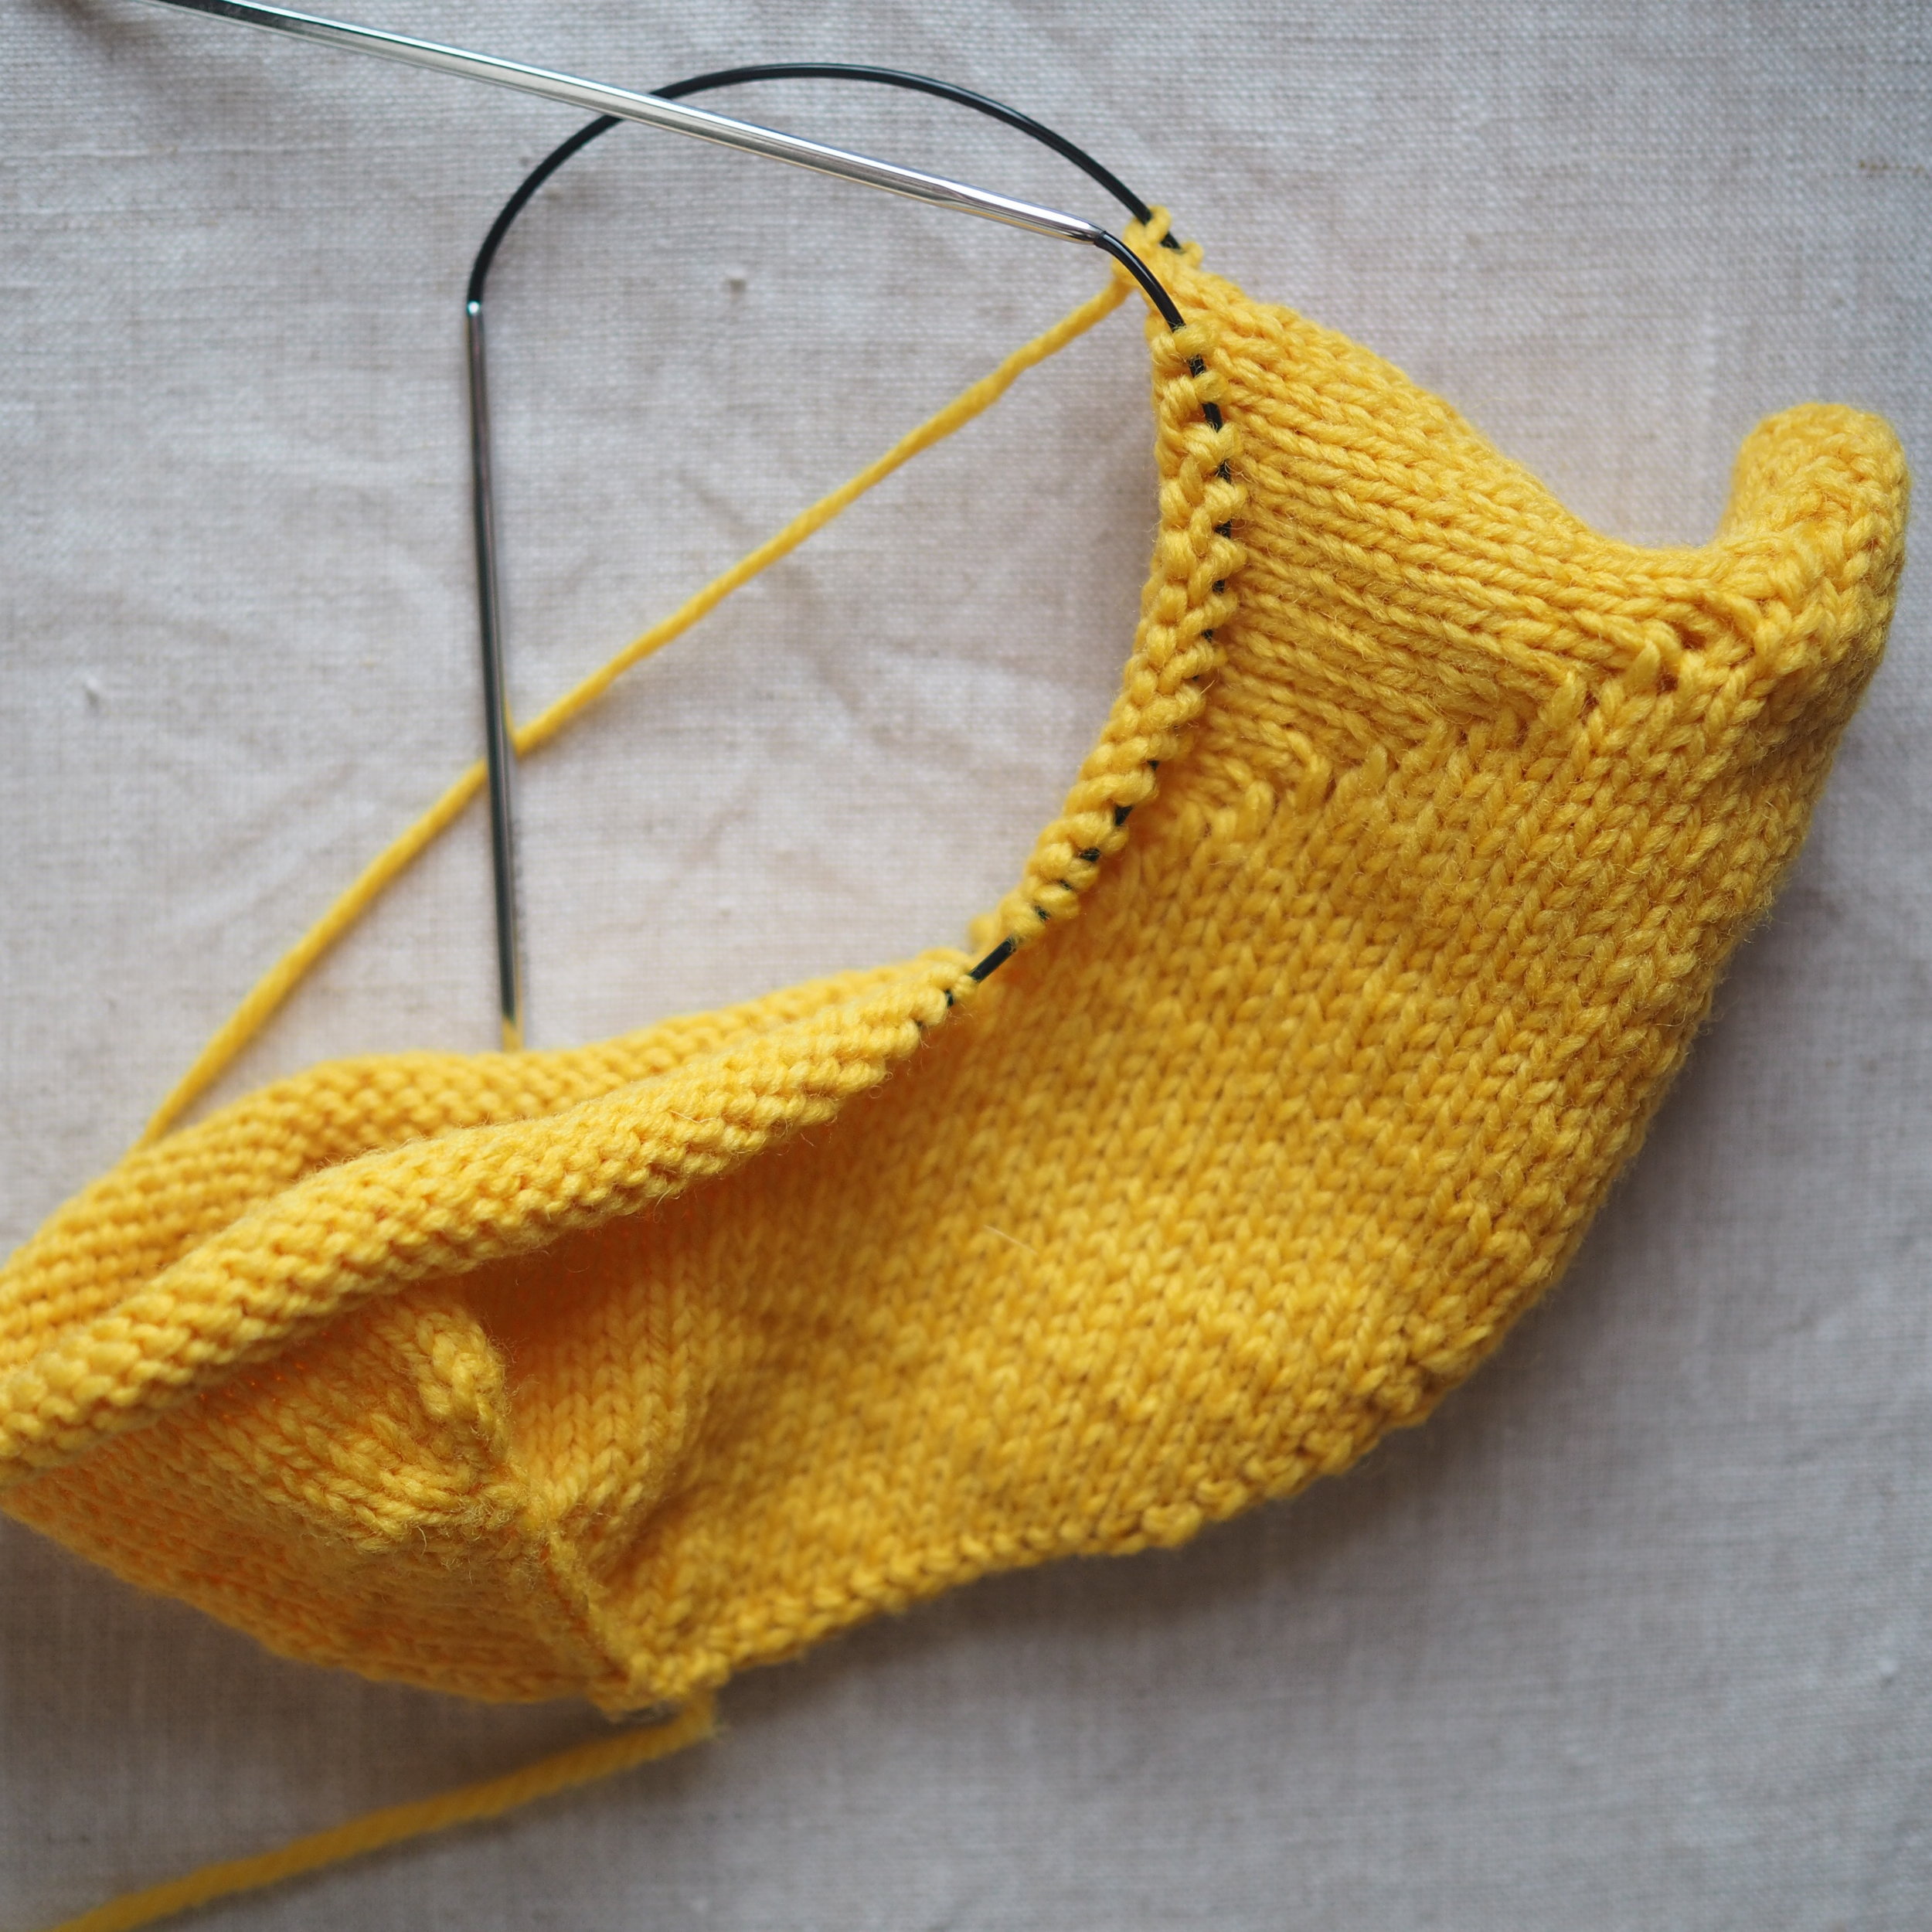
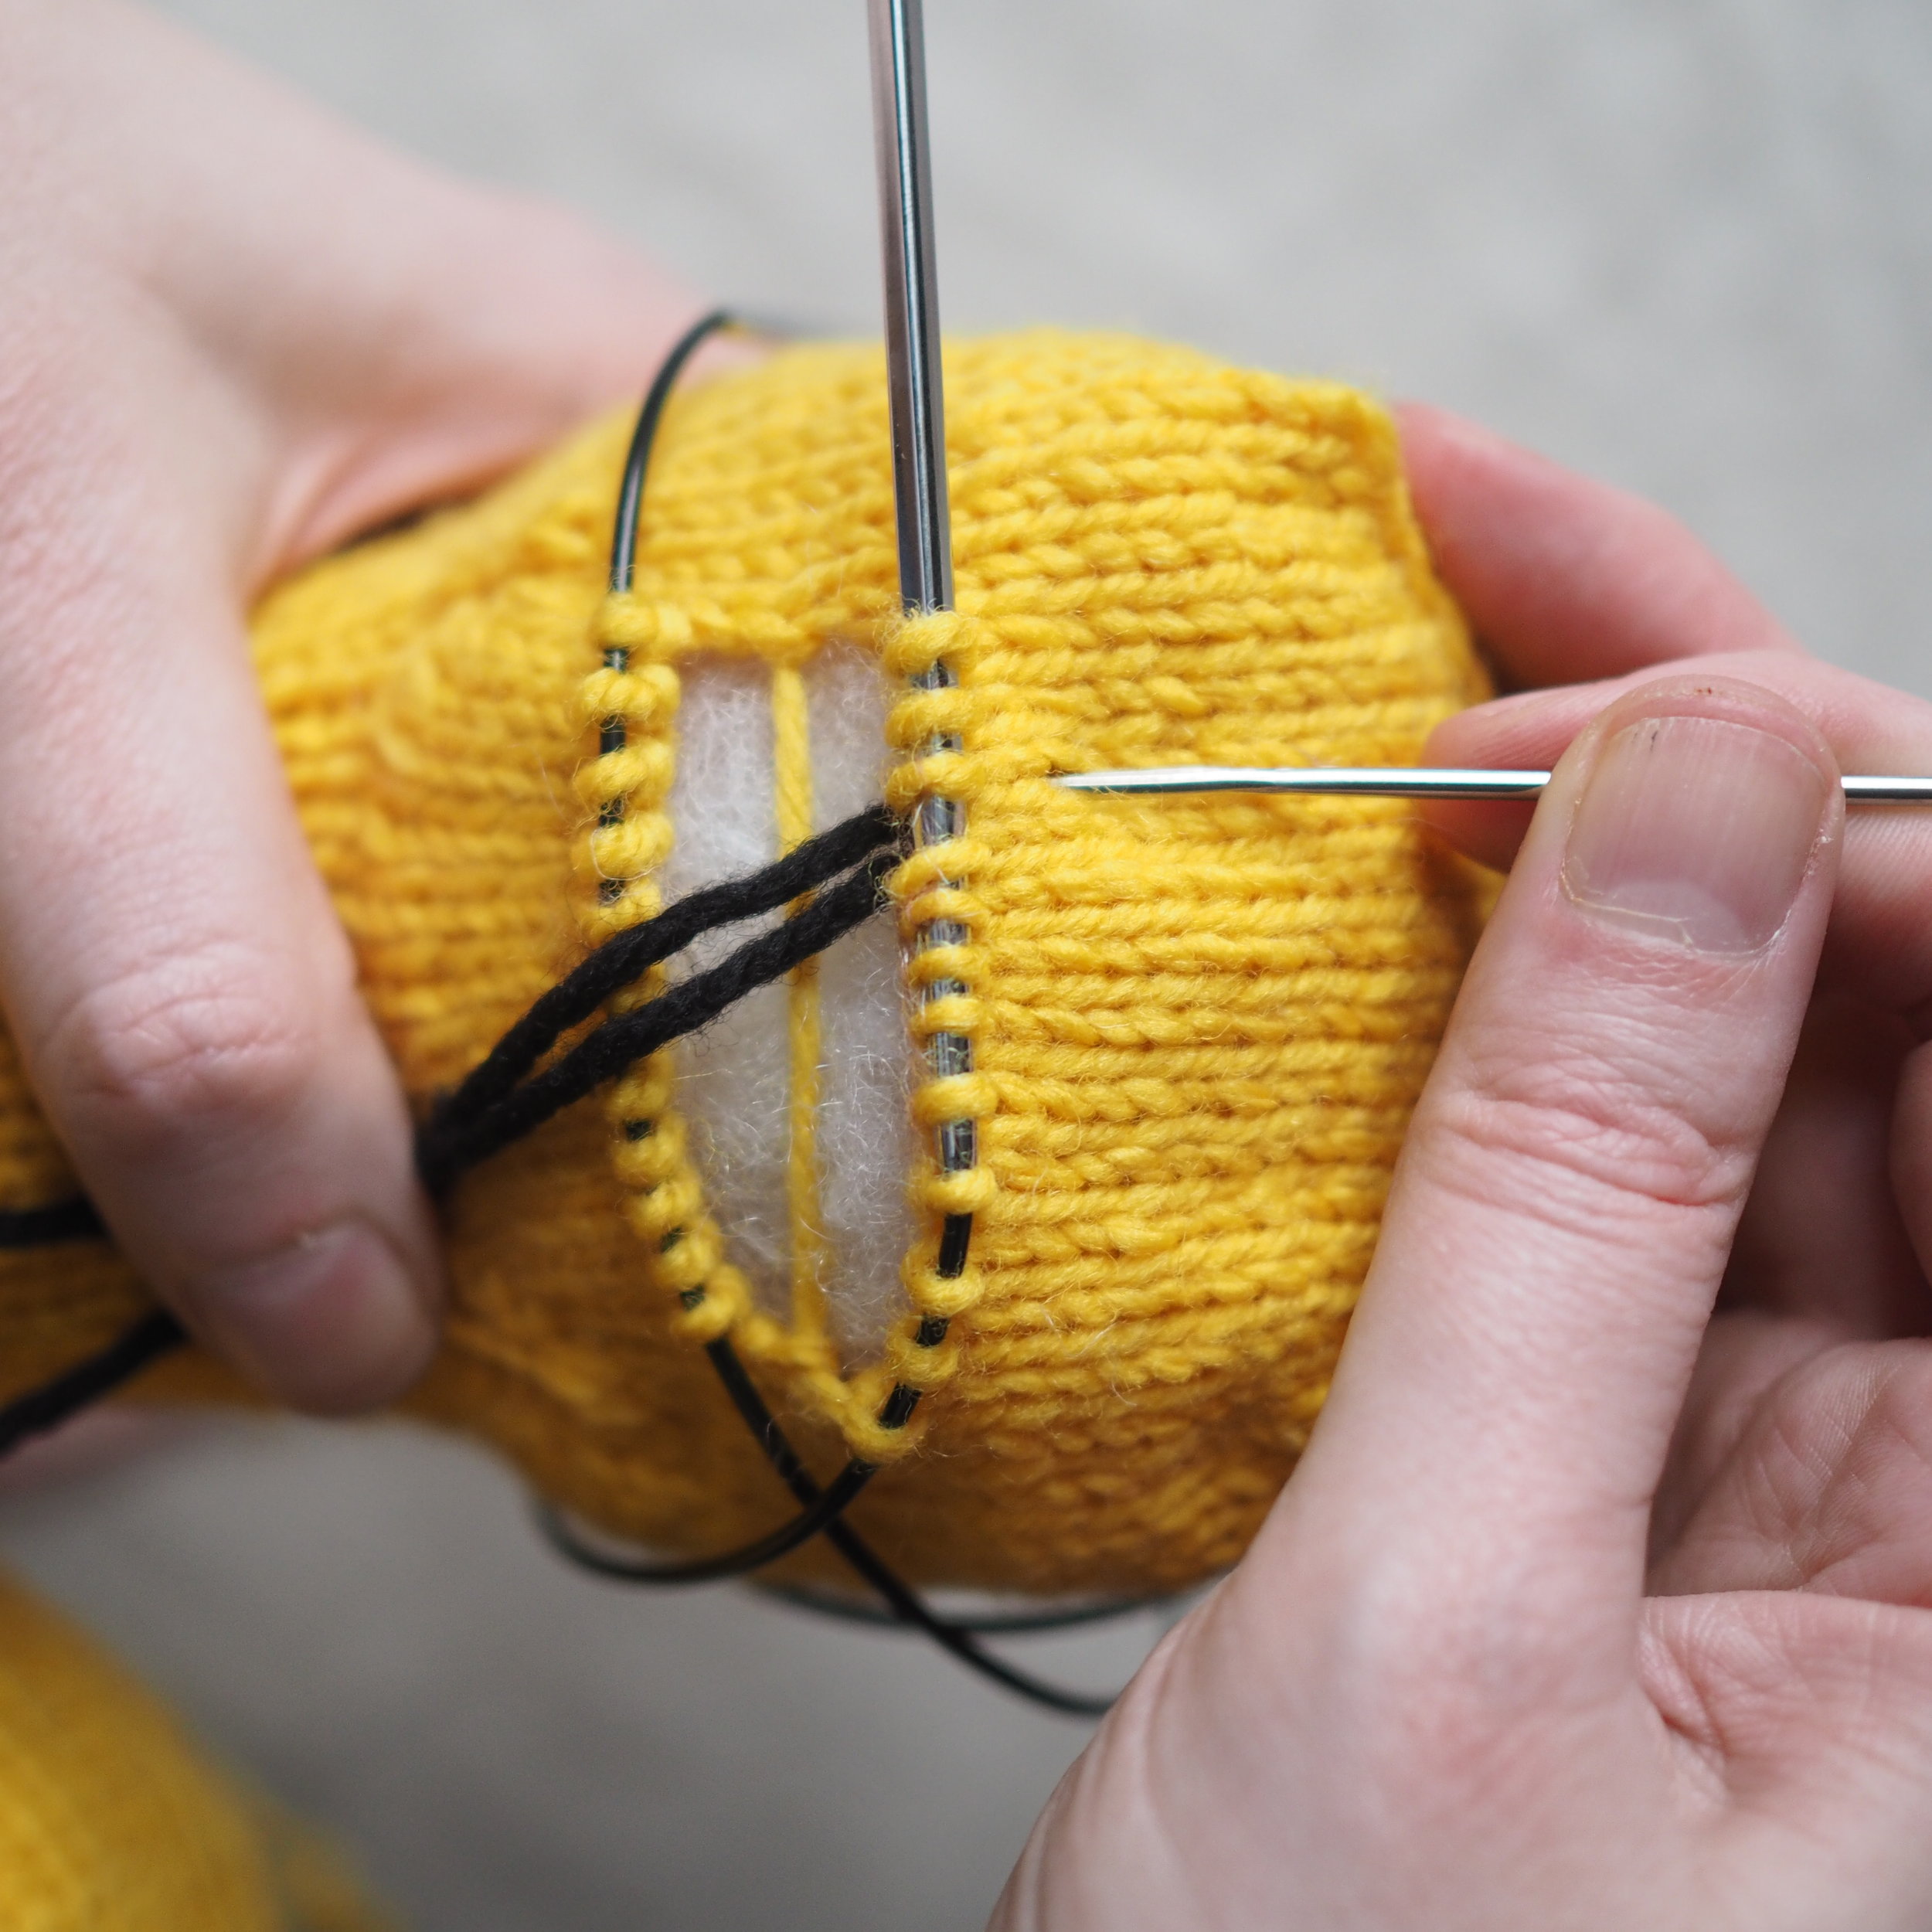
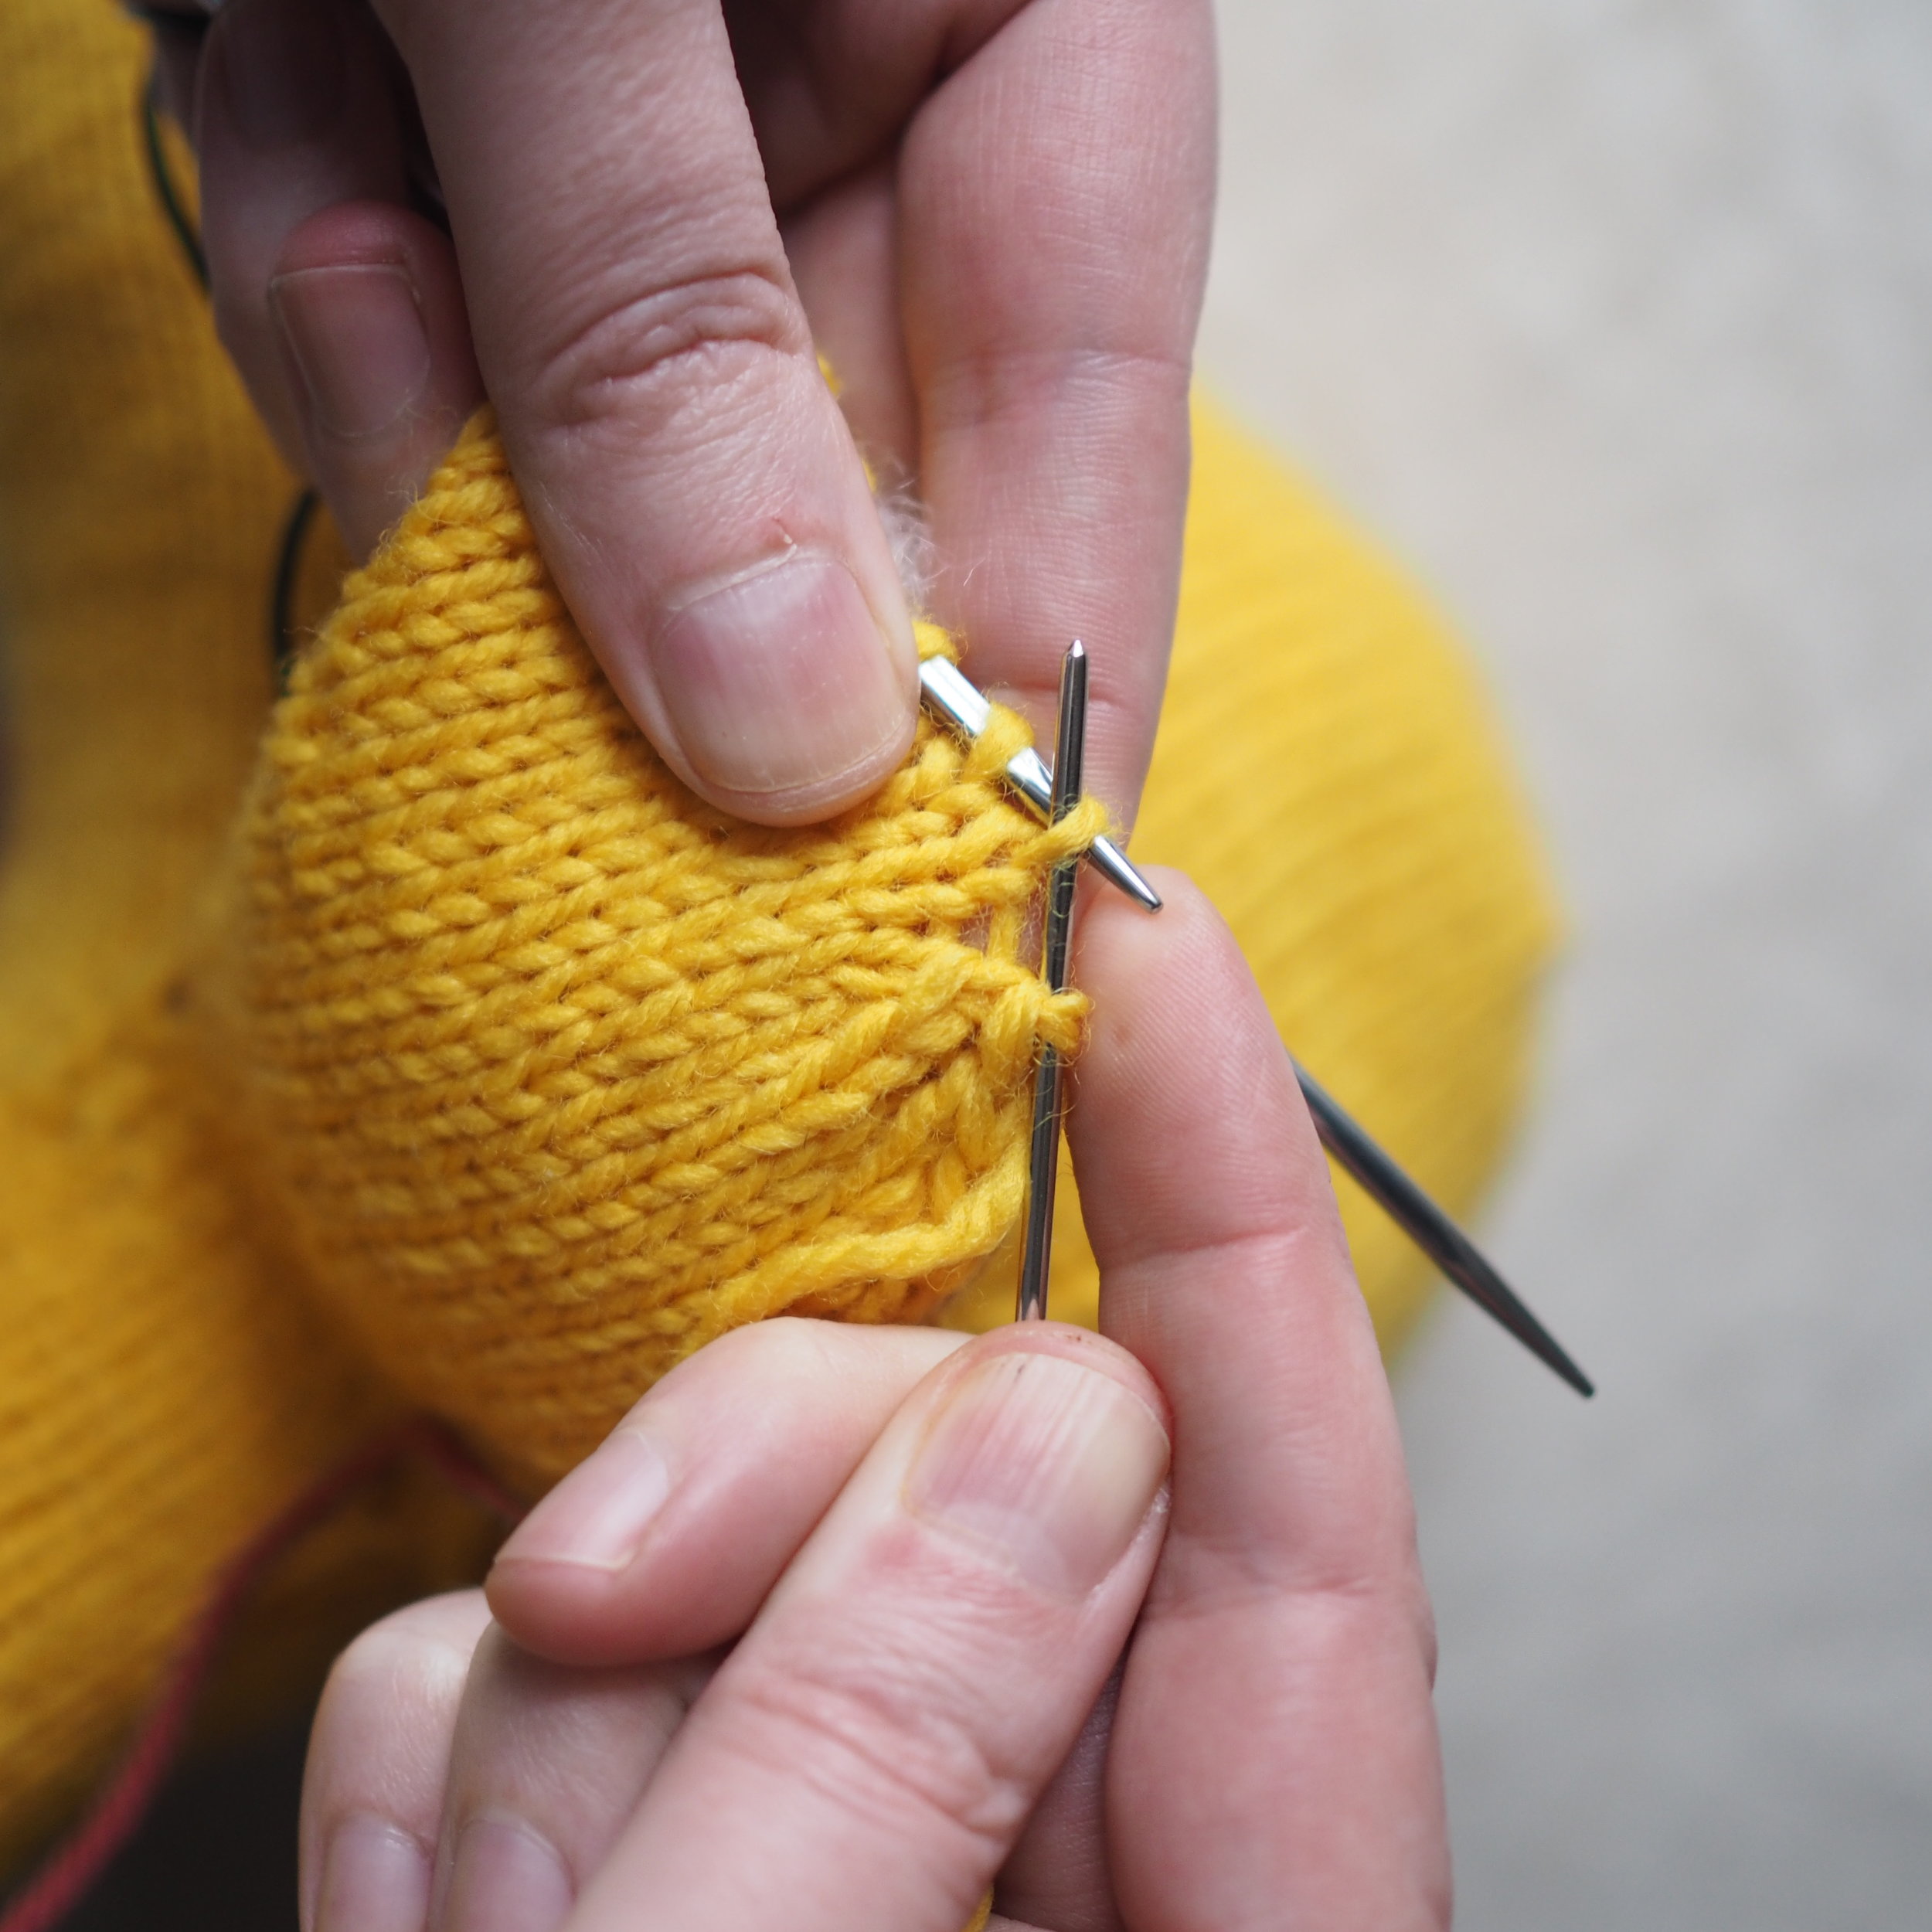
Picking Up An Afterthought Appendage

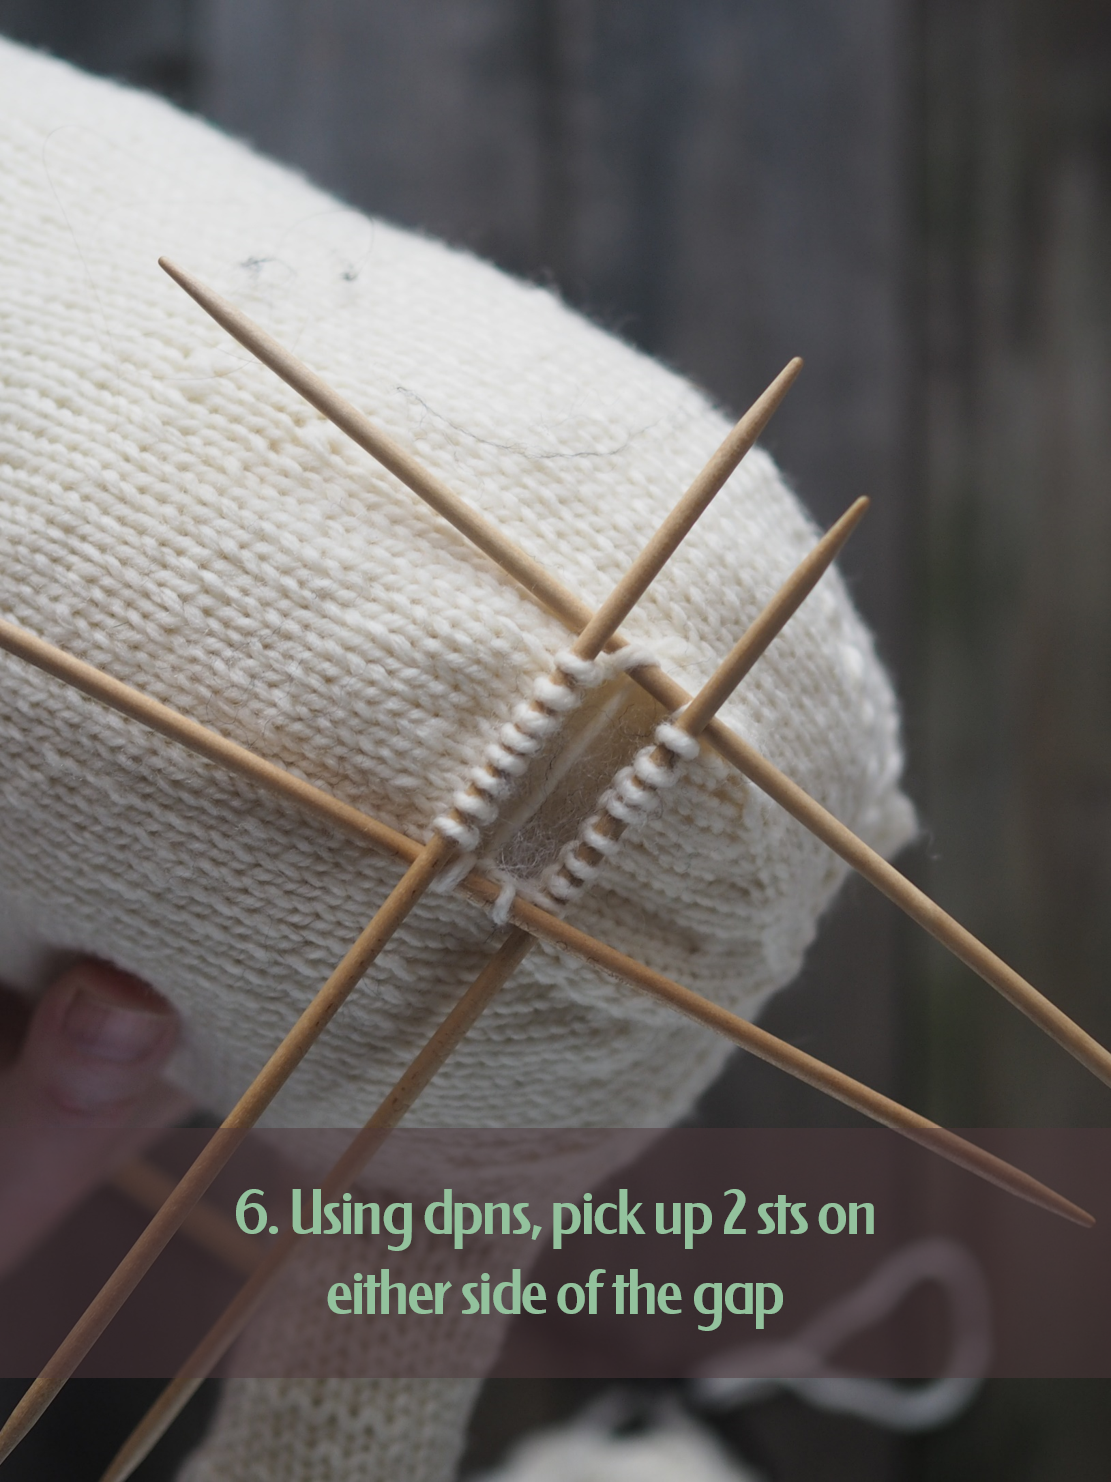
To pick up the stitches for an afterthought appendage, work as follows:

  1. Using a spare needle, pick up the right side of each stitch just below the scrap yarn stitching, picking up one stitch for each scrap yarn stitch.
  2. Repeat for the row of stitches just above the scrap yarn.
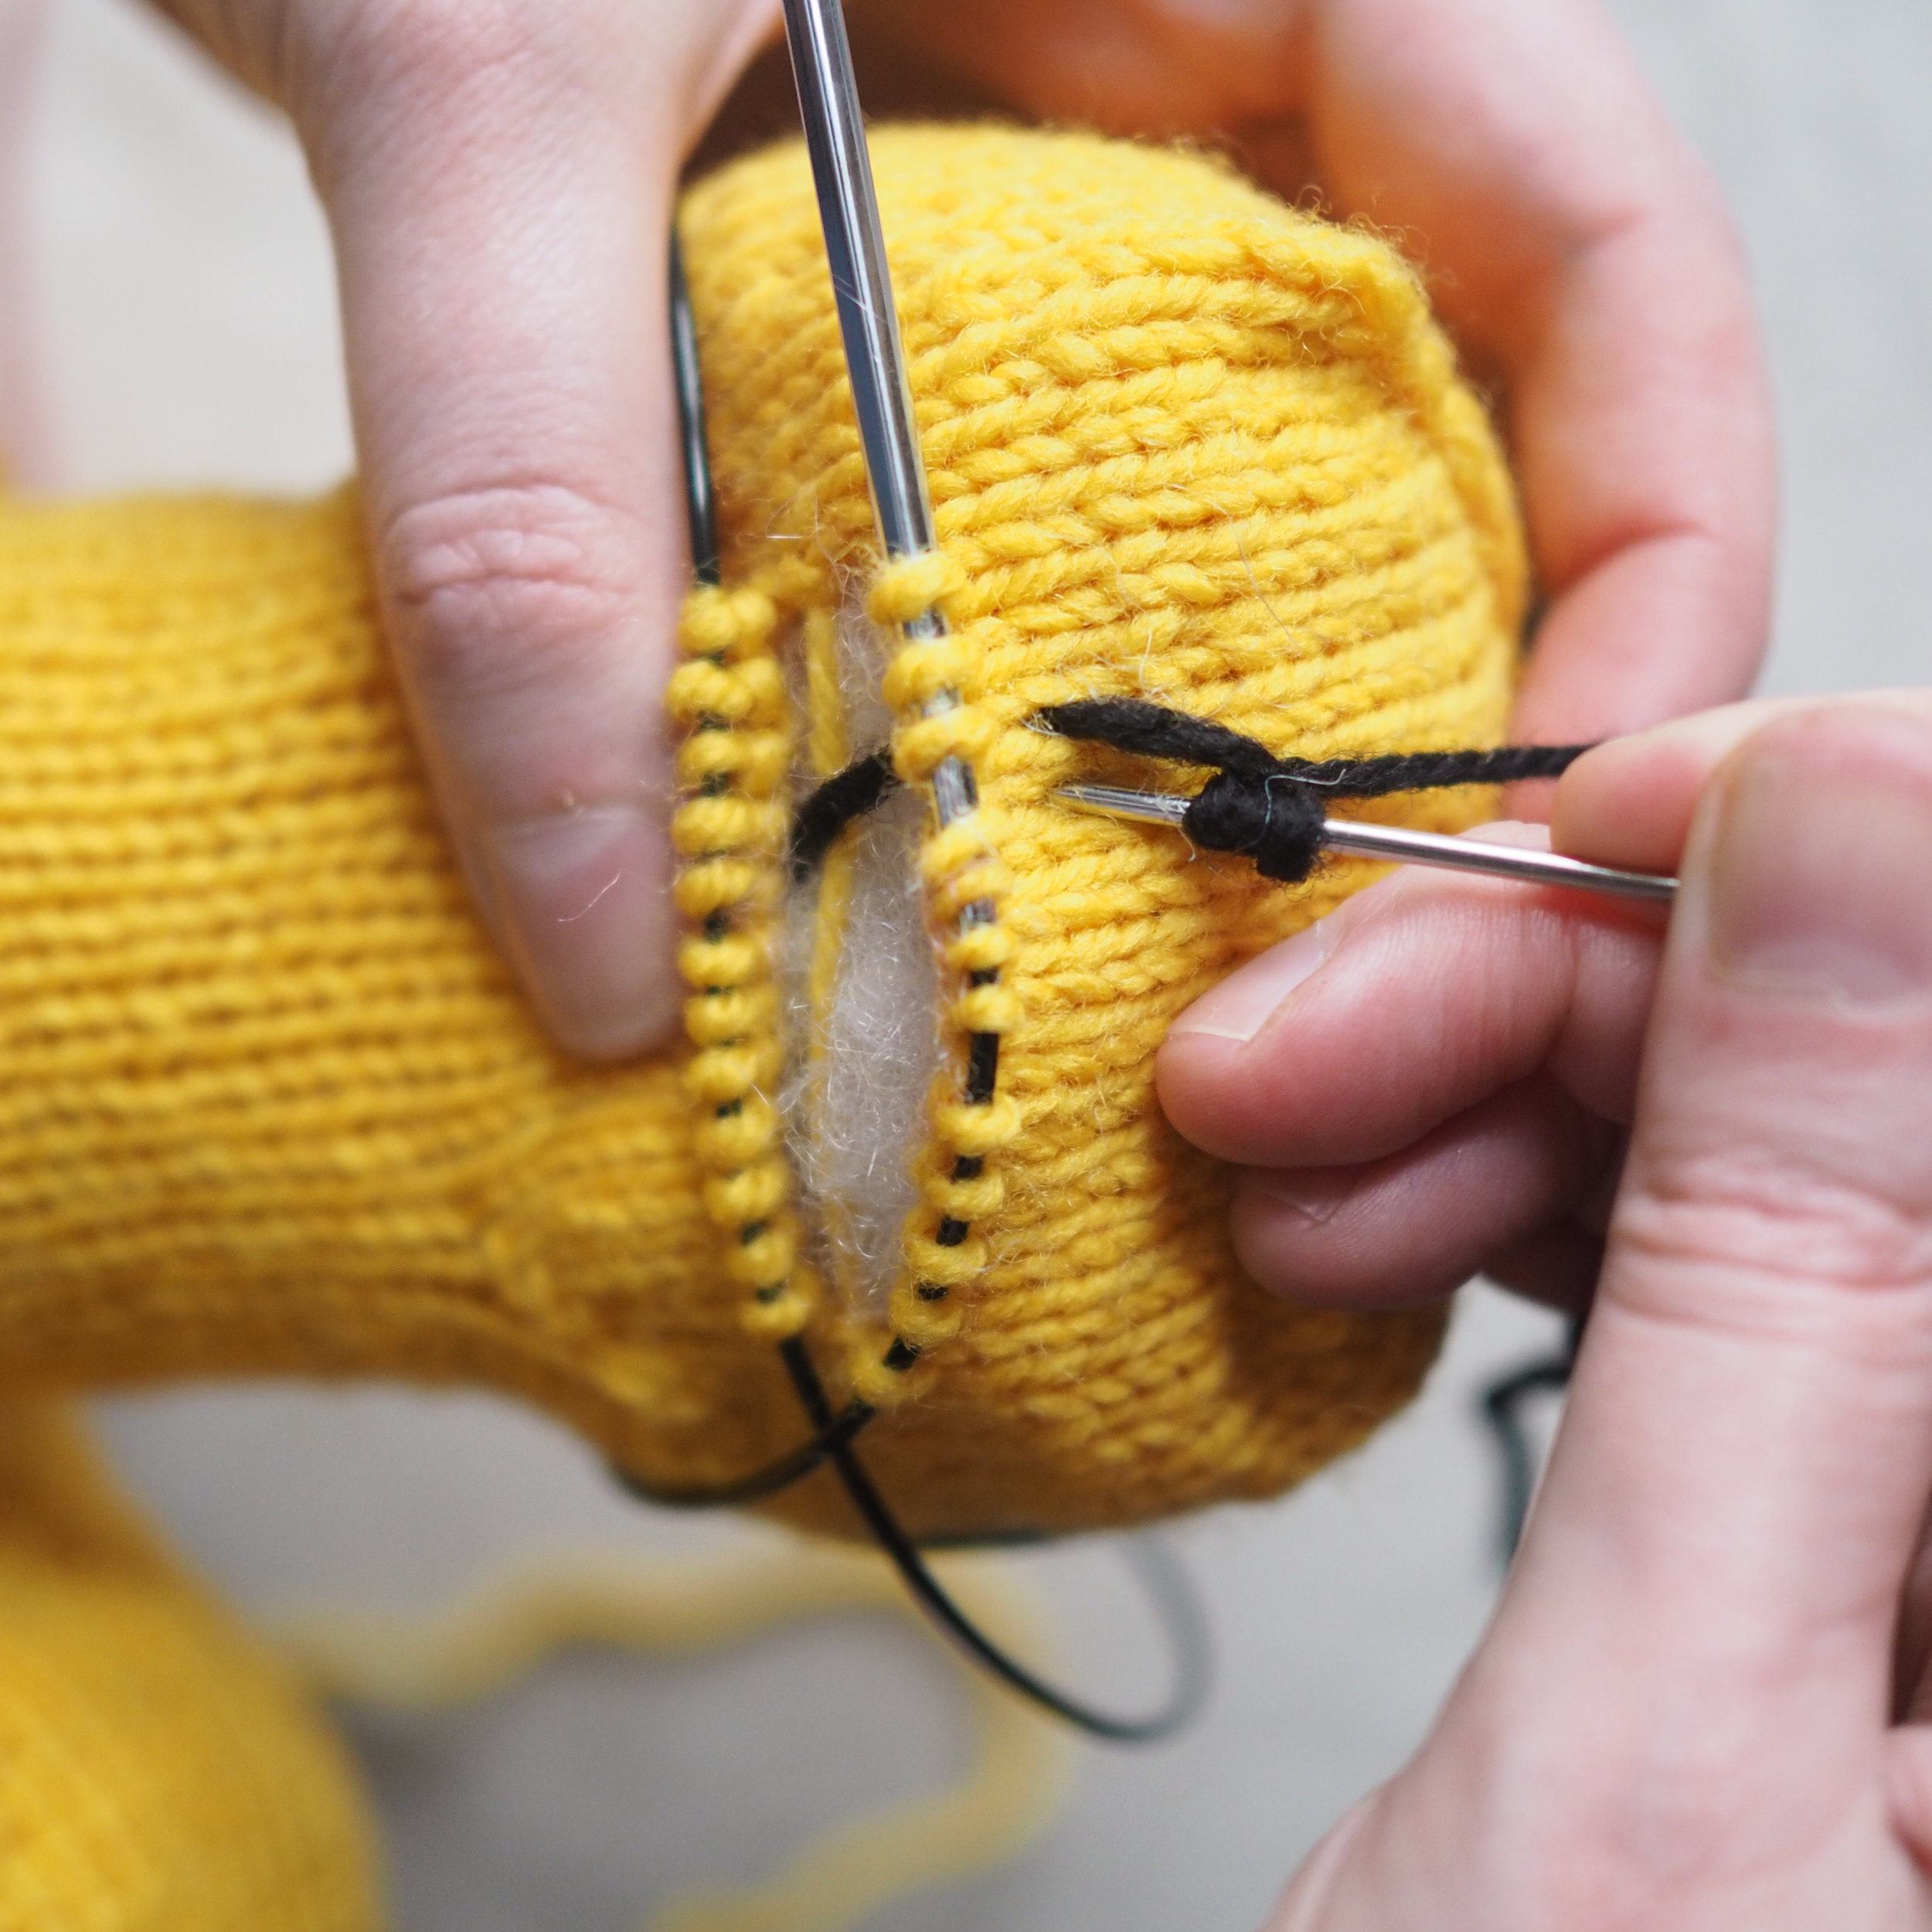
  3. Using a spare knitting or tapestry needle, pick out the scrap yarn. You should be left with the same number of stitches on each needle.

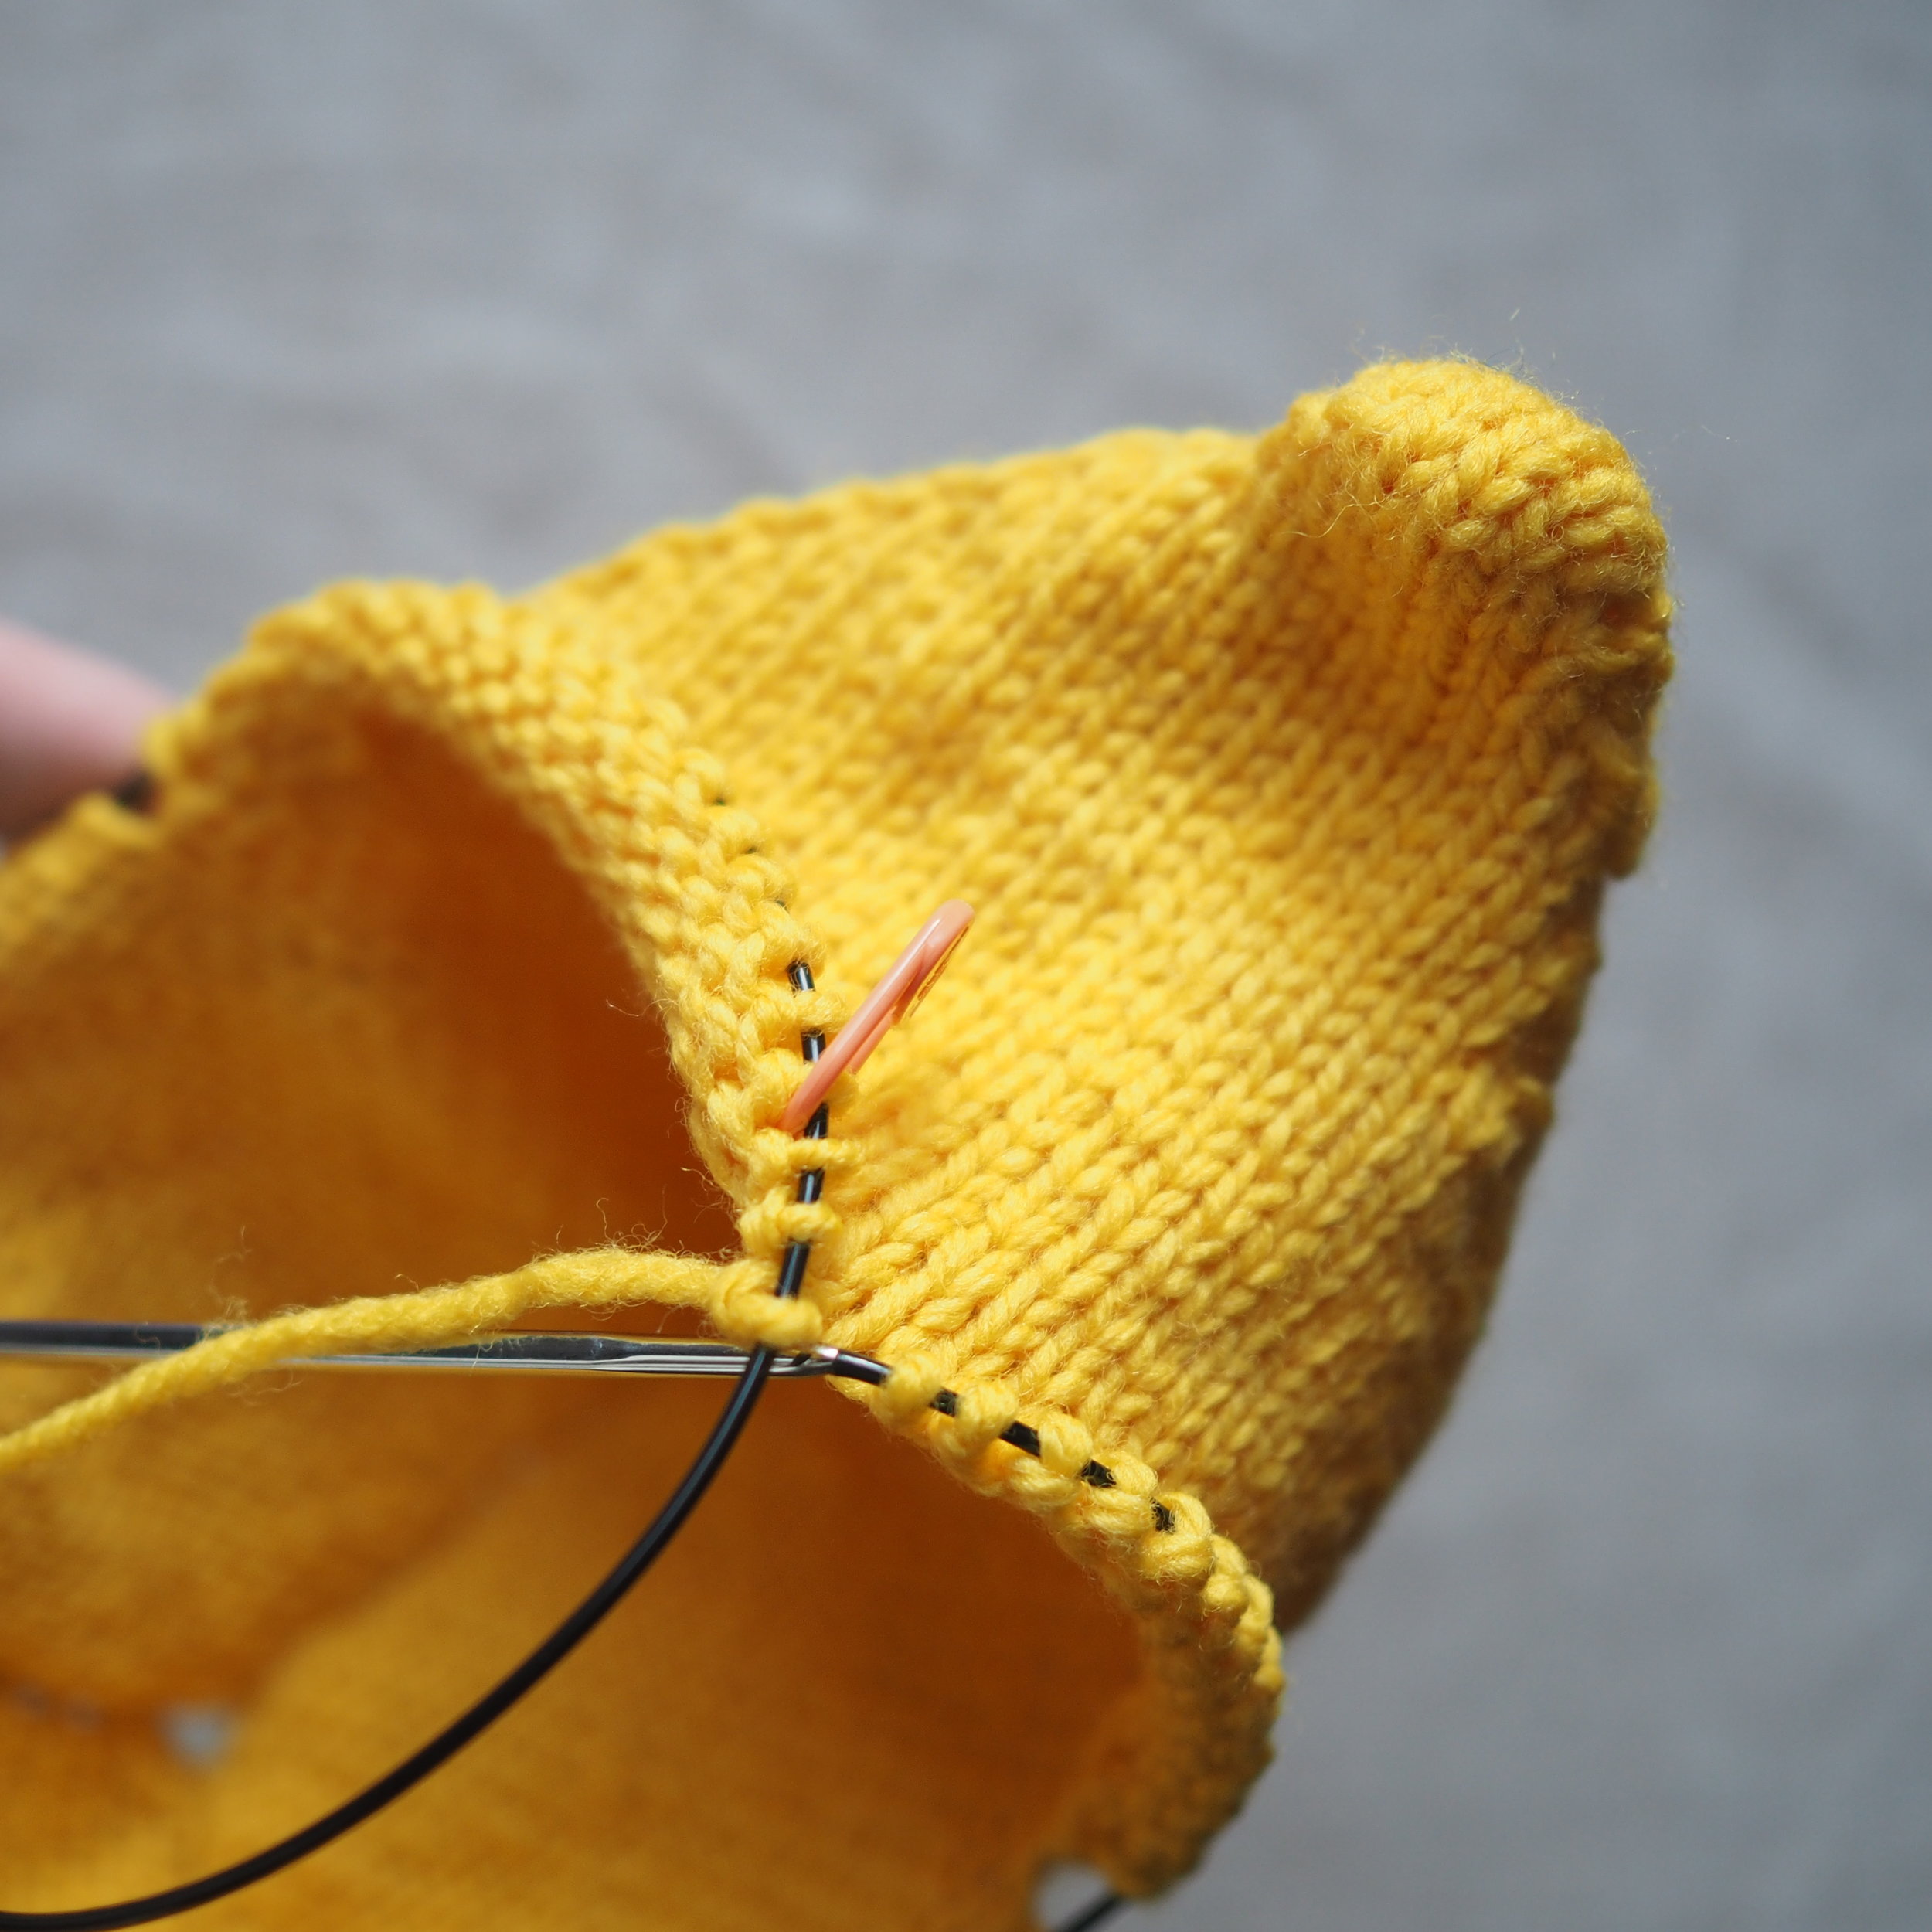
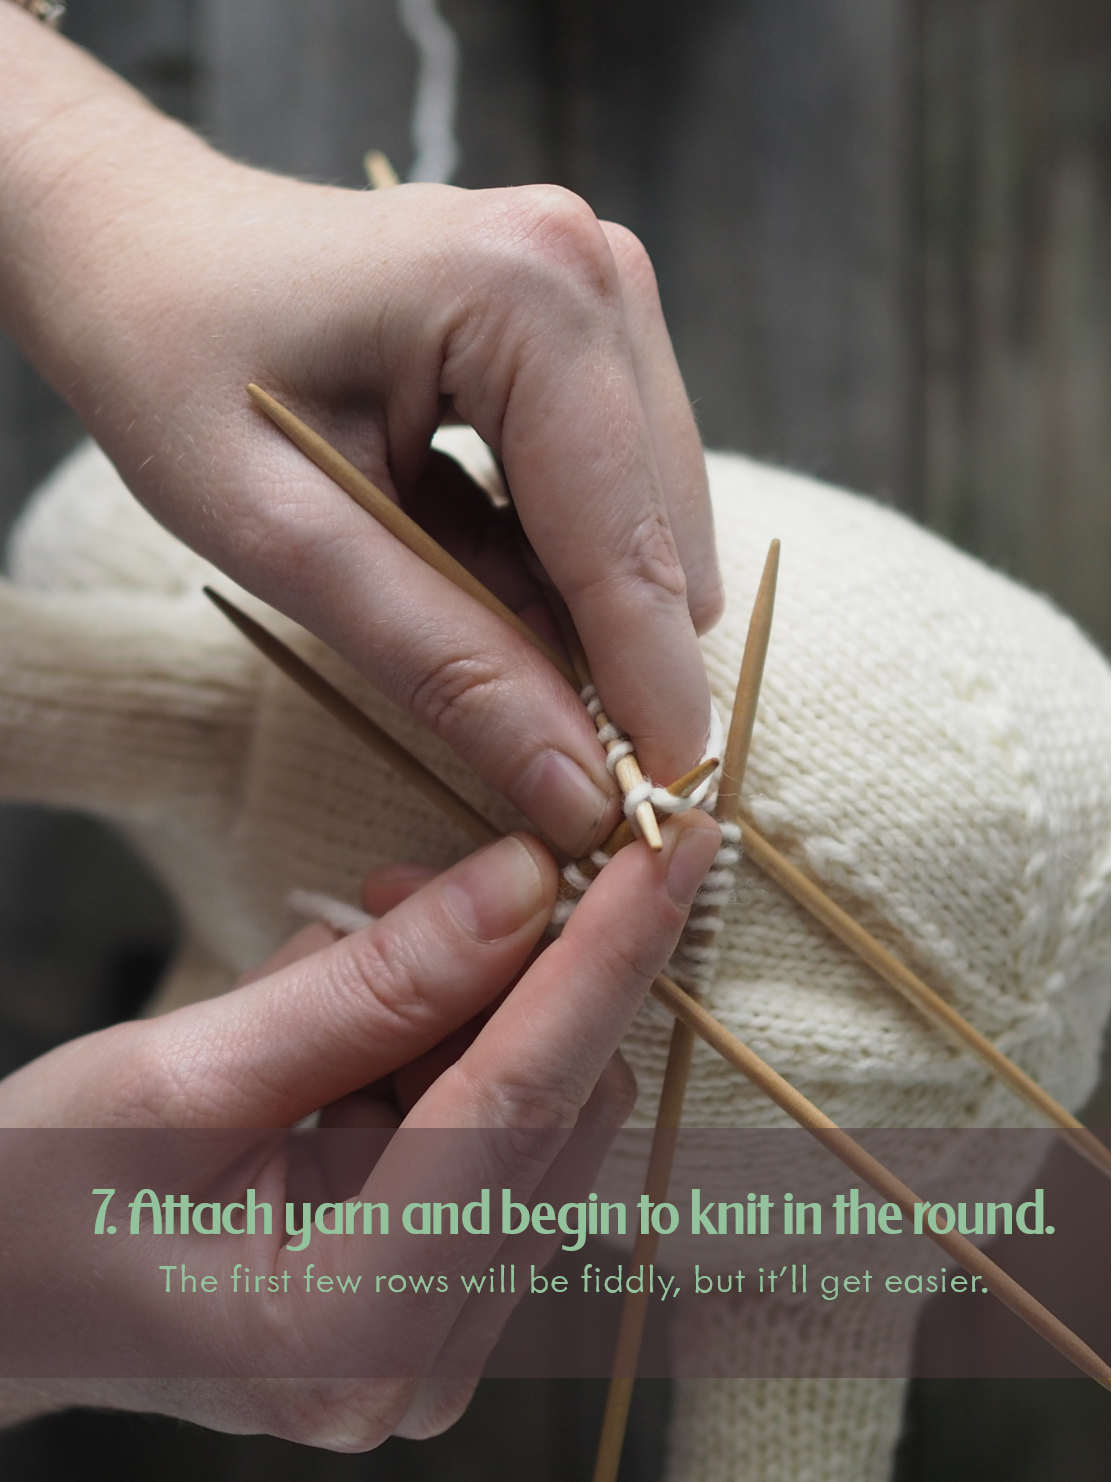
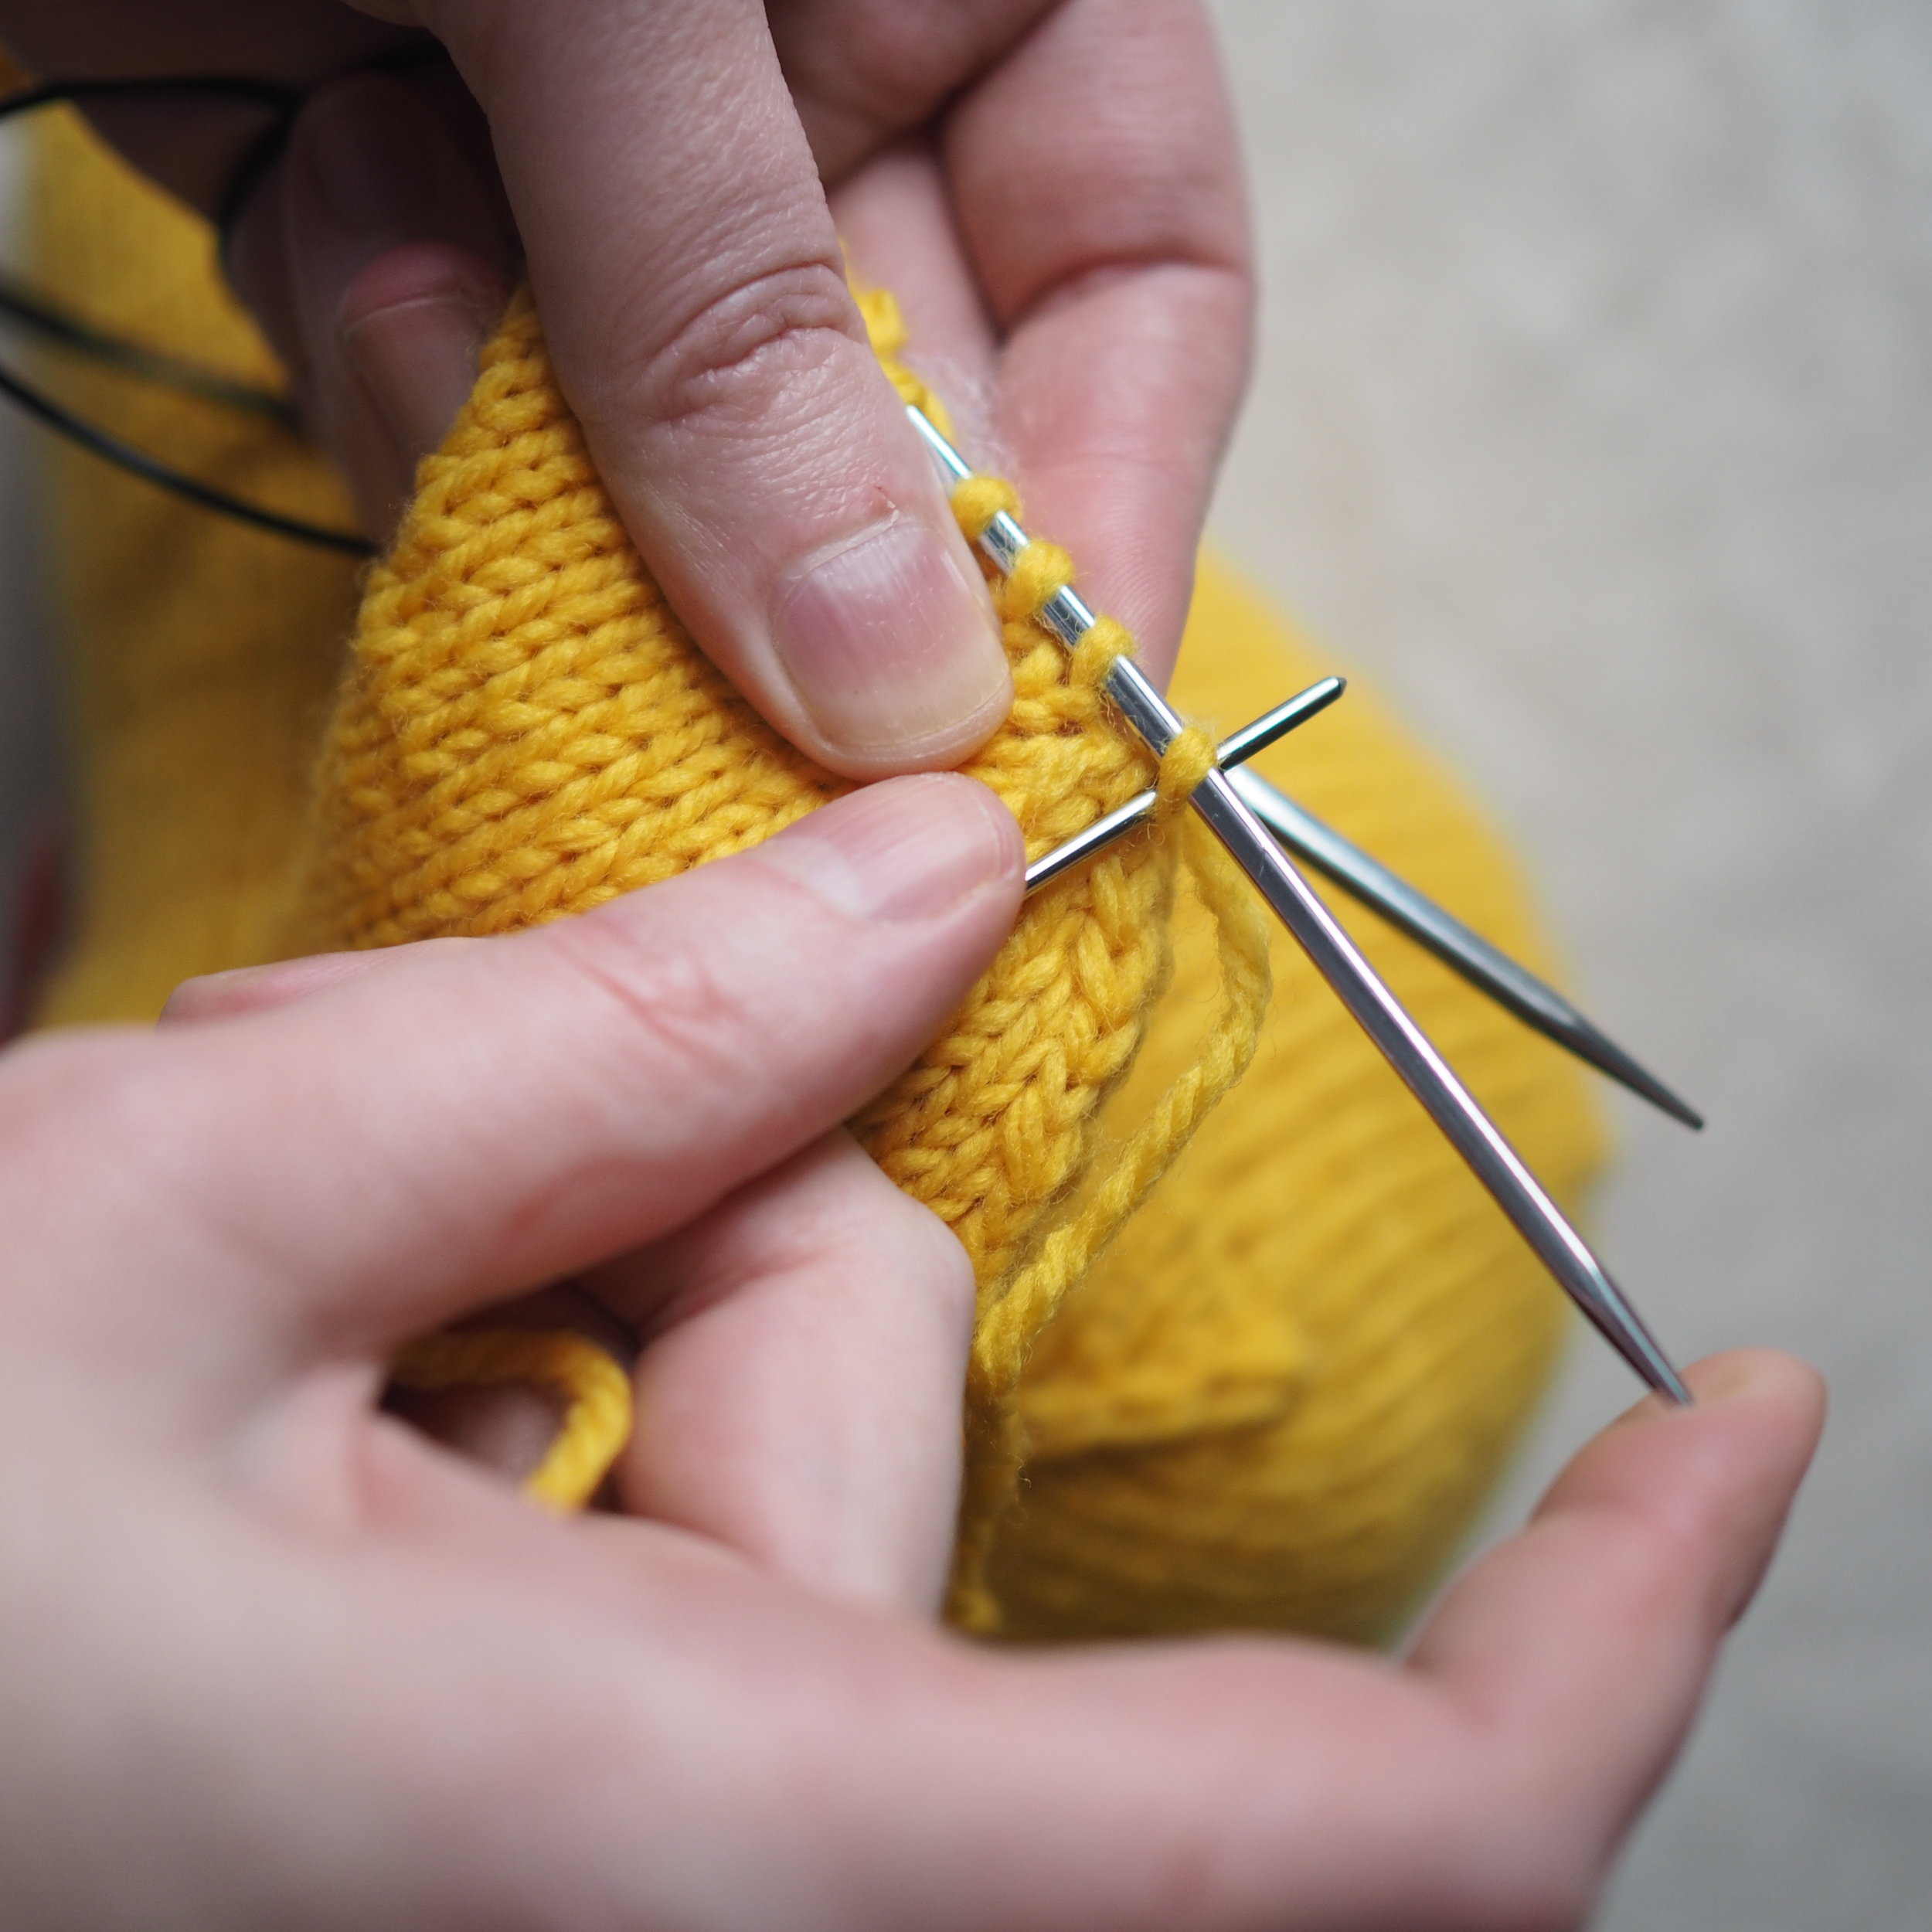
The first few rounds after you pick up will be fiddly, because there's not a lot of give because the body is already stuffed. It's a bit easier if you use magic loop and isn't a problem after those first few rows.

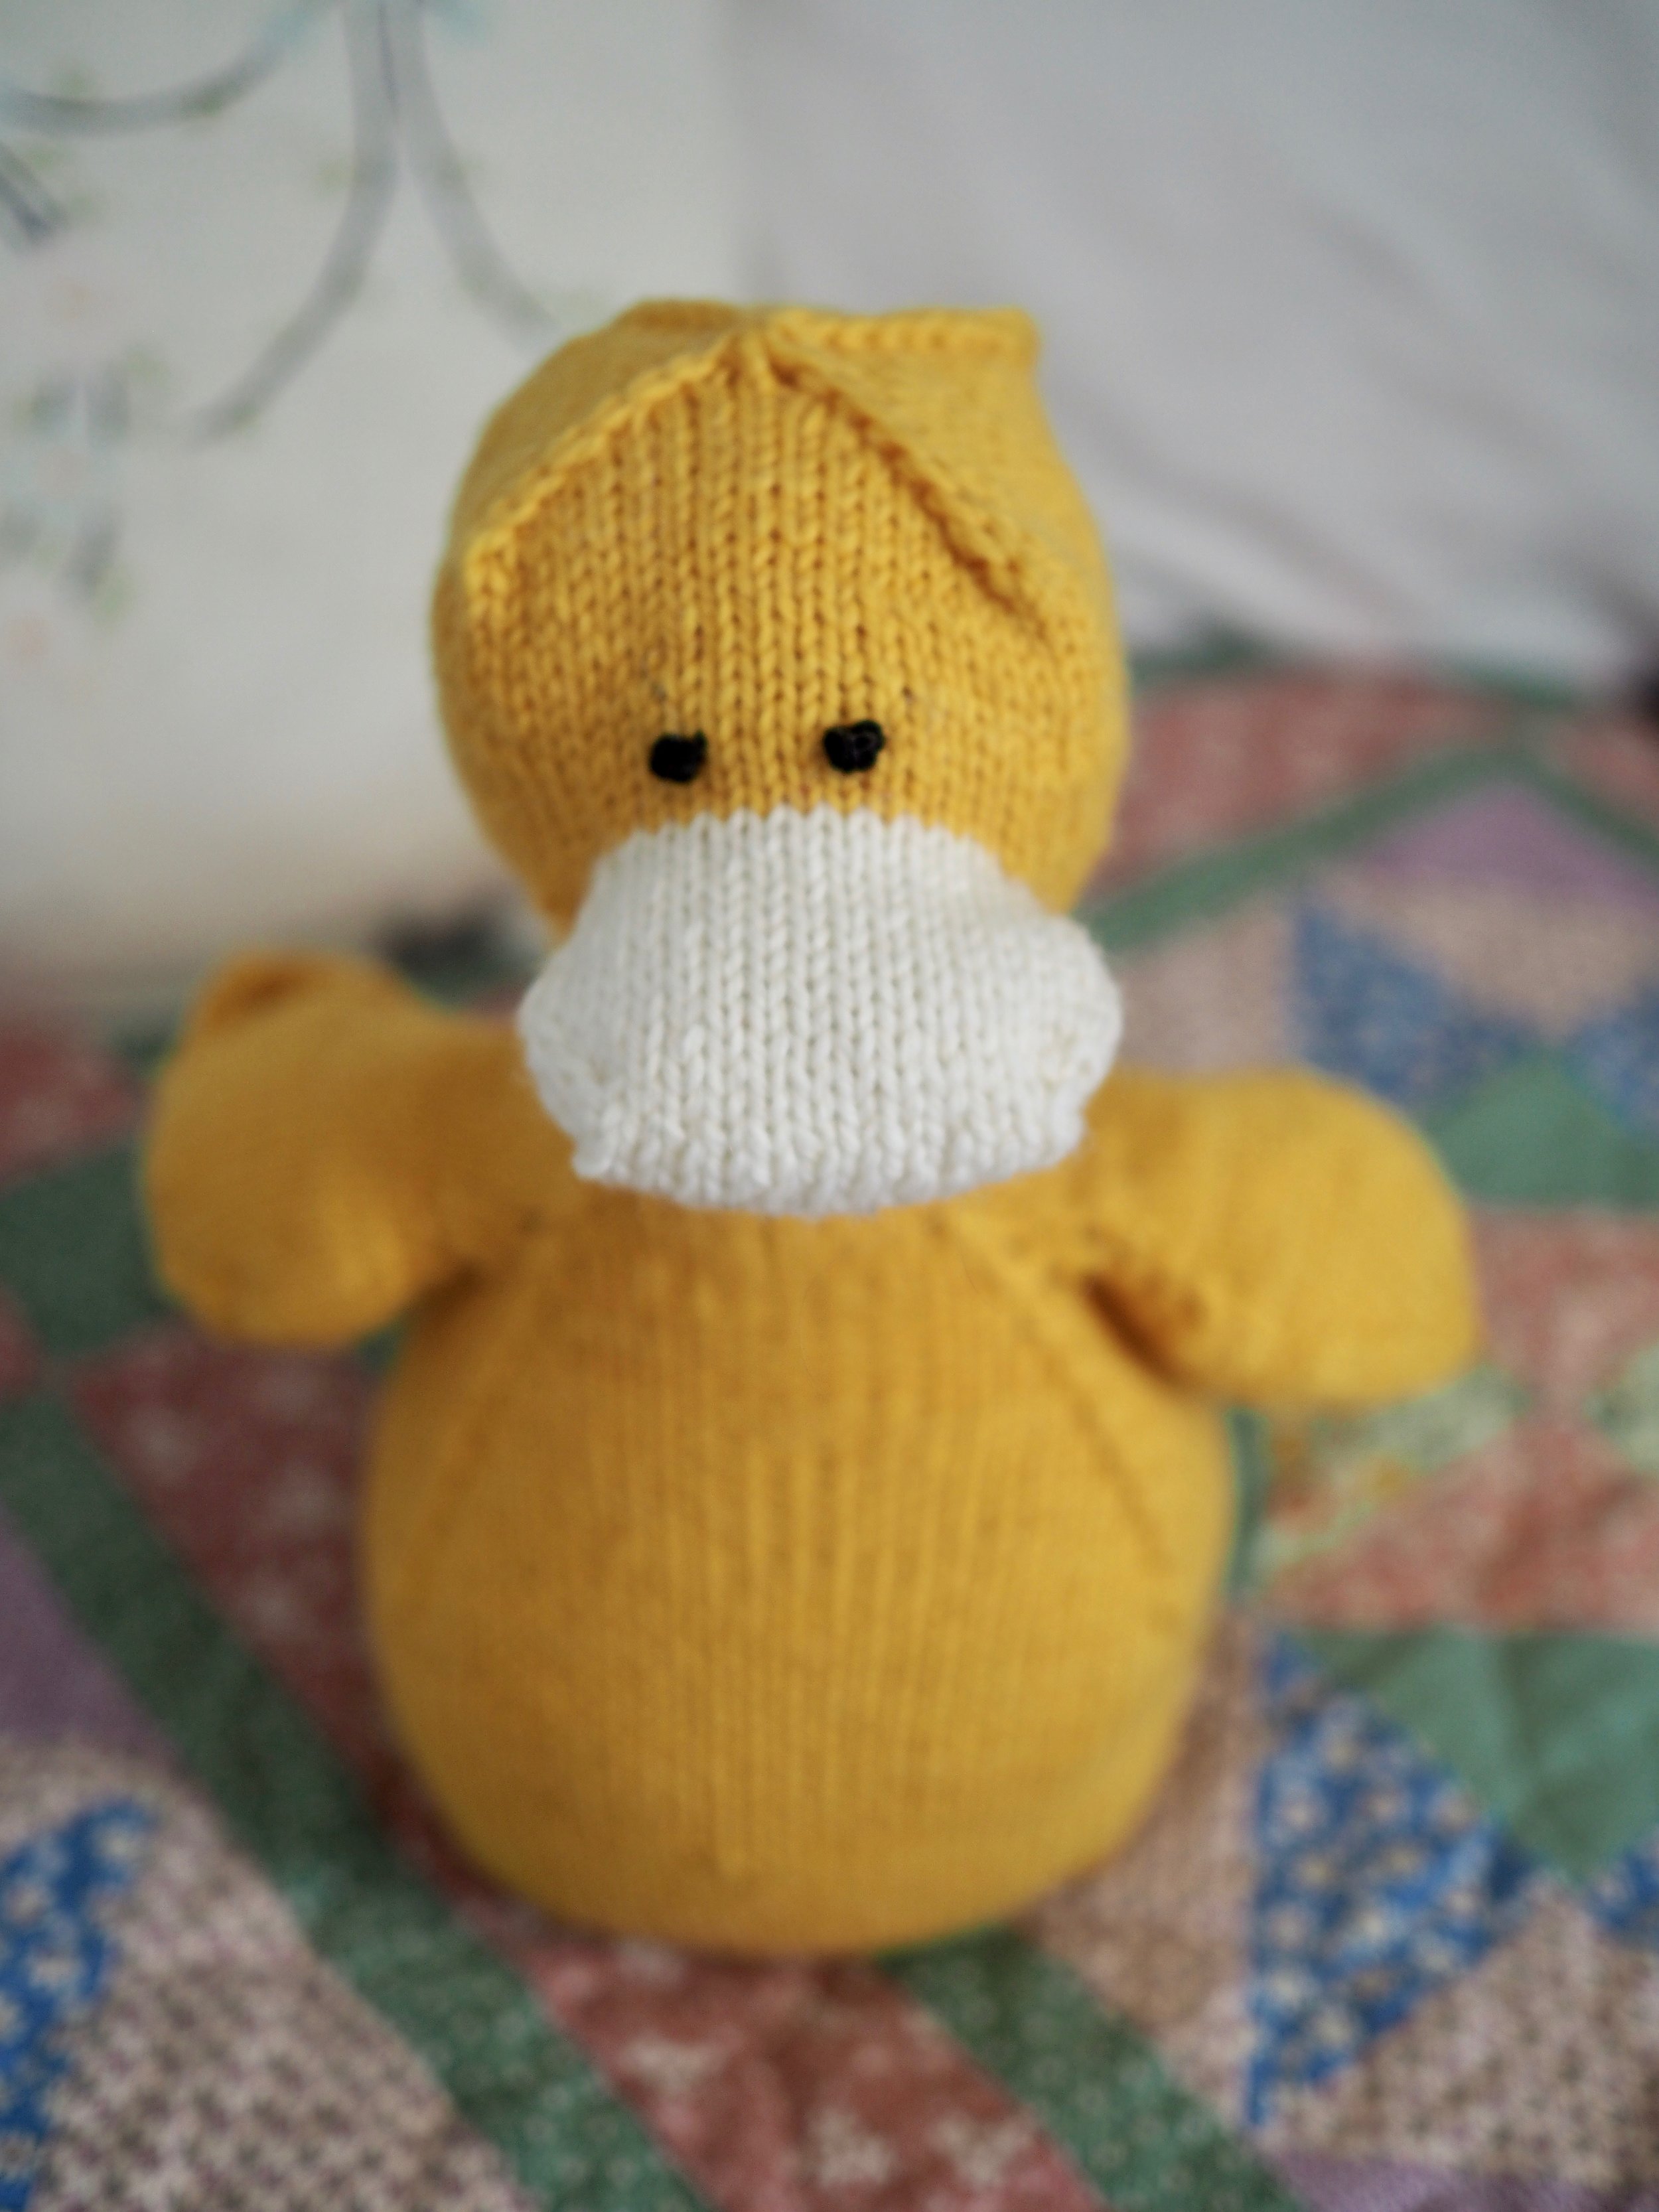
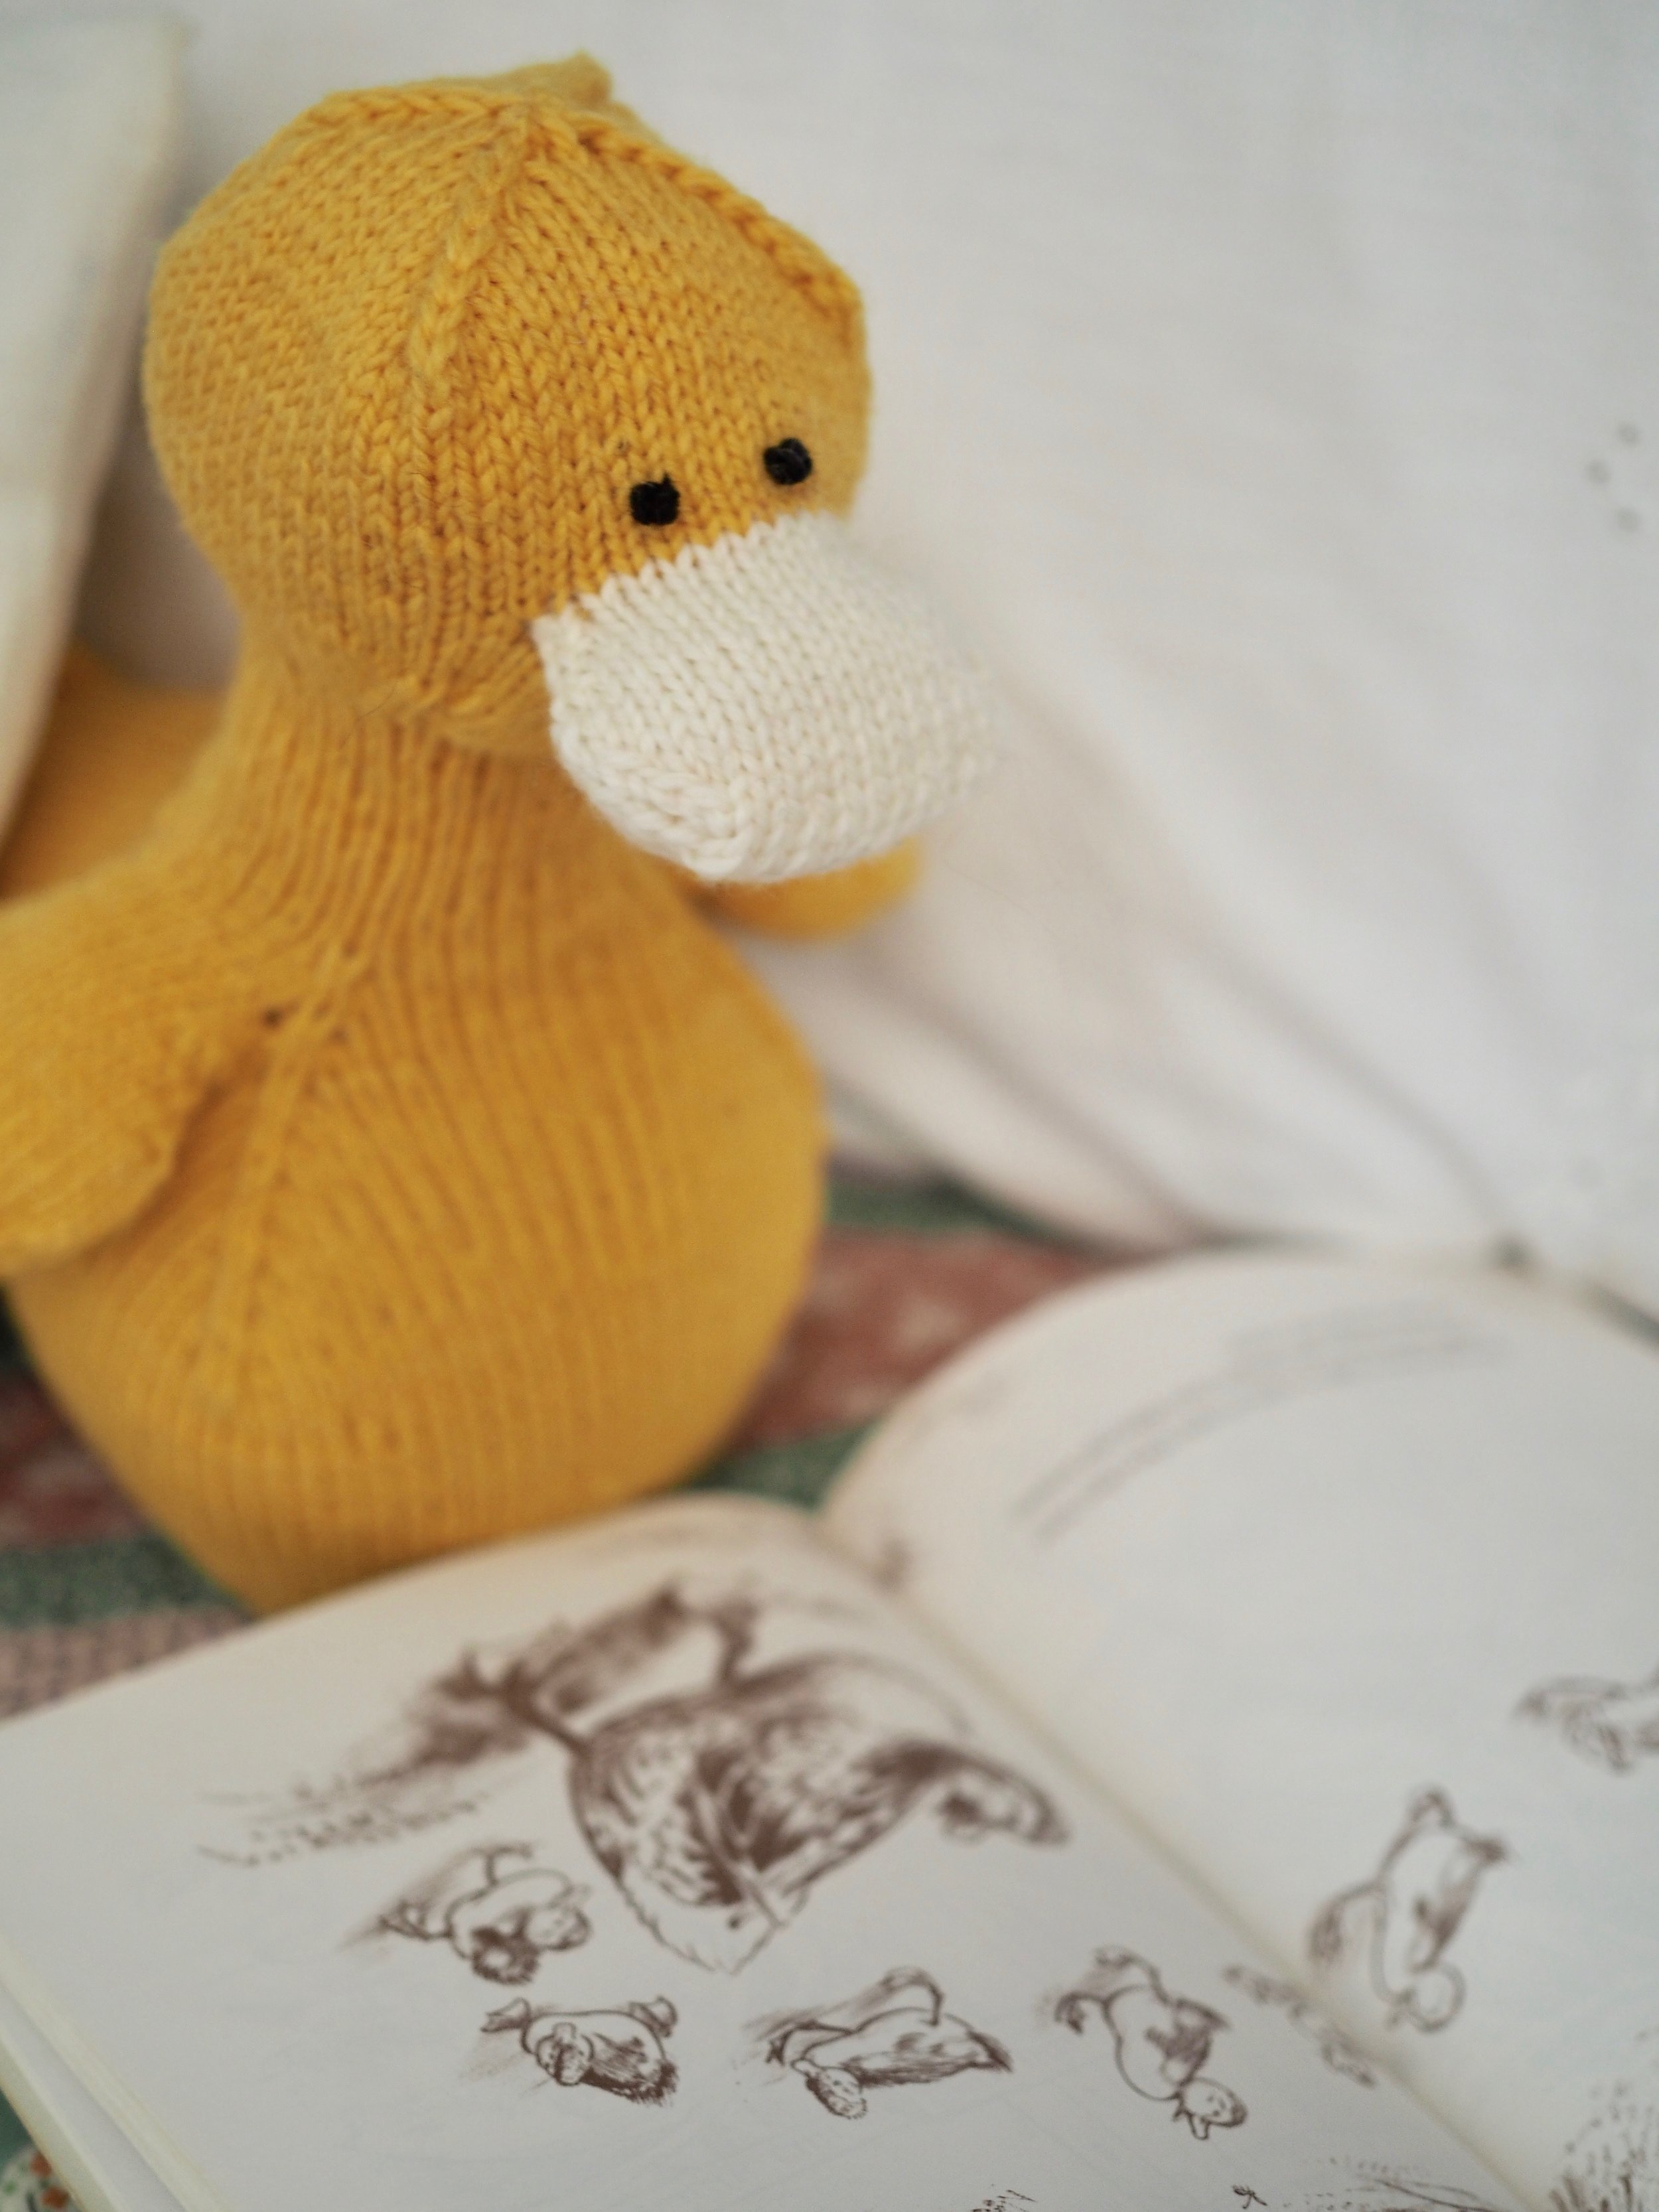
Making the Eyes (French Knots)

Make the facial features before you do (or at least graft shut) the beak, as it will be easier to hide the ends. 

  1. Secure thread at inside of head.
  2. Bring up needle through fabric at desired position.
  3. With needle pointing away from fabric, wrap thread around shank of needle 2-3 times. (The more wraps, the bigger the finished knot).
  4. Holding onto the yarn tail until it becomes too short, push the needle down through the fabric one half-stitch over from where it came up. Pull snugly against fabric.

Repeat steps 2-4 for second eye. You can also add eyebrows, eyelashes, etc. at this point.

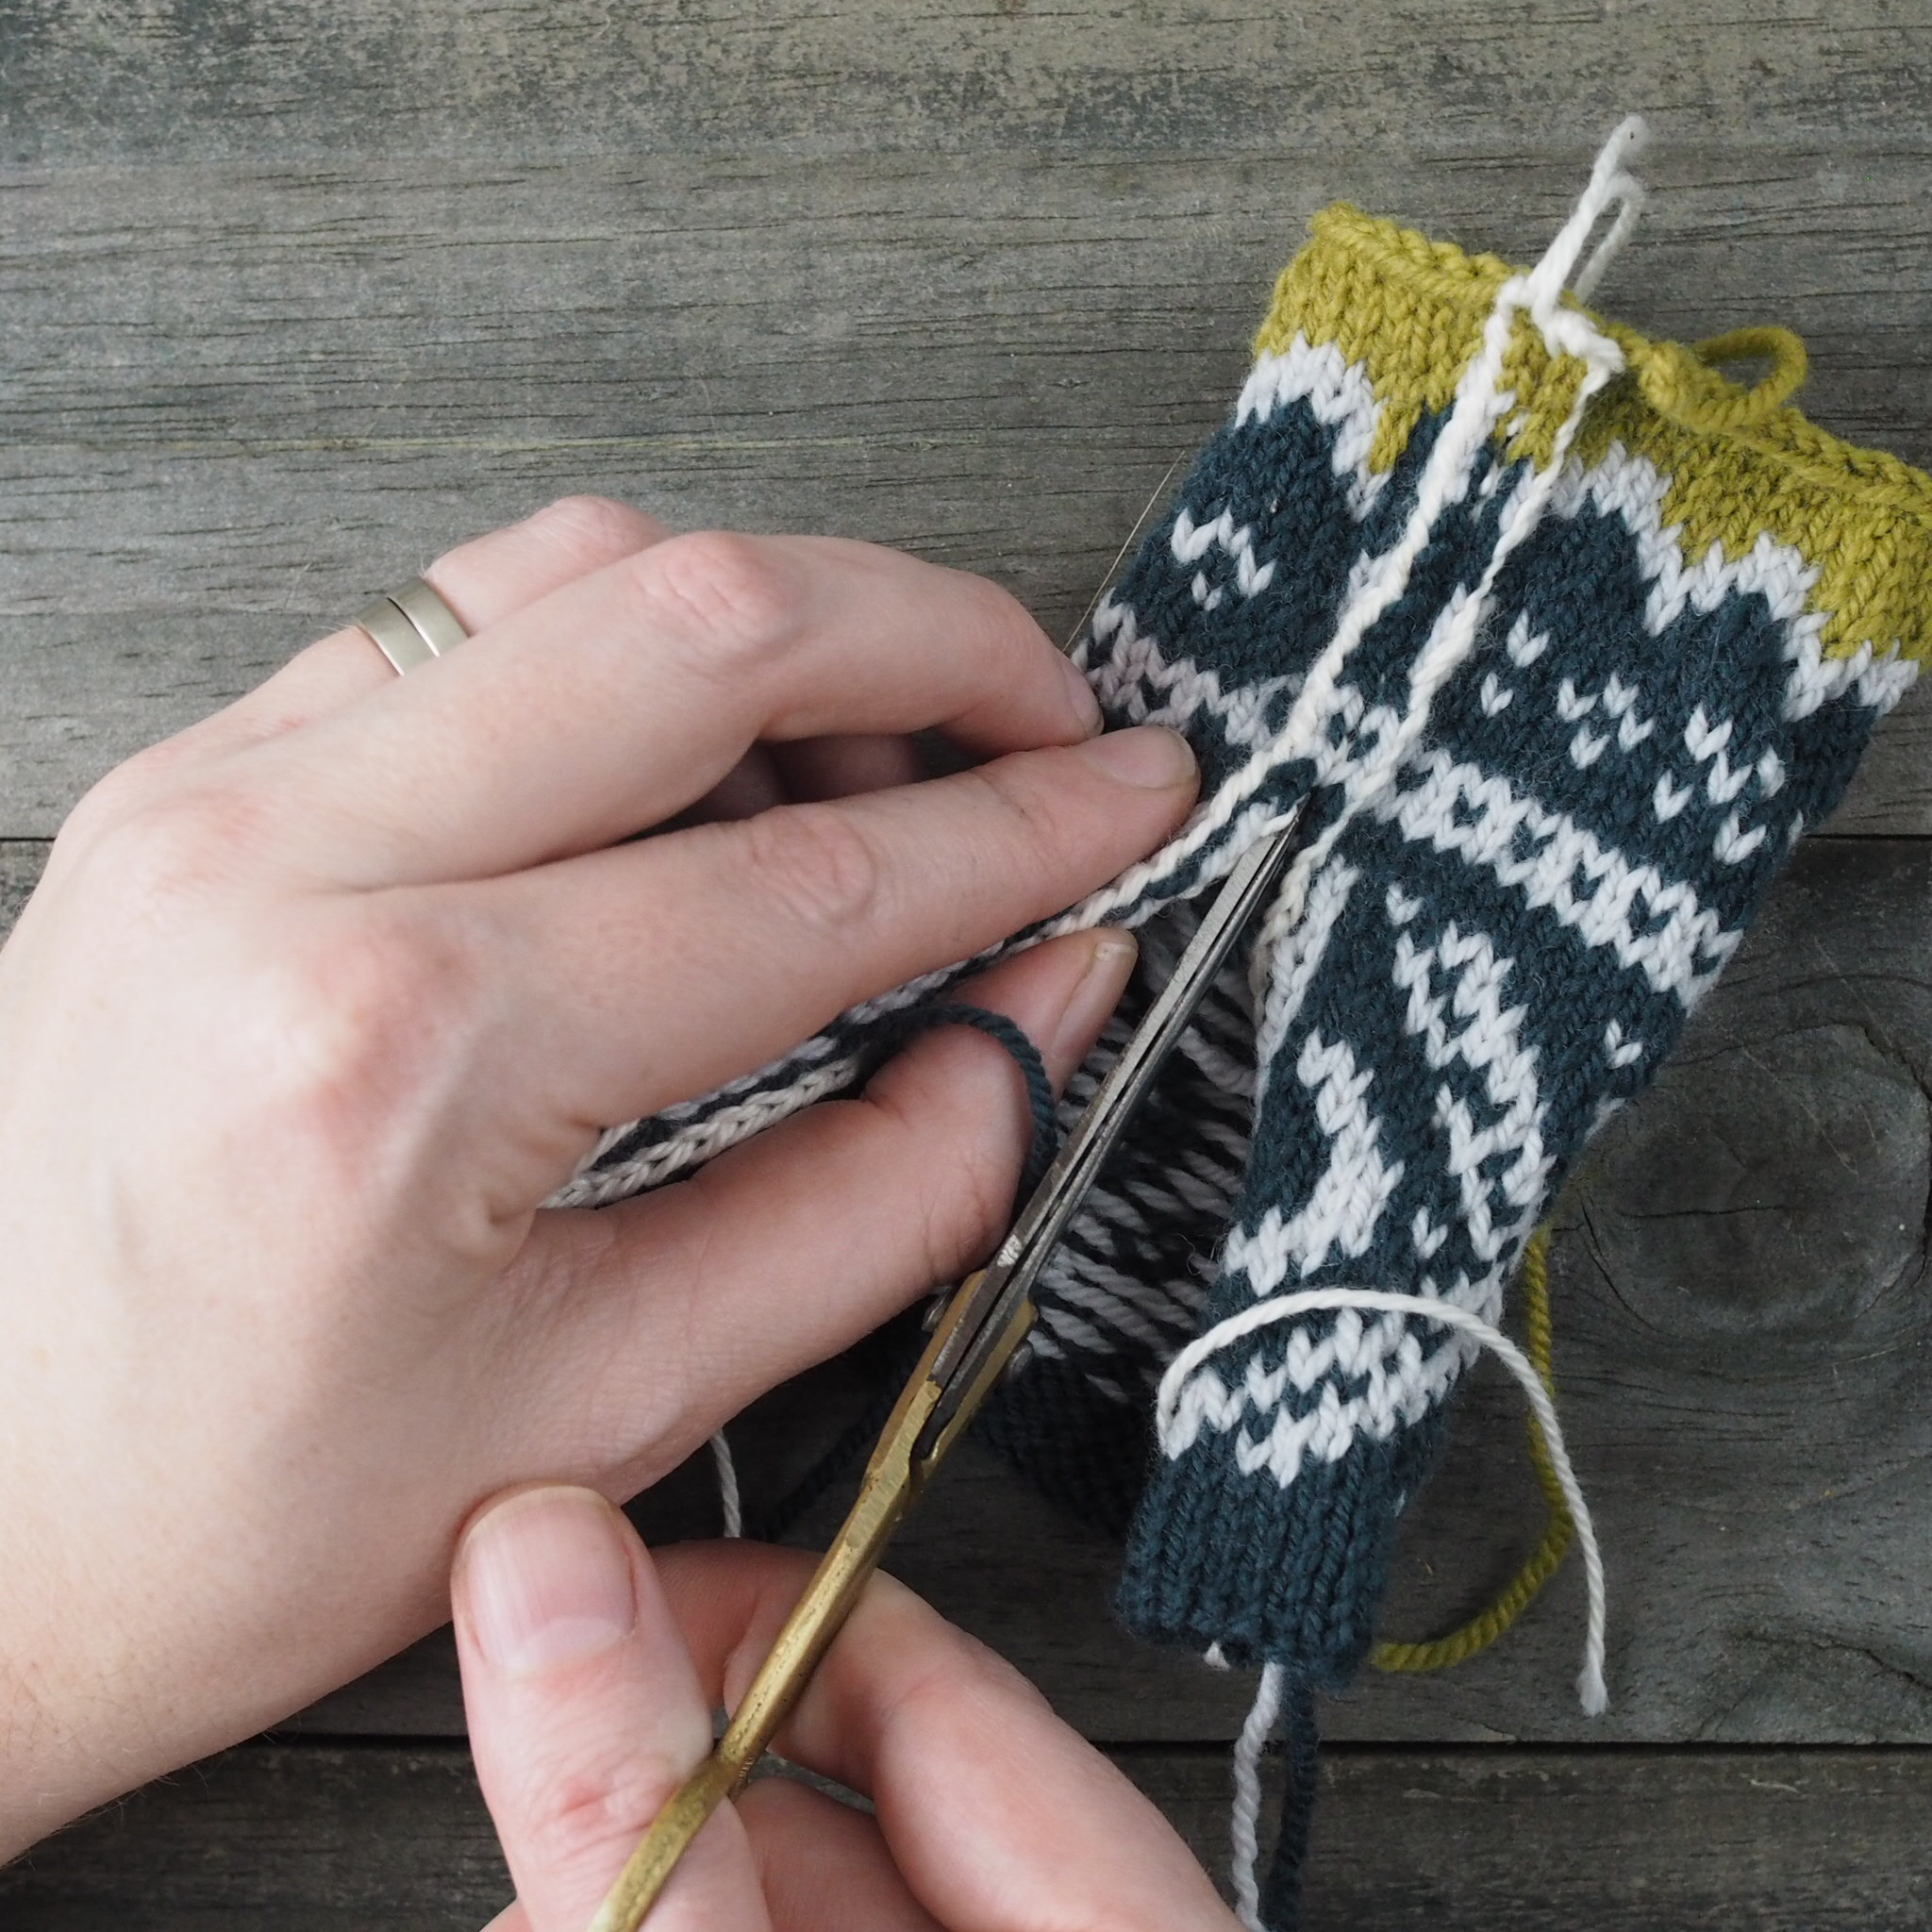
Grafting Openings Shut (Kitchener Stitch)

Kitchener Stitch is my favorite way to seamlessly close together these afterthought openings to do so:

  1. Cut the yarn, leaving a long tail and thread a tapestry needle.
  2. Place all stitches on two needles, with an equal amount on each needle and the needle tips pointing right. 
  3. Put tapestry needle through first stitch on front needle (closest to you) as if to knit and pull tail through, removing the stitch off the knitting needle.
  4. Put tapestry needle through next stitch on front needle as if to purl. Pull tail through, but DO NOT remove stitch from knitting needle.
  5. Put tapestry needle through first stitch on back needle (farthest from you) as if to purl and pull tail through, removing the stitch off the knitting needle.
  6. Put tapestry needle through next stitch on back needle as if to knit. Pull tail through, but DO NOT remove stitch from knitting needle.

Repeat Steps 3-6 until all stitches have been grated together. Adjust tightness of tail so join is smooth before weaving in ends.

Domenic Duck Tutorial

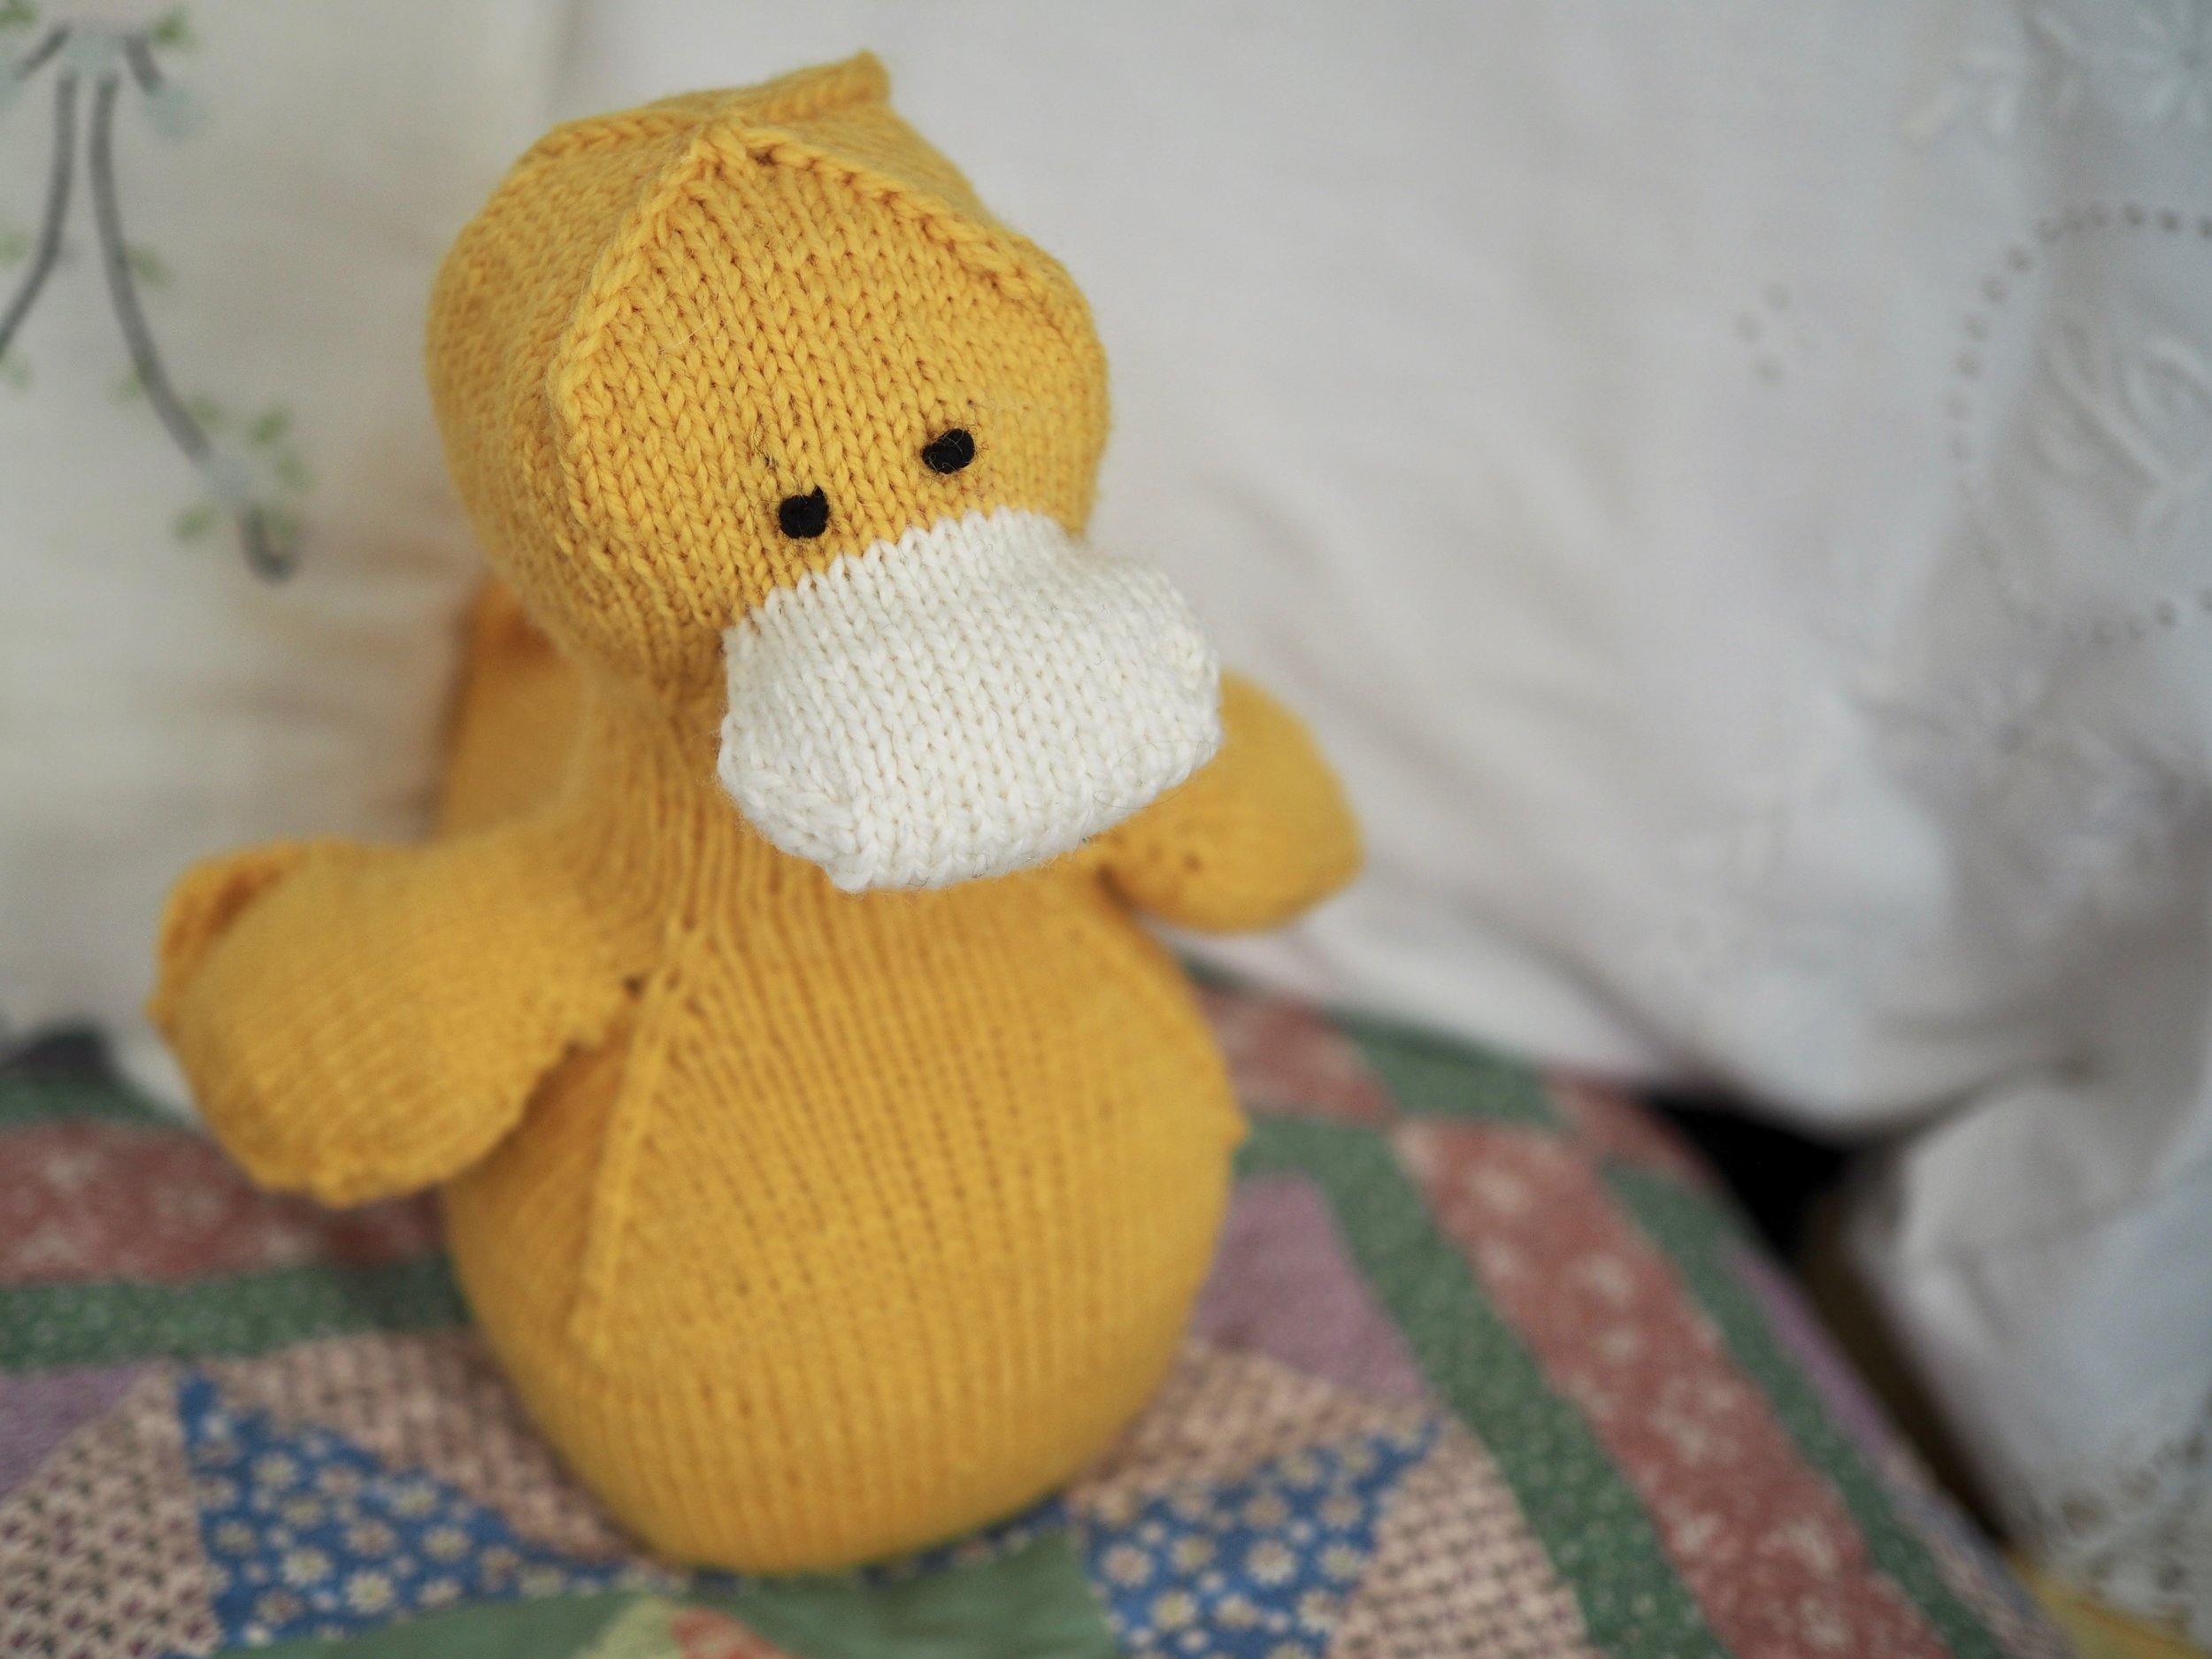
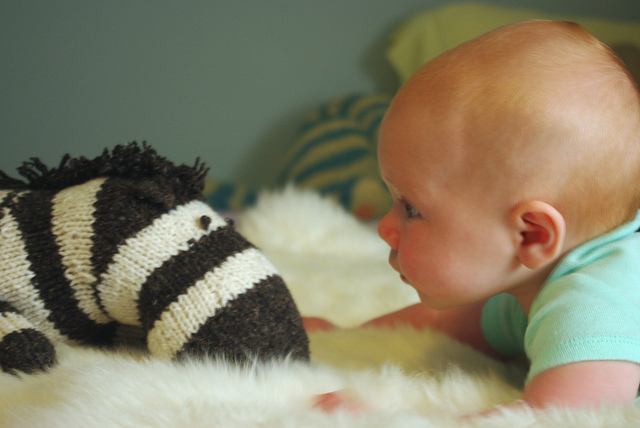
Congratulations! You now have all the techniques you need to finish your duck!! 

If you're on Instagram, please tag me @mscleaver or via #domenicKAL or post in the Ravelry Group by April 21st to be eligible to win prizes! 


Print Friendly and PDF Follow
follow us in feedly

Domenic Duck KAL - W&T Short Rows

Short rows are one of the most valuable shaping tools in a knitter's toolbox. With them you can turn heels, add bust darts, raise the back neck of a sweater, and make an adorably curly duck tail.

There are numerous ways to do short rows, but I'm sticking with the basic wrap and turn (W&T) version here. 

W&T Knitwise

  1. Knit number of stitches as indicated in pattern before wrap.
  2. To Wrap, slide next unknitted stitch to right hand needle, bring yarn to front, as if to purl.
  3. Slip st from right hand needle back to left hand needle, keeping yarn at front of work.
  4. Pull yarn to back of work. The first stitch on the left hand needle should now have a nice wrap around it.
  5. Turn work to opposite side, with yarn as to purl.

W&T Purlwise

  1. Purl number of stitches as indicated in pattern before wrap.
  2. To Wrap, slide next unworked stitch to right hand needle, bring yarn to back, as if to knit.
  3. Slip st from right hand needle back to left hand needle, keeping yarn at back of work.
  4. Pull yarn to front of work. The first stitch on the left hand needle should now have a nice wrap around it.
  5. Turn work to opposite side, with yarn as to knit.

As you work the short rows across the tail, you'll start to form a triangle shape at one end, with a neat little wrap around each stitch.

Curling the Tail

To give the tail it's adorable curl, the outside is going to need to be longer the the inner part of the curl. So you'll need to work a few short rows where the row stays the same length/doesn't get shorter. In this case, you will be re-wrapping a stitch you've already wrapped once. 

Picking up the Wraps

Depending of the short row, you may have one, two, or three wraps to pick up as you work your way back out to longer rows. 

Knitwise

  1. Knit to first wrapped stitch. 
  2. Using the right hand needle, pick up all wraps and slide them onto the left hand needle, making sure not to drop the original stitch that was wrapped.
  3. Knit through the stitch with all its wraps. This may be a k2tog, k3tog, or k4tog, depending on the number of wraps. 

Purlwise

  1. Purl to first wrapped stitch. 
  2. Using the right hand needle, pick up all wraps and slide them onto the left hand needle, making sure not to drop the original stitch that was wrapped.
  3. Purl through the stitch with all its wraps. This may be a p2tog, p3tog, or p4tog, depending on the number of wraps. 

As you work the short rows back out, you'll close off the top of the triangle and have and cute little tail! Your project will also look like a shoe for a wide-footed gnome. 

Up next: shaping the neck and setting up for afterthought appendages. 


Print Friendly and PDF Follow
follow us in feedly

Domenic Duck KAL - Joining in the Round, KFBs, and Building a Base

Domenic Duck KAL

Want to join in the fun? All kits (knit and embroidery) are 25% off now through April 4th with the code SPRINGFLING.

Today we're kicking off the KAL by starting at the bottom and building a solid base.

Circular knitting: some swear by magic loop, other prefer two circulars and still other like the old fashion simplicity of double-pointed needles (dpns). As for me? I think they all do different things really well, so it's about matching the method to part of the project. So while the majority of this KAL will be shown using magic loop, I'm going to start on dpns - you can, of course, use whatever method you prefer. :) 

Note: Click any photo in a grid to bring up a larger image.

Joining in the Round 

When it comes to a very small number of stitches, I find dpns the easiest to handle, rather than constantly shifting around a circular cord. To join in the round, my favorite method is a follows:

  1. Spread your stitches evenly across 3 dpns, making sure that the stitches don't get twisted at the needle breaks (Check to make sure the loops/bumps under the needles all look the same). 
  2. Shift the last stitch on the left hand needle to the right hand needle.
  3. Pull the stitch that is second-most to the left on the right hand needle (the first stitch you cast on), pull it over the stitch you just shifted and place it on the left needle. 
  4. Now you're joined your stitches and can begin knitting in the round.

Increasing with KFBs 

All of the increases in this pattern are KFBs or knit into the front, then back of the stitch. This increases one stitch, and leaves a rather visible bump or bar on the left at the increased stitch, with a smooth line on the original stitch. You'll want that line of the original stitch to continue unbroken up across series of increases.

To KFB:

  1. Insert your right-hand (RH) needle into the first stitch on the left-hand (LH) needle and knit as you normally would, but do not remove the stitch from the LH needle yet. 
  2. Shift your RH needle so it goes through that same LH stitch, but through the back of the loop. 
  3. Make a knit stitch and slip off the LH stitch off the needle. You'll have increased 1 st.

Changing from DPNs to Magic Loop

Because you'll be stuffing the duck as you go along, having the flexibility of a circular cable can be helpful, so once I reach a solid number of stitches on my dpns (about 10 per needle or more), I'll switch to using the magic loop technique. Two circular needles can accomplish this too.  

However, when you're on dpns it's easy to use the needle breaks in lieu of stitch markers (and I try to design my animal patterns to make sense along those needle breaks), so you'll need to add them when you switch to the circular(s).

To switch, simply put down that 4th dpn you've been knitting with and pick up your circular and start knitting as usual, putting a stitch marker at each needle break.  

Keep increasing (and keeping those increase lines nice and straight!) and next time we'll look at wrap and turn short rows for making that adorably curly tail.


Print Friendly and PDF Follow
follow us in feedly

New Kits for Spring and a KAL!

For a long time, I've been wanting to expand my designs beyond just knitting patterns, so I'm pleased to introduce my first trio of embroidery designs! Each design can be purchased as a PDF pattern or as a complete kit with pre-printed fabric, needle, thread and hoop. I've always found embroidery quite soothing, and when the design is already on the fabric, its even easier to incorporate a little slow stitching into your day. 

In addition to the embroidery designs, I'm also pleased to offer my Domenic Duck pattern as kits. This oldie but a goody has been slightly revamped for even more adorable shaping and is the perfect size for snuggling. It's also quick enough to work up for inclusion in this year's Easter baskets. 

One of the comments I hear most frequently in relation to my designs is some variation of "That's beautiful, but I'm not there yet."  

I never want anyone to feel like my designs are out of reach, and I feel like I gain so much when I try to stretch my own skills, so I've been working to make my designs more accessible for crafters of all skill levels.

This means that my new stuffed animal kits will be paired with a step-by-step online tutorial series/KAL (with prizes!) and all embroidery kits come with a basic stitch guide. Hopefully these tools will give you the confidence to take the leap and try something new!


Print Friendly and PDF Follow
follow us in feedly

Linen Verdant

It's linen month over at Quince & Co., and I'm pleased to have two designs in their latest collection of warm-weather knits: Linen Verdant

As in it's woven form, knitted linen fabric has such a beautiful texture and drape on it's own that I like to keep the designs simple. Both the Ripley tank and the Snell tee are knit from the bottom up in the round with minimal finishing, and a little decorative touch to make it special. 

Make sure to include some positive ease for that extra breezy feel, field of wild grasses not required.

You can buy both patterns as part of the Verdant Collection at Quince & Co. or as individual patterns in my shop or on Ravelry


Print Friendly and PDF Follow
follow us in feedly

Introducing the Tributary Shawl

I'm pleased to introduce the Tributary - part of Quince and Co's Piper Week and the third in my Songbird series of shawls inspired by music.

"God cage the songbird
Before the feathers run brown
God bar the windows
That we may though hollow be sound

And this island shall be shackled to her waters
Here we vow never to change
Here we will stand at last for something
With no desire to pretend"

- The Low Anthem

Inspired by lyrics from the Rhode Island-based folk band The Low Anthem, this traditional triangle shawl plays with closure and openness, with the body knit in Stockinette st for the first third, before opening up into a wide lace border.  The strong lines of double yarn-overs both open up the fabric, evoking bars, and the final pattern has a feather-like texture, the connection the two lace patterns giving the shawl a feeling of downward motion, and falling feathers.

The pattern is available for $6.50 USD from the following online shops:

MsCleaver.com   ||   Quince & Co.   ||      Ravelry


If you knit it and participate in social media, use #quincetributary to share and/or tag me @mscleaver !  

I'd love to see your version!!!


Print Friendly and PDF Follow
follow us in feedly

Colorwork Cravings

It's rare these days that I get to knit something from someone else's pattern, but whenever I do, it's such a joy that I kick myself for not doing it more often.

Case in point, my most recently finished knit - the Ebba pullover by Diana Walla.

I had eyed the pattern back when it came out in September 2015 (how time flies!) and then I had some time this winter with no knitting deadlines and thought- you know what, let's do it! 

So I went to my LYS - picked up some colors, swatched, went back to LYS to exchange a color when the first combo didn't work out, swatched again, cut my first steek, and then merrily knitted for a month. I completely enjoyed knitting this and I love the finished project. Wearing it twice a week until it's too warm is totally acceptable, right? 

But more than anything, I love that it re-triggered that colorwork-loving portion in my brain. Back in the day, I had a lot of fun designing some colorwork pieces like Zoetrope, but then for one reason or another, I stopped. But  I'm inspired now, and I maybe bought a crazy amount of yarn because I do nothing in halves, apparently, so more colorwork to come!!


Print Friendly and PDF Follow
follow us in feedly

Introducing the Cresting Waves Shawl

I was honored when Beatrice Perron Dahlen invited me to contribute to her MAINE knits book, a celebration of sea, farm and wild in Maine. It's really a thrill to be represented alongside some of my Maine knitting friends and peers, like Carrie Bostick Hoge, Bristol Ivy, Cecily Glowik MacDonald, Mary Jane Mucklestone, Beatrice Perron Dahlen, Alicia Plummer, Leila Raabe, Elizabeth Smith, and Kristen TenDyke.  

My contribution is the Cresting Waves shawl, knit in String Theory Yarn. As the name indicates, I went with the sea as my inspiration and came up with this simple shawl.  As shown, the shawl only uses 1 skein/345 yards of fingering weight yarn, making it the perfect project for that special skein. Instructions are also provided for making deeper versions for a more generous shawl. 

The lace border is worked first, then stitches are picked up along the edge for the body, which is worked in short rows. It's a great project for those nervous about tackling lace, because if you mess up a lace row, it's only about 20 stitches to pull back. You can read more about my thoughts on knitting, Maine and this design over on Bea's blog - Thread and Ladle. You can also pre-order the book on the site, which will ship in January. I've had a chance to see a proof of the whole book, and it really is lovely, filled with great patterns and beautiful photography. 

If you'd like, you can also give the pattern some love, or queue it up on Ravelry, where Bea will be releasing a preview of each of the patterns over the coming days. 

More to come on the book in January, including information about a launch party! :) 


Print Friendly and PDF Follow
follow us in feedly

Indie Design Gift-A-Long 2016 Sale

Gift-A-Long Sale!!
For the second year, I'm participating in the Indie Design gift-a-long on Ravelry. The Indie Design Gift-A-Long is a 6 week long KAL/CAL of holiday gifts made from patterns designed by hundreds of independent designers.

From November 22nd at 8pm (US-EST) through November 30th at 11:59 pm (US-EST) I, along with many 334 other indie designers will be discounting between 5 - 20 of our patterns 25% for this event with the code giftalong2016. The code is good both in my Ms. Cleaver and Ravelry shops. 

In addition to the giftalong patterns, I'll also be discounting all kits in my shop by 10% for same period (Nov 22-30).

You can find all 20 of my discounted patterns above, or here:   

Ms. Cleaver Creations    ||    Ravelry

While the knit-a-long portion (with numerous prizes!) of the Gift-A-Long is ongoing, the sale ends tomorrow, so I've curated some of my favorite offerings from other designers to consider in the following Pinterest board, a few of which I'll be snagging myself. :) 

Happy Holiday Knitting!!


Print Friendly and PDF Follow
follow us in feedly

Tutorial: Knitting an afterthought leg (or thumb or heel)

Afterthoughtlegtutorial (1).png

I like to knit my stuffed animals as seamlessly as possible. Seams can be weak spots, particularly when being pulled and dragged about by little hands. So I've designed all my stuffed animals with seamless appendages. They're set up the same way you would do an afterthought heel on a sock, or an afterthought thumb on a mitten, but if you haven't done it before, it can be a bit fiddly. So let's walk through it together, shall we? 

Want to knit a cuddly and strong seamless friend of your own? I'll be selling Bradac kits this Saturday (11/19) at Knitwit yarn shop in Portland or check out my toy designs below!


Print Friendly and PDF Follow
follow us in feedly