Generally, when it comes to transferring a printed pattern on to fabric for embroidery, my favorite (easy and cheap) method is to tape it to a window and trace. But what do you do if you can't see through the fabric, even with a window/light box?
Enter tracing paper.
A pretty common notion in the sewing world, my mother taught me to mark my sewing fabric with tracing paper and a jagged edged wheel. For transferring embroidery designs, we'll skip the transfer wheel and use a pen, pencil or stylus to do pretty much the same thing.


Transferring an Embroidery Pattern to Opaque Fabric
To transfer an image to opaque fabric you will need the following:
- Fabric
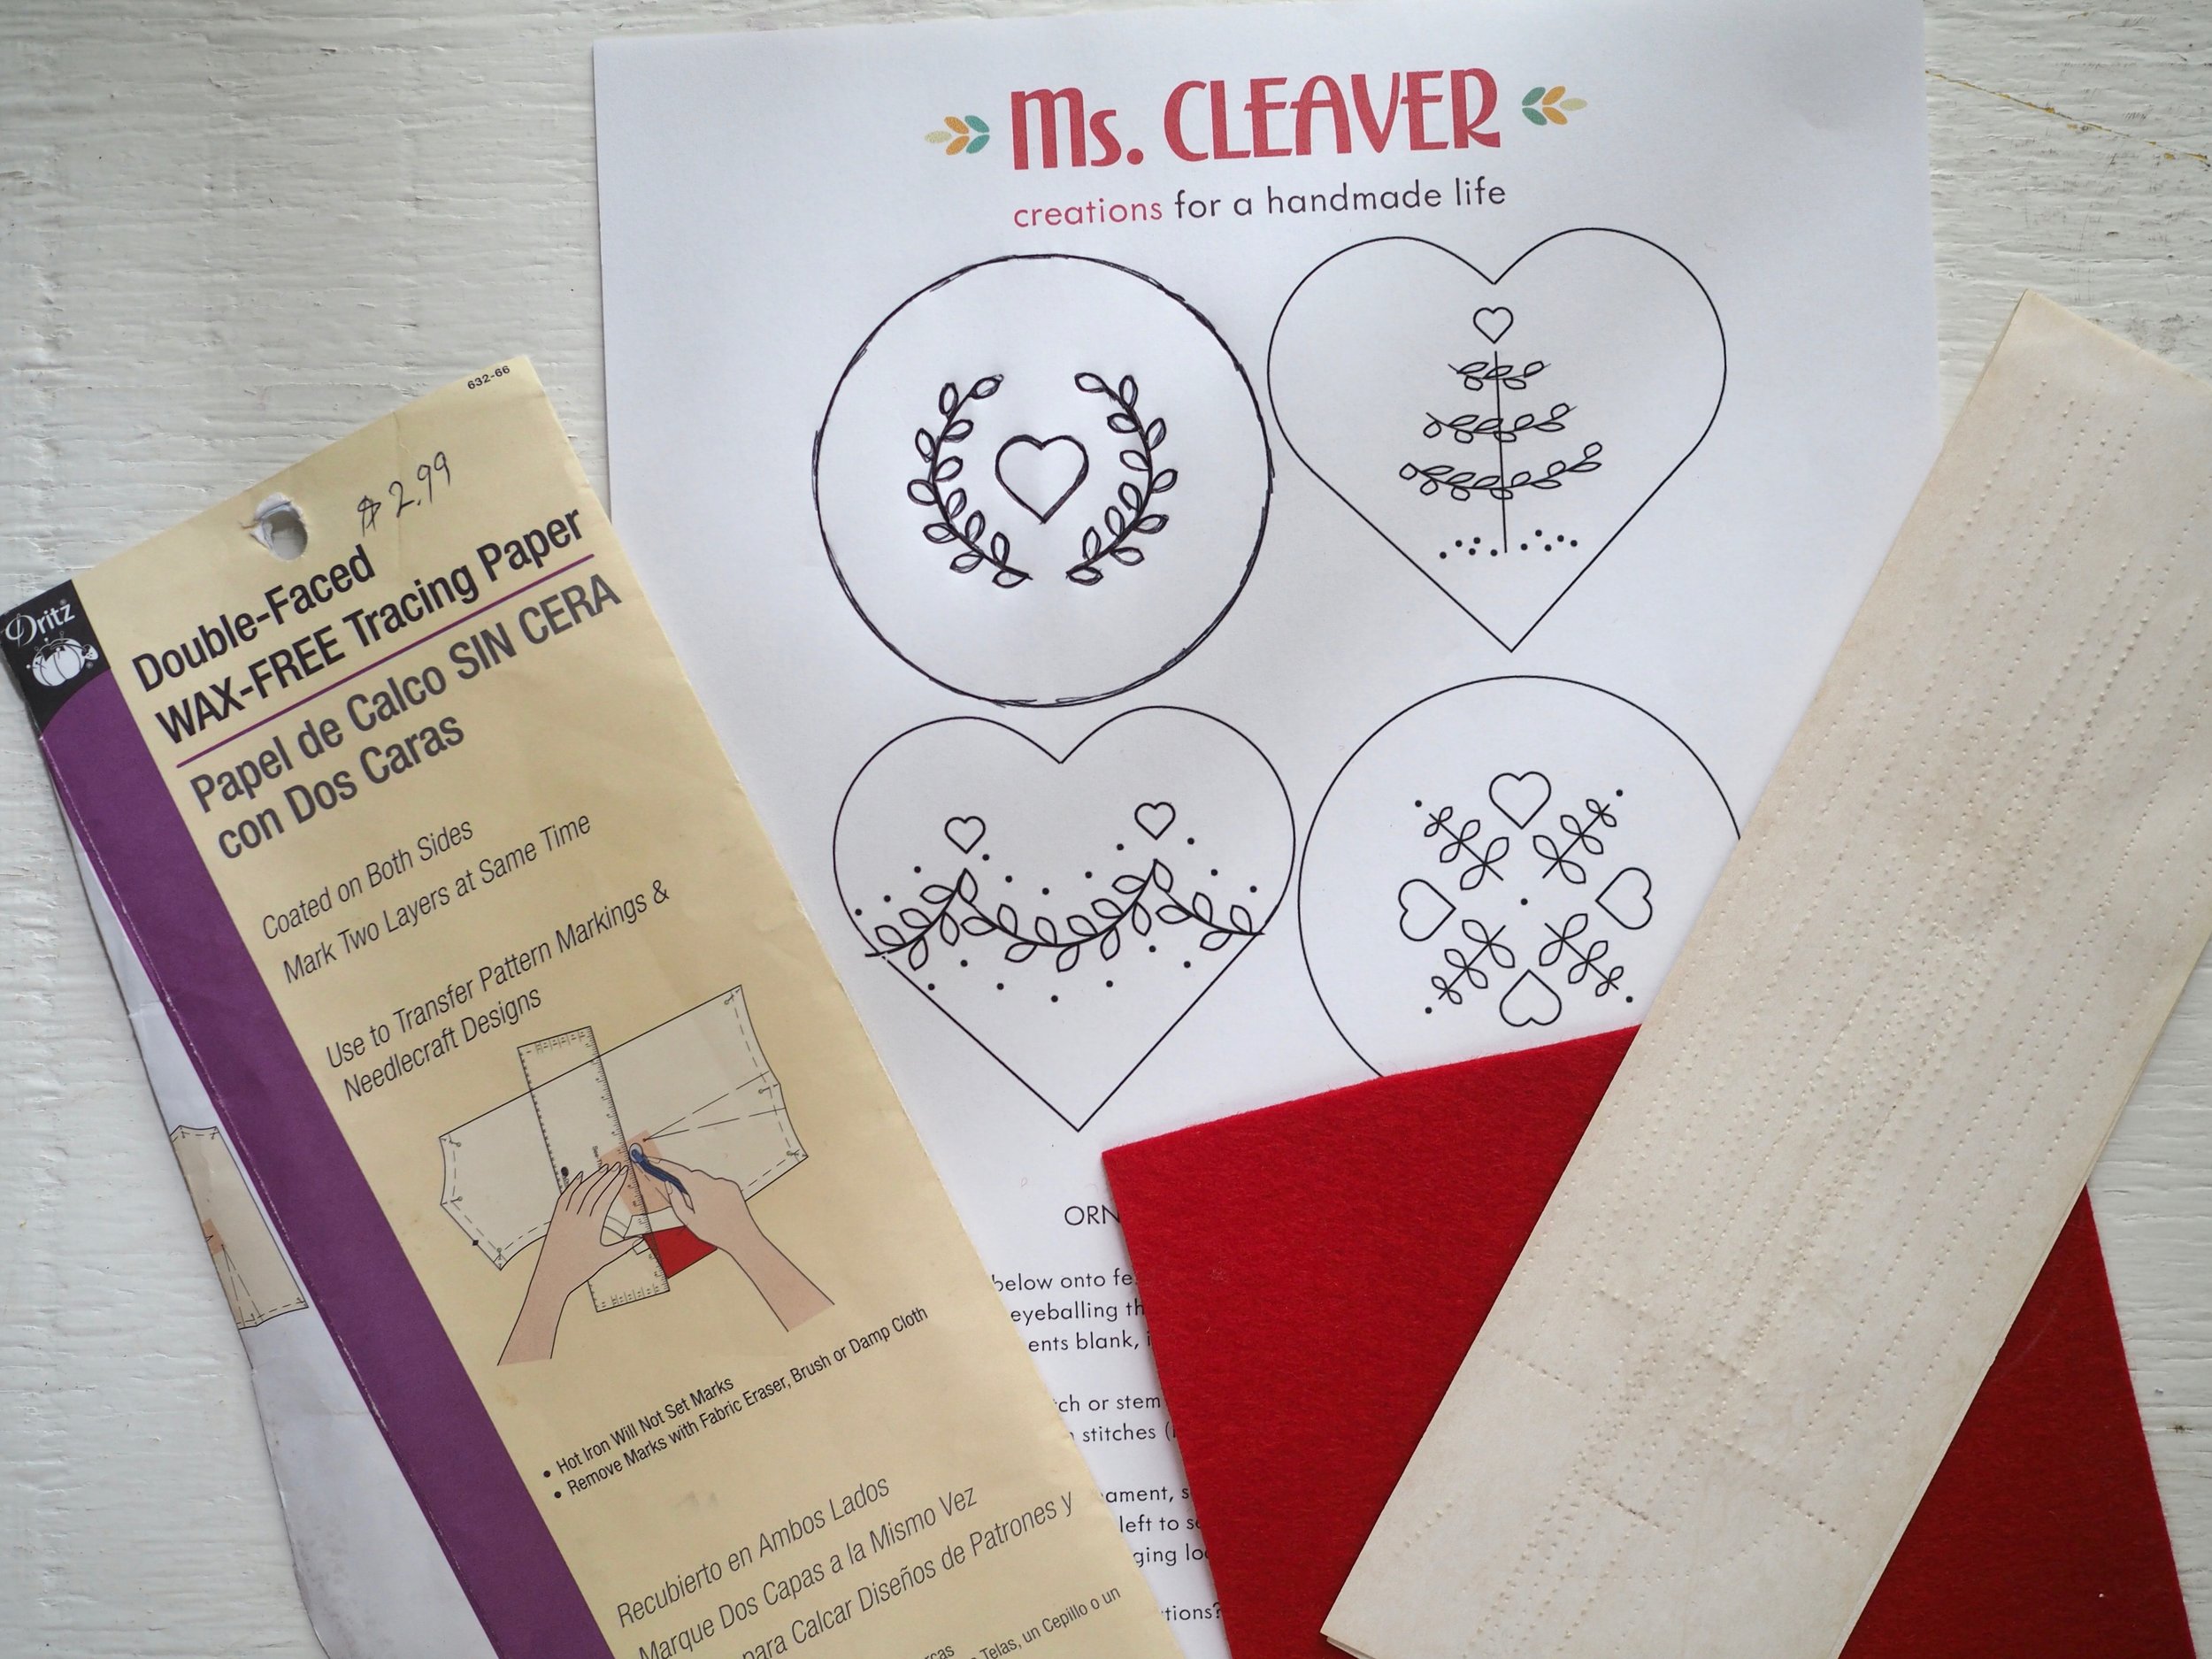
- Embroidery design printed to appropriate scale and facing the finished direction
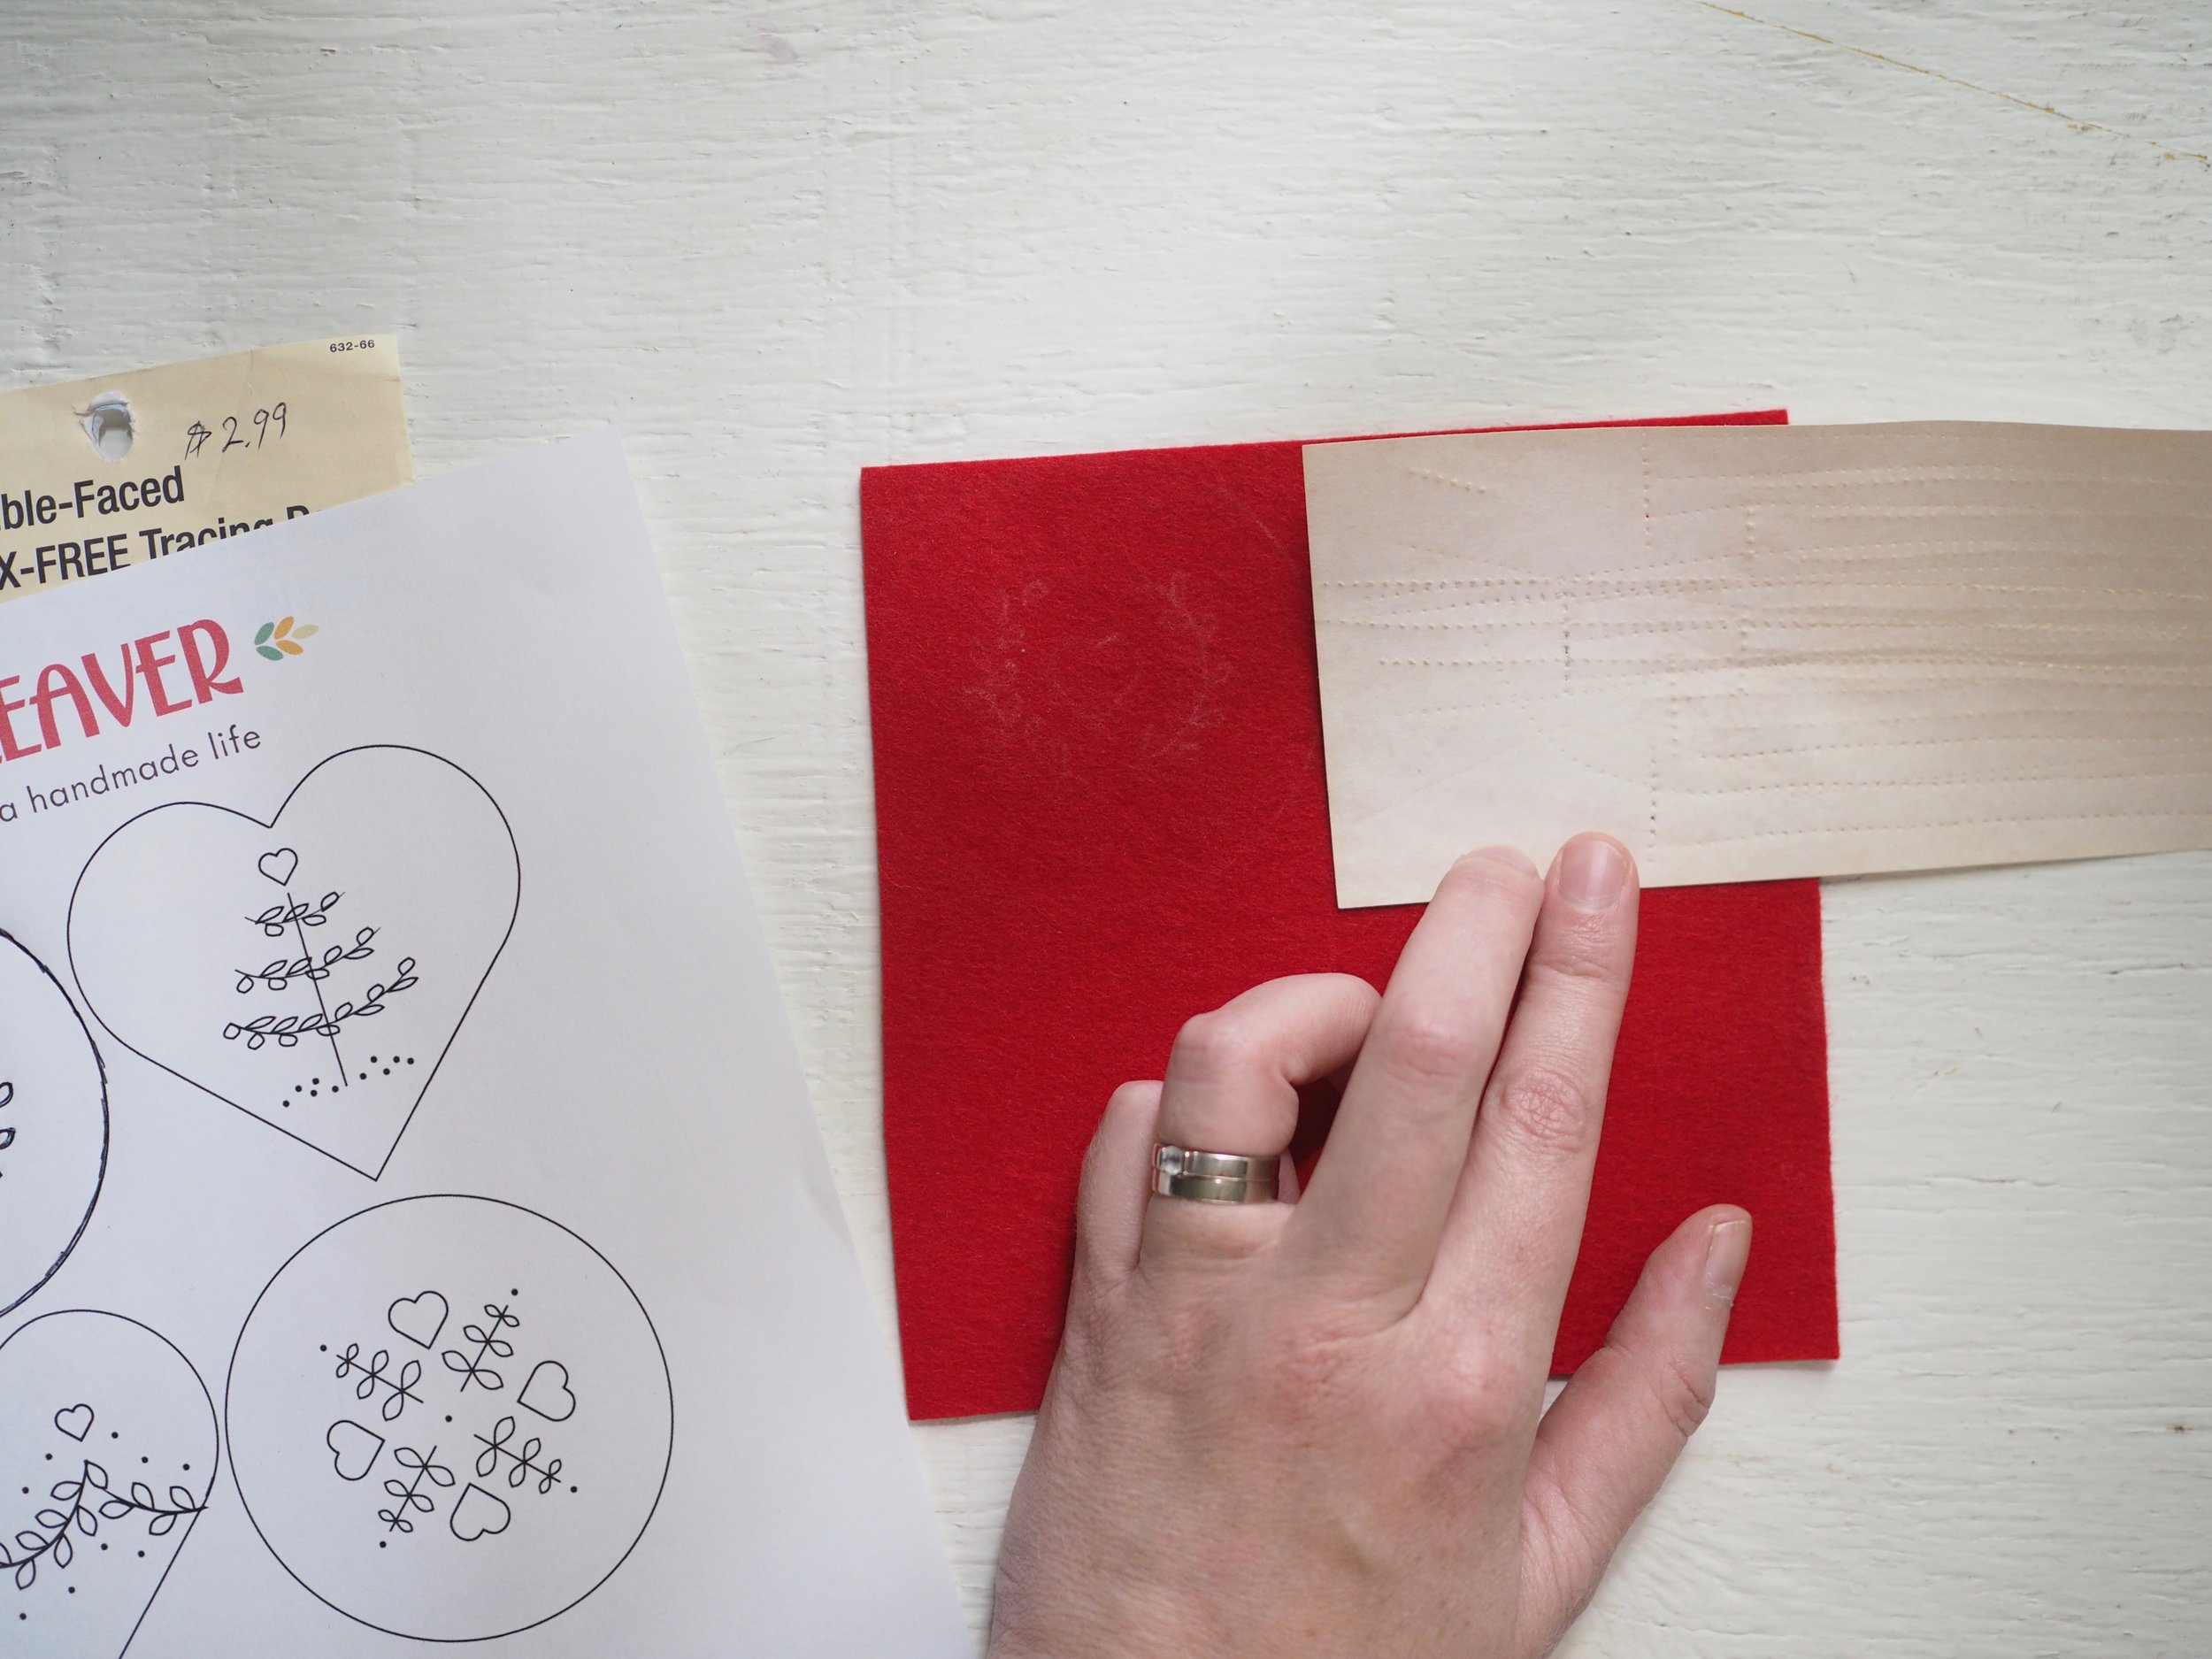
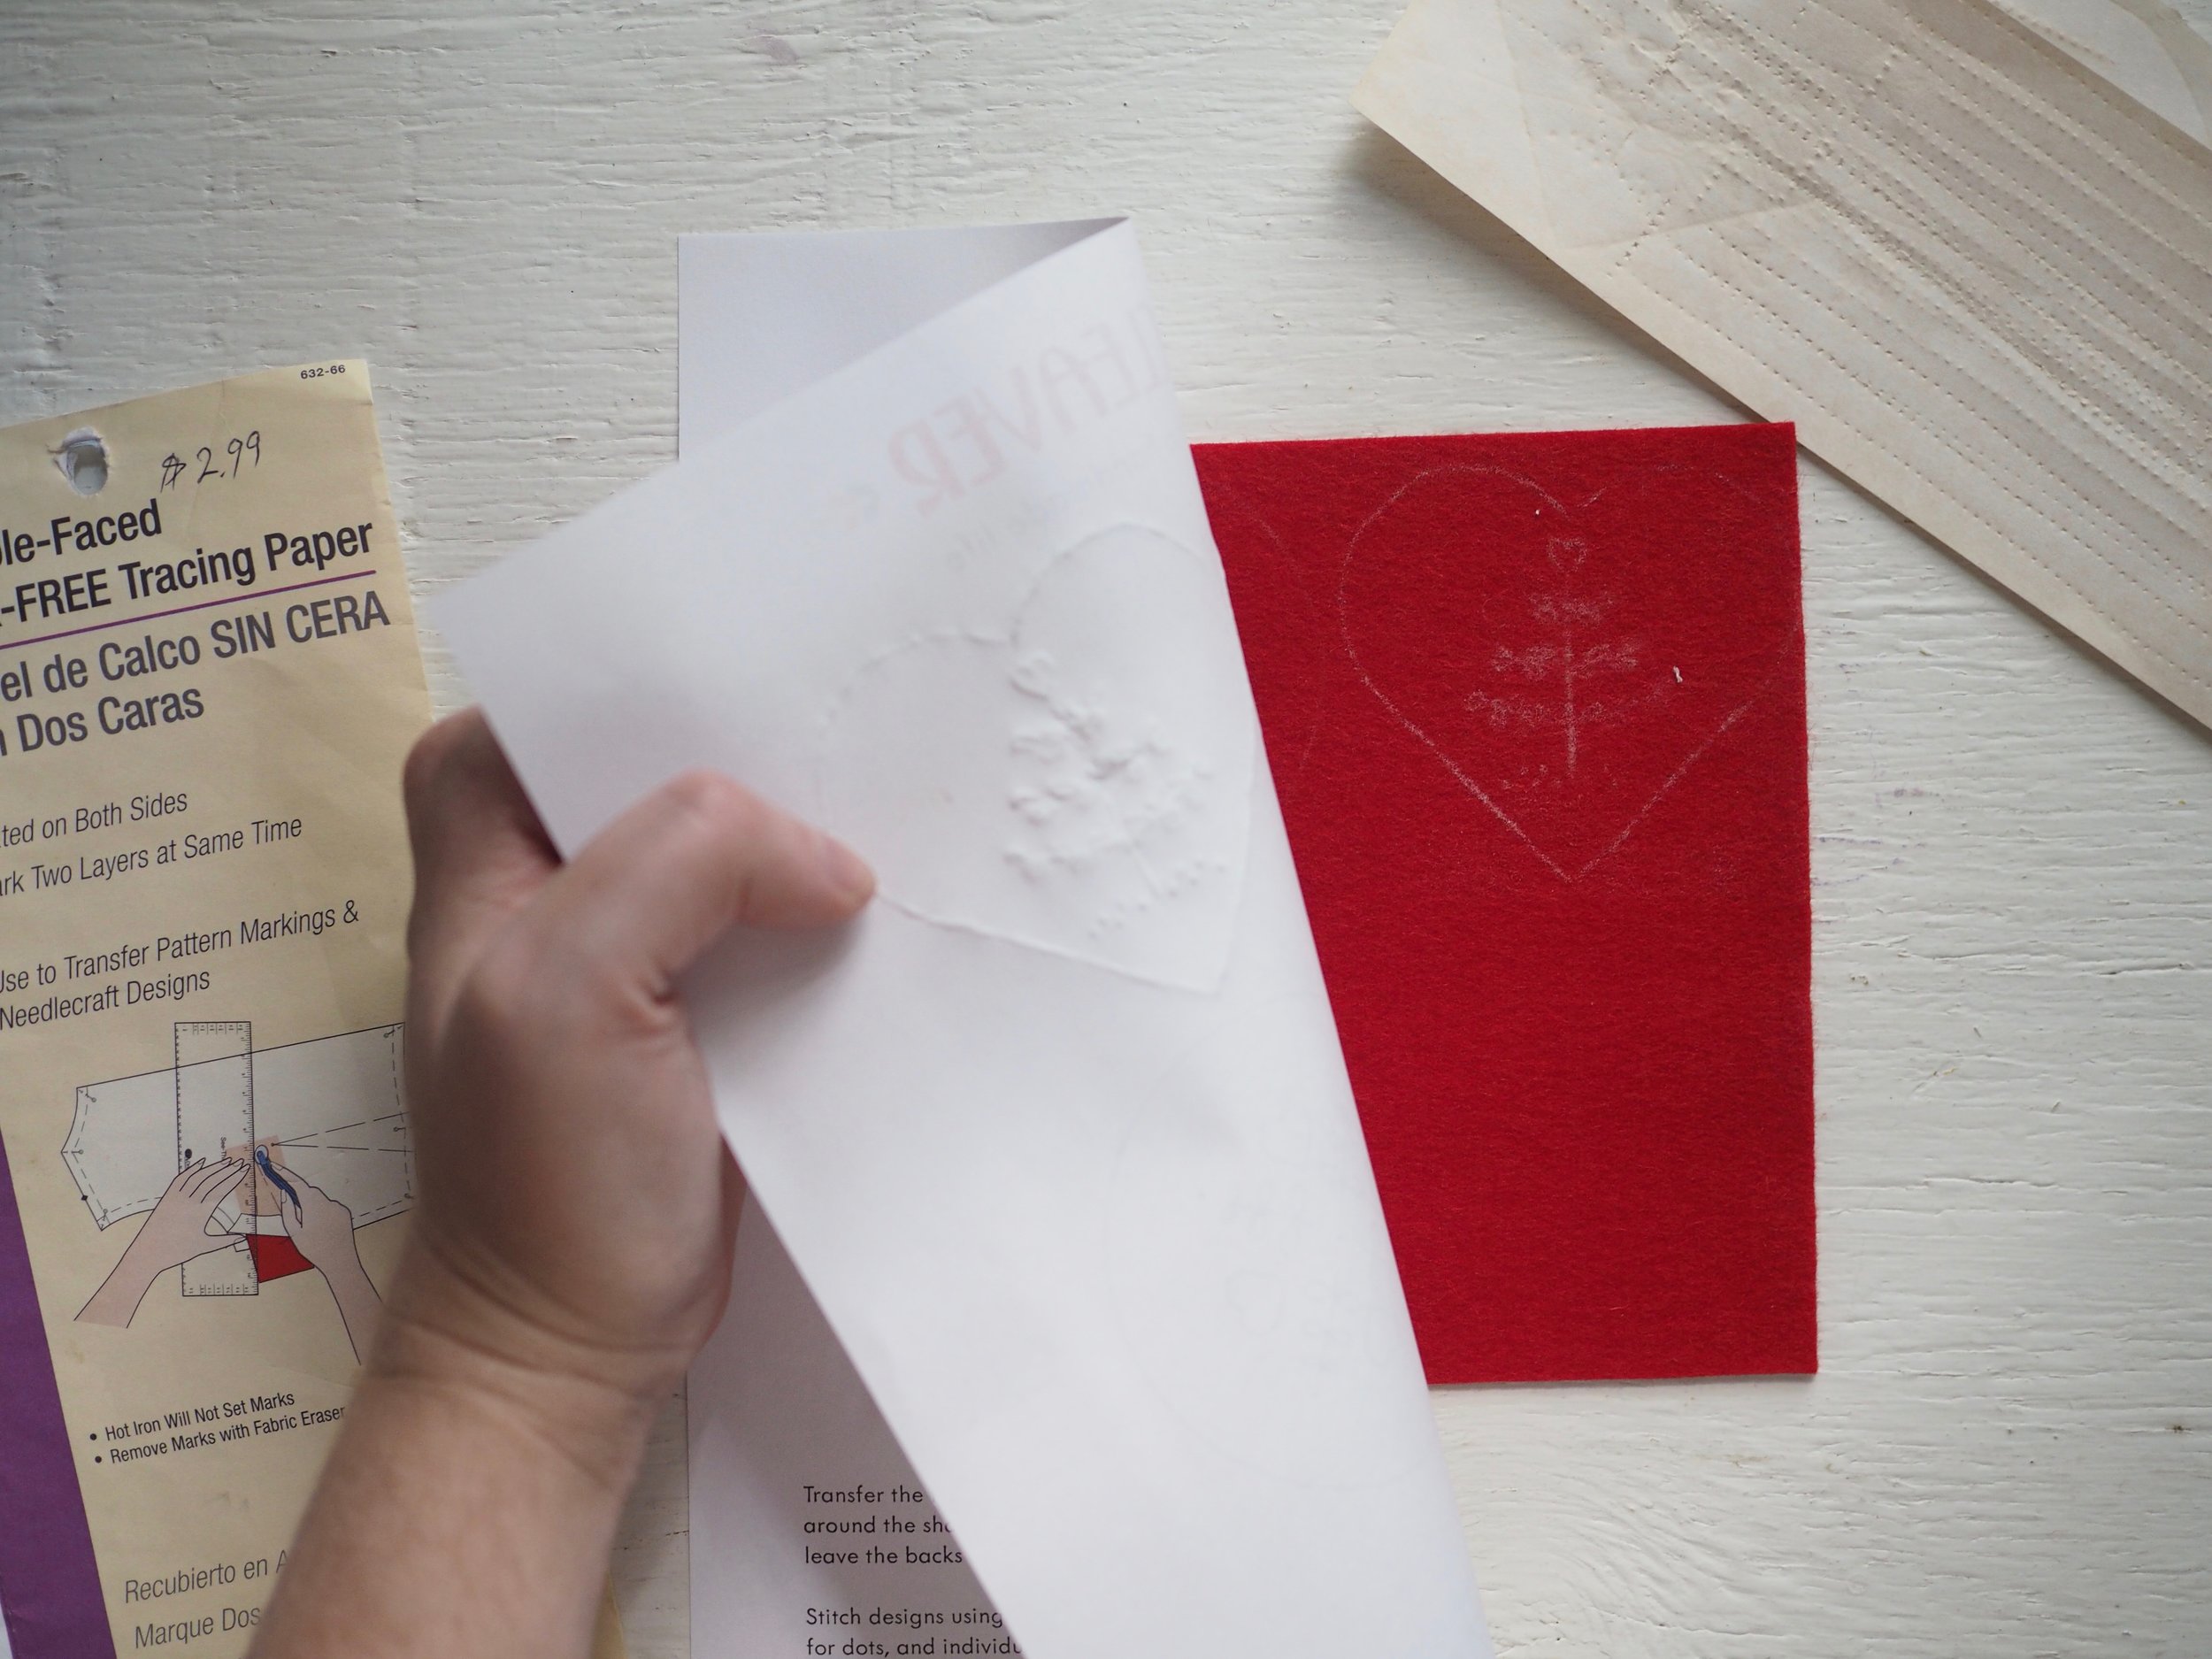
- Single-sided transfer/tracing paper in a contrast color (I used double-sided here, because it's what I had on hand. In a pinch, you could rub a piece of chalk generously across a sheet of paper and use that.)
- A pen, dull pencil, or stylus. Something with a decent point to get details, but not so pointy you poke through the paper.
- Chalk pencil or water-soluble pen (optional)
- Sandwich the transfer paper, chalk side down, between the fabric.
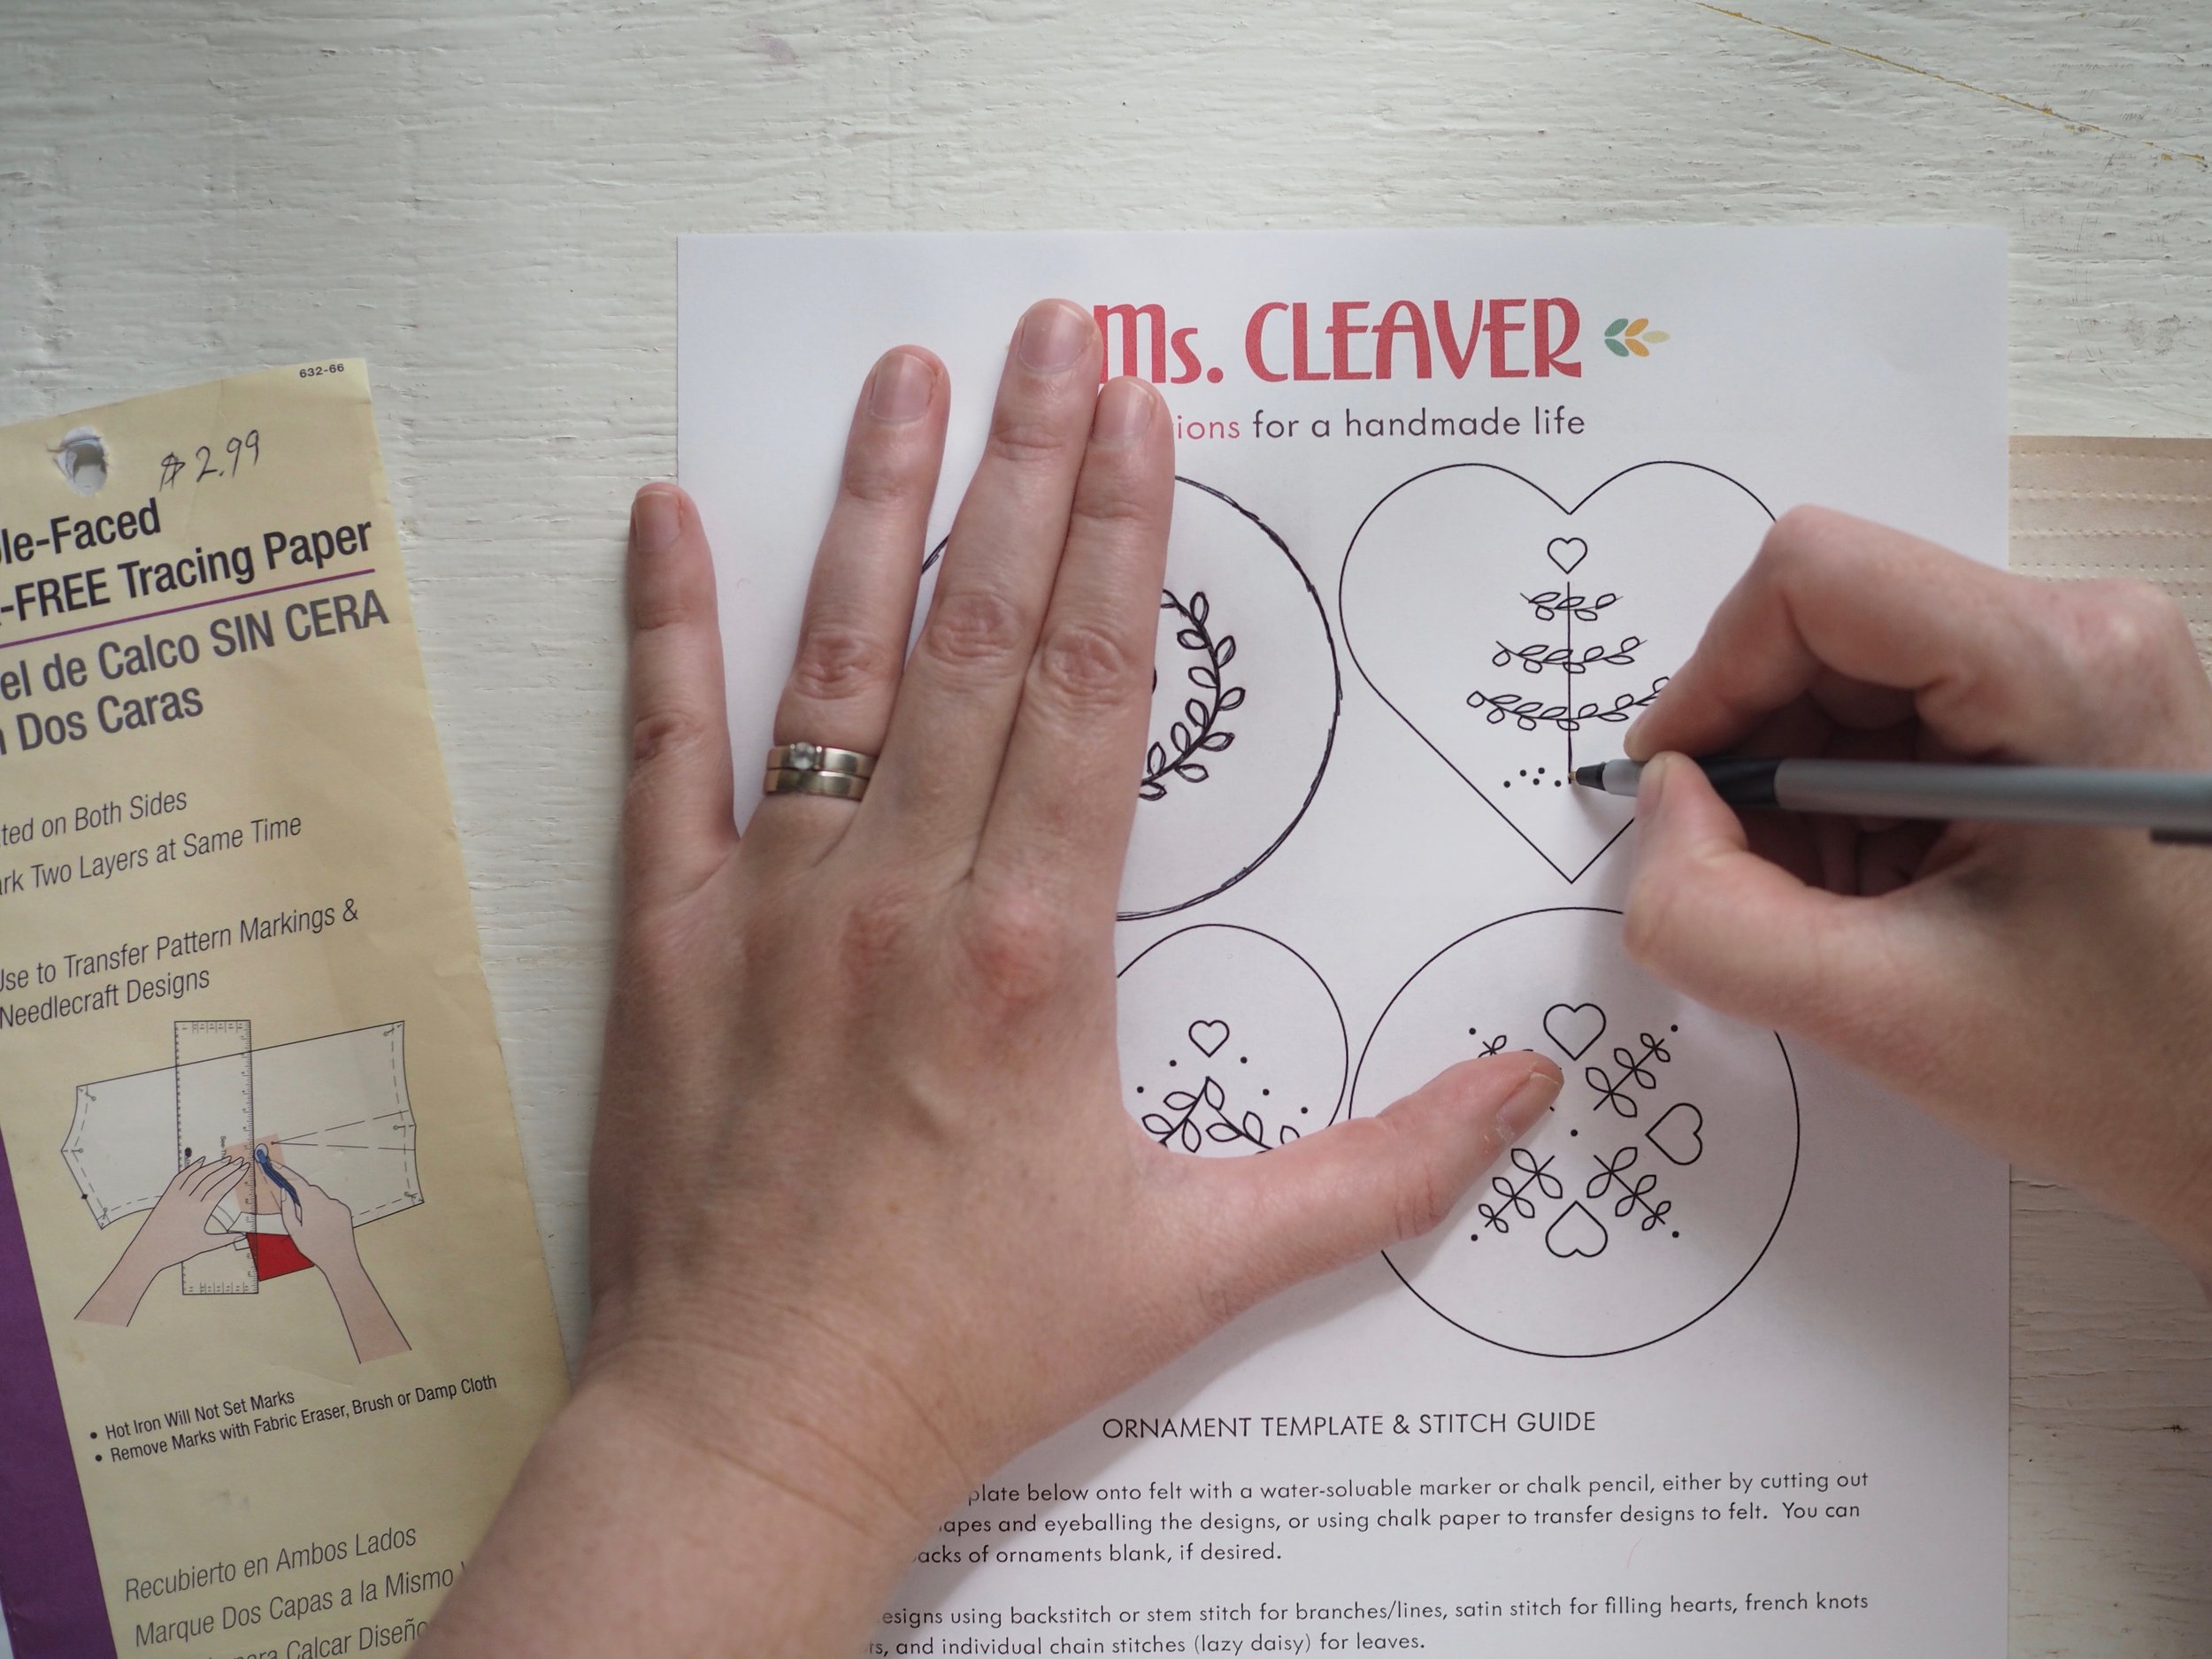
- Trace over the pattern using your pen, pressing firmly and going over each line several times as needed to make a clean mark.
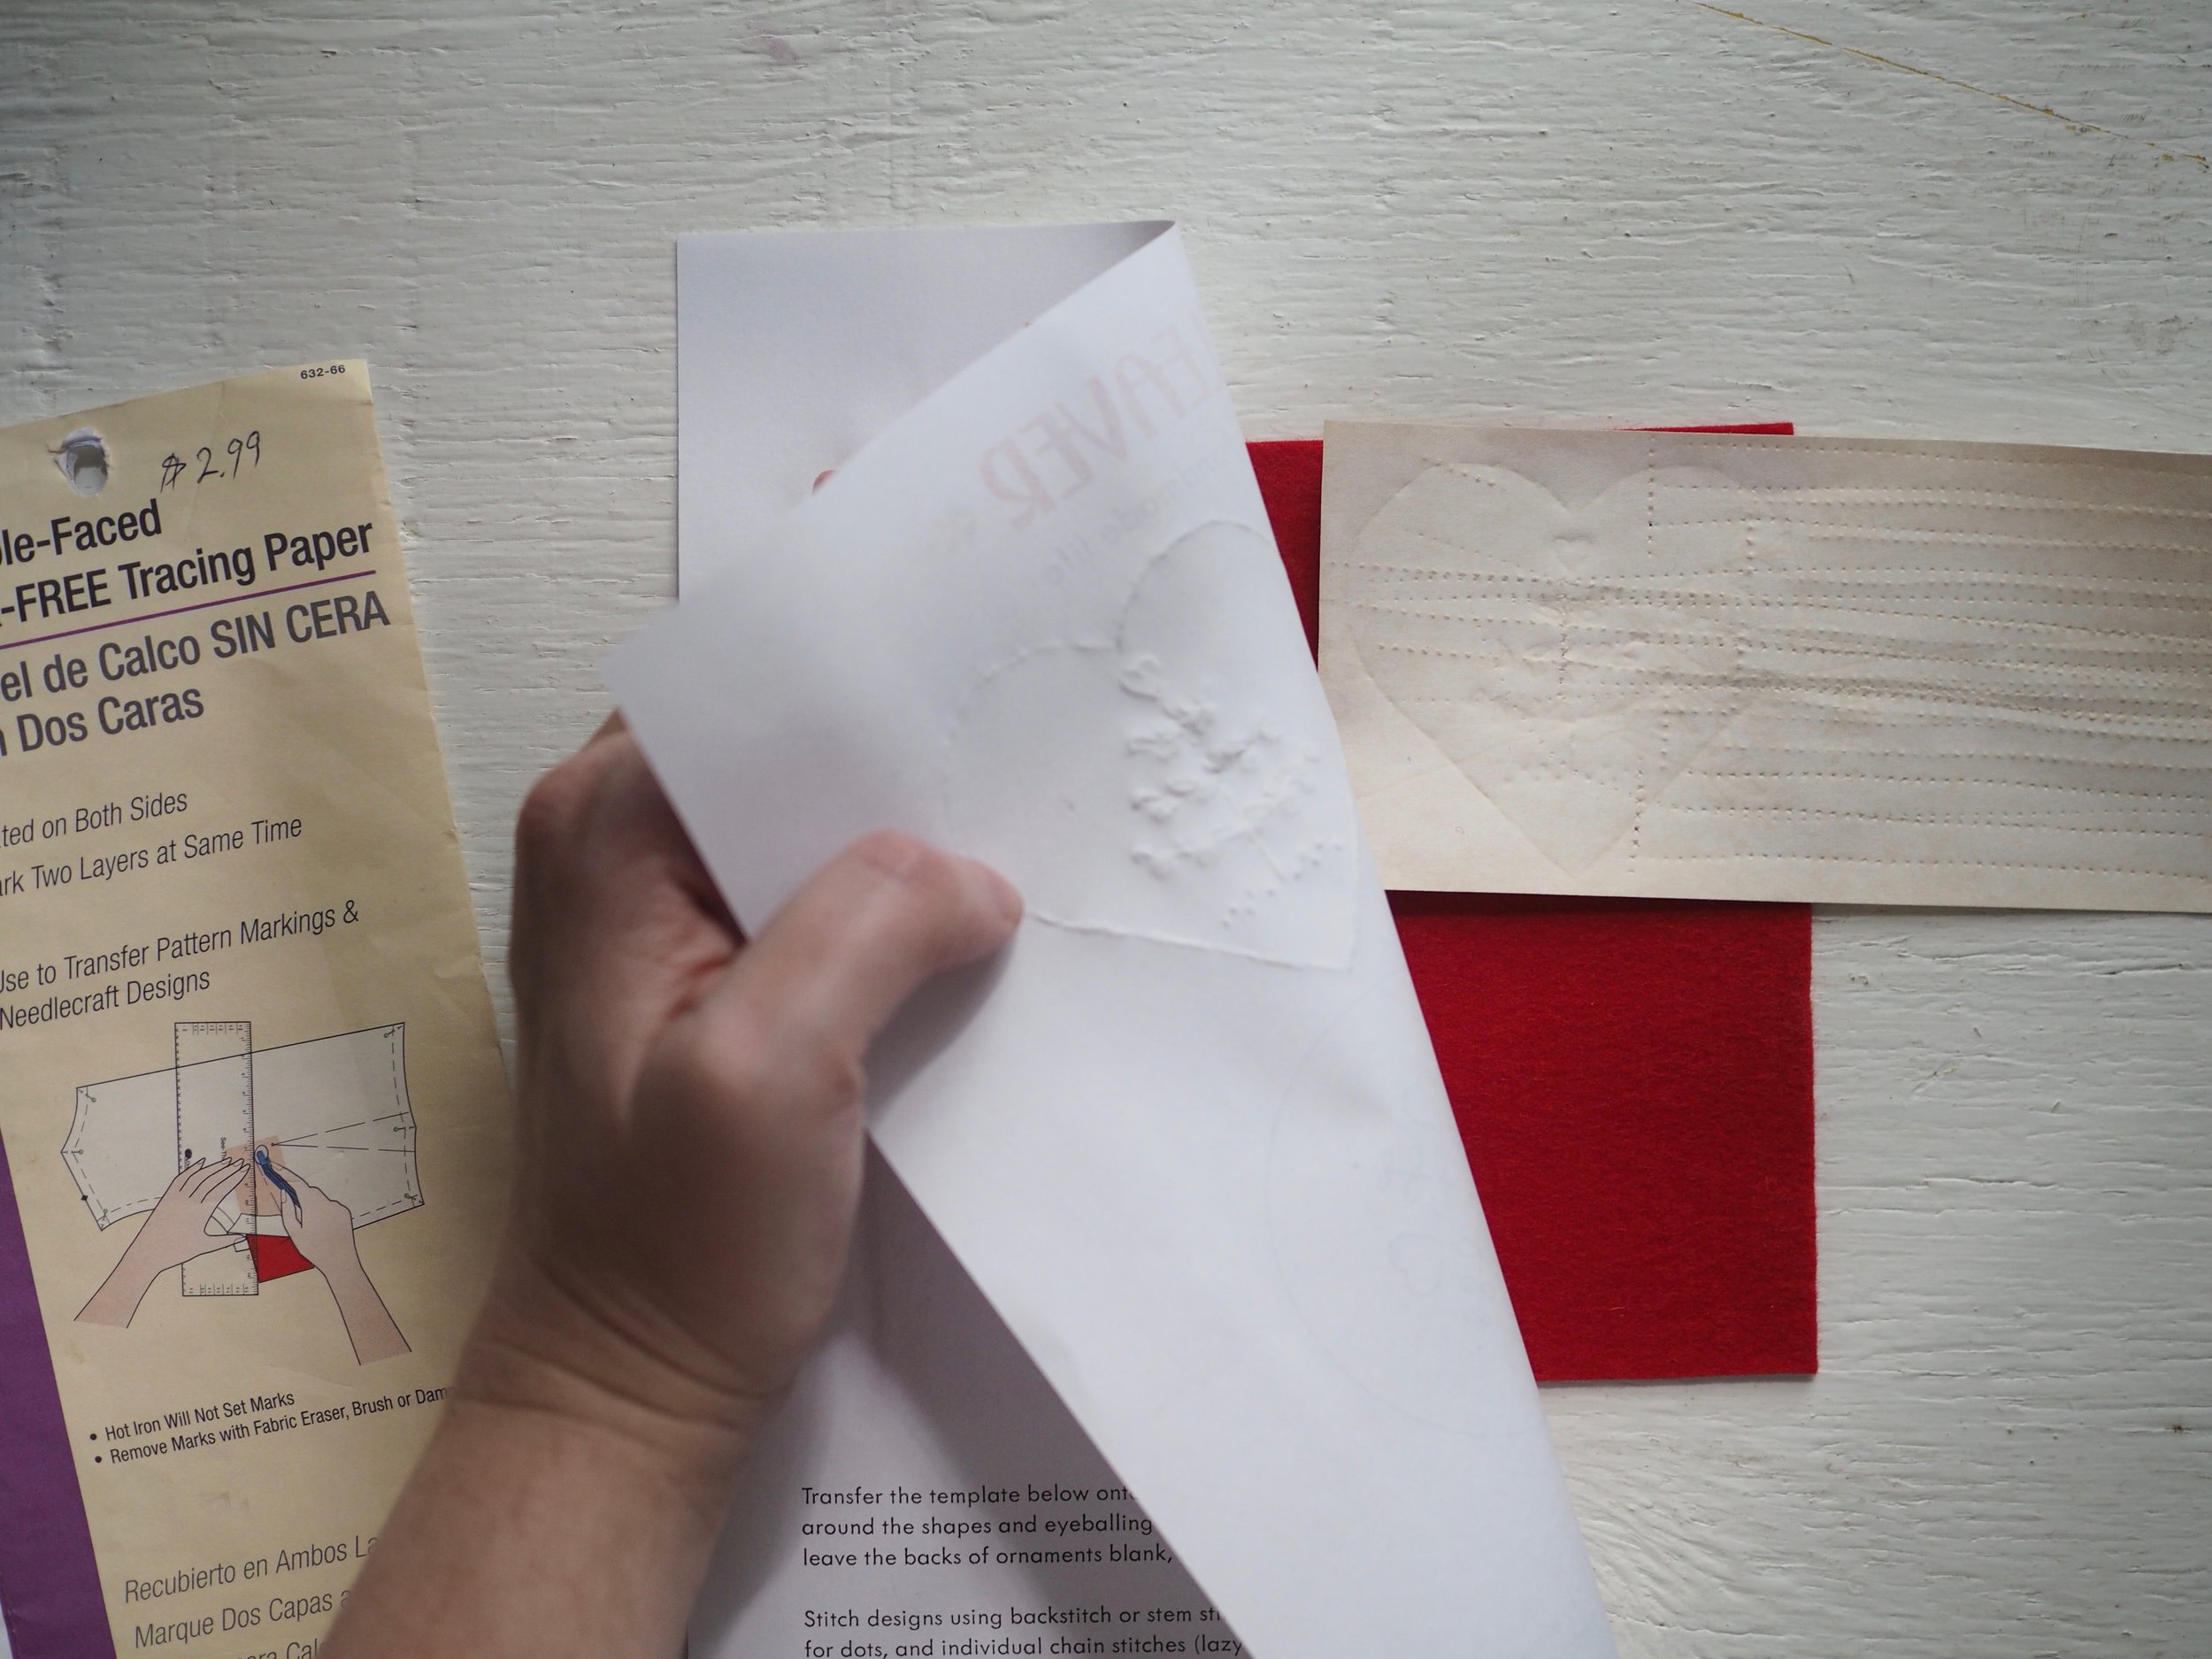
- Remove pattern and transfer paper.
- The chalk marks can be very light and easy to brush off - if desired, trace over your marks with a chalk pencil or water-soluble marker for a more clear line.
That's it! Easy-peasy, right?

Available in four colorways (see Embroidery shop for Red), so you can hang them at Christmas or all year round, these ornaments are suitable for the beginning stitcher.
Each kit makes four ornaments and contains:
1 sheet 100% wool felt in Ecru
1 sheet 100% wool felt in color of your choice
2 skeins coordinating DMC floss
Stuffing
Needle
Pattern Template and Stitch Guide
Guide to basic embroidery stitches

PDF pattern comes with 6" template, transfer instructions and stitch guide.