Stockinette St is one of the most basic of knitting techniques. It creates a smooth fabric of knit stitches, but if it has one shortcoming, it's that it's curls.
Usually this is counteracted by adding an inch or more of ribbing to hems, which works great in most cases, but does look, well, ribby. But what if you really want to embrace the smoothness of Stockinette, without having a curling hem, what do you do?
Enter the folded hem.

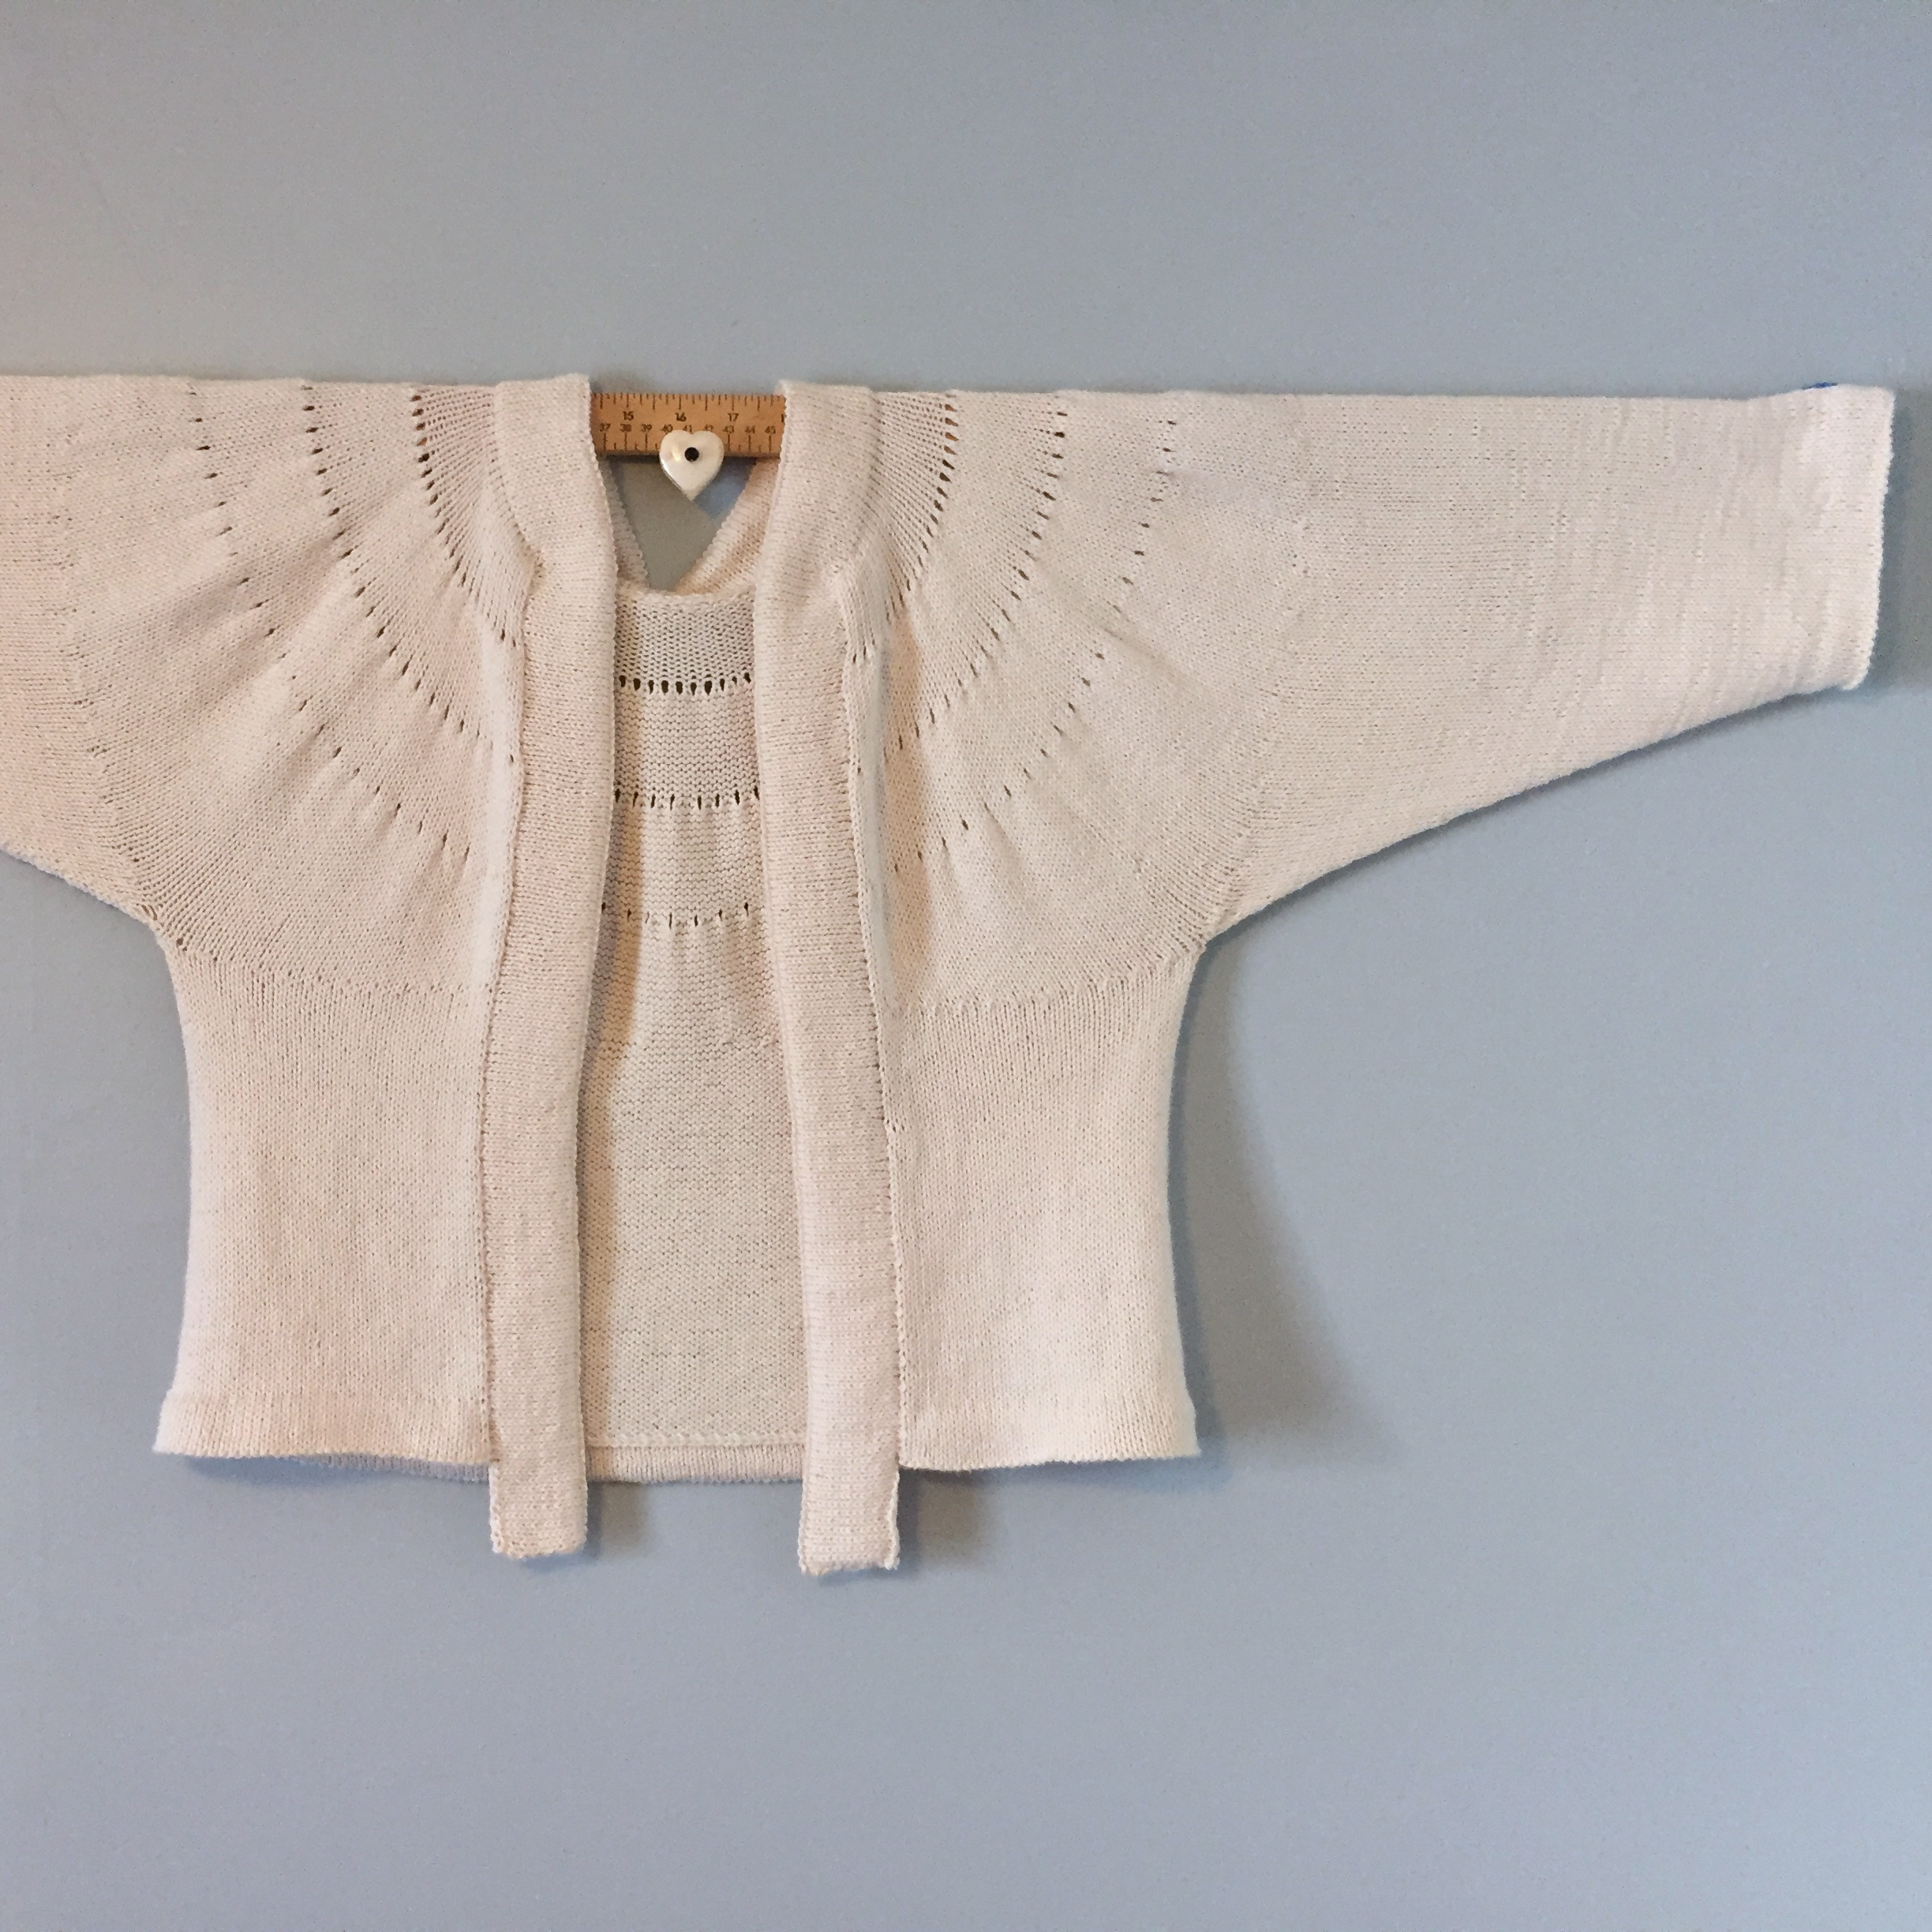
Though it requires a little extra yardage and a bit of hand sewing, the folded hem easily gives a smooth, clean finish on both sides of the fabric and can add a bit of heft/stability to a collar or button band, as the fabric is doubled. A folded hem can be put in place of a rib hem by following a few simple steps.
For simplicity's sake, these instructions will refer to a hem, but the same technique can be used for collars and front facings.
Working from the top down:
- Work pattern as described to beginning of where the rib would begin.
- Work in Stockinette (or pattern) stitch to desired finished body length or length of original rib.
- Next wrong side (WS) row, knit. This will create a line of purl stitches on the right side.
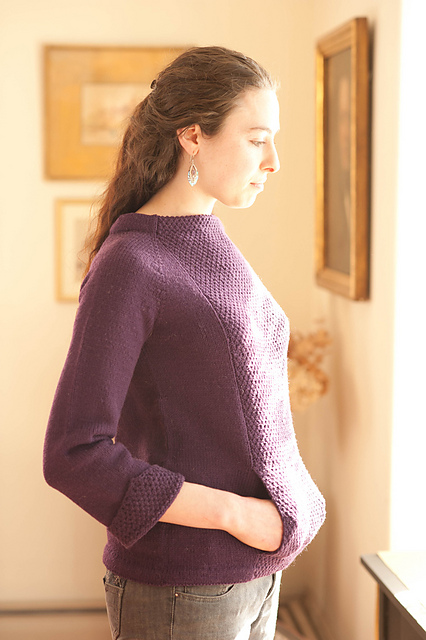
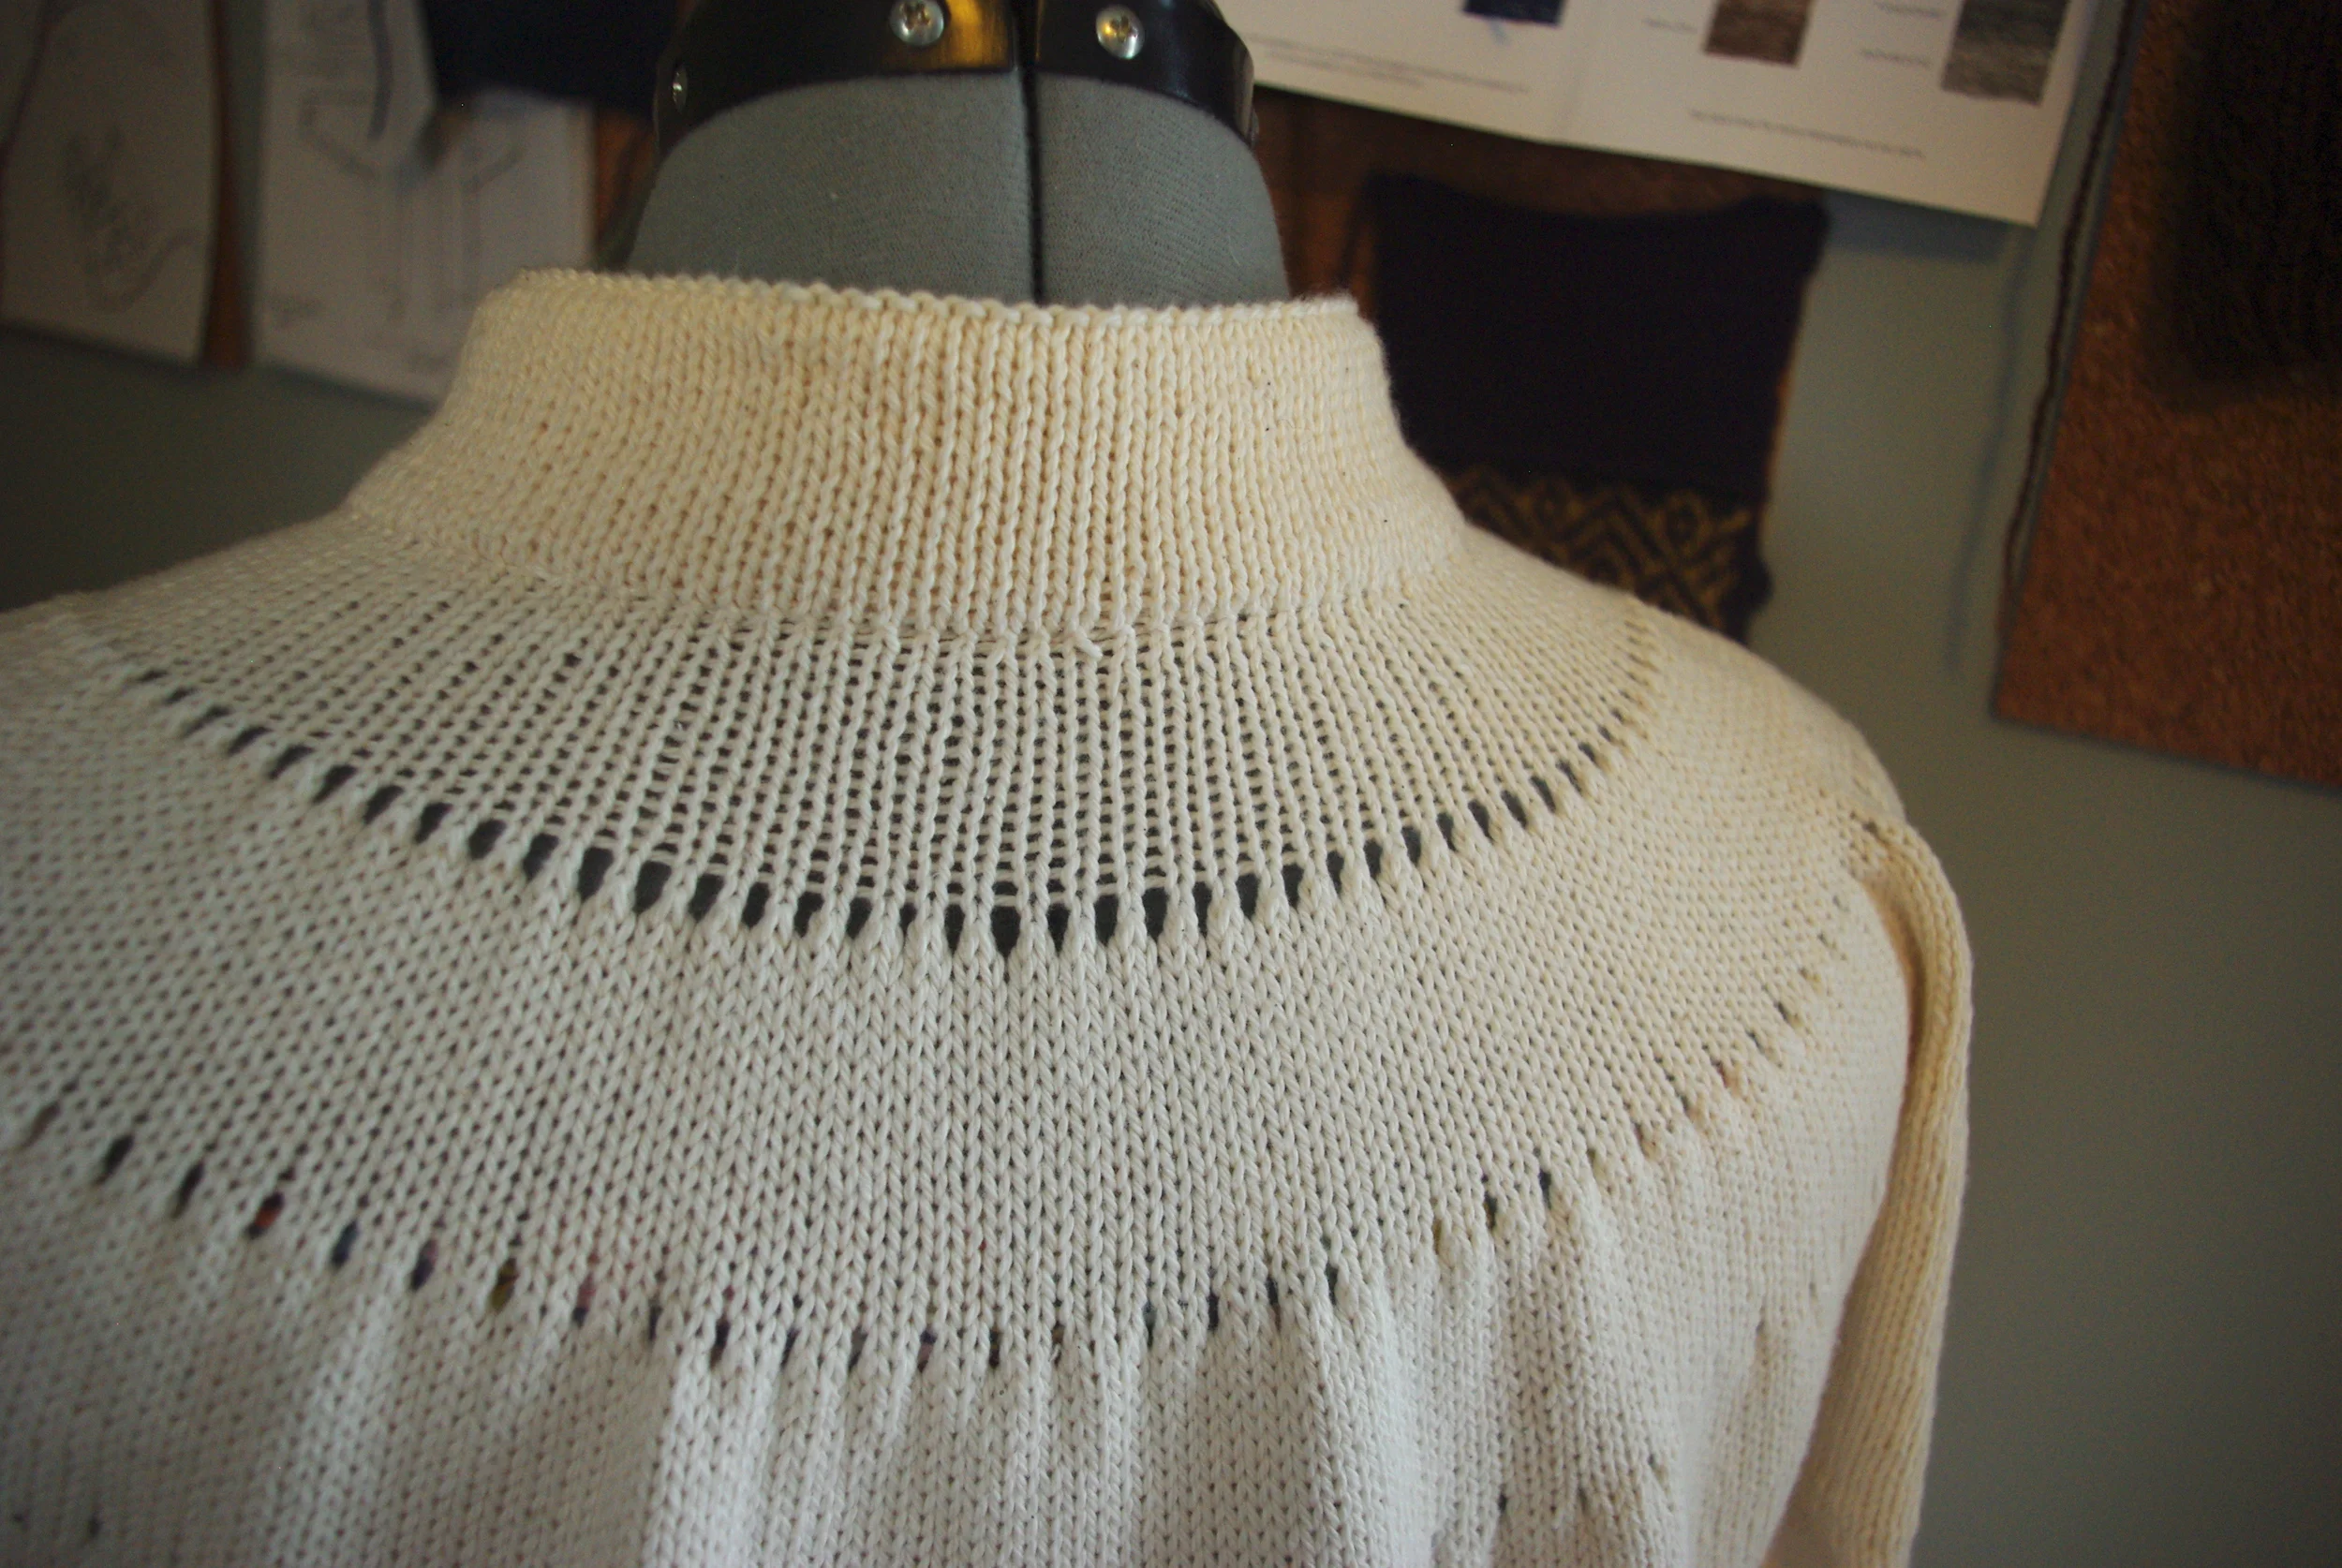
- Work in Stockinette st for desired length of inside hem. This could be the same length as the ribbing would have been or shallower or deeper, as you desire. For comparison, on the Ocaso cardigan shown here, the front bands are 2" wide/deep, while the sleeve hem and body hem are 1". All fabric after the purl line is the facing.
- Bind off.
- Block garment.
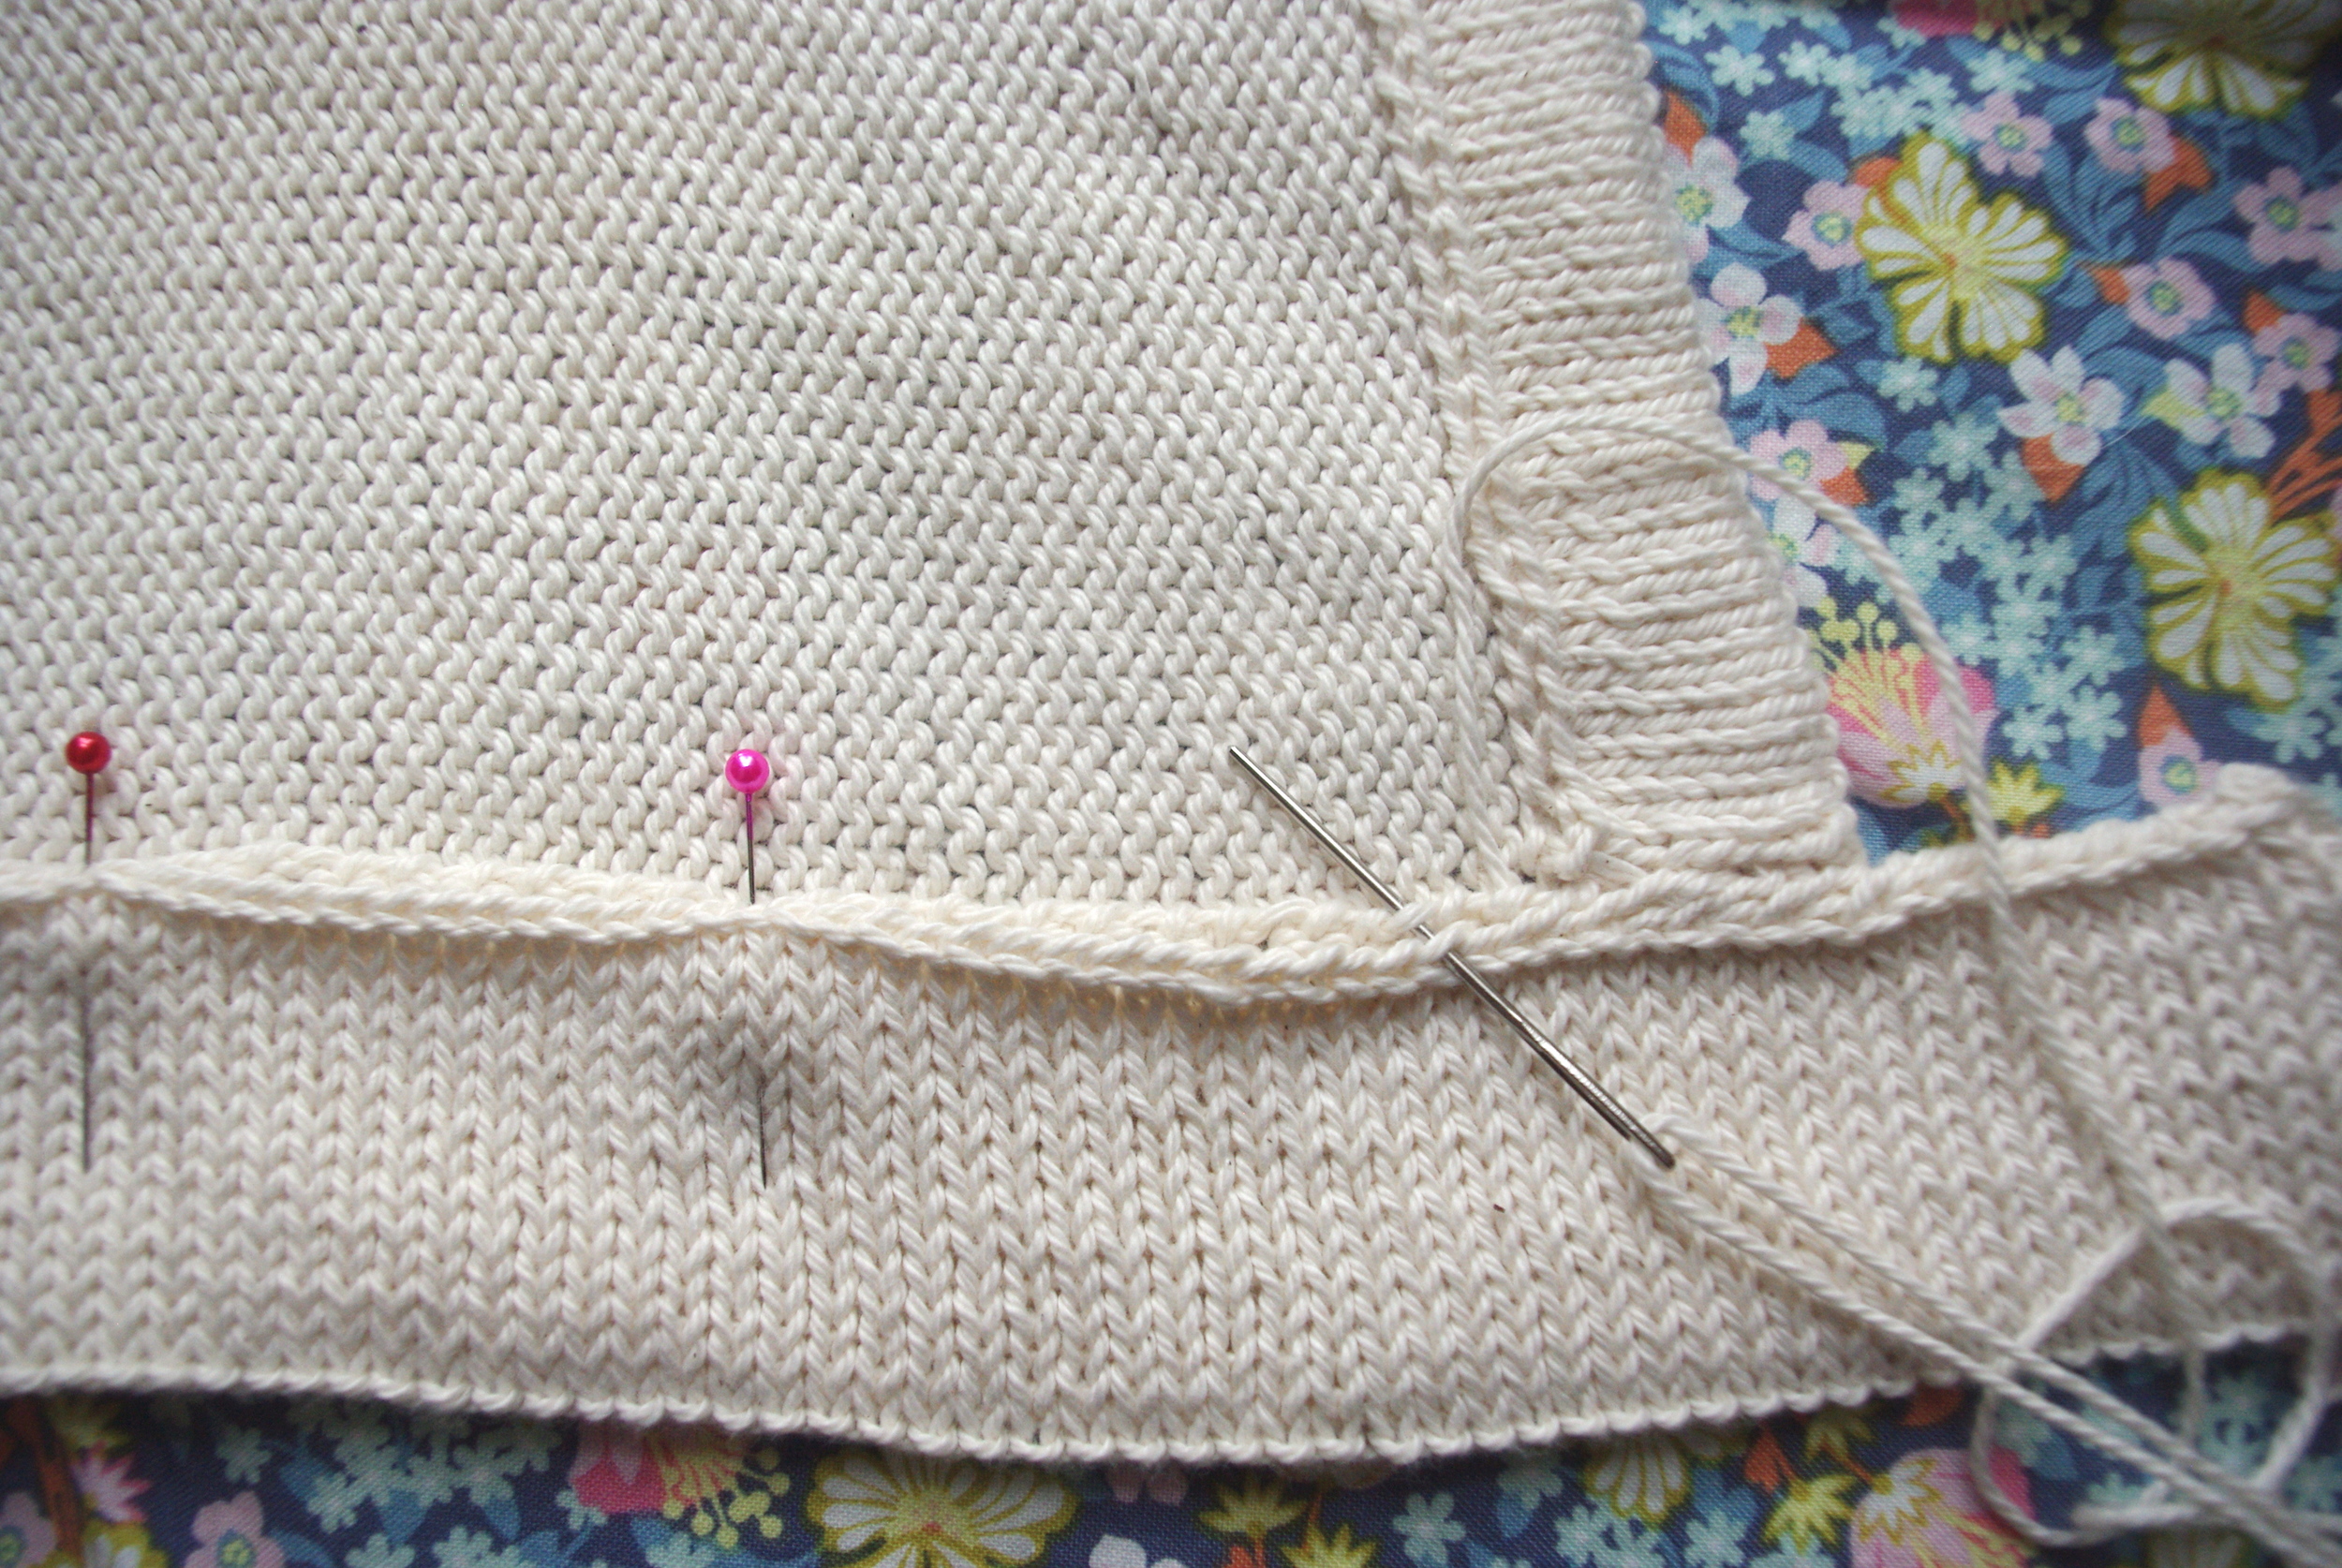
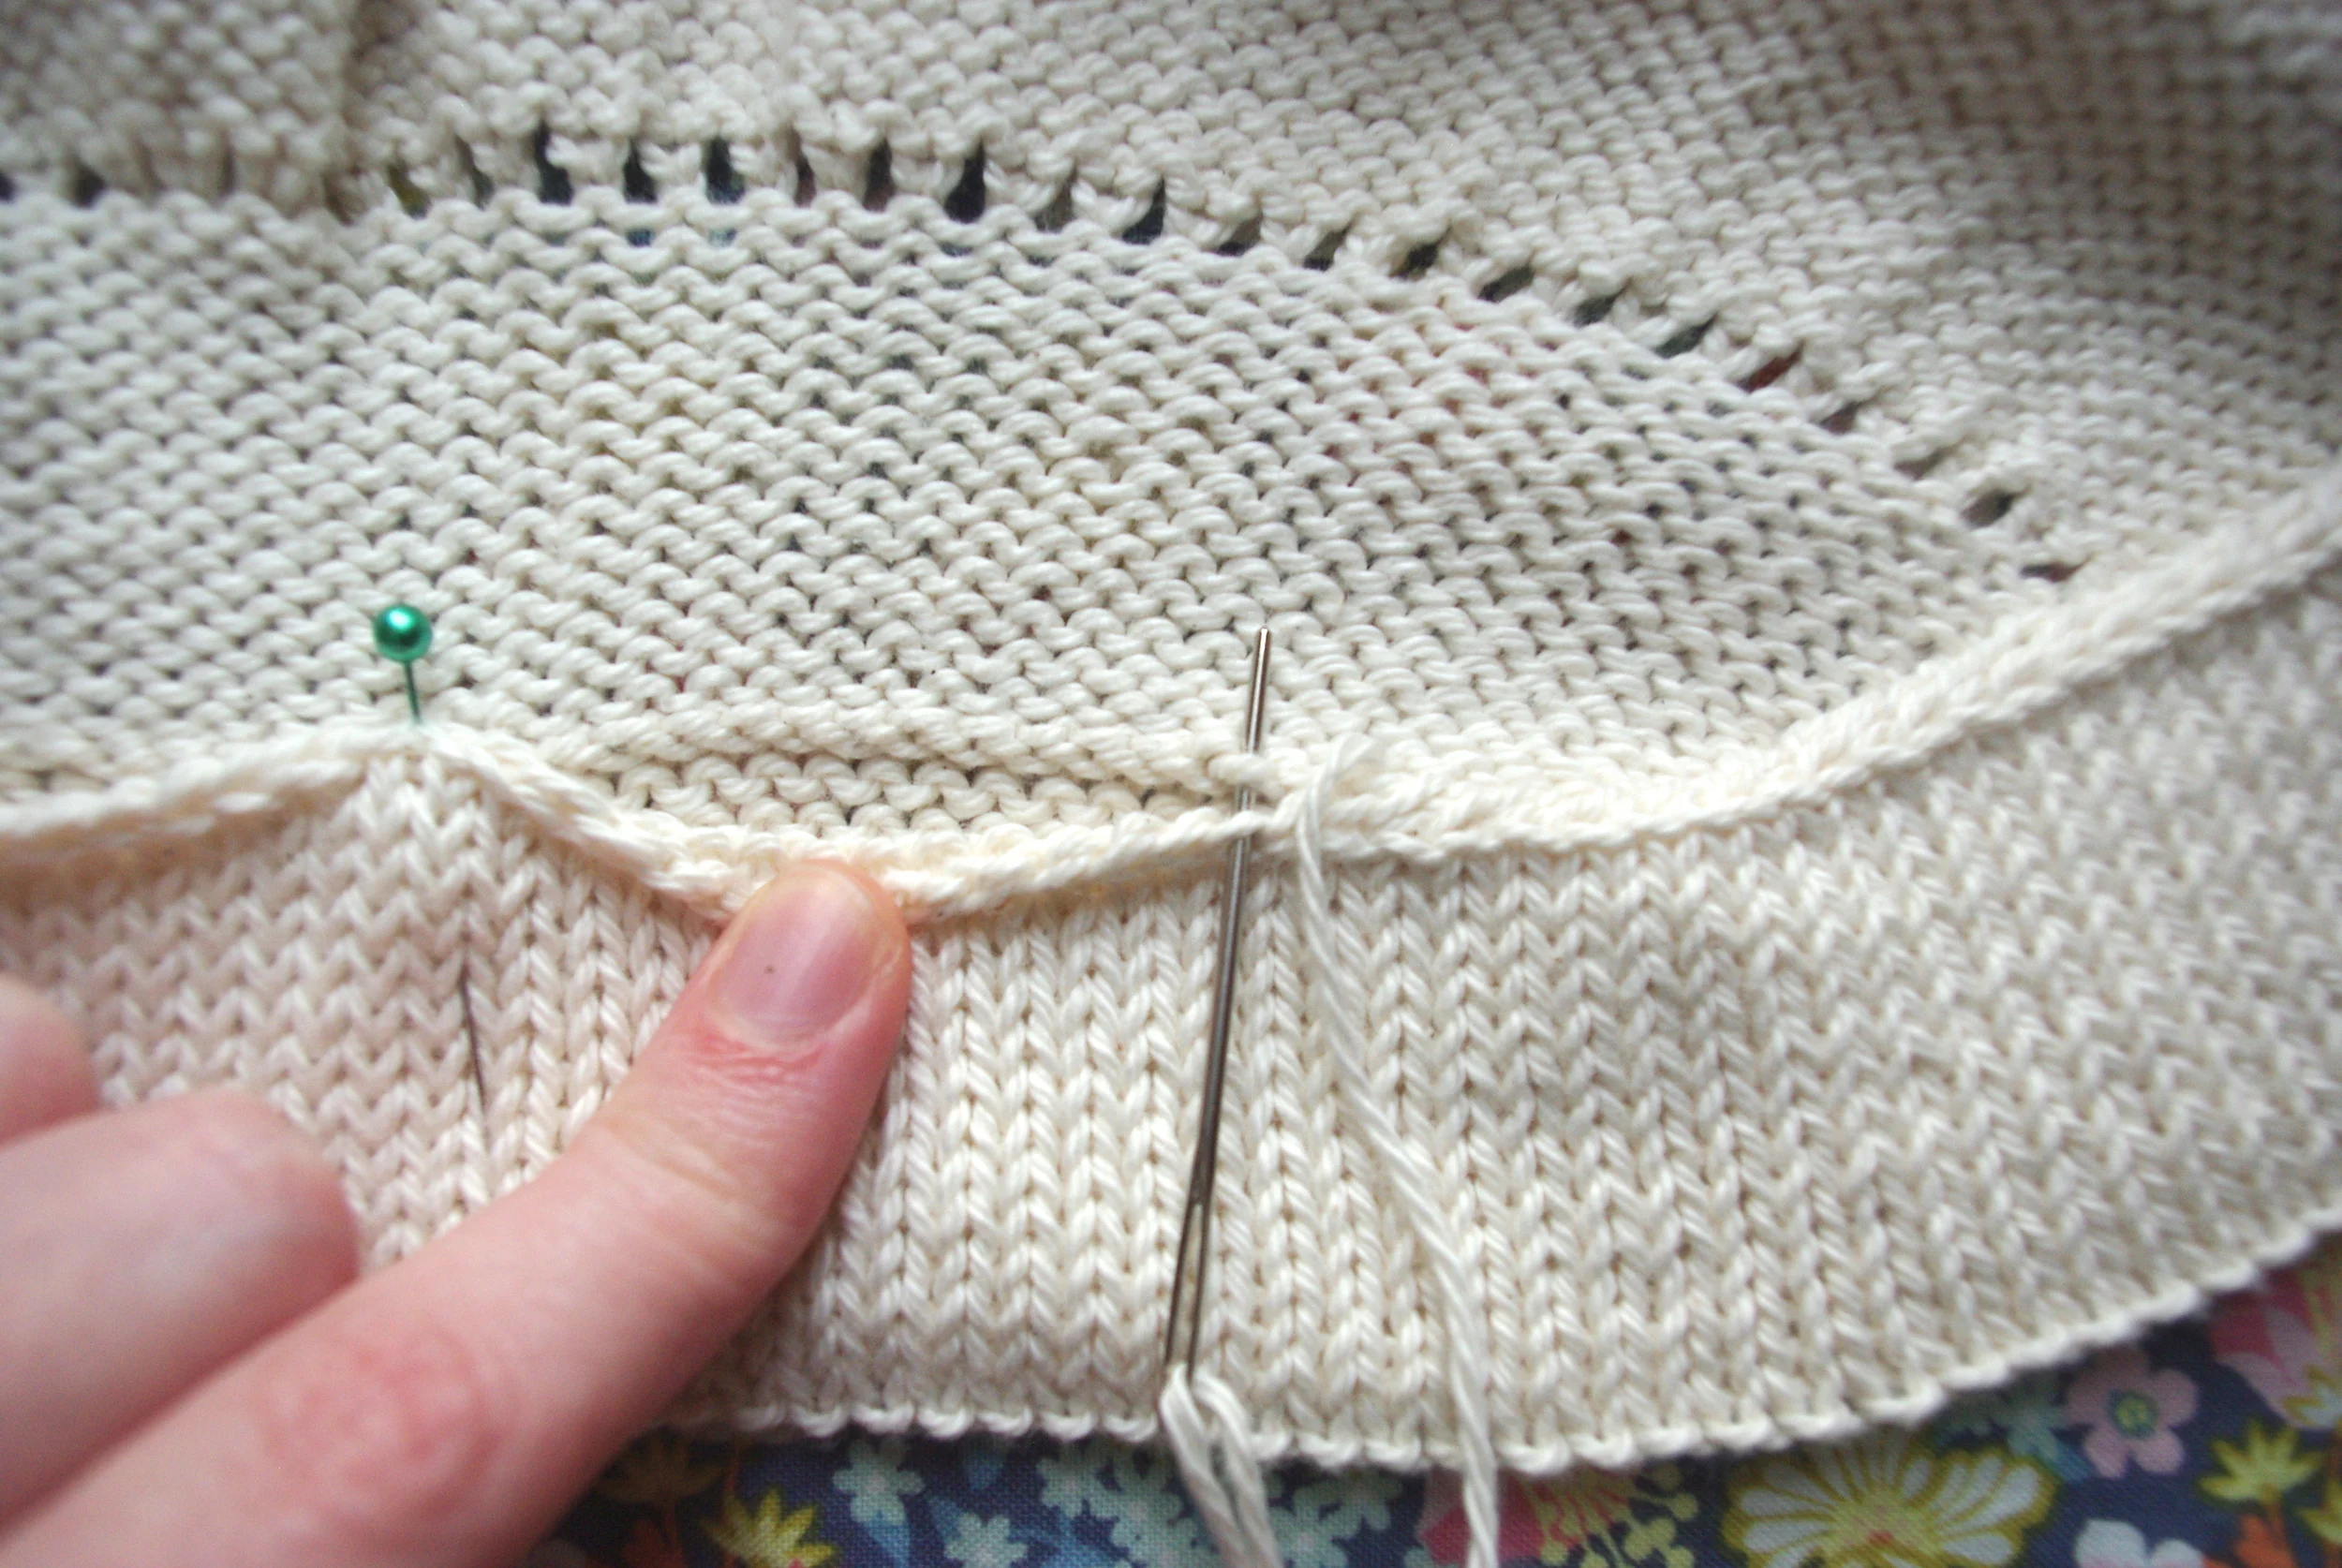
- Fold facing toward inside of garment along the purl line.
- Pin to body of garment, making sure facing lies flat and is evenly distributed.
- Using a whipstitch every 2-3 sts/rows, attach facing to body of garment. If you picked up stitches for the band, there should be a clear line to attach the facing to, otherwise, when pinning, eyeball a row of stitching and stick to it to maintain an even hem.
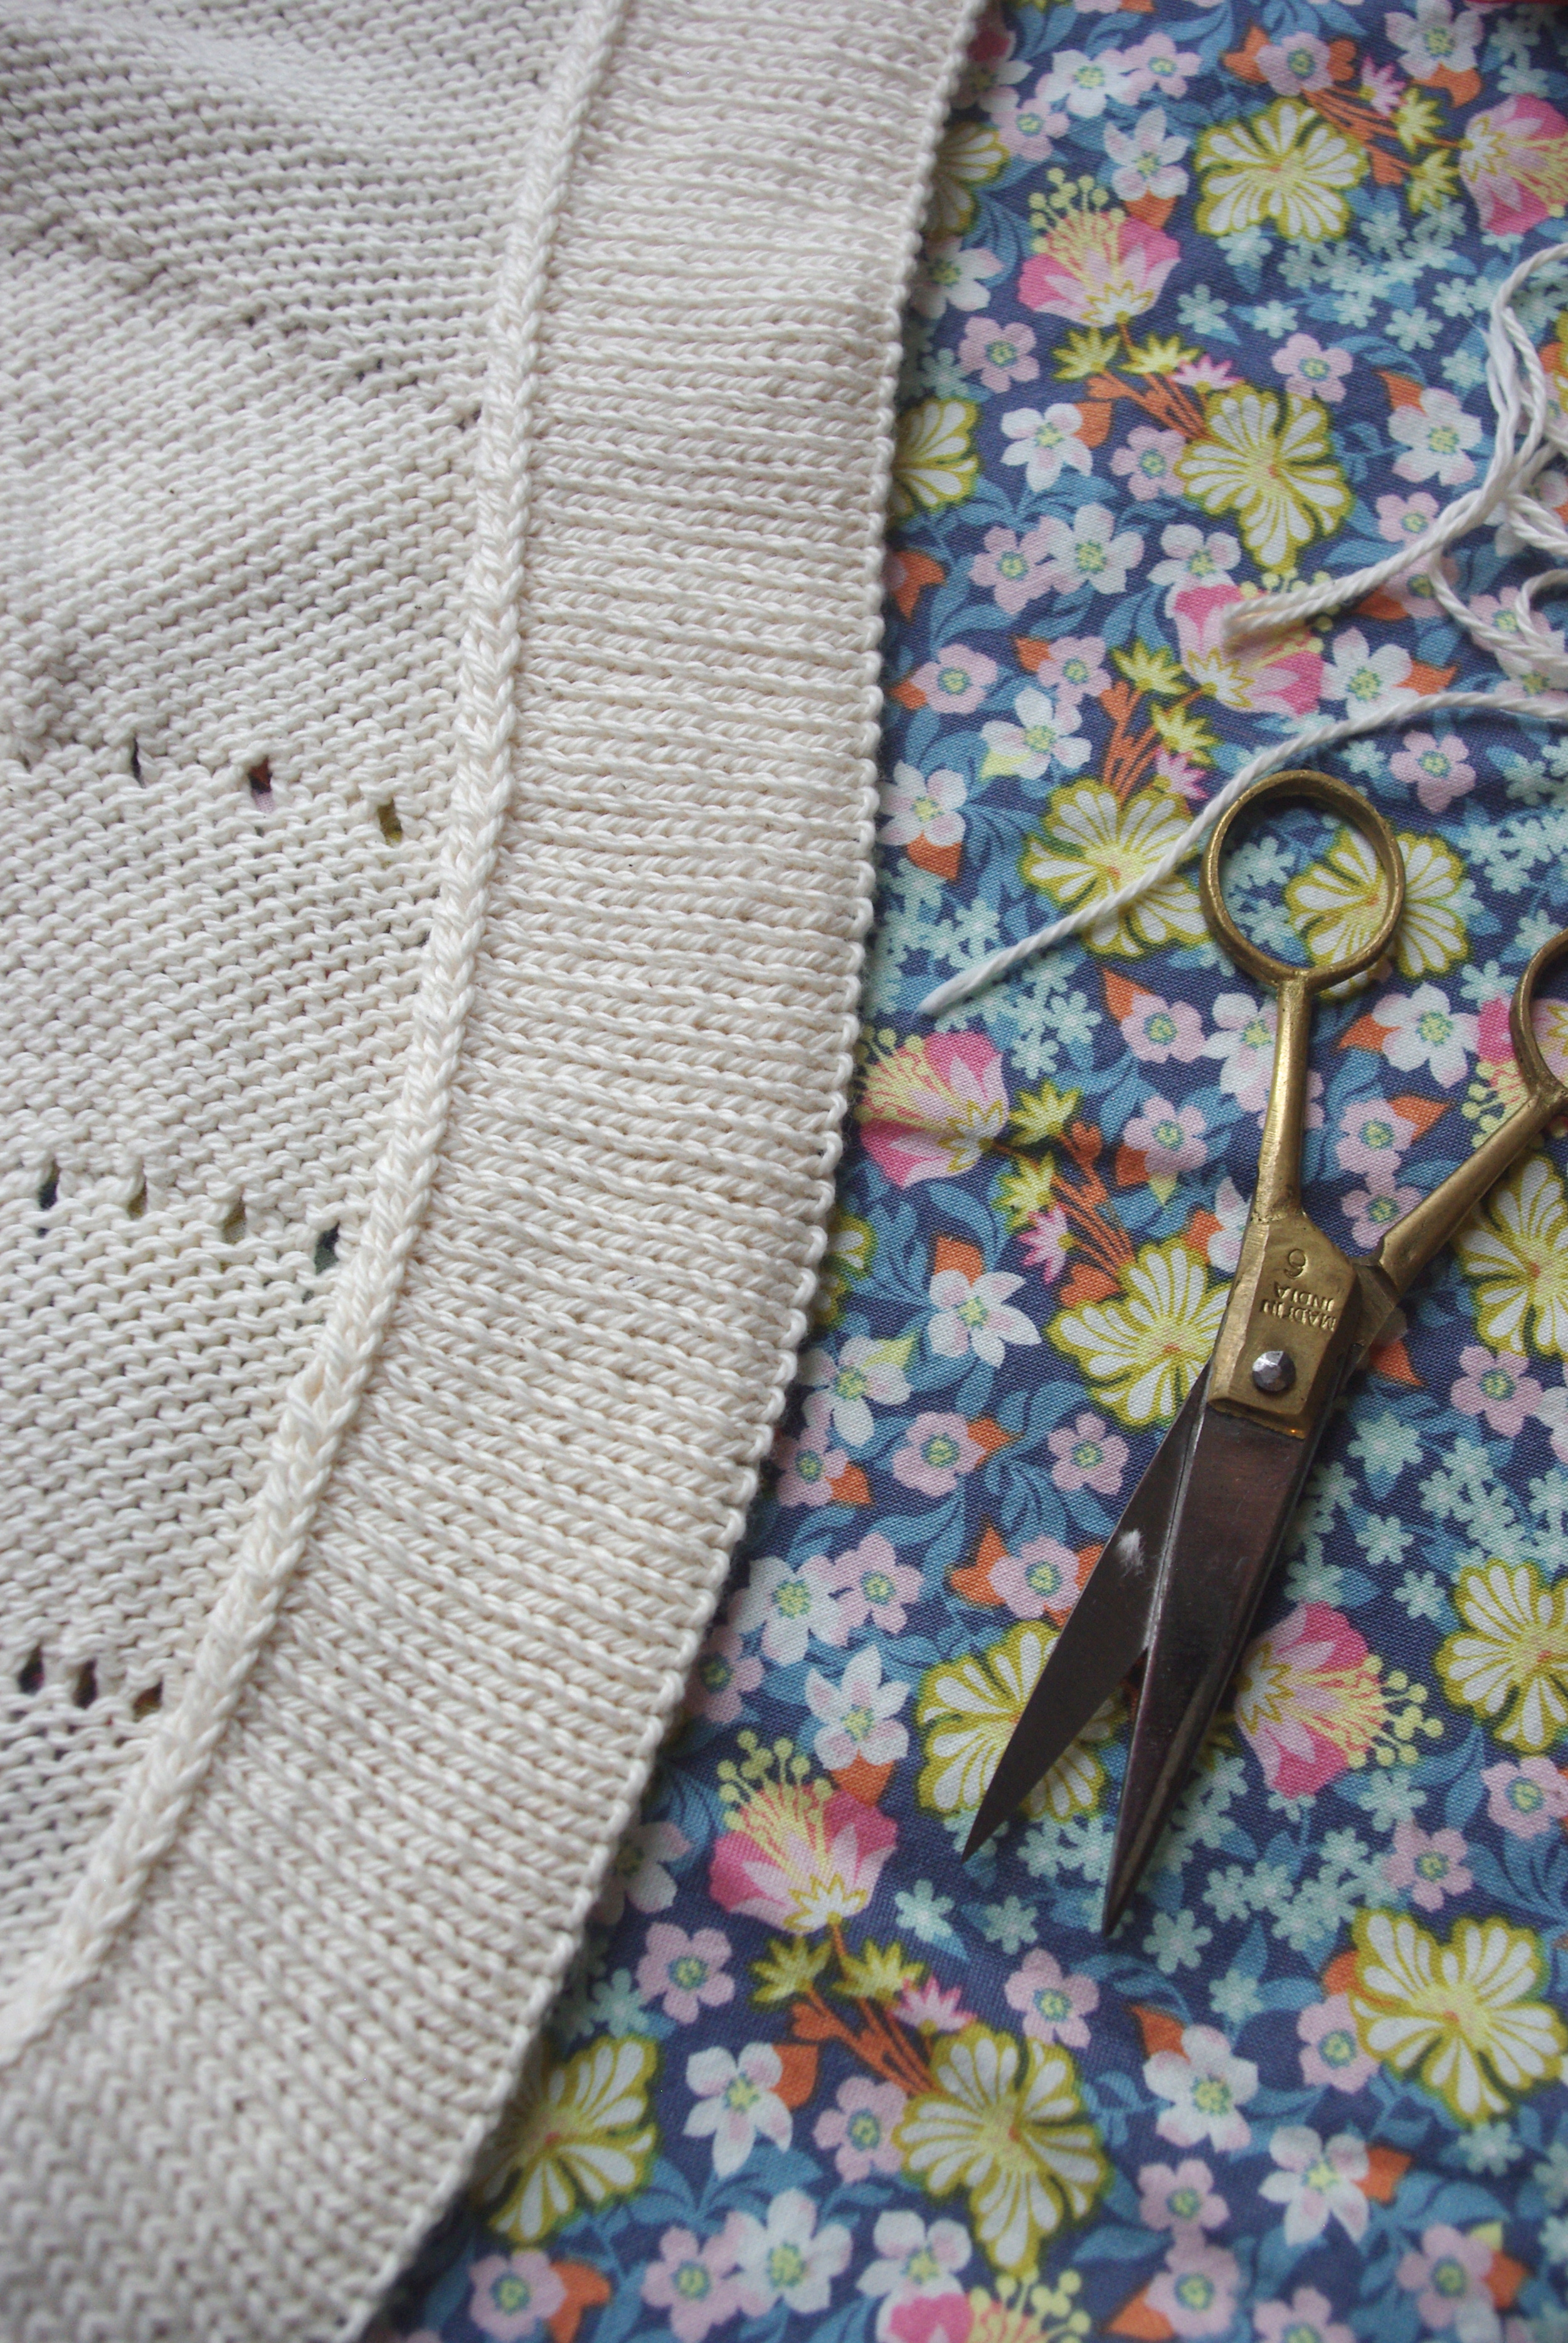
- Weave in ends and block again as needed.
- Enjoy your smooth hem!
Working from the bottom up:
- Cast on number of body stitches. If the number changes from ribbing to first row of the body, use the body number.
- Work in Stockinette st for desired length of inside hem. This could be the same length as the ribbing would have been or shallower or deeper, as you desire. For comparison, on the Ocaso cardigan shown here, the front bands are 2" wide/deep, while the sleeve hem and body hem are 1".
- Next wrong side (WS) row, knit. This will create a line of purl stitches on the right side. All fabric before the purl line is the facing.
- Work in Stockinette (or pattern) stitch to length of facing or length of original rib.
- Work garment as described.
- Block garment.
- Fold facing toward inside of garment along the purl line.
- Pin to body of garment, making sure facing lies flat and is evenly distributed.
- Using a whipstitch every 2-3 sts/rows, attach facing to body of garment. If you picked up stitches for the band, there should be a clear line to attach the facing to, otherwise, when pinning, eyeball a row of stitching and stick to it to maintain an even hem.
- Weave in ends and block again as needed.
- Enjoy your smooth hem!


Ready to Give it a Try?
These patterns include folded hems.