Introducing: Smocked Tank

Smocked Tank

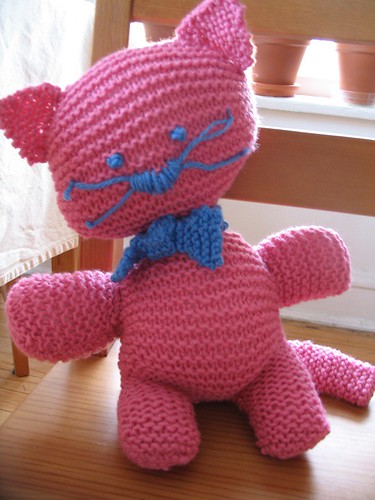
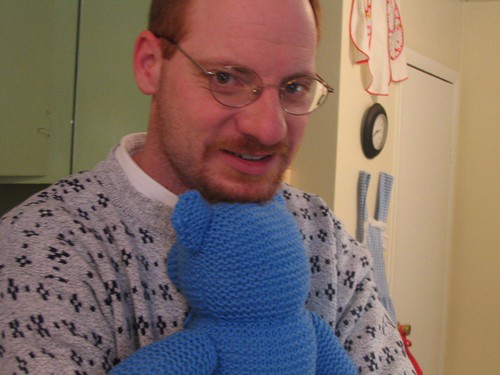
Since I first started publishing knitting patterns in earnest back during the spring  of 2010, I've had a significant backlog of items that I came up with and knitted way back when and am only finally getting around to making patterns for them. (See Exhibit A.)

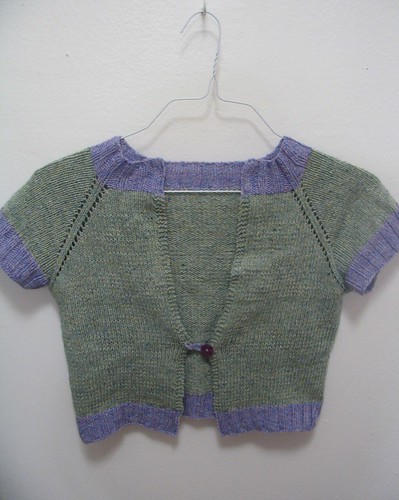
While the Smocked Tank isn't the last of the backlog (there's one more to go), it did take the longest from incubation to actualization. I hope you'll agree it was worth the wait.

Smocked Tank

I first knit this idea for myself in June 2008. So, um three years later, here's the finished product. Graded for  bust sizes 30 (32, 34, 36, 38, 40, 42, 44, 46, 48) inches/ 77 (81, 86, 92.5, 97, 101.6, 106, 113, 117.5, 122) cm.

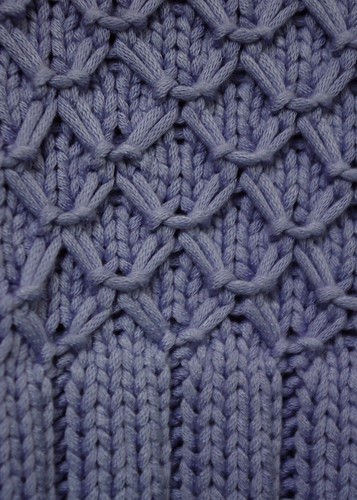
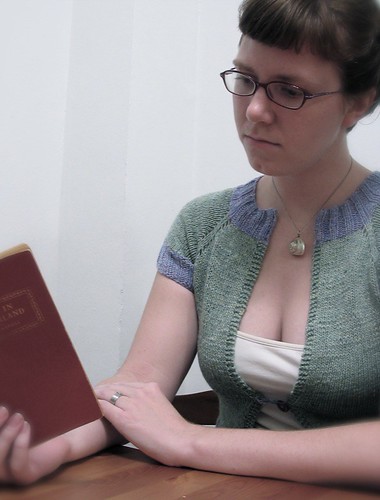
Knit in the round from the bottom up, the tank is very fitted, with curvy side shaping and is finished off with i-cord straps.

Smocked Tank Detail

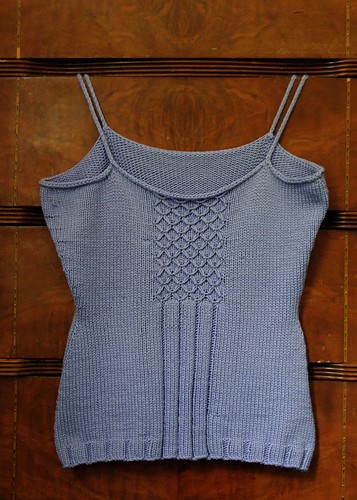
The tank utilizes 455 (495, 525, 585, 620, 670, 700, 720, 765) yds of worsted to aran weight yarn with a significant silk, bamboo, or rayon content for drape and sheen. Knit to a gauge of 18 sts and  24 rows = 4”/ 10 cm in Stockinette stitch on size 10 US / 6 mm needles.

The sample was knit in Berroco Ultra Silk in 6138 Lilac; 98 yd/90 m per 50g/1.76 oz skein; 40% Wool/ 40% Nylon/20% Silk, which has since been discontinued.

Smocked Tank

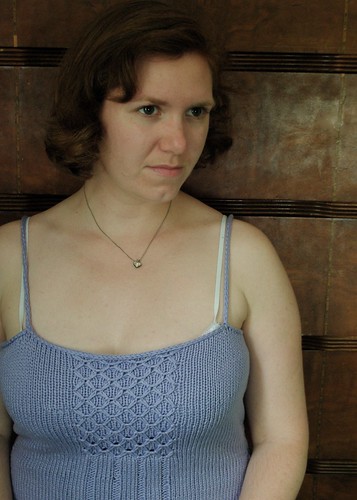
So if you need a quick summer knitting project, with a bit of a romantic flair,

the pattern can be queued up here, or downloaded for free  via the links below:

Smocked Tank Detail
Print Friendly and PDF Follow
follow us in feedly

Introducing: Fisherman's Wife Beret

Fisherman's Wife Beret

This pattern is a long time in coming. I knit the first version of this beret back in 2006 in a cream-colored bulky yarn and still wear it all the time. The pattern is inspired by fishing nets, and is the kind of thing I imagine a fisherman's wife would make and wear while waiting for her husband to come back from a long trip on the seas catching swordfish.

Fisherman's Wife Beret

The pattern came to pass when my friend Bristol approached me to make it into a pattern to feature SuriPaco's bulky farm yarn. (Full Disclosure - I received yarn support and compensation from SuriPaco for the use of the pattern.)

The yarn is a 75/25 alpaca/wool blend in a superbulky single ply.

The hat features a simple k1, yo lace pattern and can be completed in a couple of hours - if you have any last-minute knitted-hat needs.

The pattern can be downloaded via Ravelry.

The hat is knit at a relatively tight gauge, and the yarn is bulky and fuzzy enough that it stays warm in spite of the lace holes.

Fisherman's Wife Beret

That said, I wouldn't recommend taking photos of yourself outside in 33°F weather with falling snow. It took forever for my hands to warm back up! I think I need to make myself some new fingerless mitt for photo-taking :)

Print Friendly and PDF Follow
follow us in feedly

Introducing: Knoll Rib Cowl

Knoll Rib Cowl

As anyone who knows me knows, when it comes to yarn, I have one of the world's smallest stashes. So it is perhaps surprising that this pattern came from the need to knit a yarn that sat in my stash for exactly two years.

Back before I did any spinning myself, I picked up a skein of handpsun from the booth for Enchanted Knoll Farms at the 2008 Common Ground Fair, weeks after I moved back to Maine.

Knoll Rib Cowl

I was in love with this yarn and called it my Rumpelstiltskin yarn, since it looked like straw spun into gold. (It's true name is Gold Dust Woman). I admired the yarn and petted the yarn and could come up with nothing worthy of this yarn.

Fast forward to September 2010. Faced with the need for a simple knit and feeling as if I had neglected this prize yarn for too long. I picked up my needles and tried to find a good stitch pattern for a scarf. My first attempt resulted in something that looked overwhelming 1980s in style, so I frogged, did a garter stitch sample, thought that was too boring and went back to the books.

Knoll Rib Cowl

I flipped through my stitch dictionaries and came across a squishy-looking rib stitch, which I promptly memorized incorrectly, and thus, came up with my own stitch pattern. I'm sure that this was not the first time something like that had happened.

As I neared the end of my then-scarf, I decided that the short length (about four feet long) would work better as a cowl, so I seamed it up, blocked it out, and there you have it.

Knoll Rib Cowl

I think this worked out as a perfect way to display a limited amount of a lovely handspun yarn. I used pretty much every inch of the 200 yards in my skein, but the cowl stretched a lot both ways when blocking, so it could take less if need be.

In case anyone else finds themselves in my predicament (lovely handspun, limited amount, no clue what to do.) I whipped up the pattern last night. You can grab it as a free download, using the link below.

download now

Print Friendly and PDF Follow
follow us in feedly

My First Sweater: An Adaptation

Ponderous

Last night I finished my first sweater, just in time to show it off at my Tuesday night knitting circle.

It an adaptation of the "Anthropologie-Inspired Capelet" from peonyknits.blogspot.com. The numbers were a significant departure from the original, which was designed for bulky weight yarn, so I thought I'd post the pattern below for anyone interested in doing the pattern in DK-weight yarn. But I take no claim for this awesome pattern. All the glory goes to peonyknits.blogspot.com.

Honeymoon Mini-Cardi

Peony Knit’s “AnthropoIogie Inspired-Capelet” Adapted for two colors and DK weight yarn.

What I Used: Size 5 (24 inch) circular and one set of size 5 double-pointed needles. MC 2 skeins Green Mountain Spinnery “Sylvan Spirit” in Peridot CC 1 skein Green Mountain Spinnery “Sylvan Spirit” in Blue Opal

Sizing: Gauge= 22 st over 4” Note: I made mine to fit a 36-37” bust and 12” arm circumference

What I Did: CO 90 st (Note: If I had to make one change, I would have cast on a few more and had the front pieces be a bit wider) Knit in CC 2 x 2 rib for 2 inches to create neckline

Raglan Increases: (you will need 4 stitch markers to separate the body into 5 sections: left front, left sleeve, back, right sleeve, right front)

MC: Row 1, RS: k3, p11, yo, place marker, p2, yo, p13, yo, place marker, p2, yo, p28, yo, place marker, p2, yo, p13, yo, place marker, p2, yo, p11, k3 Row 2 and all WS rows: knit all stitches Row 3 and all RS rows: k3, *p to next marker, yo, slide marker, p2, yo* repeat from * 3 more times, p until last 3 st, k3 Continue raglan increases until sleeve measures the circumference of your upper arm. End with a WS row.

Split sleeves and body: MC: RS: k3, p to 1st marker, move all st from 1st to 2nd marker onto scrap yarn (right sleeve). P to 3rd marker. Move all st from 3rd to 4th marker onto another piece of scrap yarn (left sleeve). P to last 3 st, k3. WS: Knit all st Continue in reverse stockinette stitch (with k3 at each edge of the row) until desired length, ending with a RS row (I went until I ran out of MC)

CC: Knit 1 row. Switch to 2 x 2 rib, for two inches. BO all st

Sleeves: CC: Pick up all st unto doubled pointed needles, one sleeve at a time, from scrap yarn. Knit 1 row. Switch to 2 x 2 rib, for two inches. BO all st Repeat for second sleeve.

Finishing Weave in all ends. Add a button/pin as desired and enjoy!

Please note that all patterns and tutorials are for personal use only and should not be distributed or produced for sale without the written consent of the author.

Happy Thanksgiving everyone!

Honeymoon Mini-Cardi
Print Friendly and PDF Follow
follow us in feedly

Simple Stuffed Animal Knitting Pattern (or One thing leads to another, and another, and another...)

Kitty in Chair

I learned, somewhat begrudgingly, to knit about two years ago. I was interning with a theatre in Maine and by the middle of the Christmas Carol run, all eight of the other interns, including the lone guy, were knitting scarfs and hats like a nuclear winter was on the way.

I was pretty much the lone hold out. My grandmother had taught me to knit a slipper about ten years earlier and I lost interest about halfway through the second one and all my relatives lived in warmer areas of California where they had no need for scarves, so I really didn't have a reason to start knitting, in my opinion at least.

One of my fellow interns, disagreed however, and for our secret santa exchange gave me a learn to knit a teddy bear kit. It started an obsession.

Mr. Cleaver and his Bear

I knitted the kit bear. Then I knitted a large blue bear for Mr. Cleaver. Then I knitted some leg warmers for my dance class and learned to knit in the round. Then I had some grey yarn I had used for the blue bear and my cousin was having a baby, so obviously I knit an elephant.

Elephant

And then I had leftover pink from the elephant's ears and my best friend was having a baby, so obviously I knit flying pig.

Pig Butt!

Then I showed by brother (who also knits) this awesome knitted Yoda at boyknitsworld. He wanted to make one, but there's no pattern, so I told him I was pretty good with the stuffed animals and could probably figure it out. I still had a lot of pink yarn left (it was one of those big cheapo polyester skeins - which is why I don't exactly know how much yarn this takes), so I decided to use it to make a prototype, but as a cat for another friend with a baby on the way. Change the colors and the ears, and BAM! - Yoda or Bear or Mouse or Baby or Alien. I was a fool and never wrote down the patterns I made up for the pig or elephant, but I did write down this one.

Stuffed Creature Pattern: Size 7 straight needles Stuffing Tapestry Needle Yarn - 1 skein? A small amount of contrasting yarn for face and accessories.

BODY (Make 2) Right Leg: Cast on 8 stitches. Knit 20 rows. Cut yarn and leave leg on needle.

Left Leg: Cast 8 stitches on the needle with the right leg on it. Knit 20 rows. Both legs should be on the same needle.

Legs!

Attaching the Legs: Knit across 8 stiches. Make 8 stitches by looping yarn over the needle so the tail is on the inside of the loop.

Making extra stiches.

Knit across 8 stiches. Legs should now be connected by the new loops. There should be a total of 24 stitches. Knit 24 rows.

Legs connected

Shaping the Body:

Bind off 1 stitch and knit across row. Repeat 8 times until 16 stitches remain.

Bind off 4 stitches and knit across row. Repeat 2 times until 8 stitches remain.

Knit 1 row for the neck.

Shaping the Head: Make 4 as before, Knit 8, Make 4. Knit 1 row. Make 1, Knit across, Make 1. Repeat 6 times until there are 28 stitches. Knit 20 rows. Bind off 1, Knit across, Bind off 1. repeat 8 times until 16 stitches remain. Bind off.

Sew two halves of body together, using a whip stitch, leaving an opening for the stuffing. Stuff to desired cuddliness (I like to give them a potbelly!) and sew closed the opening.

ARMS (Make 2) Cast on 20. Knit 20 rows. Bind off.

Fold each arm in half and sew bottom and side together to form a tube. Stuff and sew unto body at appropriate location.

Kitty face

EARS/TAIL/ETC.

Knit ears and tail to reflect whatever creature you desire. Sew on face, whiskers, freckles, whatever. Make accessories as desired. This thingy is infinitely adaptable and adorable.

Please note that all patterns and tutorials are for personal use only and should not be distributed or produced for sale without the written consent of the author.

Print Friendly and PDF Follow
follow us in feedly