Maine Fiber Frolic

Baby Lambs!
Angora Rabbits
Alpacas
Knitted Monsters
A-1 Diner
A-1 Diner Pie

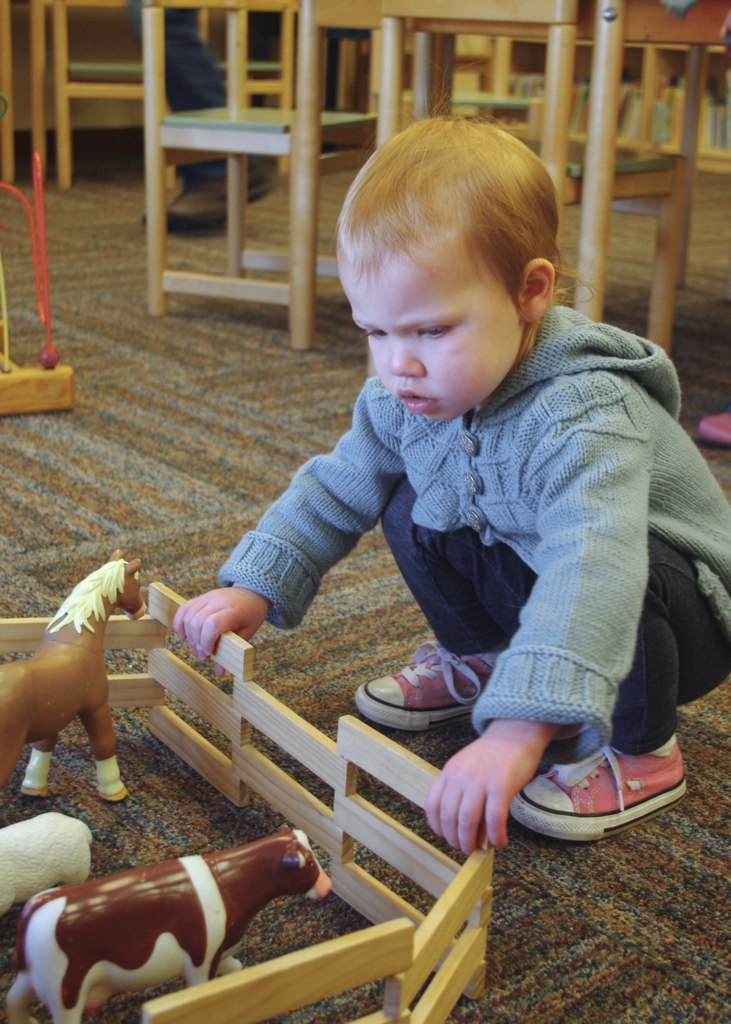
Since I was either hip-holding or hand-holding a toddler for the majority of my time there, I didn't get many photos of this year's Maine Fiber Frolic, but I did have a great time. It's been a few years since I've been up to the Windsor Fairgrounds, (blog says 2012!) but it seemed like high time to return. 

I spent several days talking up the sheep and bunnies to Little Miss Cleaver and then picked up a few from my knitting group and we were on our way. The car ride was just long enough to have some good conversations about knitting and wardrobes and work and plans and lupine season in Maine always makes the highways so pretty. 

Doing anything with a small child is about expectations, so I knew that this visit would be pretty animal-centric. In any case, as I hardly need anymore yarn at the moment, my shopping list was brief. Bunnies were petted, and alpacas visited. I picked up a pretty shawl stick and some perfectly-matched vintage buttons for an upcoming sweater, ate a gyro and some fries and called myself content. That I got pie at the A-1 Diner and did some card-handing out/networking with local dyers/yarnies, was an excellent bonus.  

One of my favorite things about these types of events is seeing just how many crafters there are, and the variety of things they love. From the woman who weave masks, to the felters and rug hookers and spinners and knitters, there's a place for all. 

Did you make it up to the Fiber Frolic this year, or is there a great fiber festival in your area? 


The Work of My Hands

Vintage Embroidery Pillowcase by Ms. Cleaver
Making Ice Cream
Portable Ballet Barre by Ms. Cleaver
Portable Ballet Barre made by Ms. Cleaver

I'm always astonished when I meet people who are one-craft only people, they only quilt, or crochet, or knit - and that's it. I'm constantly having to stop myself from picking up yet another creative pursuit. In some ways I'm jealous of their devotion to a single art - when it's just one you can really dive deep and get really good, really creative.

But I have always been a generalist, polymath, utility player - call it what you will. I love trying out new things, giving them a go and I think it's served me well. When I was deep into theatre, I did a lot of things within the theatrre, writing, directing, set design, etc., but it was mostly just theatre (and a little dance). When I reached a point where theatre didn't really work for my life anymore, I found fabric and yarn made a good outlet for my creative needs. In 5 years, painting may fit right. 

I made my Memorial Day weekend extra long by taking Friday off and filled it with multiple trips to the park, food, family, and a wide variety of creating. I prepped my raised beds and planted seedlings; I learned to use a racheting pipe cutter (!!) and made LMC a portable ballet barre; I sewed an old table runner into a throw pillow; I made peppermint ice cream for our BBQ; and wore a recently finished dirndl skirt that had been hanging around in my to fix pile for too long. Not to mention all the furious knitting I did on a deadline project while watching The Time Machine and Anne of Green Gables.

After a long weekend of creating, my hands are weary, but my heart is full.

Tried and True Review: The Comic Book Dress

The Comic Book Dress (2015) - a Ms. Cleaver Creation
The Comic Book Dress (2012) - a Ms. Cleaver Creation
Shirring the back

A Tried & True Review, where I look back at old project and discuss how it's held up since I made it, both successes and closet rejects, in an attempt to show how my projects have stood the test of time and/or to learn from the mistakes of my yesterdays.

The Original:  POW! The Comic Book Dress

Made: May 2012, 3 years old

Update: This dress is still unreasonably awesome, with a new and improved fit!

Fit: When I originally made the dress, I think it fit fairly well, but since I originally made the dress there's been a pregnancy and breast feeding and stopping nursing and life, and it ended up just too big in the bust and waist to really be wearable. But my love for this garment knows no bounds, and too big is always easier to fix than too small. Enter... shirring!  A quick review of this tutorial and I made my first attempt at shirring. One spool of elastic thread later, I had a new and improved dress, just in time to wear it to the annual Maine Comic Arts Festival to match LMC's "H is for Hero" Wonder Woman tee. 

Style/Materials: A mash-up of Colette Pattern's Parfait and a full gathered skirt (with pockets!), this is the perfect sundress for me.  As for the fabric, I only wish I had bought more of it  (though if you search "Camelot Cottons Girl Power" you can still find a second design printing of similar prints). It's quilting cotton, and its undeniably girly with the pink and the female superheros and it just makes me happy.  

Construction: In 2014, I replaced the original buttons with some fabric covered ones and made the buttonholes functional for nursing purposes. The inside is well finished, with a bias bound waist stay and facings in the bodice. It's held up perfectly well. The shirring makes it even more comfortable and wearable.

Lesson(s) Learned: Shirring is super easy and too big is often easy, and worthwhile to fix!

Final Verdict: This dress is the best. 

Spring in Southern Maine

Chatting with Supergirl
Checking out the Mandarlorian Mercs.
KIDShorts - Racer version - made by Ms. Cleaver
Goodies from Grey's
kidshortspattern
KIDShorts - Racer version - made by Ms. Cleaver
Fencing the Garden
Blueberry bush pruned and mulched
Playing in the Sandpit
Tulips and Daffodils
Big Slide

It finally feels like spring! The grass is getting greener by the day. the daffodils and tulips are in bloom and I'm cleaning up flower beds and laying down mulch. The blueberry bush is pruned, the veggie garden fence has gone up, and the sand pit has been raked out and is ready for play. Free Comic Book day happened and we've pulled out the sunscreen and the Seadogs hat. 

It'll still be a while before its warm enough for shorts, but that didn't stop me from sewing a pair for Little Miss Cleaver. The pattern is the KID Shorts from Dana at MADE. While I don't love that all the sewing instructions are on her site instead of included in the pattern (meaning I'm following instructions off my phone), the fit seems spot on (I made a 3T, lengthened the to the 4T hem), and the finished product is uber-cute, if I say so myself. I even got to sew in my first Ms. Cleaver label!

It took about 1.5 hours to make from taping together the pattern to finished shorts, and I imagine future pairs will be even quicker, especially if I do the more straightforward versions. It warmed the cockles of my sewist heart when LMC wanted to try them on as soon as she got up from her nap and wear them over her pants for at least an hour before the need to put a ballet skirt on trumped it.

I'm hoping to sew two more pairs before shorts weather is truly upon us, and then I'm delving into some serious me sewing. I have some grey gingham that I got on vacation last summer that is calling out to be an Archer button-up and I picked up a Watson bra kit and some denim for Ginger Jeans from Grey's Fabric as well as Cascade Duffle pattern that I'll be sewing into my new winter coat come September or so.

I've been super busy with knitting projects of late (look out for a lot of new stuff this fall!), and haven't had much time to sew and I forget how much sewing means to me. To be able to single-mindedly focus on seam finishes and fabric selection and to make something useful and beautiful.  


Introducing Barbe

Barbe Socks, Designed by Leah B. Thibault for Ms. Cleaver Creations

A downside to designing knitting patterns is that you spend an awful lot of time knitting for other people - samples in the sizes you'd never fit in, that sort of thing. So when you have a legitimate knitwear need for yourself? Well, that's where self-publishing comes in handy.

My sock drawer has been looking a bit sad lately, and so, I introduce to you - the Barbe socks!

Despite the fact the socks photographed above, in a lovely Permission Tree Farm Piggy Sock Yarn, were made in a few weeks, this pattern is actually several years in the making! It's my habit to only  knit socks while traveling due to their general portability and I began knitting a pair of socks with the same winding cable motif out of the leftovers of a sweater when traveling in late 2011. I finished that pair of socks, only to find that Sock #1 and Sock #2 weren't remotely the same size.

Somewhat disheartened by this, I put away the socks for a few years (like you do). This year, with my resolution to fight the entropy  I pulled out those old socks, determined to make a matching pair. Well, the finished pair ended up matching in size, but were a bit too large for me and were gifted to Mr. Cleaver.

I figured, in for a penny, in for a pound, so I found some suitable sock yarn in my stash to make another pair and figured, hey, why not make a pattern out of it while I'm at it?

Not content to do anything halfway, Barbe is available in five sizes from 6" to 10"/15-25.5 cm in circumference, so the unisex styling can fit feet of all sizes.

Worked from the toe-up with a short row heel (the easiest heel in my humble opinion), and the simple to work, but fancy to look at, spiraling cables Barbe would make a great introduction to sock-knitting and/or short rows. Barbe works equally well as a sock drawer builder for when you want a quick knit with a little something more. The ribbing throughout also makes for a nicely fitted sock.

Pattern Details 

Sizes

Foot Circumference (unstretched): 6 (7, 8, 9, 10)”/ 15 (18, 20.5, 23, 25.5) cm. To be worn with approximately 1-1½”/2.5-4 cm negative ease for best fit and display of cables.

Yarn

One skein Persimmon Tree Farm Piggy Toes SW [100% Superwash Merino]; 560 yds [512 m] per 113 g or approximately 350-520 yds of sock yarn for one pair, dependent on finished width and length. Sample as shown uses approximately 375 yds.

Purchase

Barbe is available for purchase via the following methods:

Ravelry  //  Ms. Cleaver Creations  //  Love Knitting 


Introducing Belacqua

Belacqua Cardigan by Leah B. Thibault -- A Ms. Cleaver Creation

A key thing to know about my progress as a designer is that I learned to sew a long time before I ever learned to knit. As a result, some of my earlier designs were the product of shoehorning knitted fabric into a sewn-like construction (I thinking primarily of Wetherell and the Carmel Clutch here.) Not to say that they didn't work, but that they weren't "knitterly."

When I say knitterly, I mean something that takes distinct advantage of what only hand-knitting can do, or what knitting does best. Yes, you can knit a woven-look stitch pattern, but clearly weaving does it better (and easier). Knitting miles of fine gauge stockinette? Perhaps you're better off buying a sweater-knit fabric and sewing it together, or working the pattern on a knitting machine. But shaped-lace? Knitting (or crochet) wins. Cables? Only in knitting. Seamless construction that's not a simple tube? Knitting again.

Which brings us to i-cord. 

If, like me, one of your first introductions to knitting was through a knitting doll/nancy or mushroom, then you know that i-cord or "corking" is quintessentially knitterly. Those tight little tubes of yarn that go on and on and on. 

I first ran into i-cord as a garment edging when I knit my still much loved and worn Manu sweater. Having enjoyed it in someone else's designs, I decided to integrated into one of my own, and to see if I could find a way to replicate the effect of i-cord, not just on the edges,  but within the fabric itself. Discovering that a horizontal pleat/welt/ridge did the trick nicely, I ended up with the Bob & Wave Cowl.    

The i-cord/welt combination  stuck in the back of my mind and when LMC needed a winter sweater it sprung back to life (in a surprisingly similar color...).

Here the i-cords and welts play up the structure of a circular yoke and give not only a clean finish to the garment edges, but provide some built-in button loops. The circular yoke  construction is further emphasized by expanding vertical ribs. A simple workhorse yarn - here Quince & Co's Lark, places the focus on the texture and structure.

The finished garment is nearly seamless (there is some grafting at the back of the hood) and, I would say, very knitterly. 

Pattern Details 

Sizes

NB (3 Mo, 6 Mo, 12 Mo, 18 Mo, 2T, 3T, 4T, 5, 6)
Chest Circumference: 18 (19, 19.5, 20.75, 21.75, 21.75, 23, 24.25, 24.5, 25.25)”/ 45.5 (48.5, 49.5, 52.5, 55, 55, 58.5, 61.5, 62, 64) cm”
Sample size 2T, shown on 22-month old w/ sleeves cuffed.

Yarn

4 (4, 4, 5, 6, 6, 7, 7, 8, 8) skeins Quince & Co. Lark in Bird’s Egg [100% American Wool]; 134 yds [123 m] per 50g or approximately 415 (455, 495, 555, 695, 735, 845, 930, 990, 1045) yards of worsted weight yarn.

Purchase

Belacqua is available for purchase via the following methods:

Ravelry  //  Ms. Cleaver Creations  //  Love Knitting 

Tried and True Review: Flowers and Lace Skirt

Granny Skirt 2011 made by Ms. Cleaver
Granny Skirt 2010 made by Ms. Cleaver
Granny Skirt 2015 made by Ms. Cleaver

A Tried & True Review, where I look back at old project and discuss how it's held up since I made it, both successes and closet rejects, in an attempt to show how my projects have stood the test of time and/or to learn from the mistakes of my yesterdays.

The Original: Floral and Lace Skirt

Made: March 2010, 5 years old

Update: This is my go-to skirt when I want to look ladylike, but be comfy. (see also: "No Pants" Lent 2011)

Fit: It was self-drafted, with a pretty forgiving fit. That said I did (upon originally making it) do an adjustment to the waistband. The waist line has moved up and down as my weight fluctuated over the years, but it's managed to hang in there.

Style/Materials: A super basic a-line skirt, in a  floral fabric and lace. This was a free piece of  quilting cotton given to me by my mother-in-law, along with some cotton lace trim from my stash. It was pink and had tiny flowers all over it, which is not very me. Nothing about it should work, but it just does. 

Construction: The waistband fix was some darts I put into the finished waistband, so a little wonky there. Also, since it was meant to be a muslin, I didn't interface the waistband, which means its always crinkly, but probably contributes to the comfy factor of this skirt.

Lesson(s) Learned: .Really small prints are quite versatile and never underestimate the power of simple and comfy!

Final Verdict: I never would have imagined that I would still be wearing this skirt five years after I first sewed it up. It was meant to be a wearable muslin for goodness sake! I still have the draft pieces somewhere, so I should make another version, no?

Design Diary: Lady Heartrose - Grading and Calculations

Design Spreadsheet by Ms. Cleaver

I've always considered one of my greatest strengths to be the fact that I'm pretty much equally right-brained/left-brained, analytic/artistic, or concrete/creative. 

While it makes me a great utility player, this dichotomy has it pros and cons. When I worked in a primarily creative environment, the highly creative folks pushed me into more administrative positions, but now that I work with primarily analytic people I get to do all the fun wacky creative things. It's been much more rare to find something that scratches both those itches, however.

And then I met knitwear design...

Textiles and drawing and geometry and Excel spreadsheets! When I design a sweater, I get to do it all.

As many designers will tell you, making something in one size is easy (especially if it's your size), making it work across 8-10 sizes? That's the difficult part and the reason why you'll see so many free patterns that are one-size only.  

Grading can be terribly time consuming, but I derive genuine pleasure from a well-designed Excel spreadsheet.At it's most basic, the spreadsheets take the body measurements and translate them to stitch counts based on my swatch, but after 5 years of designing, my template sheets have gotten increasingly complex and sophisticated and I'm pretty pleased with my latest iteration.

My sizing is all based on ASTM International Standards for Body Measurements (from a few years ago), which gives me more confidence in my sizing than when I was mushing it together from various sources.My current version also shows ALL my calculations (See the screenshot for an example), as well as regular confirmations that I'm still on stitch count and within my desiring sizing.

It helps me make sure I'm not missing anything and is a helpful bit of information to have on hand for tech editors and pattern support requests, especially when the latter comes months or years after I released a design. 

At this point is also when I lock down the nitty-gritty of the design details - width of the button band, depth of the ribbing at the sleeves/hem etc. My highly scientific method for determining these? Holding my index finger and thumb apart to what looks like a good width/depth and measuring the space with a ruler, making sure it looks relatively proportional to my sketch. Similarly when it comes to ease, I take a cloth tape measure and myself or a mannequin and see what looks right and matches the sketch. For this pattern, I wanted the hem to be fairly swingy, so there's 7-10 inches of ease at the hips (with the larger amounts at the top of the range). 

 It often feels like overkill to do the full grading before I cast on, but I like my instructions to flow fairly smoothly from one size to the next, so if I have to make a bunch of adjustments to half the sizes, I try to even it out across the size range as much as possible. Of course, that's not to say I won't calculate a portion (like the body) just to be able to cast on - I'm only human after all.

Any questions about the grading process? My favorite Excel formula? The trickiest bit to calculate? Put them in the comments below!

Next up - Sample Knitting!

Little Miss Cleaver had a Farm

Play Barn - Made by Ms. Cleaver

LMC's 2nd birthday is fast approaching on Sunday, but since she doesn't read this blog I can give you a sneak peak of one of the presents I made for her.

Do you make stuff from Pinterest? I know a lot of people that cook from it, but not a lot that actually do projects, per say. It's definitely been the inspiration behind a few things for me, like LMC's first Halloween Costume, and this past Christmas' Advent Calendar.

This gift is really a follow-on to that advent calendar - every since she got all the farm critters in the calendar, she's been playing with them constantly and I thought it would be nice to give them a little home (and if it means less searching for a missing tiny horse or chicken for me, well, that'd be nice too.).

The barn is based on the tutorial from here.

It's a tutorial and not a pattern, so there's a certain portion of the instructions that involve winging it, particularly in respect to cutting out pieces and seam allowances and even then I made a few changes.

  • Pleated the roof portions
  • I cut out and sewed the batting pieces together, rather than the wrap/and tape method - if I were to do it again, I'd just interline the fabric pieces with the batting and save myself a bunch of trouble.
  • I didn't sew the fold lines. They folded fine on their own, I didn't want the thread lines showing and I'm not that worried about the plastic canvas sliding.
  • I did all the applique (by machine) before I sewed the pieces together, and just marked the stitching lines on everything so I didn't put a door where it'd get half cut off.
  • I'd also make the button loops tighter/smaller next time.

For materials I bought some deliciously soft red brushed flannel and the white twill tape for the doors/windows specifically for the project and everything else was leftovers from other garment projects (wool, linen, twill, and corduroy).

I'll note that this is a fairly time-consuming project. It probably took me 3 naptimes to complete. Though that was mostly the applique and getting the pieces cut and arranged, the actual structural assembly went fairly quickly.

My finished product isn't quite as sharp-looking as the tutorial mostly because I was a bit loosey-goosey with the seam allowances, but I think LMC will like it all the same - I certainly enjoyed playing with it to take these photos! And come-on, it's a tiny carry-along barn with a path and pond! It's pretty stinking adorable.

Design Diary: Lady Heartrose - Swatching

Heartrose Swatches by Ms. Cleaver
Heartrose Swatch by Ms. Cleaver

Usually I sketch before I swatch, but in this case, since I worked a little backwards.

The yarn here is Swans Island DK Washable Wool Merino in Malbec. The original child's cardigan was in a hand-dyed fingering weight washable wool from the Woolen Rabbit. For the grown-up version I wanted something with similar properties, but in a slightly larger, more knit-able, scale. For that, the Swans Island was a perfect match, with the Malbec a nice feminine, but grown-up colorway.

[Full disclosure: I had ID'd this as my dream yarn a while back, and then earned access to some  yarn support from Swans Island following the publication of my  Breakwater Pullover].

Unless I know I want a particularly dense or flowy fabric, I generally begin swatching with the needle size indicated on the ball band. The swatches here are done on US 6/4.0 mm and US 7/4.5 mm. I learned to knit on size 7 needles, and as such, I've always had a bit of a soft-spot for them.

While the 7s resulted in a bit looser fabric, the main difference in these swatches is the scale of the cable pattern. The size 6 swatch uses the same cable pattern from the childre's cardigan, while the size 7 swatch doubles the thickness of the rib and cables. 

I gently washed and blocked both swatches (just flattening and not stretching), which is extra important in super-wash yarns, which I've found have a tendency to grow. Then I pinned on various place of my unnamed dress form  to see how it hangs and feels in scale to the body. Unless I'm doing a sample for a publisher, I usually keep the form at my own measurements, which is a 38-39" bust. 

Scale is the key here. If Lady Heartrose was a fall/winter cardigan, I'd go with the thicker version in a heart-beat, but for a spring/summer garment, I want something more delicate, so the thinner cable it is. The size 6 fabric also just looks a bit "cleaner" to me, so size 6 swatch wins overall!

Next up - practical math and complex spreadsheets!!