
I just finished knitting/finishing two adult sweaters and my next big sewing project is a button up Archer shirt for myself, but before I dive into what is going to be another involved project, I wanted to bang out a few quick mini-makes for some more instant gratification.


Band Tee for LMC.
To say that we are fans of the band Darlingside in the Cleaver household would be a massive understatement. We love this band. Ever since Mr. Cleaver and I saw them on 207 back in 2012, we've been hooked and have seen them in as many local shows as possible. Our household also probably counts for 5% of the hits on their youtube videos. And thus, through frequent exposure, they have become Little Miss Cleaver's favorite band too. If we ask her what she wants to listen to, she will almost always say "Darlingside." Unfortunately, they don't make band shirts in size 4T. Fortunately, I know my way around an exacto knife, a stencil sponge, and a sewing machine.
The image is from the cover of their album Pilot Machines, and I thought the balloons would be perfect for a kid. So I traced the image unto a file folder and cut it into two stencils, one for the balloons/ strings and one for the body. I cut up an old shirt of mine into a Made by Rae Skinny Tee, stenciled it on, sewed it up, and there you go! A mini Fangirl tee. We're seeing the band at a show in September and I'm hoping to get them to sign it for extra cool factor.
While I'm at it, here's a video of my current favorite Darlingside song. LMC's favorite is this one or this one.


Playsilks
LMC and I recently dyed some playsilks with Kool-Aid and managed not to accidentally dye anything else except our fingers- success! The silks came from dharma trading company and I used this tutorial from Knitty to pick my Kool-Aid packets. I had made a blue and green one a while back that get heavy use as ballet skirts and super-capes, so it's nice to have the full rainbow to choose from now.
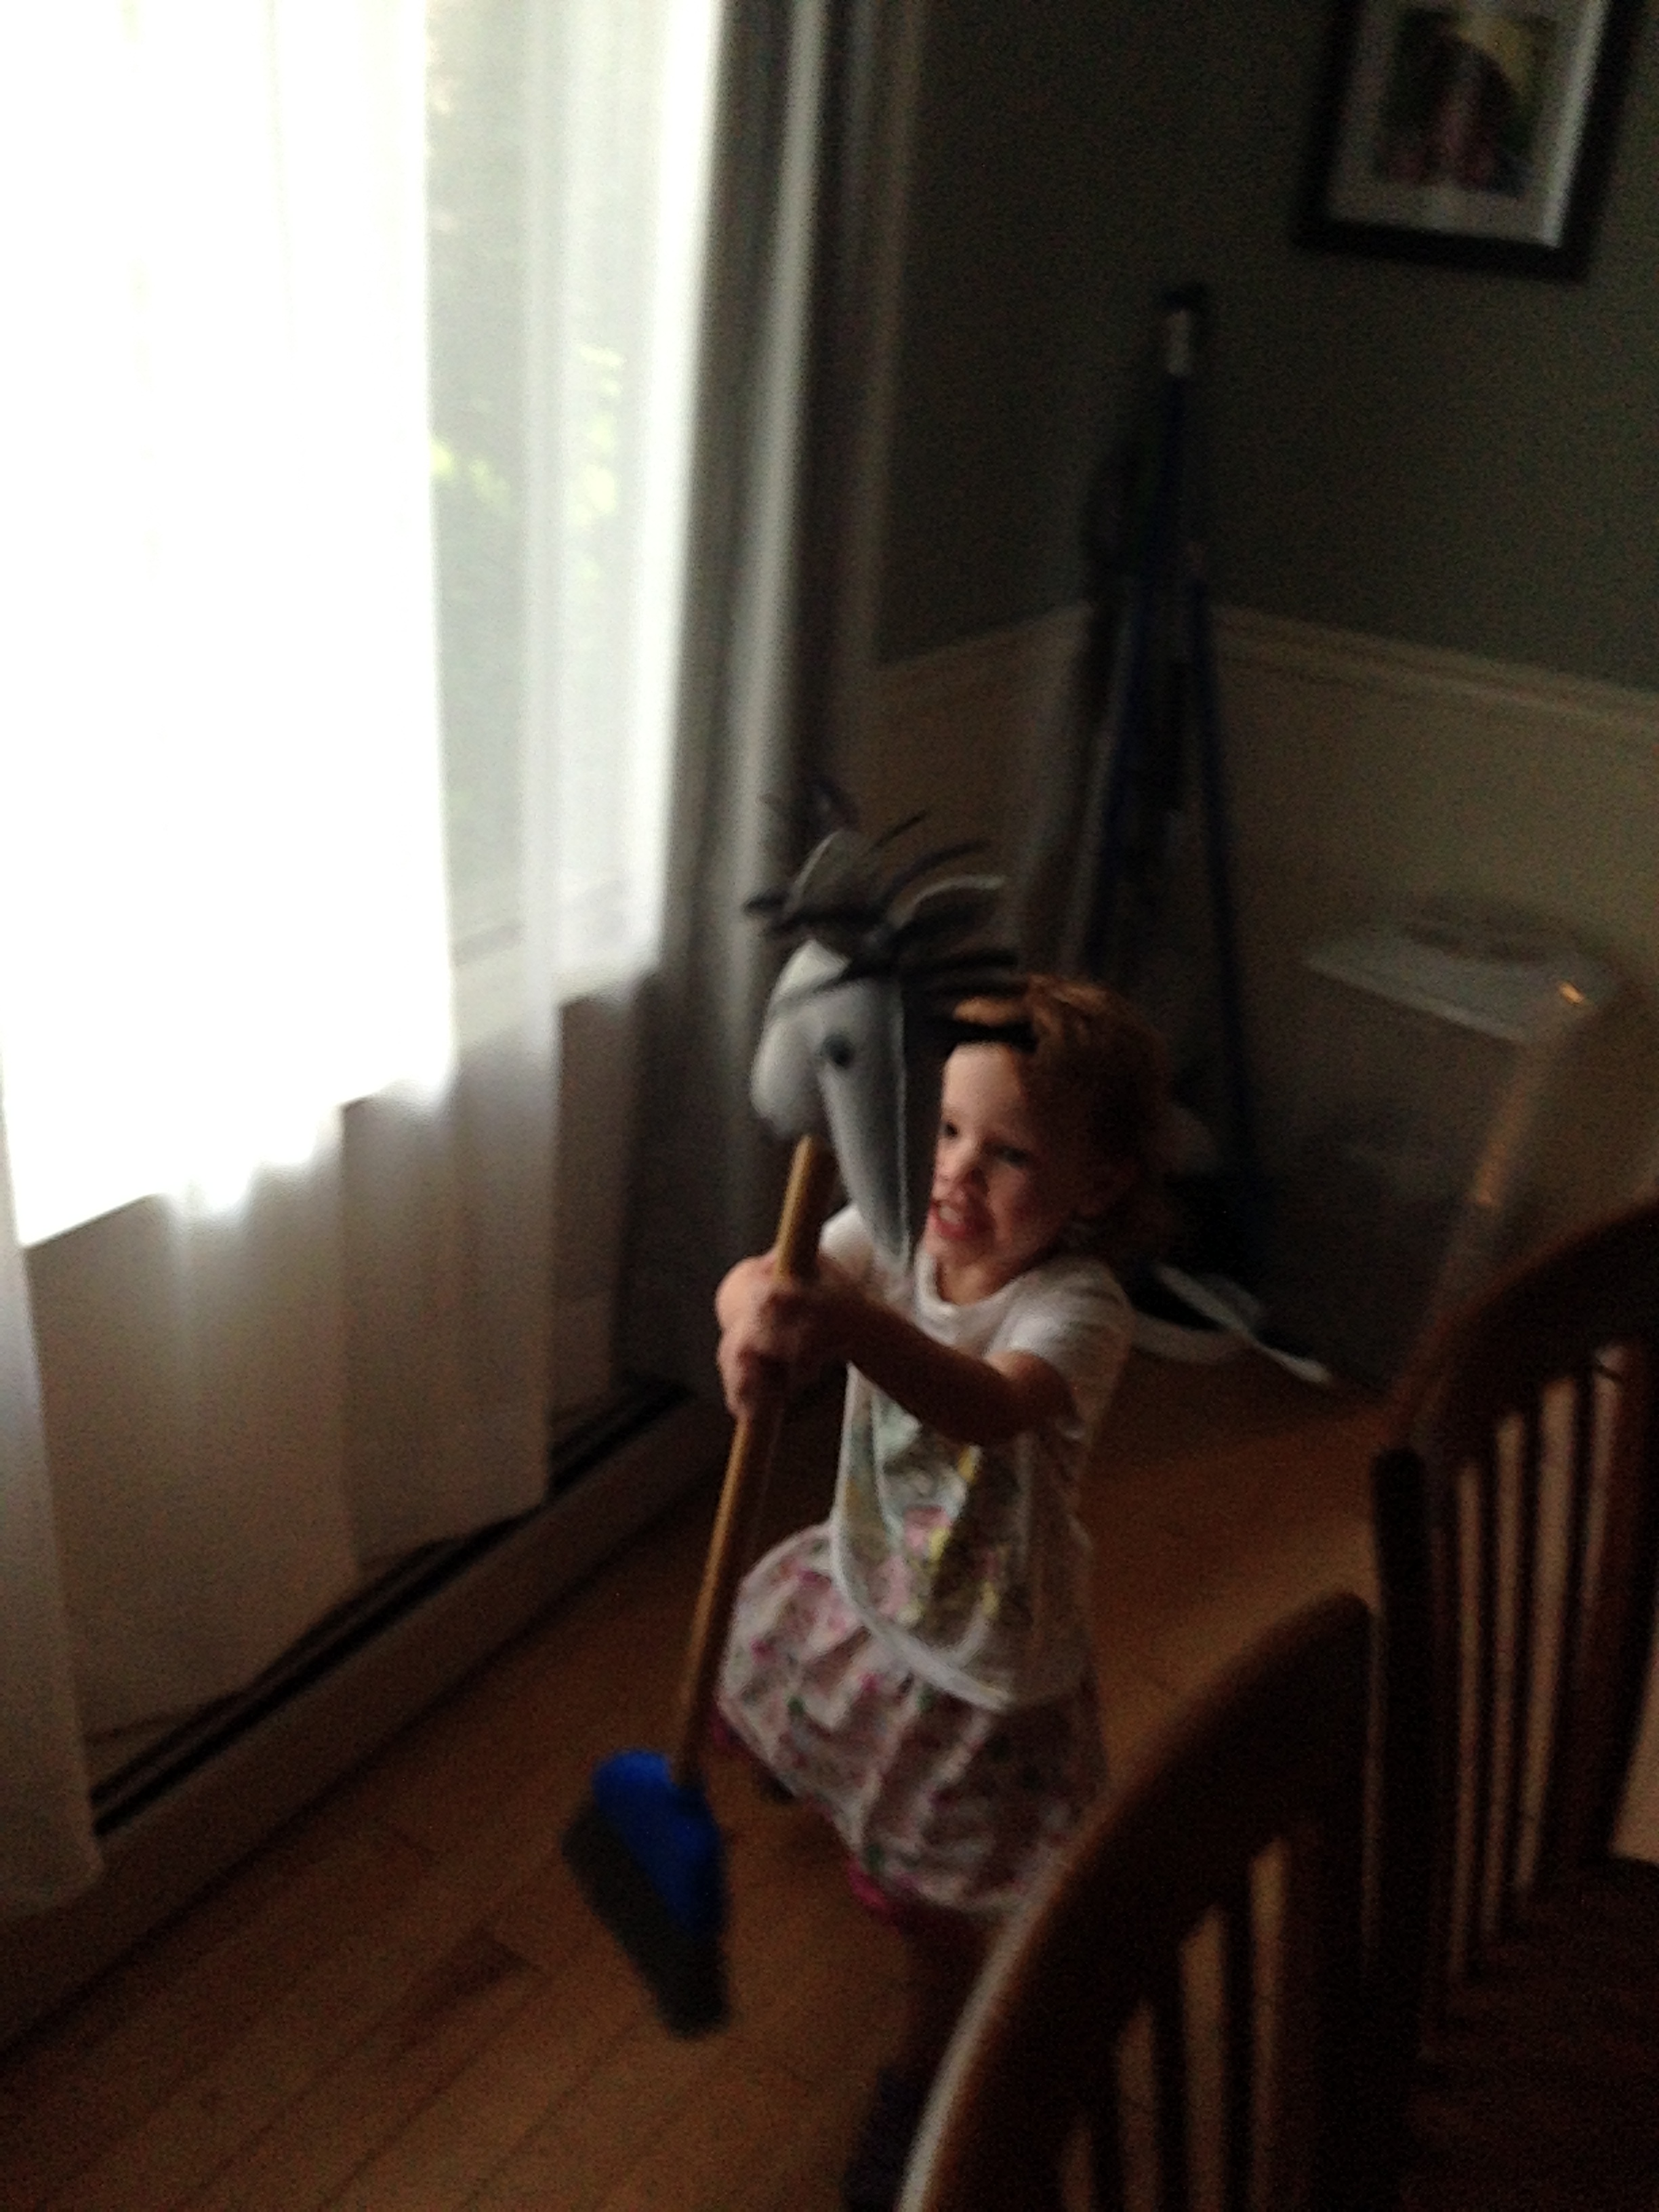


Hobby Horse
Lastly, a few weeks ago, we picked up a bunch of books at Goodwill to refresh our collection, which included a pop-up version of the Nutcracker. In one panel, one of the children had a Hobby Horse. I said something along the lines of "I could make that," resulting in daily requests from LMC for Mommy to make her a horse. Fortunately, I had a free pattern already pinned on Pinterest, and all the supplies I needed in my stash. Except for a dowel, which means that LMC can sweep and play at the same time! Of course now, Little Miss Cleaver thinks that I have the magic ability to just make anything (which kinda cool), but I can't mention that I'm considering making anything for her, because she demands I sew it now (even if the fabric is still uncut).
What have you been making?


Wherein I talk about body image, mental health and making your own clothes, one year later...