
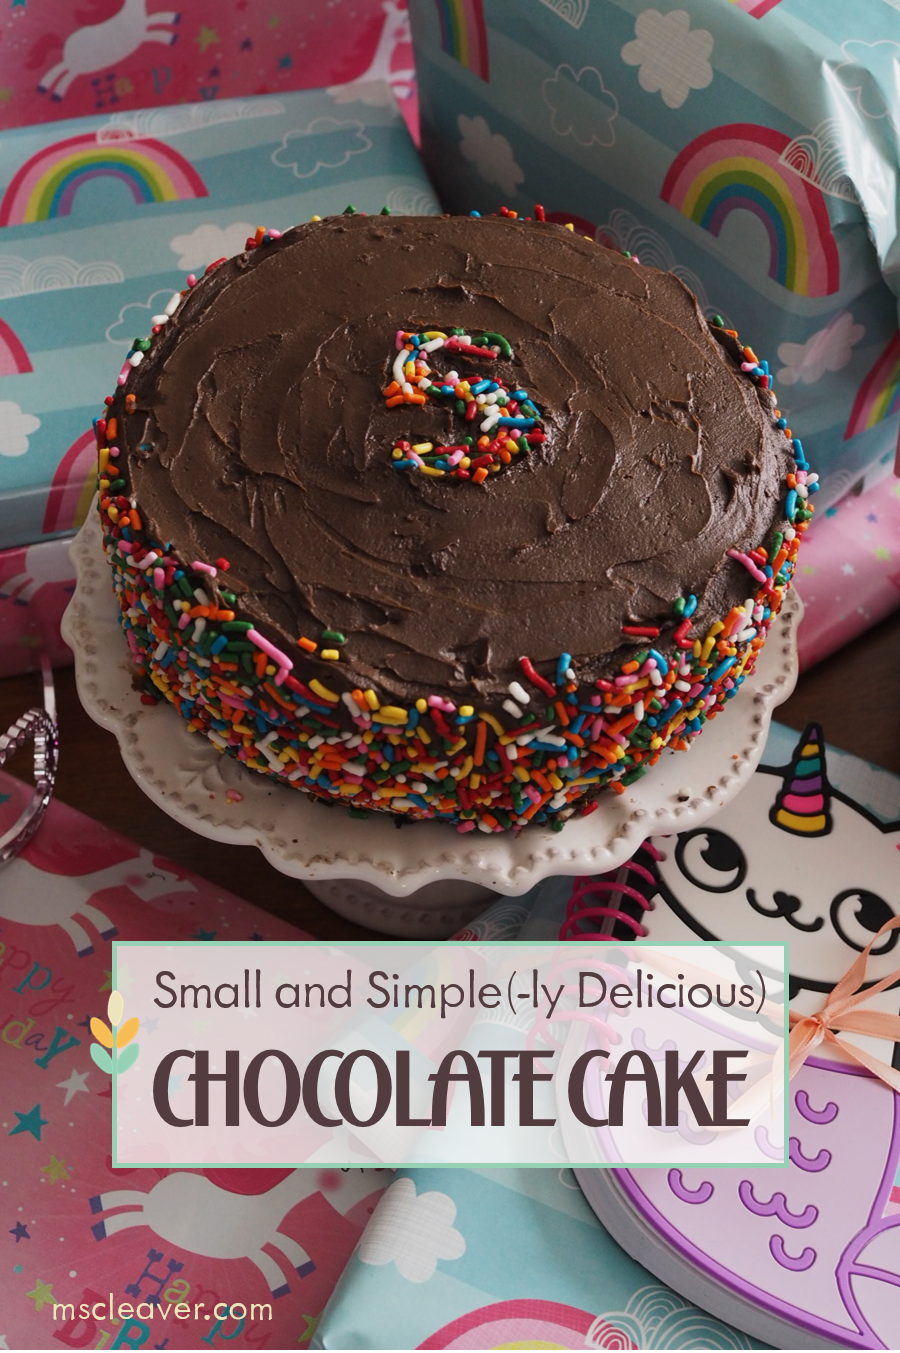
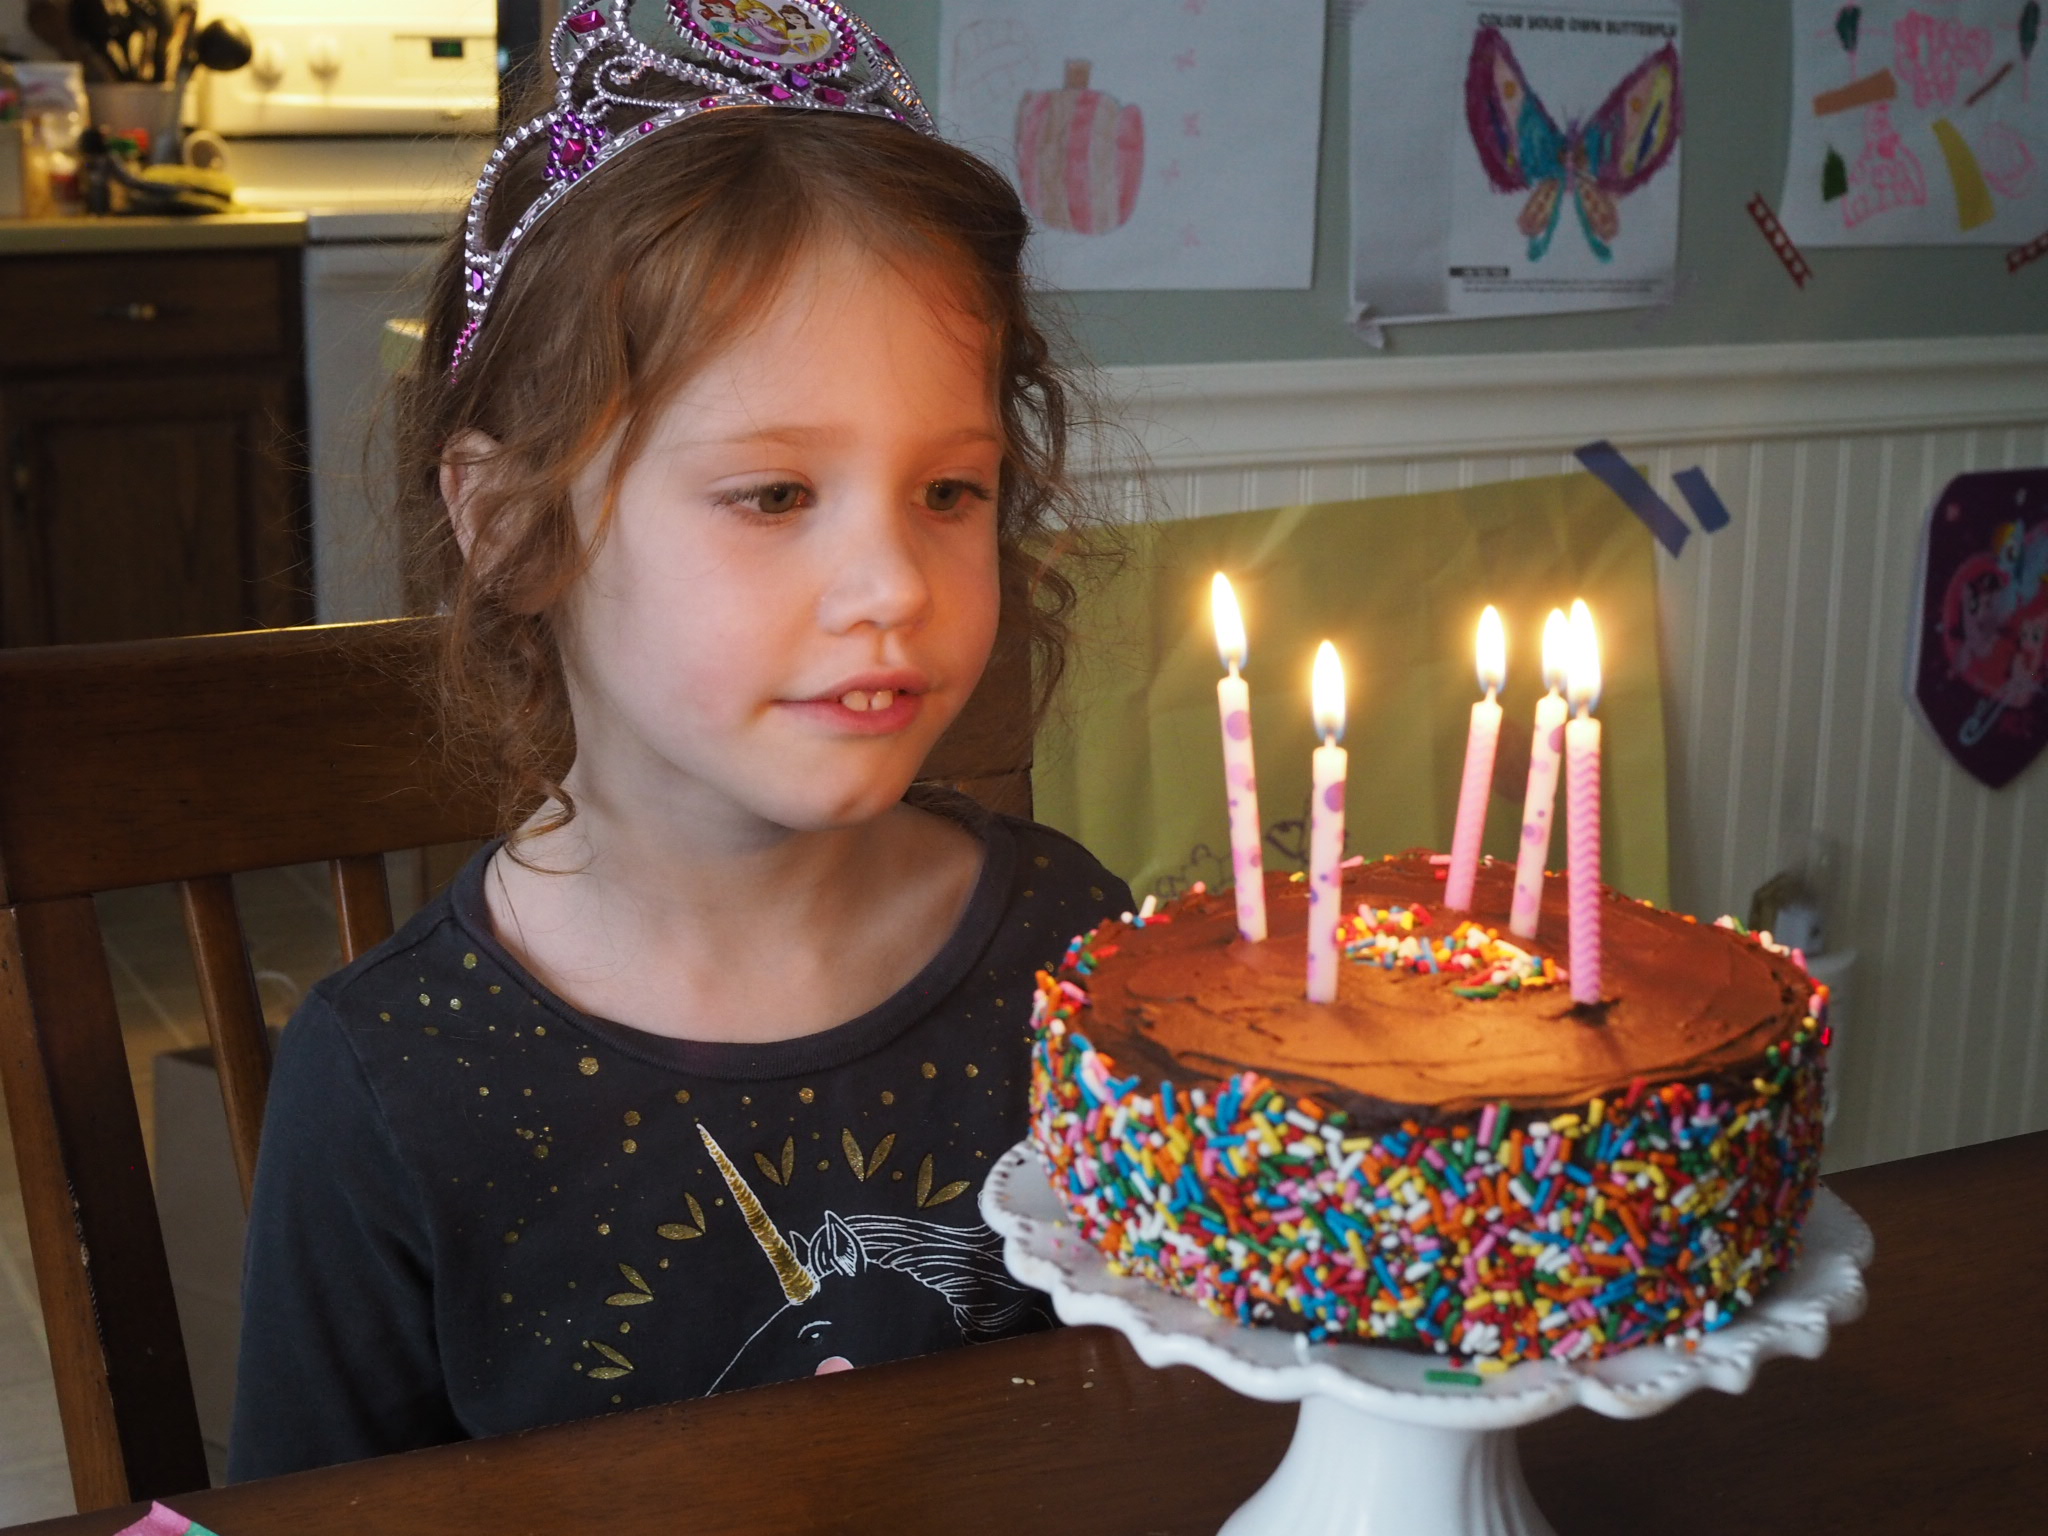
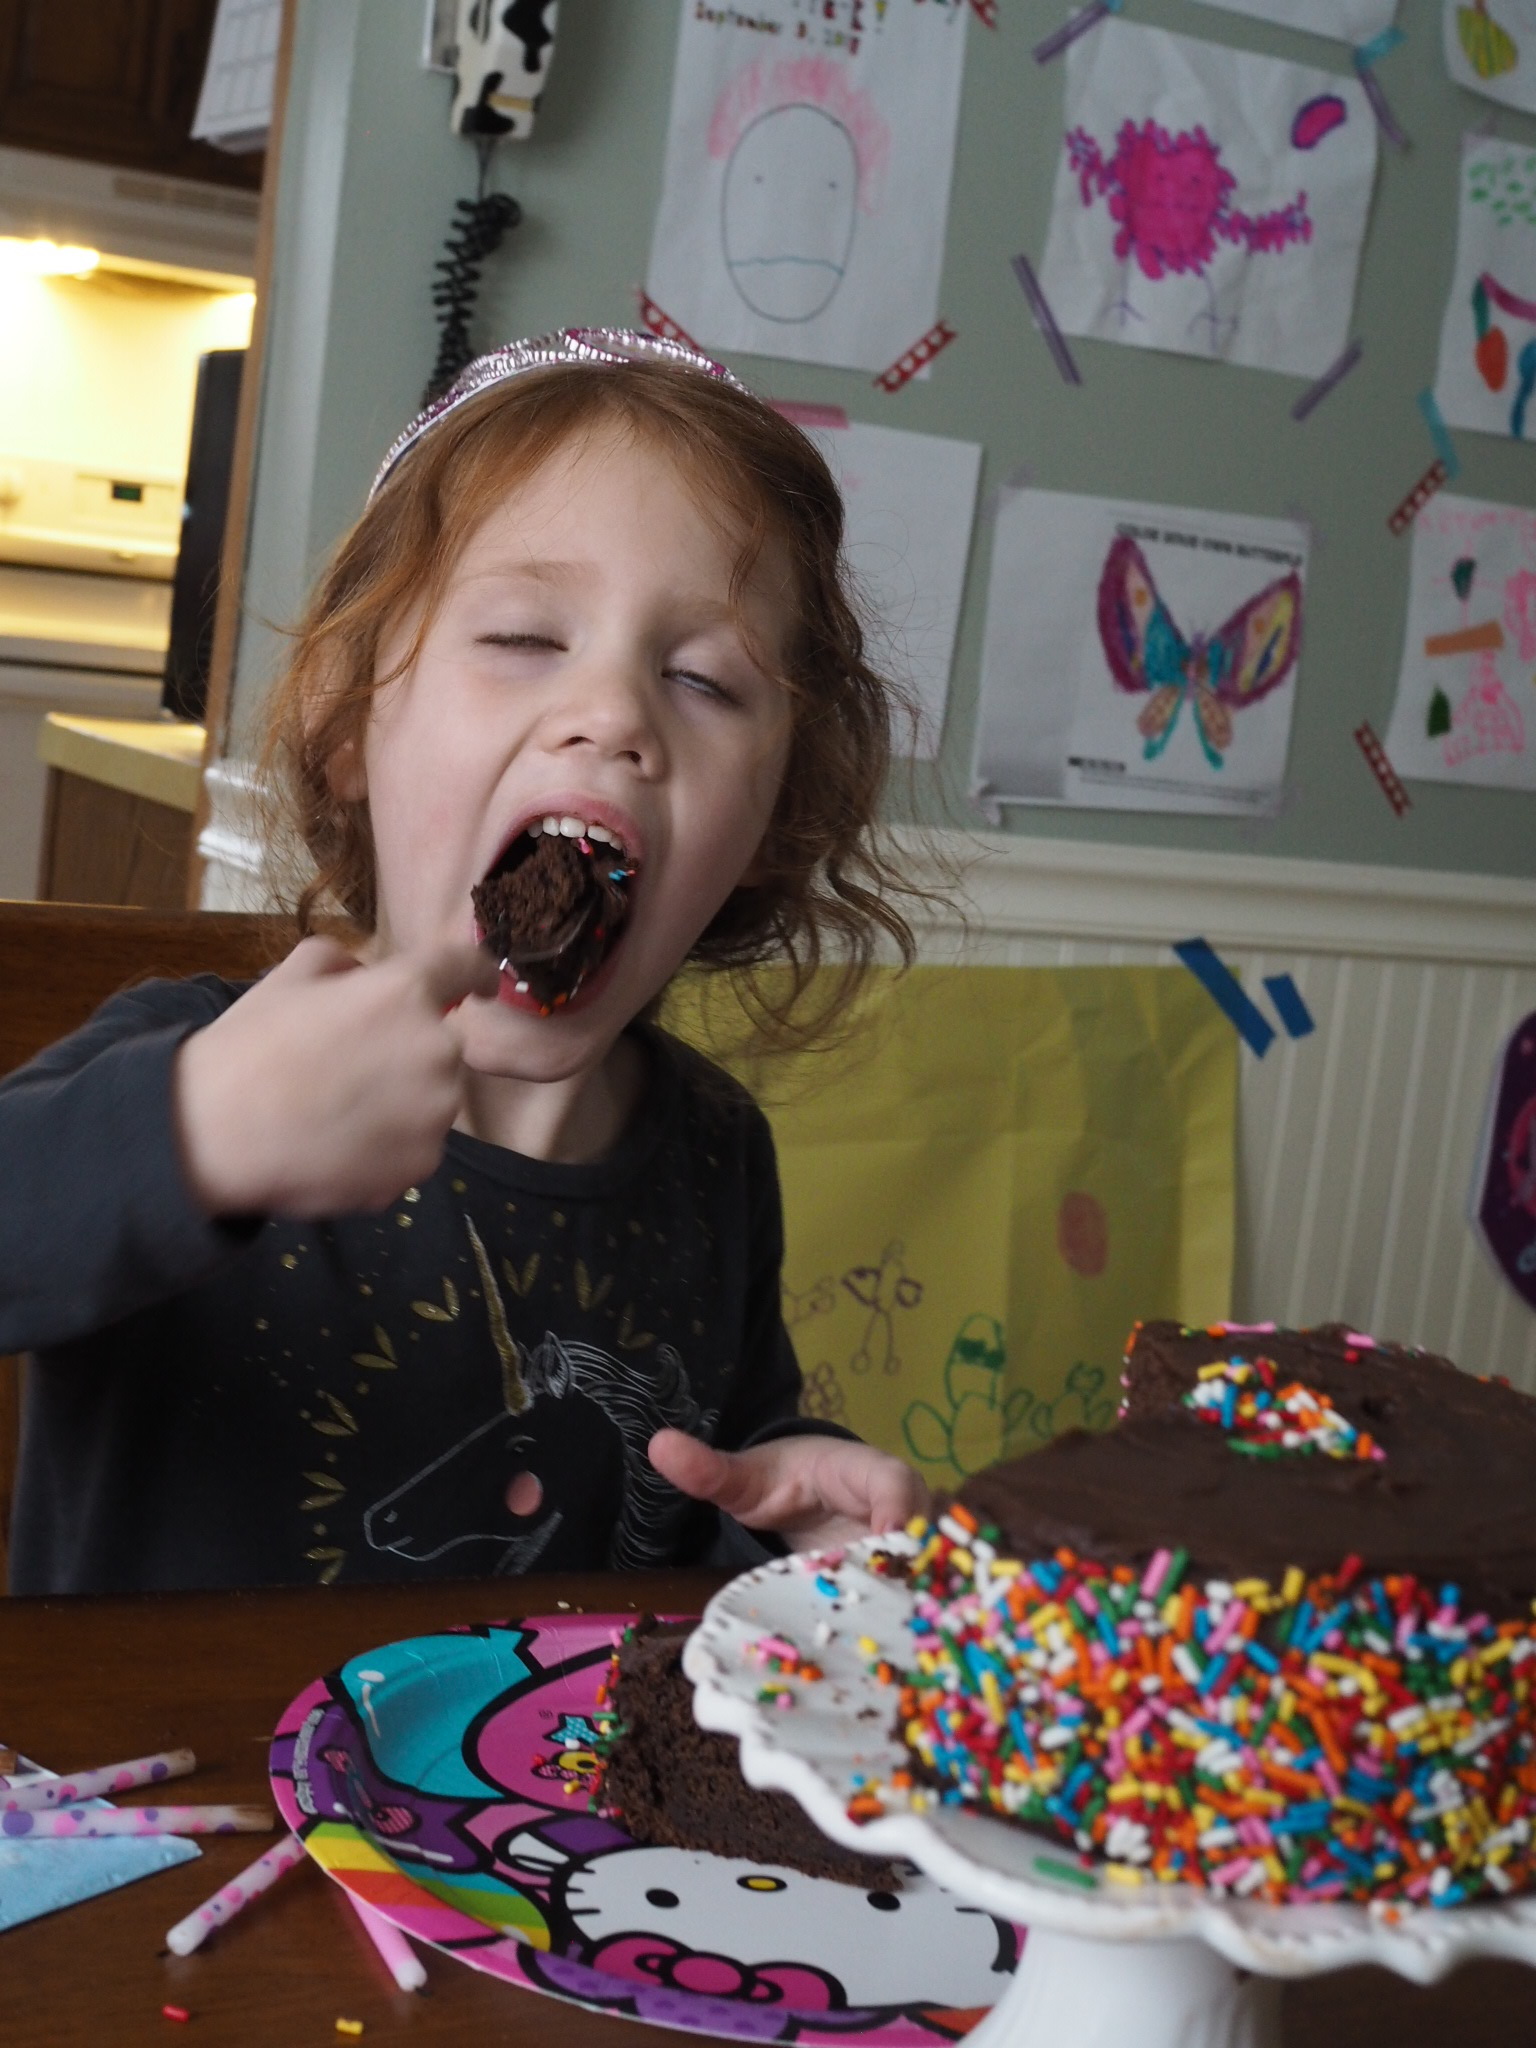

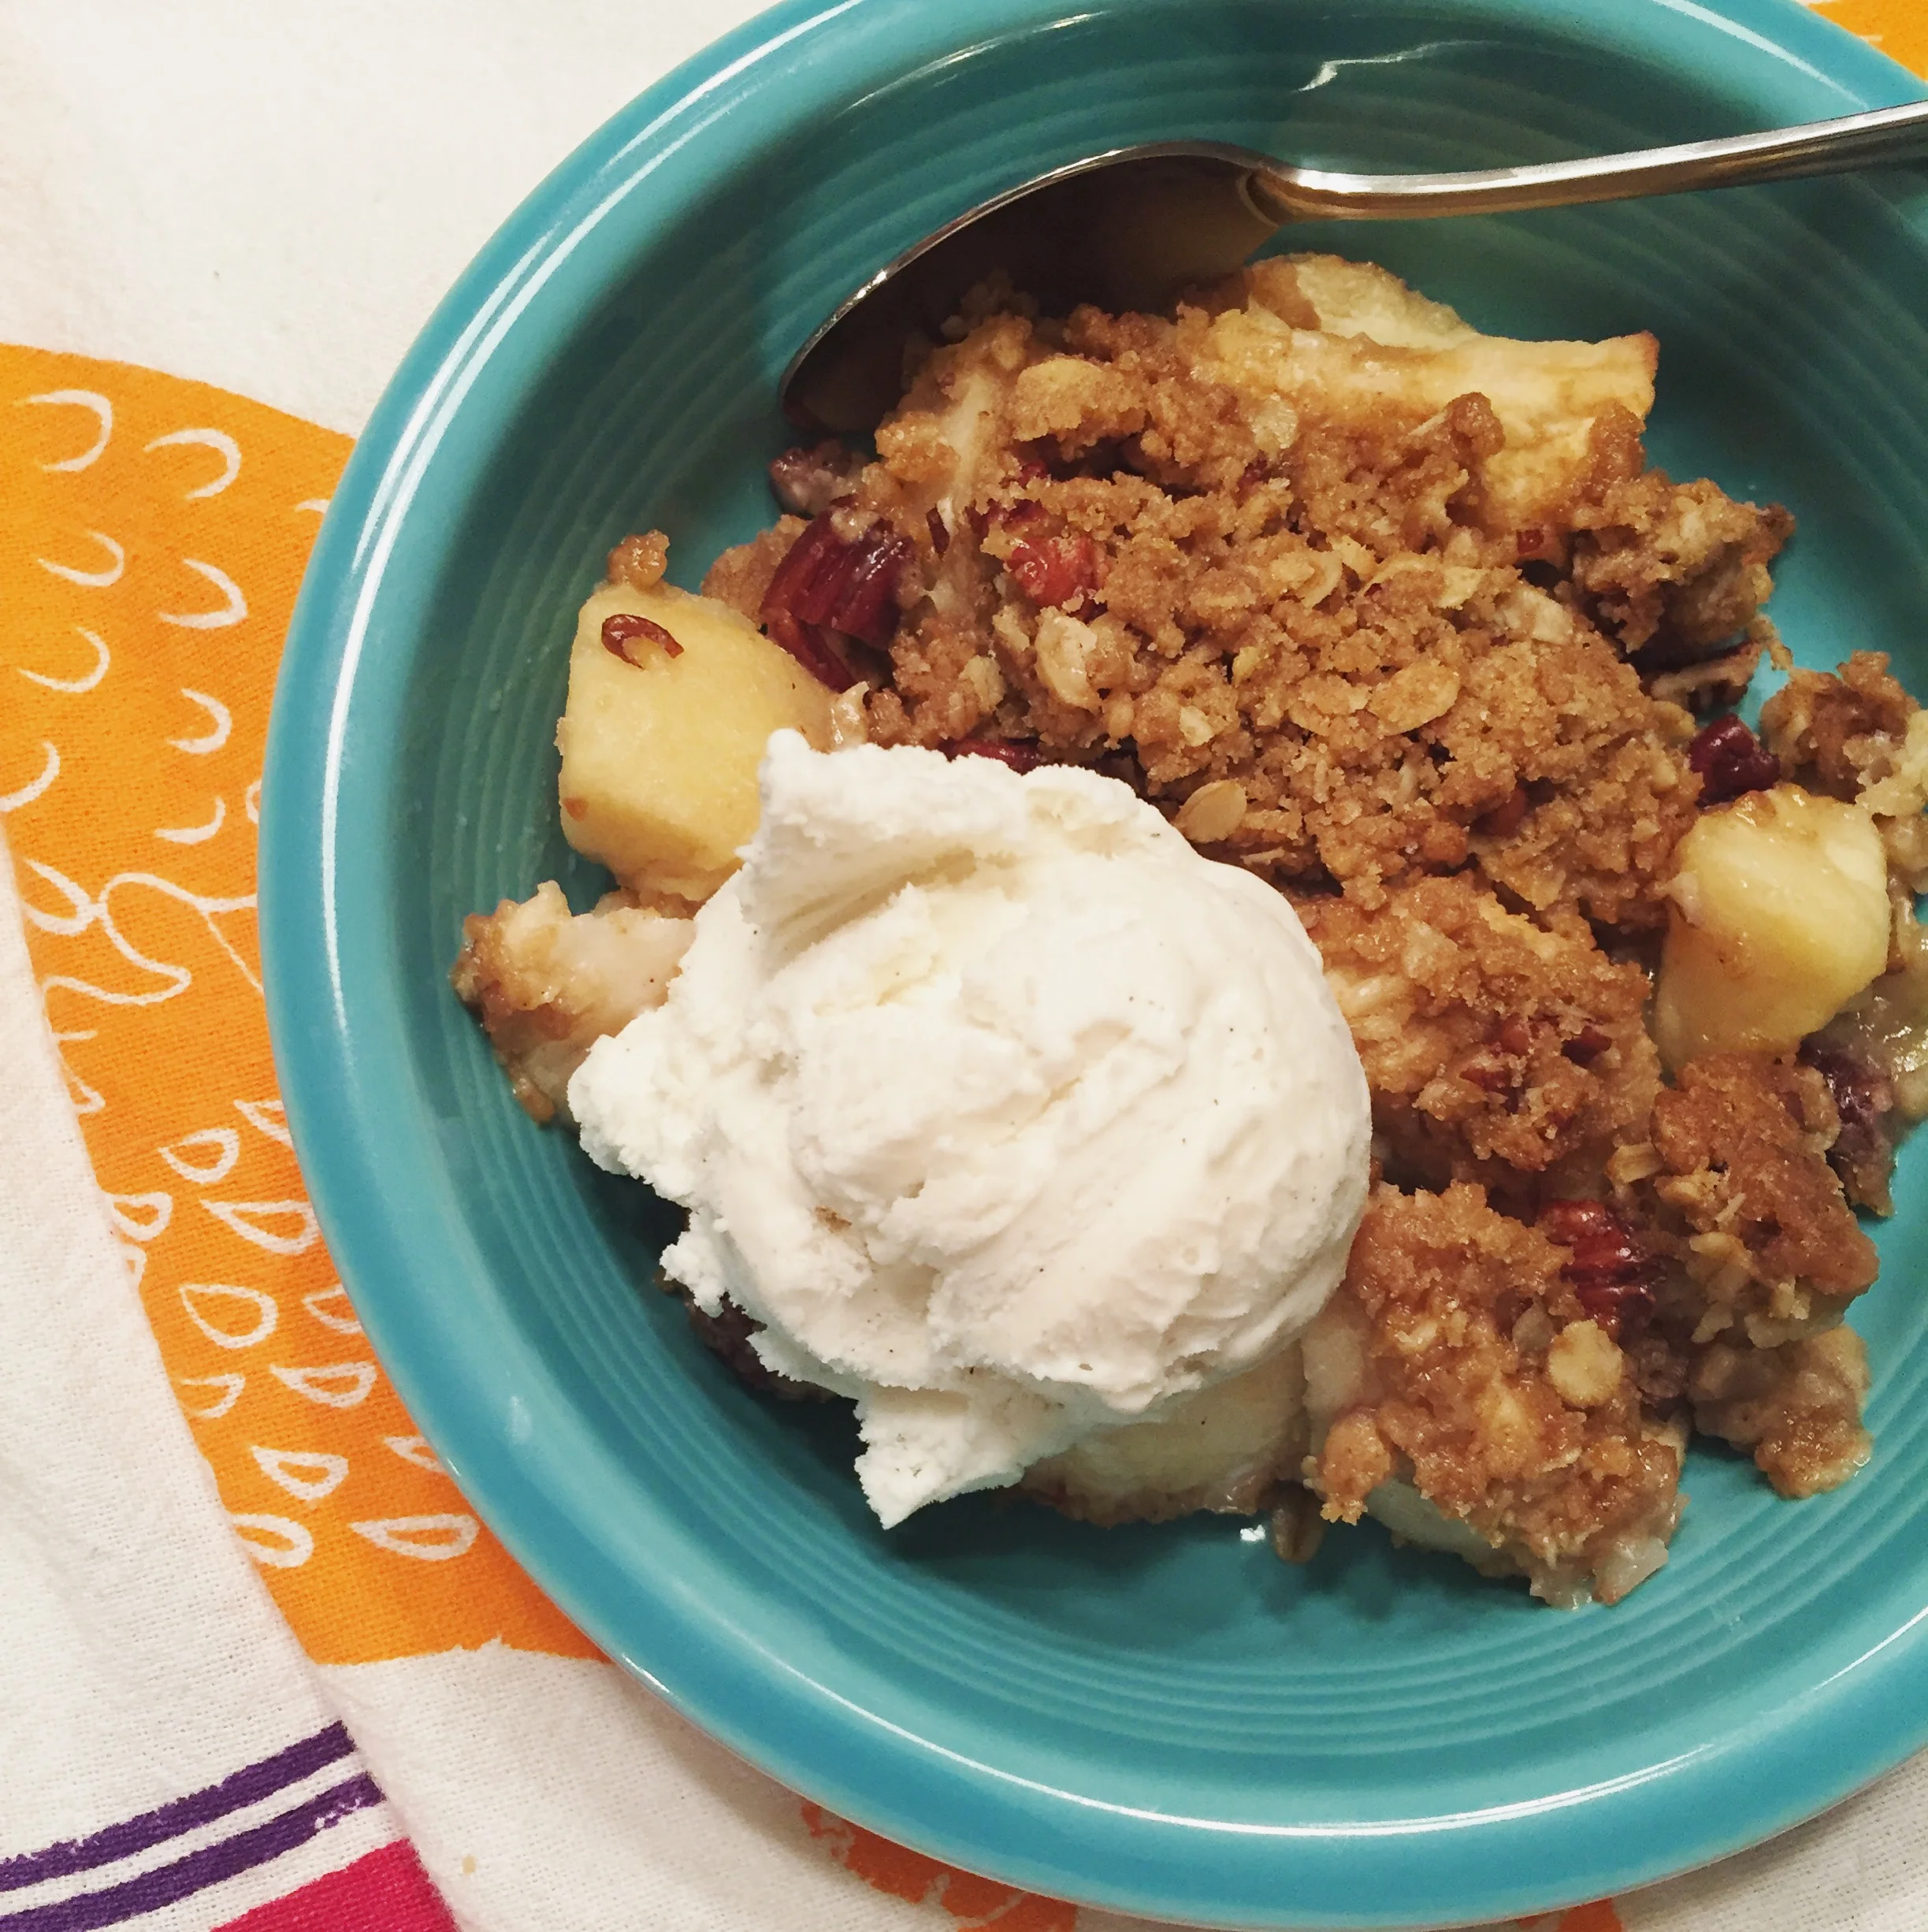
Little Miss Cleaver just turned five in March. (I know, I have no idea how that happened so fast either).
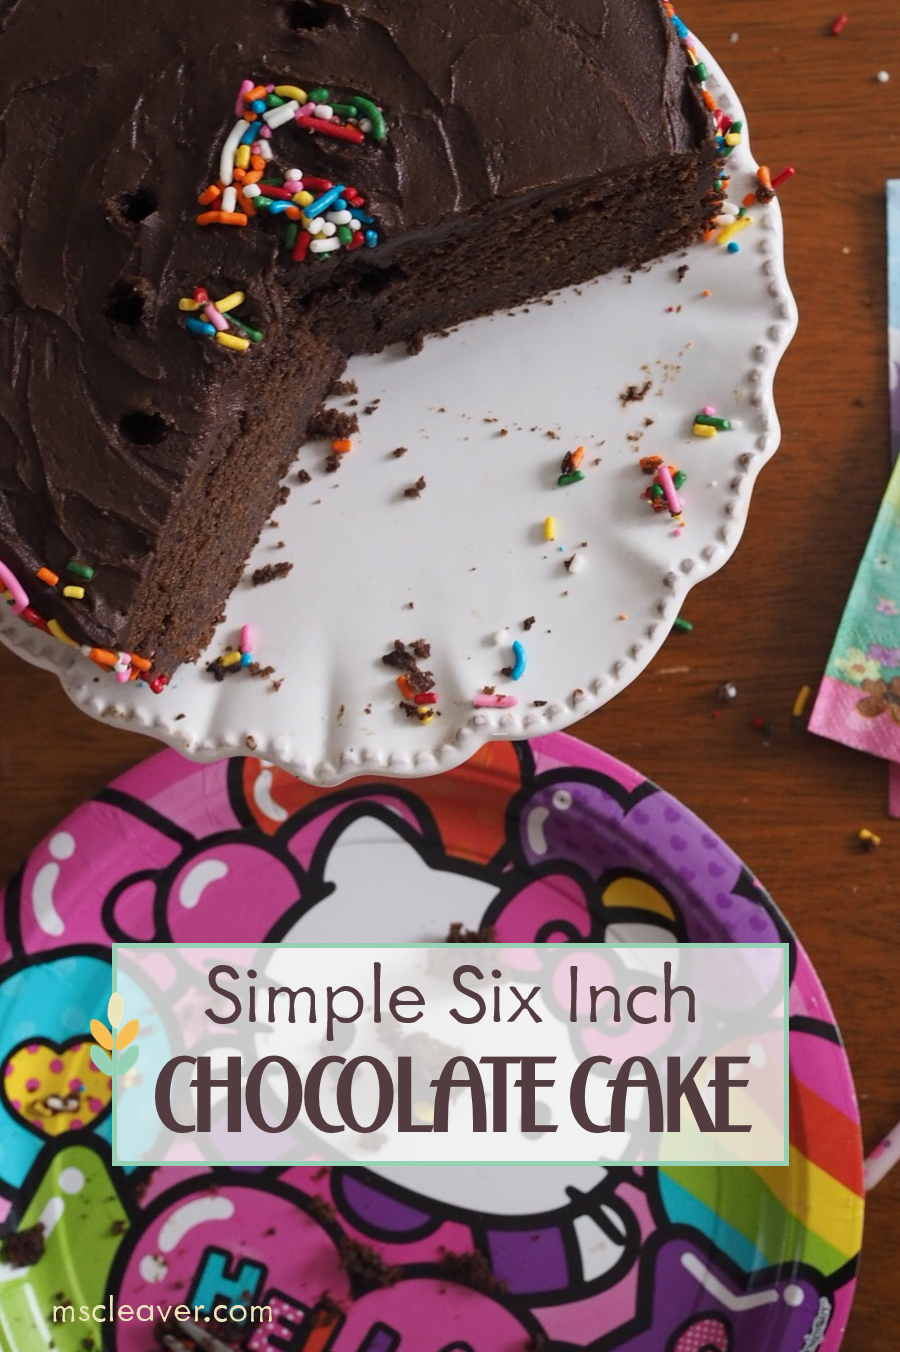
To celebrate such a momentous occasion, we had a big friend birthday party about a week before the actual day. But, in LMC's words, the "real party" was the one with family on her actual birthday. So even though we were solidly cupcaked-out by that point, a cake was still in order. Enter this deeply chocolaty, but petite cake - just enough for the three of us to handle and cute to boot.
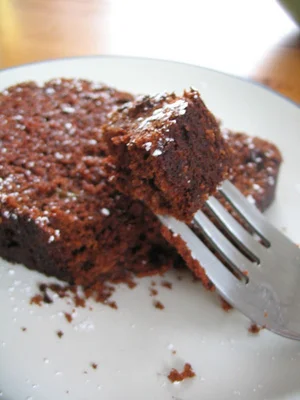
There are hundreds of chocolate cake recipes out there, so I'll just say that this one was still really moist after three days at room temperature and I use my blog as my own personal recipe box and I wanted to put this out there so I can remember it for the next birthday.
This recipe will fill any of the following:
- One 9" cake pan
- Two 6" cake pans
- About 10-12 cupcakes
- Or a really thick 6" cake, plus a small ramekin. (which is what I did).
Small and Simple (-ly Delicious) Chocolate Cake
Cake
- 1 cup all-purpose flour
- 1/2 cup plus 3 Tbl unsweetened cocoa powder
- 1/2 tsp baking powder
- 1/2 tsp baking soda
- 1/4 tsp salt
- 1/2 cup salted butter, softened
- 1/2 cup plus 2 Tbl sugar
- 1 tsp vanilla
- 1 large egg
- 1/2 cup plain Greek yogurt
- 3 Tbl cold coffee
- 3 Tbl milk
Frosting
- 4 Tbl salted butter, softened
- 1 1/3 cups powdered sugar
- 1/4 cup unsweetened cocoa powder
- up to 3 tbl milk
- 1/2 tsp vanilla extract
Optional (lots of sprinkles to decorate)
Directions
Preheat oven to 350 Degrees F. Grease pan(s) and coat with cocoa powder or use liner if making cupcakes.
In a medium bowl, sift together flour, cocoa powder, baking powder, baking soda, salt, In a small bowl or large measuring cup, combine coffee, milk, and yogurt.
In a large bowl, cream together the butter and sugar until light and fluffy. Add egg and vanilla to sugar and mix until well combined.
Starting and ending with the flour mix, alternate adding flour mix and yogurt mix to sugar/egg mix, making sure batter is thoroughly combined before each addition.
Scrape batter into prepared pan(s), keeping the distribution as even as possible if using multiple pans.
Bake cake until a tester inserted in the center of the cake comes out clean. Start your timer at 20 minutes and check every 3-5 minutes thereafter, cooking times will vary based on which pan you choose.
Cool cake in pan for 10 minutes then invert unton rack to cool completely before frosting.
To make frosting: Beat butter until light and fluffy. Add cocoa and powdered sugar to butter. Add milk a tablespoon at a time, until desired consistency is achieve and then beat in vanilla.
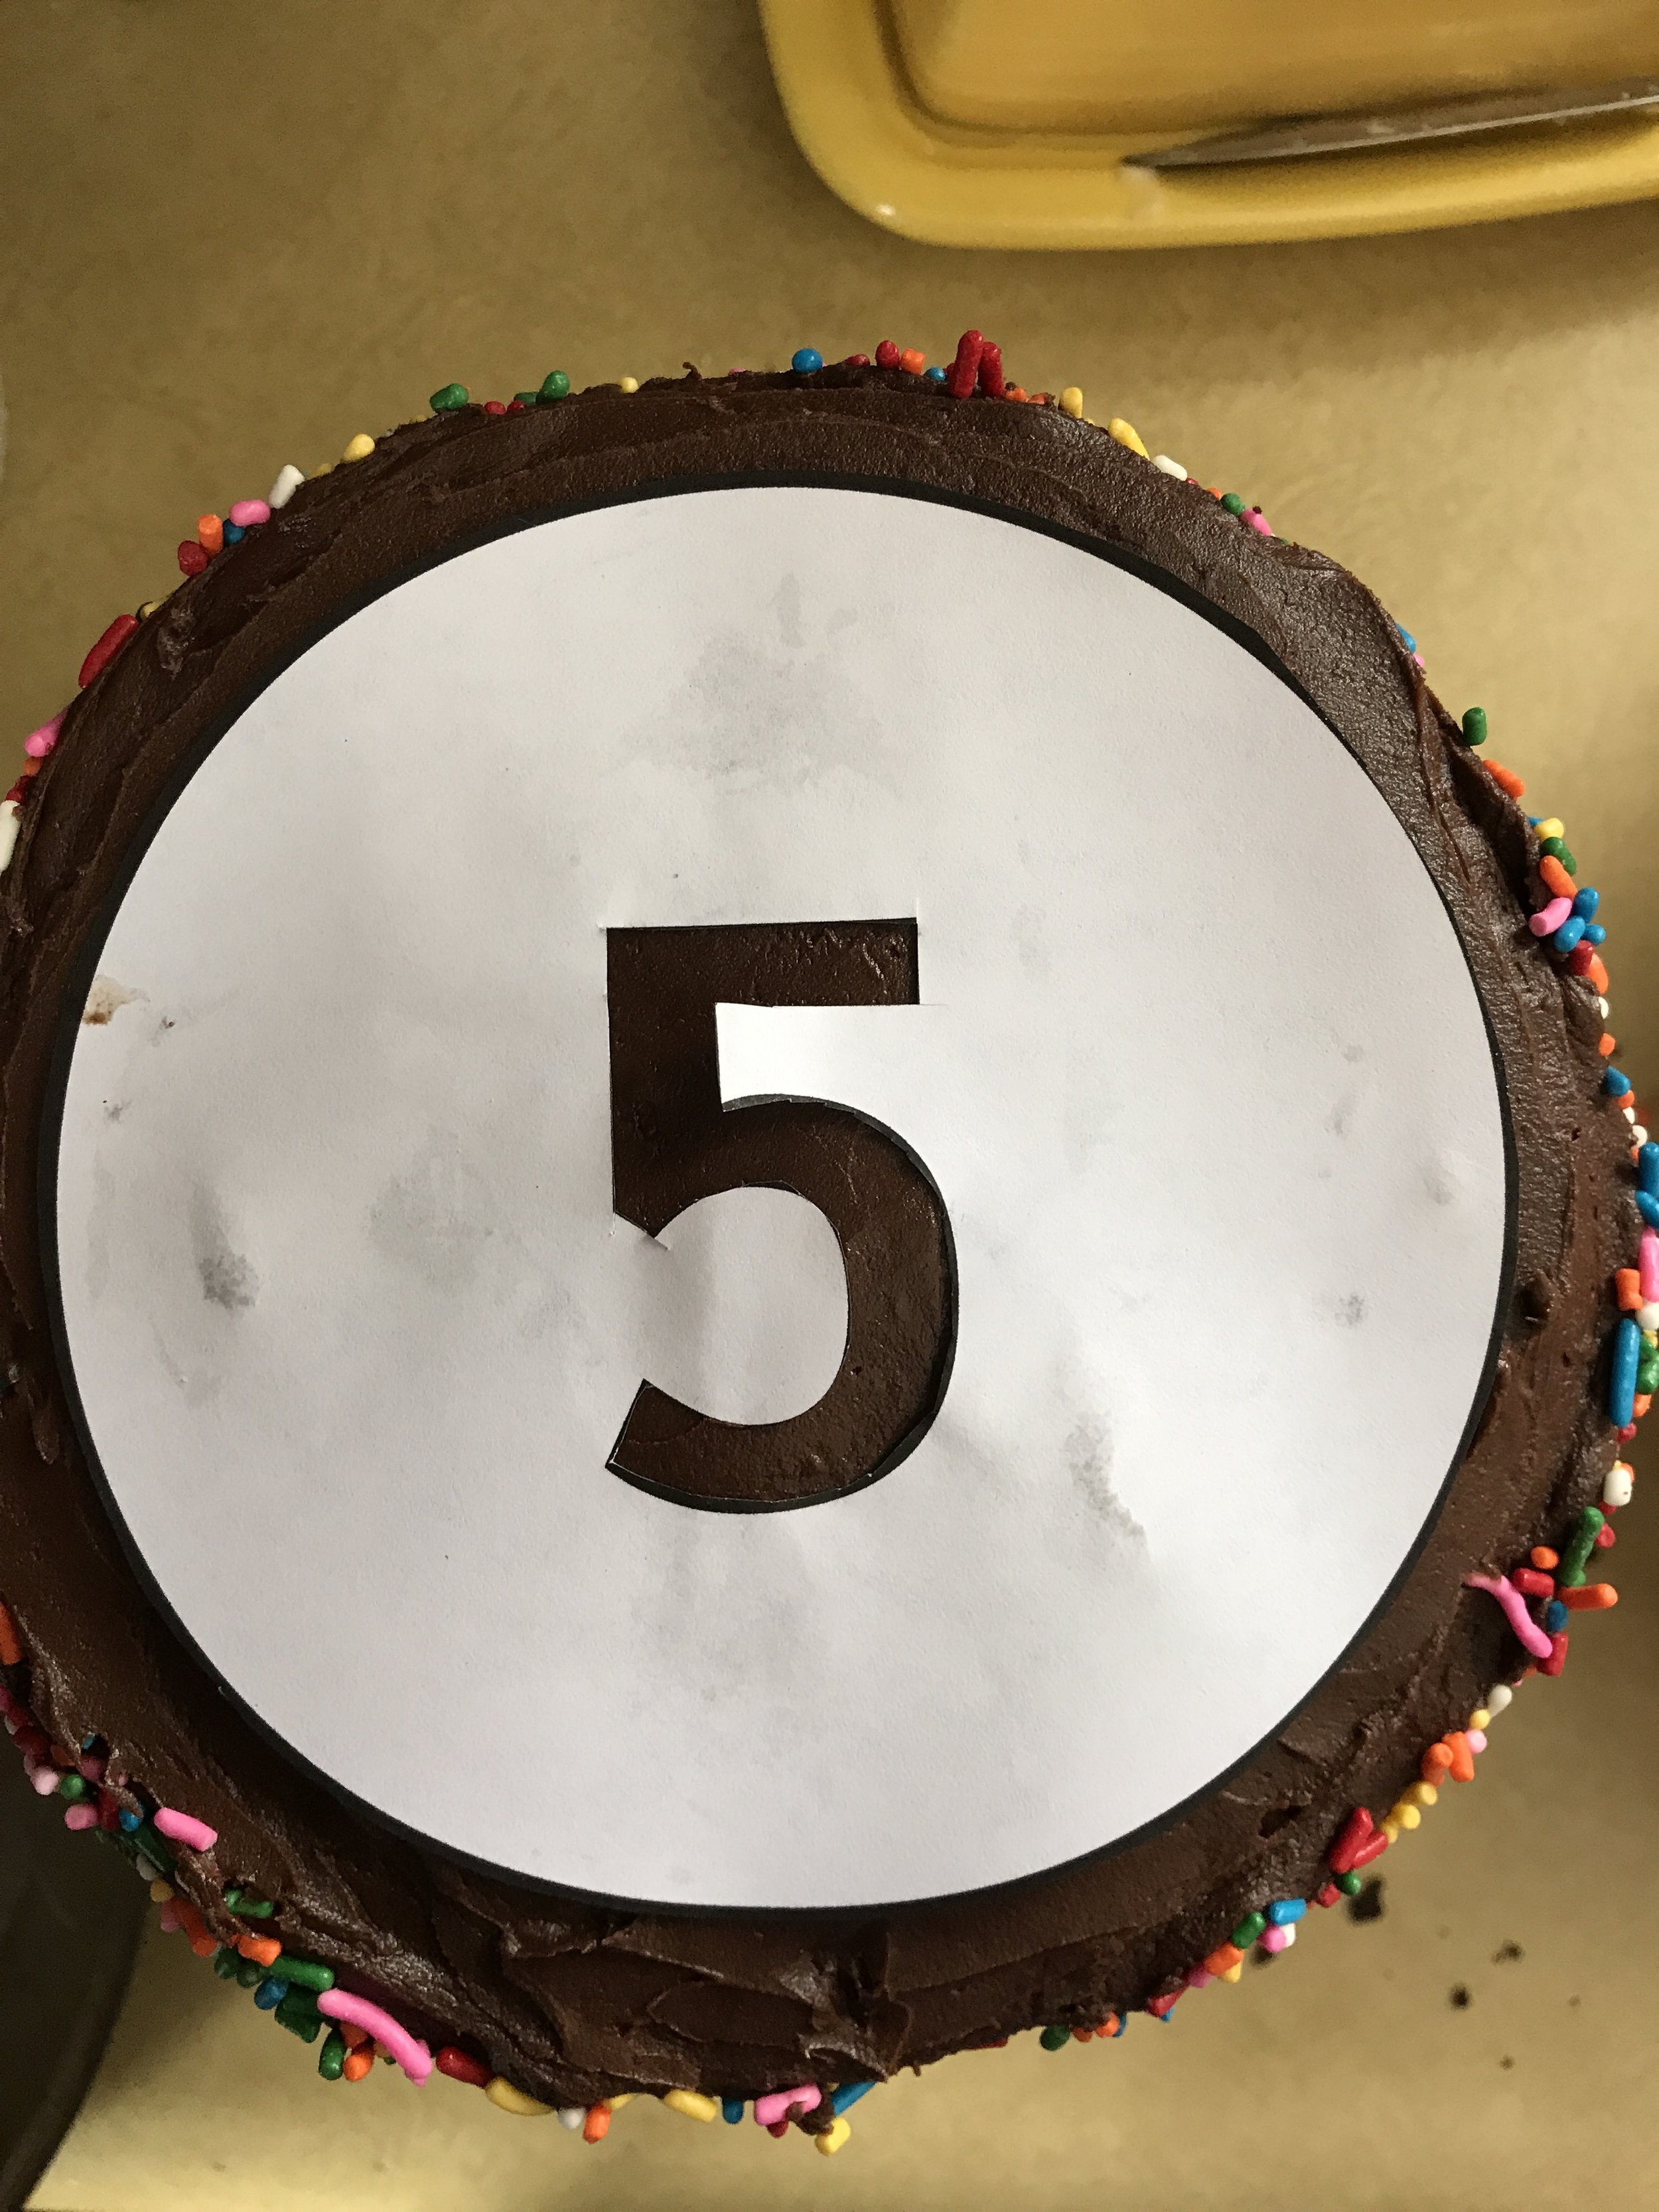
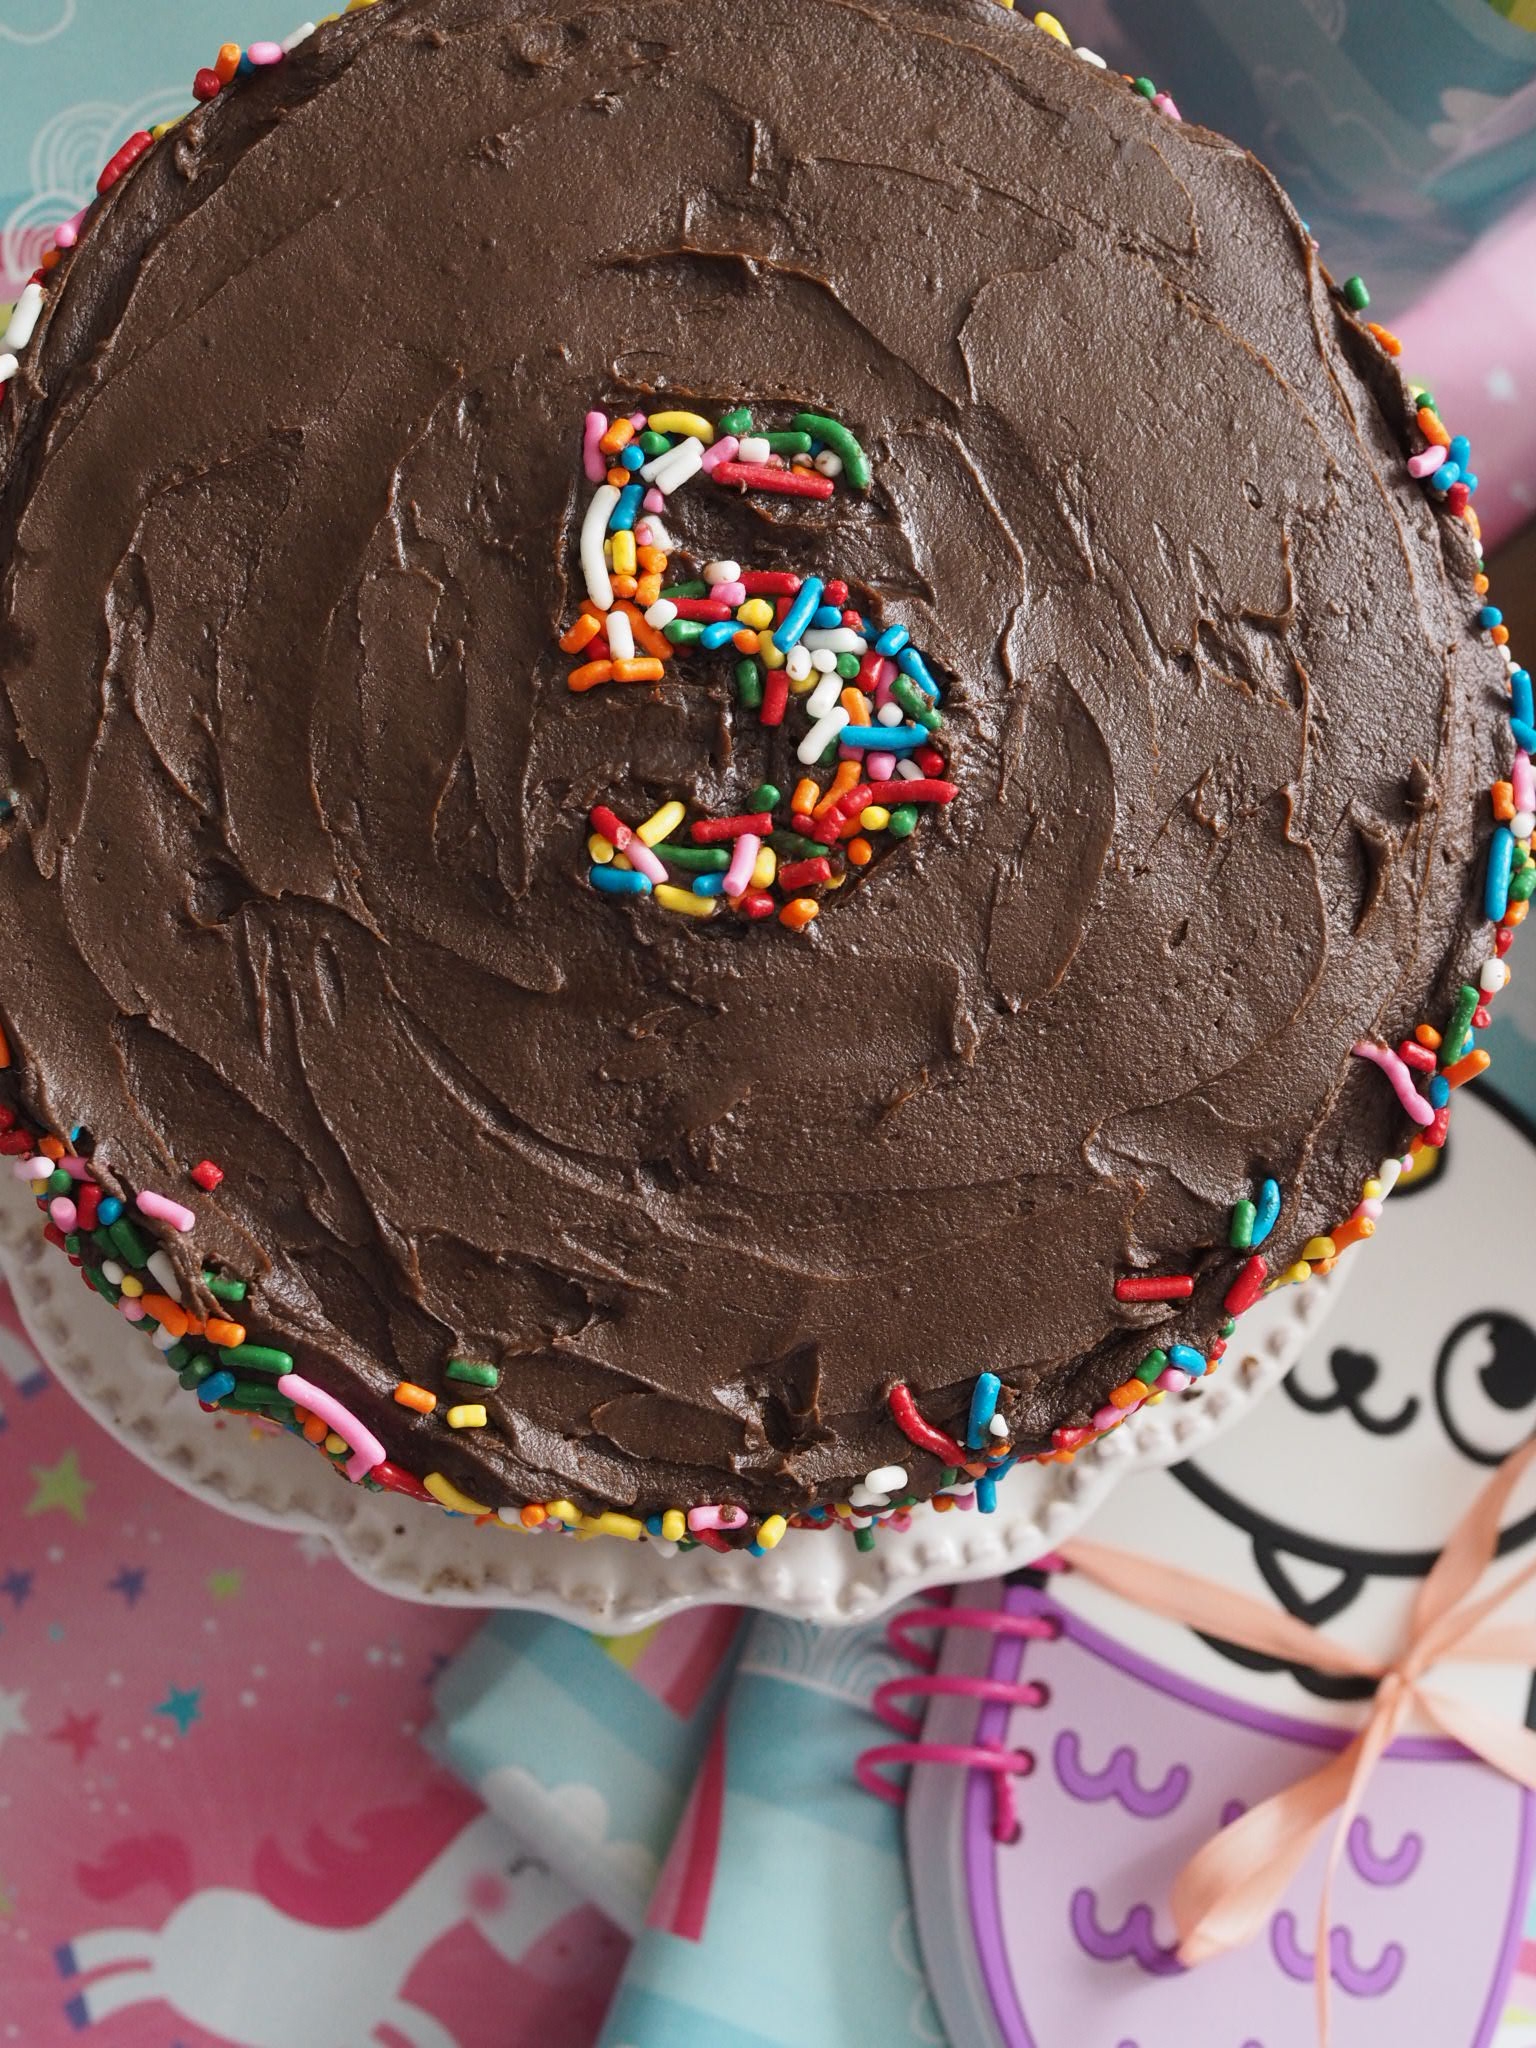
To decorate as shown: Place a large amount pf sprinkles into a pie pan or rimmed baking dish. Frost sides, but not top of cake. Being very careful, tilt the frosted cake into the pie pan and roll until sides are coated with sprinkles. Gently place cake unto serving dish or stand and press sprinkles into the side as needed. Frost top of cake. To make number, print out number of choice in a very large font (I think I used Impact here) in the center of a 5" circle. Cut out number with sharp scissors or an craft knife. Place template gently on top of cake, trying not to stick it to the frosting. Pour sprinkles into your template, mushing them into the frosting gently with you fingers and carefully remove template.
Goes excellently with a glass of milk.
Adapted from Ghirardelli's Grand Fudge Cake (aka the one on the back of the cocoa powder bag).
To print, see button at bottom of post.
Small and Simple (-ly Delicious) Chocolate Cake
Serves 9 Ingredients: 1 cup all-purpose flour 1/2 cup plus 3 Tbl unsweetened cocoa powder 1/2 tsp baking powder 1/2 tsp baking soda 1/4 tsp salt 1/2 cup salted butter, softened 1/2 cup plus 2 Tbl sugar 1 tsp vanilla 1 large egg 1/2 cup plain Greek yogurt 3 Tbl cold coffee 3 Tbl milk Frosting 4 Tbl salted butter, softened 1 1/3 cups powdered sugar 1/4 cup unsweetened cocoa powder up to 3 tbl milk 1/2 tsp vanilla extract 1 1/2 teaspoons salt,


Croque Monsieur Handpies

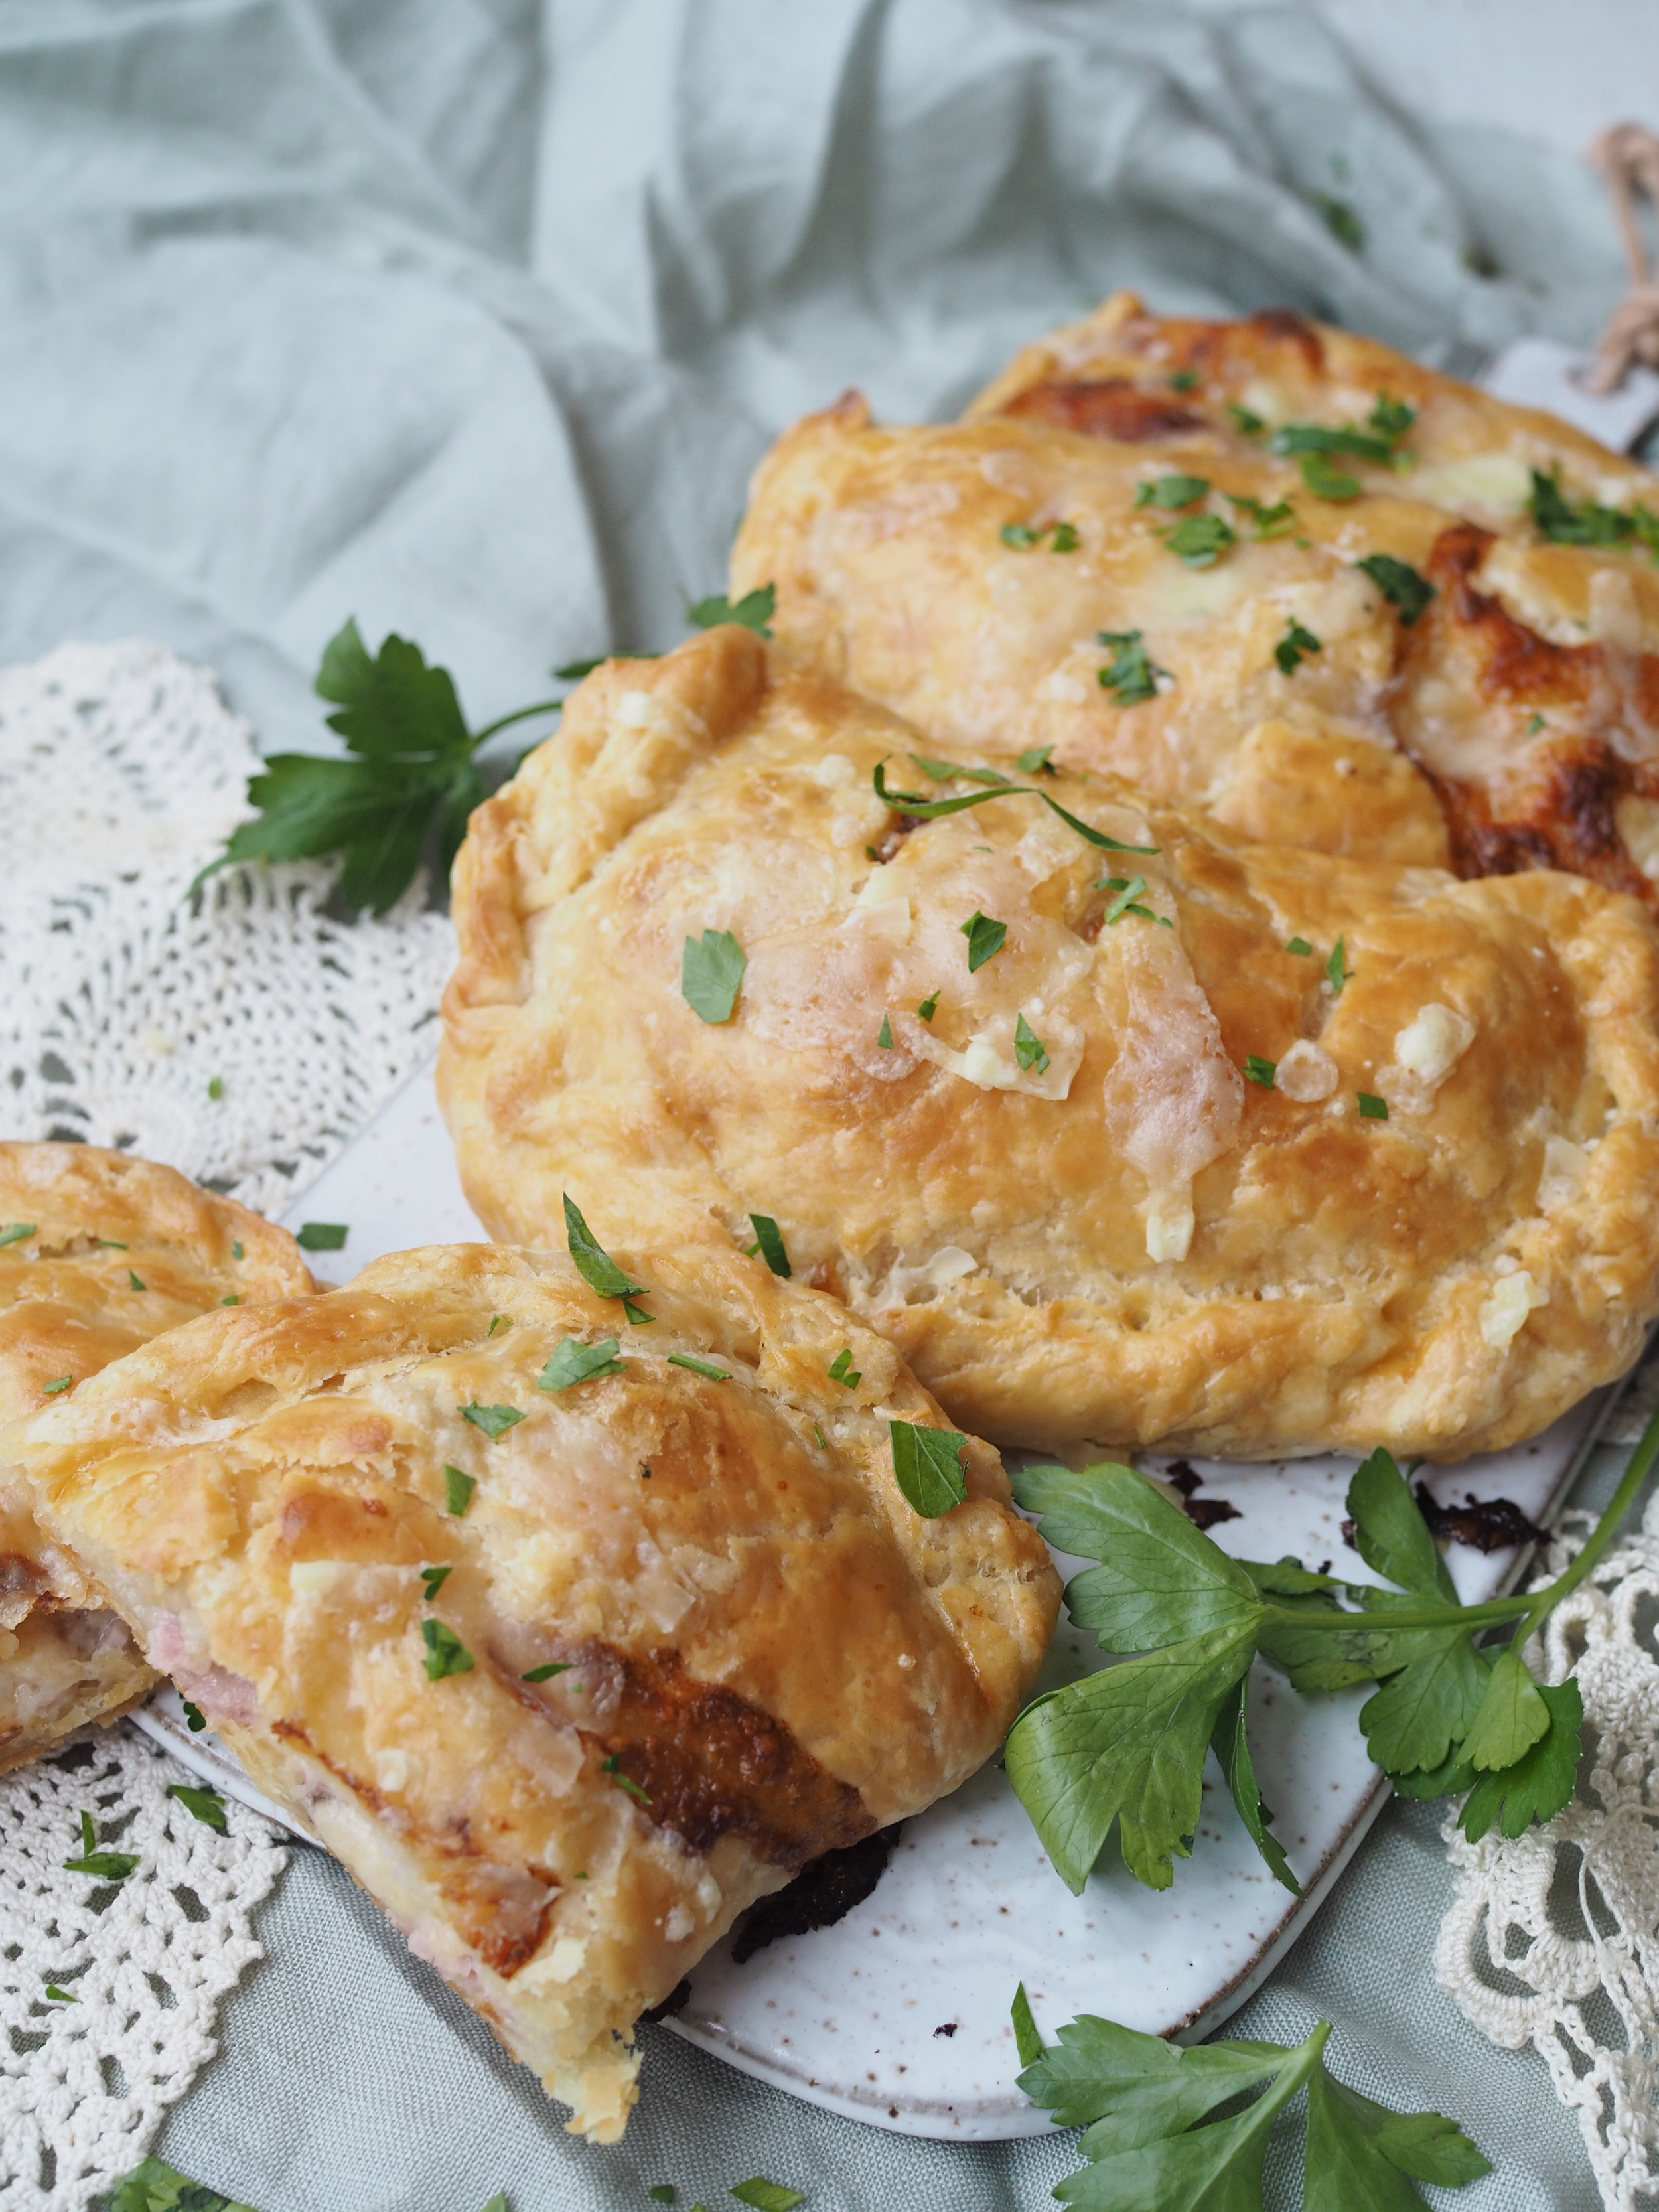
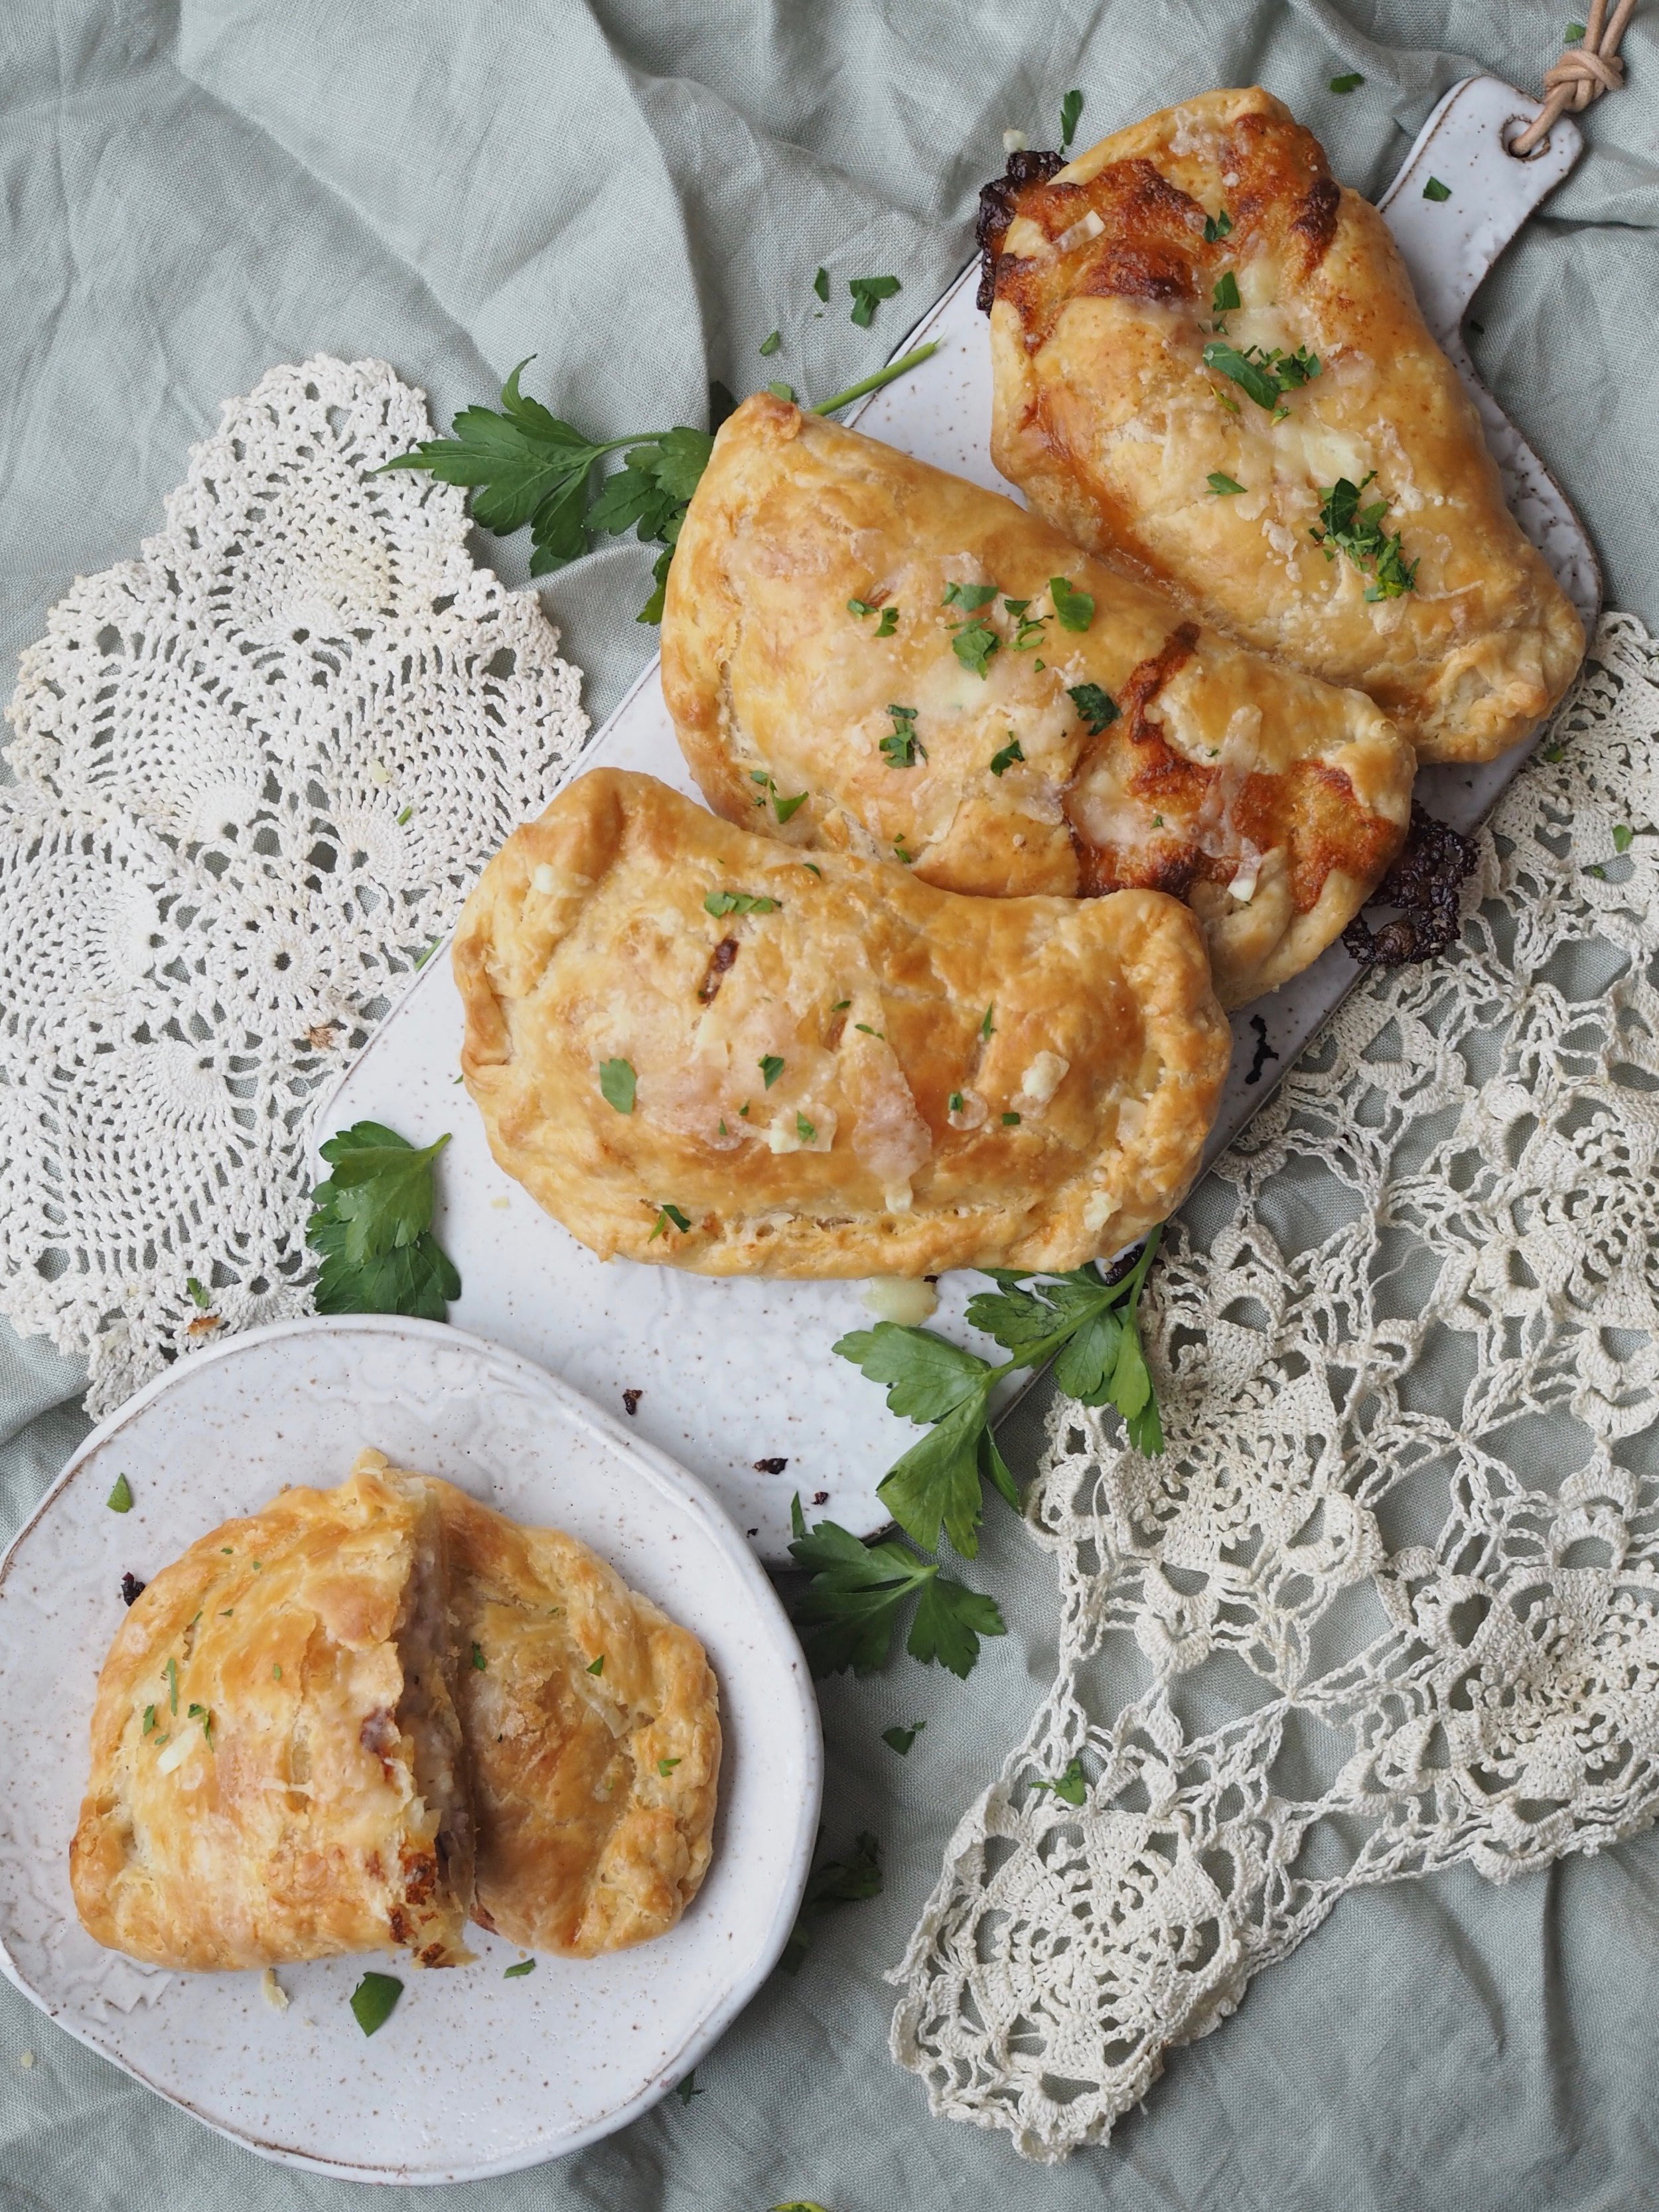

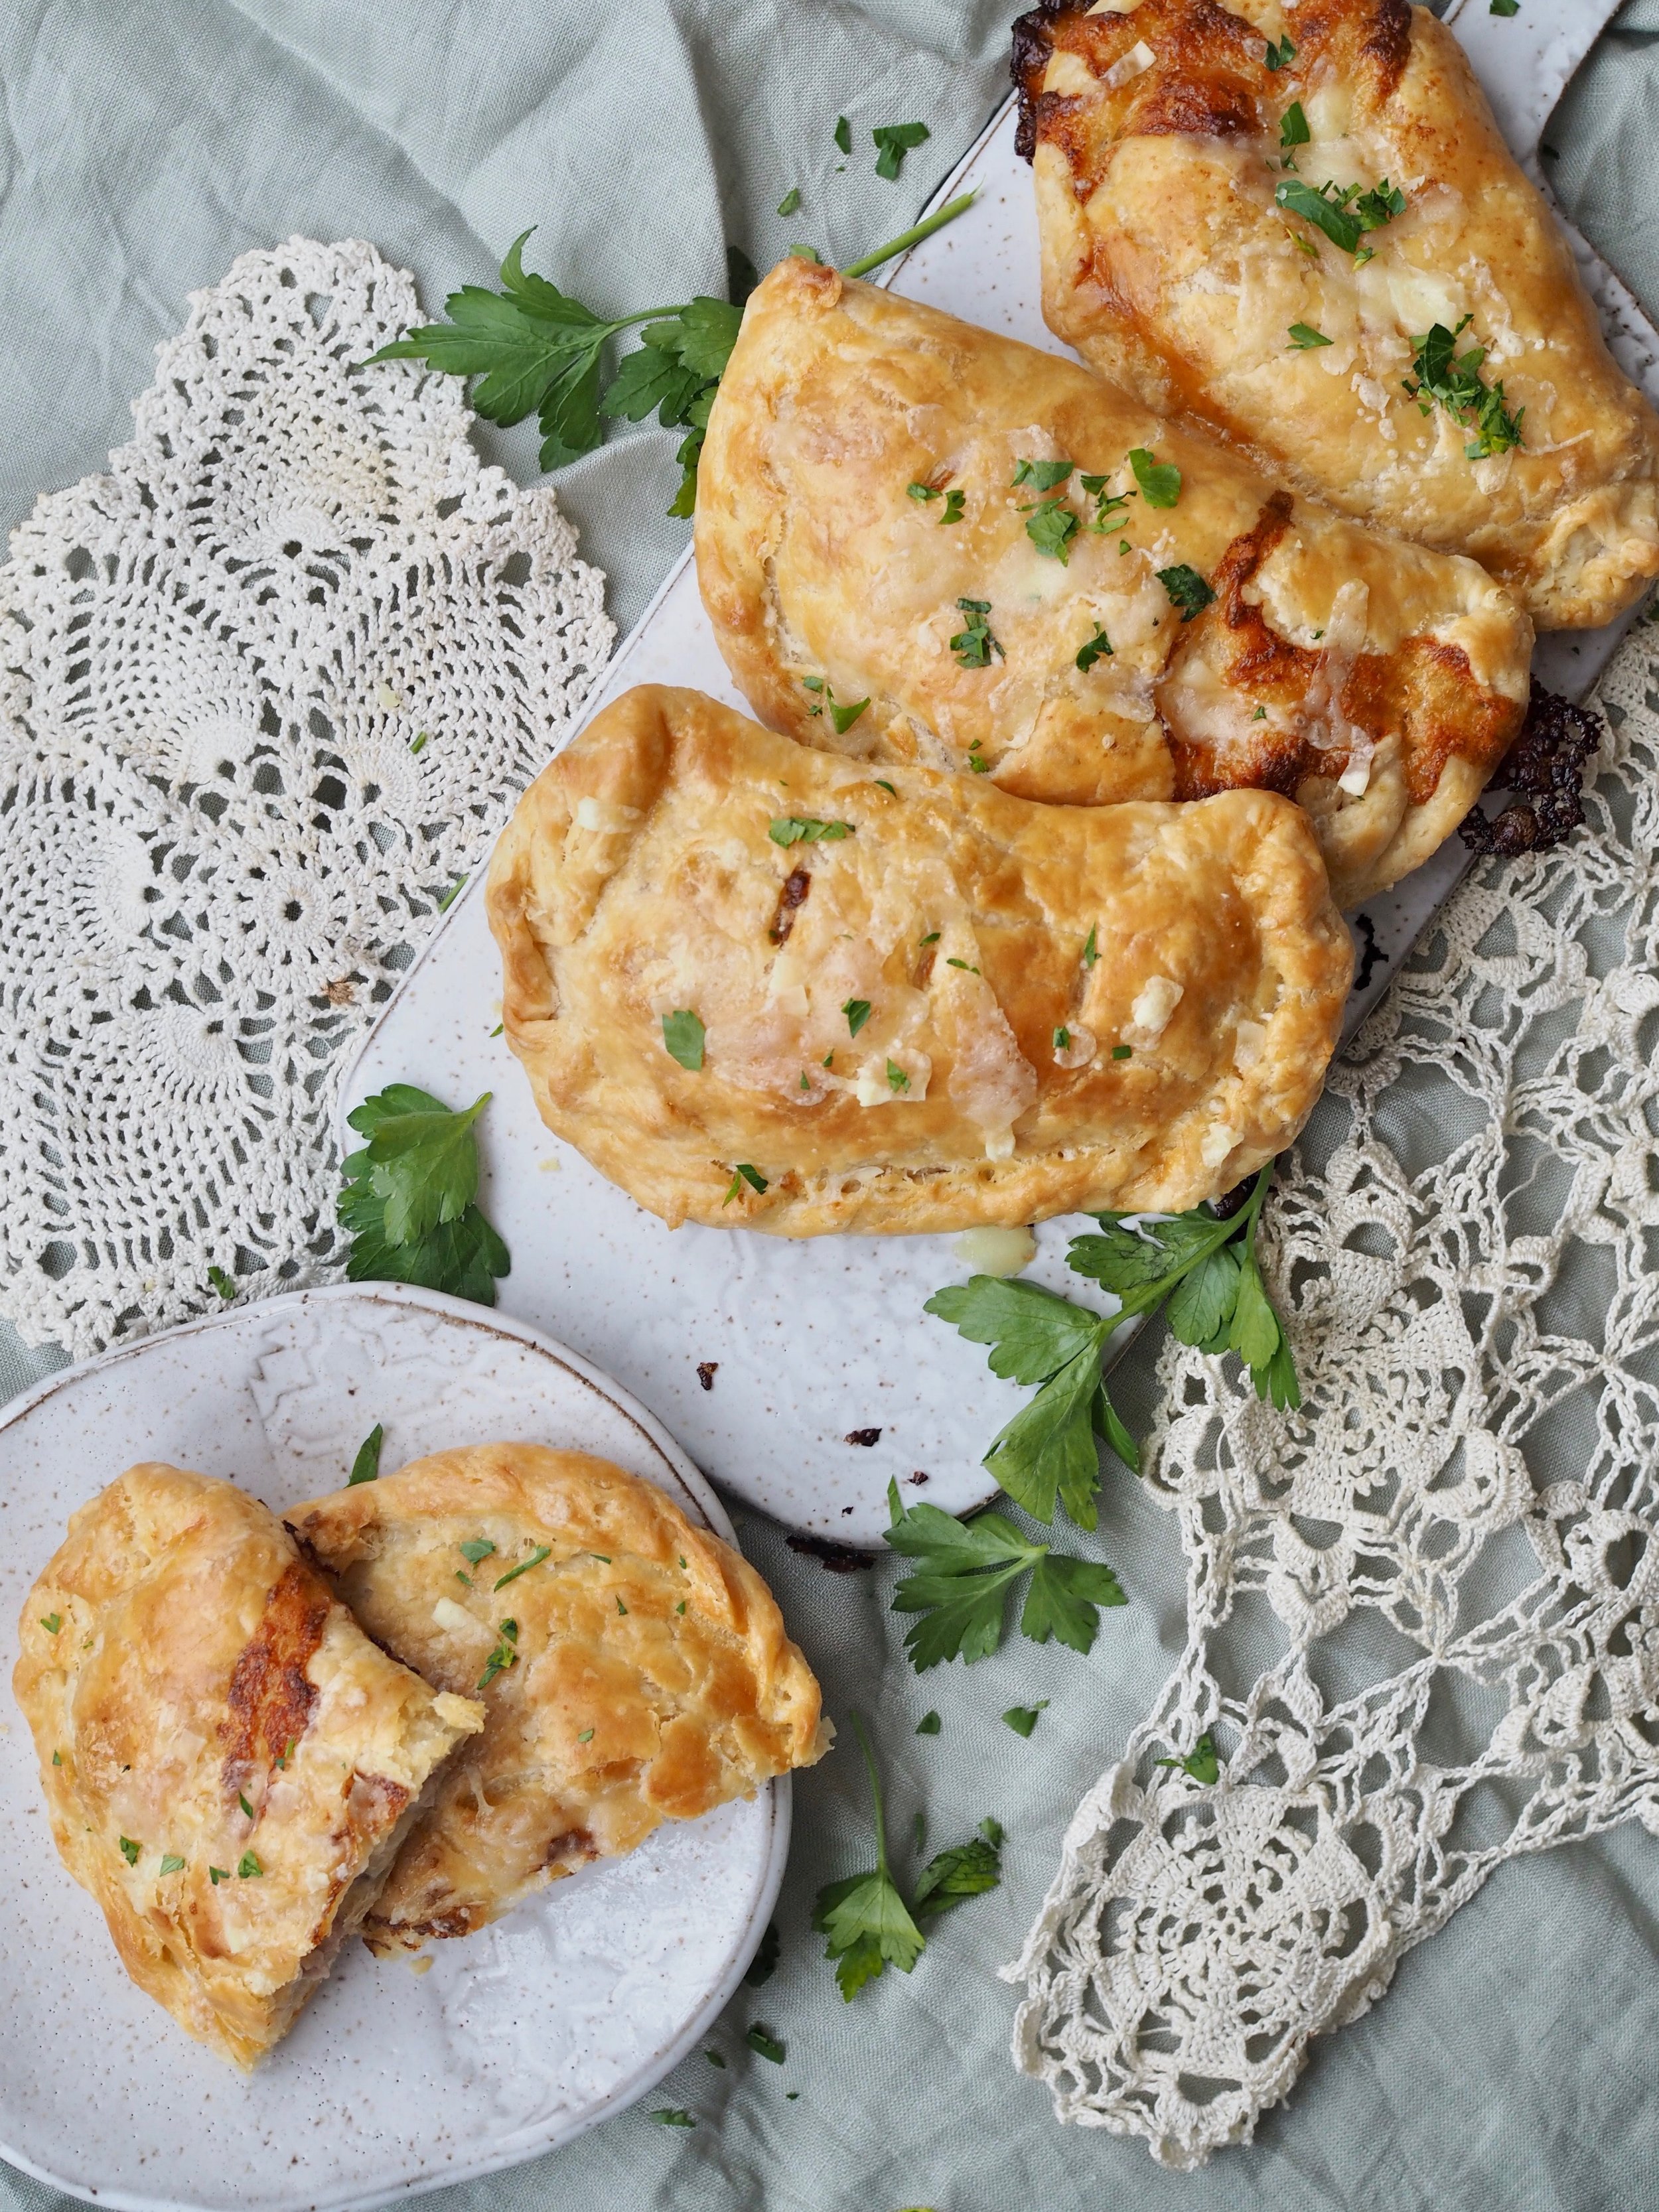
We've fallen in love with the croque monsieur in our household. The croque monsieur, a grilled sandwich featuring ham, Gruyere cheese and béchamel sauce originated in the brasseries of France as a hearty snack or light meal. You can turn the sandwich into a croque madame with the addition of a fired egg on top (health food, this is not). For the Cleaver family, the addition of ham and sauce take the grilled cheese to a dinner-worthy level, so when it came time to come up with a savory pie for my annual pie-luck, rec-creating this sandwich in pie form seemed like a no-brainer.
Typically, I use shortening in my pie crusts for it's ease of use, but for a French inspired recipe, I had to use butter. Instead of fully incorporating the butter into the dough ("the damp sand" look), I suggest leaving a few beads of butter intact, which, when rolled flat into the rounds, leaves pockets of butter to create an almost puff-pastry like crust. Make sure to chill the dough before rolling for maximum flakiness.
Since I originated this recipe for an event were there was 11 pies for 7 people, I went light on the filling. To use as a main dish, simply double the ham and cheese. The béchamel sauce should be sufficient to cover both amounts.
Croque Monsieur Handpies
Crust
- 3 cups all-purpose flour
- 1 1/2 teaspoons salt
- 2 sticks unsalted butter (cold)
- 2/3 to 3/4 cup cold water
Filling*
- 6 oz sliced ham, diced into small pieces*
- 6 oz Gruyere cheese, shredded*
- Fresh parsley (optional)
*filling sized for appetizer portions, for a meal-sized pie, double the filling
Béchamel Sauce
- 1 1/4 cup milk
- 3 Tablespoons all-purpose flour
- 2 Tablespoons butter
- 1 pinch nutmeg
- 1 pinch pepper
- salt to taste
Directions
Preheat oven to 350 Degrees F.
Make crust. In a large mixing bowl, combine flour and salt. Using a pastry cutter or food processor, cut in shortening until mixture mostly resembles damp sand, leaving a few small pea-sized chunks of butter. Add water, a little bit at a time, until dough sticks together. You will want it slightly more elastic than crust for a pan pie. Break dough into two evenly sized pieces, wrap in plastic wrap, and place in refrigerator up to a day in advance.
Make béchamel sauce. Melt butter in a saucepan over medium heat. When butter starts to bubble, add flour and whisk until combined, mixture will be clumpy. Cook flour mixture (roux) for 2 minutes. Slowly add milk, whisking constantly to break up any clumps and prevent scalding for approximately 8 minutes, or until sauce is a thick consistency. Pour into a bowl and set aside to cool.
Make filling. IN a bowl, combine 3/4 of the shredded cheese, the diced ham, and enough béchamel sauce to thoroughly coat the filling.
Line two rimmed cookie sheets with parchment paper.
Remove crust from refrigerator. Cut each ball of dough into four equal pieces. On a well-floured surface, roll each piece of dough into a 7 to 8 inch square. Place dough on cookie sheet. Scoop filling into the center of the square making sure to avoid the edges.
Fold dough over filling, so top portion of crust is about 1/4 inch shy of the edge of the bottom. Fold up bottom crust to meet top crust and pinch/crimp to seal. Slice a few holes in the top to let steam escape. Repeat for remaining pies.
Whisk together 1 egg with 1 Tablespoon water. Brush egg wash generously over pies.
Place cookie sheets in oven and bake for 45-50 minutes, until filling bubbles and crust is golden brown, rotating pans halfway through cooking time.
To serve, sprinkle on remaining shredded cheese. Broil briefly to melt cheese. Sprinkle finely chopped parsley on top (optional) and eat warm.
To store, cool completely on a wire rack, wrap in tin foil and place in refrigerator for up to one week. To reheat for 10-15 minutes in a 350 degree F oven.
To print, see button at bottom of post.

Croque Monsieur Handpies
Serves 8 Ingredients: 3 cups all-purpose flour, melted 1 1/2 teaspoons salt, 2 sticks unsalted butter, 6 oz sliced ham, 6 ox gruyere cheese, 1 1/4 cup milk, 2 tablespoons flour 2 tablespoons butter nutmeg pepper parsleyGluten Free White Chocolate Raspberry Tart with Coconut and Lime

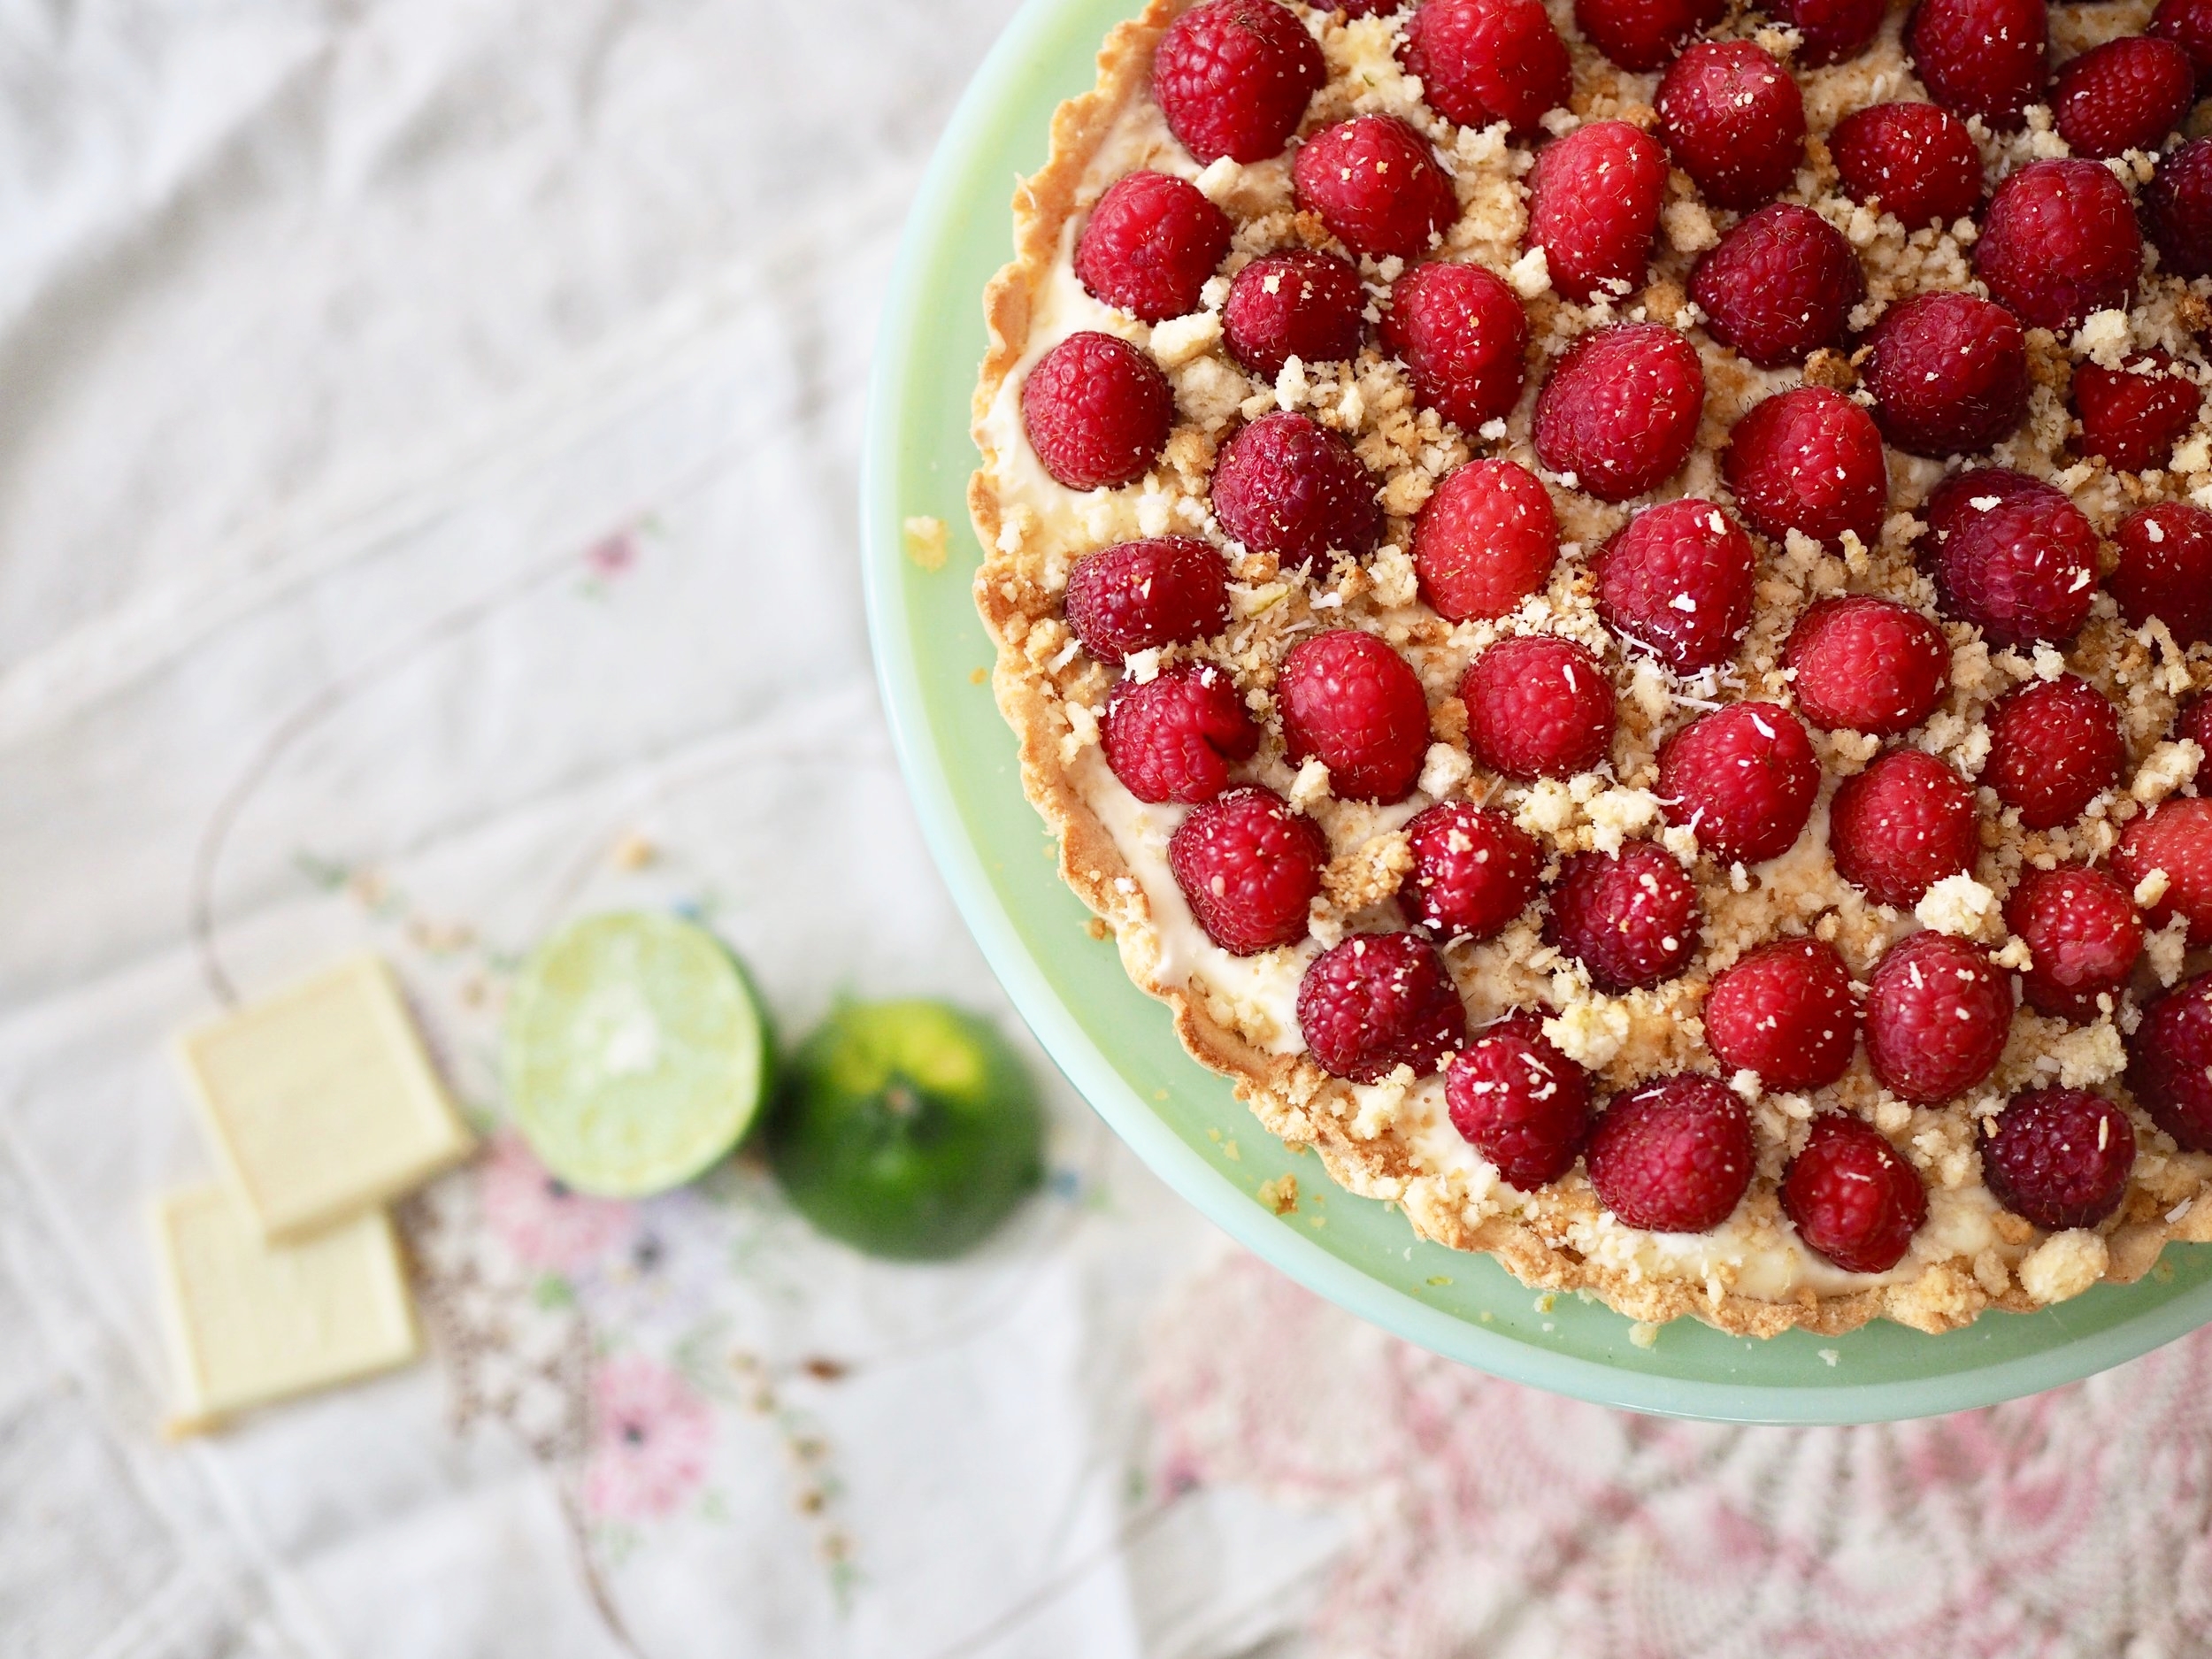
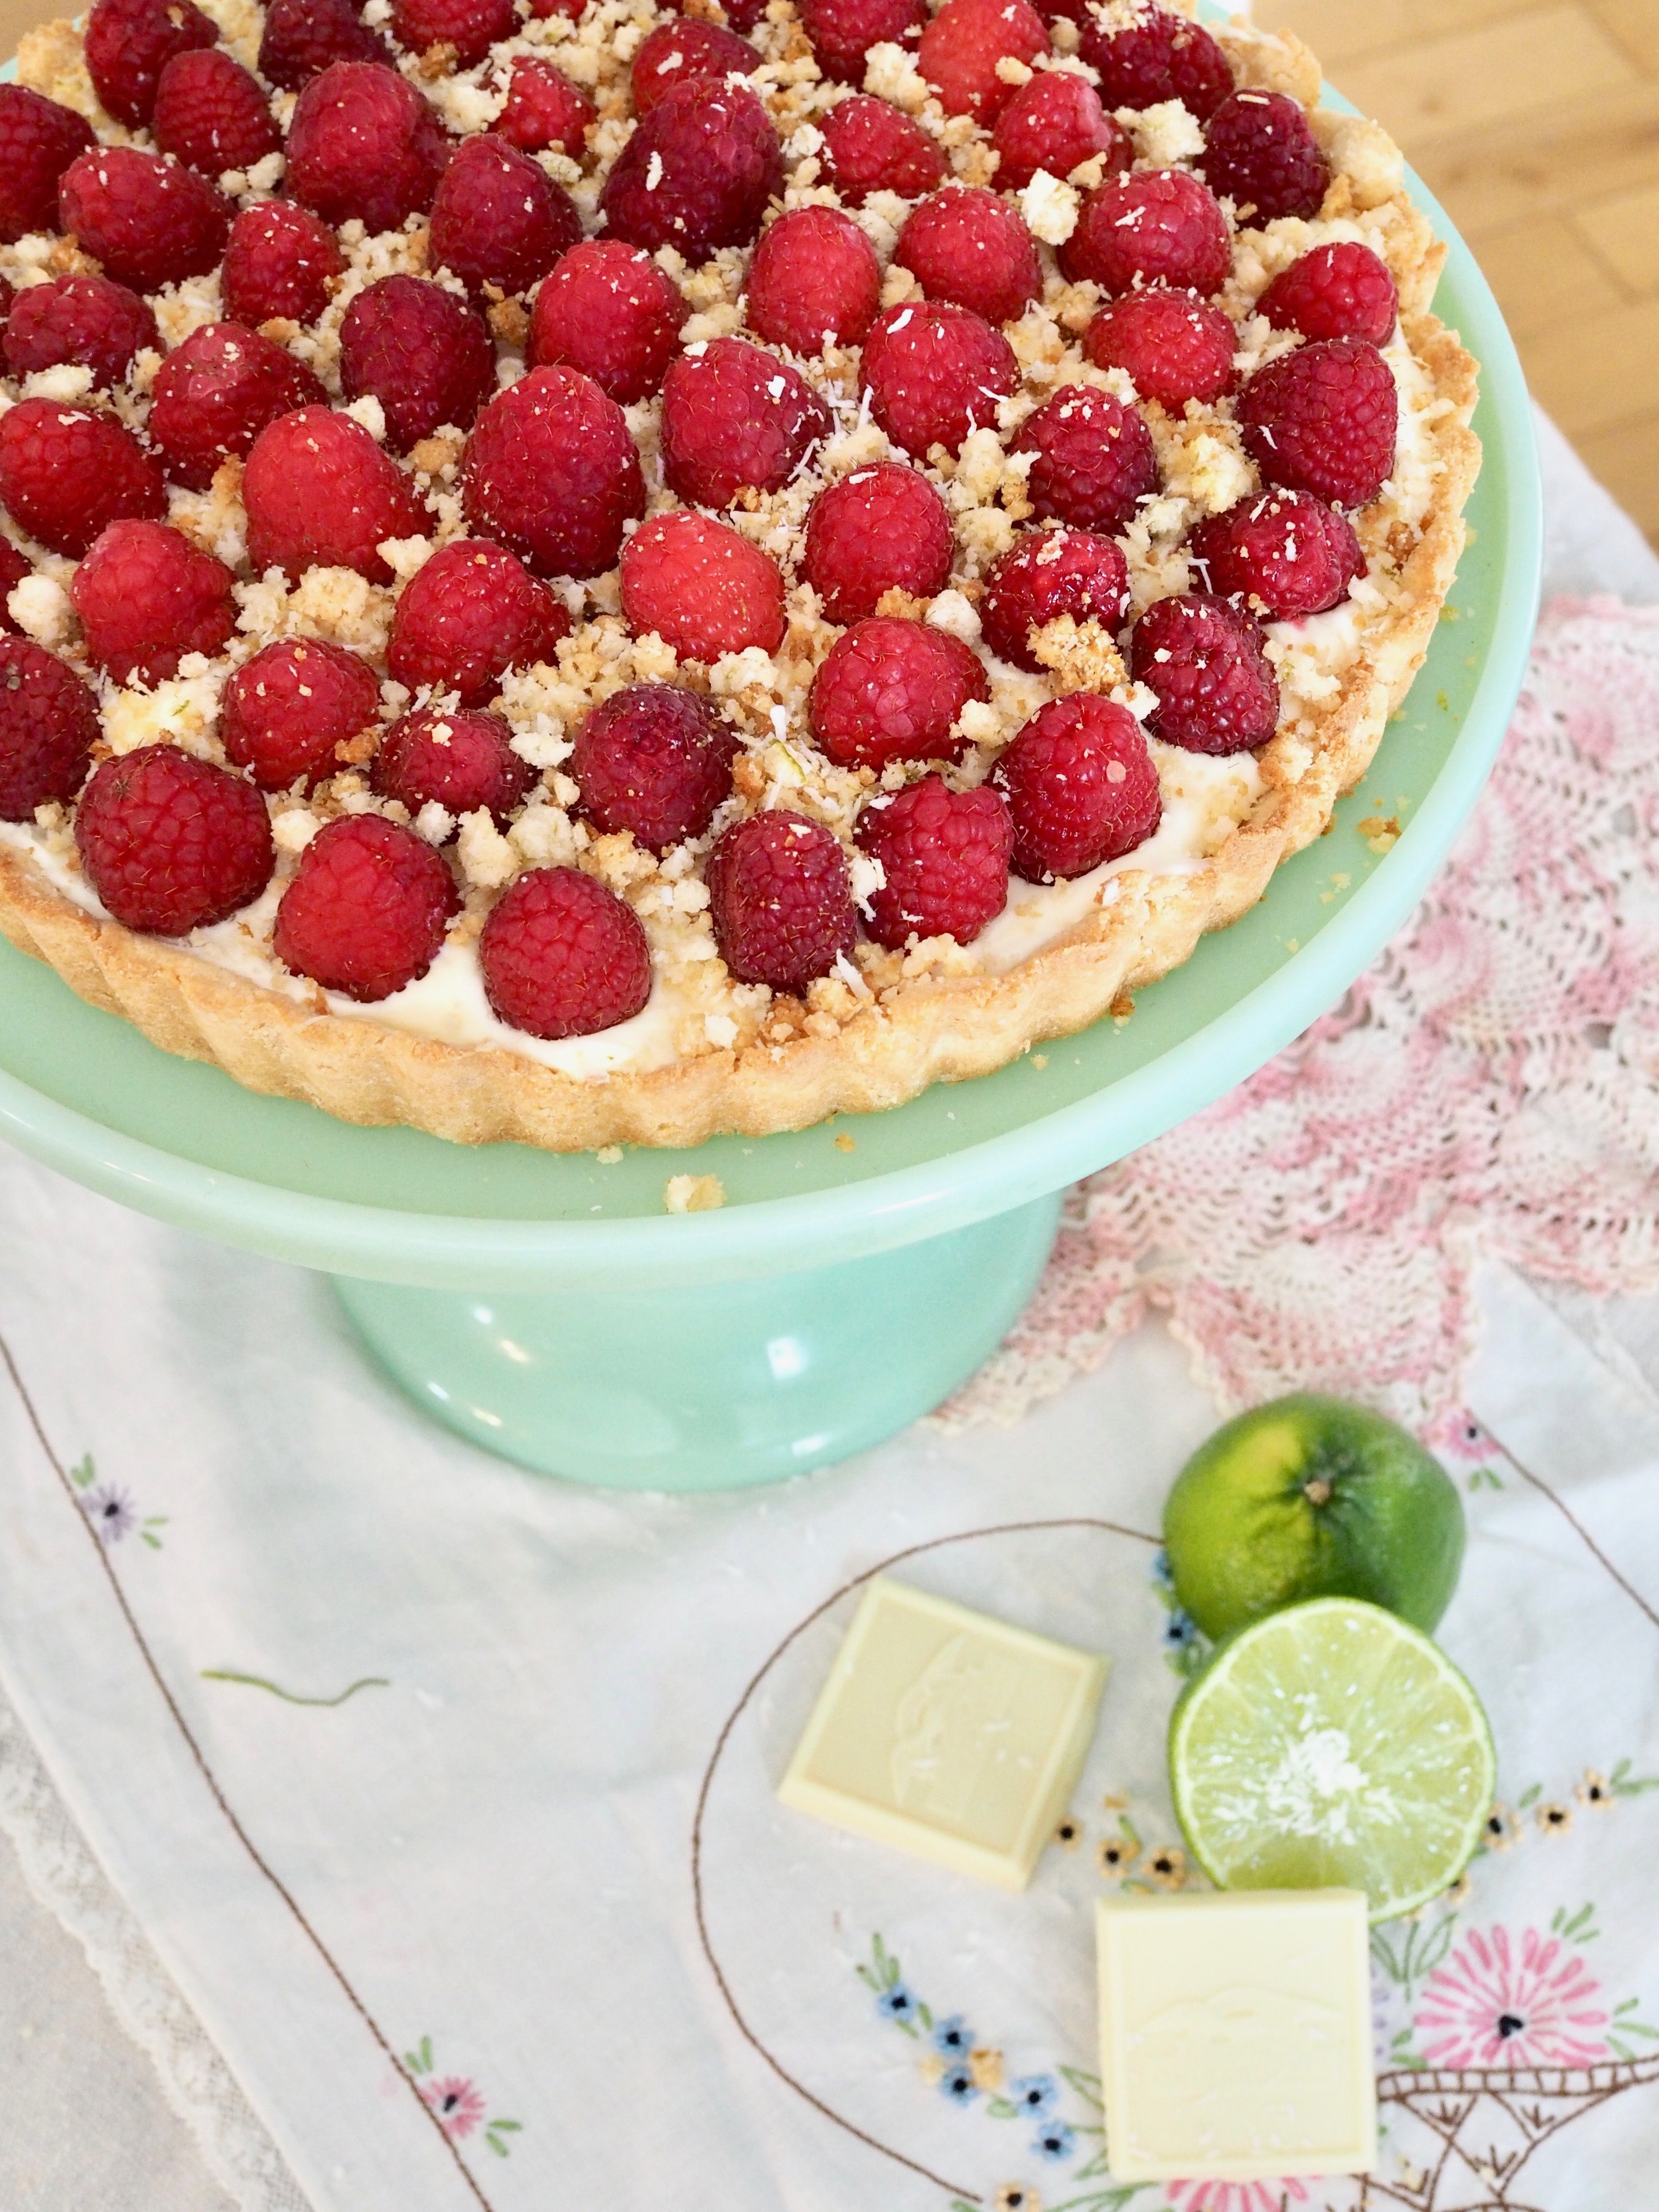
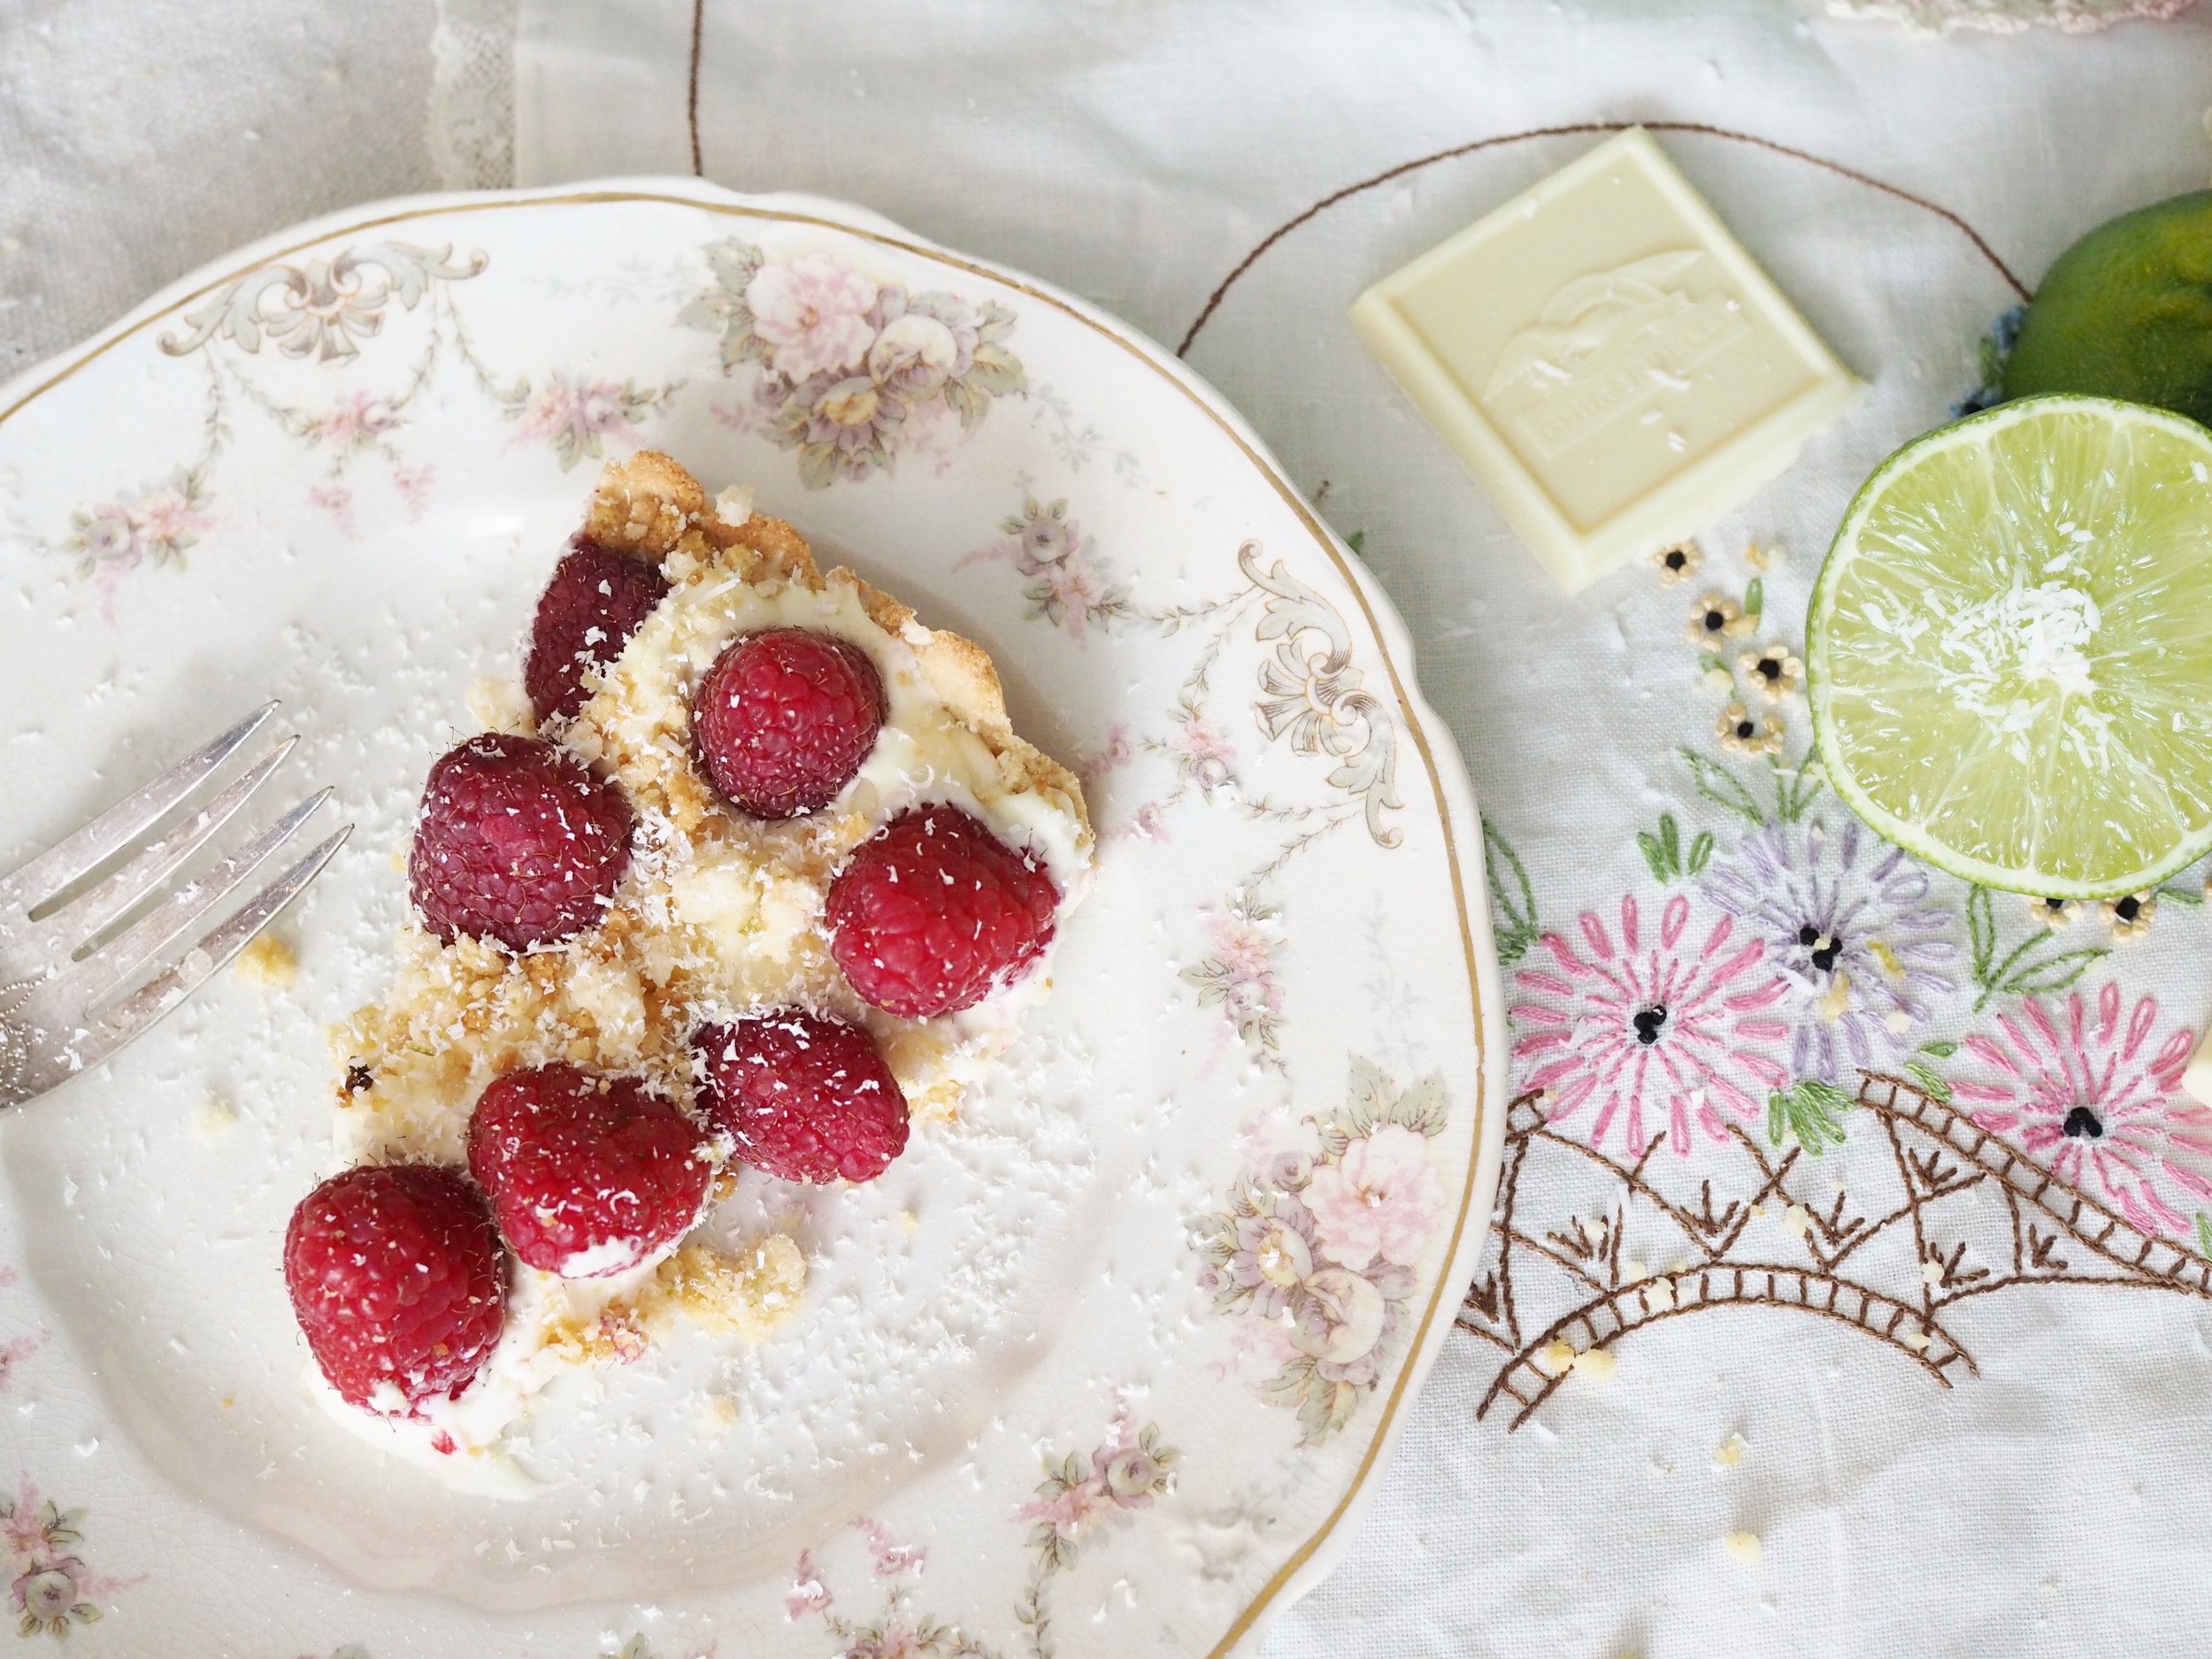
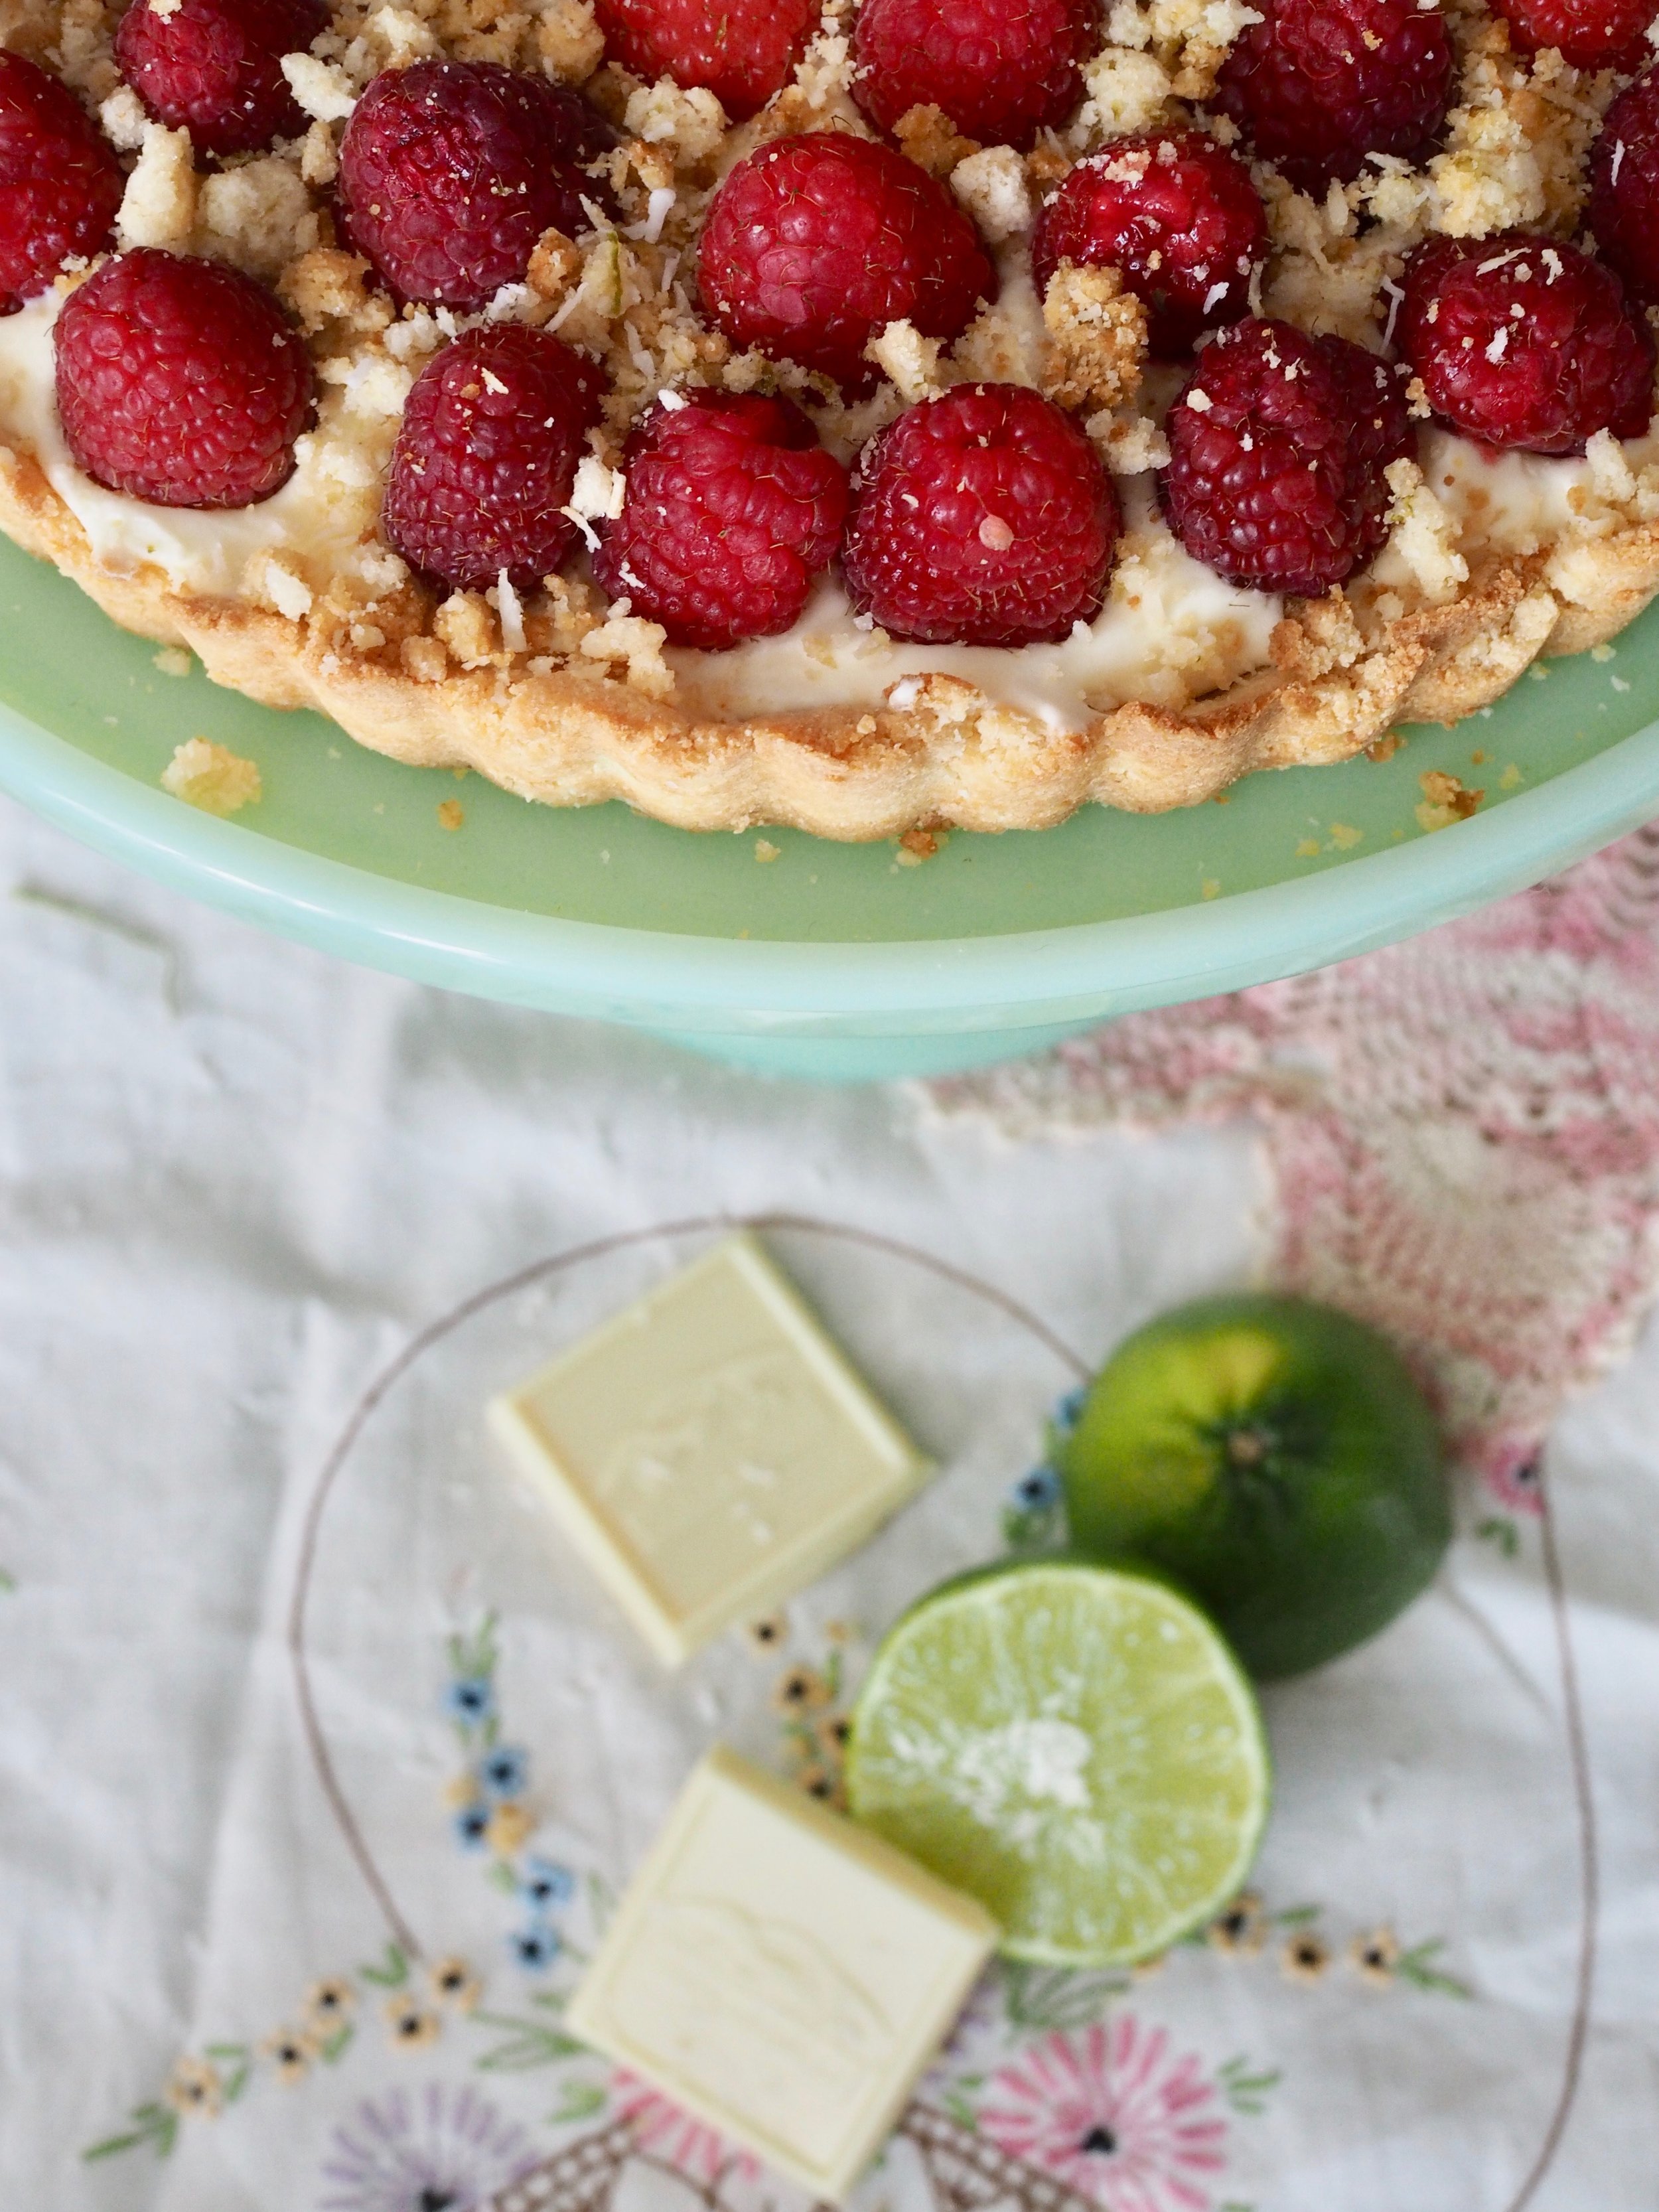
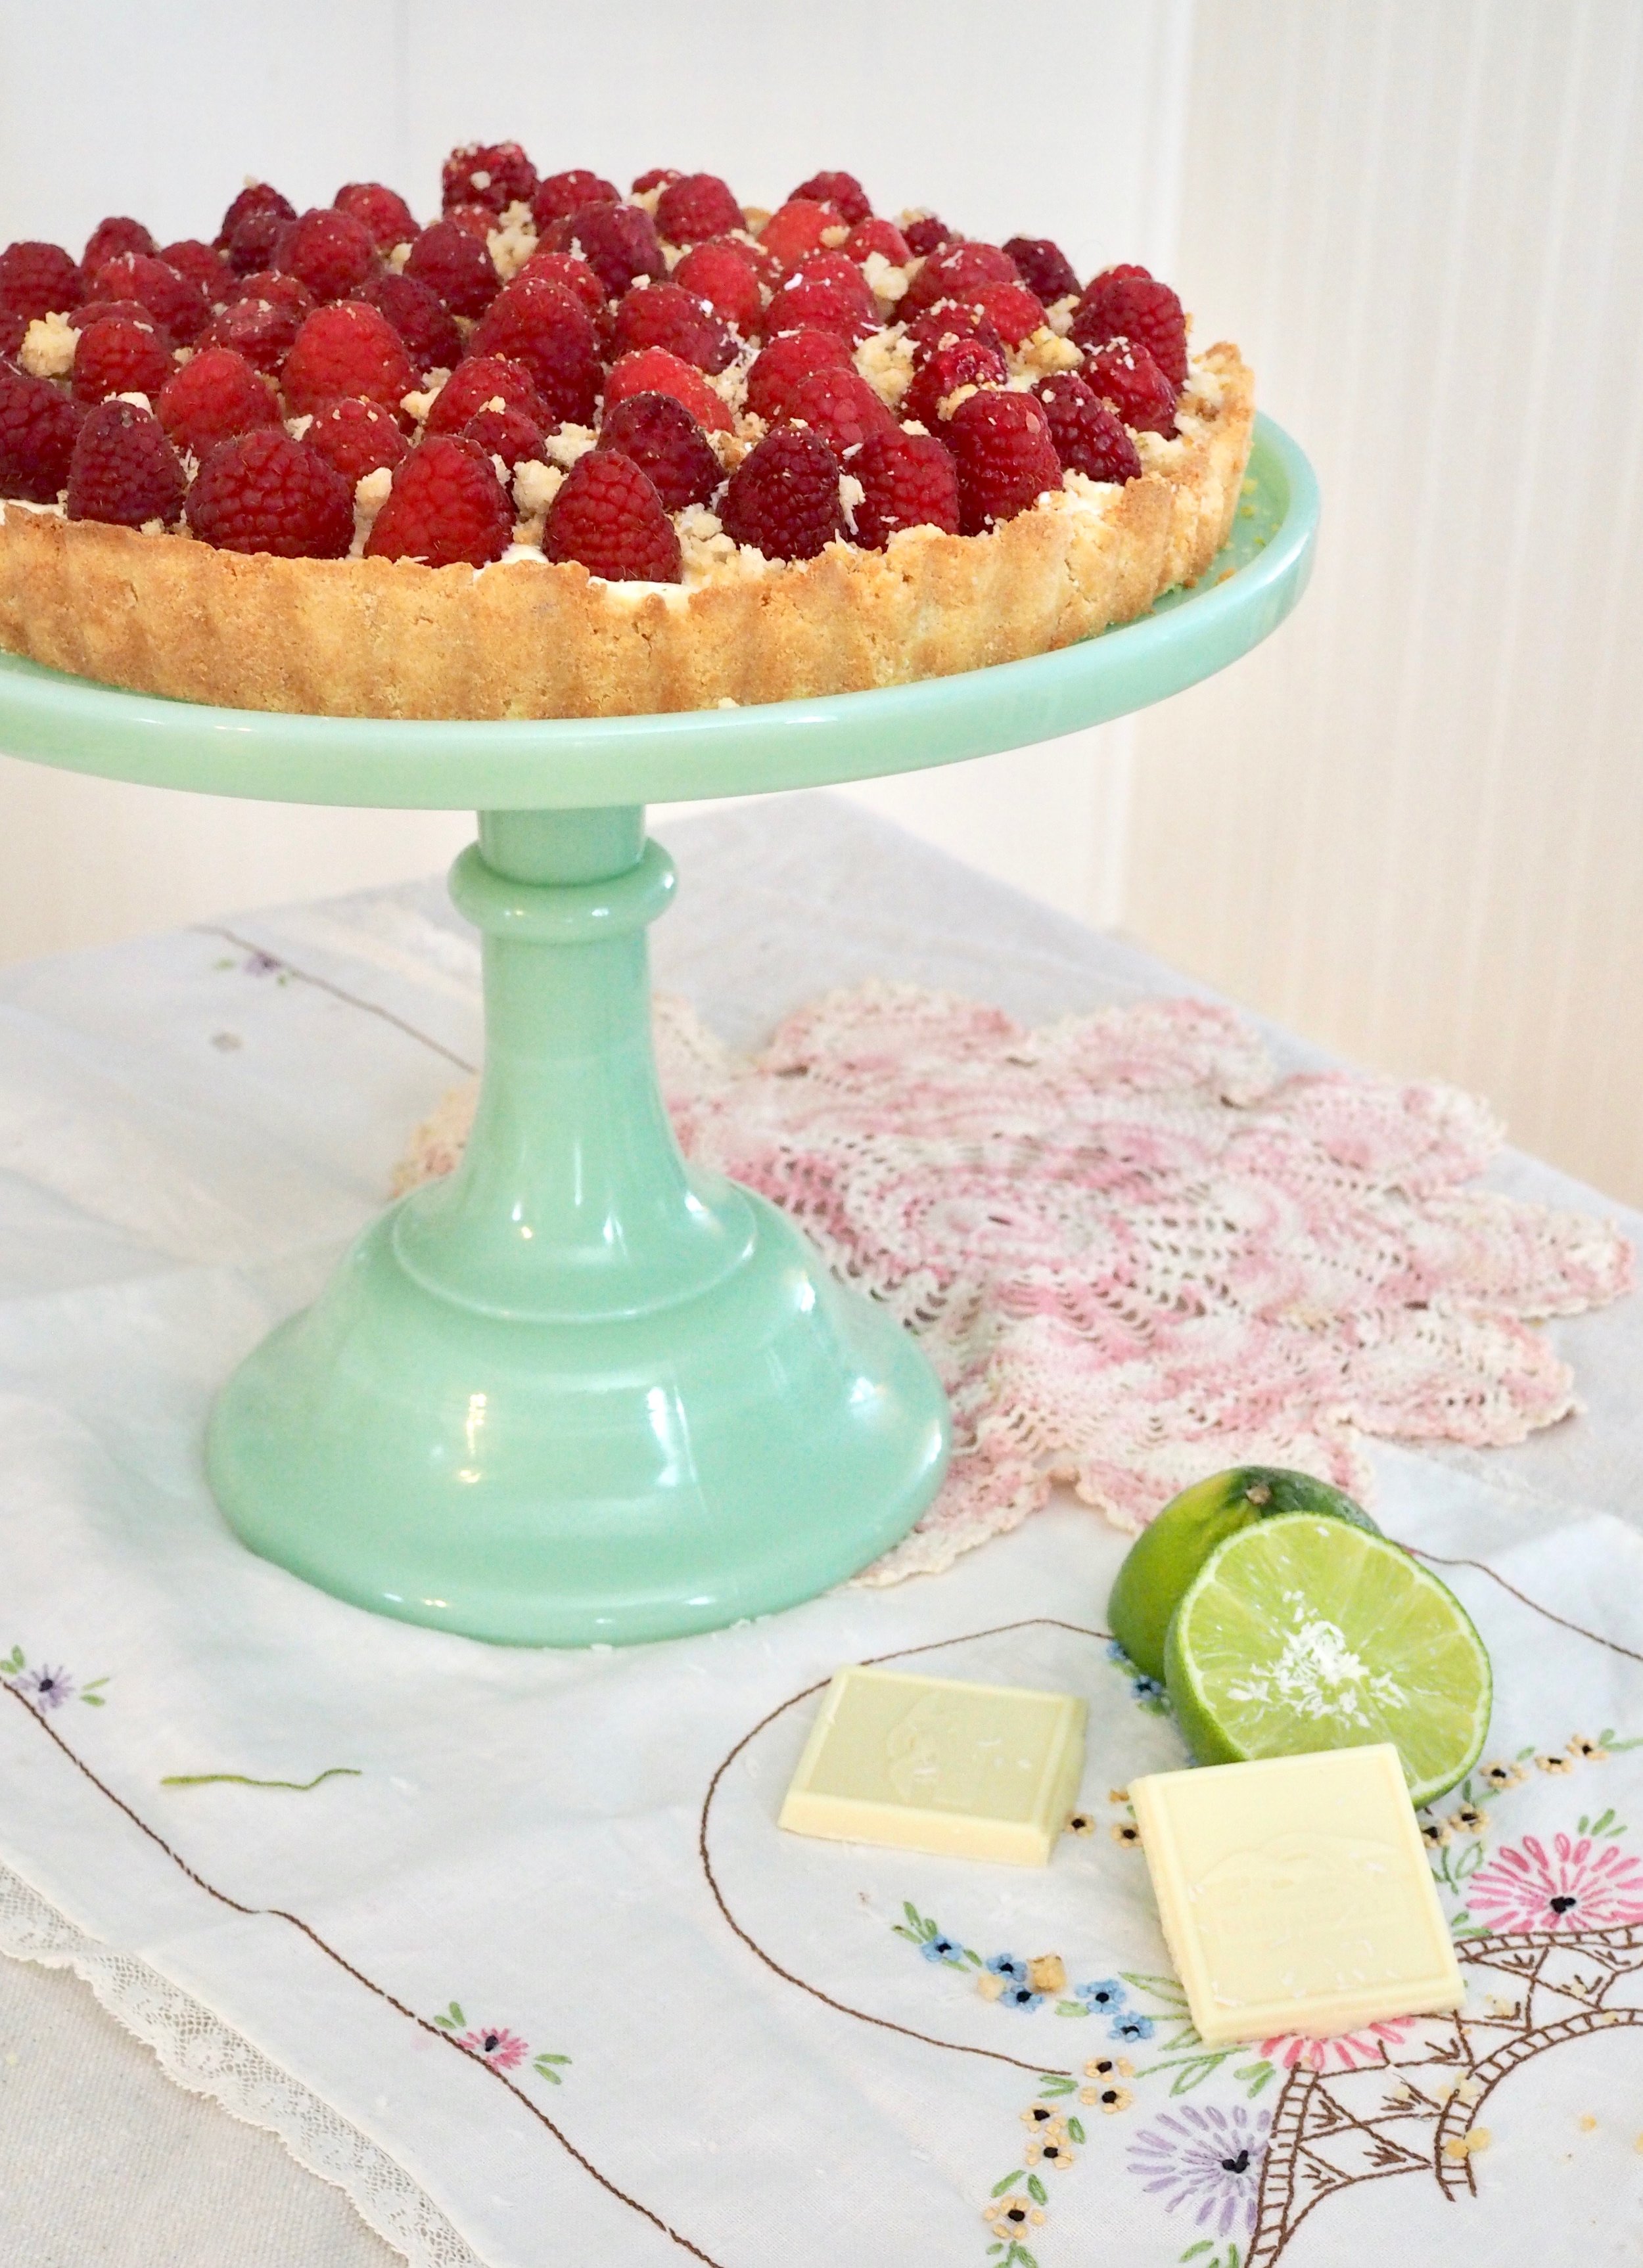
I use my annual National Pie Day potluck to expand my pie-making skills. Fueled by a desire to work with white chocolate, I came up with this show-stopping tart with a coconut flour crust, white chocolate mousse filling, and topped with fresh raspberries and a coconut lime streusel, which just happens to be gluten-free.
I'm not gluten-free myself, but I have many friends who are, and the pressed-into-the-pan crust used here is easy for a gluten-free beginner. The coconut flour, with its subtle coconut flavor compliments the bright flavors of the lime and raspberries, even if you aren't gluten -free.
White Chocolate Raspberry Tart with Coconut and Lime (Gluten Free)
Crust
- 1/3 cup unsalted butter, melted
- 2 eggs
- 1/4 teaspoon sea salt
- 3/4 cup coconut flour
Lime/Coconut Streusel
- 1/2 cup coconut flour
- 1/4 cup shredded, unsweetened coconut
- 1/3 cup granulated sugar
- 4 Tablespoons (1/2 stick) melted butter
- Zest and juice of one lime
White Chocolate Mousse
- 7 ounces white chocolate, chopped into very small pieces
- 2 egg yolks
- 2 tablespoons sugar
- 1 1/4 cup heavy cream
Topping
· 12 oz Fresh Raspberries
Directions
Preheat oven to 320 Degree F.
Make crust. In a large mixing bowl, combine flour and salt. In a separate bowl, beat together eggs and melted butter. Combine wet and dry ingredients until a dough forms. Pat dough into a 9” greased pie or tart pan. Prick crust all over with a fork.
Bake crust for 10 minutes, cover edges with foil and bake for another 10-15 minutes until golden brown. Remove crust from oven and cool completely before filling.
Make Streusel. Combine streusel ingredients, adding lime juice until mixture clumps nicely. Spread streusel on a lined cookie sheet and bake for 12-15 minutes, stirring occasionally, until evenly browned. Set aside.
Make Mousse. In a saucepan, whisk together 1/4 cup of the cream, eggs yolks and sugar. Cook over medium-low heat for 3-4 minutes, stirring constantly, until mixture is thick enough to coat the back of a spoon. Remove from heat and whisk in chopped chocolate. Strain through a sieve into a bowl and chill until cool.
Beat remaining cream until stiff peaks form. (If doing this by hand, chill your bowl, cream and whisk in the freezer before you start). Stir half the cream into the chocolate mixture, then gently fold the remaining whipped cream in.
Scoop mousse into completely cooled pie crust, cover, and chill at least thirty minutes and up to overnight.
Bring pie out approximately 30 minutes prior to serving. Line top of pie with fresh raspberries and sprinkle streusel on generously (you will use about half the streusel – use the rest to top yogurt, pancakes, etc.) Top pie with grated white chocolate (optional). Serve at room temperature.
To print, see button at bottom of post.

White Chocolate Raspberry Tart with Coconut and Lime (Gluten Free)
Serves 8 Ingredients: 1/3 cup unsalted butter, melted 2 eggs 1/4 tsp sea salt 1 1/4 cup coconut flour 1/4 cup shredded unsweetened coconut 1/3 cup granulated sugar 4 tablespoons salted butter, melted lime 7 oz white chocolate 2 egg yolks 1 1/4 cup heavy creams 12 oz fresh raspberries


Lemon Lavender Poundcake Recipe

To say I have a love affair with putting citrus in my baked goods, would be putting it mildly. I generally feel that there are few things that aren't improved by bit a fresh zest, and this poundcake definitely falls into the better zesty category. With some added flavor from honey and aromatics from the inclusion of lavender buds, this is the perfect spring dessert. Not too sweet, with an excellent crumb, and easy to transport to your next picnic.
To print, see button at bottom of post.
Lemon Lavender Poundcake
(serves 8)
- 3 large eggs -room temperature
- 3 Tbl milk
- 1 1/2 tsp vanilla
- 1 1/2 cups cake flour (or 1 cup + 5 Tbl all purpose flour + 3 Tbl cornstarch)
- 3/4 cup granulated sugar
- Zest of one lemon
- 3/4 tsp baking powder
- 1/4 tsp salt
- 13 Tbl (1 stick + 5 Tbl) unsalted butter - room temperature
- Confectioner's sugar (less than a cup)
Lavender Lemon Syrup
- 1/4 cup fresh lemon juice
- 4 Tbl honey
- 2 Tbl granulated sugar
- 1 tsp dried lavender buds
Make lavender lemon syrup by combining sugar, lemon juice, and honey in a small pan over medium heat and stirring until sugars are dissolved. Pour syrup over lavender buds in a heat proof container and cover. Set aside.
Preheat oven to 350 Degrees Fahrenheit. Grease and flour a 6-cup loaf pan or line with parchment paper (preferred).
In a medium bowl, combine eggs, milk and vanilla. In a separate bowl, shift together cake flour, sugar, baking powder and salt. Add lemon zest to flour mixture and combine.
Add half of the egg mixture and all of the butter to the flour mixture. Beat with a wooden spoon until ingredients are moist and well combined. Butter should be mixed well, throughout with no visible chunks. Gradually add the egg mixture in two parts, combining each fully before adding the next. Batter will be very thick.
Scrape batter into prepared pan and spread evenly in container, smoothing the top.
Bake until a tester inserted in the center comes out clean and top is a golden brown, about 55 minutes.
After baking, remove cake from oven. Keeping the cake in the pan, place on a rack and poke all over with a wooden skewer or long toothpick. Strain lavender buds from syrup and brush strained syrup generously over the top of the cake.
Let cake sit in pan for 10 minutes, then remove and place on rack. Brush sides generously with syrup. reserving about 1/8 cup of syrup. Add confectioner's sugar Tablespoon by Tablespoon to reserved syrup until it forms a thick, opaque glaze.
When cake has cooled, place on serving platter and pour glaze on top. Decorate with lemon slices and lavender as desired. To store, wrap tightly in plastic wrap and keep at room temperature.


Lemon Lavender Poundcake Recipe
Serves 8 Ingredients: 3 large eggs -room temperature 3 Tbl milk 1 1/2 tsp vanilla 1 1/2 cups cake flour (or 1 cup + 5 Tbl all purpose flour + 3 Tbl cornstarch) 3/4 cup granulated sugar Zest of one lemon 3/4 tsp baking powder 1/4 tsp salt 13 Tbl (1 stick + 5 Tbl) unsalted butter - room temperature Confectioner's sugar (less than a cup) 1/4 cup fresh lemon juice 4 Tbl honey 2 Tbl granulated sugar 1 tsp dried lavender budsGreyhound in the Garden - Cocktail Recipe

We're just about to embark on a long weekend here in the States, so why not kick back and enjoy a bright and refreshing cocktail - not too sweet, not too boozy, with a hint of earthiness from the garden.
Greyhound in the Garden Cocktail
(makes 1 drink)
- 2 oz freshly squeezed grapefruit juice
- 1 1/2 oz gin
- 1/2 oz Rosemary Honey Syrup (see recipe below)
- Sprig of fresh rosemary for garnish (optional)
Stir all ingredients together and serve over ice, add rosemary for garnish as desired.
Rosemary Honey Syrup
- 1/2 cup granulated sugar
- 1/4 cup honey
- 1/2 cup water
- 2 sprigs fresh rosemary
Combine first three ingredients in a small saucepan and stir over medium heat until sugar dissolves completely. Add rosemary and simmer for 3 minutes. Remove from heat and remove rosemary sprigs. Pour syrup into a sterilized bottle or jar and refrigerate.

Greyhound in the Garden Cocktail Recipe
Makes 1 drink Ingredients: 2 oz grapefruit juice 1.5 oz gin .5 oz rosemary honey syrupCraving Spring

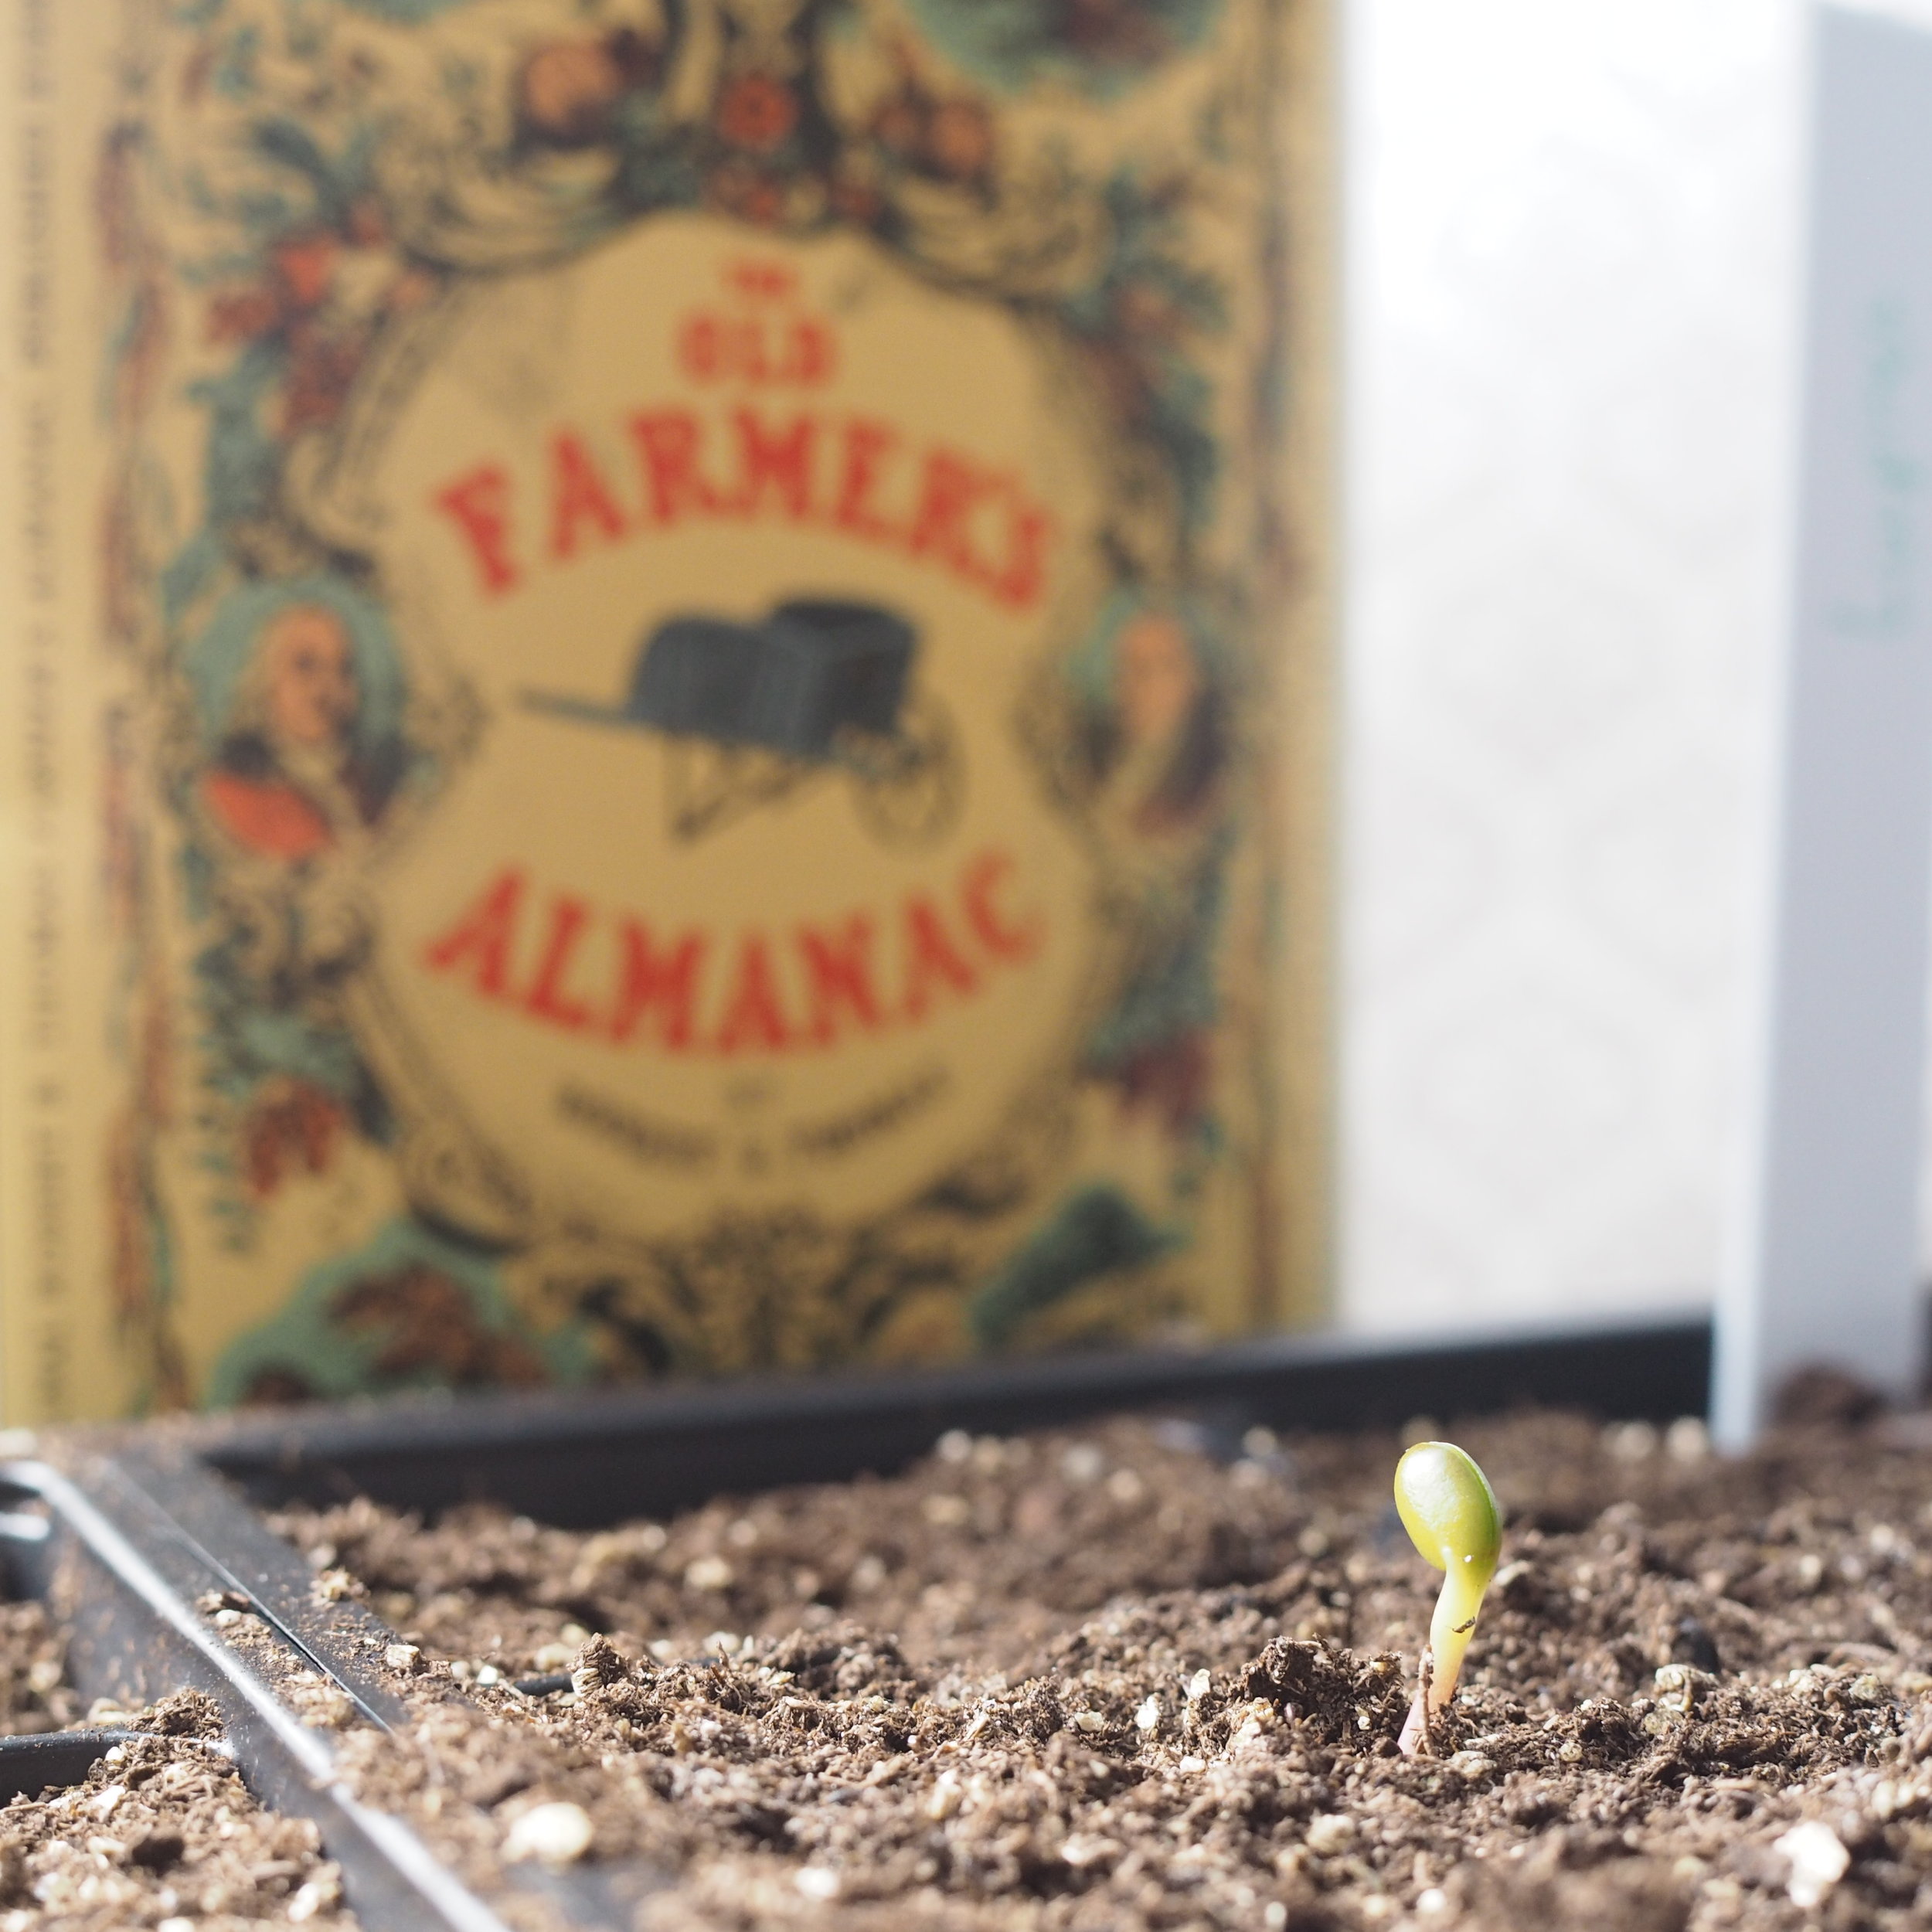
You might have heard we had a blizzard in Maine last week. My town ended up with 16" inches and while the shoveled spots have melted nicely since, the piles are still quite large.
But I'm thinking about spring anyway.
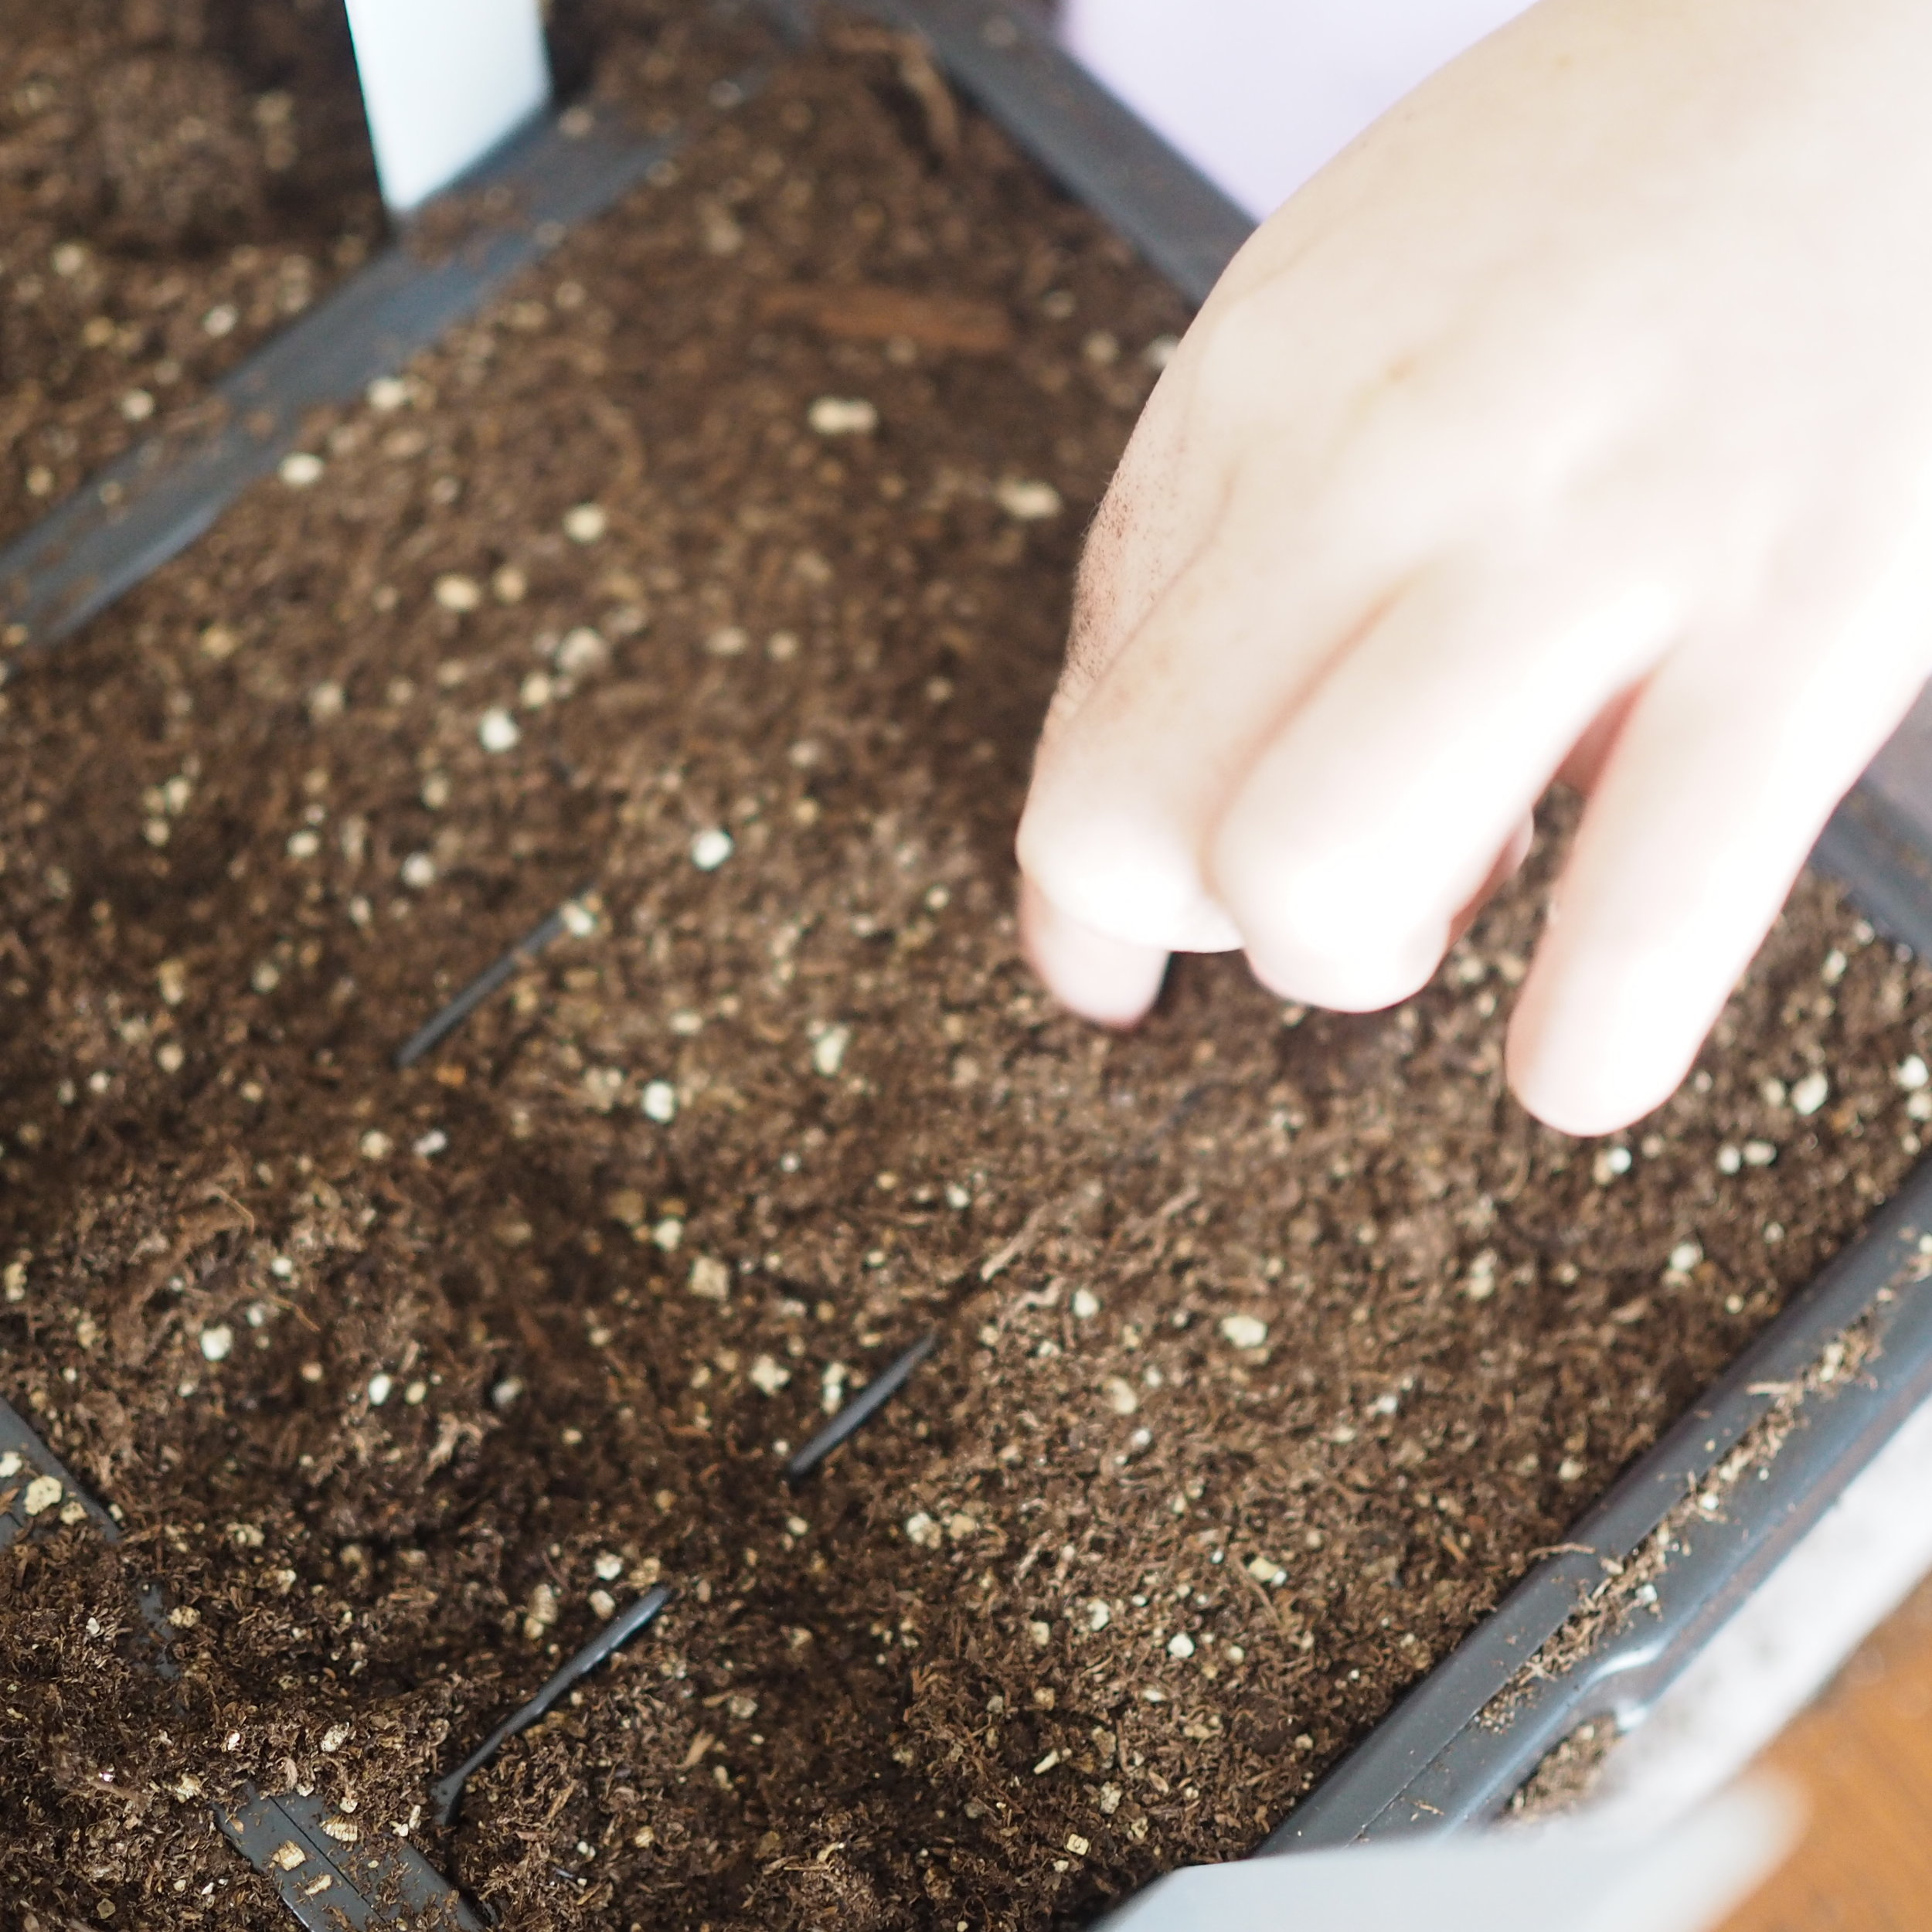
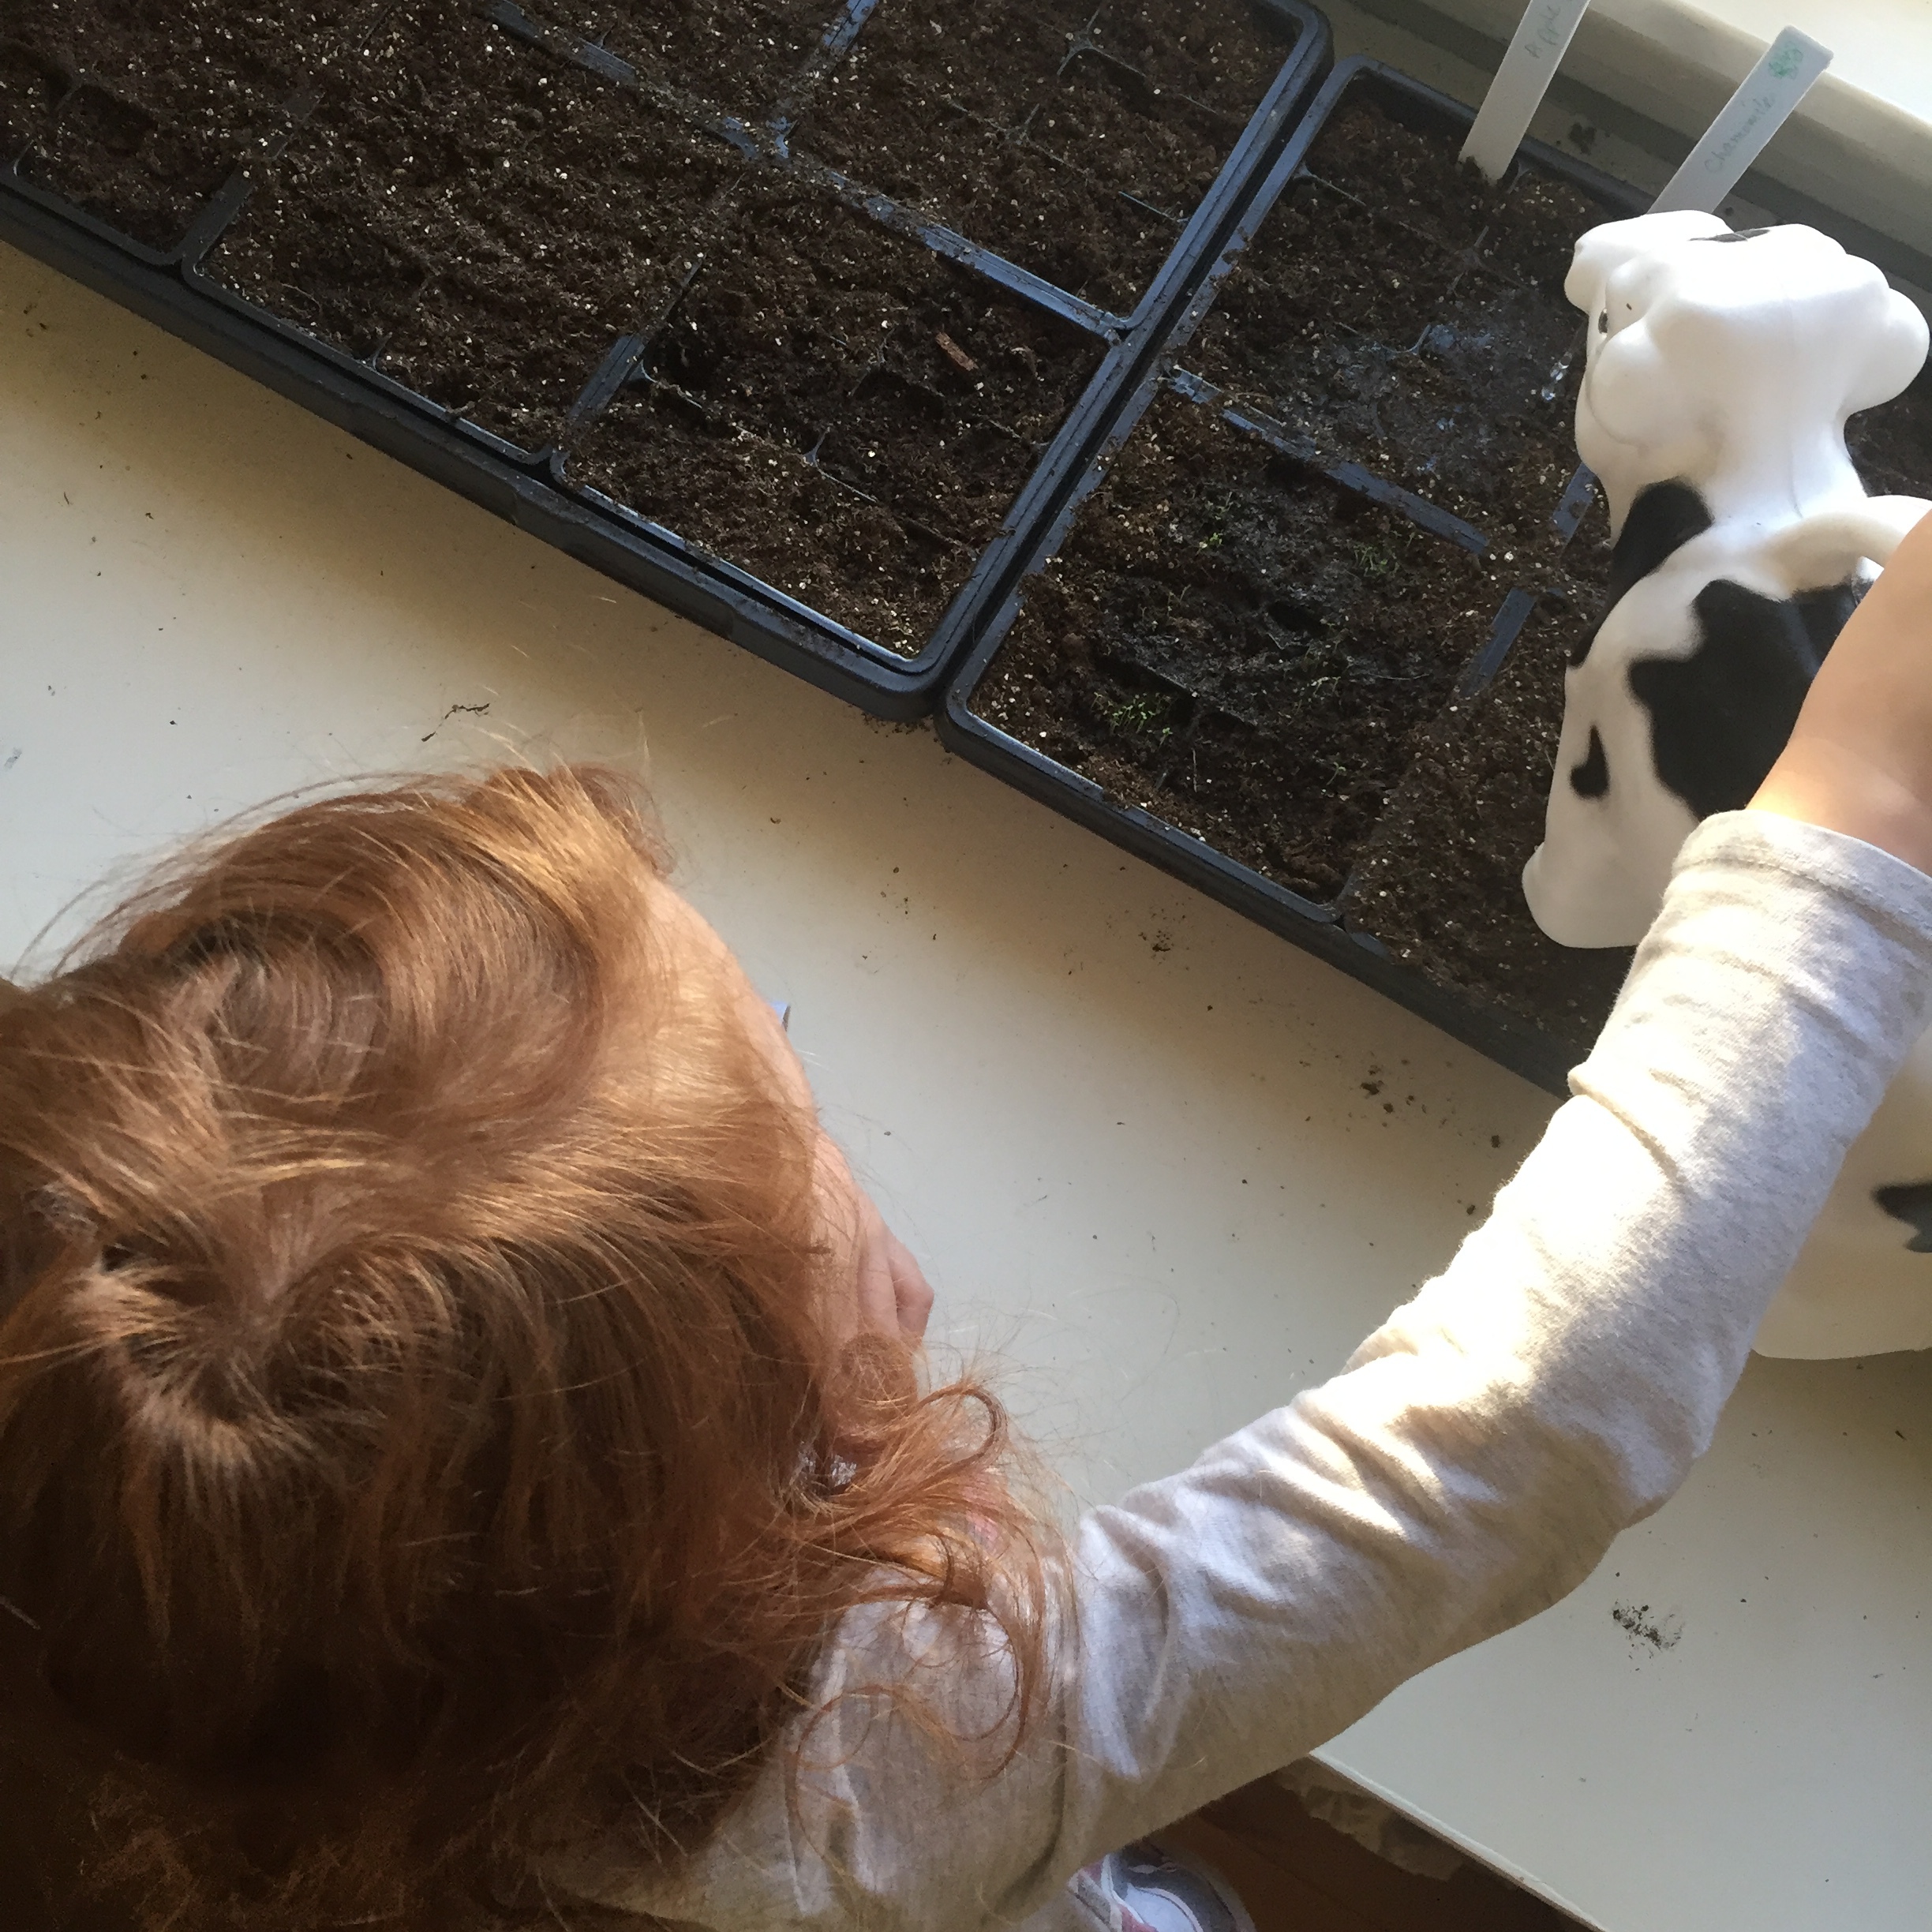
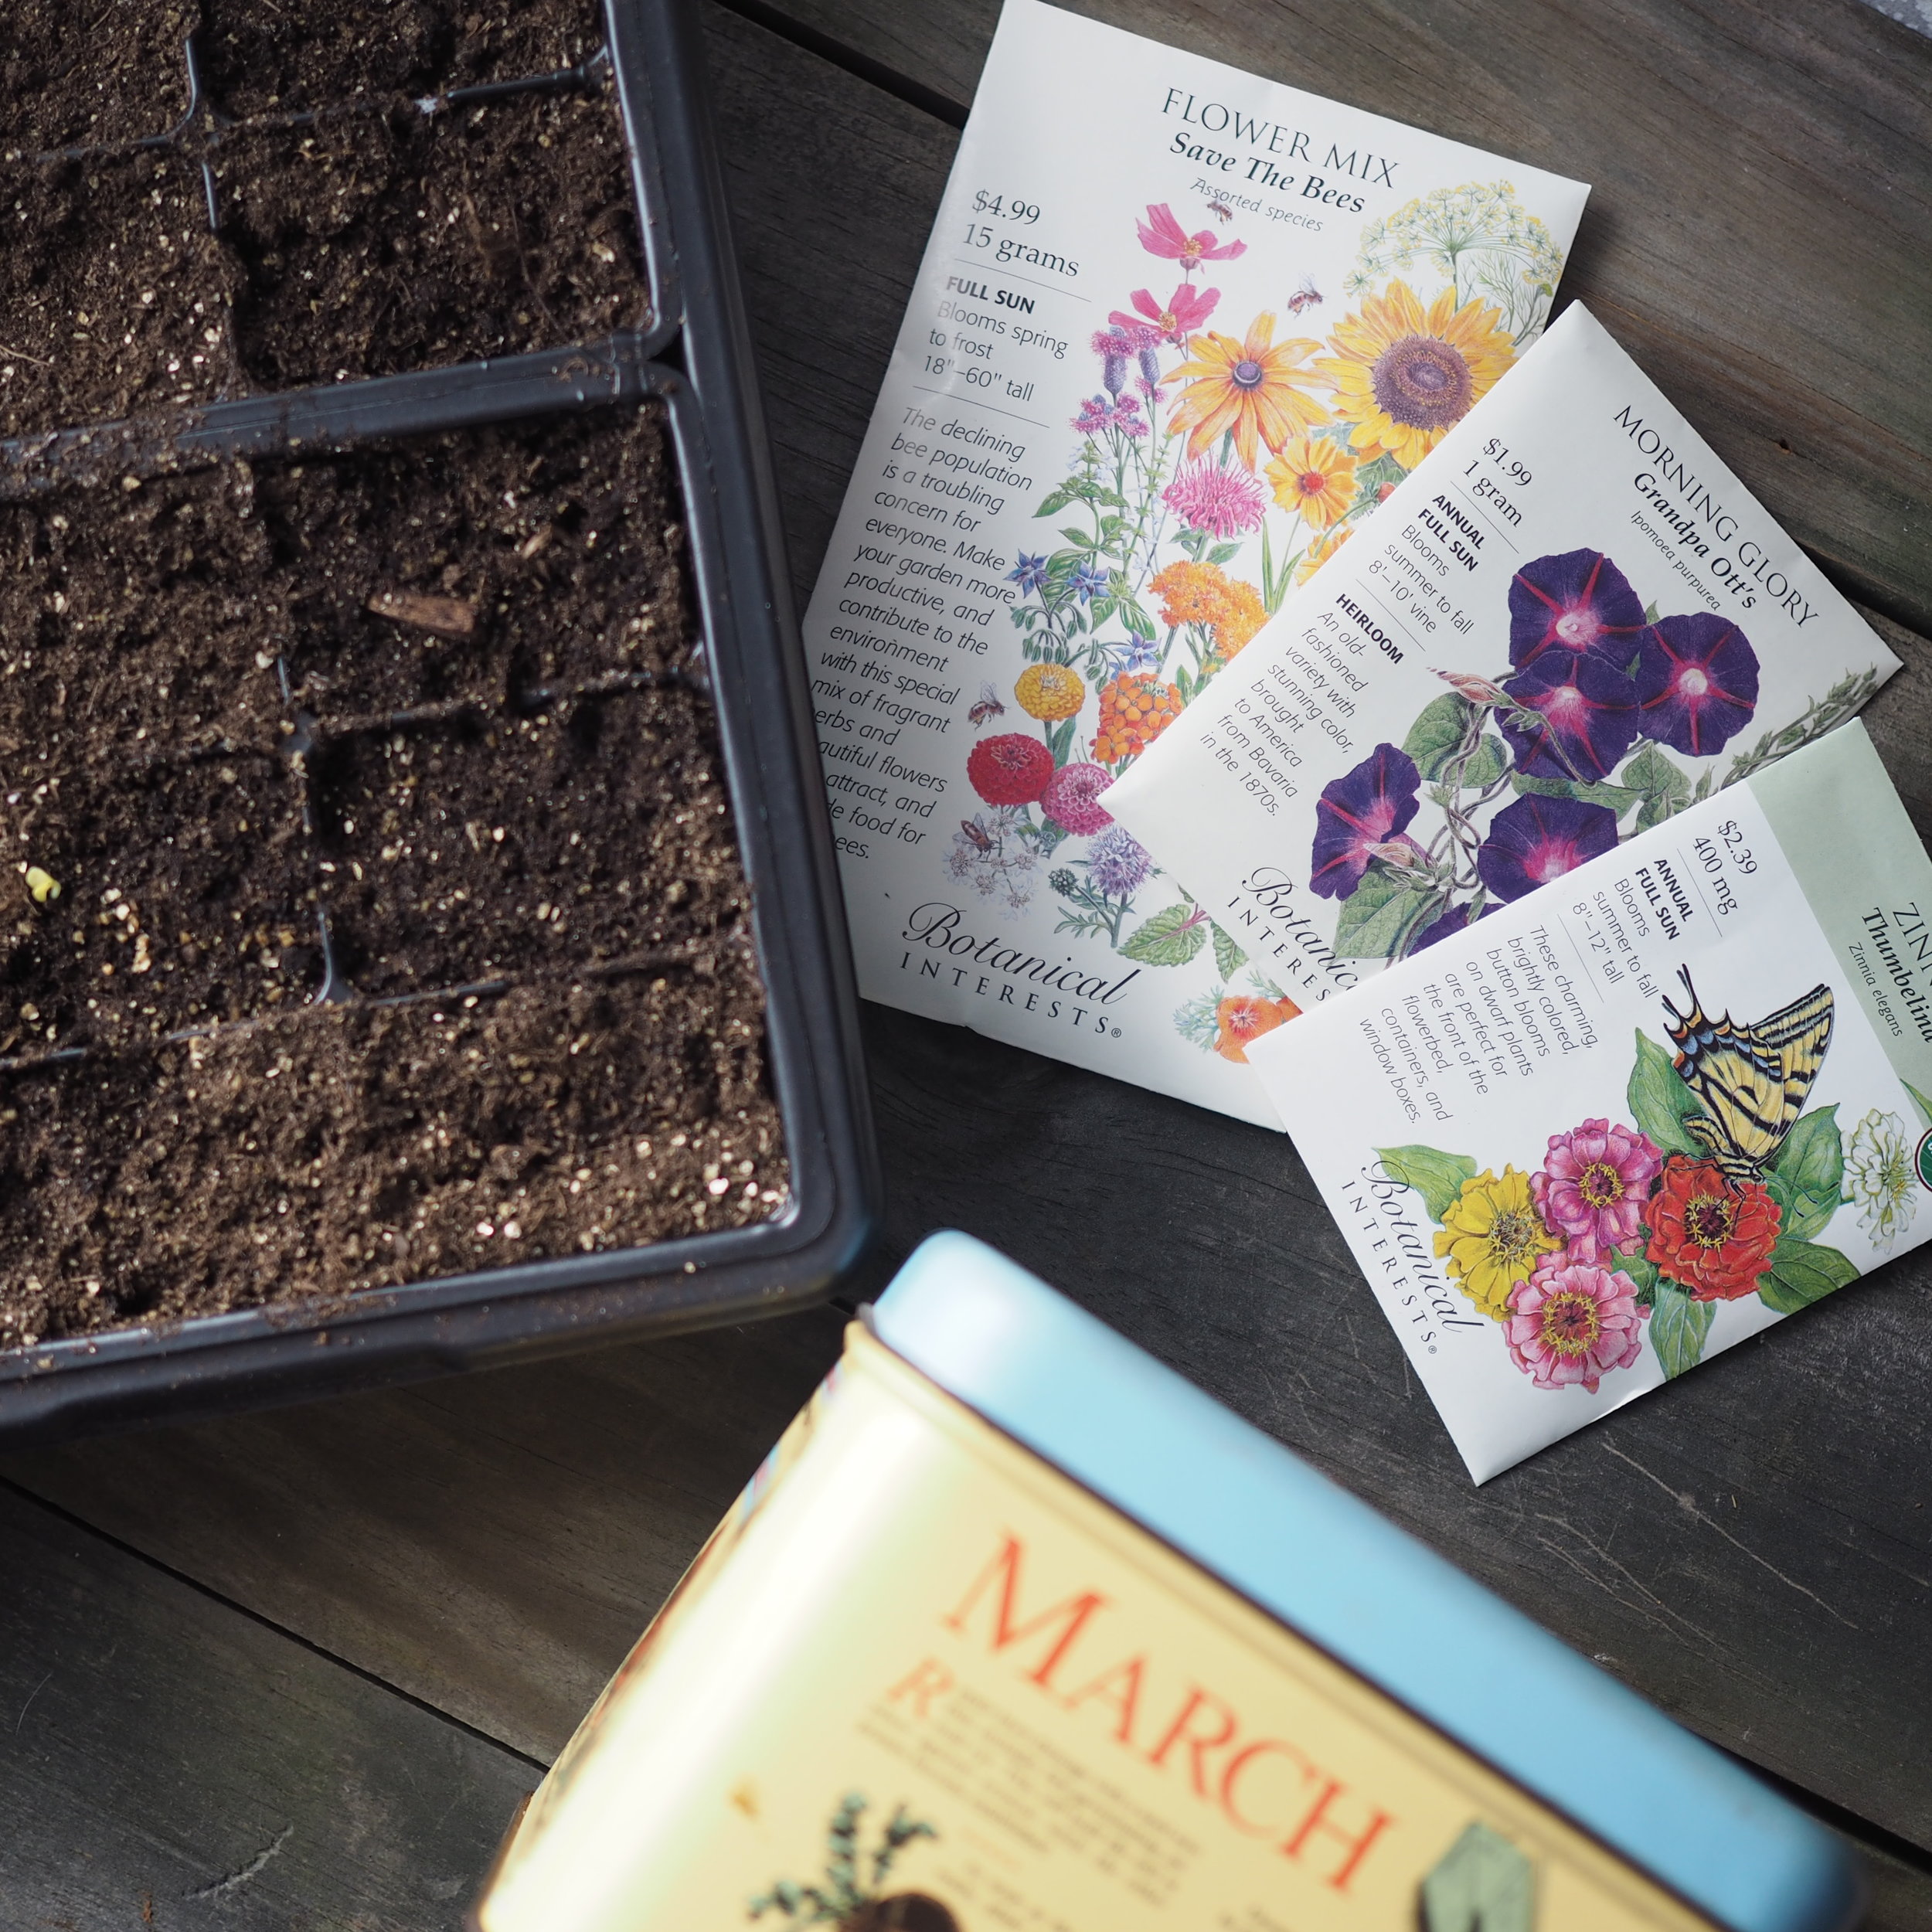
I mentioned to a friend the other day that starting seeds is what gets me through March. Right now my Instagram feed is full of crocuses and blossoming trees. My yard is full of snow. In reality, I won't really be able to plant much outdoors until May, but since the growing season is short, I try to give my plants (particularly the peppers and tomatoes) a leg up. So I ordered my seeds, purchased my flats and Little Miss Cleaver and I got to planting.
If there's one thing I'm particularly proud of as a parent, it's that LMC is really excited about gardening.
For months she's been saving the seeds out of whatever food she finds them in (I had to explain that we couldn't plant seeds from a pickle). So we've got a few random apple seeds in those flats next to the basil and zinnias. She also cheerfully picked the wildflower packets with the bees and butterflies on them, because she wants to help them (thank you Nature Cat!).
Everyday, we've both been checking the progress of our little seedlings, and while I have to remind her that over-watering is just as bad as under-watering, she's an excellent co-gardener. Having every flat surface in my living room covered with flats of soil is a small price to pay. :)
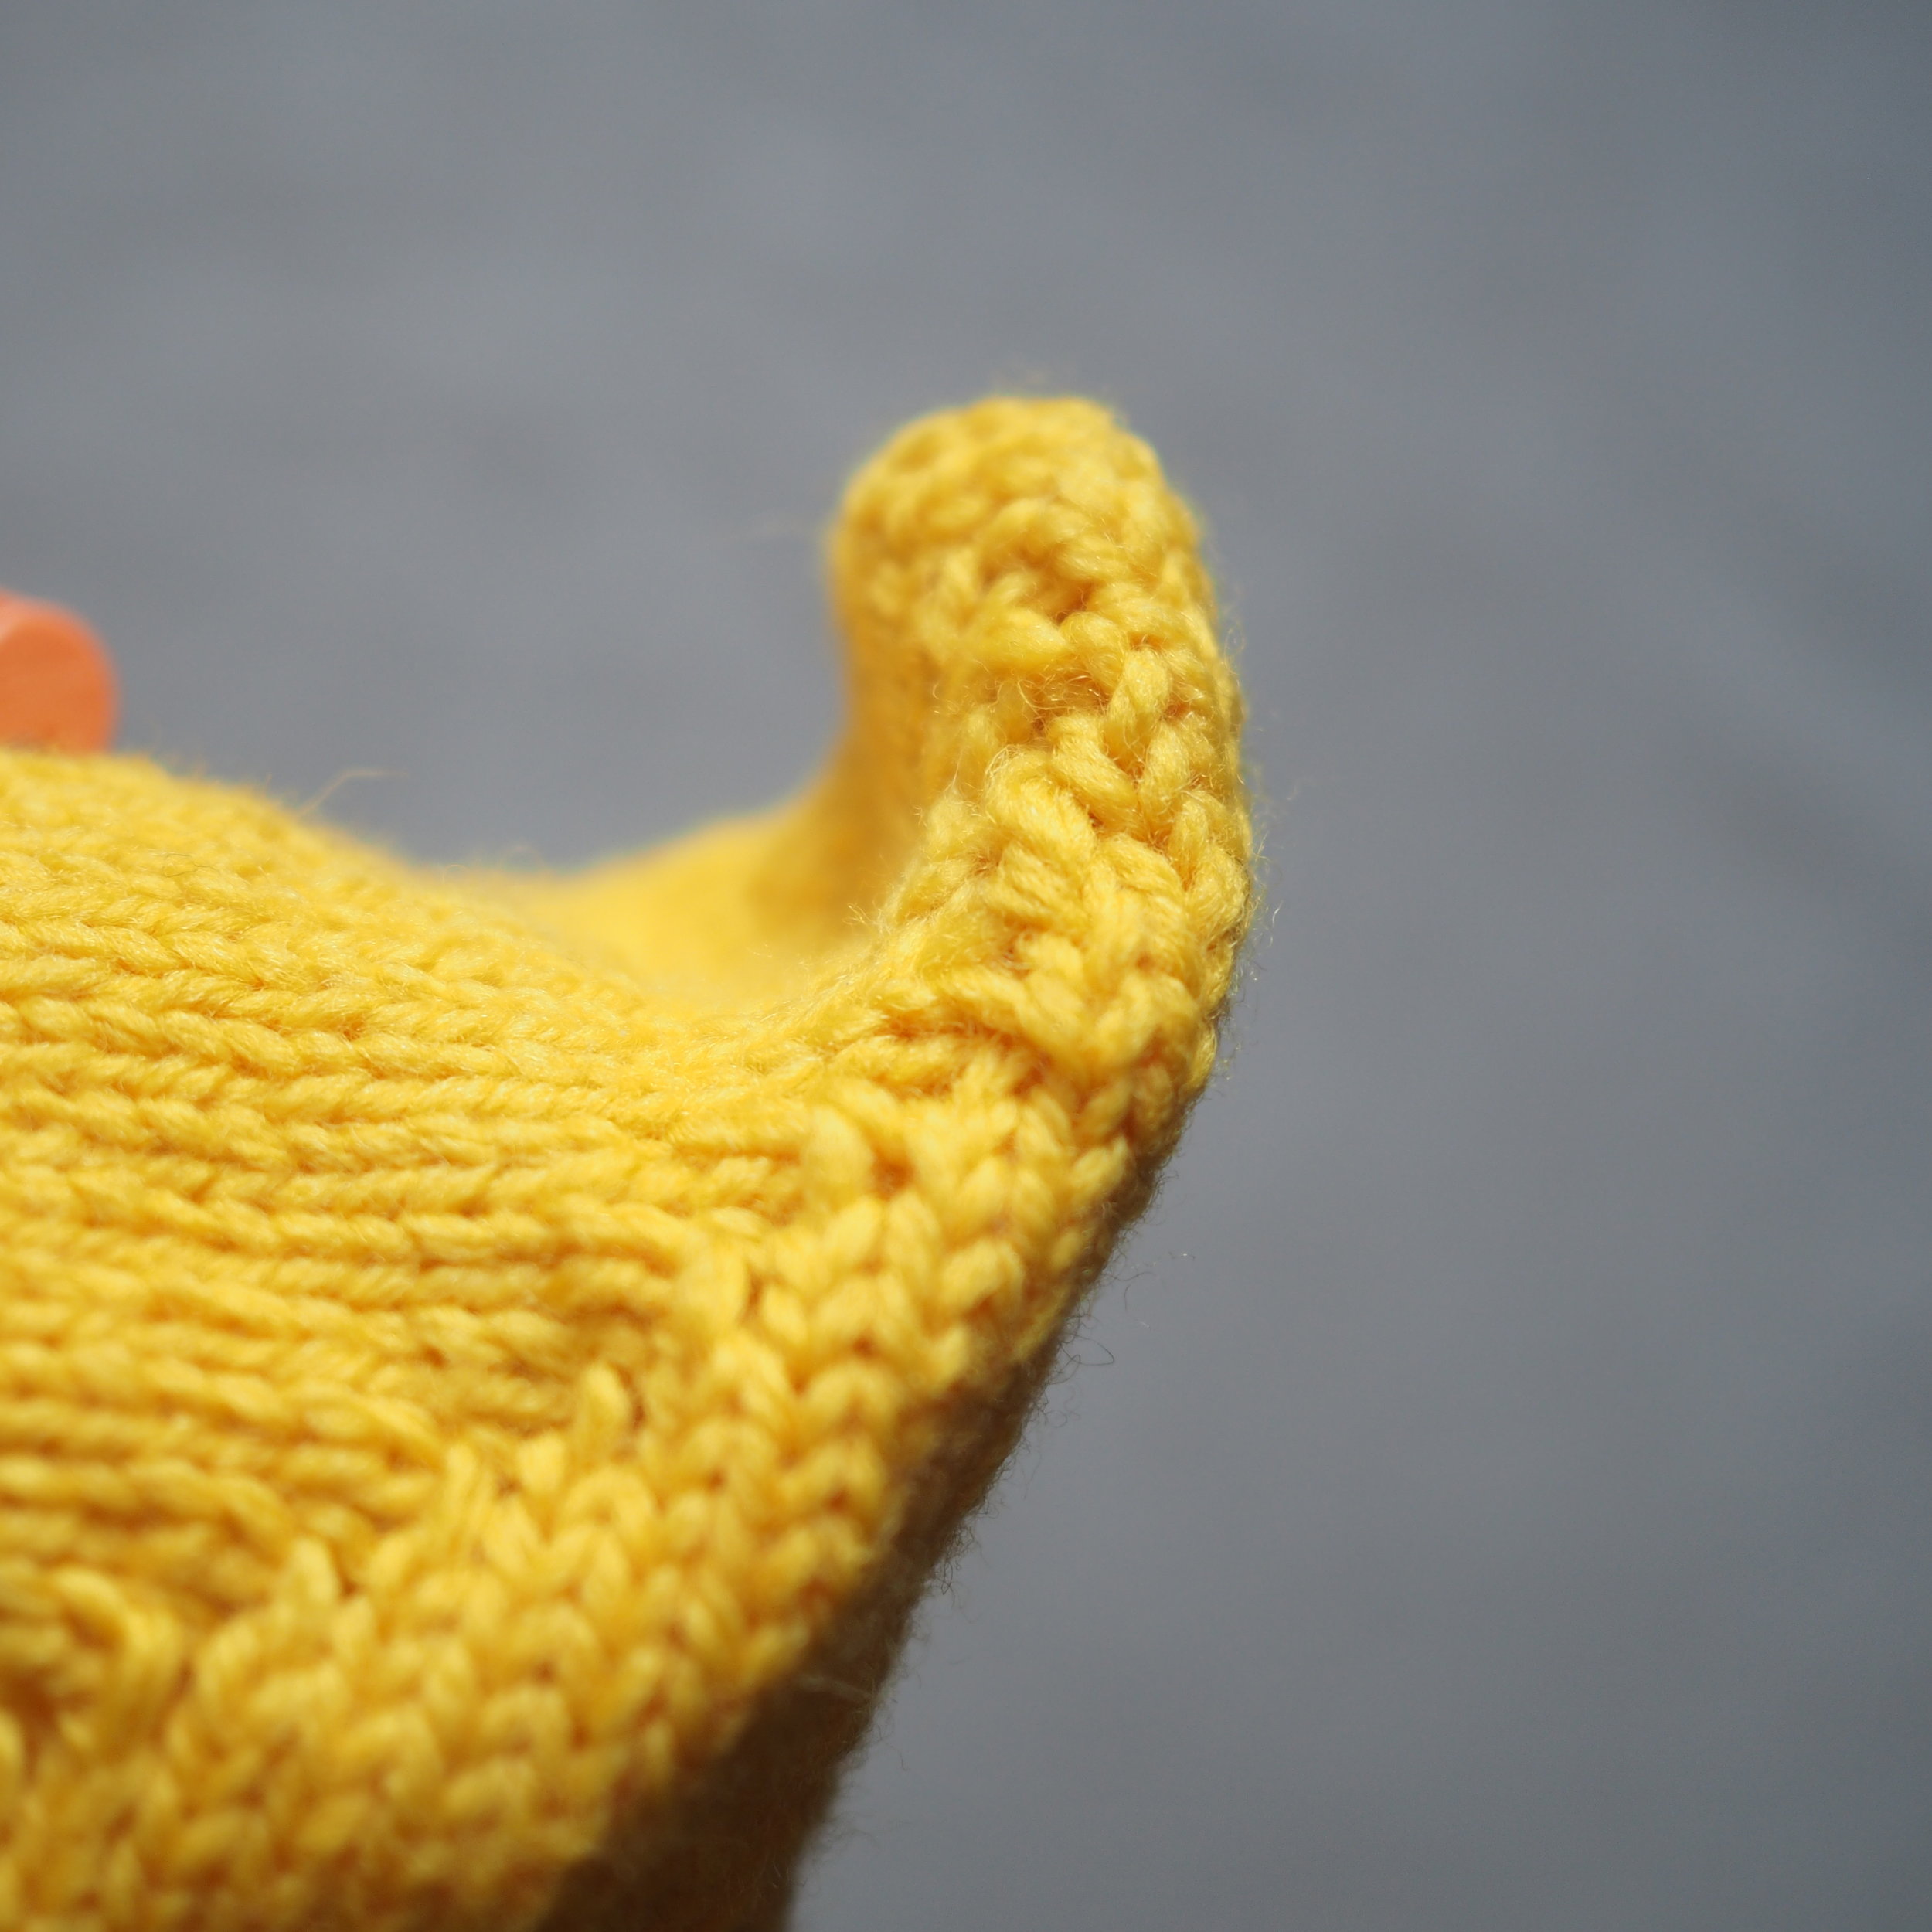
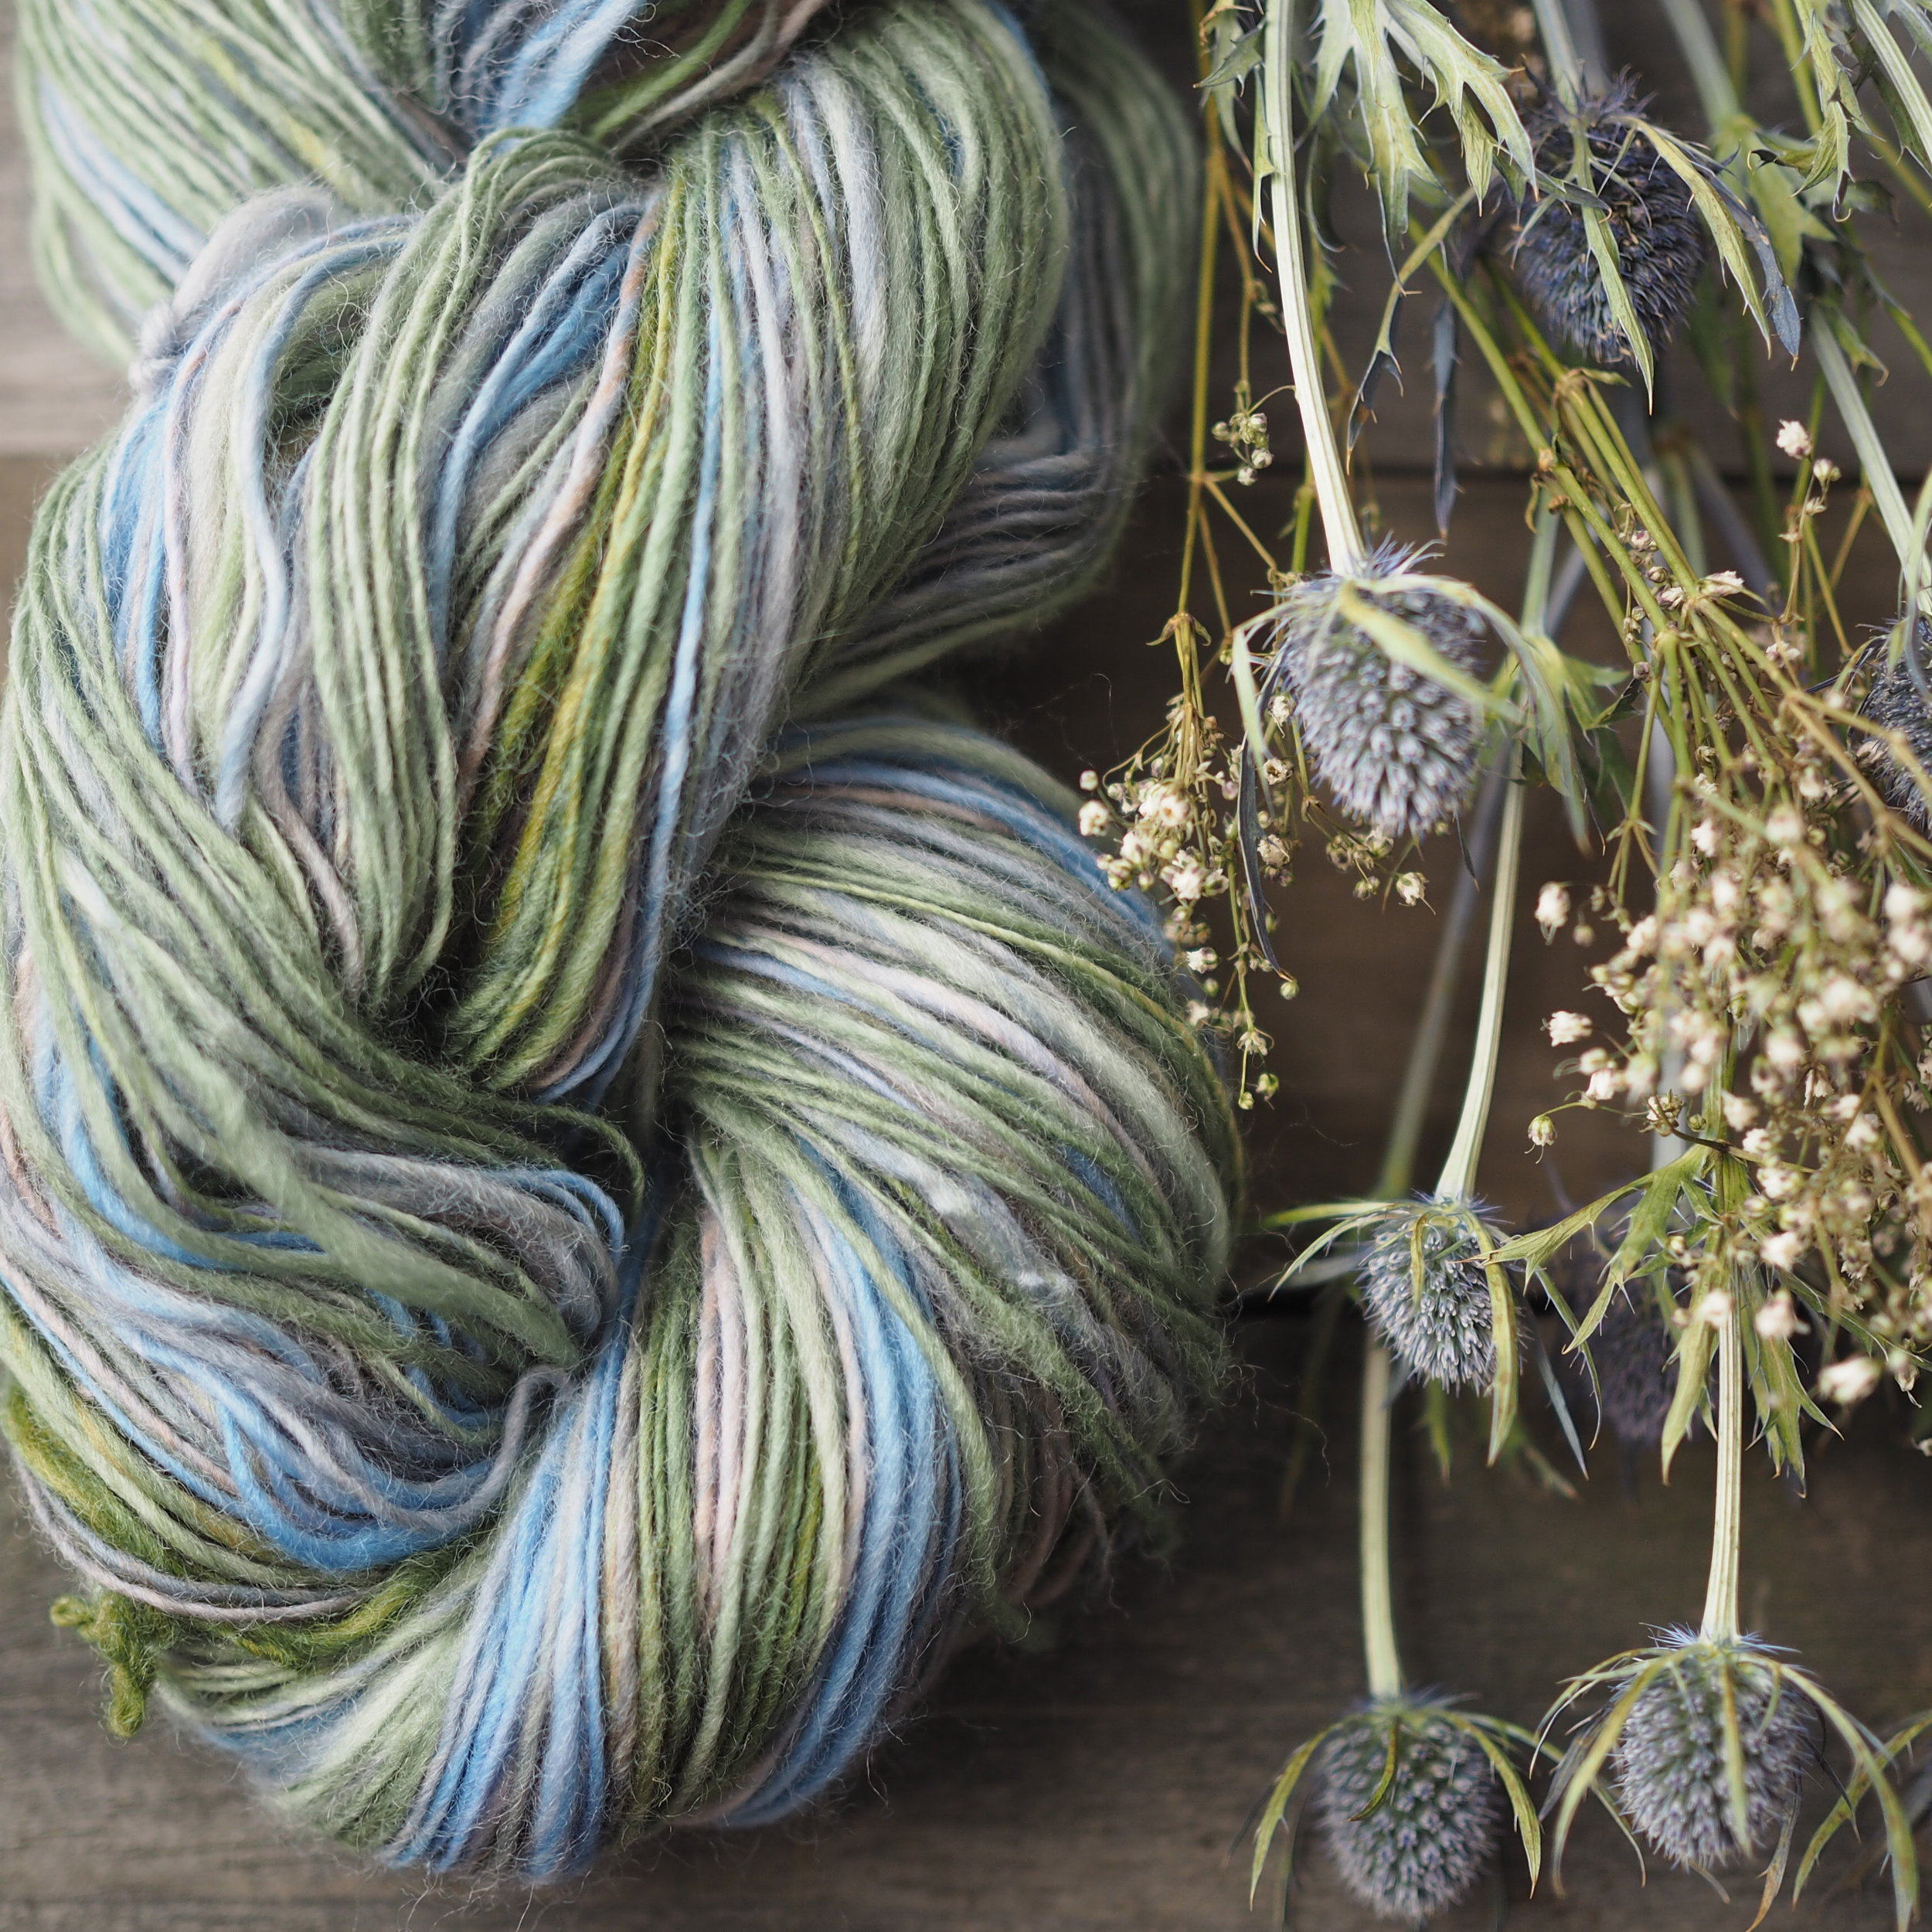
I've also been embracing the coming spring in my crafts, with sheep and ducks and linen making notable appearances. I've also been working furiously behind the scenes to pull together some new kits for spring. If you want to be the first to hear about them when they go on sale, subscribe to my newsletter, which now comes out monthly and includes new releases, sneak peaks and a recipe!


Spring Things!


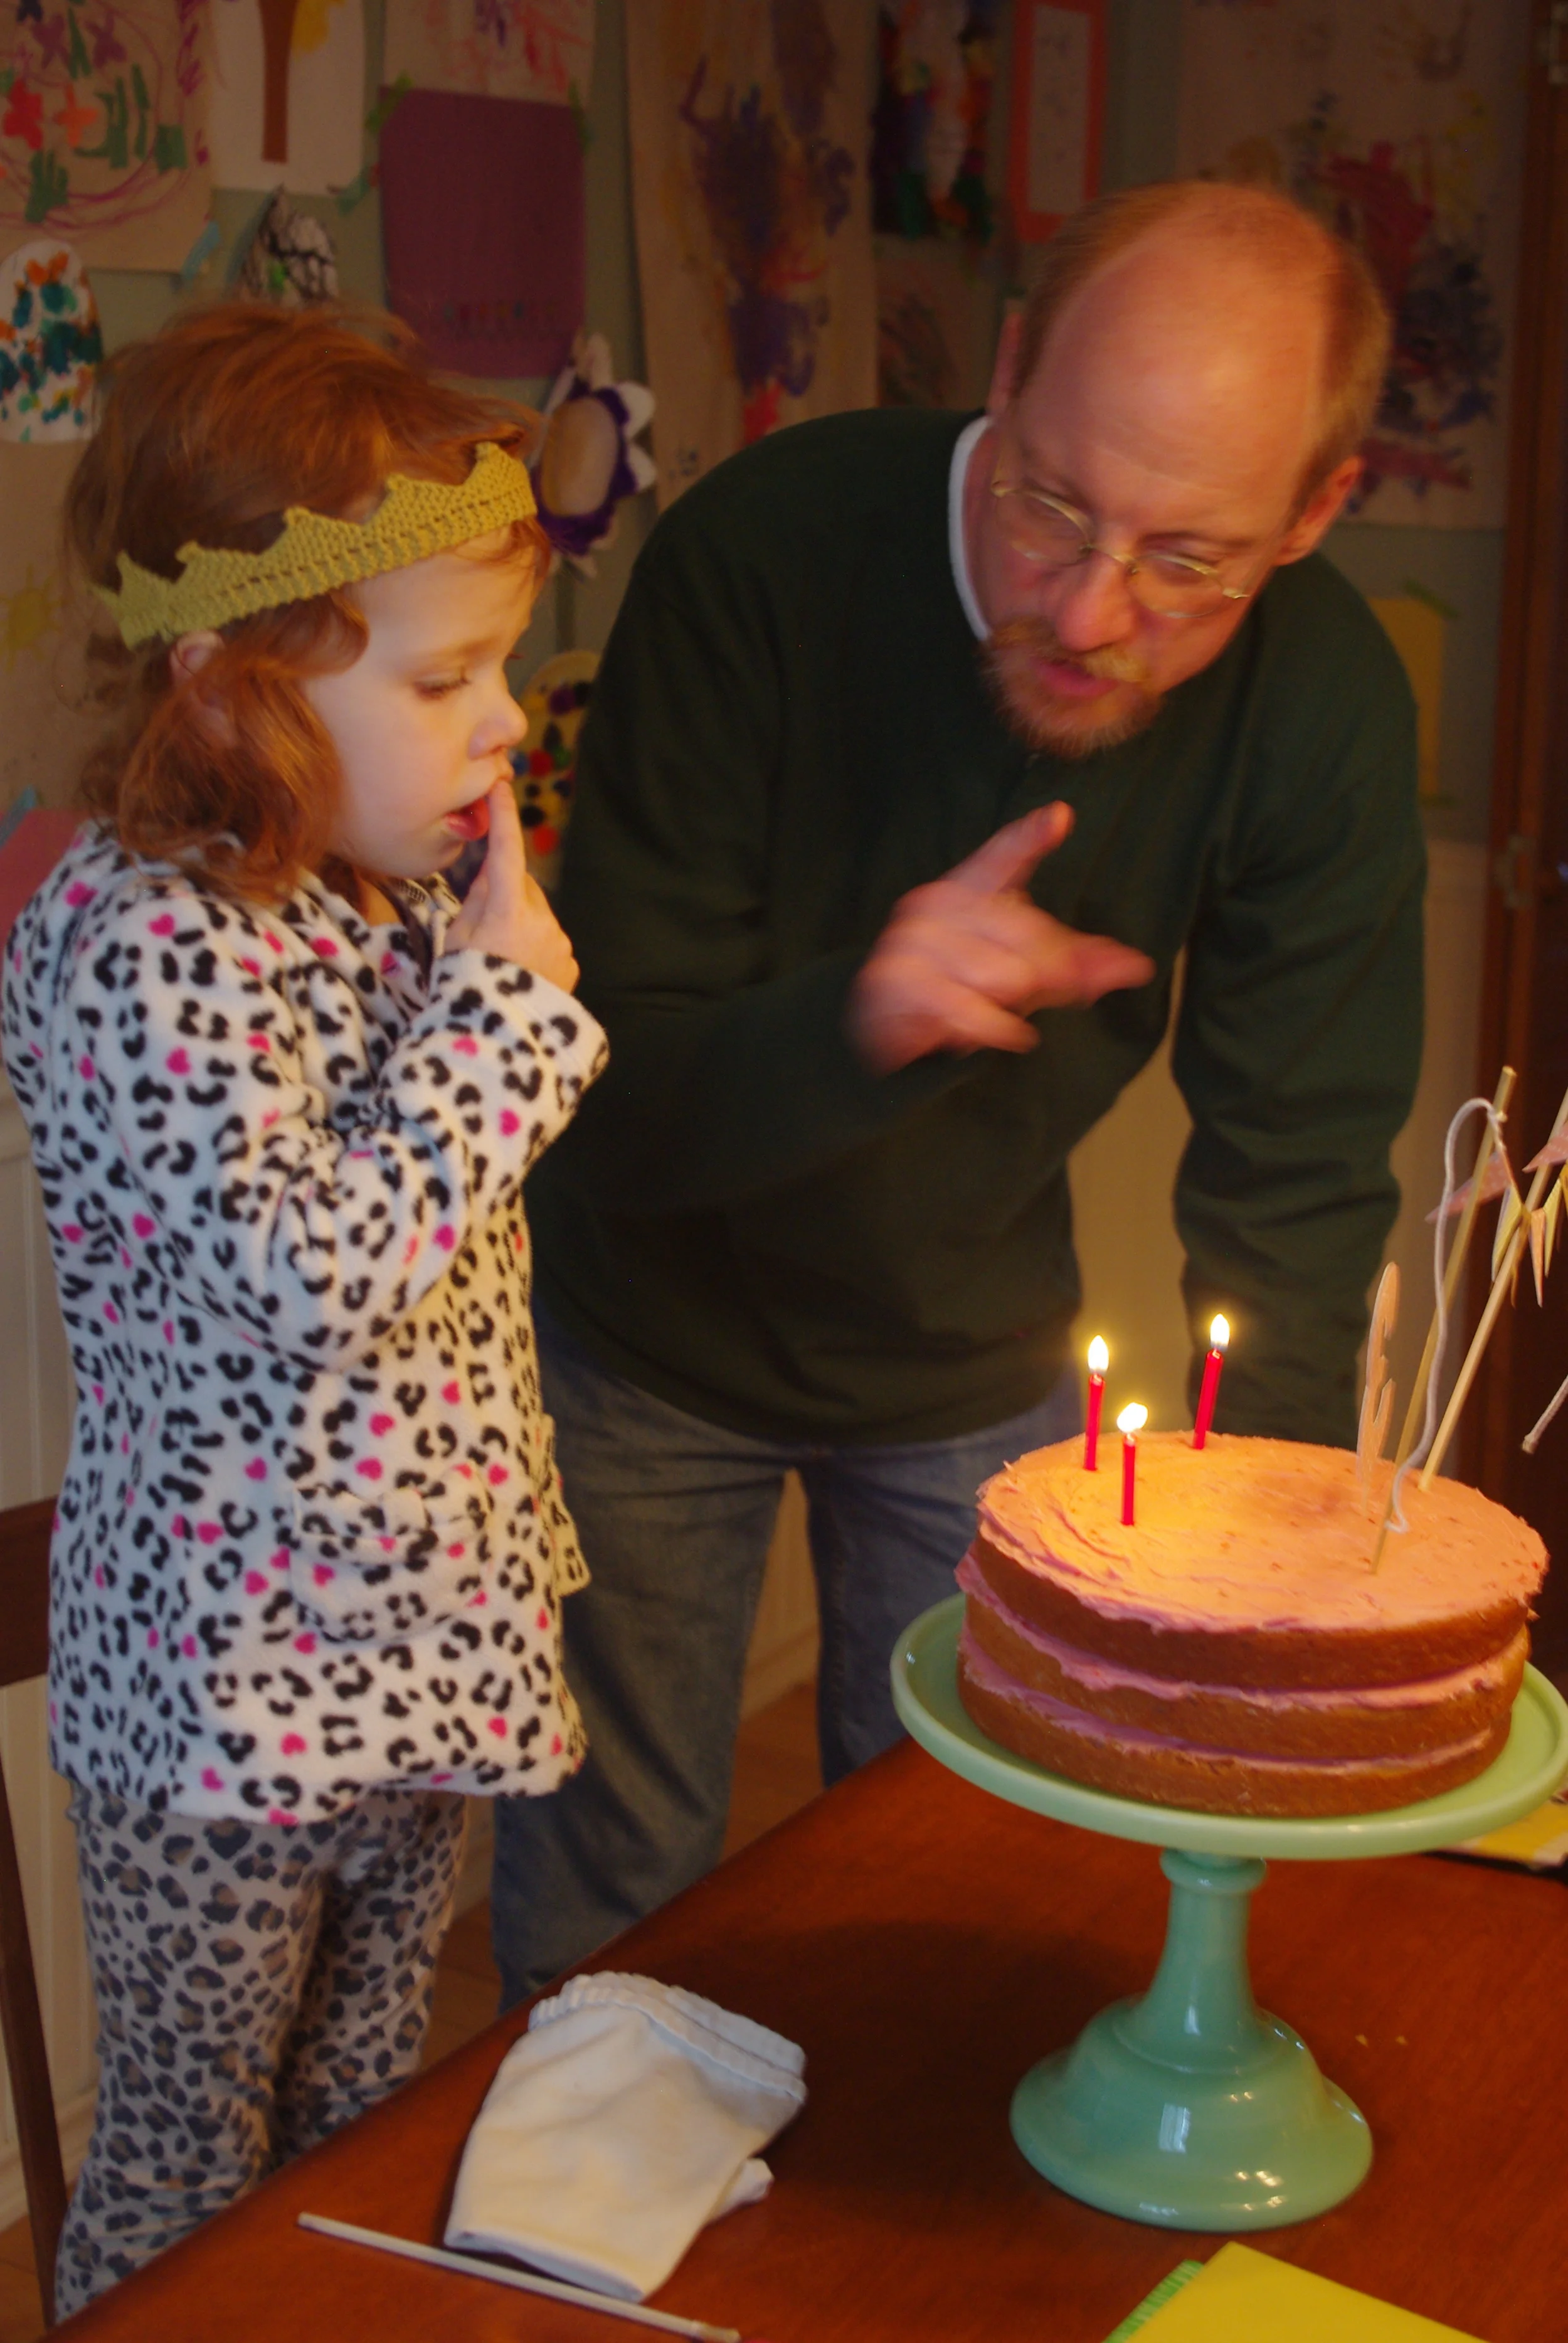
Parent who have kids with birthdays near Christmas, you have my sympathy.
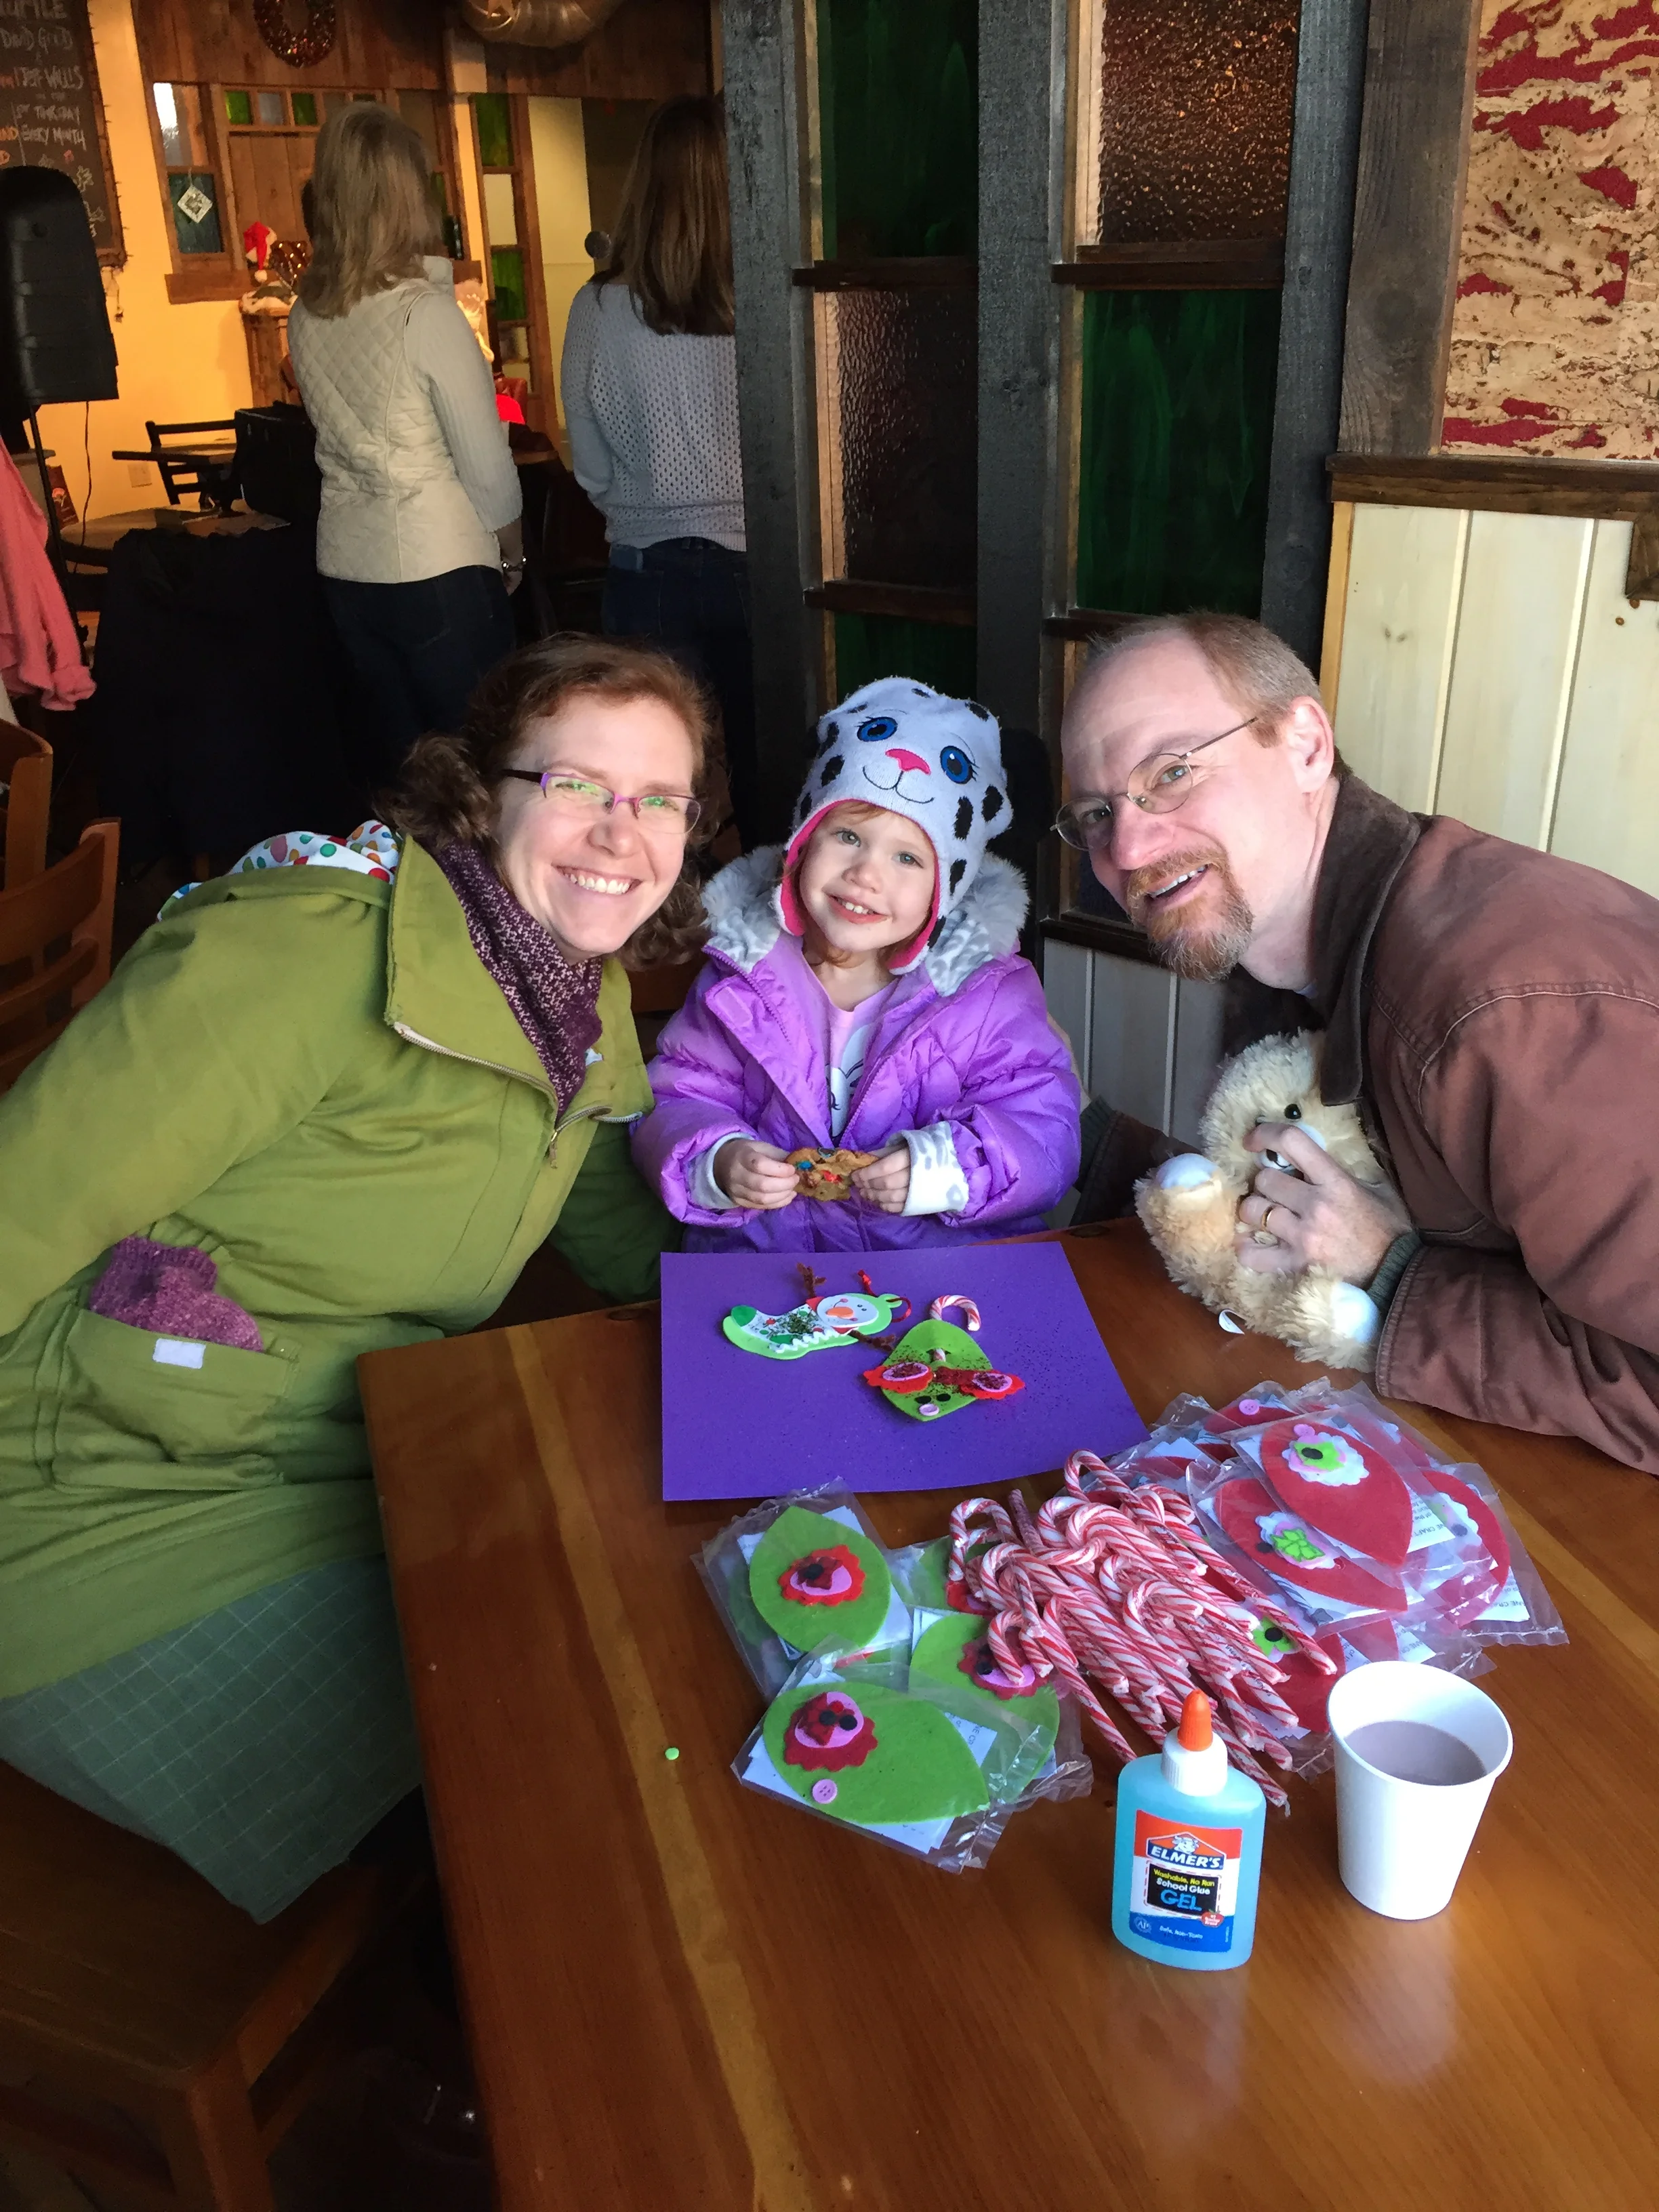
This year, LMC's birthday and Easter were four days apart and that meant a week full of activity, and stuff, and more sugar than Momma would normally allow. Pair that with a bad cold and her cousin's birthday the weekend before, it means I'm just getting my feet back under me right now.
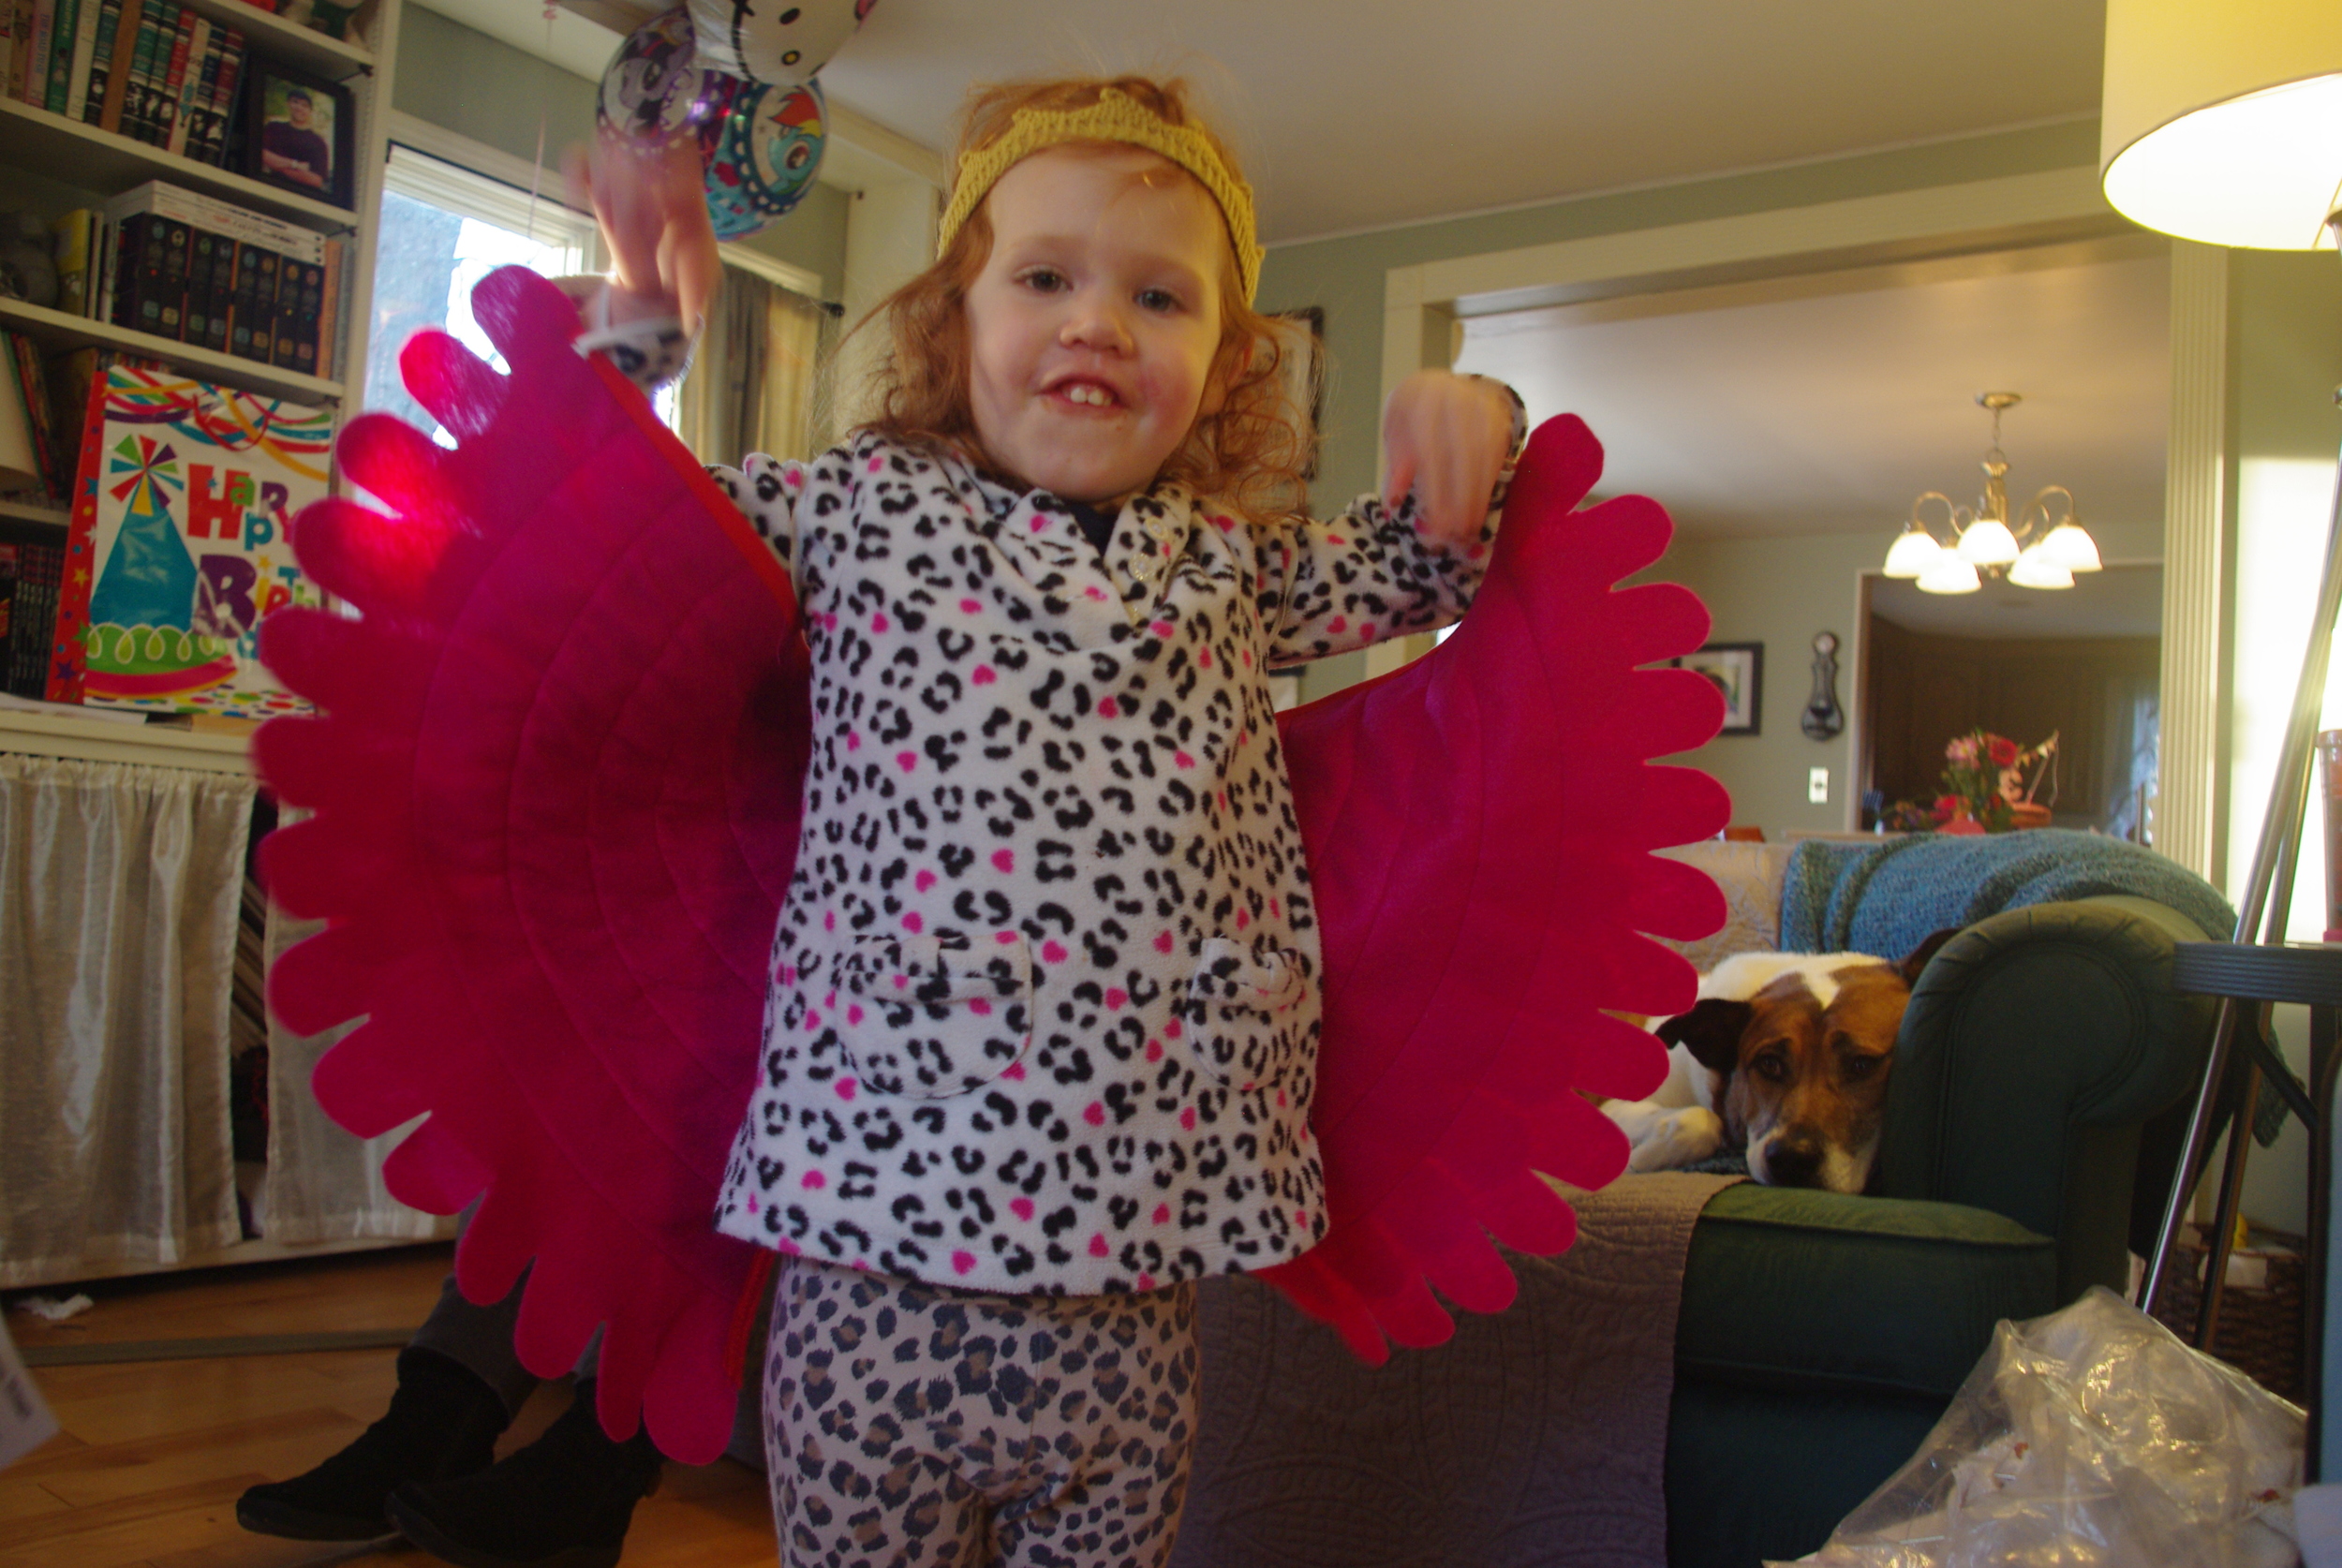
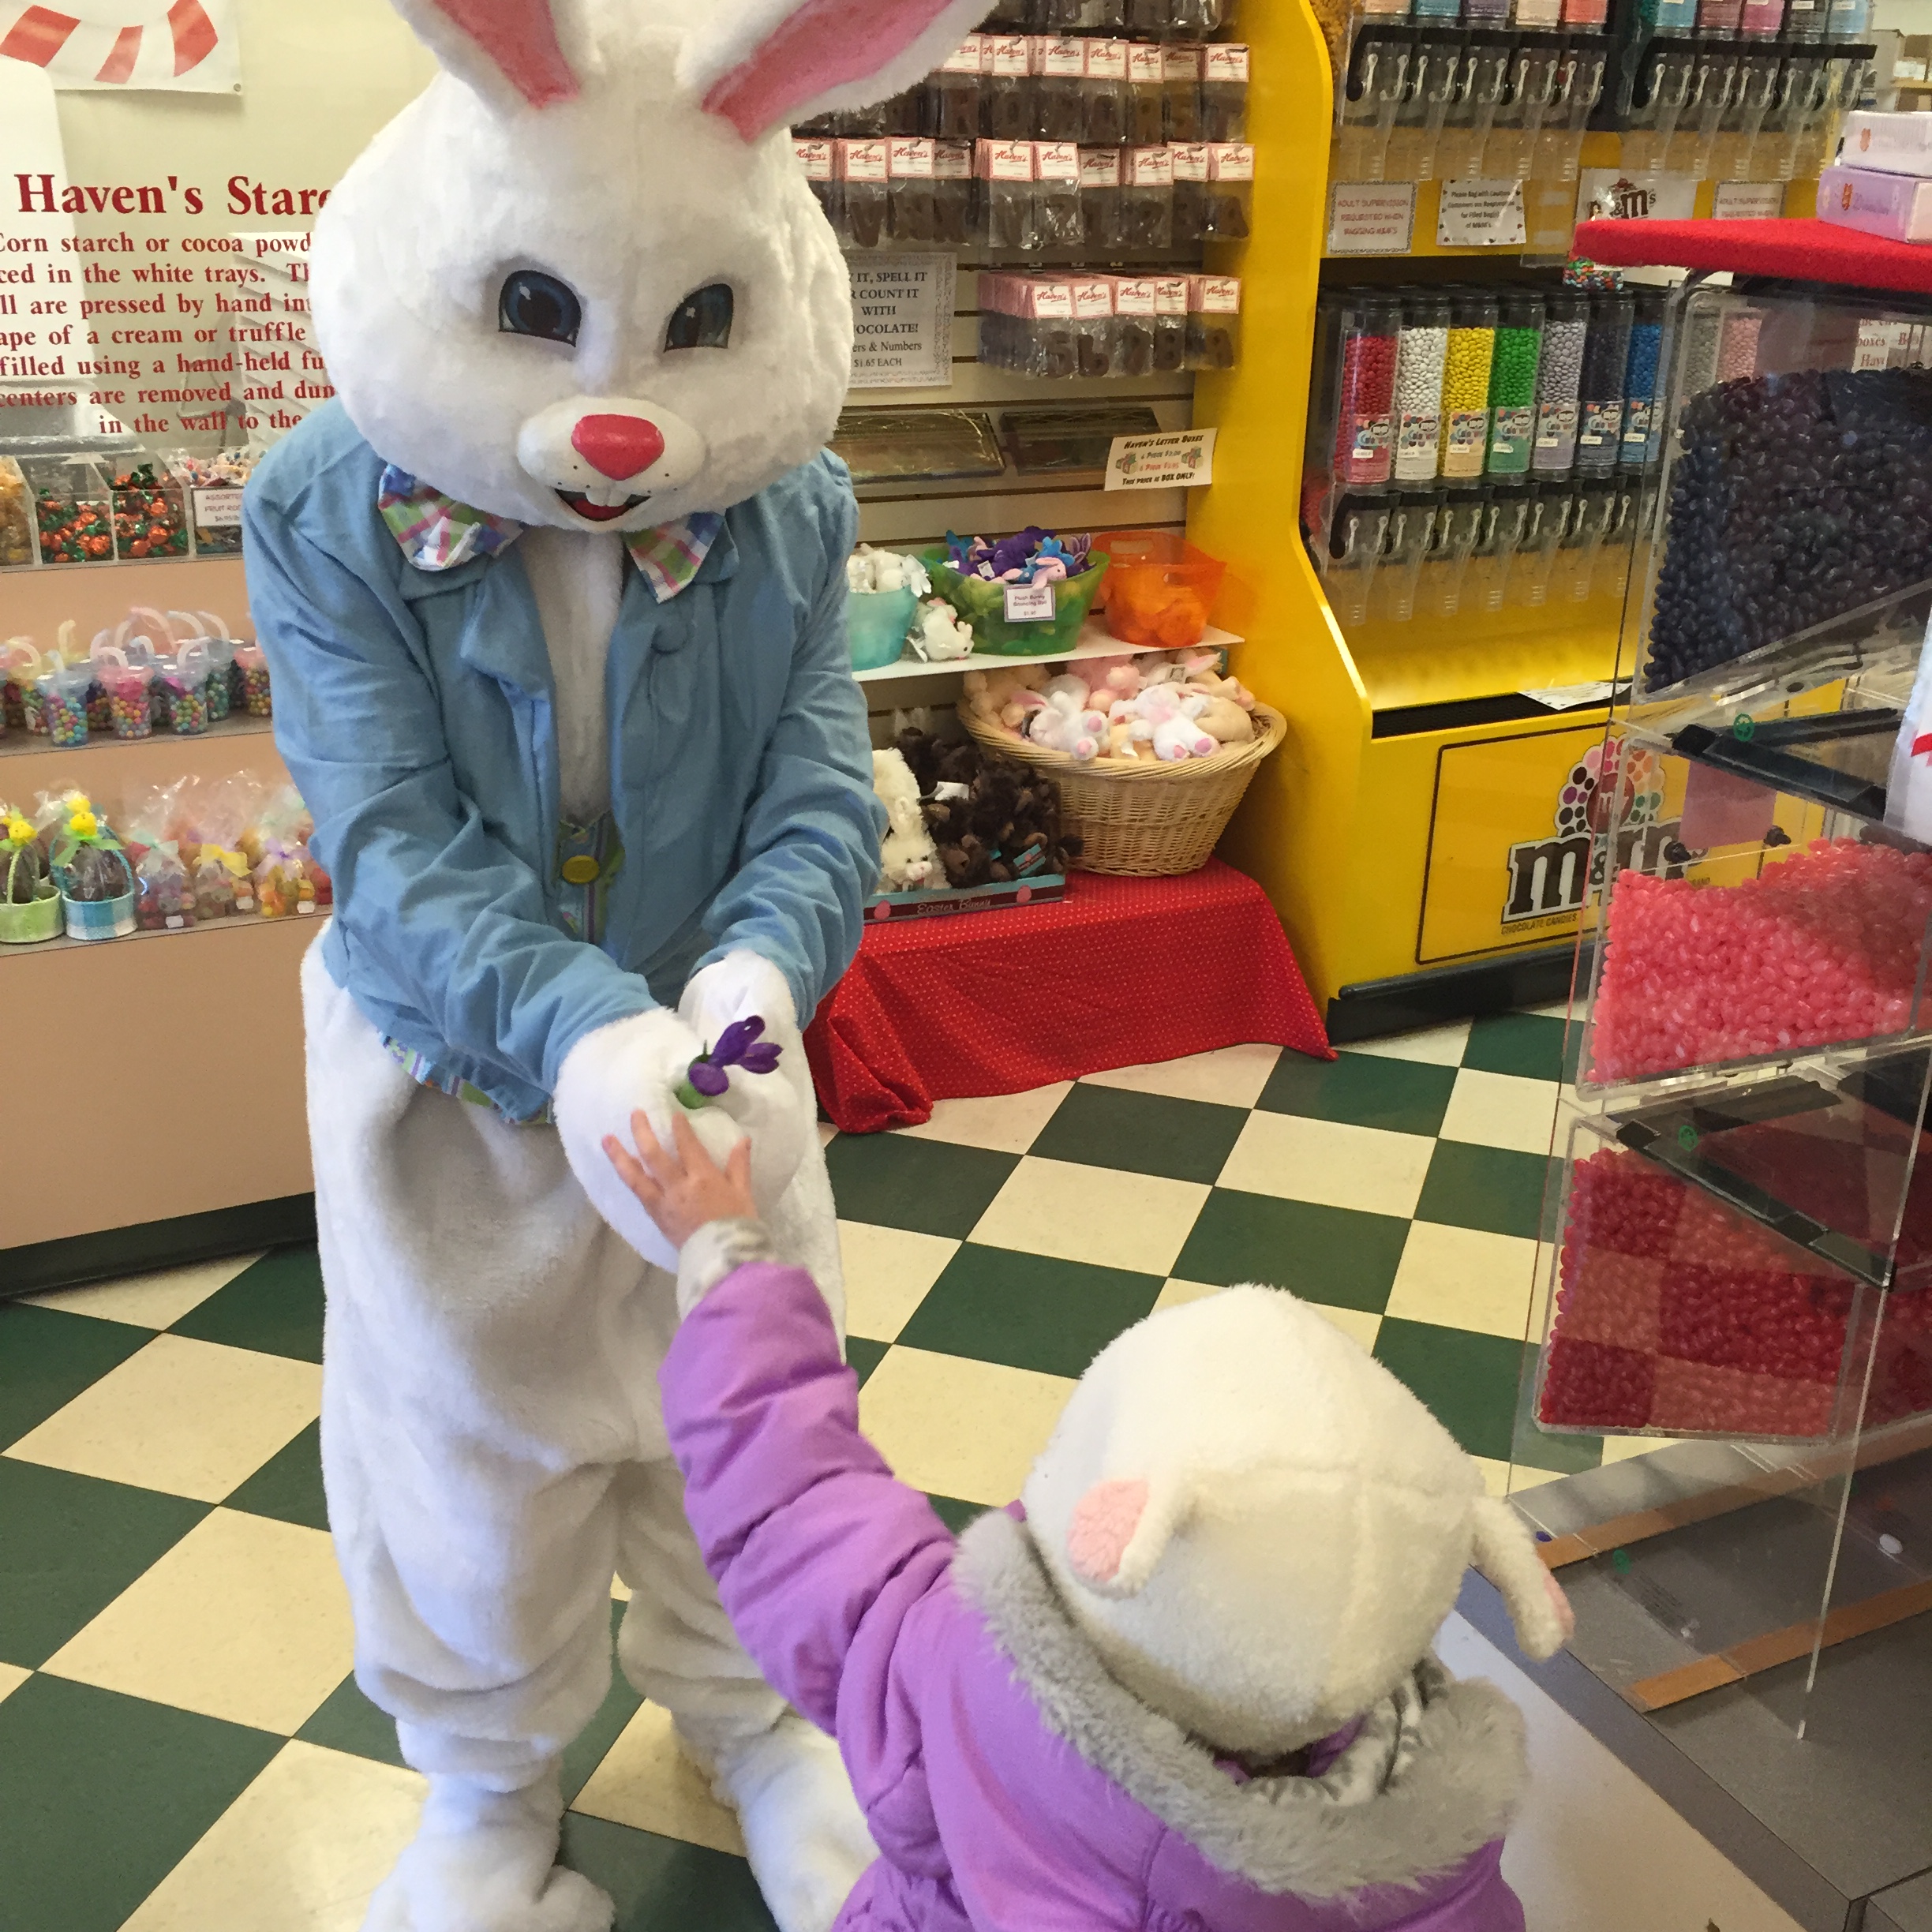
That said, it was full of joy. LMC is at the age now (3!) where she gets that these are special days and is super excited to meet the Easter Bunny or find eggs, blow out candles, or get to wear her birthday crown. She is cultivating a deep appreciation for Peanuts and Bass/Rankin holiday specials. She also doesn't have huge expectations about it though. When asked what she wanted for her birthday, she merely asked for a pink cake with pink frosting and pink candles. I wanted the cake to be pink tasting and not just pink-colored, so I made cake flavored/colored with raspberry jam (and a few drops of food coloring). It was a little over-sweet with the jam. but was still a big hit with the birthday girl (especially the frosting).
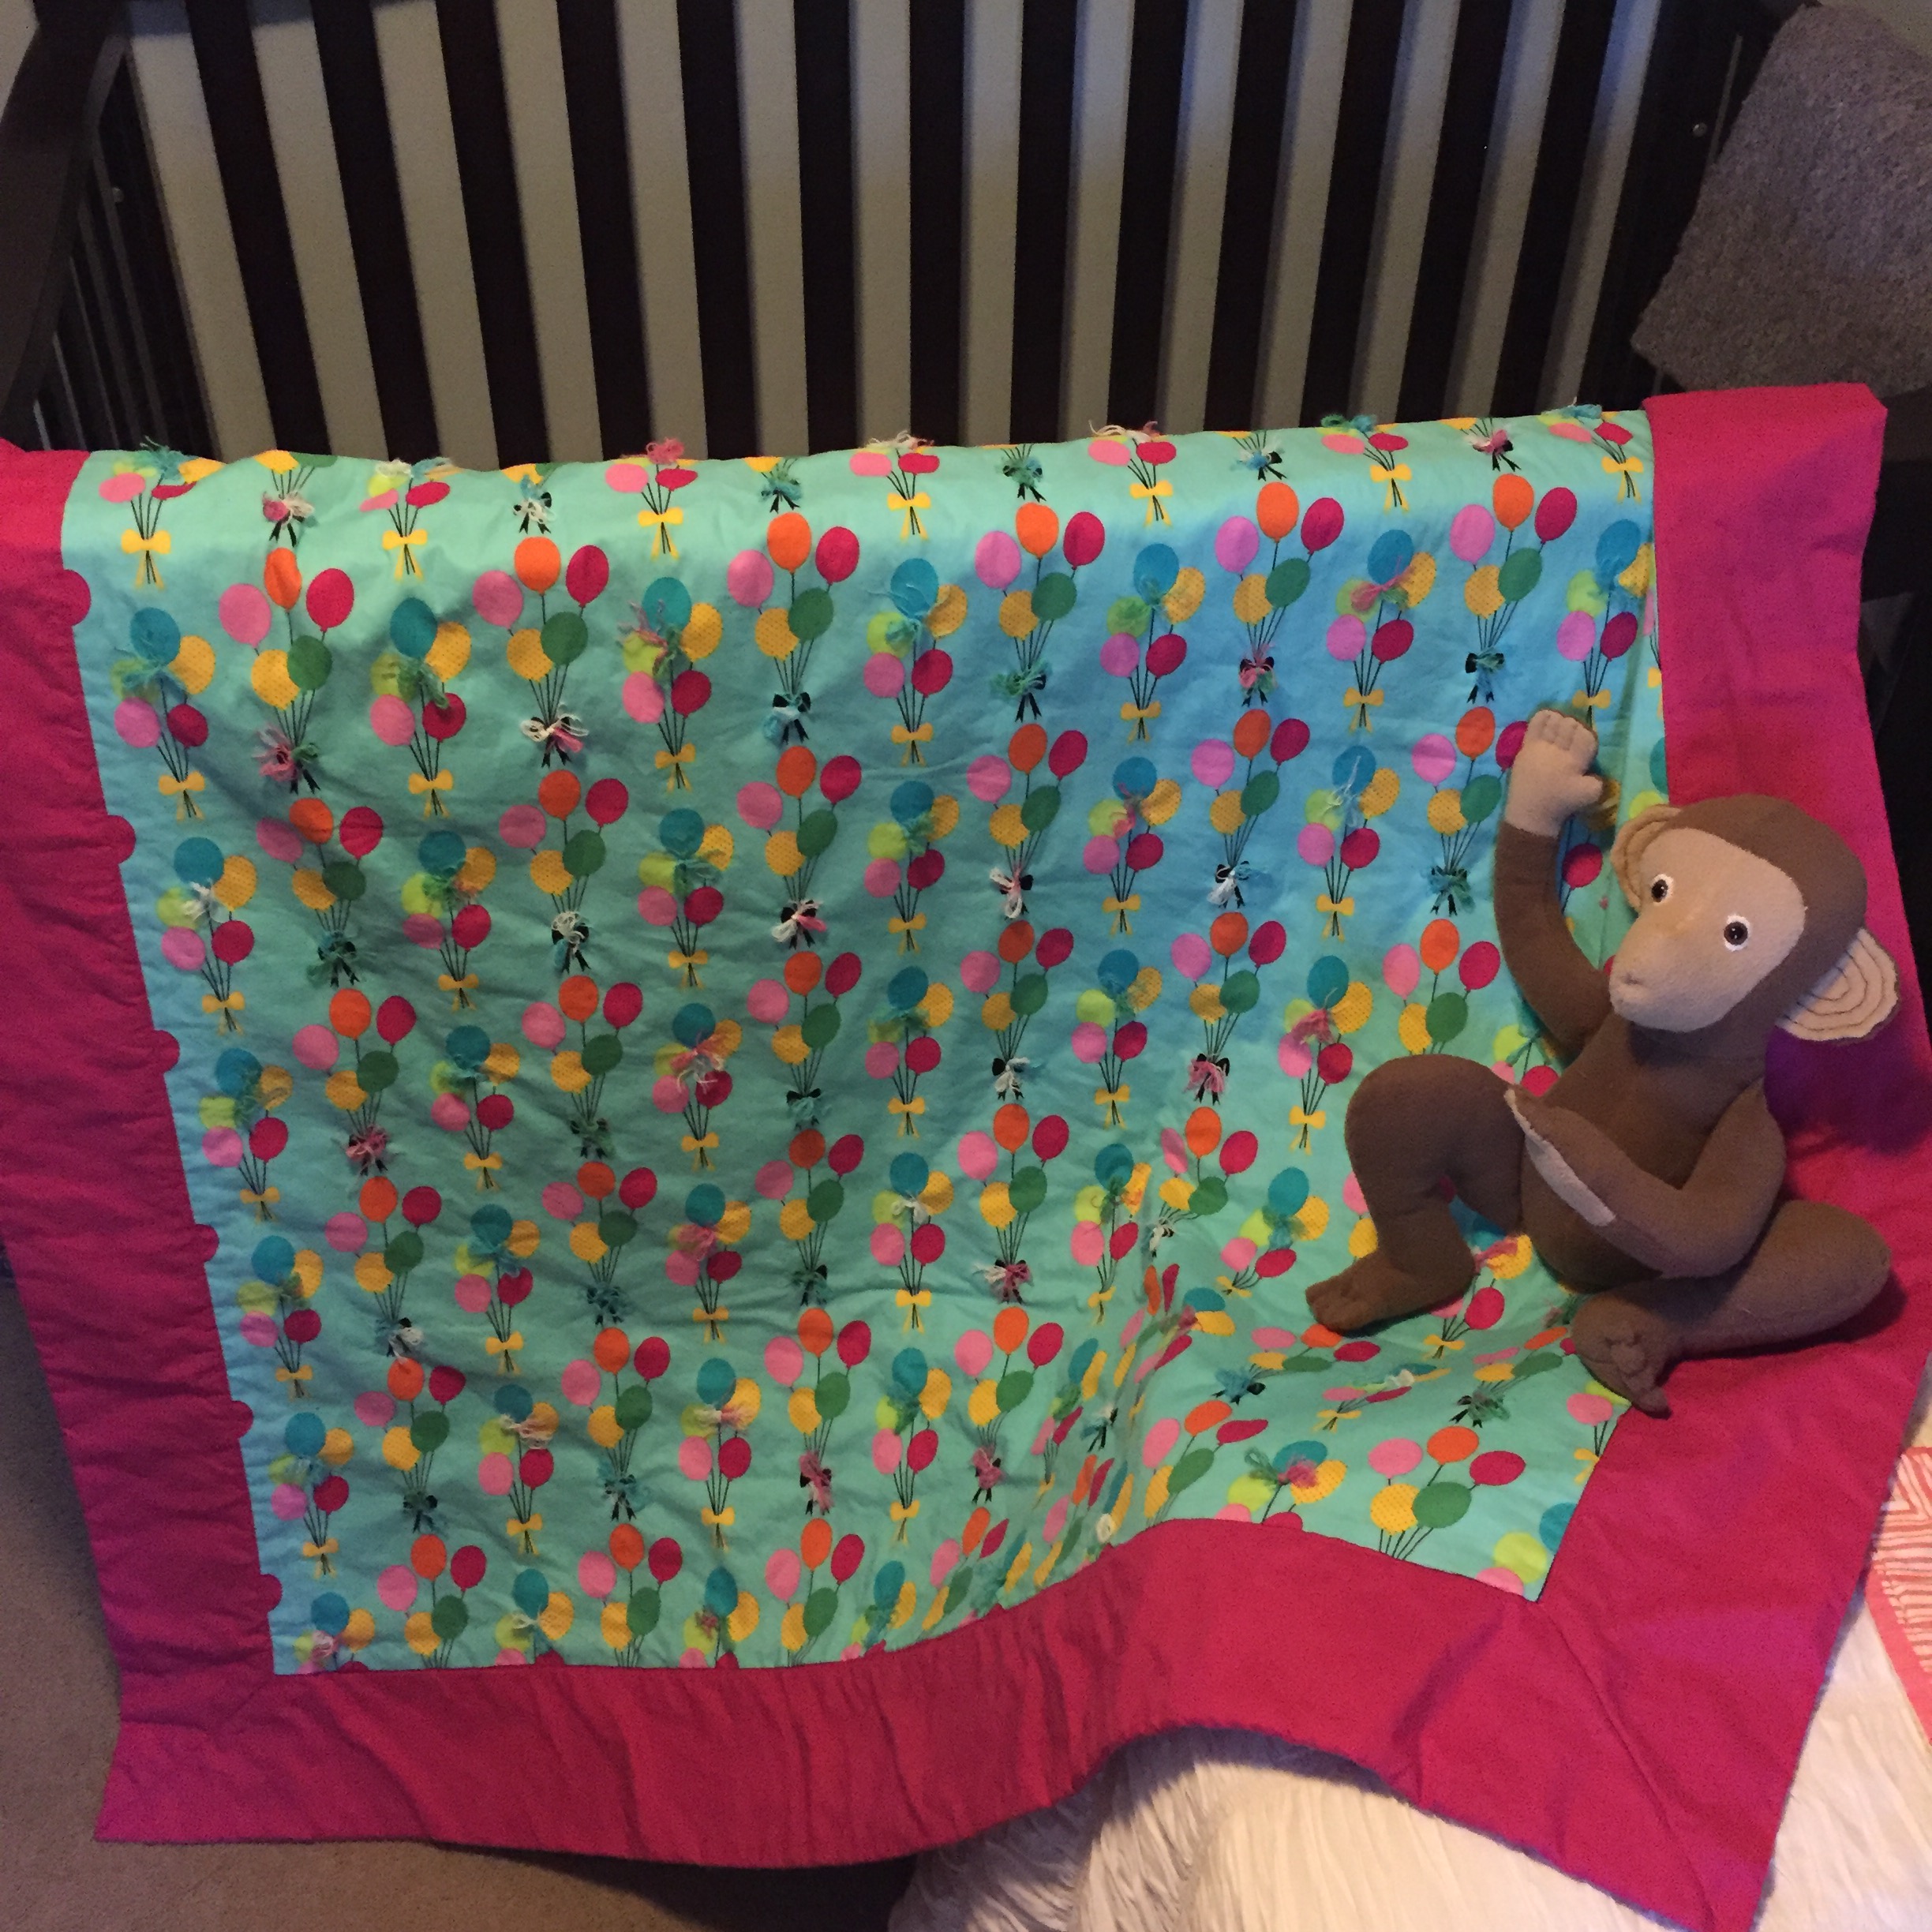
She got a number of neat gifts from family and friends for her birthday, but the one I'm most proud of is her quilt I made to be just like Curious George's (her favorite character/tv show). I managed to find a Michael Miller fabric that was really close to the print on George's bed and used a tutorial for a Self-Binding Blanket (scaled up and modified to include batting) and then tied it with some multi-colored cotton yarn. I had no idea how tiring the tying process would be for my hands, and the cotton yarn plies separated more than I would like, but for my first completed quilt, the whole thing turned out rather well and is very cozy. I can see how this quilt thing could get addictive.
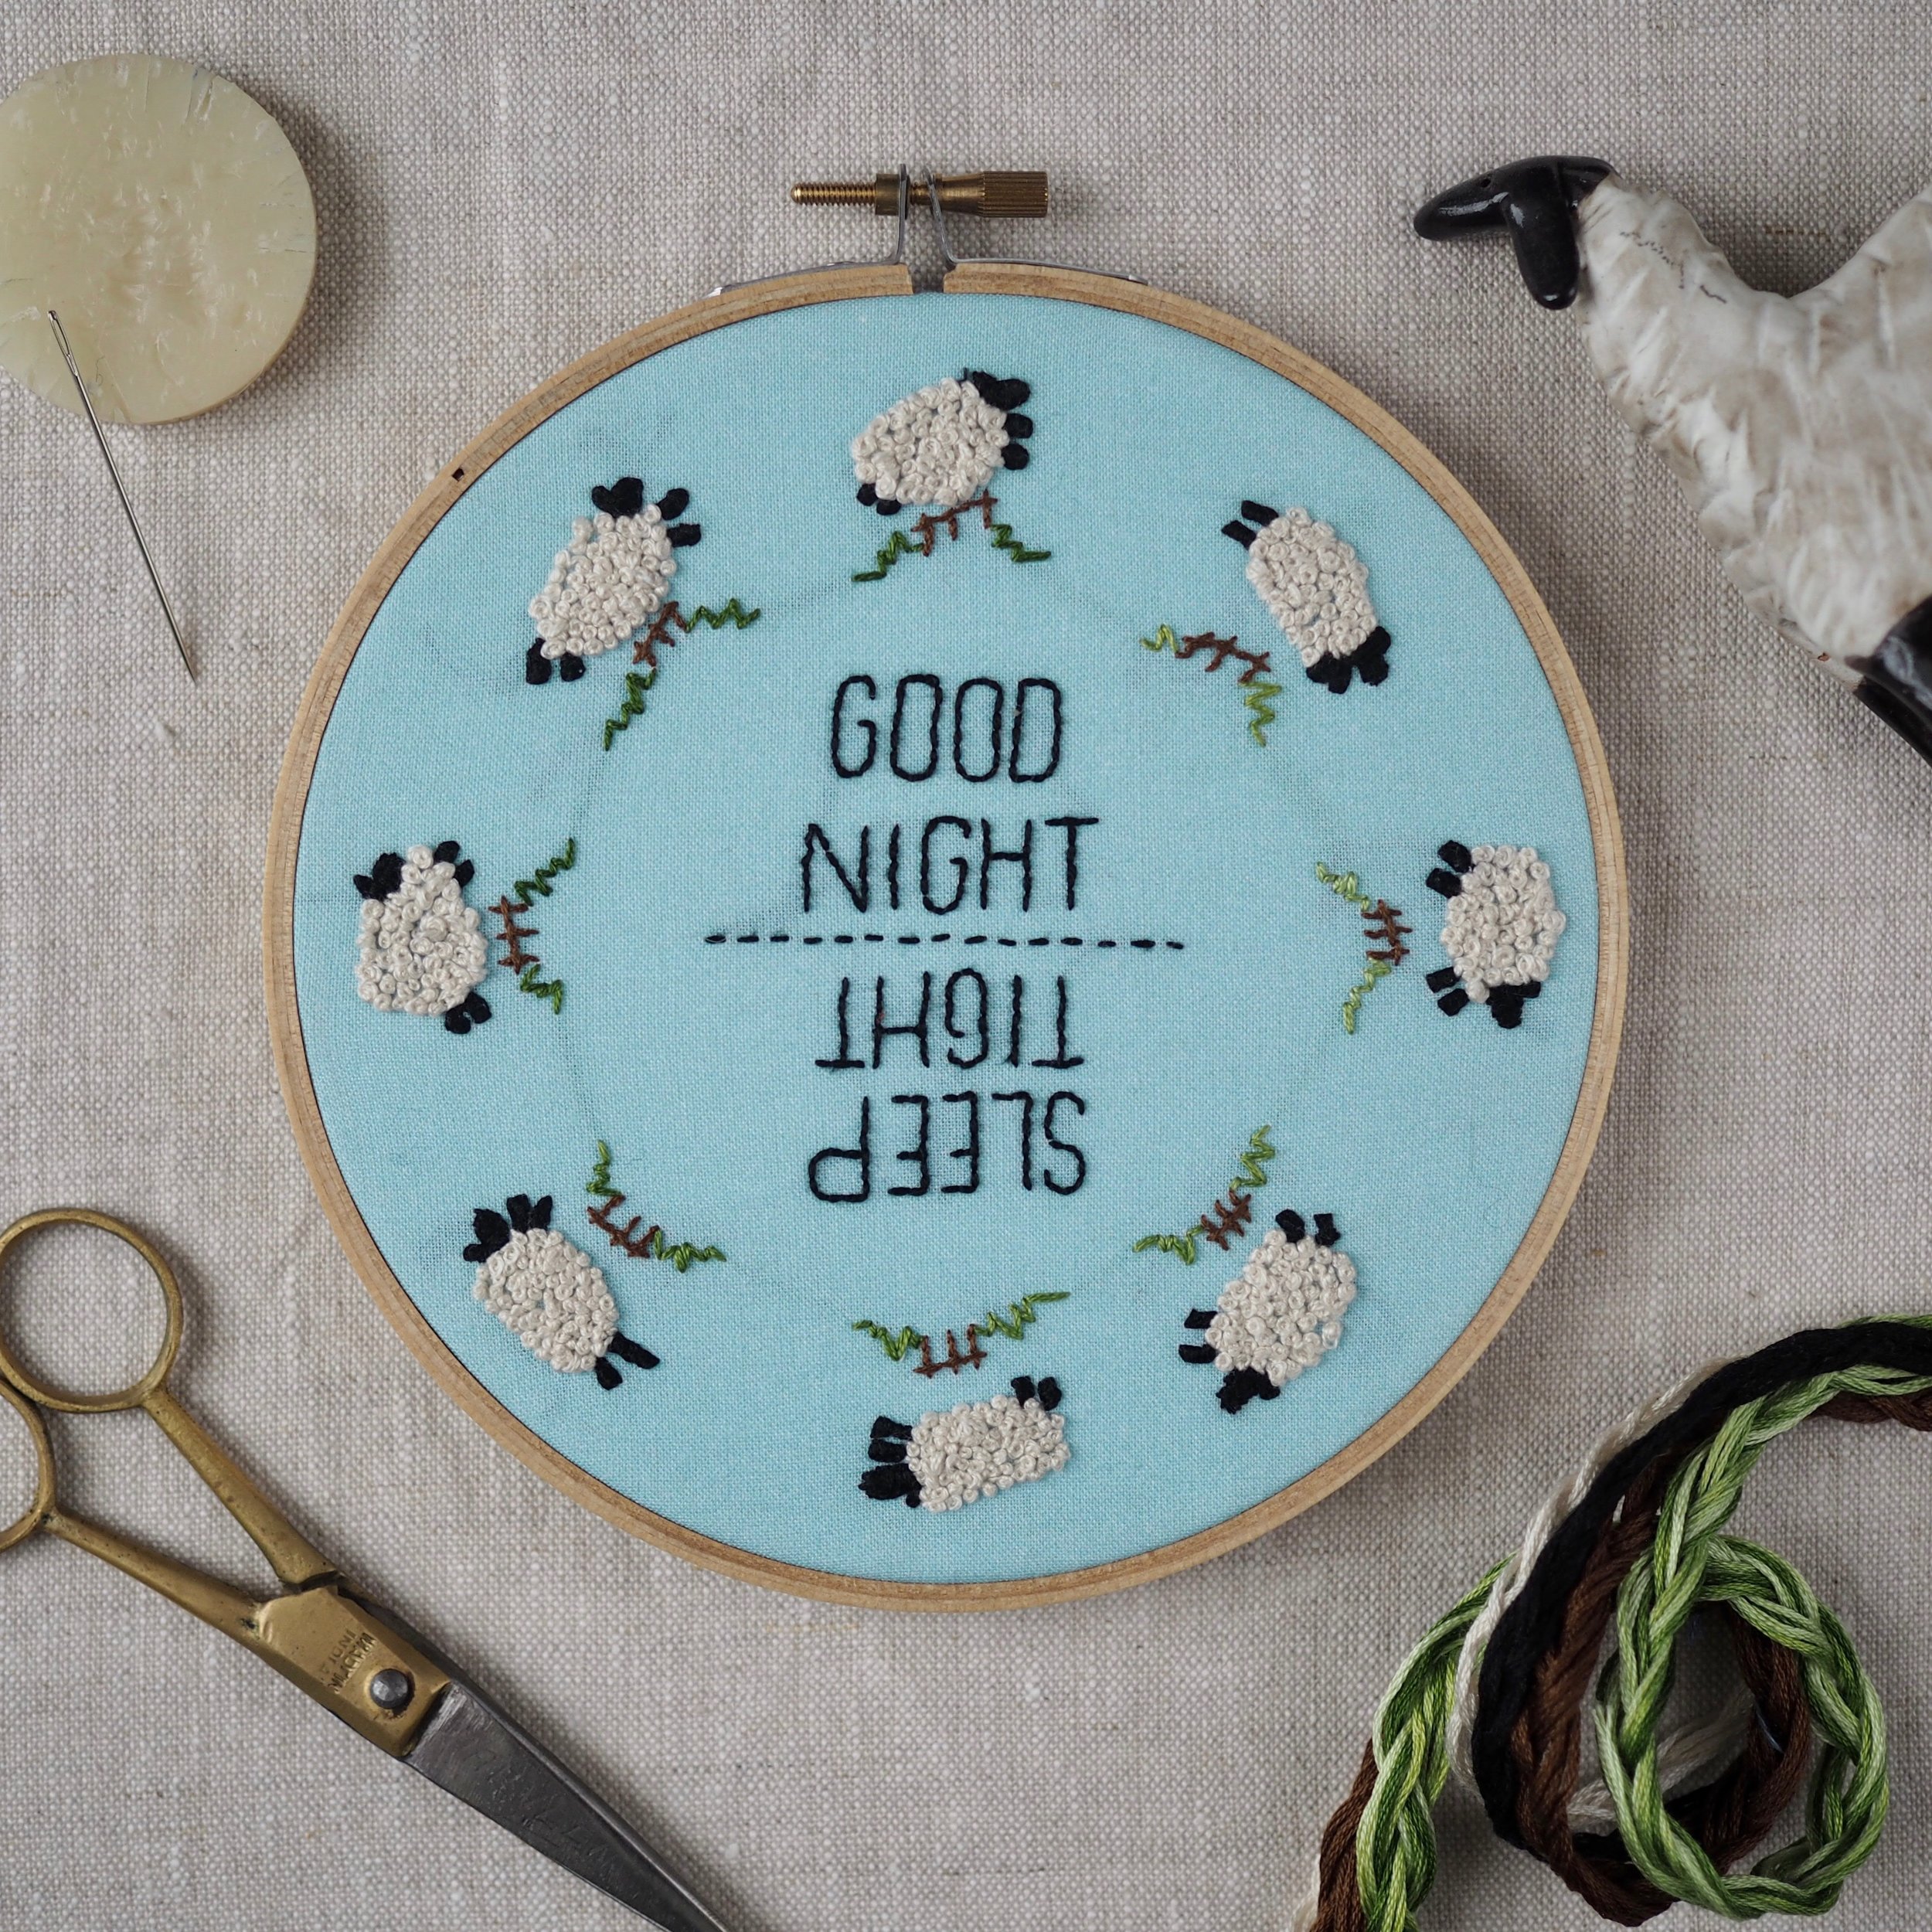
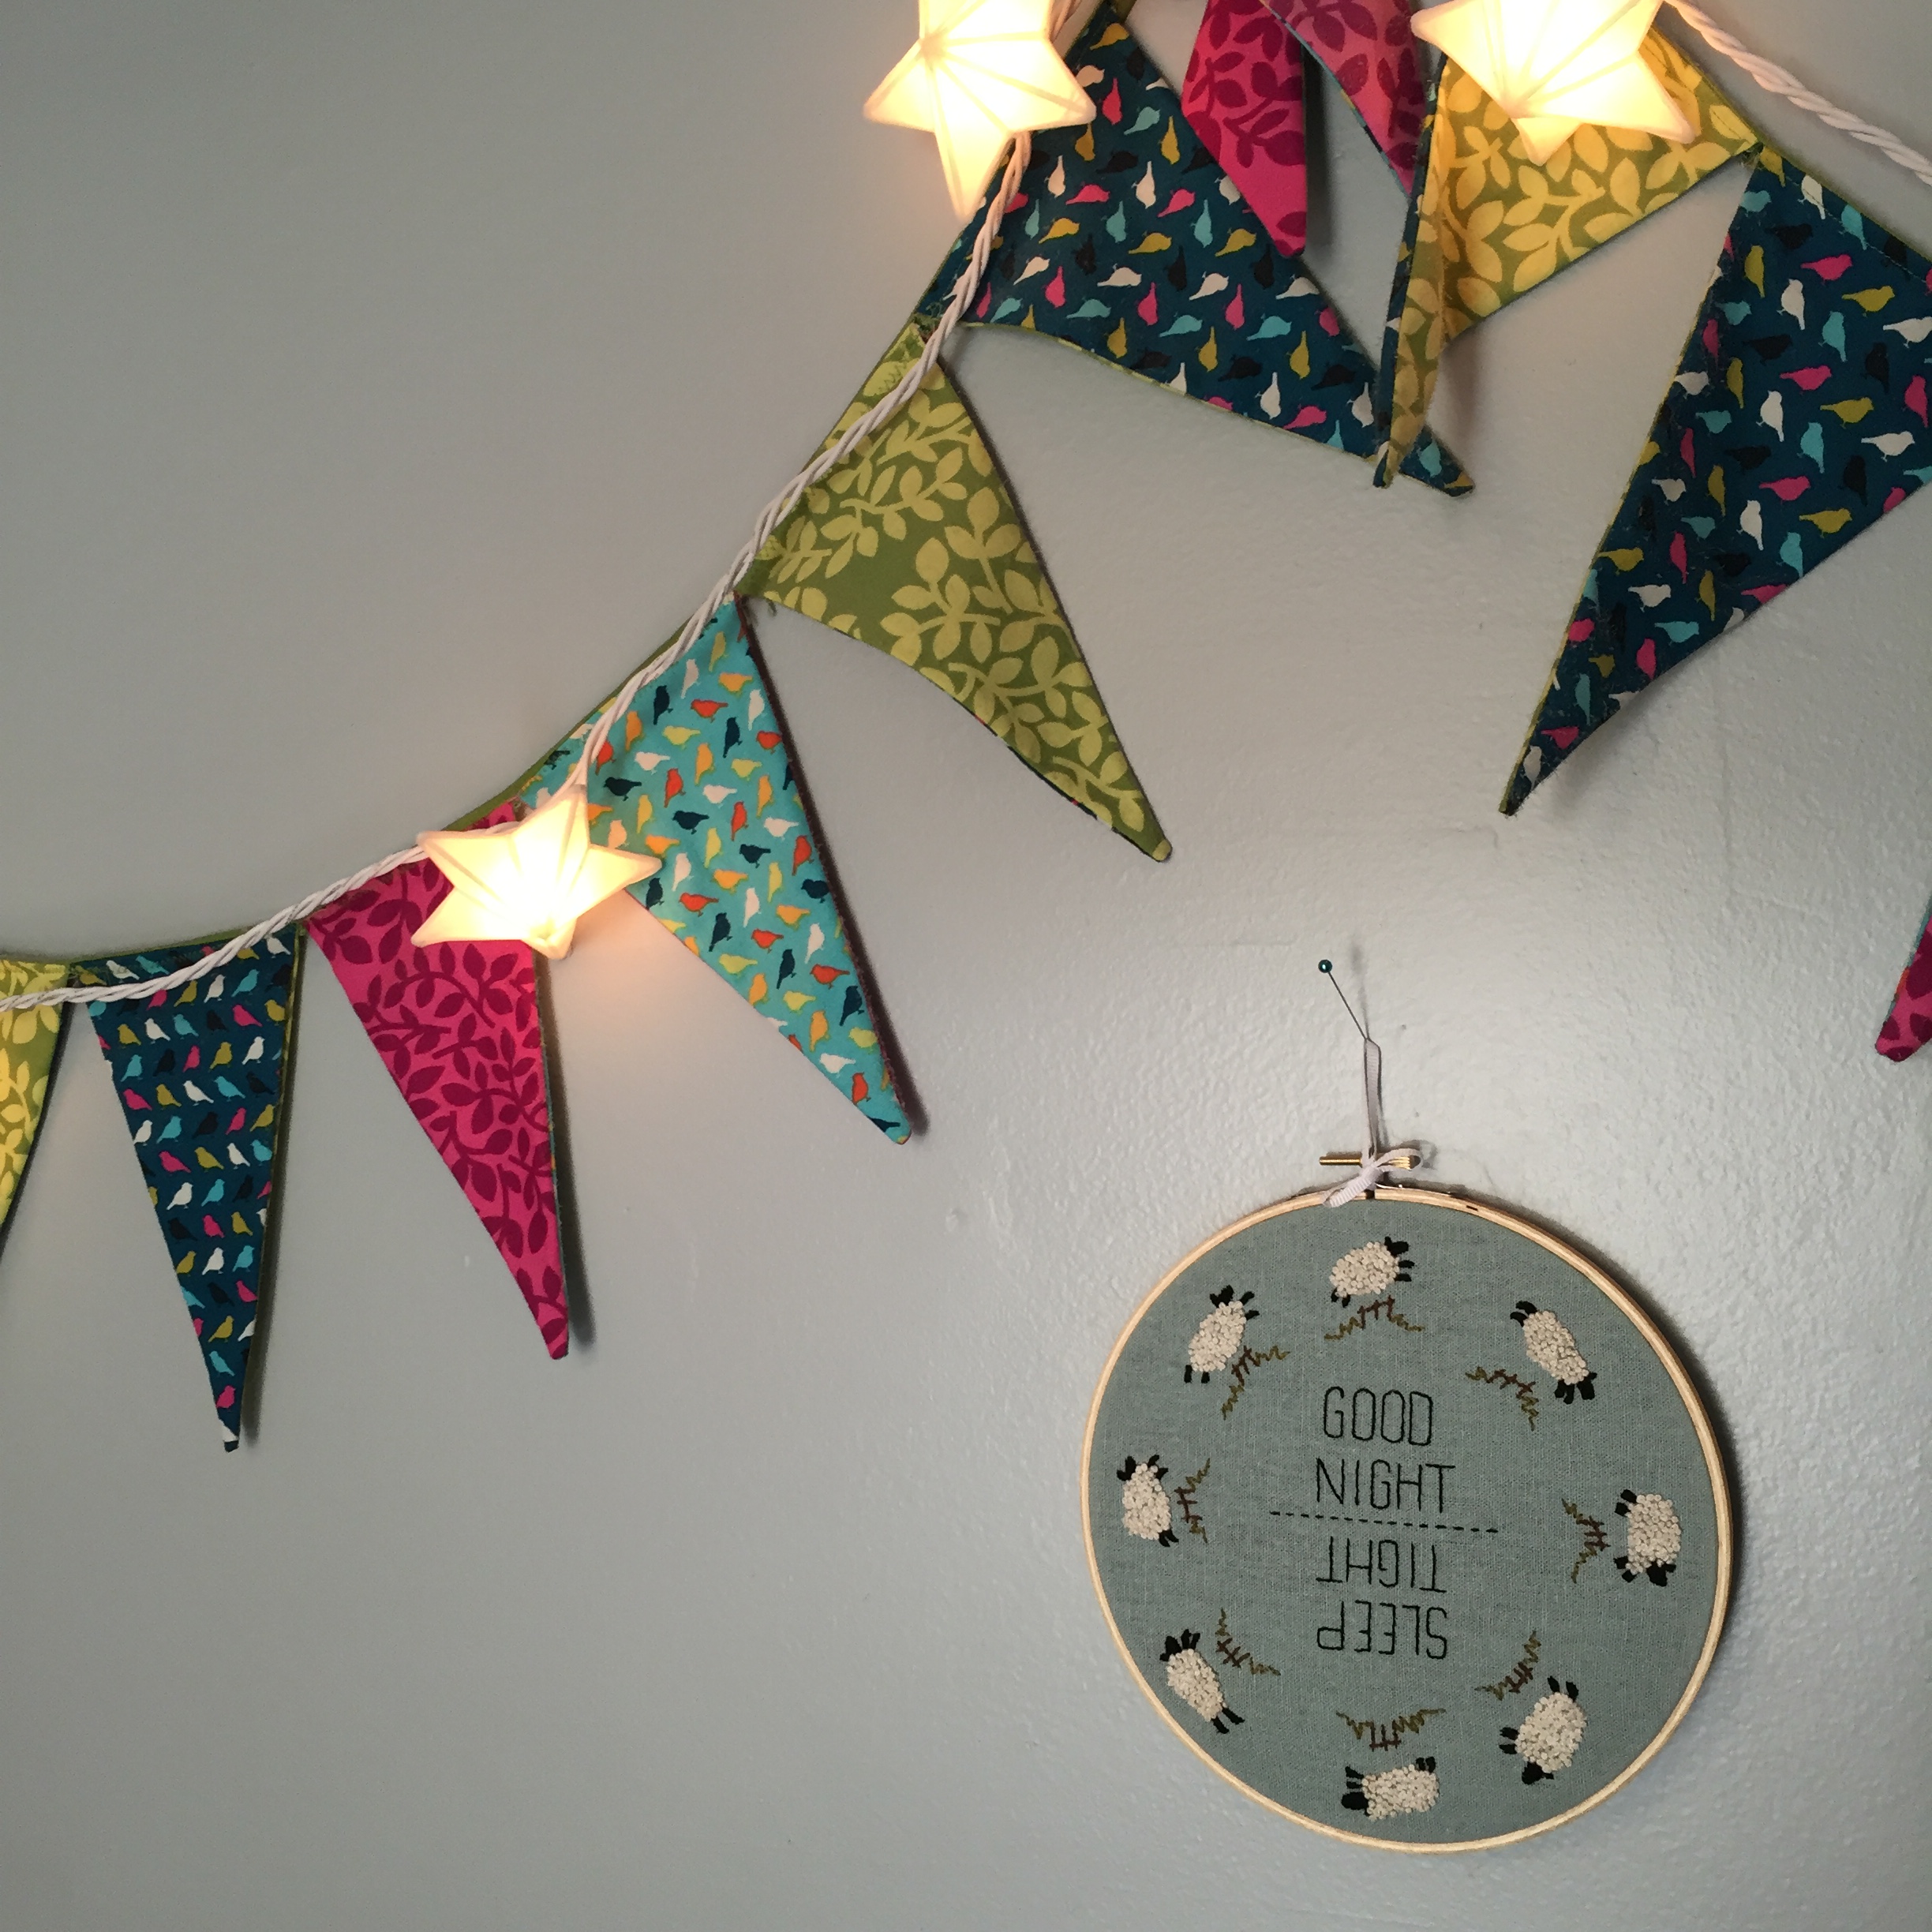
We just moved her to the big-girl bed a few weeks ago and while she had chosen to lie on top of, rather than under it, I think she appreciates the quilt (as much as a three-year-old will appreciate a blanket). I also finished my Good Night Sleep Tight embroidery I started forever ago in time to hang it over her new bed. I'm kinda in love with my little french knot sheep and am planning to turn it into a pattern/kit. LMC must like it too, because when I started working on my new embroidery project from cozyblue, she asked if that was for her room too.
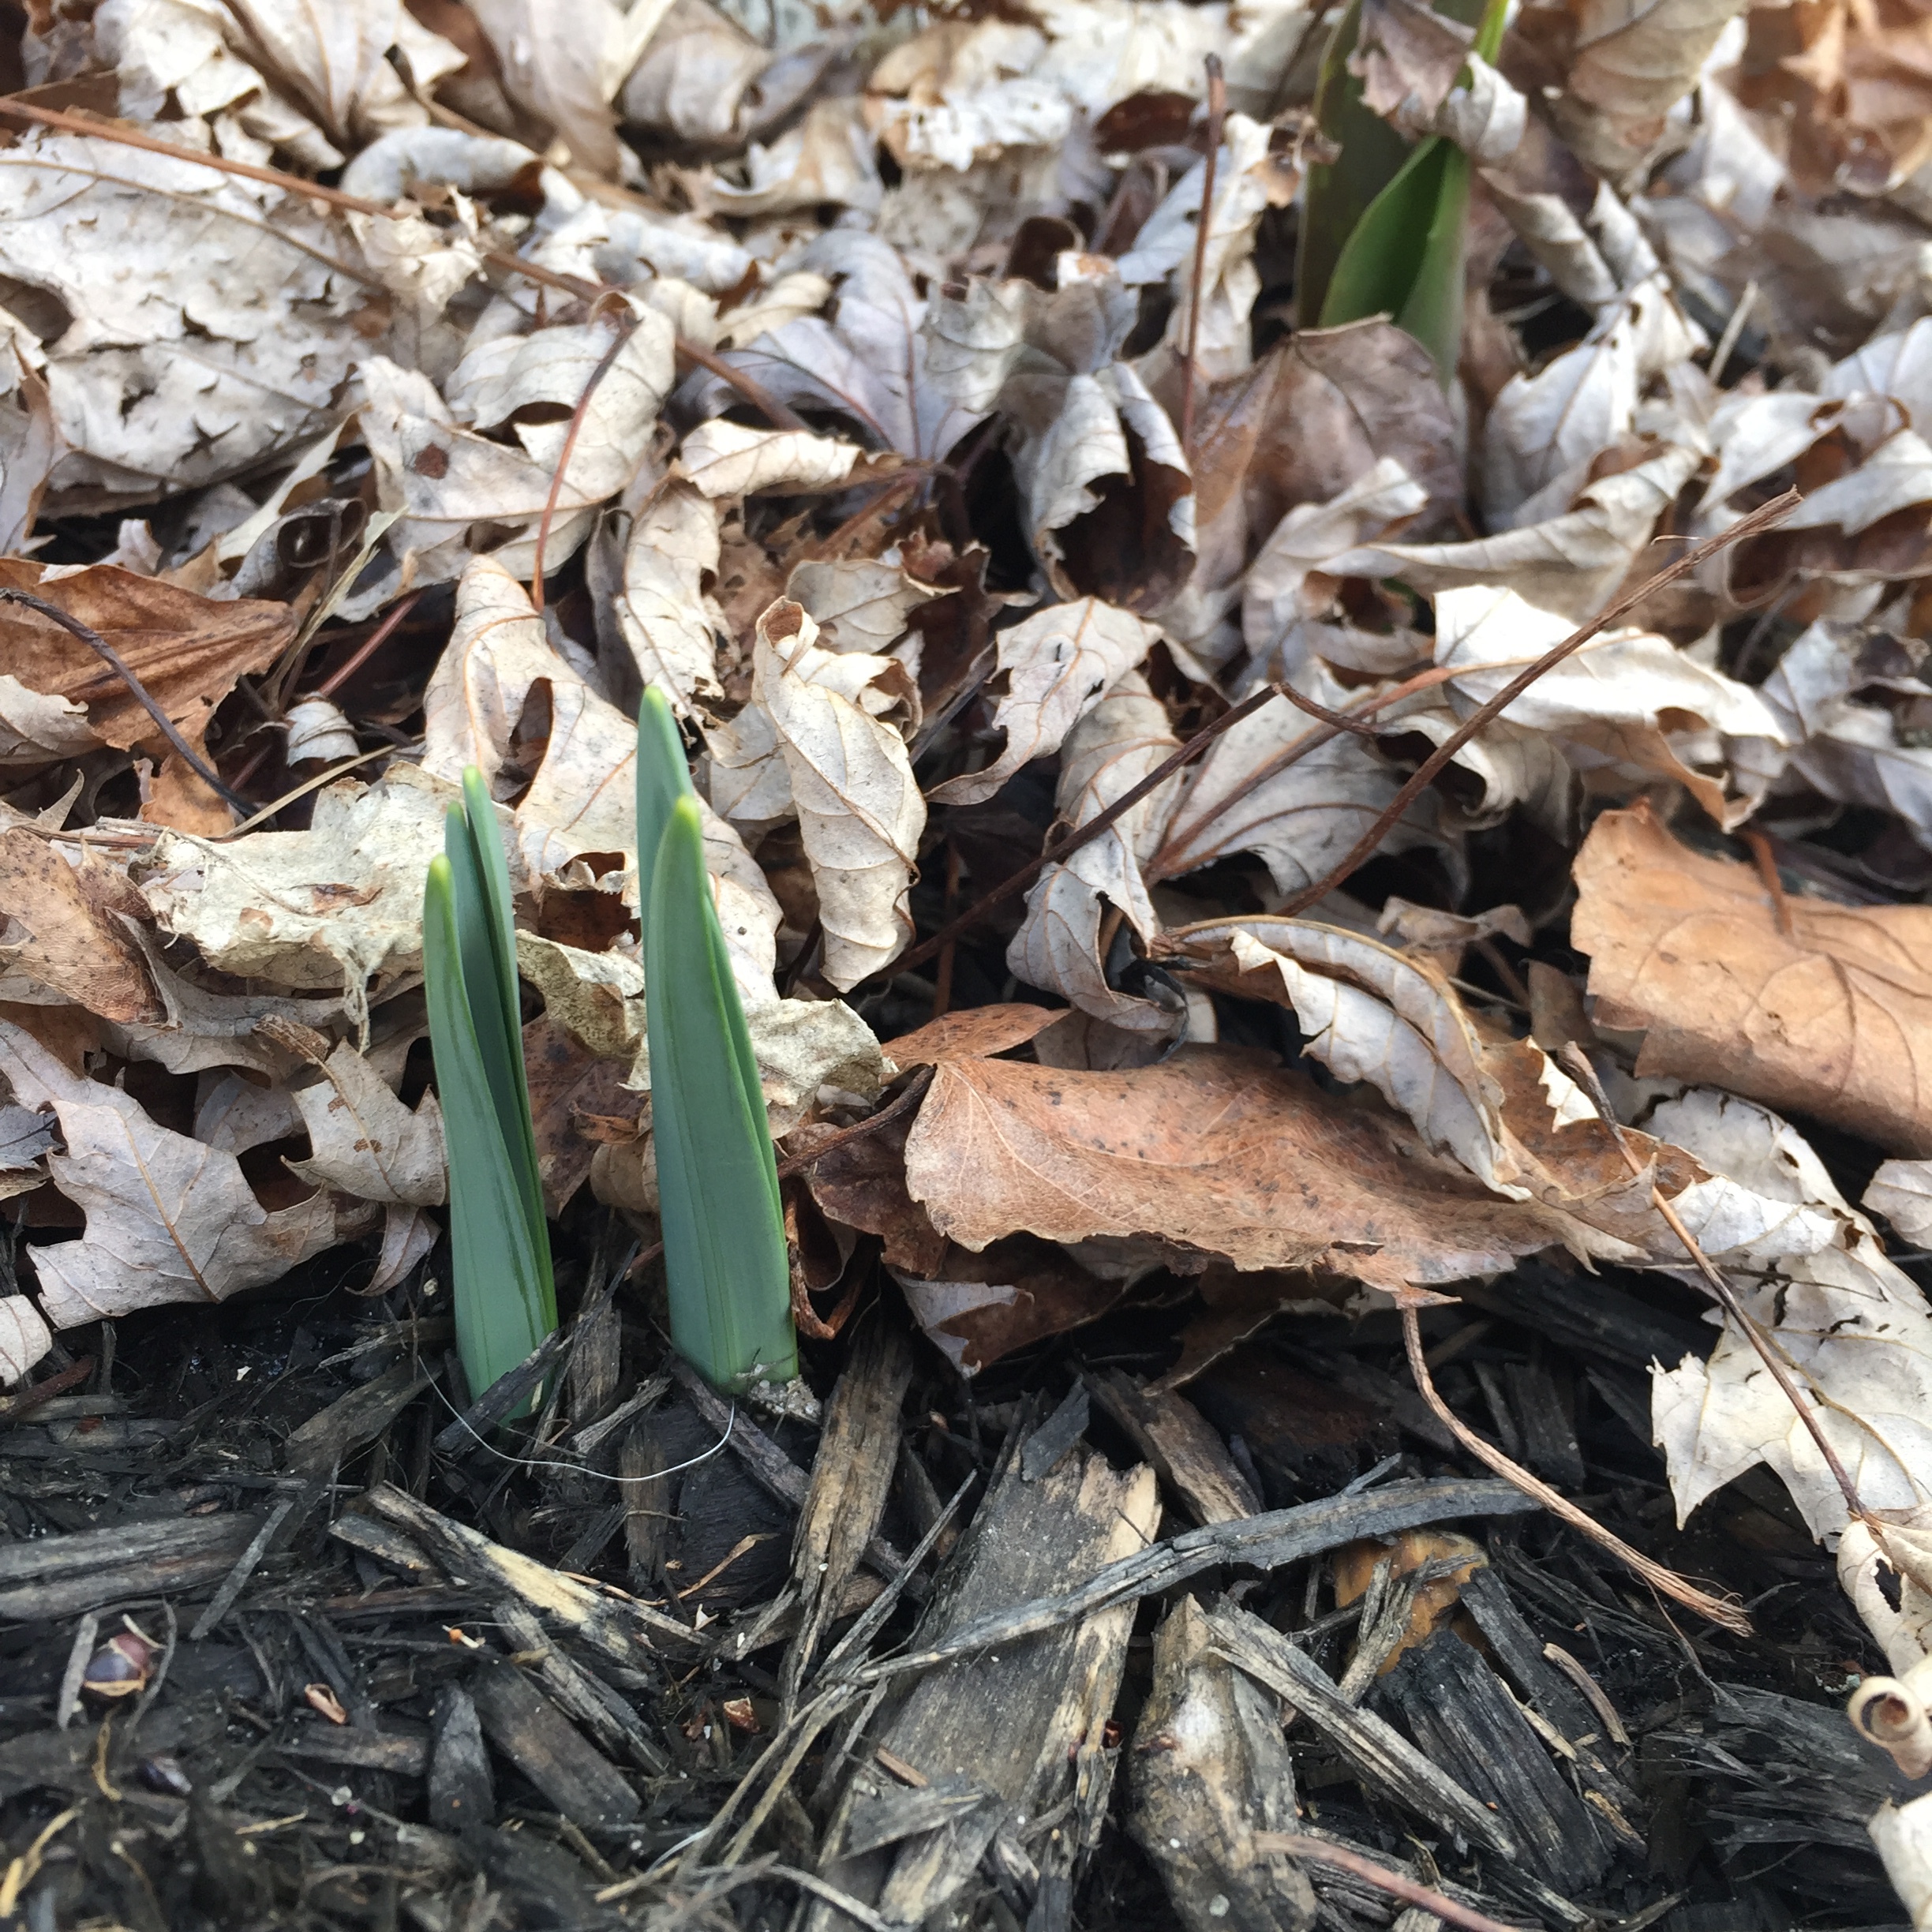
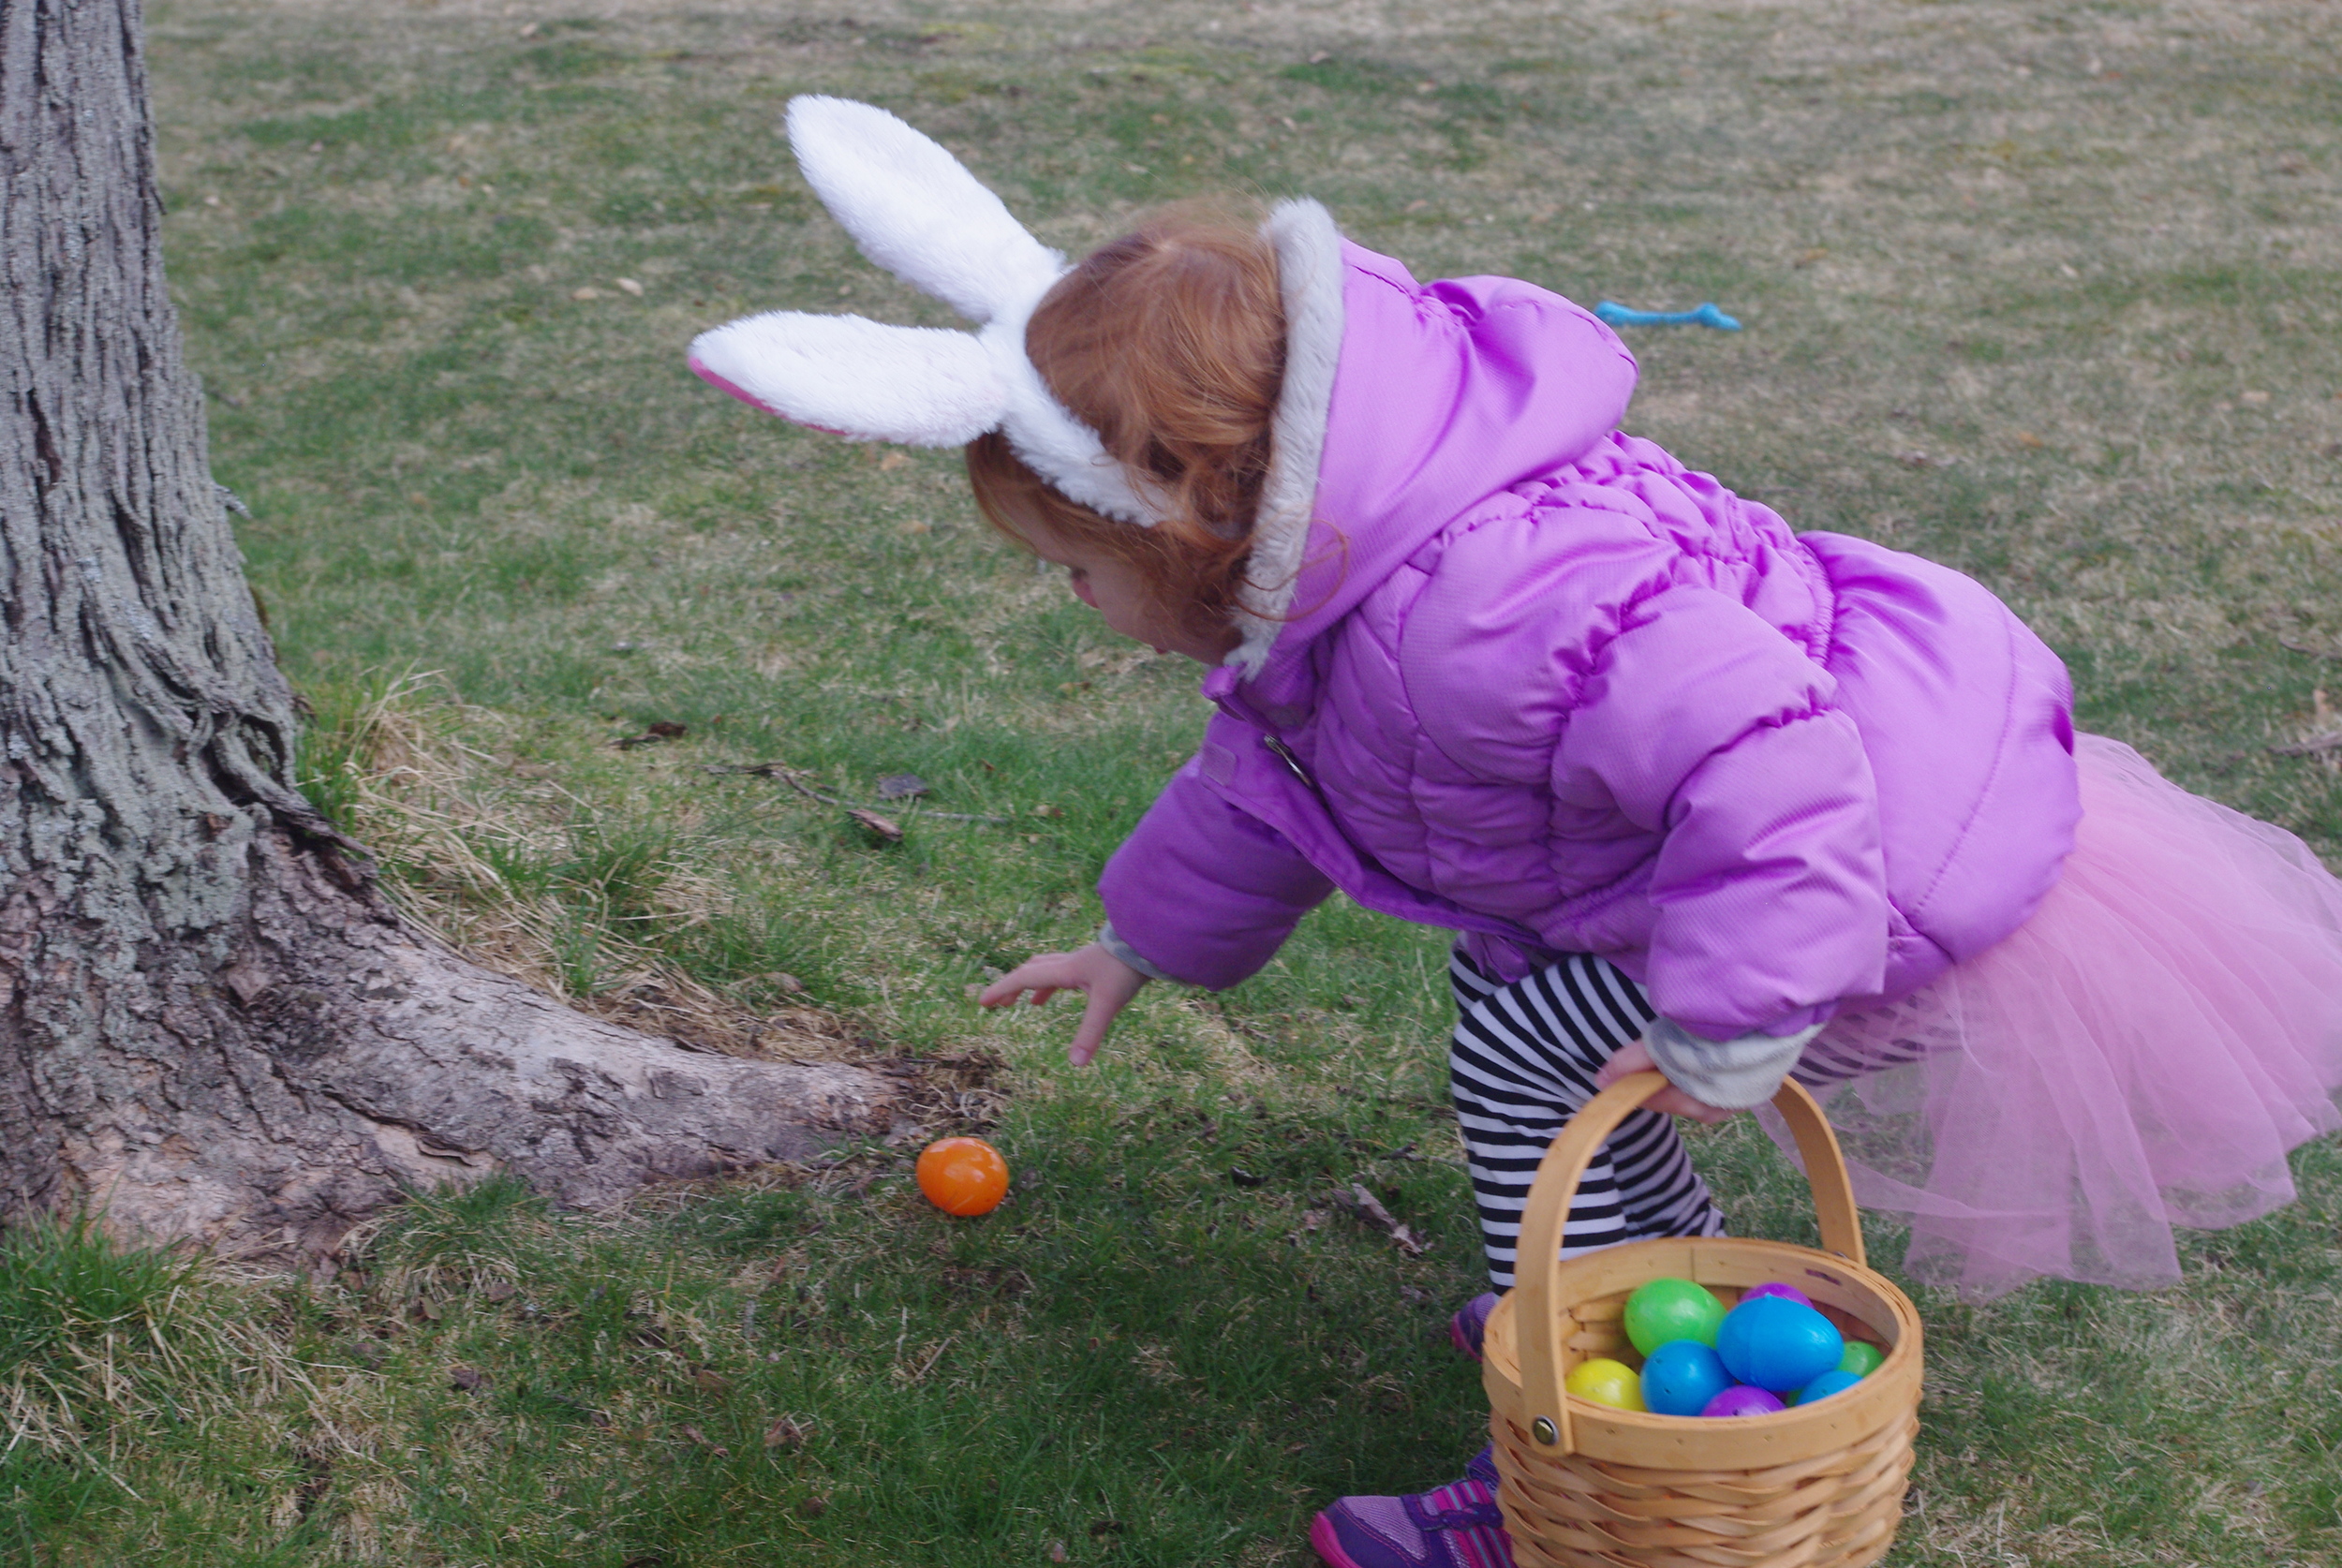
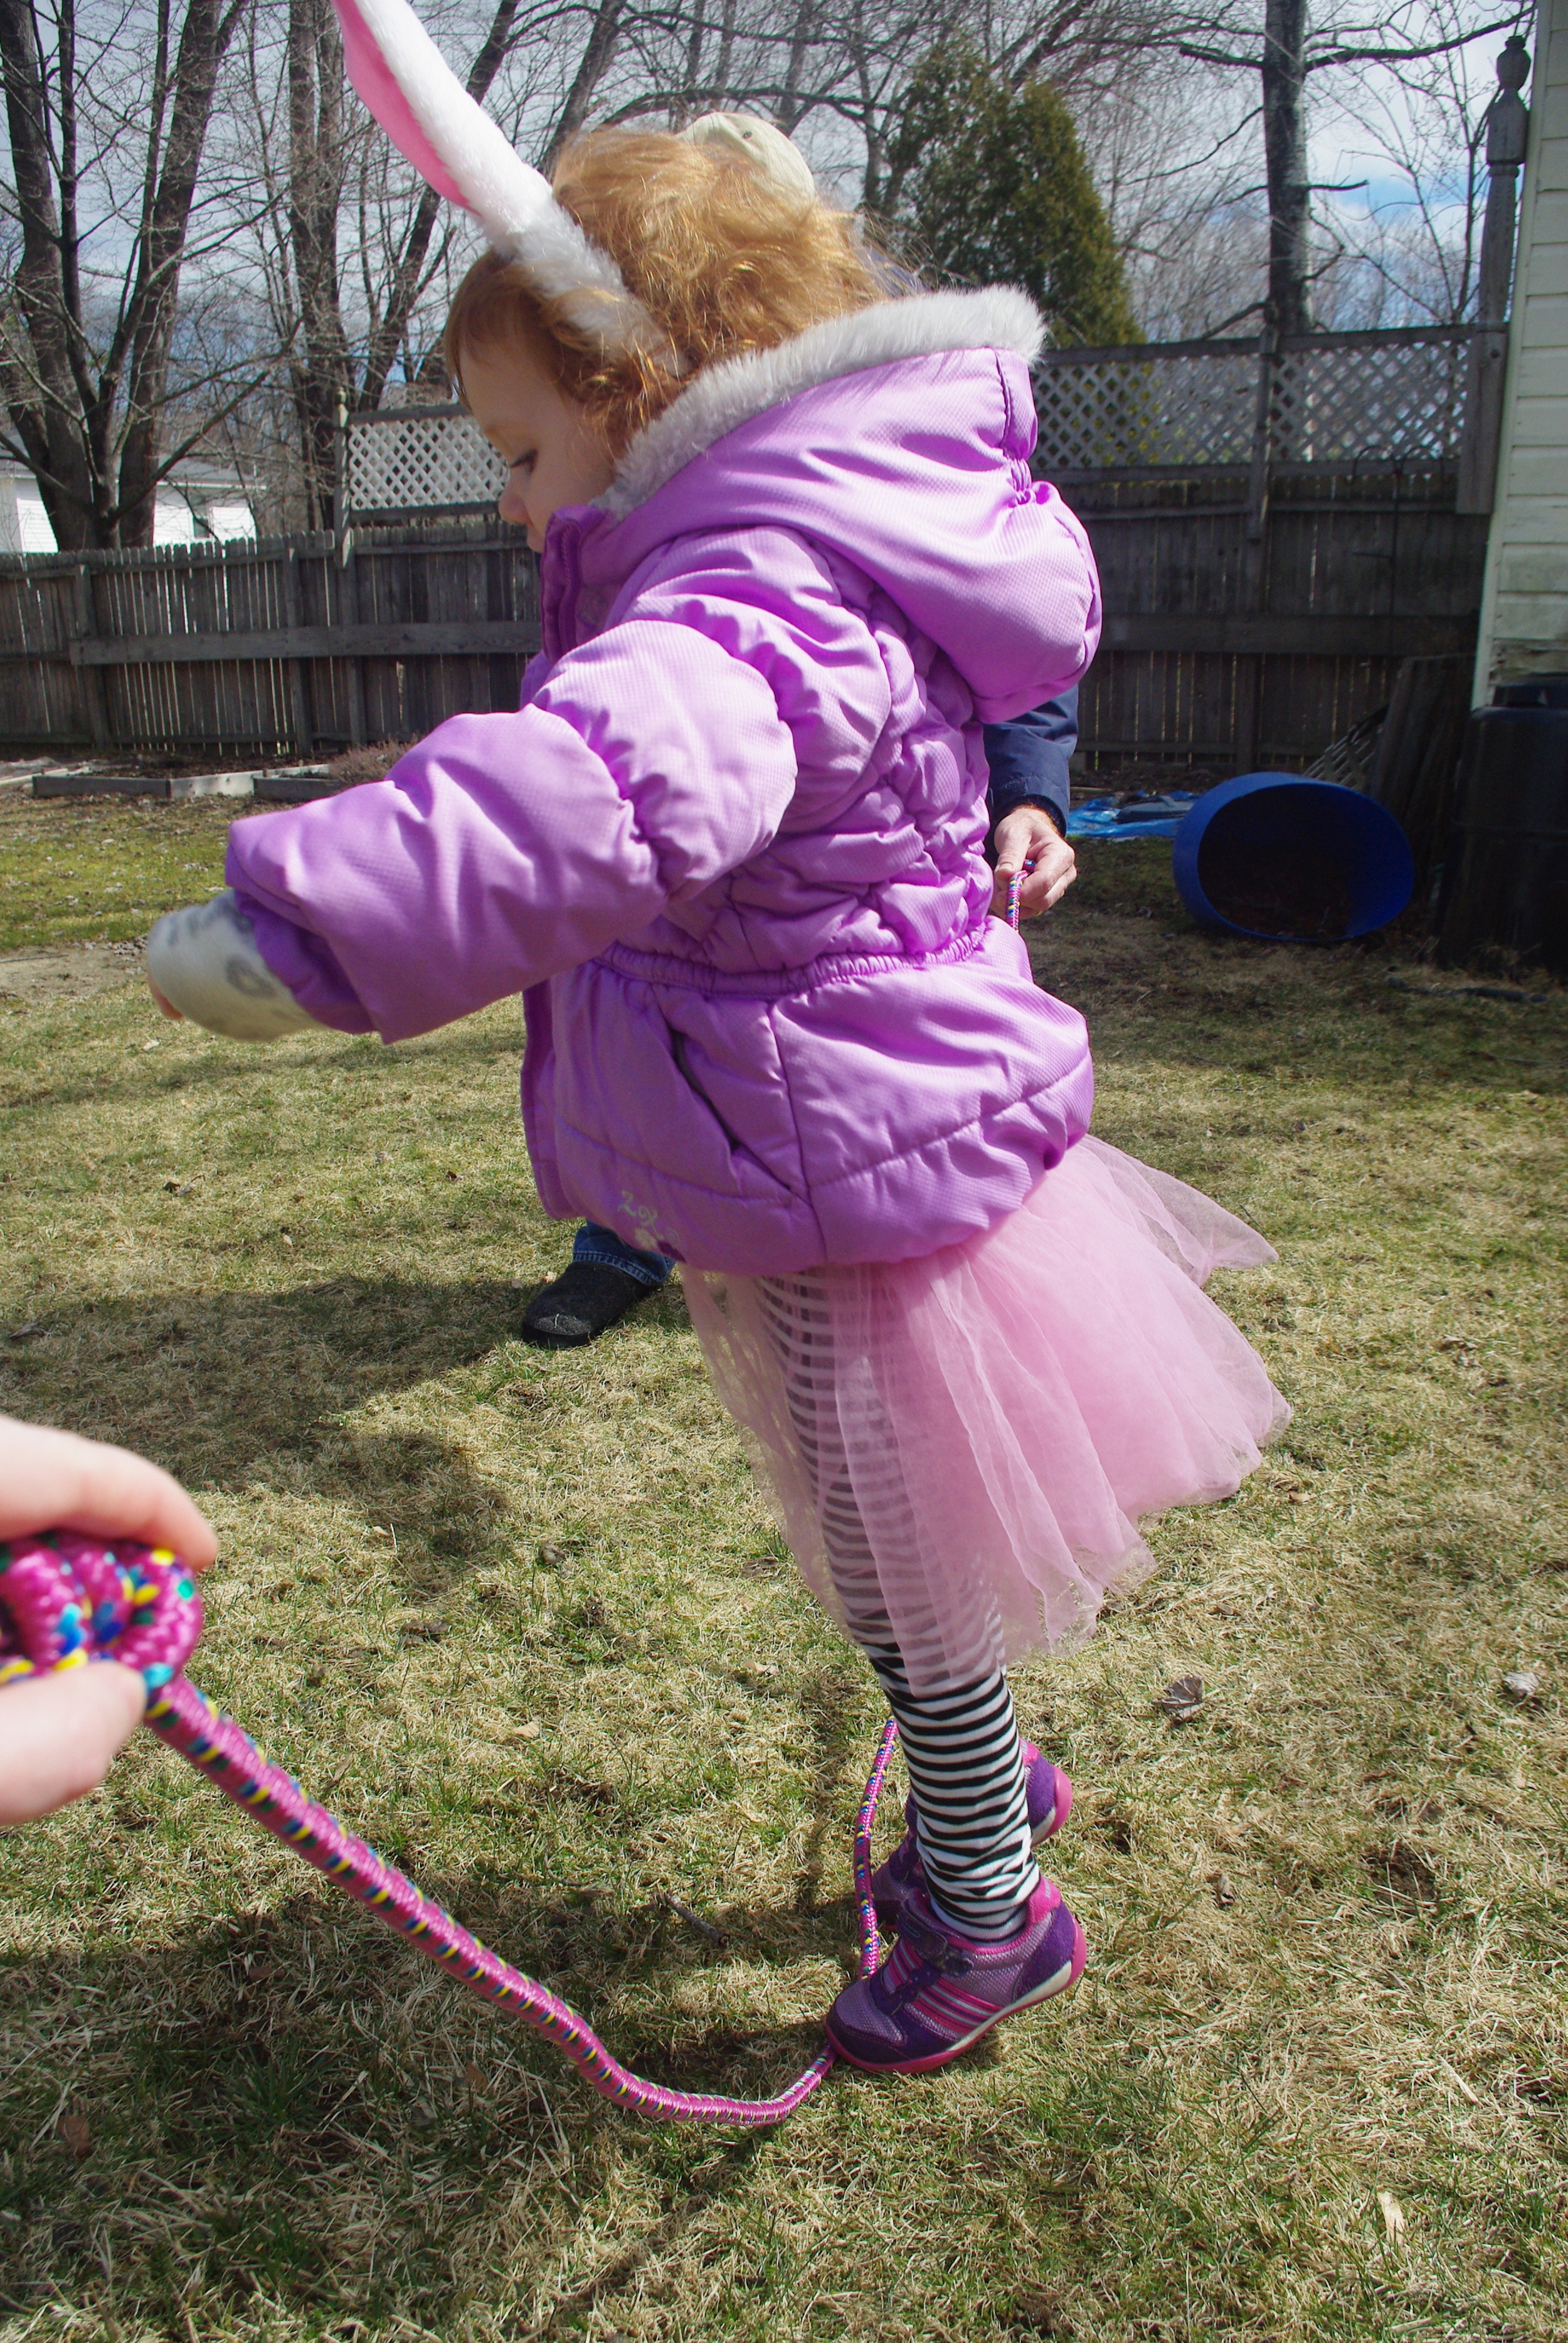
Despite the fact that Winter has seemed to hold off doing all it's wintering until Mach, it was actually warm enough to do our egg hunt outside, which was great fun. That tiny patch of snow is all gone now, my bulbs are starting to bloom and my seeds are sprouting indoors. It's all starting to feel very much like spring, even if we still have to wear our winter coats for a little while longer.


Spring in Southern Maine


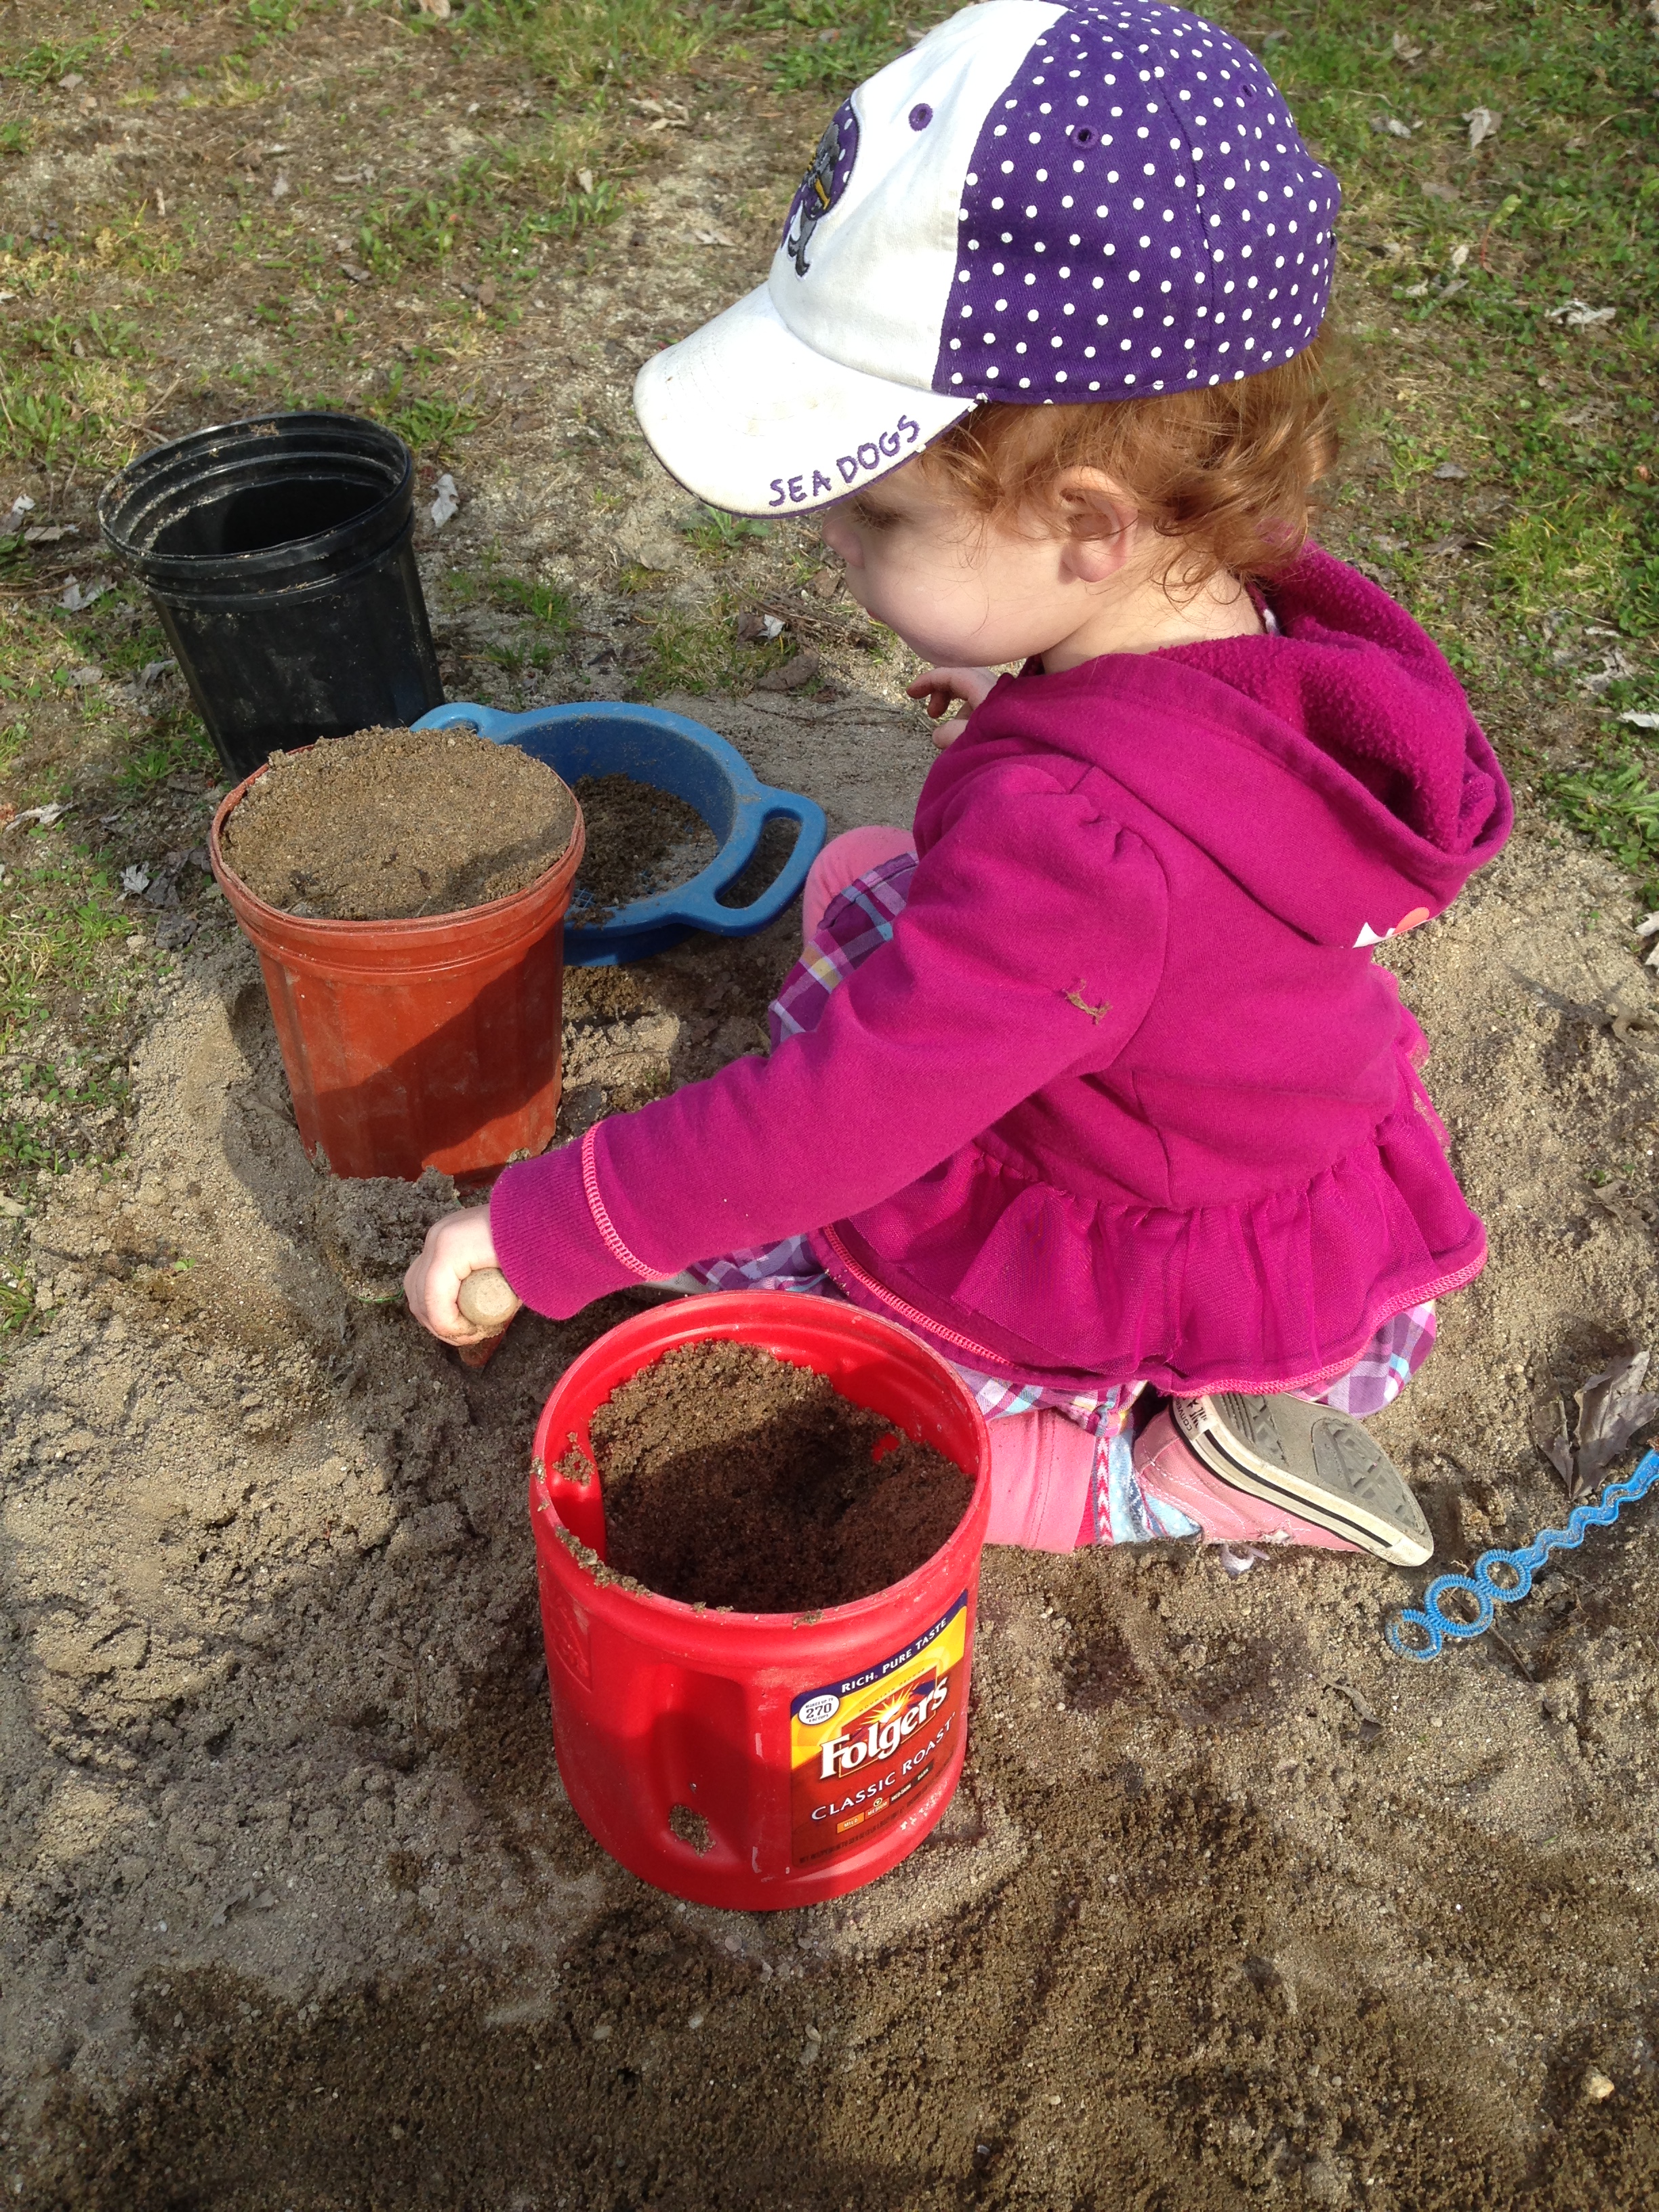

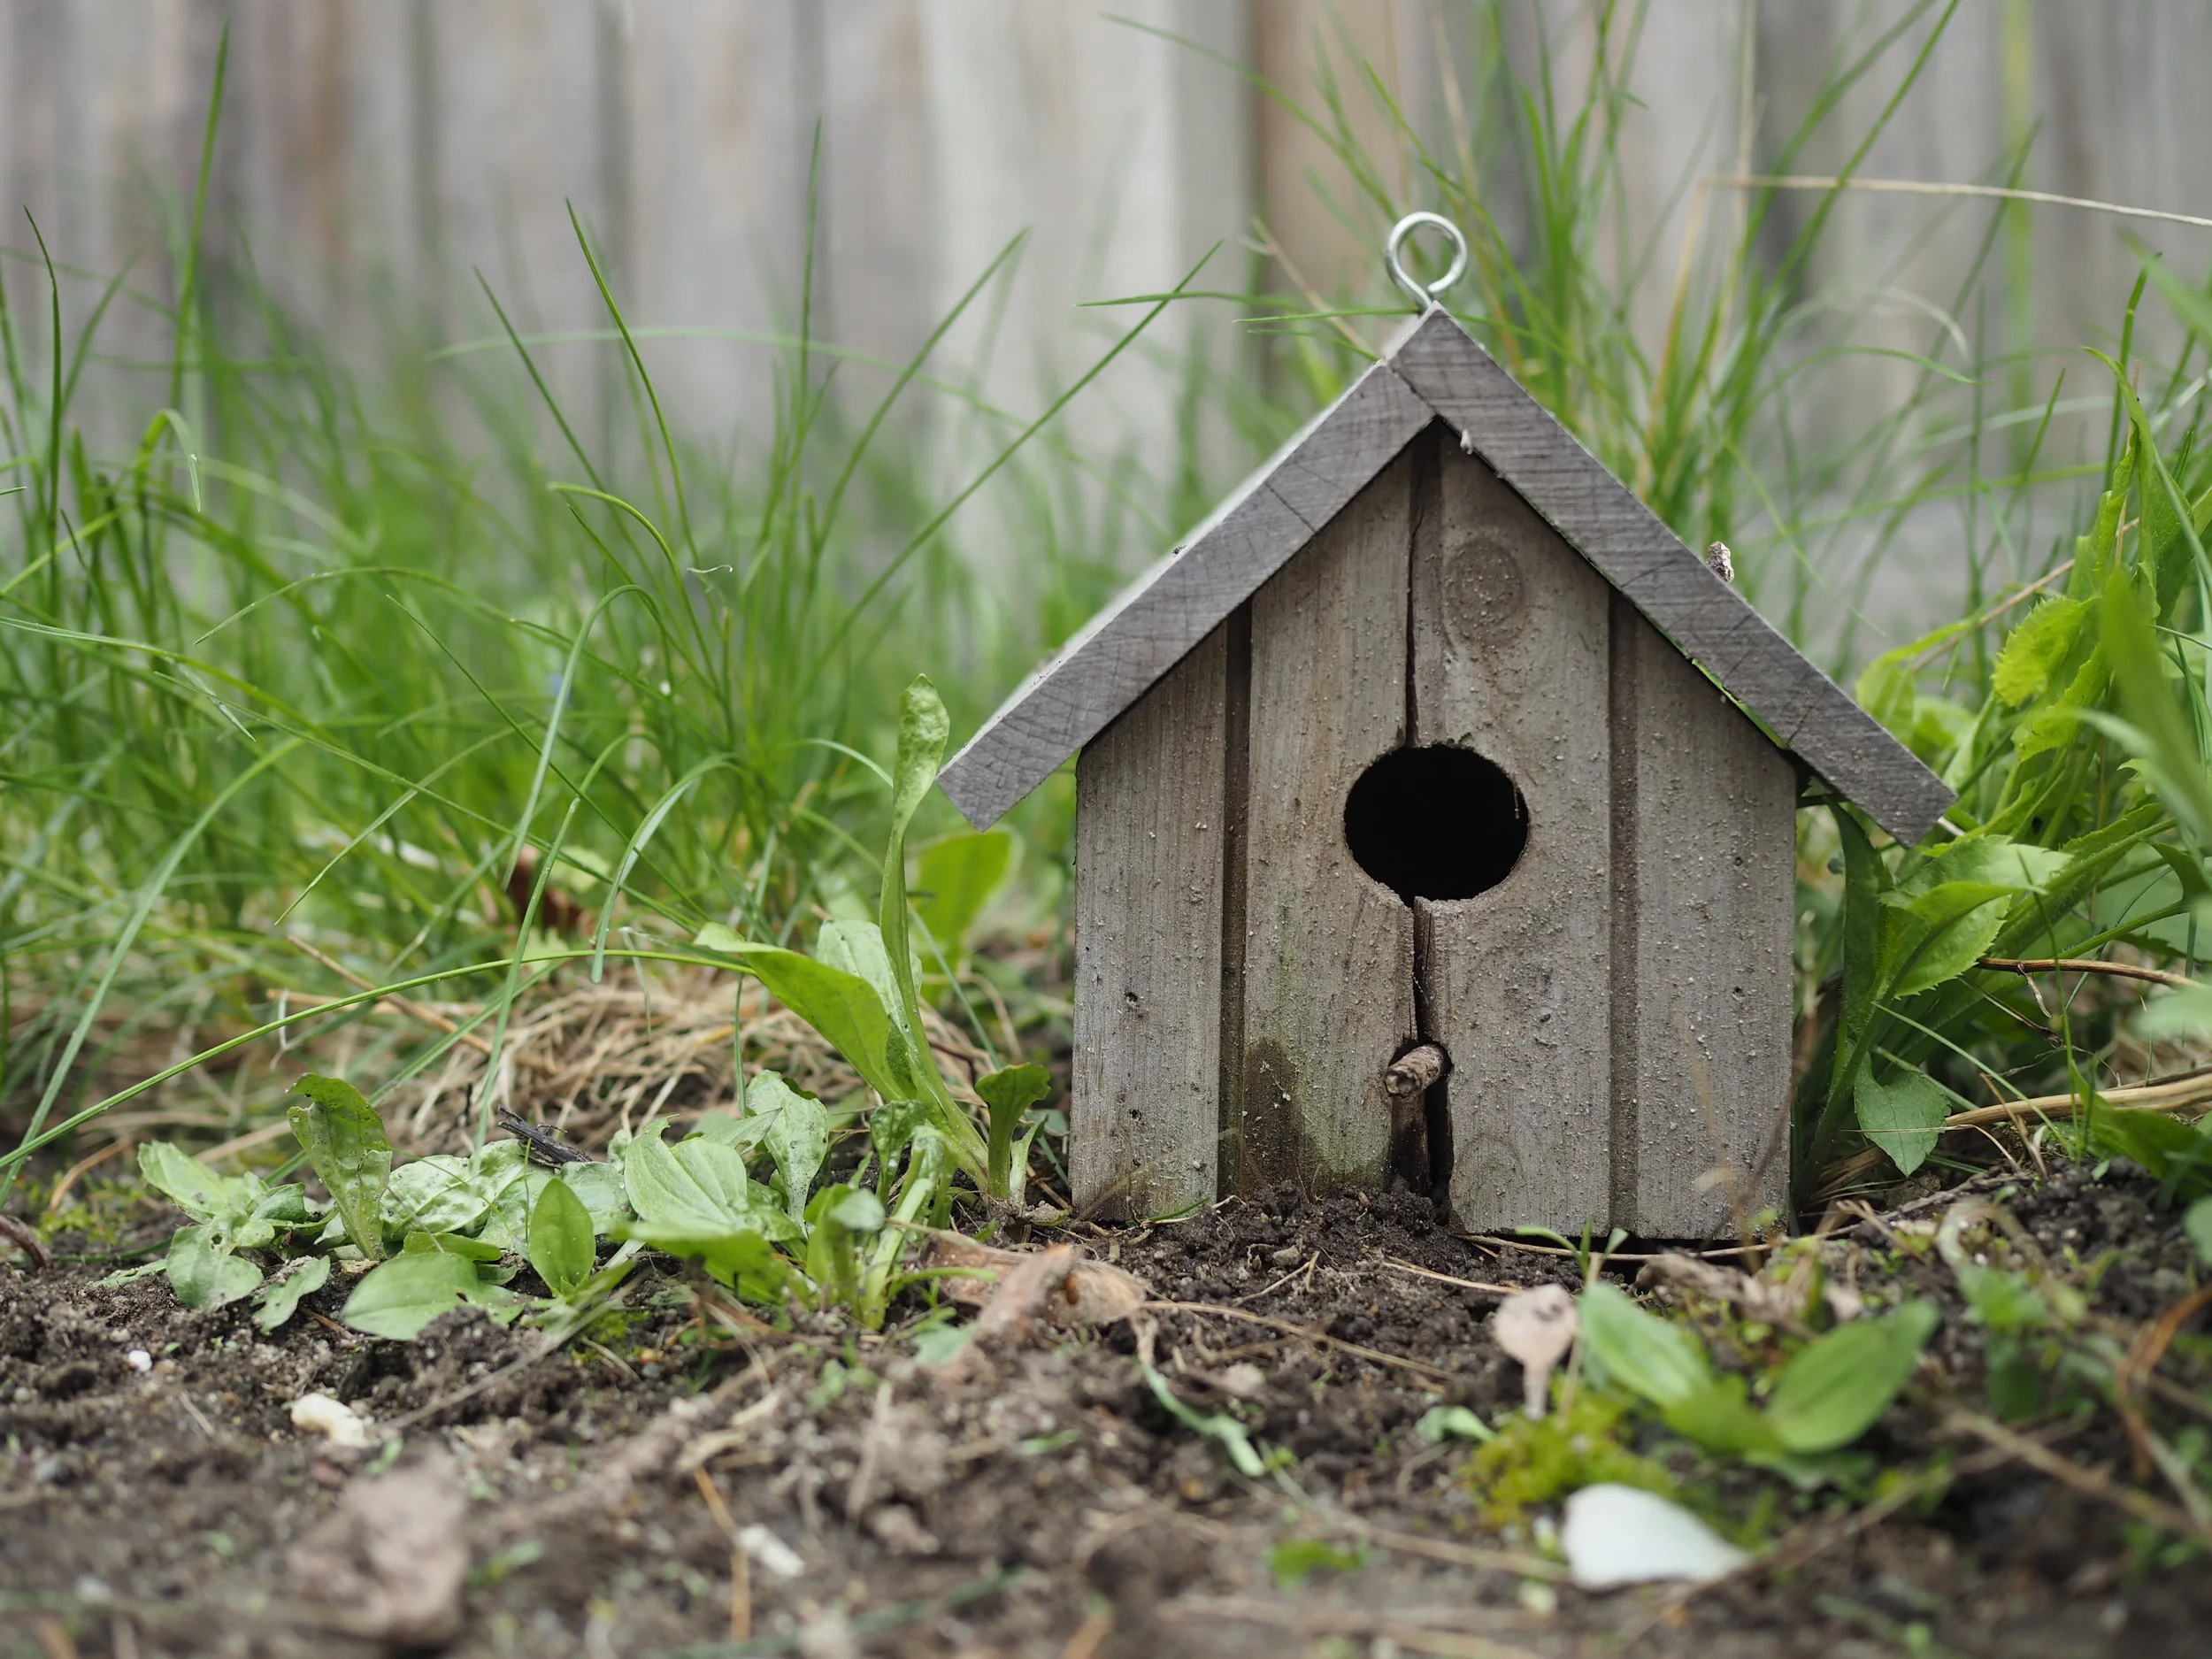
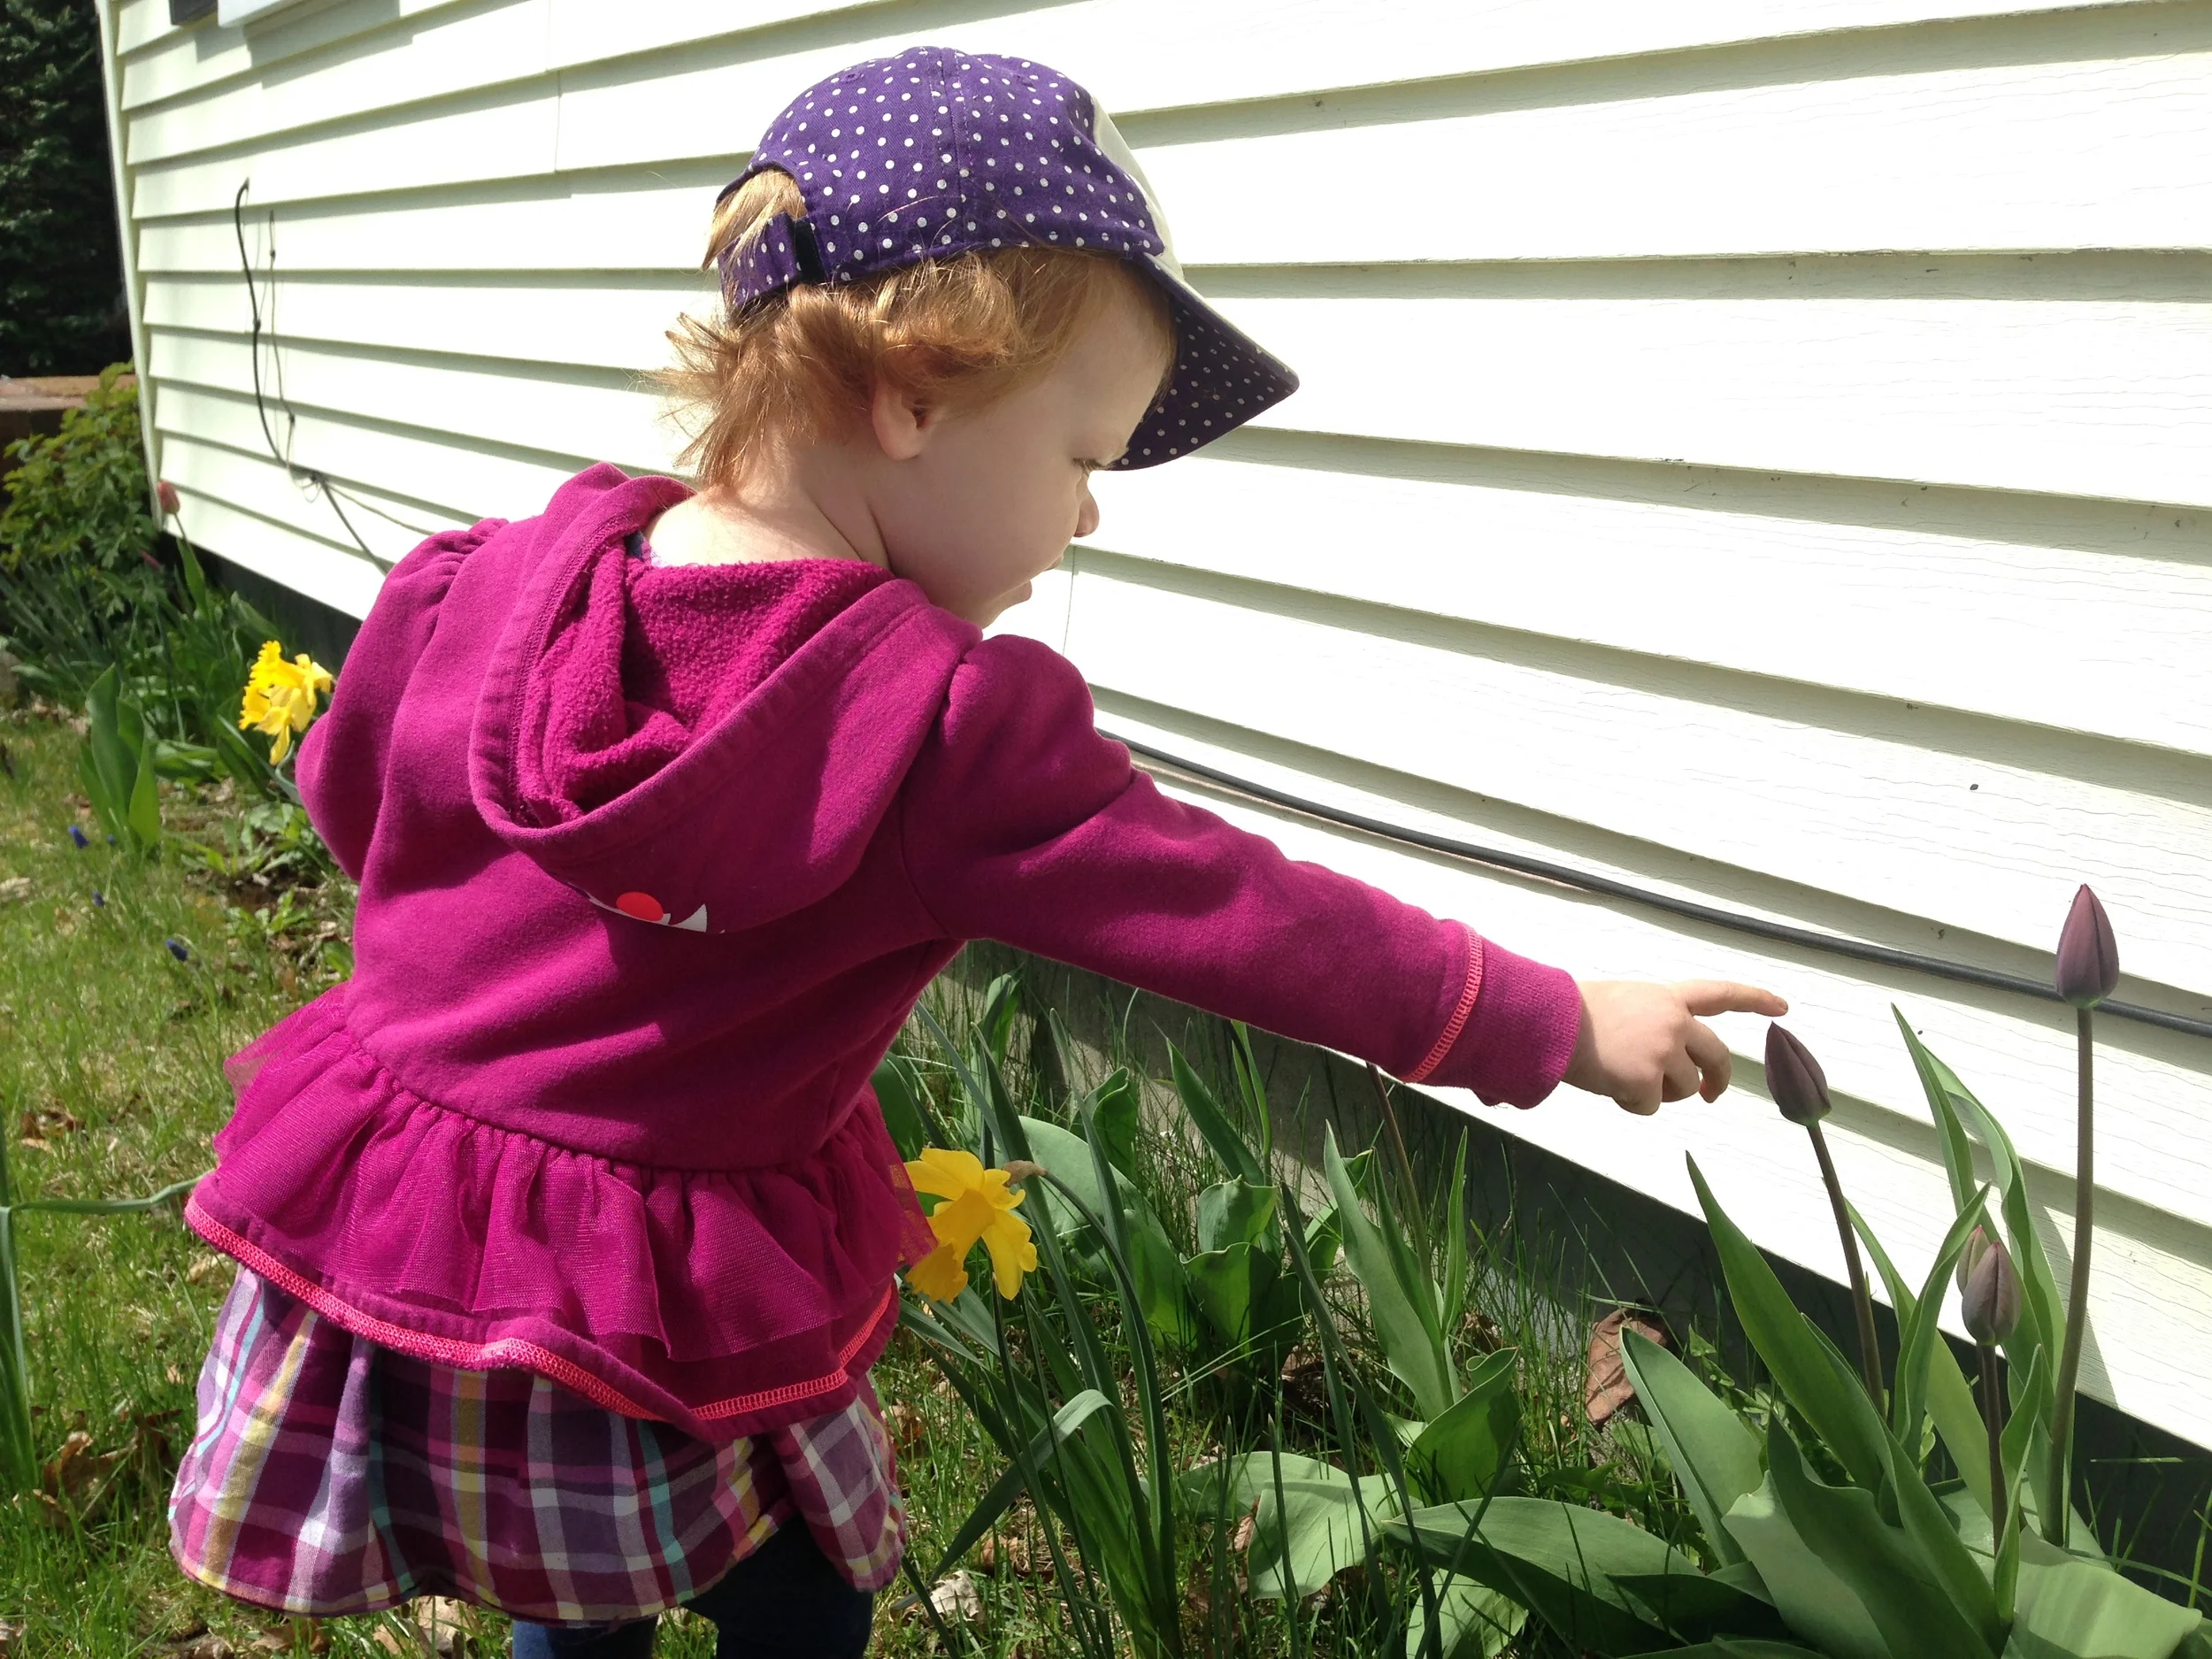
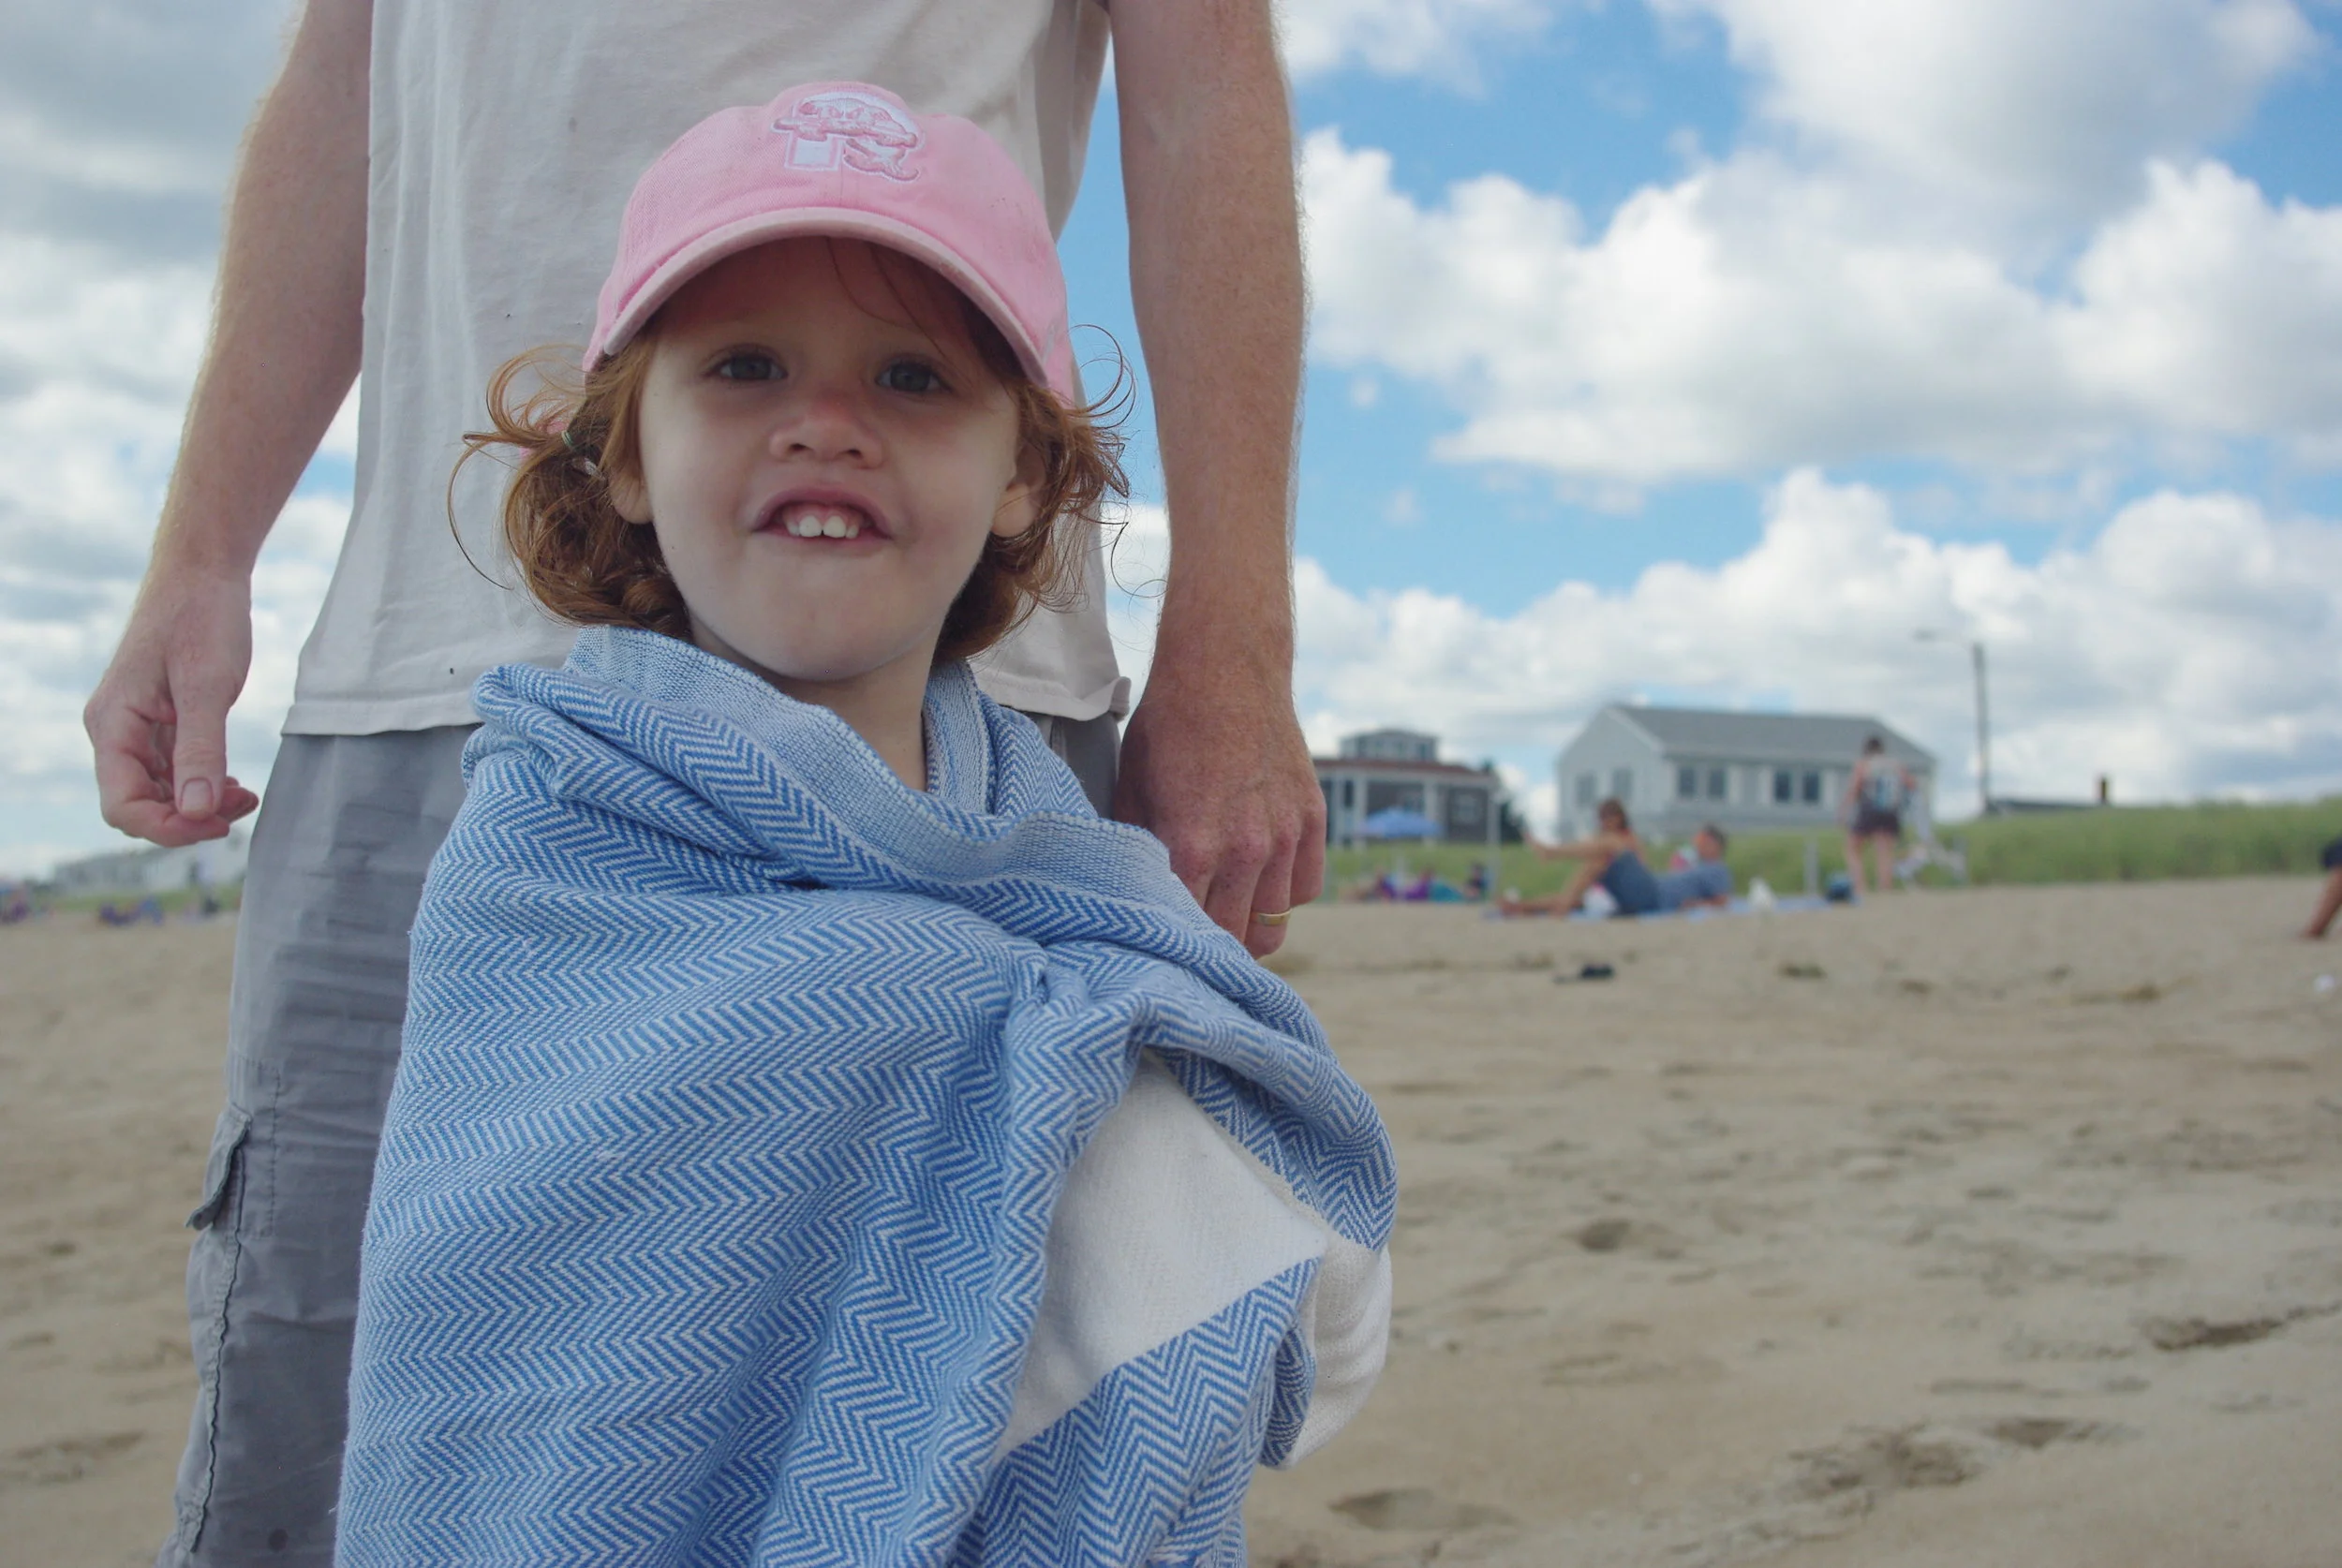
It finally feels like spring! The grass is getting greener by the day. the daffodils and tulips are in bloom and I'm cleaning up flower beds and laying down mulch. The blueberry bush is pruned, the veggie garden fence has gone up, and the sand pit has been raked out and is ready for play. Free Comic Book day happened and we've pulled out the sunscreen and the Seadogs hat.
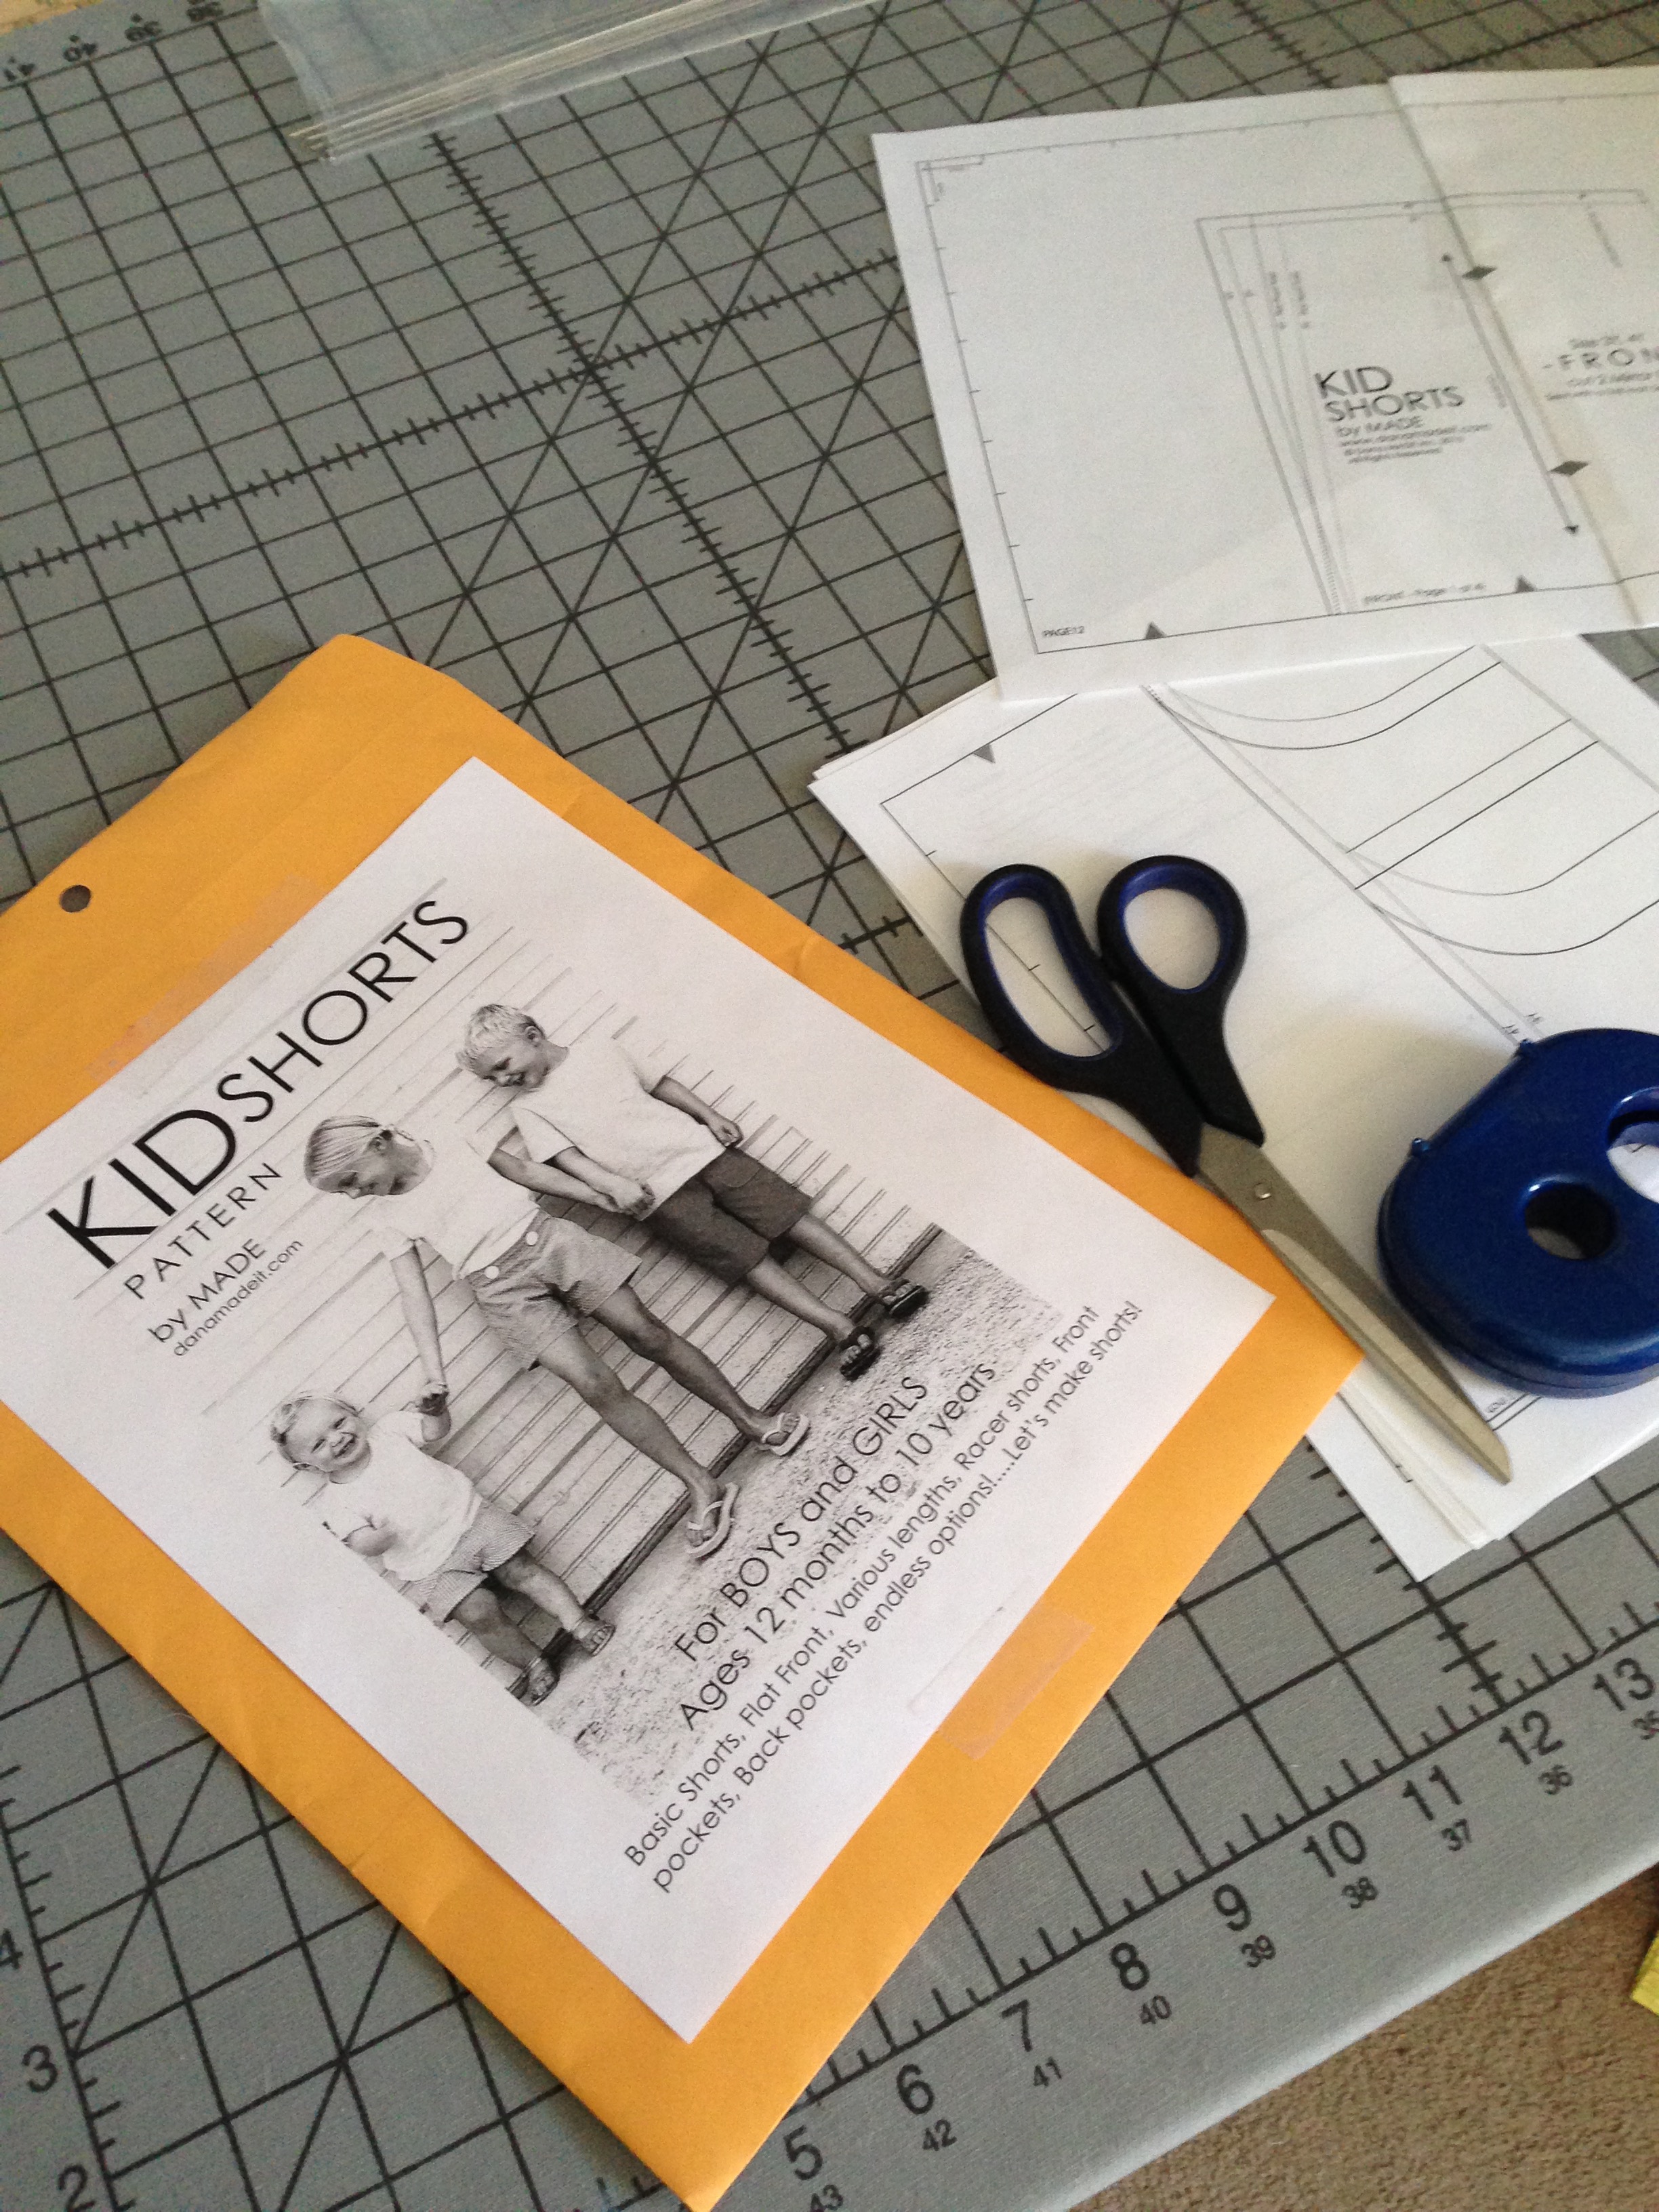
It'll still be a while before its warm enough for shorts, but that didn't stop me from sewing a pair for Little Miss Cleaver. The pattern is the KID Shorts from Dana at MADE. While I don't love that all the sewing instructions are on her site instead of included in the pattern (meaning I'm following instructions off my phone), the fit seems spot on (I made a 3T, lengthened the to the 4T hem), and the finished product is uber-cute, if I say so myself. I even got to sew in my first Ms. Cleaver label!
It took about 1.5 hours to make from taping together the pattern to finished shorts, and I imagine future pairs will be even quicker, especially if I do the more straightforward versions. It warmed the cockles of my sewist heart when LMC wanted to try them on as soon as she got up from her nap and wear them over her pants for at least an hour before the need to put a ballet skirt on trumped it.
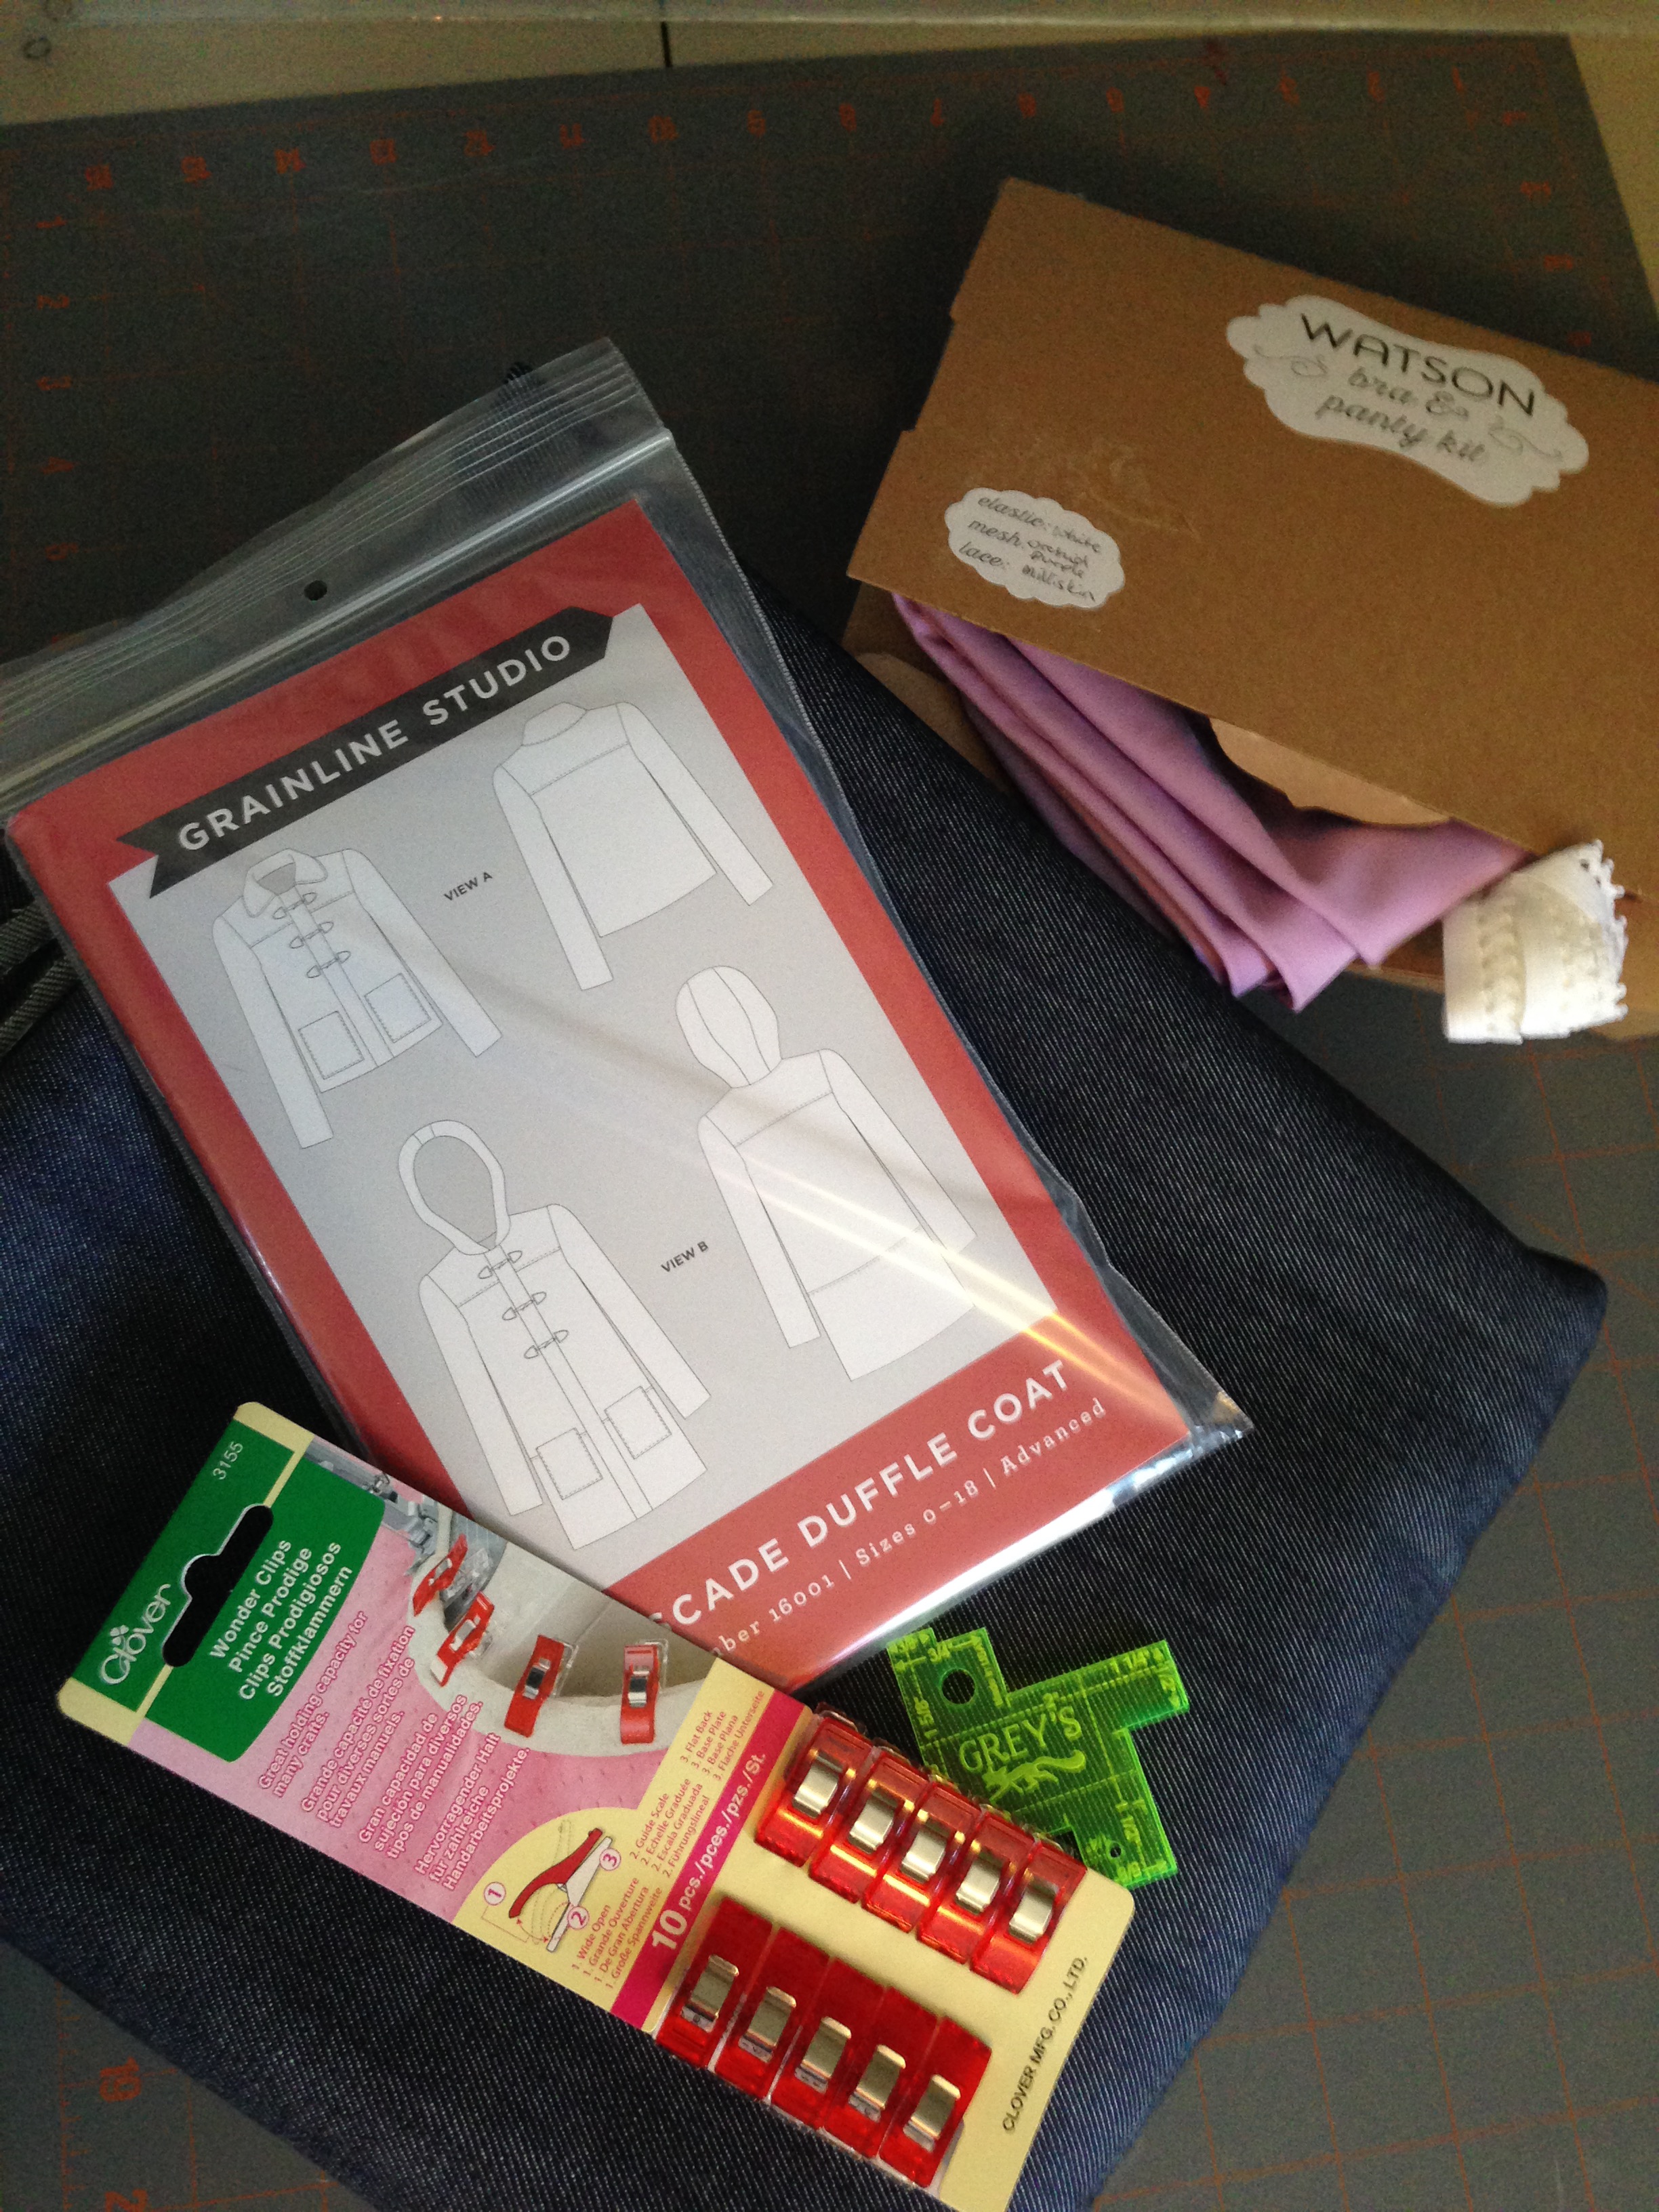
I'm hoping to sew two more pairs before shorts weather is truly upon us, and then I'm delving into some serious me sewing. I have some grey gingham that I got on vacation last summer that is calling out to be an Archer button-up and I picked up a Watson bra kit and some denim for Ginger Jeans from Grey's Fabric as well as Cascade Duffle pattern that I'll be sewing into my new winter coat come September or so.
I've been super busy with knitting projects of late (look out for a lot of new stuff this fall!), and haven't had much time to sew and I forget how much sewing means to me. To be able to single-mindedly focus on seam finishes and fabric selection and to make something useful and beautiful.
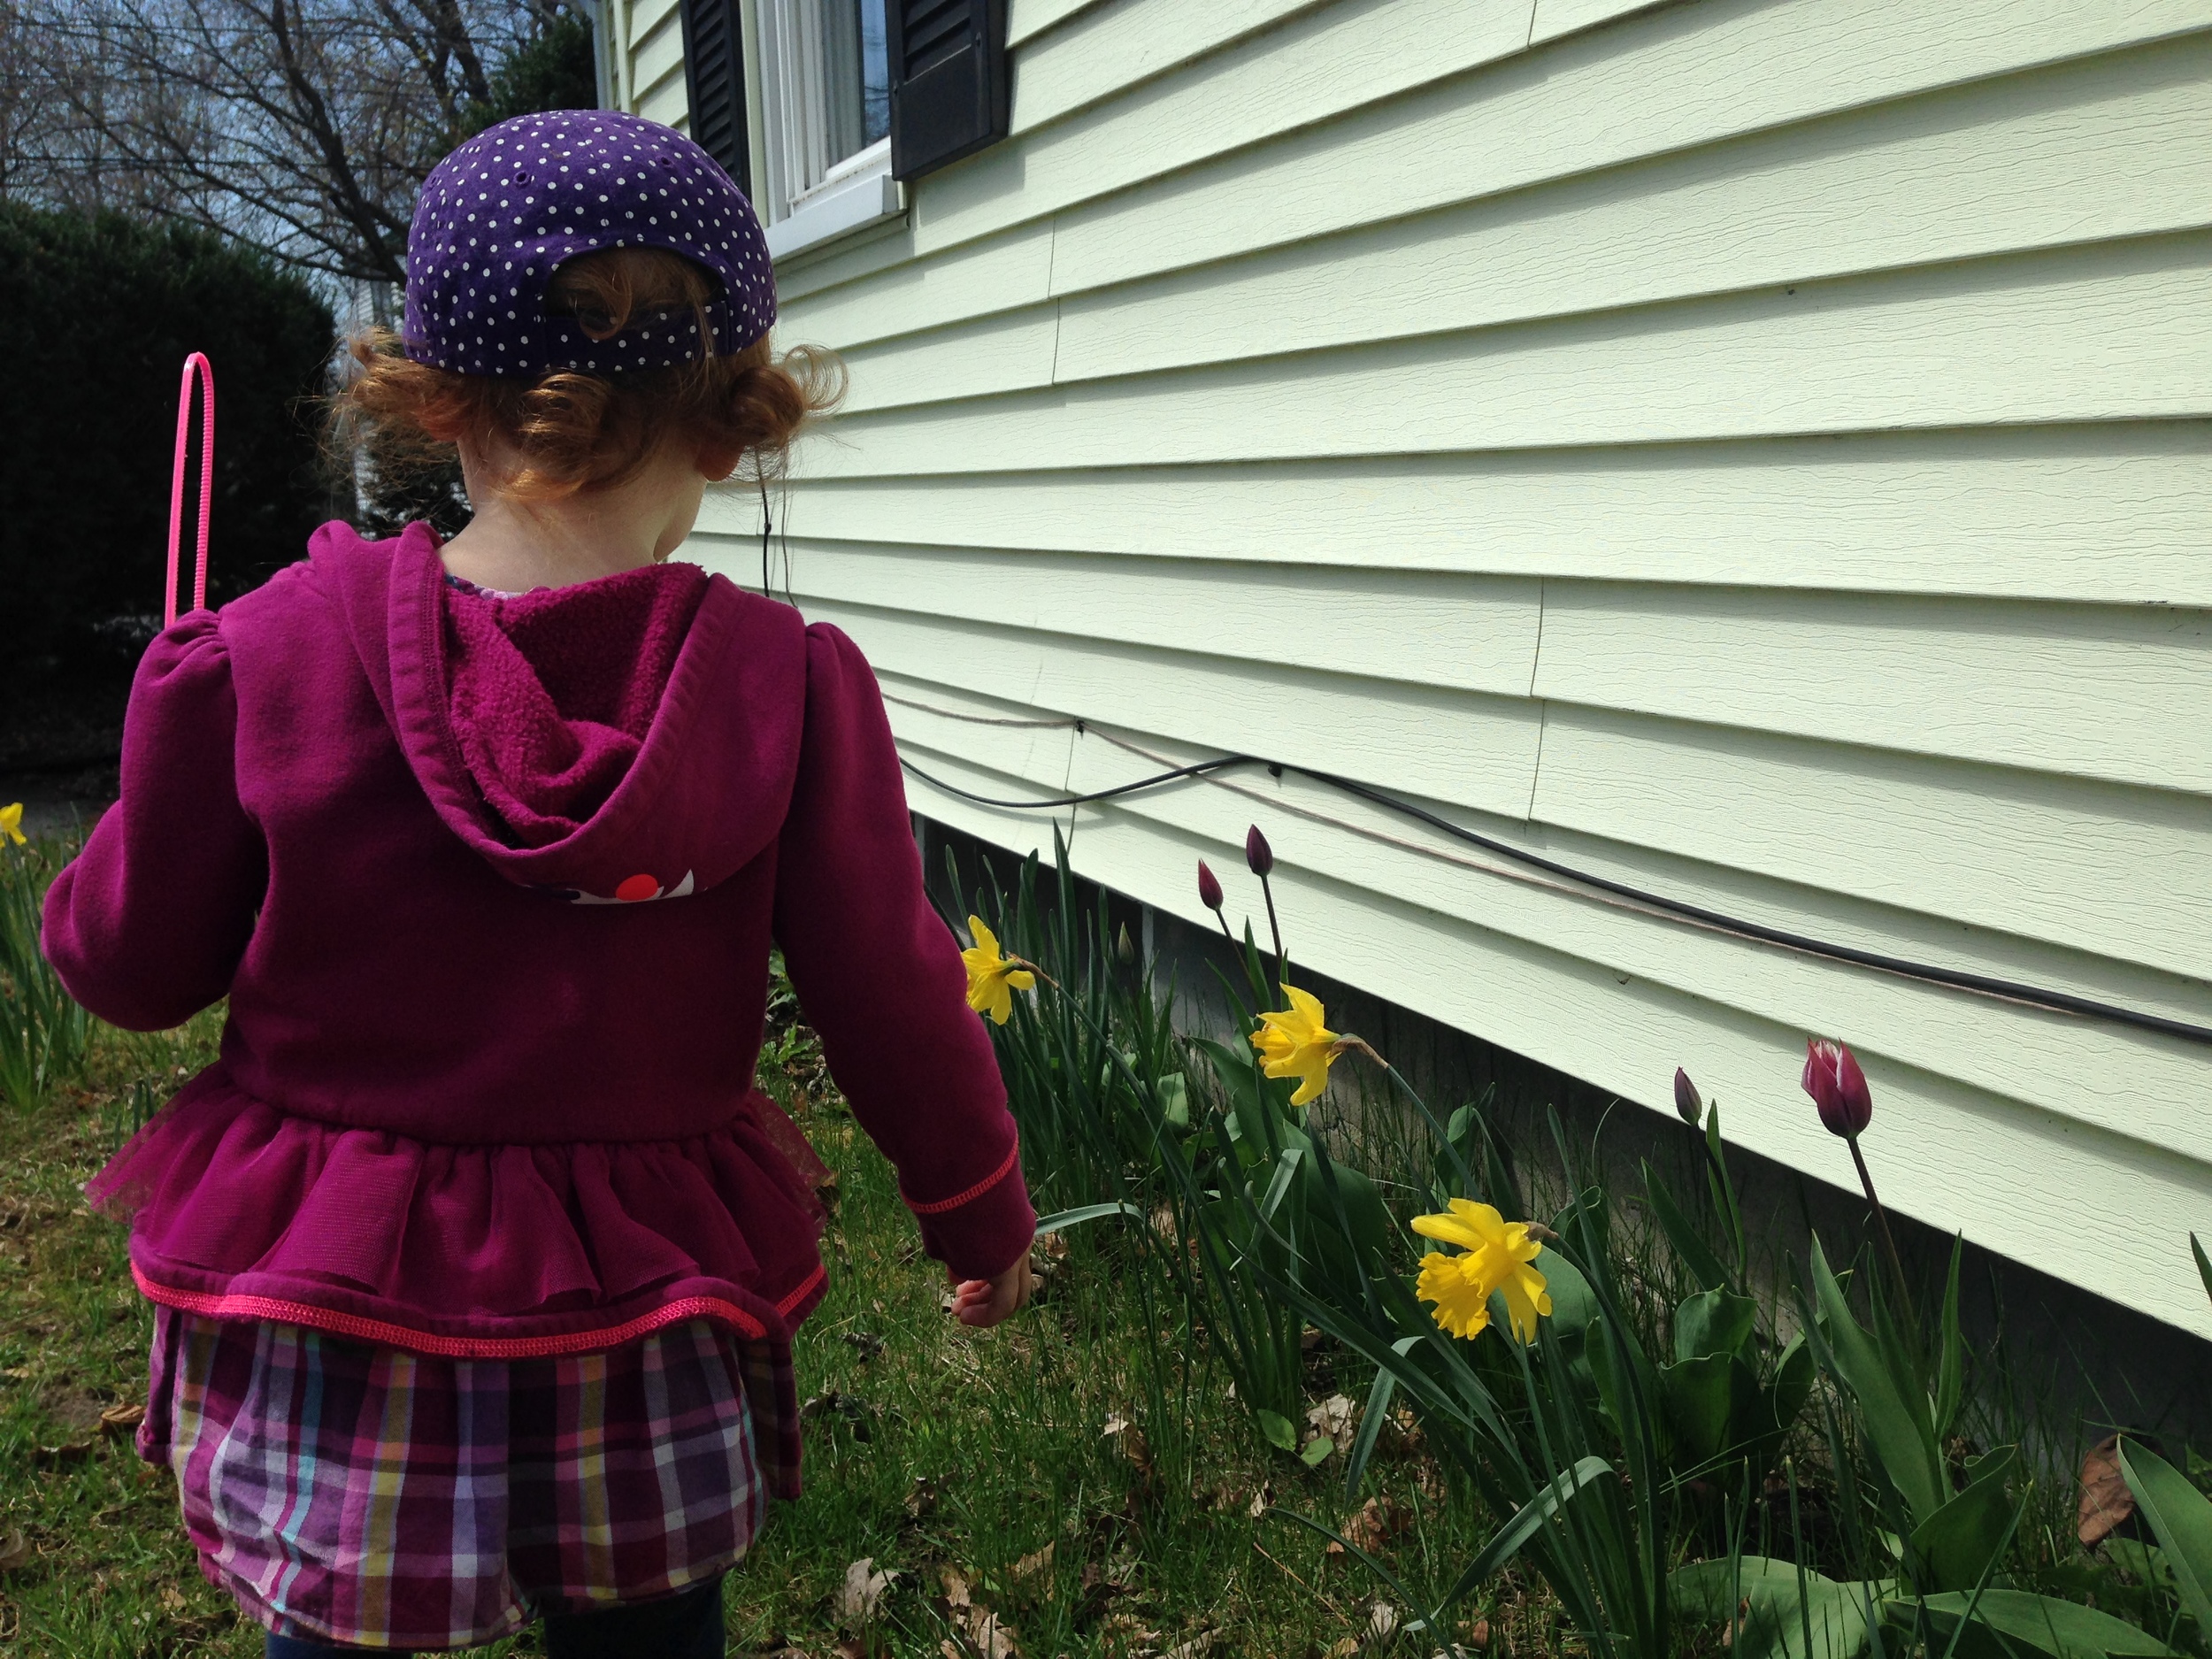
A Spring Stroll


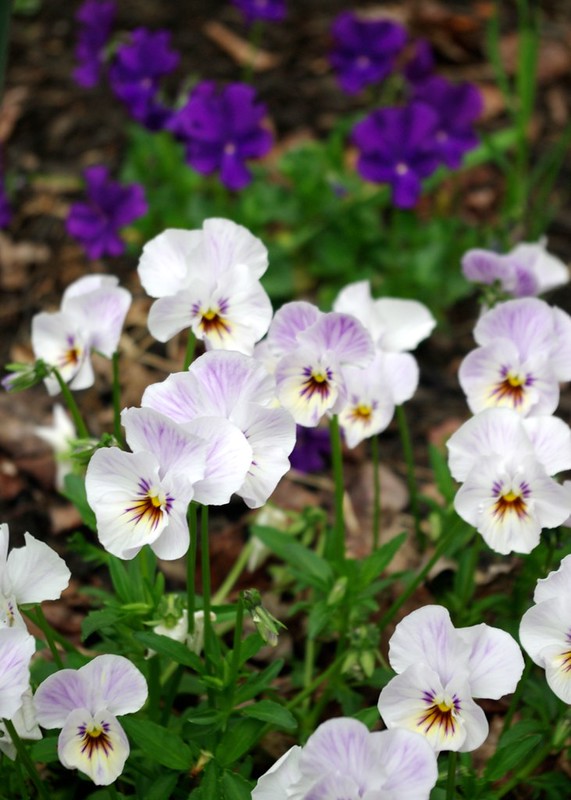
Having grown up in California, and gone to college in the Oregon, I have a slew of friends who still reside in those more temperate climes. So while we still had snow on the ground, my Facebook feed was filled with West Coast photos of freshly bloomed daffodils. Now, June is in sight, the snow is but a memory and the daffodils have come and gone, but it feels as if Spring has just arrived in Maine. Suddenly the grass is green, the trees have leaves, and everything is in bloom.
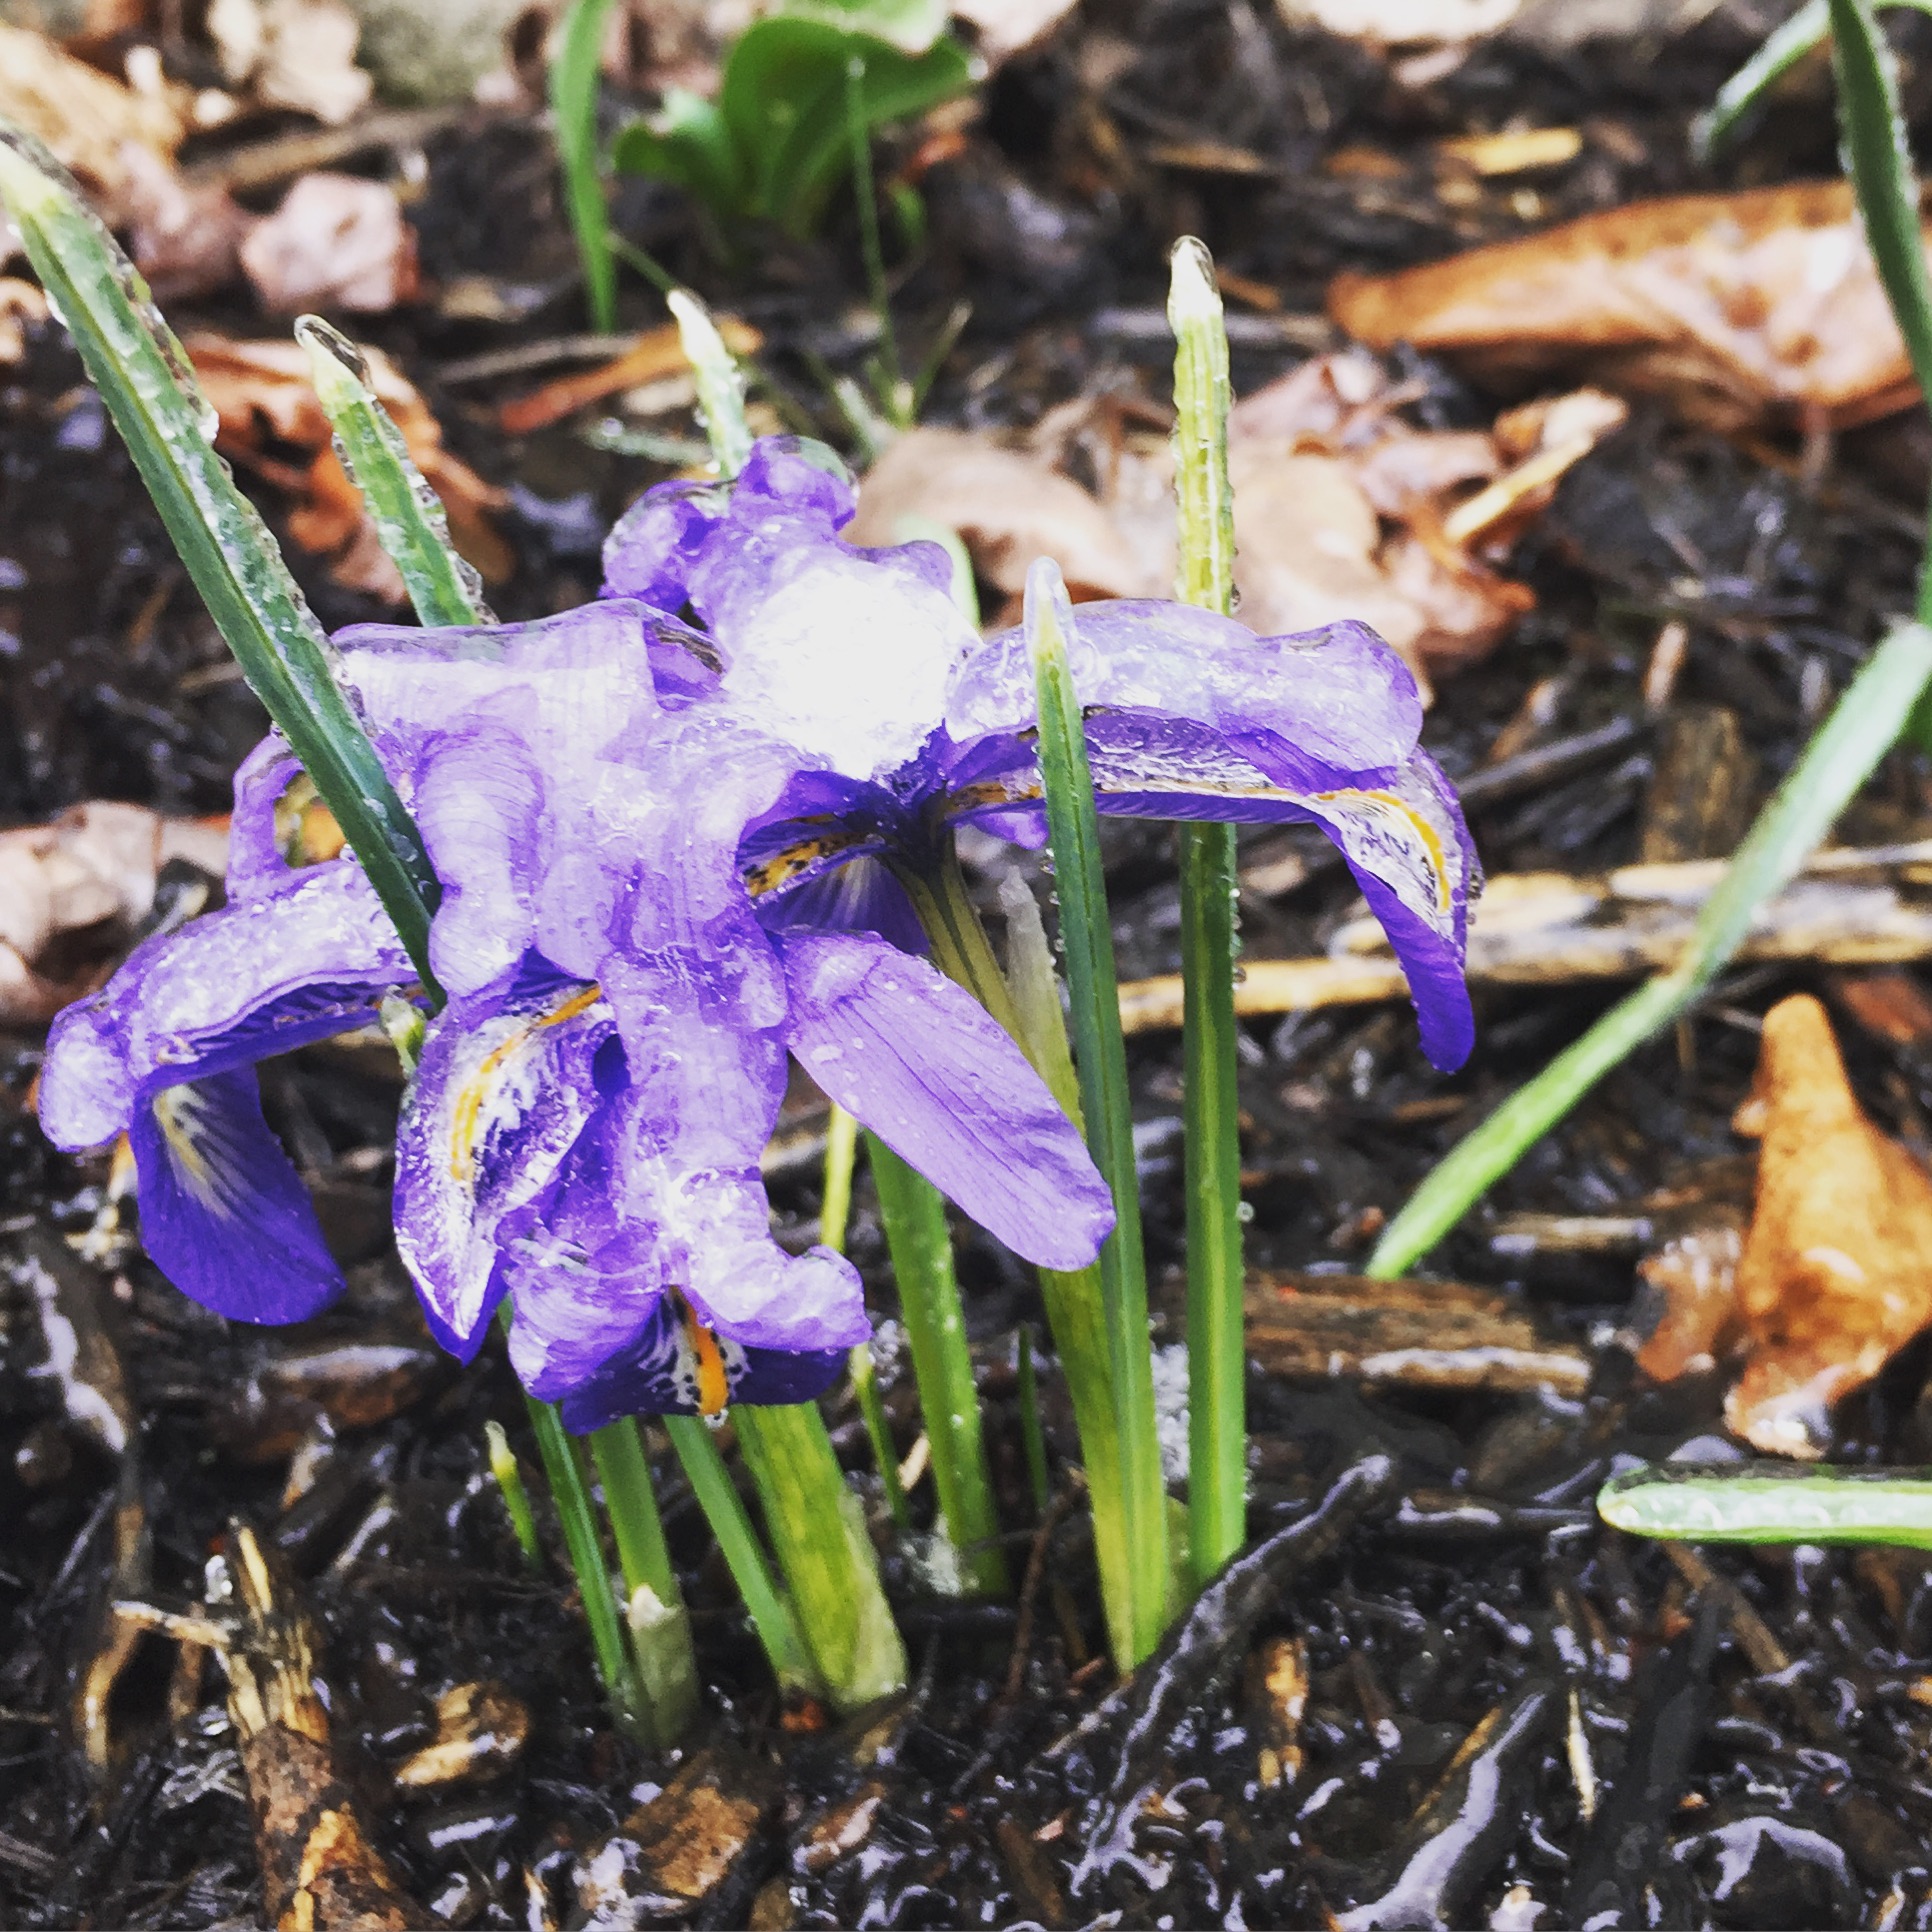
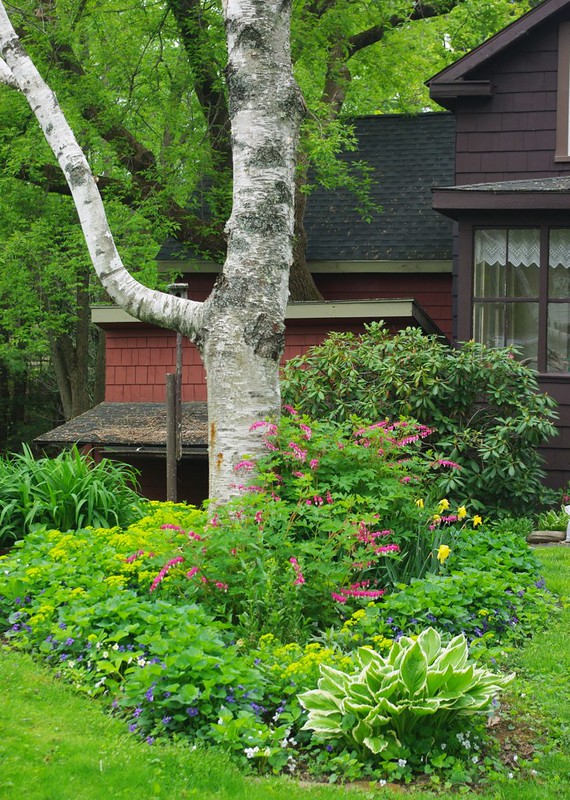
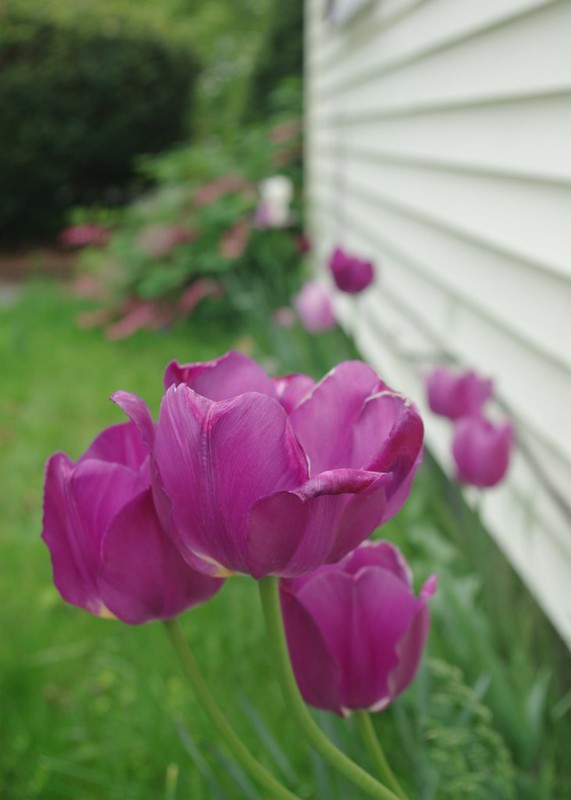
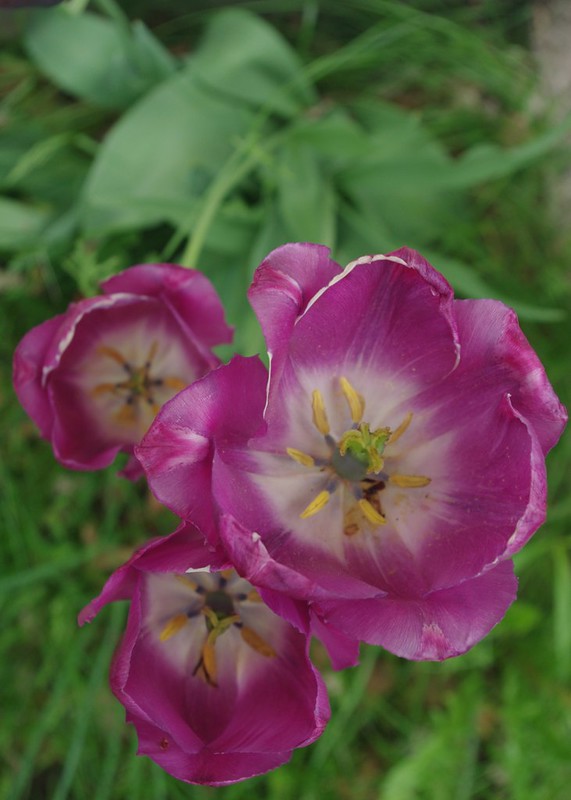
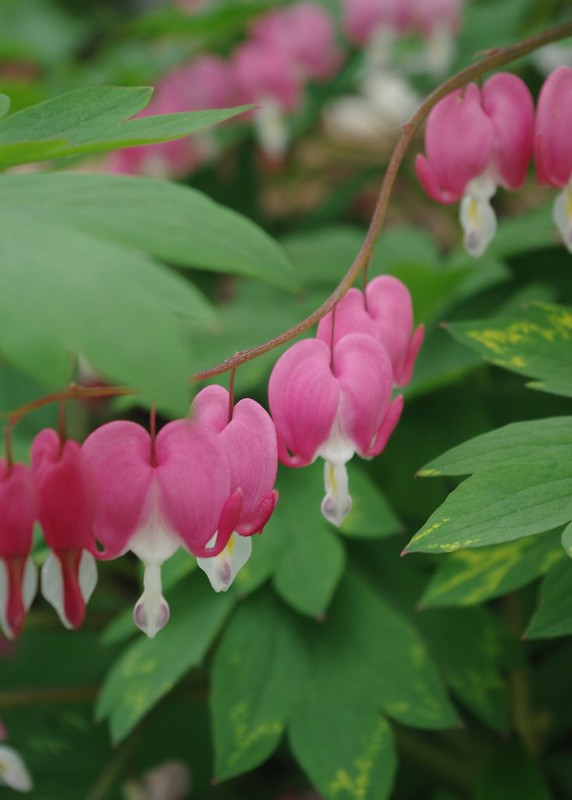
In my own little garden, the sand cherry is in bloom, the violets are out, the bleeding heart has grown to massive proportions and the tulips are starting to fade. My perennial bed, now in its third year, is starting to fill in and I may have to start doing some dividing come fall.
Now that the weather is nicer, LMC and I have started taking a little stroll together before I head to work in the mornings, giving me a chance to scope out the neighbors yards for ideas. The phlox that's everywhere? Totally want some of my own. That perennial bed around that birch tree? Divine!
When we first moved into our little house, I started my flower beds with no real plan or knowledge. I got the gift of some plants from friend's gardens, picked up a few of my own and started digging out red brick mulch, tearing out layers of landscape fabric, and plopping plants down and crossing my fingers. Three years later, between some experience and episodes of This Old House, I'm starting to learn more about this gardening thing. Or at least paying more attention. I know enough to know that moving plants is pretty easy, dark mulch makes everything look better and if something doesn't work out you can always plant something new in its place.
It's good to be out in the garden again.
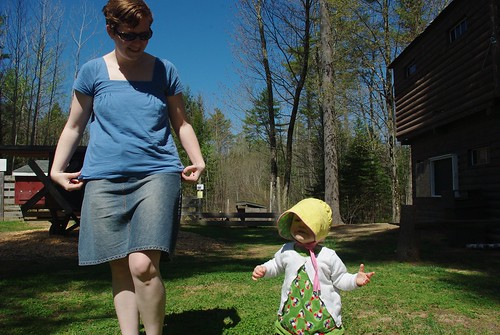
Mother's Day on the Farm

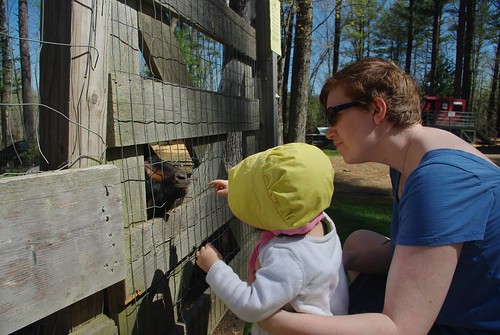
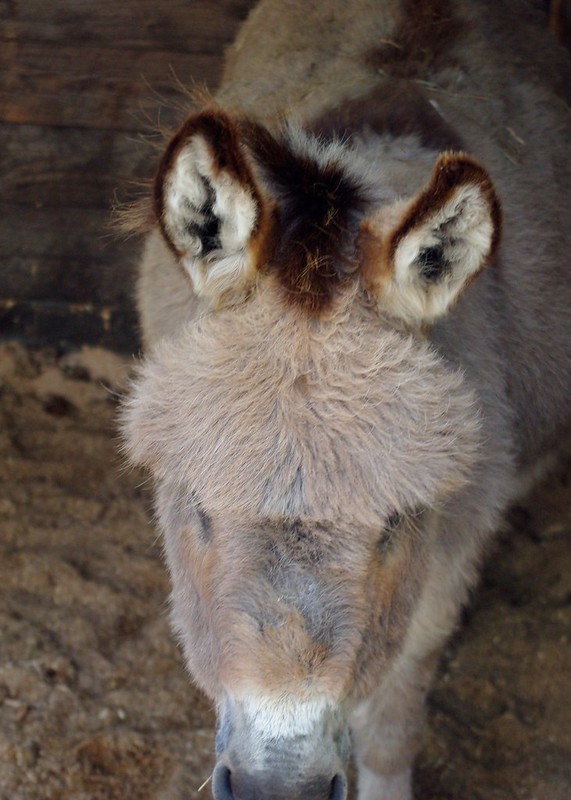
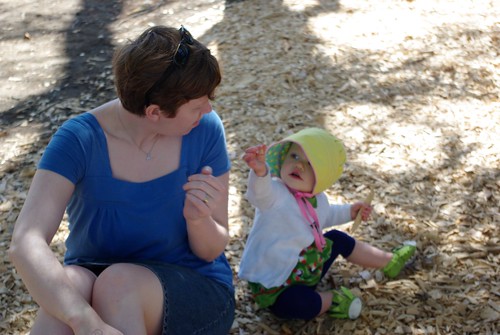
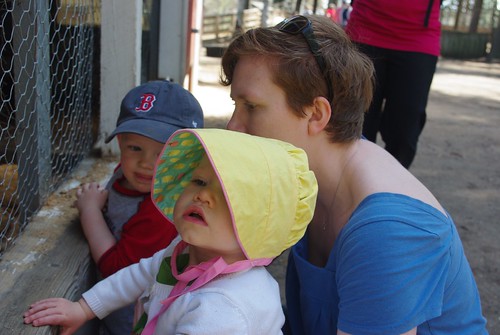
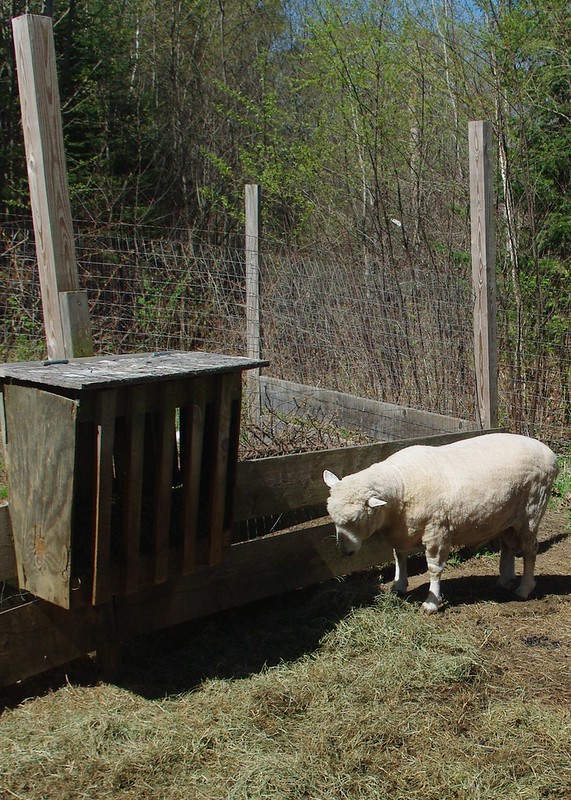


For my second Mother's Day we celebrated with a delicious homemade brunch (french toast! strawberries! bacon! mimosas!) and followed it up with a late morning trip to the The Barnyard at Smiling Hill Farm and an afternoon of sewing for me while LMC napped.
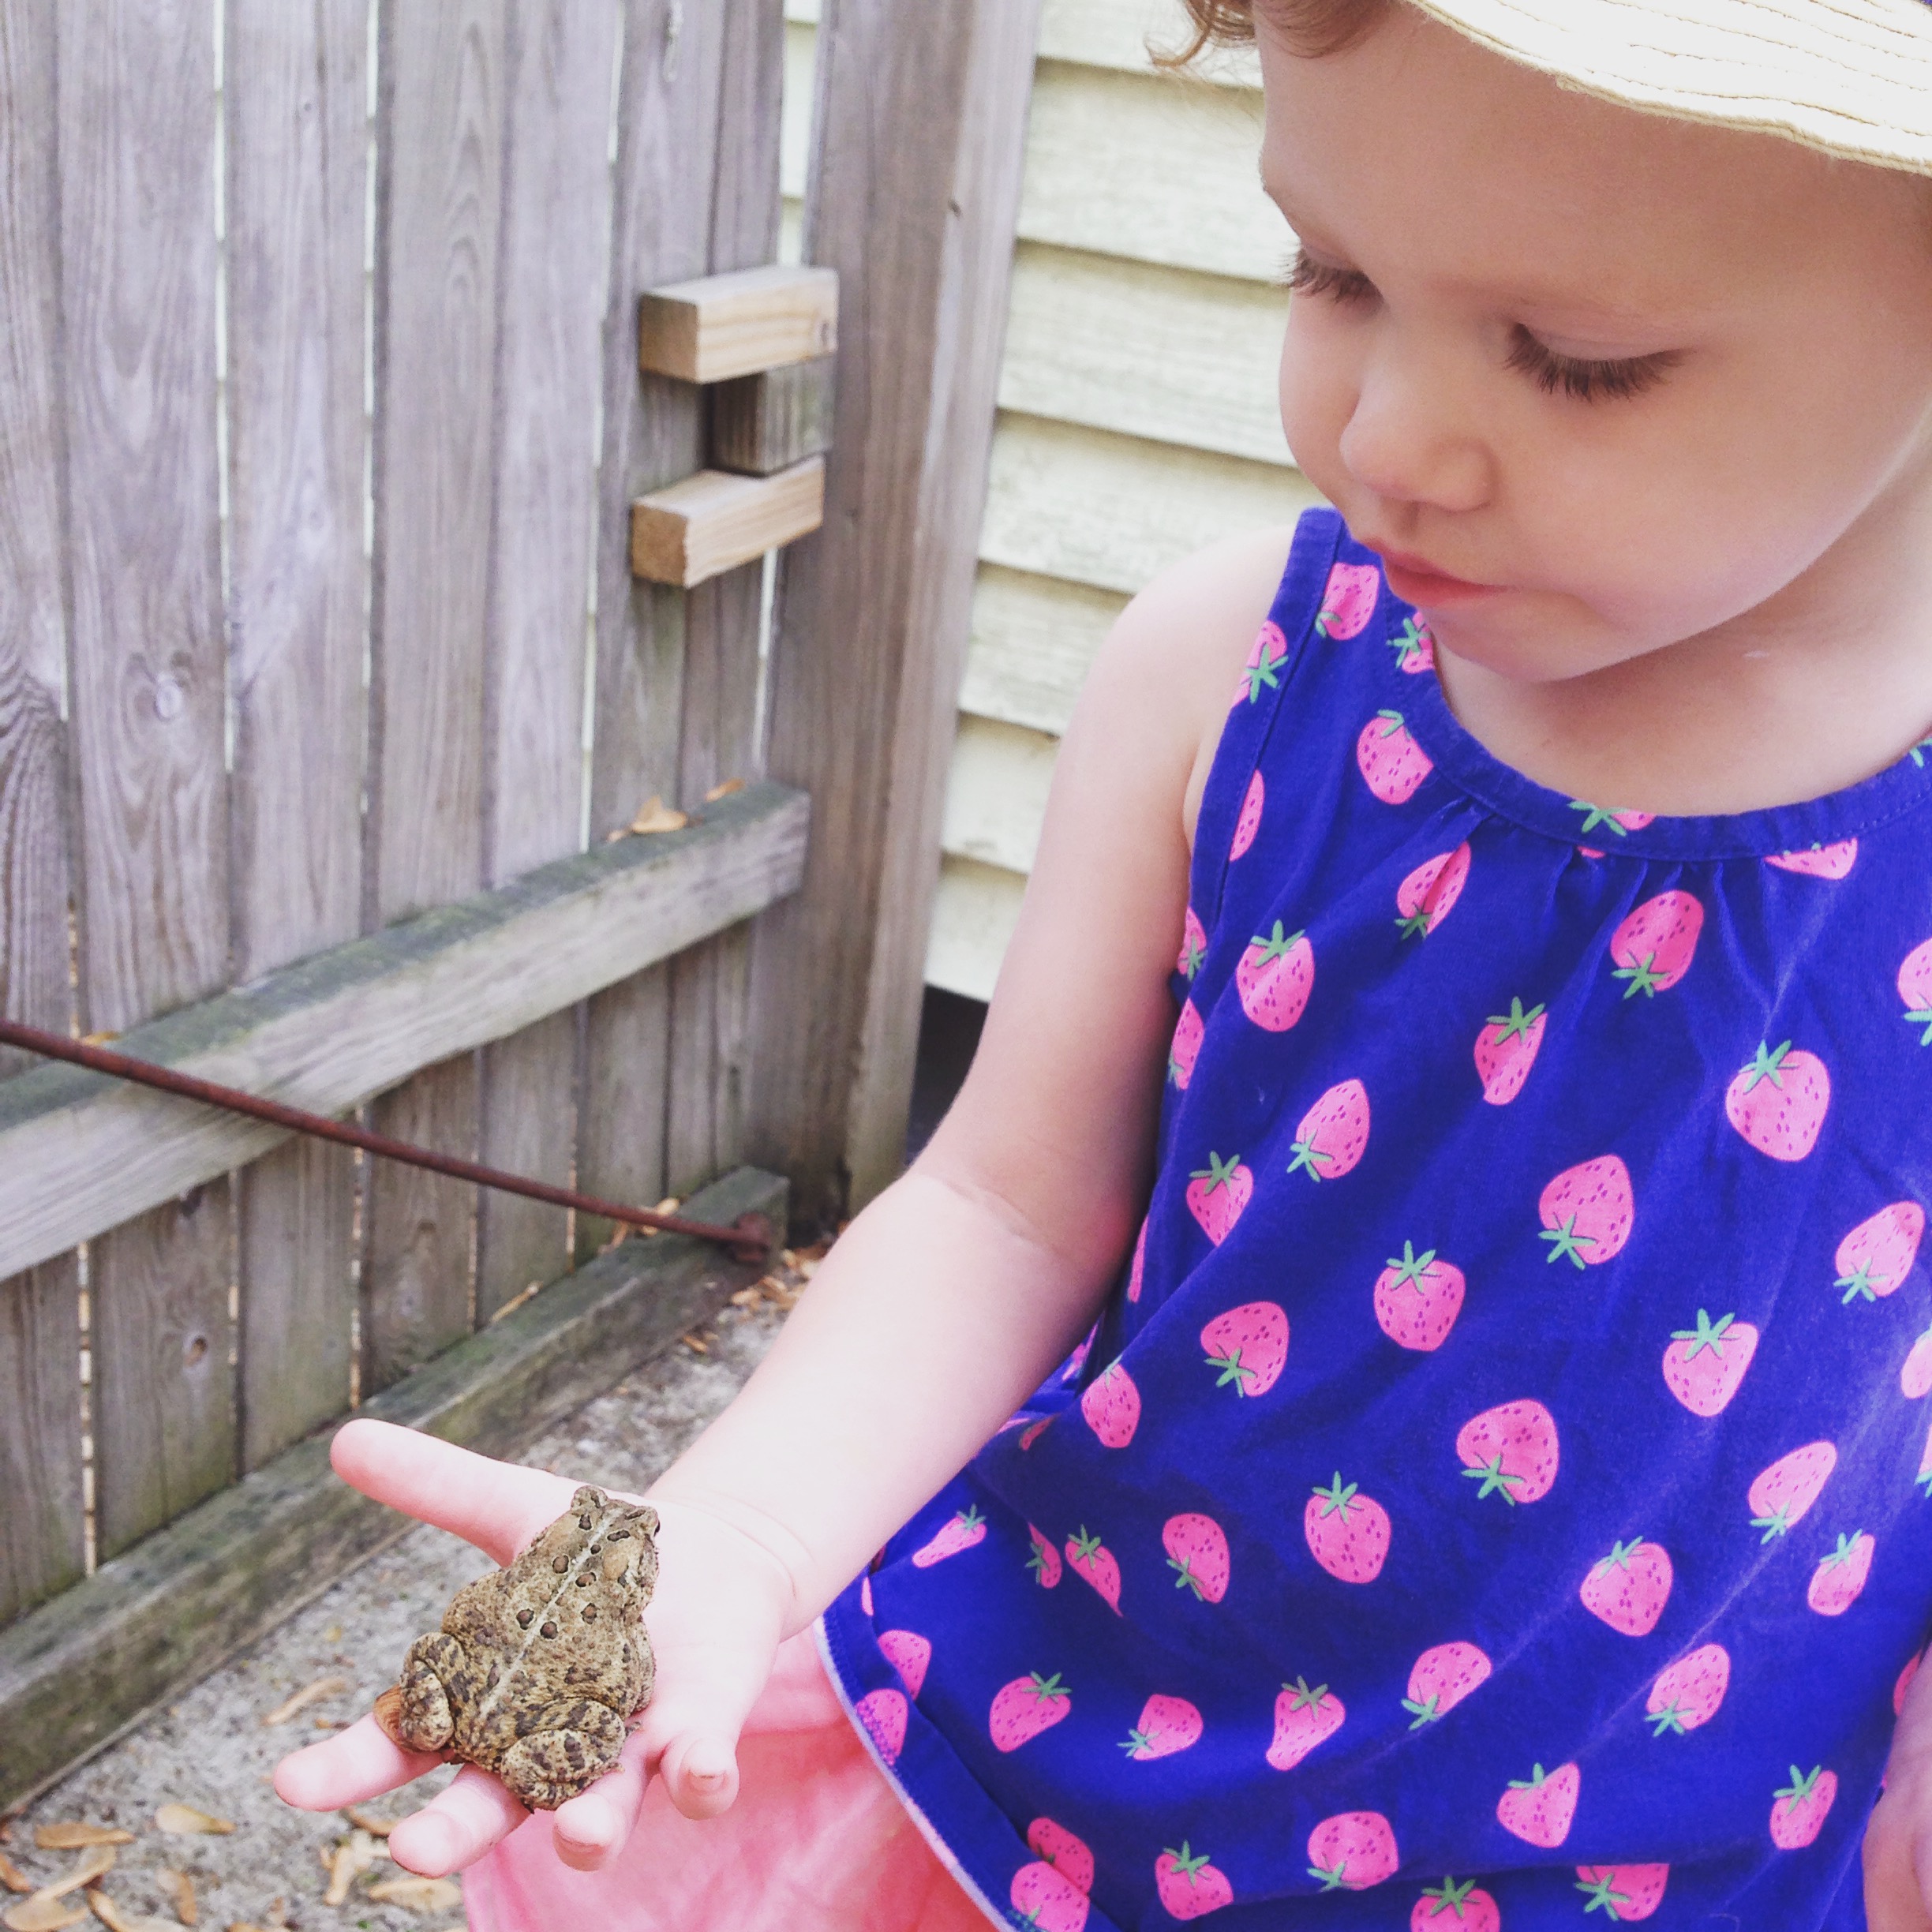
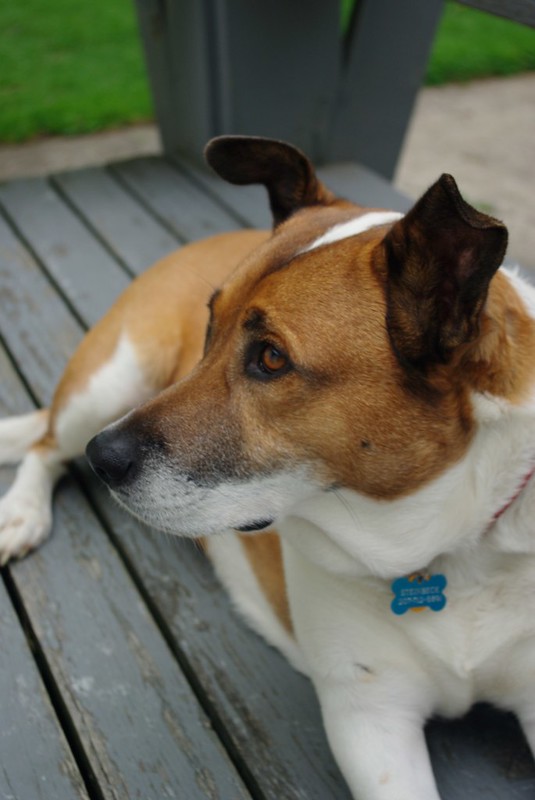
We knew the Barnyard was going to be a hit as soon as she squealed with delight at the first animal she saw (a ferret). Little Miss is very much into animals these days - she knows dogs say woof woof and lions roar and snakes sssssssssss and she wanted to touch everything in sight. Of course the mulch was equally as interesting as all the furry creatures. Everything is new and interesting and it's such a joy to see LMC discover.
And she's moving and grooving now too, walking everywhere, and she's thankfully decided all of a sudden to accept shoes like it's no big deal, as if she wasn't turning into jelly legs and a pile of tears a few weeks ago. How quickly things change.
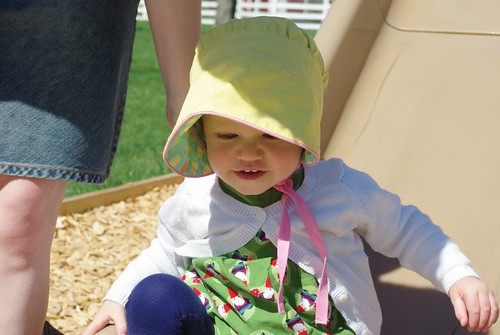
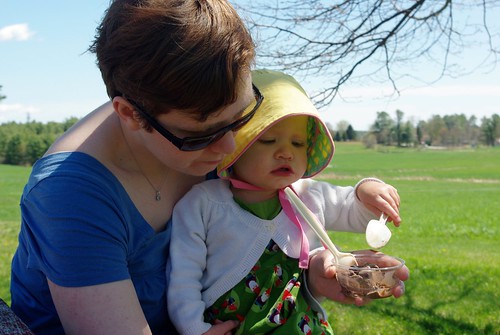
Of course, now that spring has finally arrived in Maine it means I'm working on perfecting my stealth sunscreen applying skills and that more accessories are required for my little red-headed girl. Which means time for another Peakaboo Bonnet. This one featured some solid yellow Kona Cotton and a Lisette ice cream print trimmed with pink piping, all from JoAnn's. I imagine it'll be showing up in photos from now through September. But is there ever really enough of babies in bonnets? In my book, never. And I've got enough left over fabric to make a matching dress, just as soon as I finish a little sewing project for me!