The Cakes My Mother Made

I’ve been thinking about my mom a lot recently.

It’s only natural. Back in February, I took a trip out to California, where (among other things) I took the time to say goodbye to her. My mother has dementia, and while she may have many months left to go, she is far along in the progression of that disease. Her memory has failed her, but I’m finding comfort in my own memories.

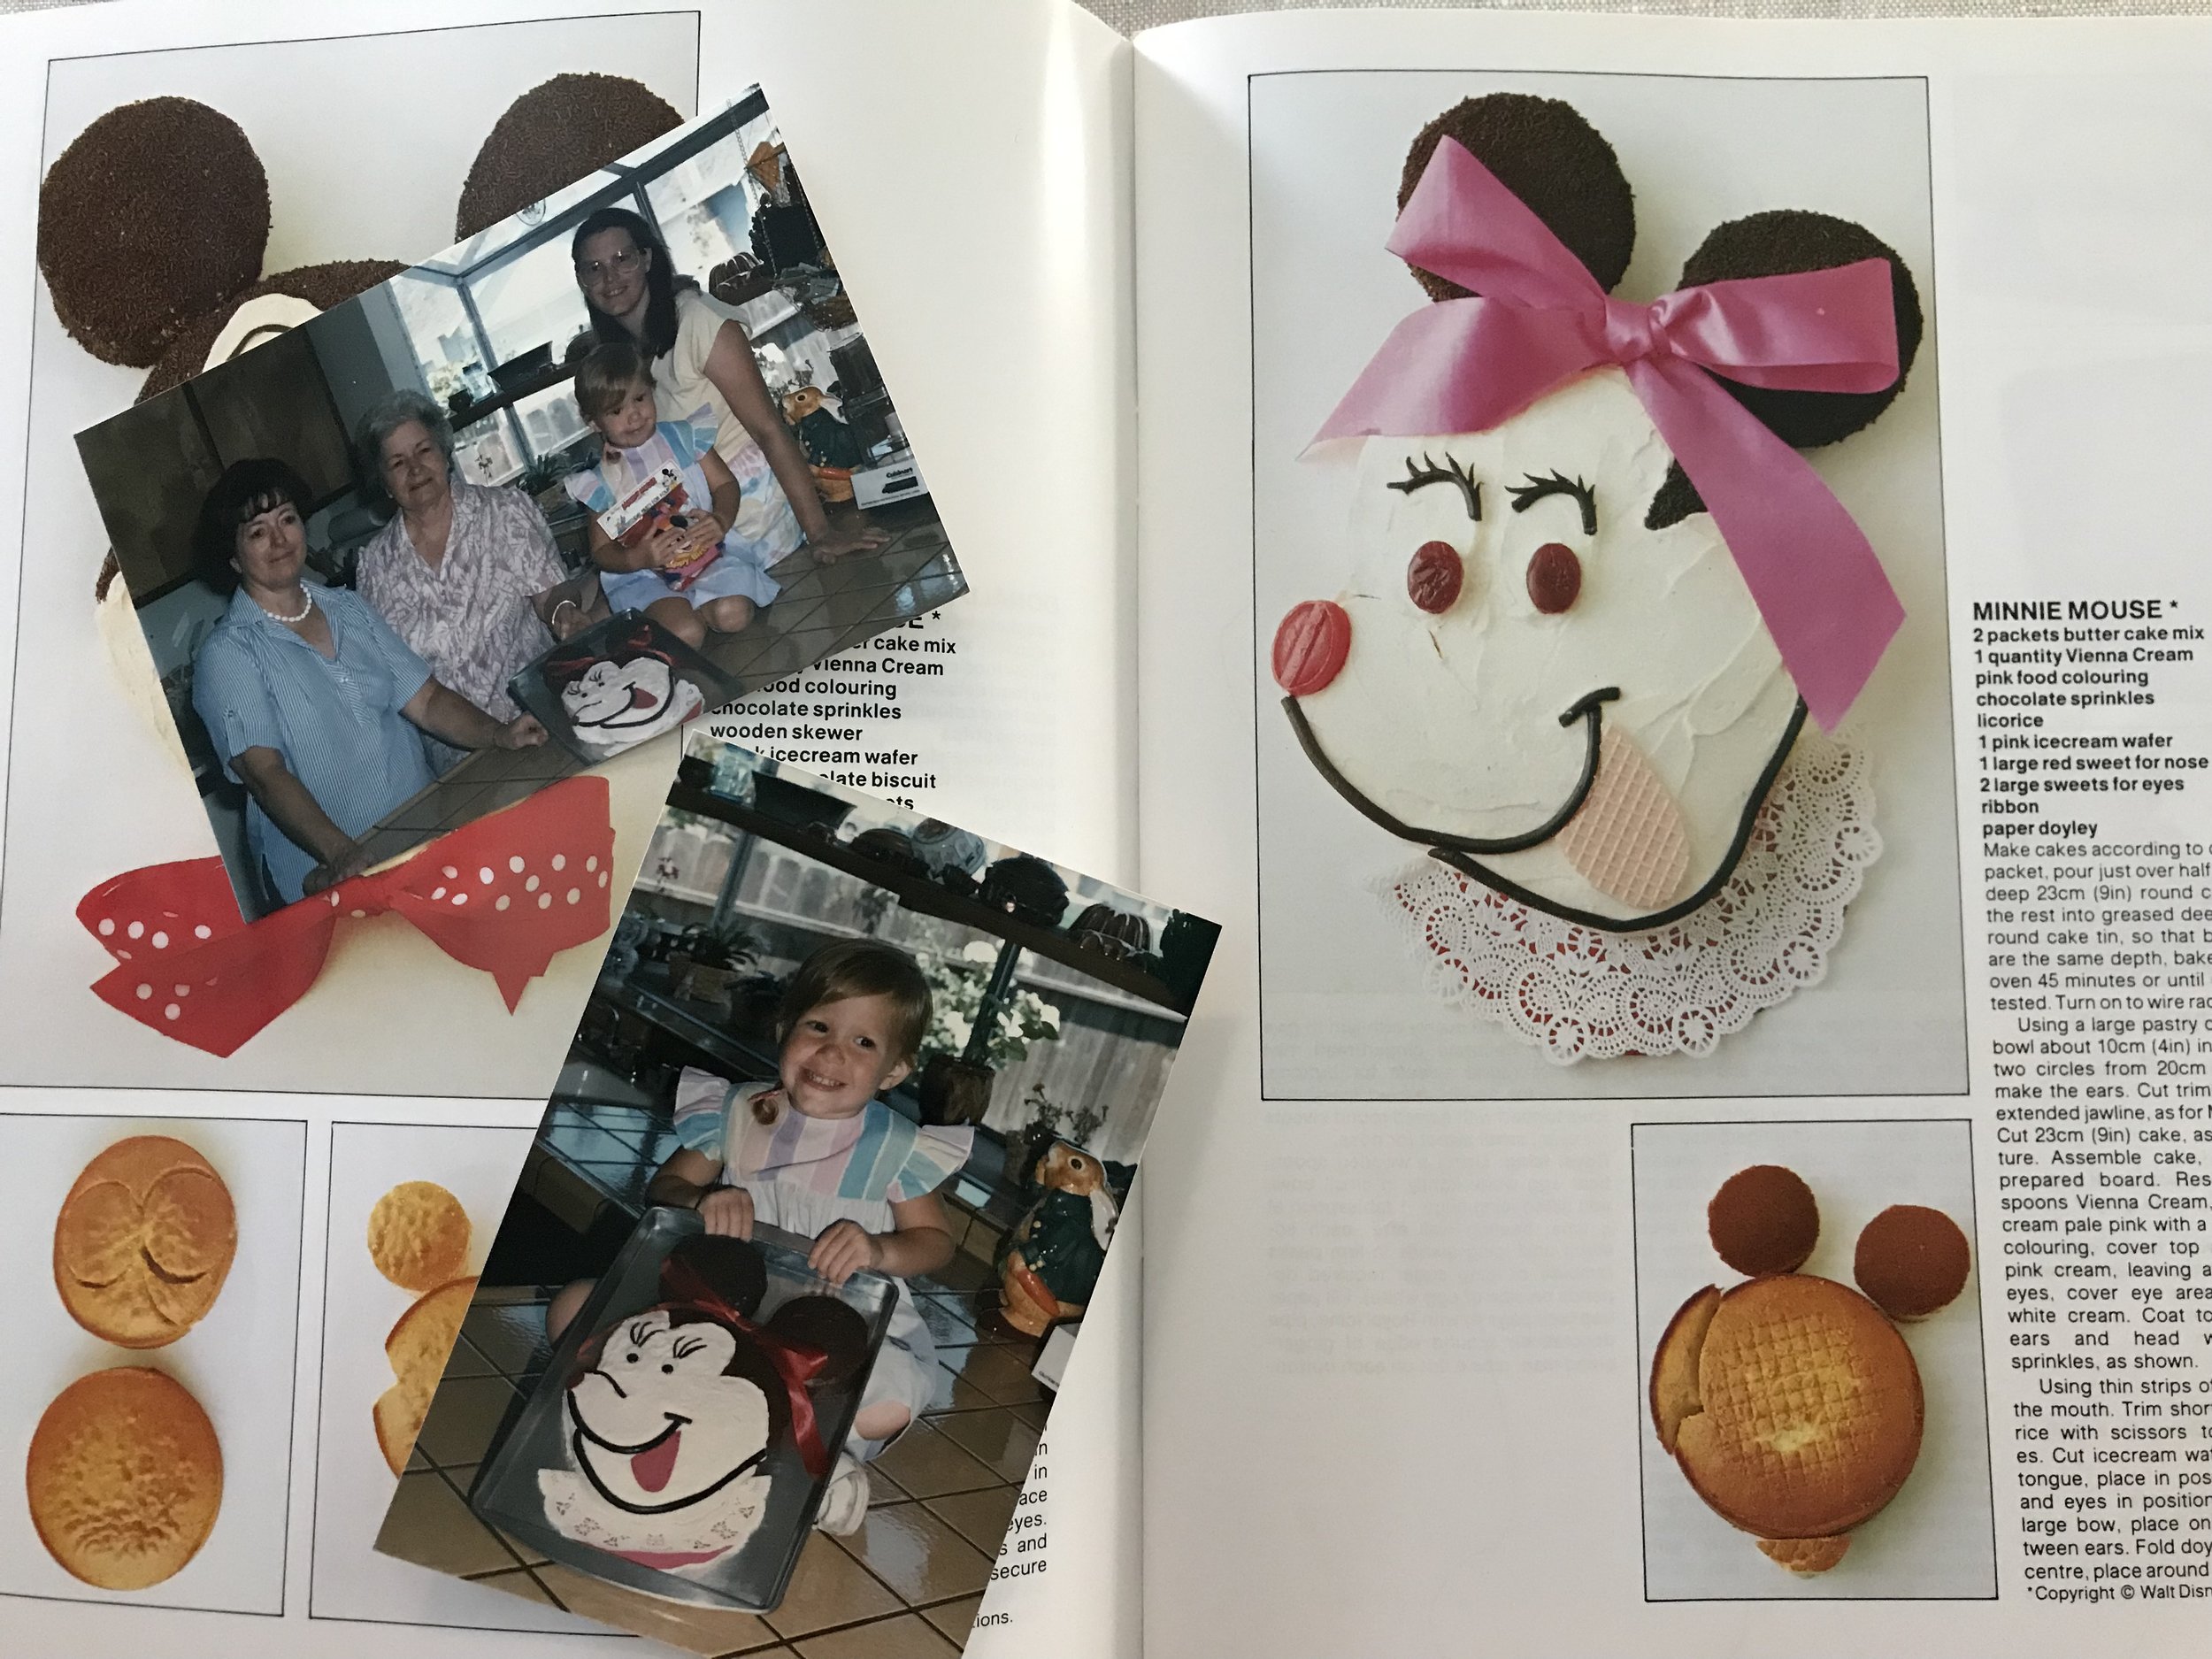
It was not surprising then, that a few weeks before I left for that trip, I thought of my mother’s birthday cakes.

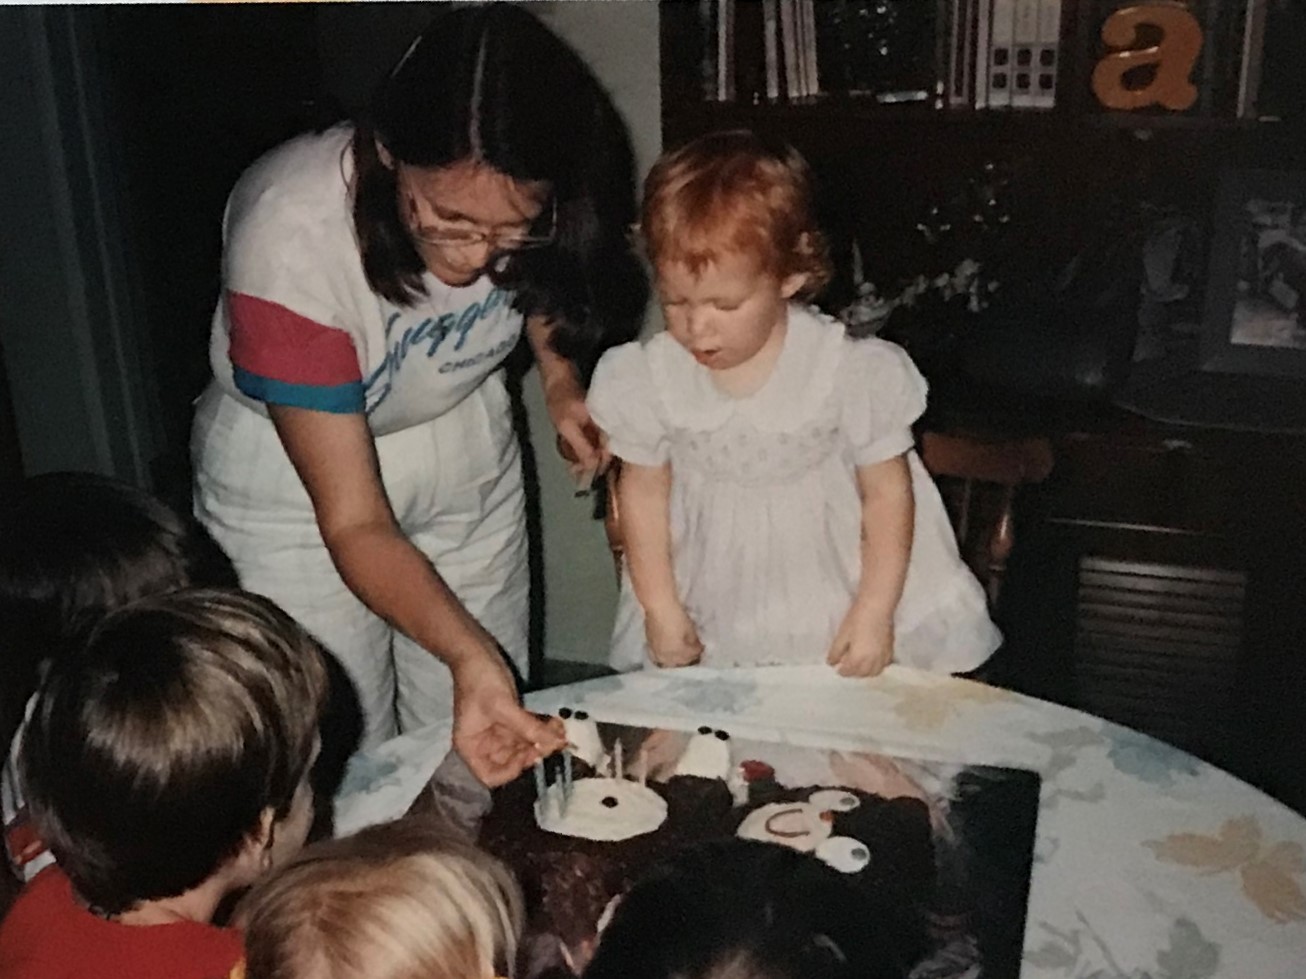
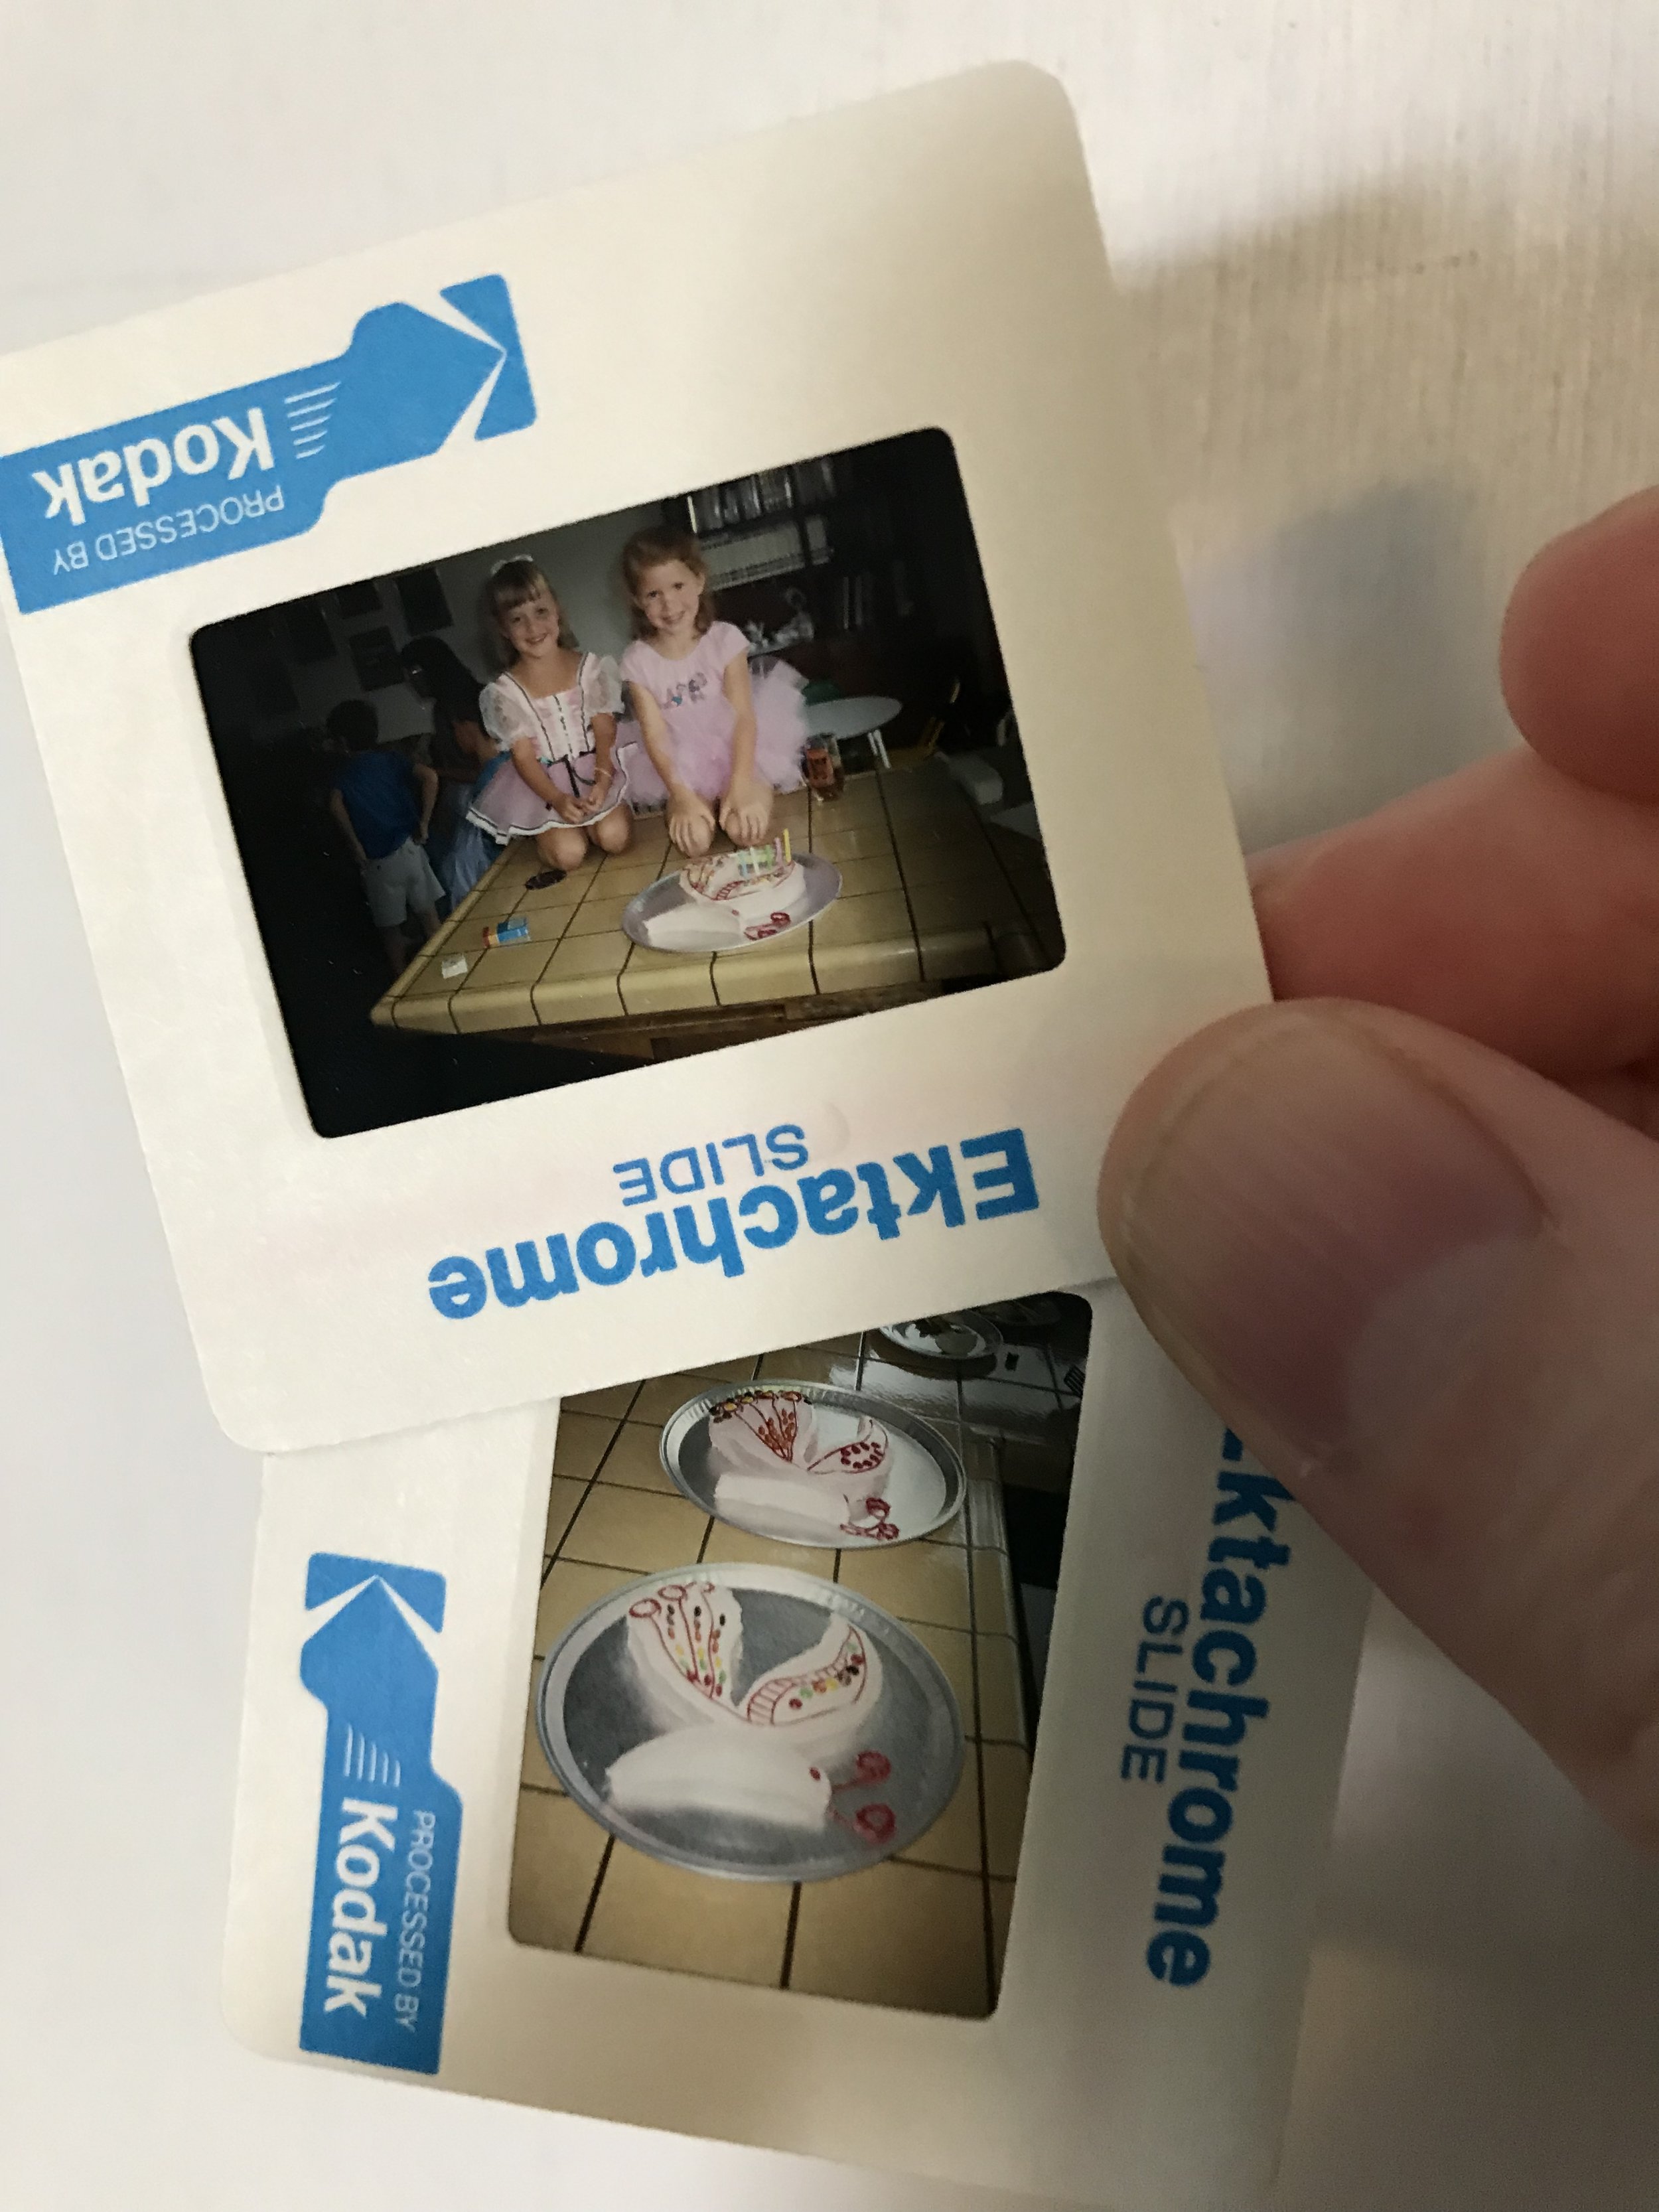
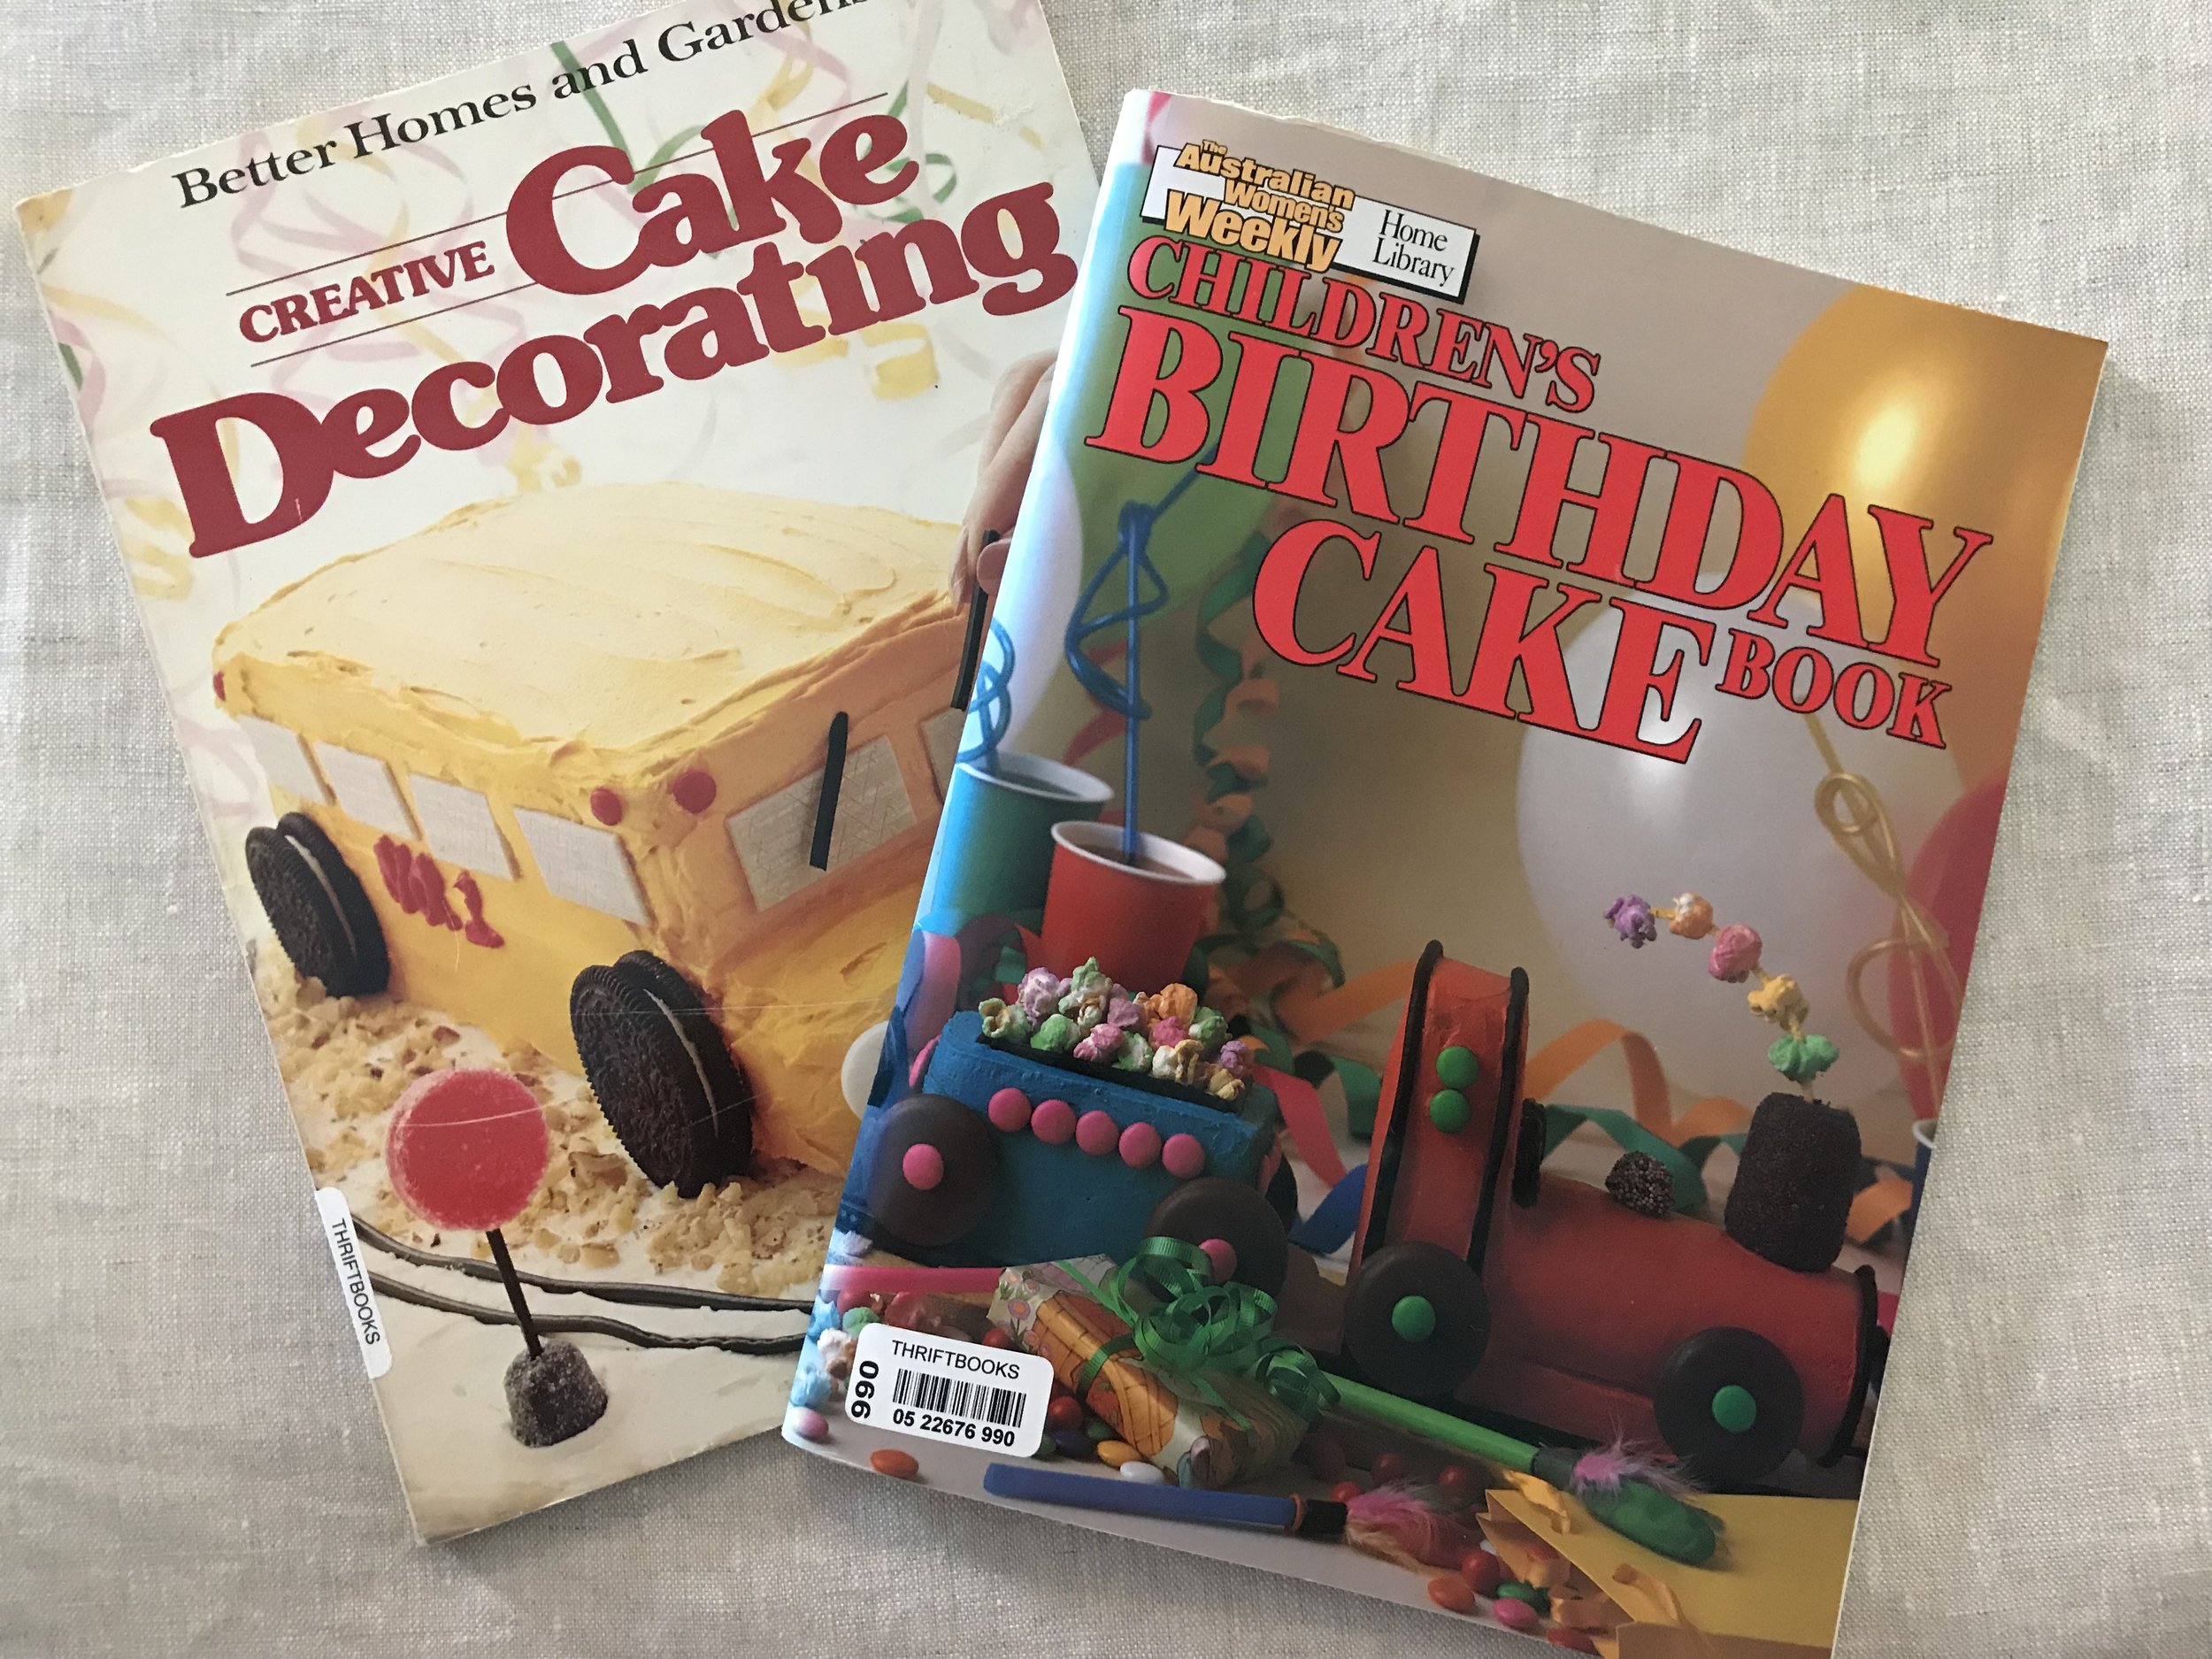
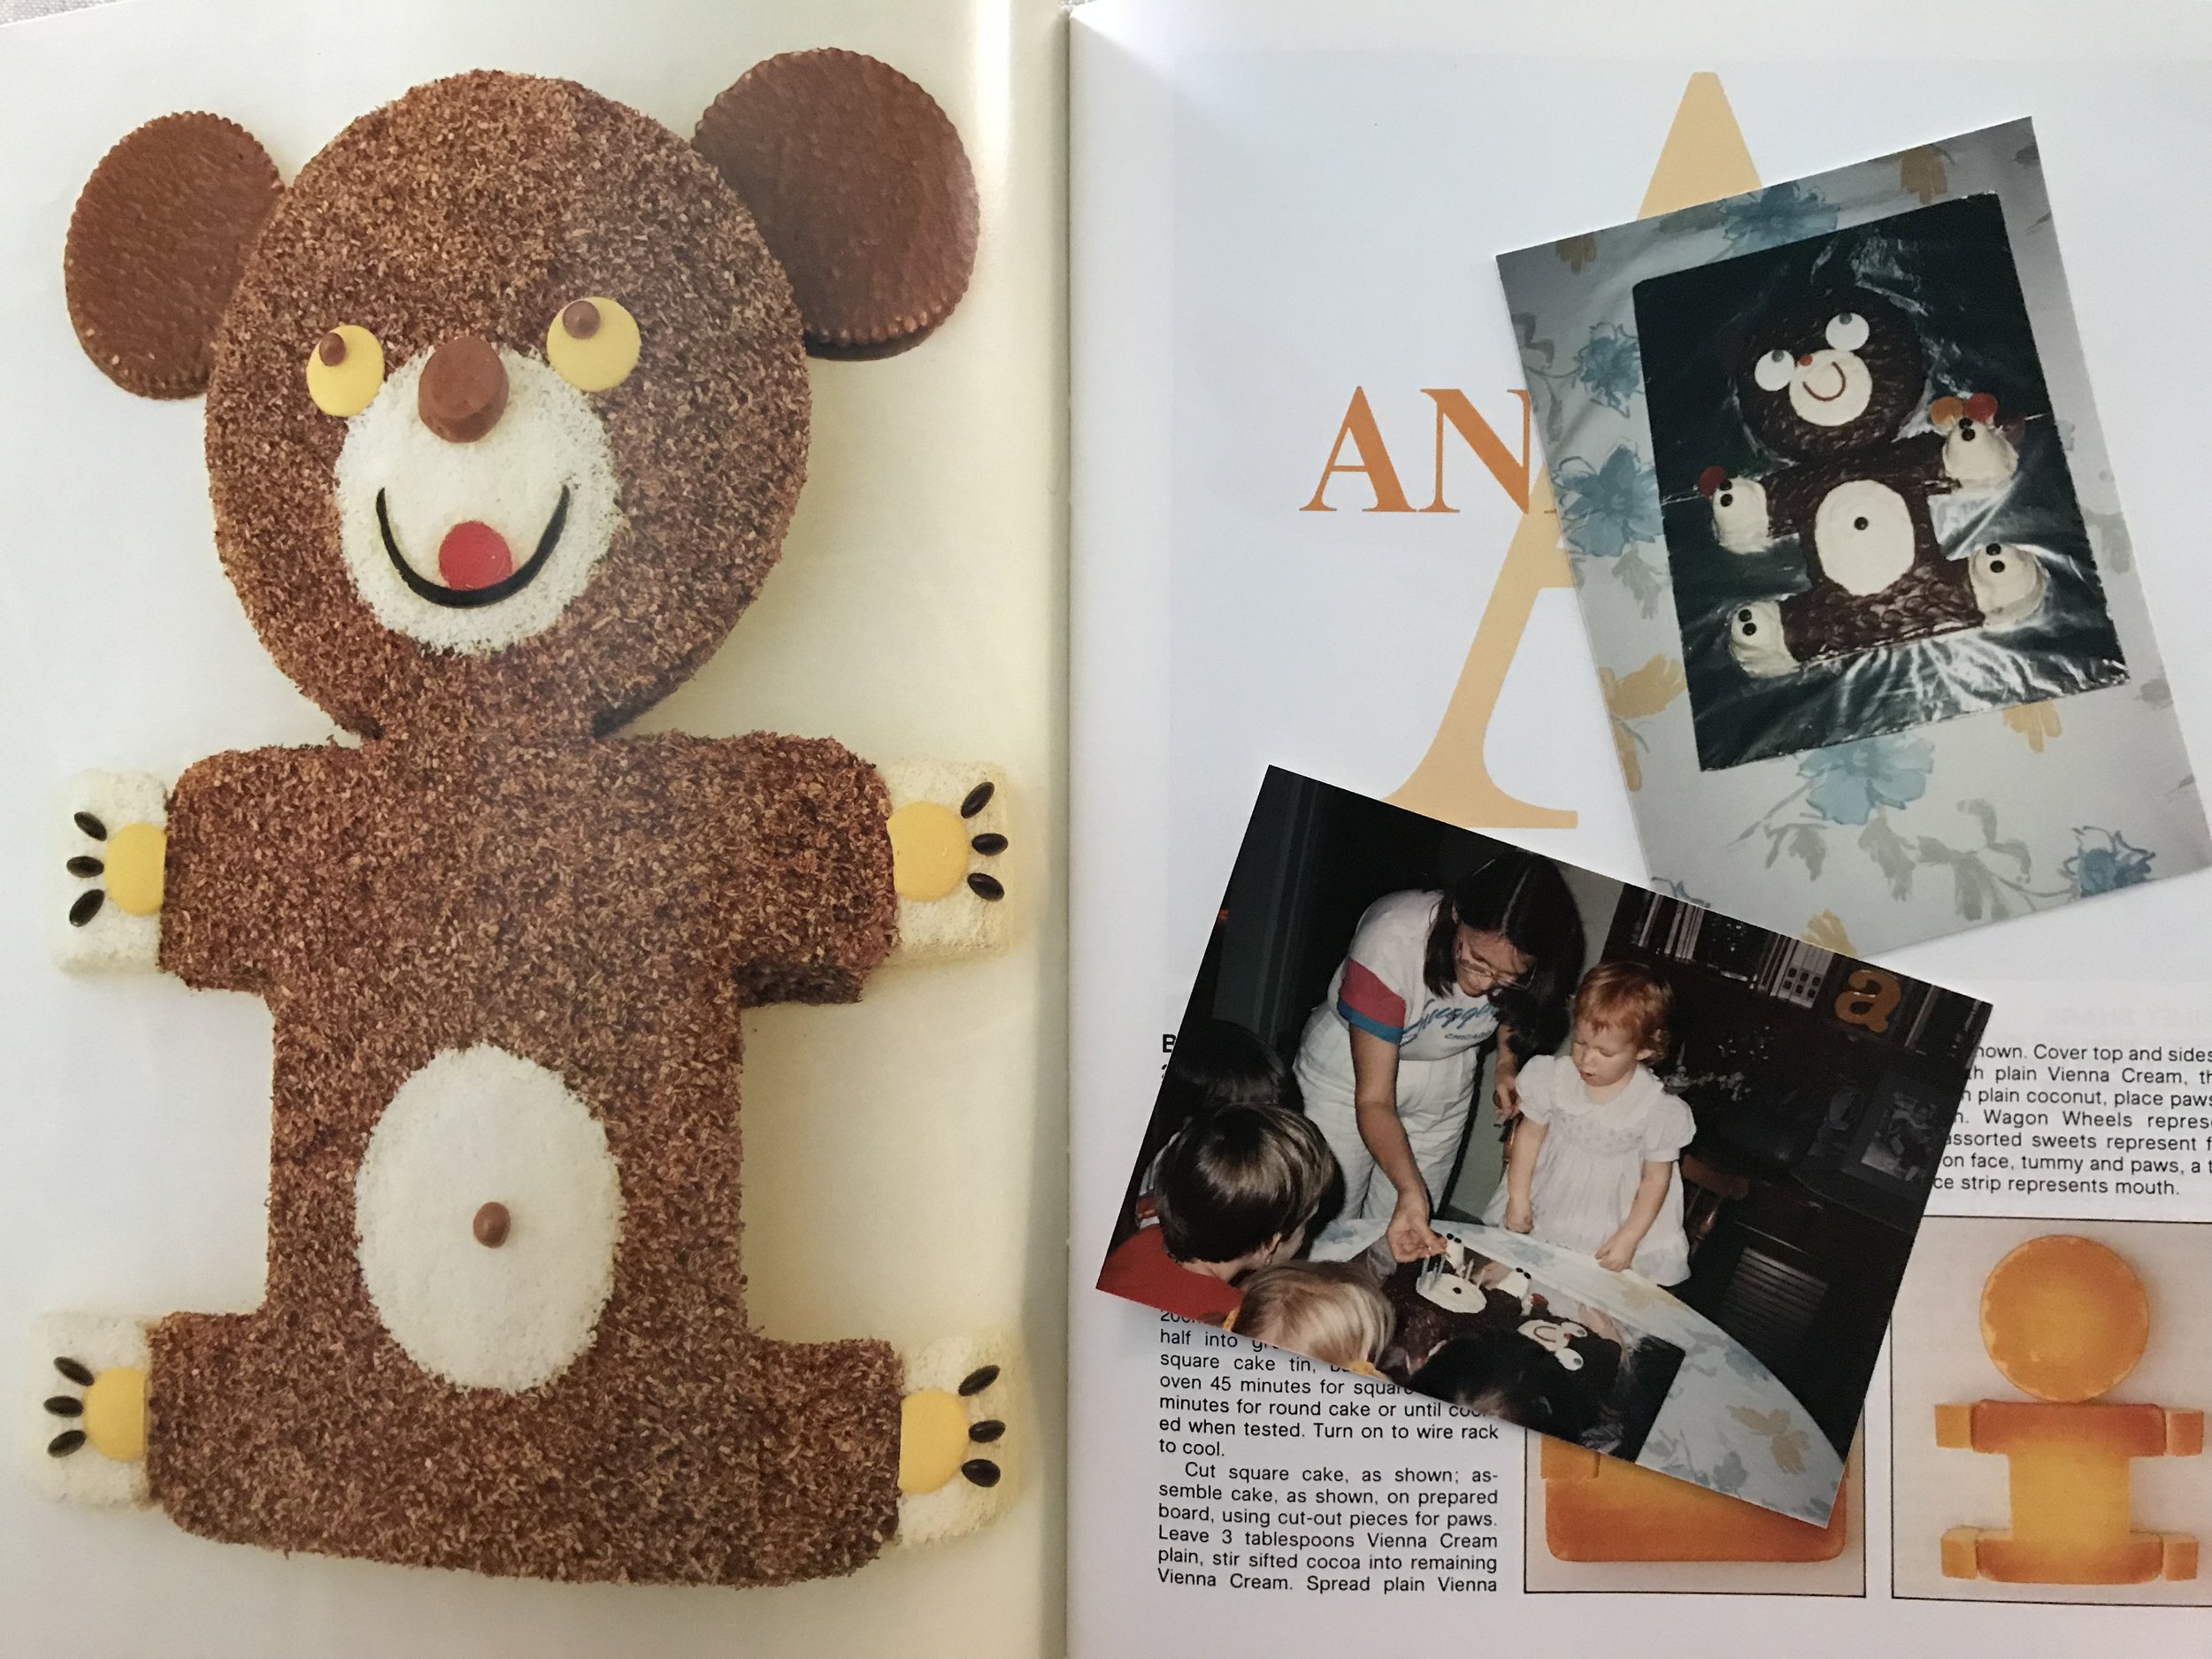
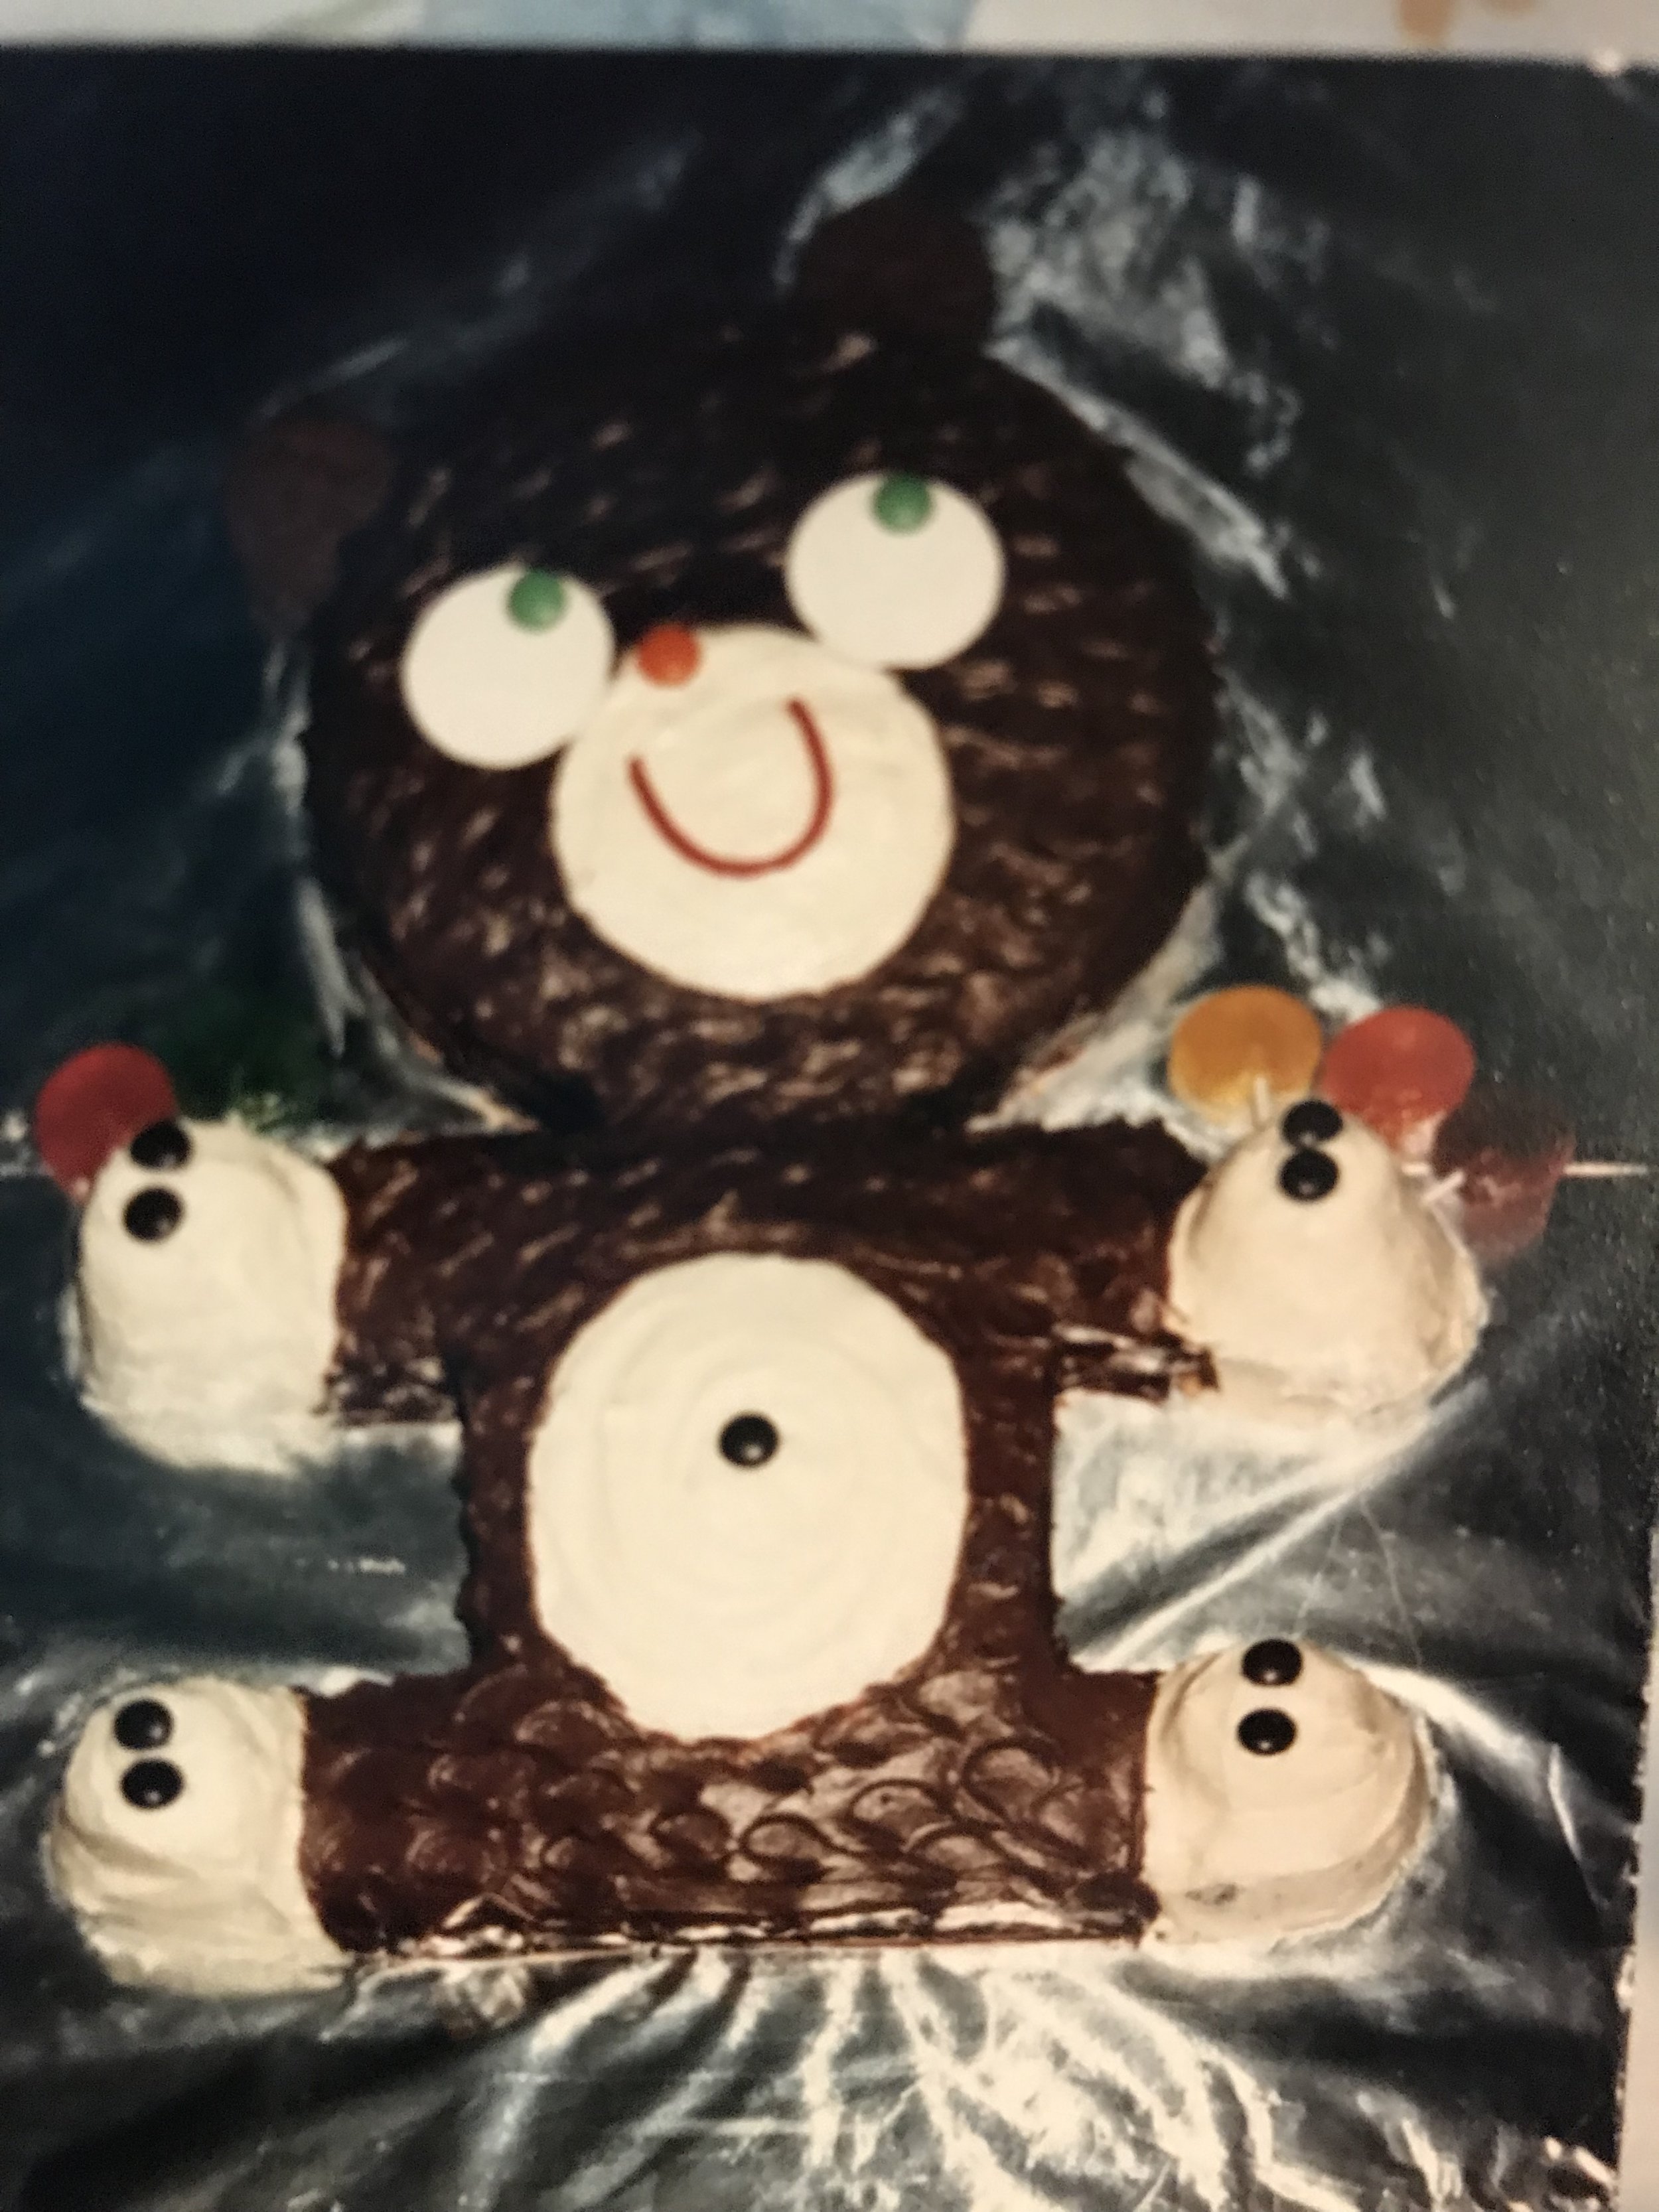
Growing up, we had two cake-decorating books that I absolutely adored. The pages, I recall, had become a little loose with wear. In the weeks leading up to our birthdays, my brother and I would flip through the pages to pick out the perfect birthday cake. Then my mom would make it and even in the pre-Instagram age, it would be photographed for posterity.

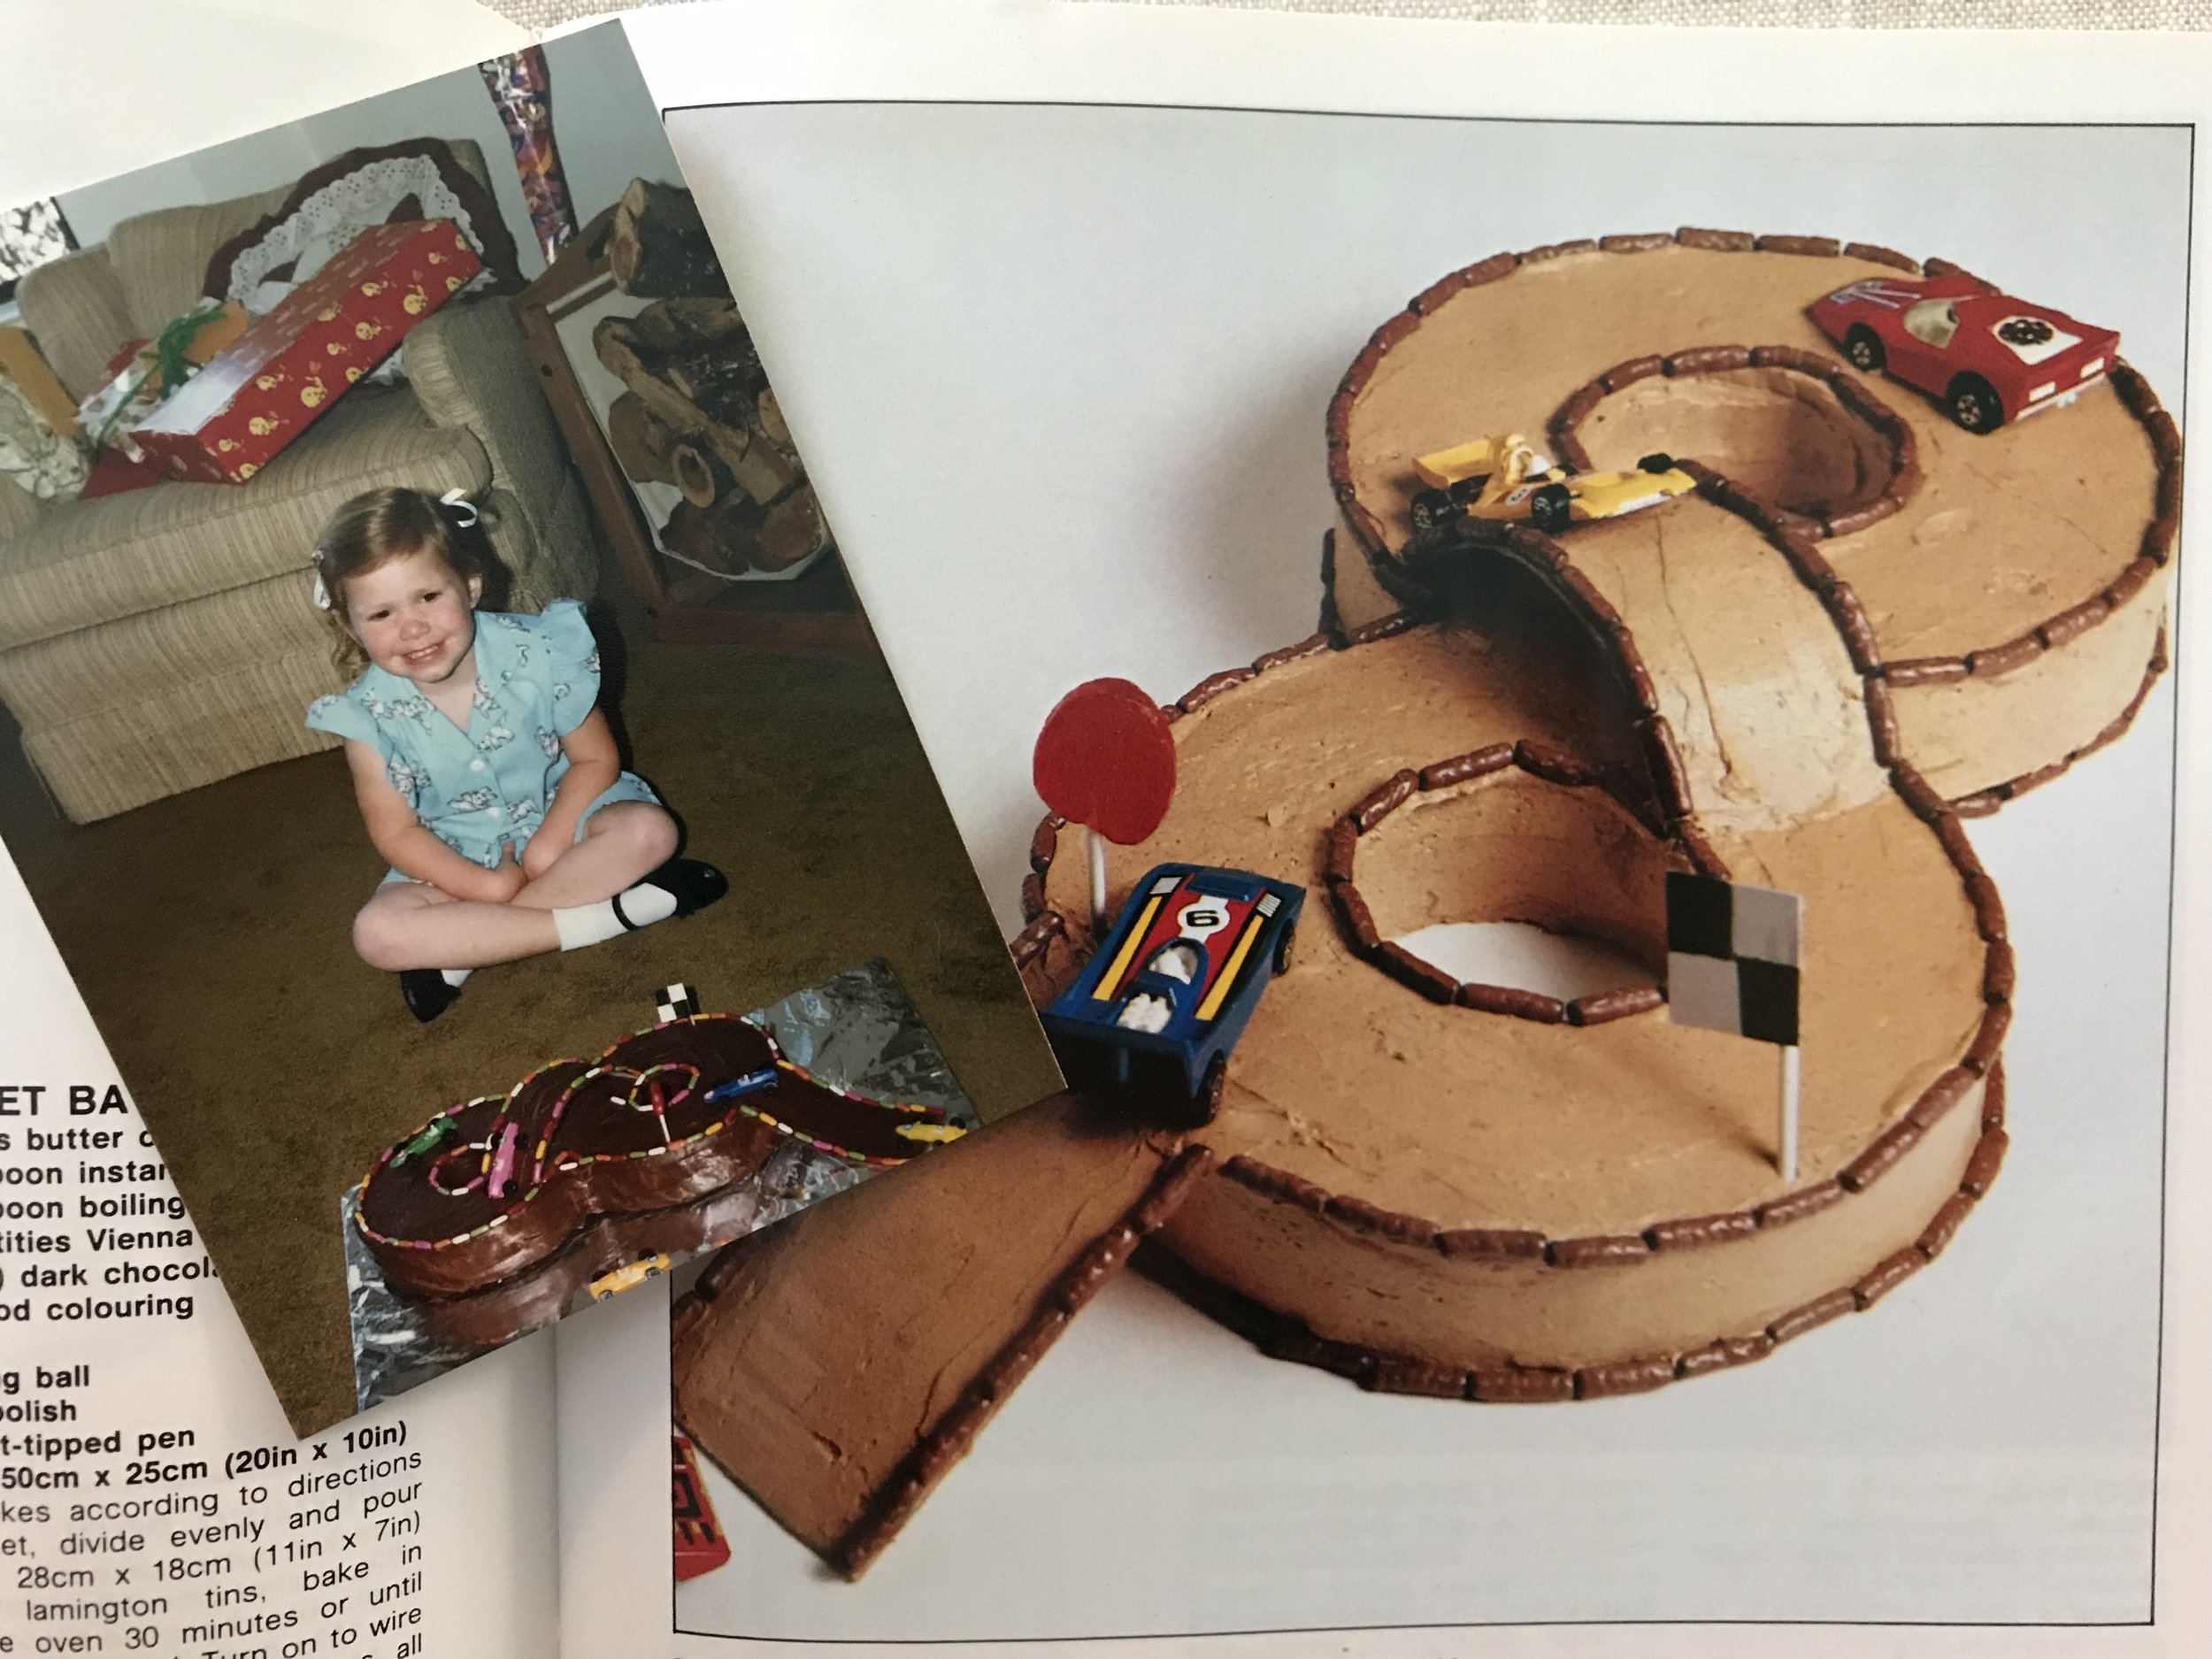
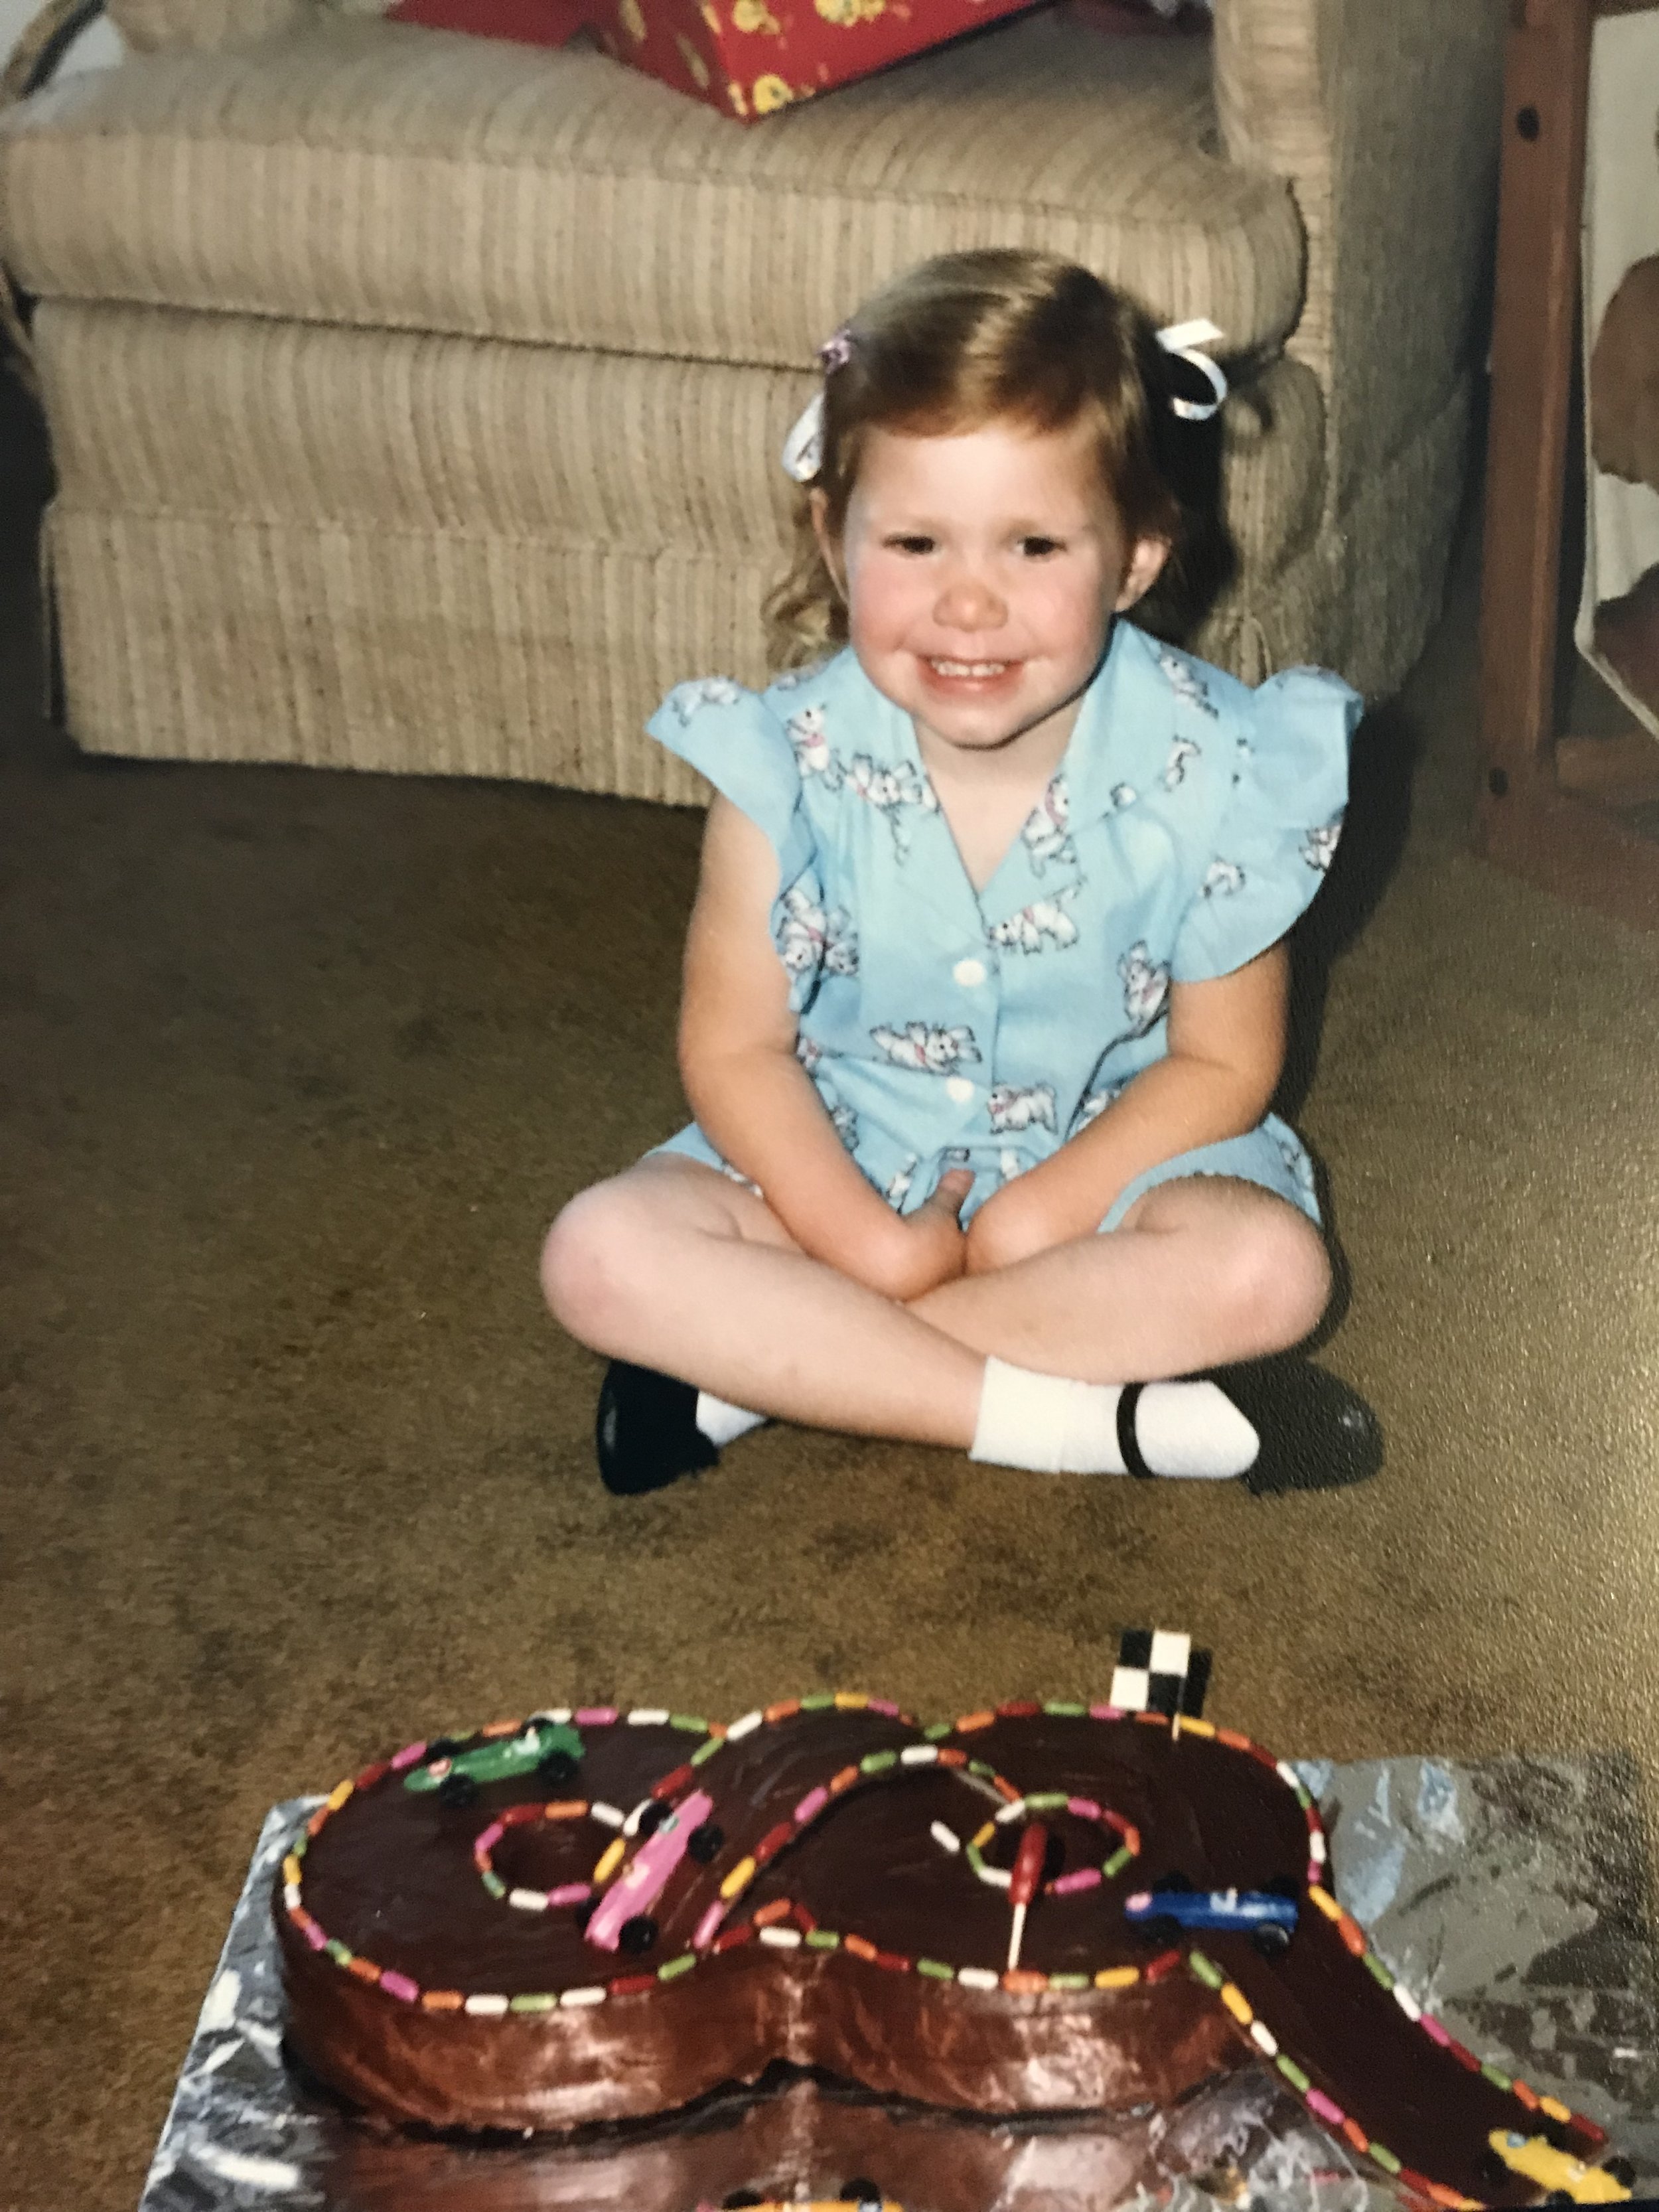
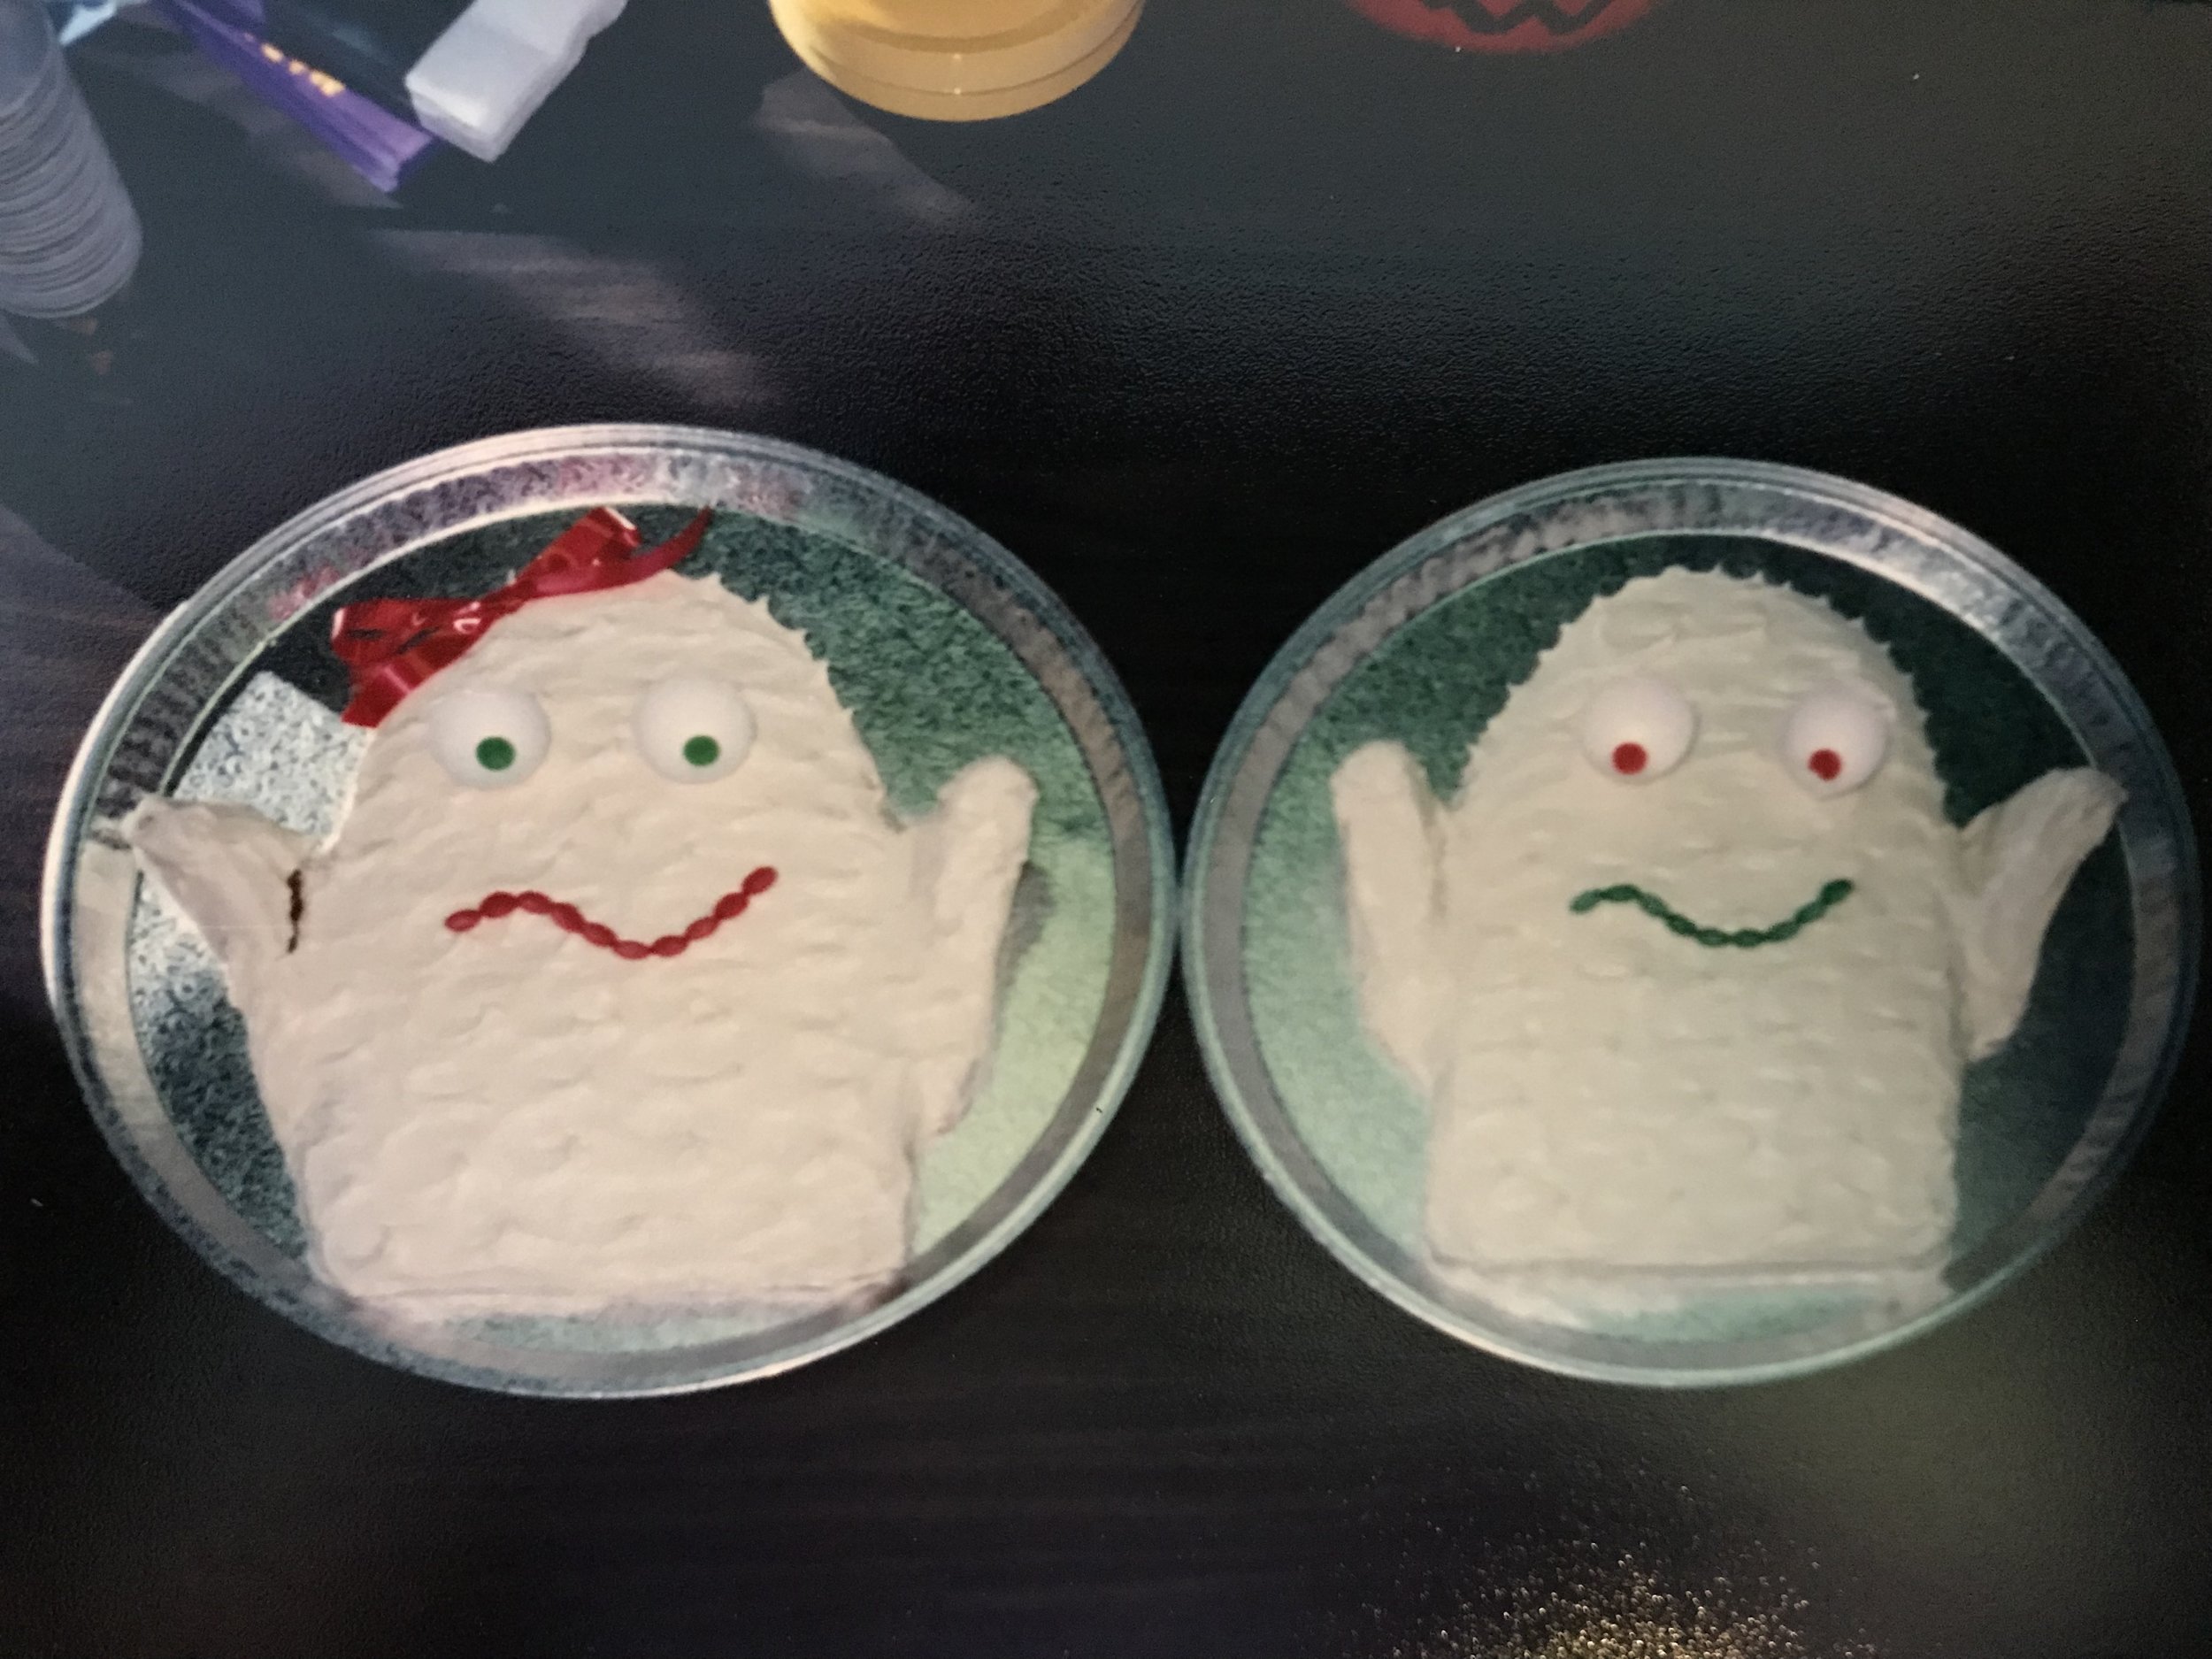
The books fell out of favor as we grew older. The books were used for the last time sometime when I was pre-teen - my father and brother were out on a Boy Scout trip and it’d just be me and mom for my birthday, so in a fit of early nostalgia I requested a large tiger cake as a nod to my love of Winnie-the-Pooh’s Tigger. The cake was huge, and my mother was by then diabetic, which meant I largely ate the cake alone. I made it through the tail and hindquarters before throwing the rest away. Still, she made it, all I had to do was ask.

I didn’t think of the cake books much after that and it didn’t come to mind when I made a list of items I wanted from my mother’s house when my brother moved her from our childhood home. So I caught myself a bit off guard when they sprung to mind a few weeks before my trip.

I was struck by one of those late-evening obsessions. The original copies of the cake books were gone or buried deeply in my brother’s garage, perhaps I could find them online. A Google search for “1980s birthday cake book” gave me the titles I needed (as results one and two at that), then a few minutes of searching used book stores online and a $10 charge to my credit card later, both books would soon be mine.

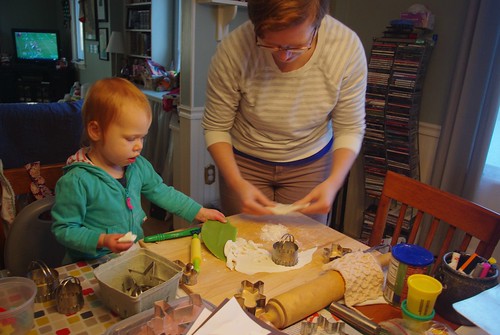
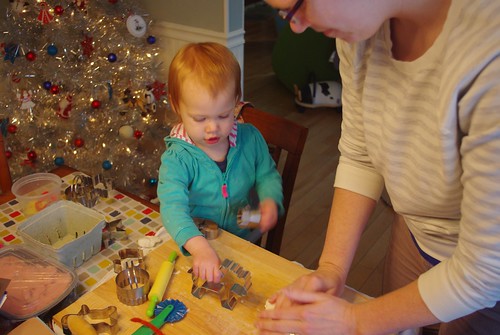
They were waiting for me upon my return from California, about a month in advance of Little Miss Cleaver’s own birthday. I shared the books with LMC, who was a bit less enthused than I had hoped, (though in her defense photography and styling from 1980 doesn’t age particularly well), but in the end she did select a cake.

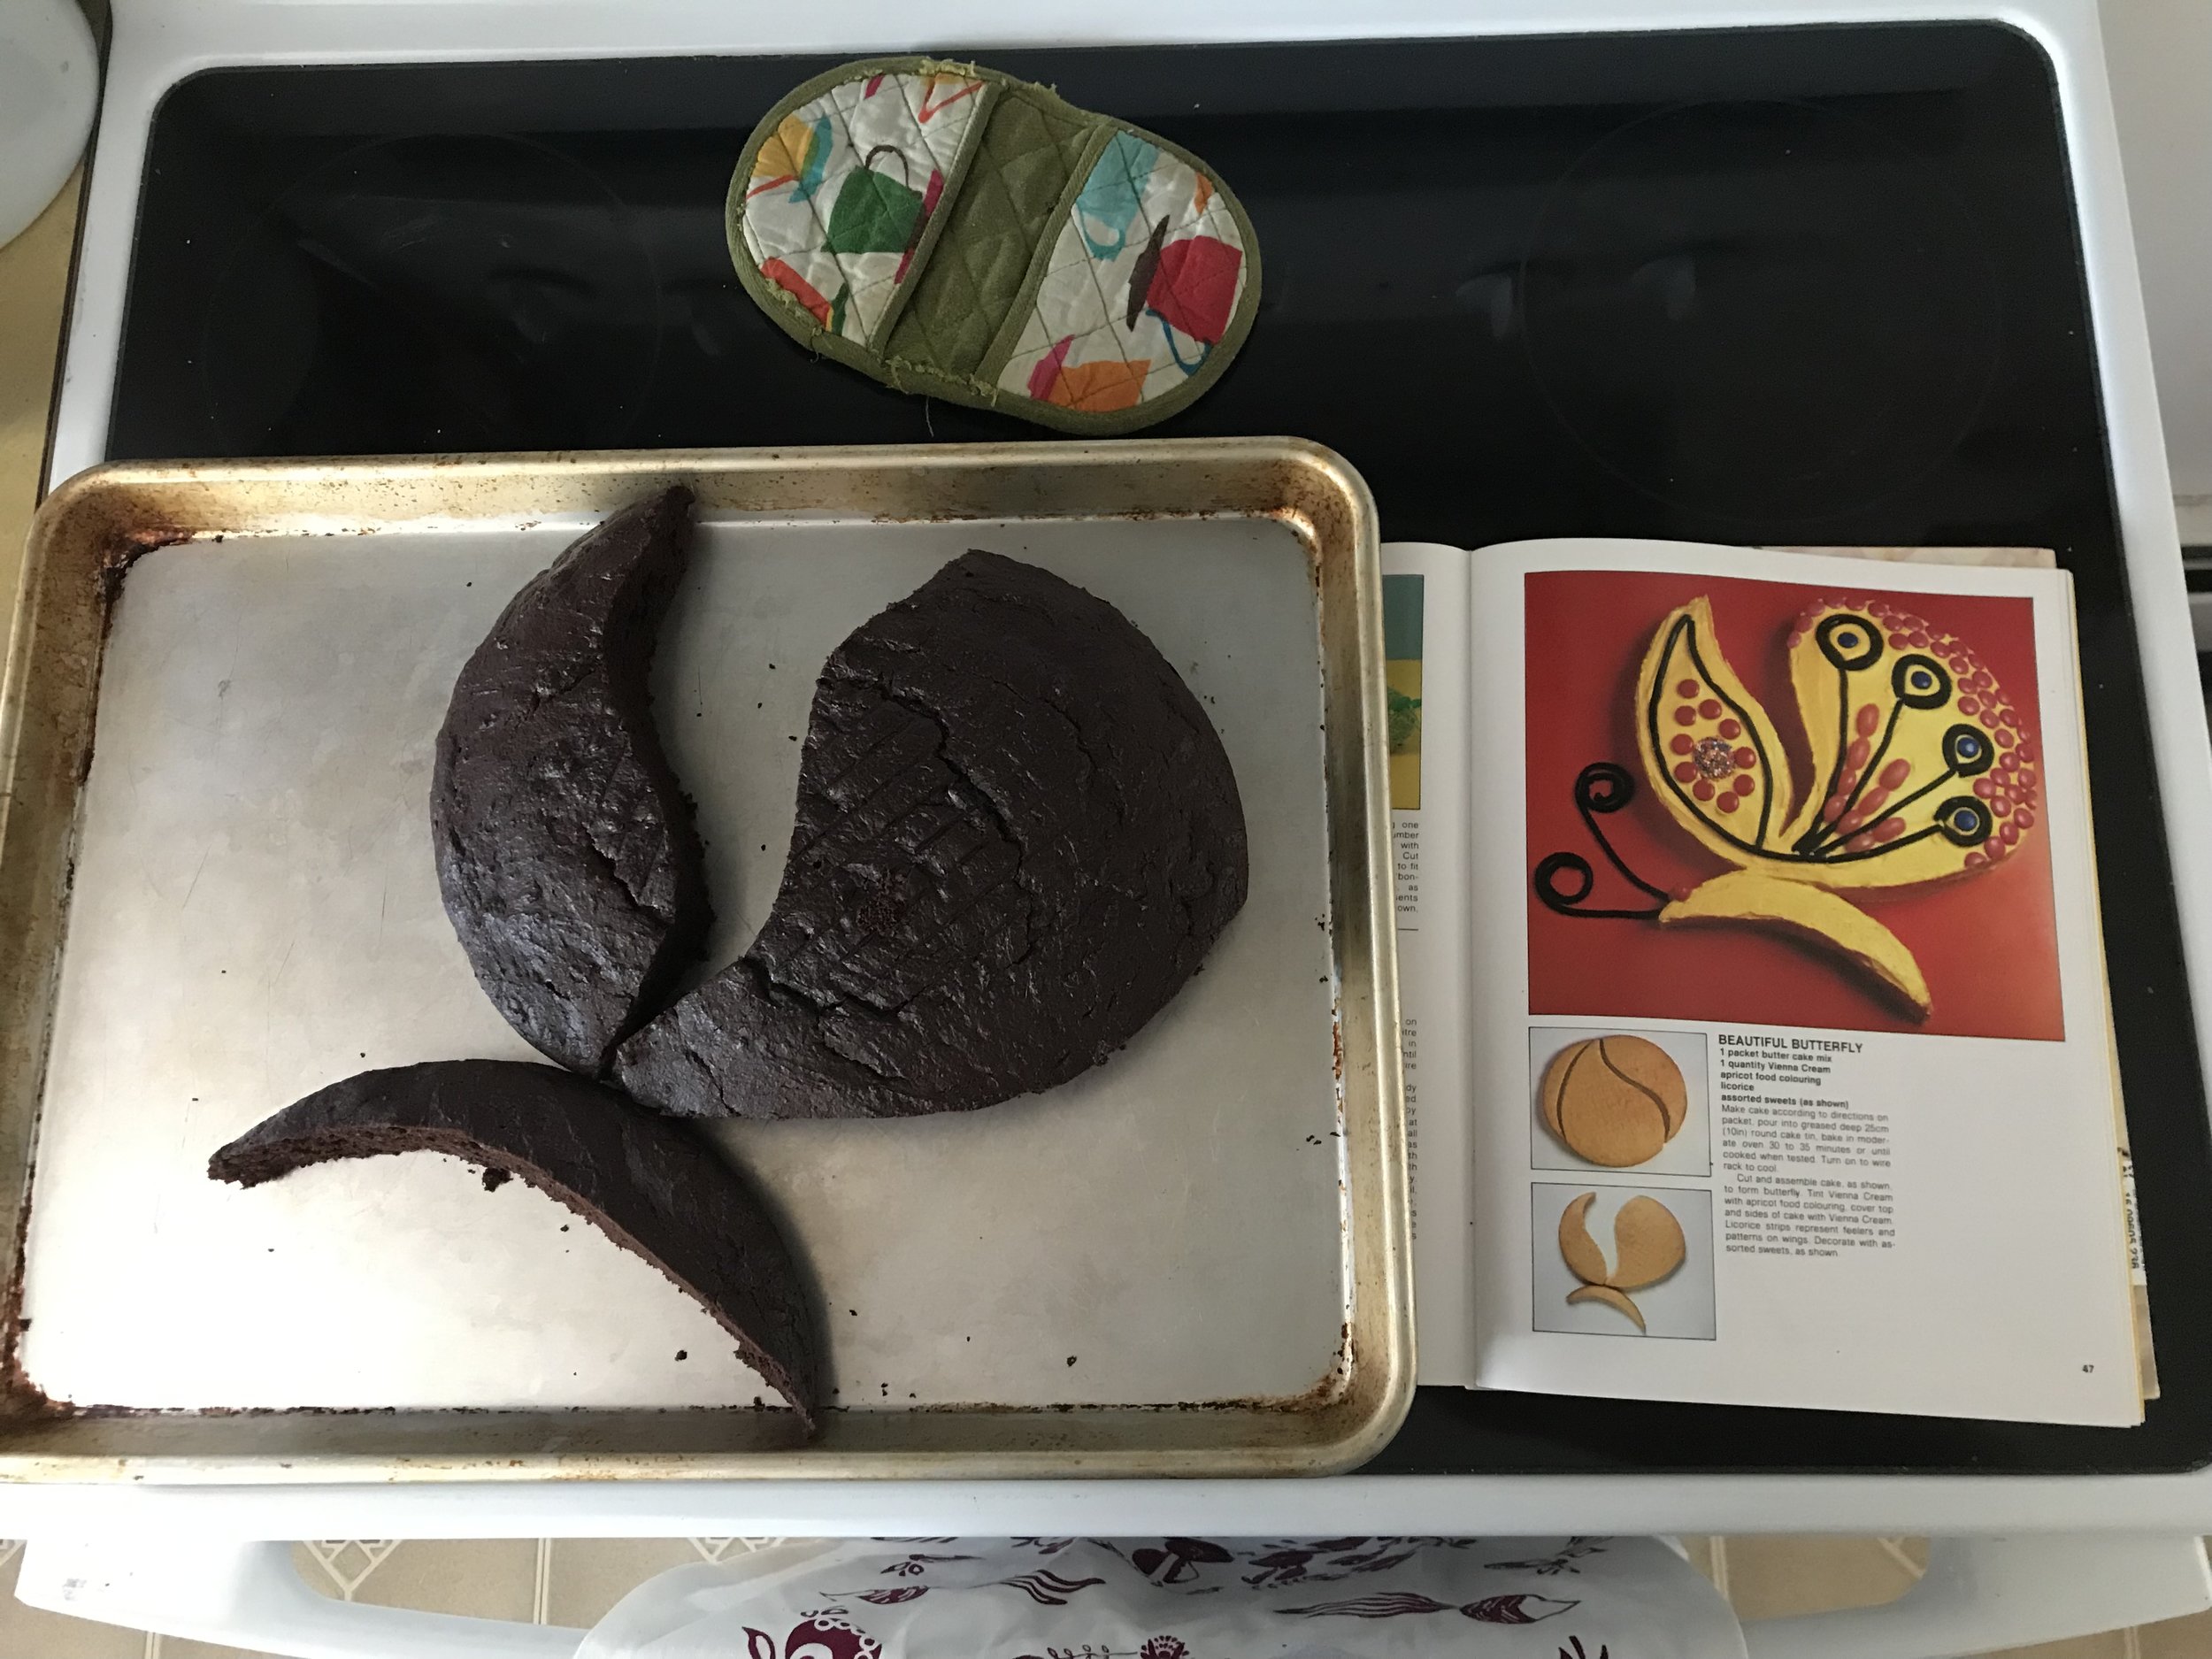
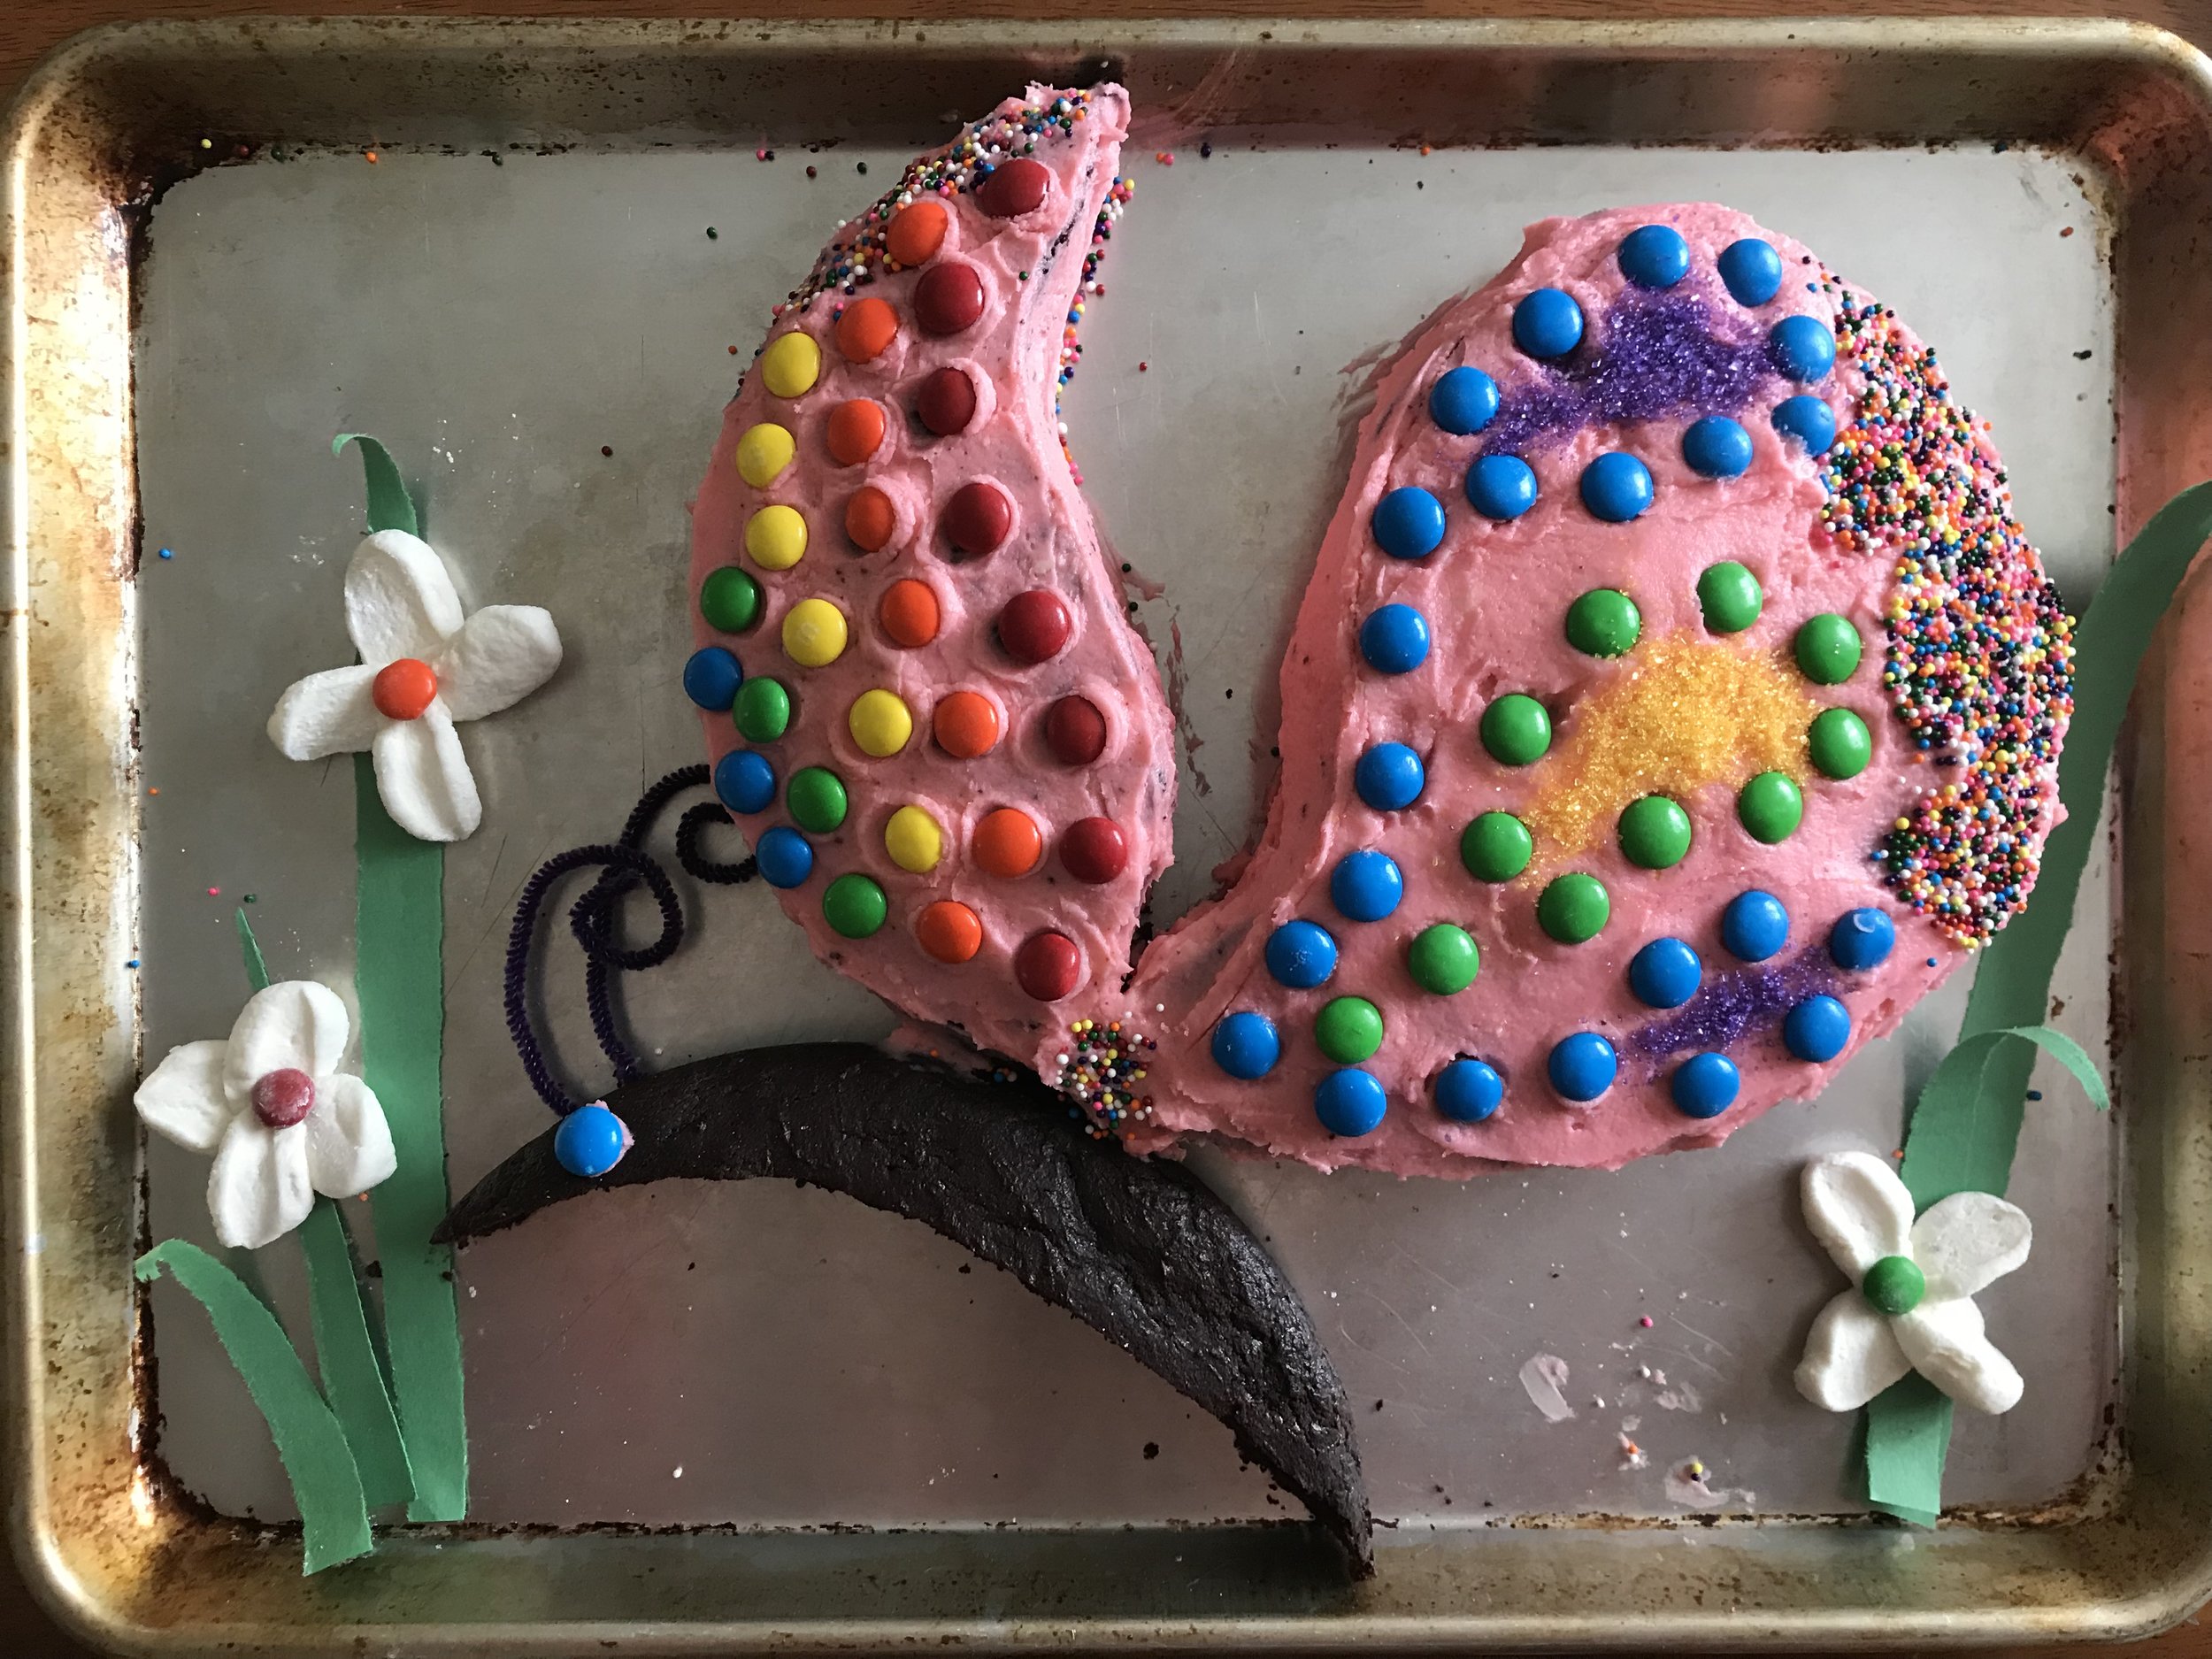
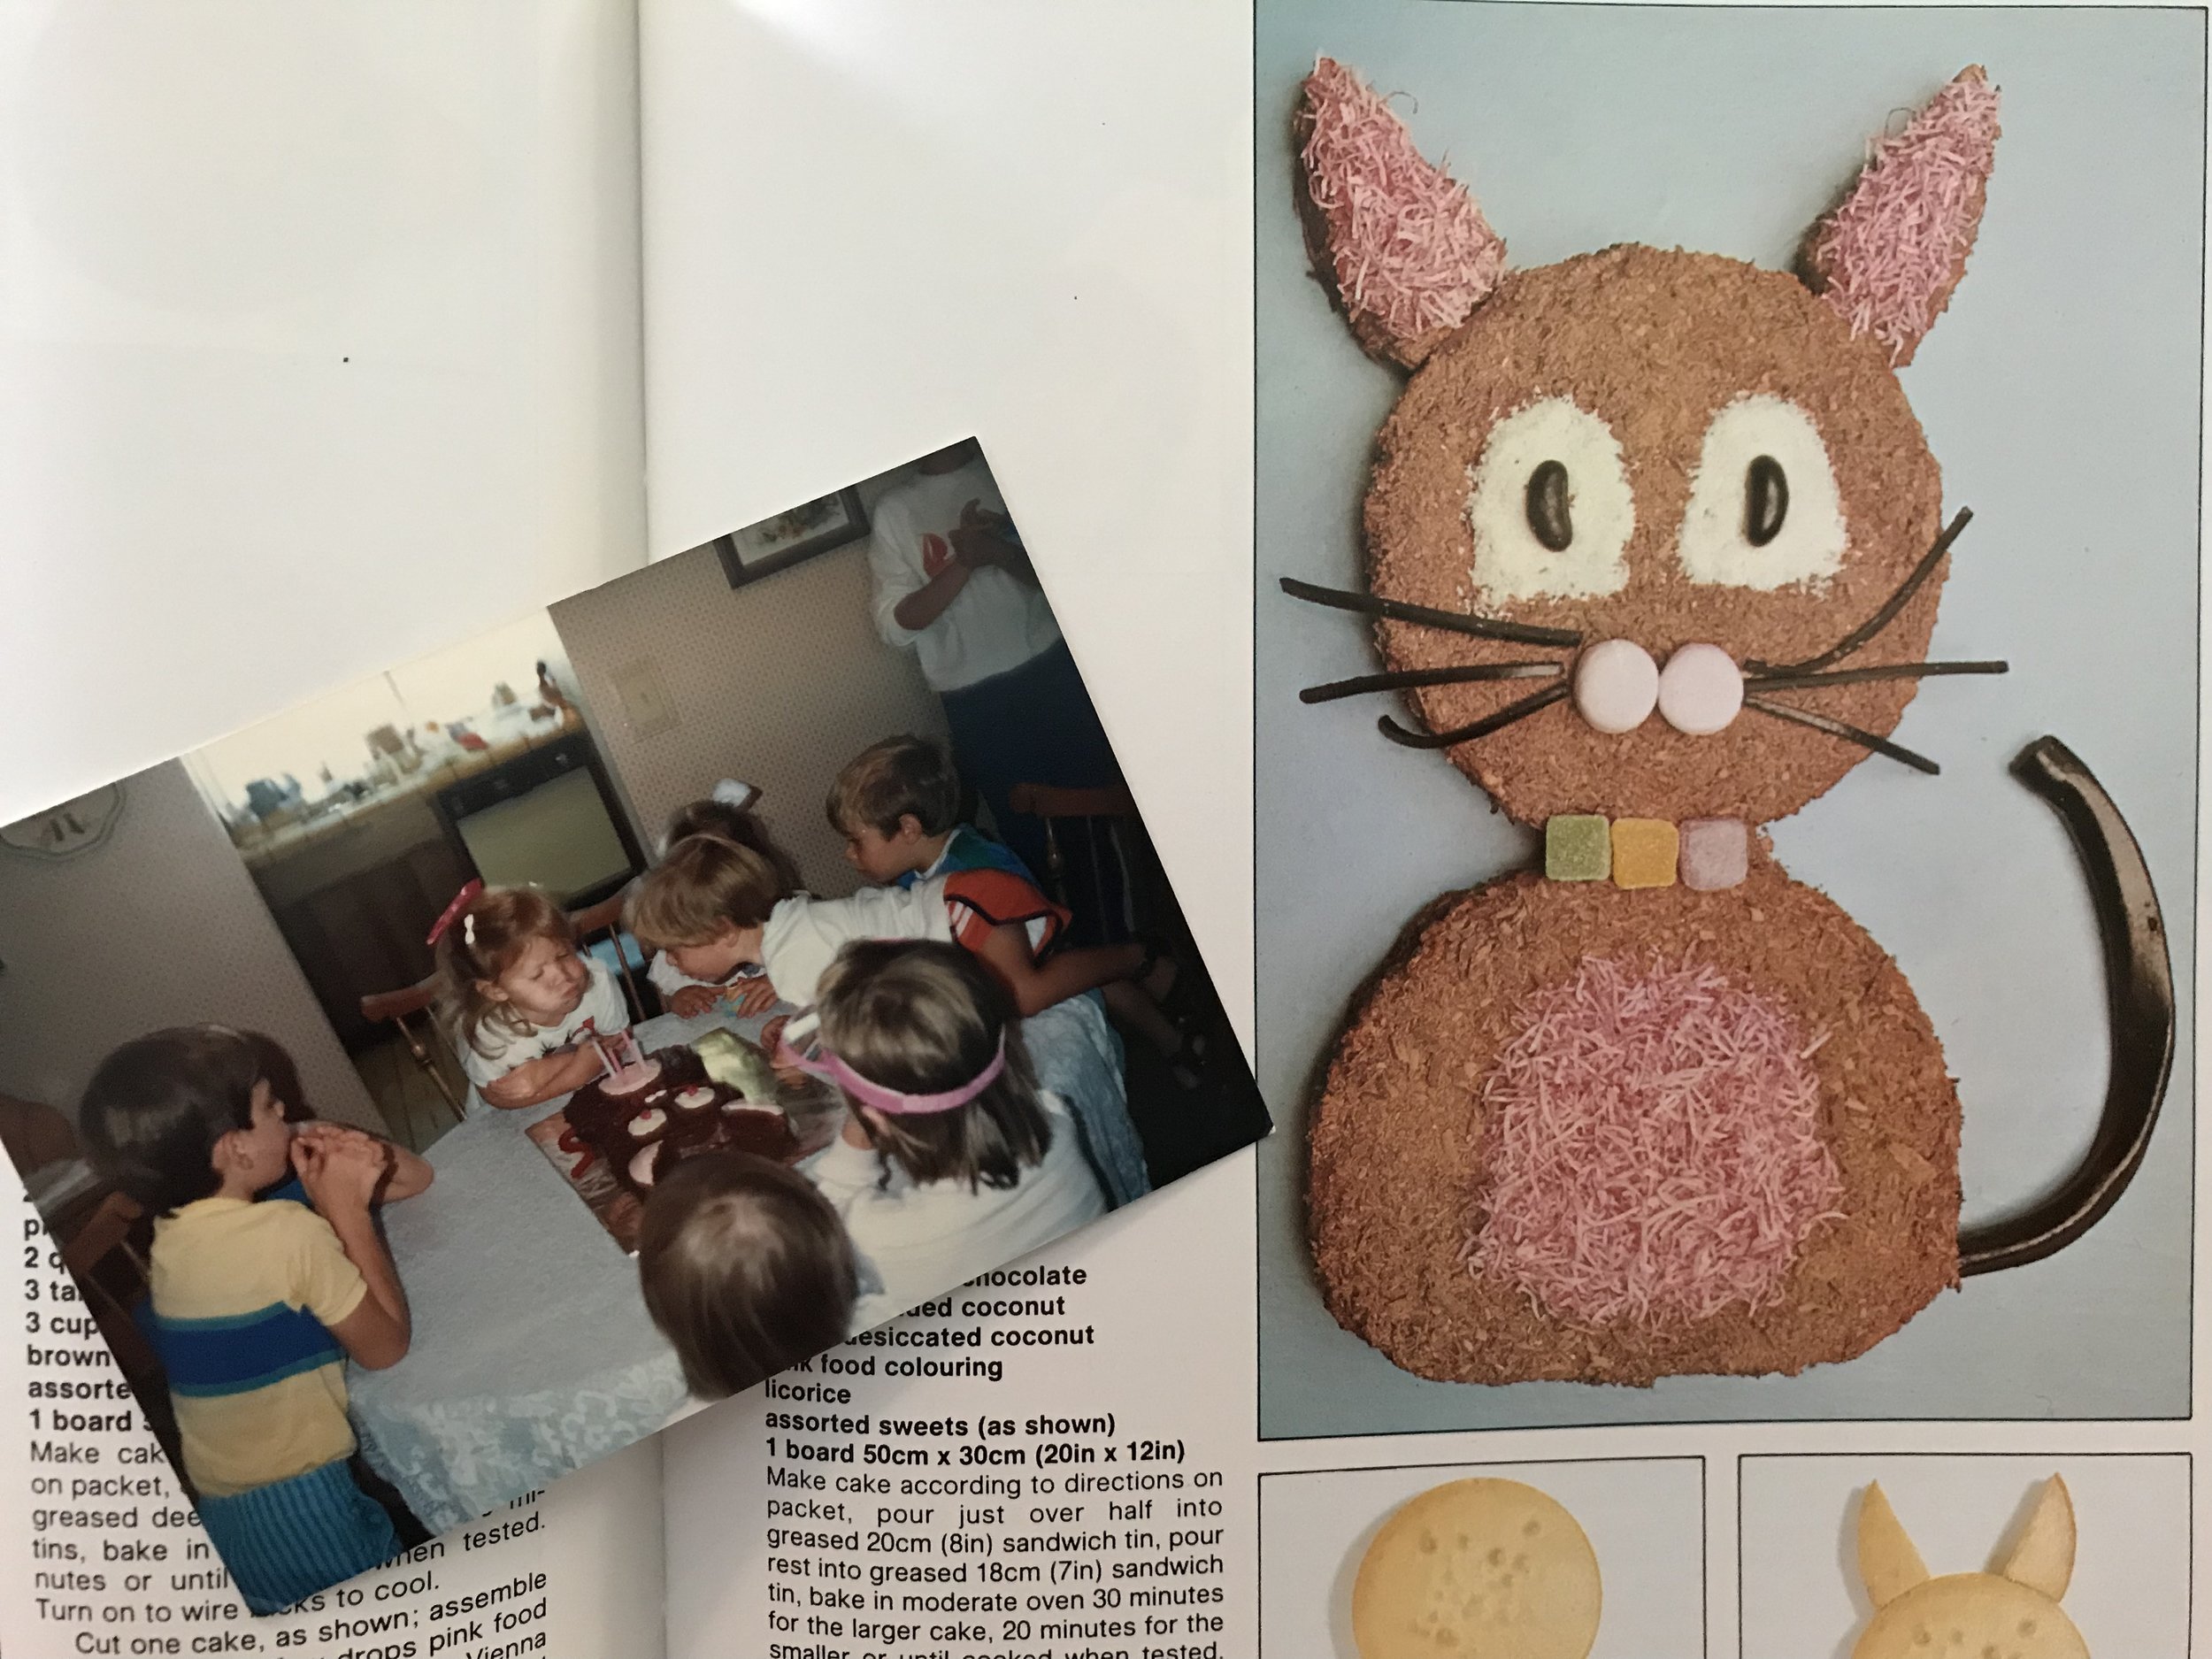
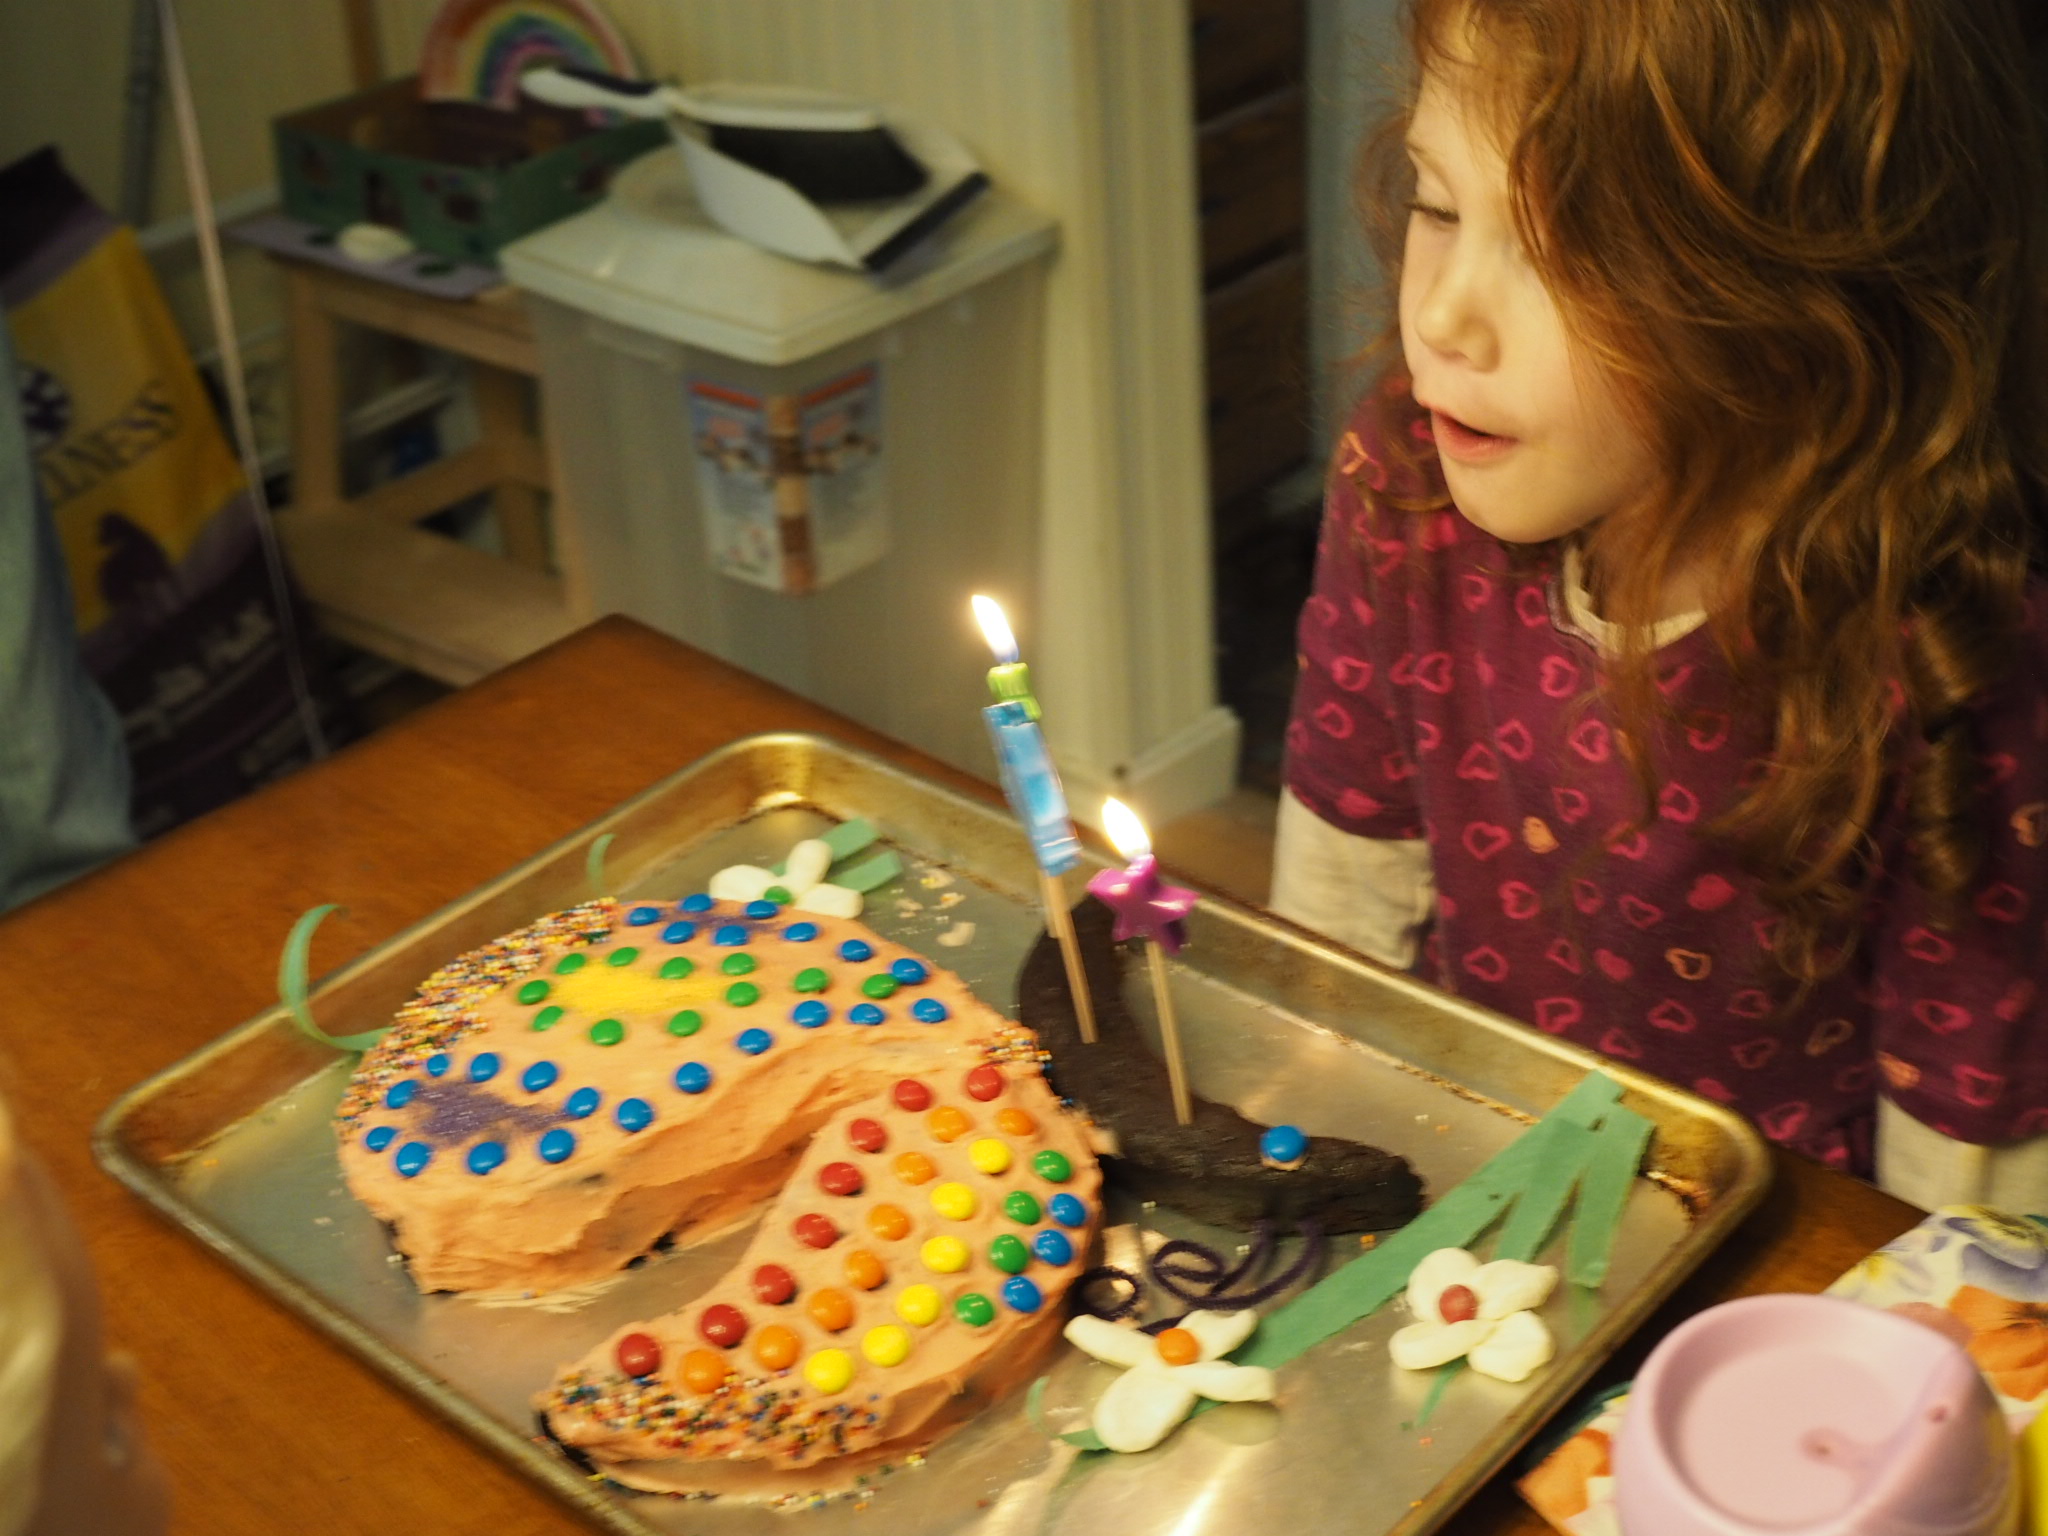
I did my best attempt at the Butterfly Cake from The Australian Women’s Weekly Children’s Birthday Cake Book for LMC’s 6th birthday, which just passed. A cake design that my mother had made for my own 4th birthday back in 1987. I think her version was a bit more elegant, but mine passed kid muster all the same.

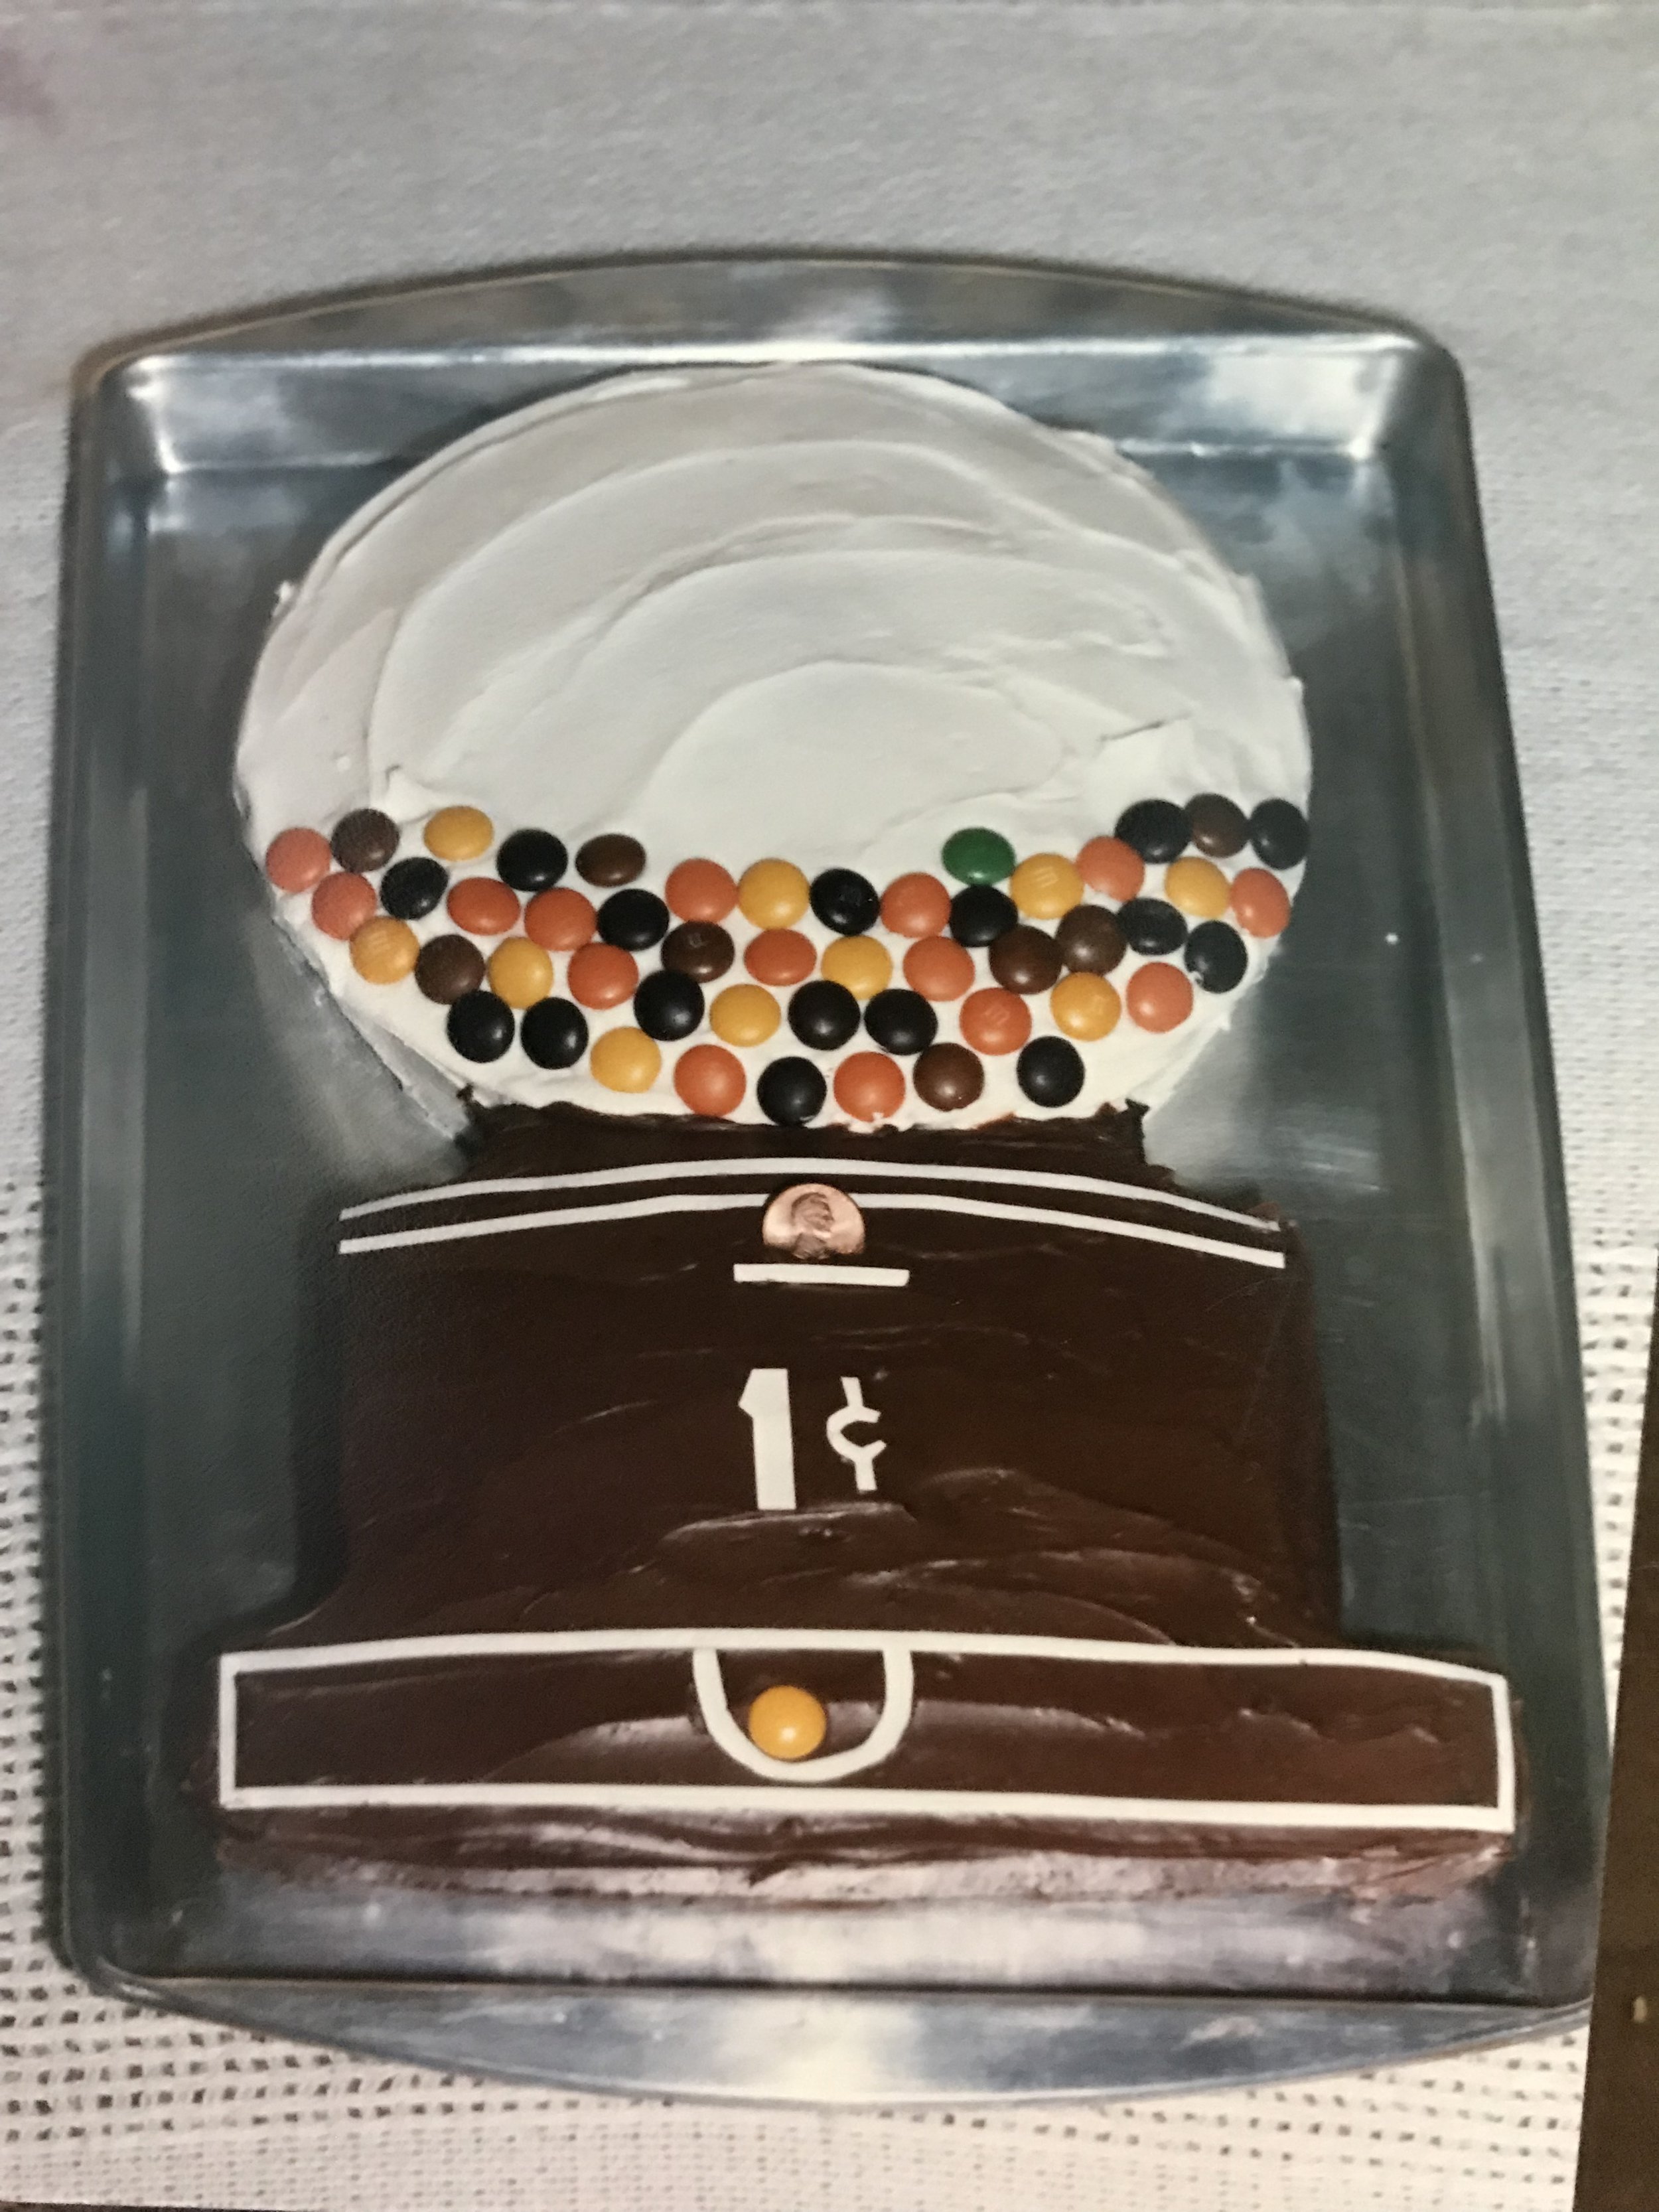
LMC, as with most cakes, ate the frosting off her slice and hasn’t touched it since, so like that Tigger cake all those years before, this cake was mostly for me. And you know what? I’m okay with that and also I’m pretty sure it won’t be the last…

Print Friendly and PDF Follow
follow us in feedly

Ornament Fail (and Redemption!) and Giveaway Day Winners

Painting Ornaments
Untitled
Untitled
Untitled
Untitled
Untitled
Untitled
Untitled
Untitled
Painting ornaments

Every year my knitting group gets together for a handmade ornament swap and this year I though I'd combine my swap-ornament making with kid-crafting and make some cornstarch dough ornaments inspired by these.

The dough was easy enough to make (though the cornstarch gives it a sickly sweet smell) and it was easy enough to roll out, but my attempts at yarn embossing were awful and LMC's insistence at playing with all the dough (not just her half) meant I had to keep rolling it out over and over again, which I just don't think it was designed to do. So in the end, I had some brittle dough, a lot of ornaments missing a limb and a few with a rather prickly texture. Nothing suitable for gifting.

But, because they were no longer "precious" it meant that LMC and her dad could go to town painting them all and now I think they're the most beautiful smudgy mud-colored things I've ever seen - missing legs and all.

All of this is to say, it was a valuable lesson in managing my expectations. Of course she's going to want to the play with the salt dough like her play dough. Of course things are going to break. But you know what? At the end of the day, it doesn't matter a jot because LMC had a great time poking and painting and hanging them up on the bottom of the tree.

So while I did have to come up with another plan for my swap ornament, I'd say all in all, it was a success.

Speaking of success - thanks to the 136 (!) of you who entered the giveaway and a very warm welcome to any of you who are staying around as new readers!

The winners chosen via random number generator are commenters Liz (#129) for the subtle kit, Rachel (#10) for the spicy kit, and Magda (#109) for the gift certificate. Congrats -I've sent you all an email about claiming your prize.

I'm down to the wire on my holiday crafting, with one toddler sweater on the blocking board and three more handmade projects in various stages, but the good news is come Friday, I've got two weeks off - one to finish everything and one to recooperate!

Print Friendly and PDF Follow
follow us in feedly

All Ready for Advent

Punch-Through Advent Calendar Prepping the Advent Calendar

Prepping the Advent Calendar

I finished my homemade calendar just in time for the start of Advent today!

When I was a kid we had an Advent calendar with little numbered doors that my mom would put candies in. In truth, I can't really remember what it looked like, butt I do remember the fun of hunting for the right door to open for the day. As an adult, we've purchased the crummy $1 chocolate ones with the smiling Christmas mushroom, but I wanted to do something a little more for this year.

I have big dreams of making a beautiful quilted or embroidered or felt calendar for use year after year, but it time-wise, it just wasn't happening this year and I wanted to make sure LMC had something to open on December 1st.

After scouring Pinterest, this project seemed a little more my speed. So I painted some toilet tubes, bought a Toob of farm animals* and some tissue paper and was off to the races. In reality, this was a three nap project, one for shopping; one for cutting, painting and gluing tubes; and one for assembly of the little gifts and activities (about a 50/50 split).

Today she got a little German shepherd figure and wanted to start punching in all the other days. So I guess you could say it's a hit. So much so that we had to hide the calendar until tomorrow. ;)

Do you do Advent calendars or wreaths?

* Though they're a perfect fit for this calendar, technically, the Toob figures aren't recommended for under 3-years old.  LMC has had some similarly-sized dinosaurs for a while that she loves and hasn't managed to choke on or eat, but use your best judgement for your own household.

Print Friendly and PDF Follow
follow us in feedly

Making Monsters!

Devil Tube Monster

A Gathering of Monsters

Four-Legged Devil Tube Monster

Frankensteins Tube Monster

Tube Monsters

A Shelf Full of Monsters

Inspired by Pinterest, and in need of some Halloween decorations, Little Miss Cleaver and I got crafty this weekend and jointly made some little monsters to jazz up the jadeite shelf in the dining room.

As a wee toddler, there's a limit to LMC's crafting skills, but I couldn't have made these guys without her, and I'll admit to having way too much fun making these myself.

To make some monsters of your own you'll need a few simple supplies:

  • Toilet paper and/or paper towel cardboard tubes
  • Finger or tempura/poster paints
  • Googly eyes
  • Hole Punch
  • Pipe Cleaners
  • Black makers
  • Big sheet of paper
  • Finger-painting Toddler

First, let your toddler go wild with finger painting on the big sheet of paper. When it's good and goopy, take the tubes and roll across the finger paint for a fabulously mottled effect. If you have older kids (or are an adult), you can paint the tubes directly, but the finger-painting method is a lot more messy and fun!

Once the paint is dry, try to discern your monster's personality. Are they scary or silly? Does it need multiple eyes? Does the top need to be smushed down into horns? Is there a smear or crease that would make a particularly good eyebrow or mouth?

Alternatively, let the toddler put stick-on googly eyes wherever they'd like and go from there. LMC preferred to put them on her chairs and clothes, so I had to improvise. Use the black marker to draw on eyebrows, teeth, scars, etc.

Using the hole punch, make a few armholes and thread a pipe cleaner through and bend into arms or legs.

Find a suitable display/play space and enjoy!

(Keep spare googly eyes on hand for when toddler inevitably rips them off to put on her shirt.)

Print Friendly and PDF Follow
follow us in feedly